Device Links
Your profile pic is one of the first details other users notice when they visit your Instagram profile. Many will form a first impression according to the image, which is why having a stunning picture is essential. If you don’t think that the current one is up to scratch, it’s time to change it.
But how exactly can you do that?
In this entry, we’ll give you a step-by-step guide on changing your Instagram profile picture.
Changing your profile pic on Instagram is quite straightforward:
That’s all there is to it, your profile picture has now been changed on Instagram.
Changing your Instagram profile picture can also be done on Windows 10:
You can take the same steps when changing your profile picture on your Mac:
Since Google Chrome is the most popular internet browser, it’s only fitting that we cover how to change your Instagram profile picture using the nifty program:

Unfortunately, you can’t change your profile picture on Instagram without cropping. As of today, the app doesn’t have a feature that lets you upload full-sized images.
Changing the size of your Instagram profile picture is also impossible. The closest thing you can do is resize your image while uploading your profile photo.
Many users have reported encountering an error while changing their profile pic on Instagram. If that happens to you, here’s what you can try:
• Log out or quit Instagram on your device and head back to the app to try and re-upload the image.
• Go to the App Store or Play Store to make sure that you’re using the latest version, and the app doesn’t require any updates.
• Log in on your desktop computer and try to edit your picture from there.
Instagram doesn’t send you notifications about your profile picture. Therefore, the chances are that you mistook it for another one. The app notifies its users about six categories:
• Comments, posts, and stories
• Messages
• Followers and following
• IGTV and live
• From Instagram
• Fundraisers
No, Instagram doesn’t tell other people when you change your profile photo. Of course, users will be able to check out your new picture, but they won’t be alerted of the change directly.
Your Instagram profile picture plays a key role in attracting other users to your account. Changing it from time to time is a great way to freshen things up, and now you know how to do it. Whether you’re using the app on your phone or computer, make sure that your current image isn’t holding you back from getting in touch with new people.
How many times have you changed your Instagram profile picture? Do you prefer taking a new image or importing one from Facebook? Let us know in the comments section below.
Your profile picture on Instagram is a small snapshot you upload to represent your account. If your account is just about you and your life, chances are your photo will be a selfie or a shot of yourself with a friend, partner, or pet.
If you have a business account, you might feature a photo of a product you're selling. Whatever you decide to use as your profile photo, the good news is that it can be changed quickly and as often as you'd like.
If you decide to change your Instagram profile picture, you can do so via the app or via the Instagram website in a few steps. Here's how to do it.
Instagram profile picture sizeYour Instagram profile picture should be at least 1000 by 1000 pixels.
Instagram profile pictures are compressed until they measure 320 by 320 pixels — and a circular cutout is displayed that is a mere 110 by 110 pixels. The higher resolution the photo that you start out with is, the better the compressed outcome will be.
As such, it is advised that you upload a picture that is at least 1000 by 1000 pixels and has the elements you want featured in the center, so as to avoid being cropped out.
1. Locate the Instagram app icon on your iPhone or Android and tap to open it.
2. Tap on your profile button in the far-right corner of the menu bar running along the bottom of your screen.
3. On your profile page, tap Edit Profile.
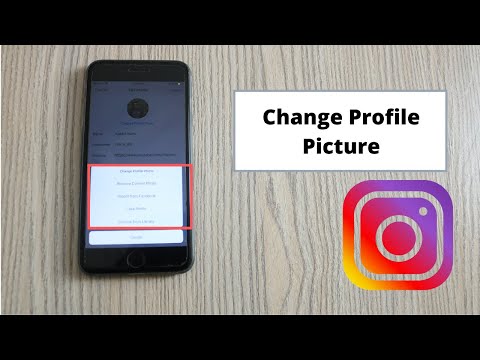
4. On the Edit Profile screen, tap Change profile photo.
5. From the pop-up menu that appears, choose to either import a photo from Facebook, take a new photo on your phone's camera, or choose one from your phone's photo library.
6. Choose the photo you wish to upload and move it within the round circle to crop it.
7. Click Done to complete the change.
1. Go to the Instagram website on your Mac or PC and login using your account username and password.
2. Click on your username on the right-hand side of your home screen to go to your profile page. Alternatively to this, you can skip to step 4 by clicking on your existing profile picture located on the menu bar running across the top of your screen and then clicking on Settings.
3. On your profile page, click Edit Profile.
4. Under your username, click on Change Profile Photo.
5. Click Upload Photo.
6. Select the photo you want to upload as your new Instagram profile picture from your computer, then click Open. Once the button is clicked,, your profile photo will then be uploaded and applied to your account.
Quick tip: Alternatively to steps 3 and 4, if you are viewing your profile already, you can click on your profile picture and skip to step 5.
Jennifer Still
Jennifer is a writer and editor from Brooklyn, New York, who spends her time traveling, drinking iced coffee, and watching way too much TV. She has bylines in Vanity Fair, Glamour, Decider, Mic, and many more. You can find her on Twitter at @jenniferlstill.
Read moreRead less
There are many businesses and bloggers in the Russian segment of Instagram* and Facebook* who would like to transfer their existing business accounts to audiences in other countries, but the button " promote" turned off. And you can’t just link a card of another country. The advertising account itself is considered Russian and is blocked by Instagram. It's a pity to lose the accumulated audience and create a new account (especially if you have already accumulated 20-50-100-200 thousand). But no one saw the way out. Up to this day.
52 854 views
It was today that I discovered how to reset the country and enter a new one. I tell you what I did.
Disclaimer 1: It's not a fact that you need to repeat all the steps. I cannot confirm or deny with 100% accuracy that none of this can be skipped.
Disclaimer 2: We are in Thailand now, we have a Thai sim card.
So, we drove the procedure by day.
Day 1: Like many, I decided to create a completely new account. To do this, I created a new Google mail with a link to a local phone. When registering, I indicated the country of Thailand.
A new Instagram account was created with reference to this mail and phone number. Created from desktop. I uploaded 1 post, signed up for 5 world accounts and left it for a couple of days to rest. All new accounts should be allowed to lie down, because there is a risk of blocking forever.
Day 2: Created a new personal Facebook account. With reference to the new mail and local phone. And again let it lie down for a couple of days. From another account, my colleague tried to look at the country of the new profile and could not find this info.
Day 4: Logged into insta and fb from my phone. I uploaded a post to Instagram and stories from my phone. Made a couple more subscriptions. Mentioned this account in another personal profile, got about 8 subscriptions. A minimum of actions, everything should look organic. Otherwise, insta can delete the account without explanation.
Created a business page from the FB desktop.
Day 5: Uploaded a post and story from my phone to Instagram again. Made a couple more subscriptions, liked a few photos. I went to settings to switch to a business account. And I found that the choice of the country and currency to which the profile is attached takes place at this very moment. And yes, you can't really change it anymore. And then a bold idea came to my mind, which I tested on one old account, from which there was almost no action.
I logged into my Russian business account and transferred it back to my personal account. And then I switched back to business and Instagram offered me to re-select the country and currency. To do this, I have already become attached to the new "Thai" FB page. And bingo, it worked. This account has never run ads before and no cards have been linked, so I repeated the procedure with another profile. And again everything worked out. This hack is still working.
Naturally, only foreign cards can be linked. And pay only if you have already received citizenship of another country or are transferring your account to a citizen of another country. Because the Russians are still prohibited from sponsoring terrorist organizations. And Instagram and Facebook are now exactly them.
I must mention that in the process you will lose all previous statistics.
Evaluate in advance what is more important for you: the function of advertising in new countries or old statistics.
I'm writing this because a lot of small businesses feel like they're losing the game of monopoly. Either a pass, or a surprise card “pay taxes,” or deprivation of many opportunities.
If this information helps you achieve something new, that would be great.
And besides the information, here's a promo code for you all VC15 for the purchase of absolutely amazing postcards in my company. Reducing the cost of purchasing cool related products for your business is also cool.
*Instagram and Facebook are banned in the Russian Federation
After reading this article to the end, you will be able to add and configure link buttons on your Instagram in 5-10 minutes. We will also tell you what an “Action Button” is and how to make it.
Advertising: 2VtzqwCpaPT
Read also : How to add a link to WhatsApp, Viber on Instagram
To use all the possible buttons on Instagram, you need to switch to a business account or connect an author account. After that, advanced functionality will be available to your profile, including buttons.
But to avoid confusion, let's first look at what buttons can be on the profile page.
Buttons that the authorized account owner sees:
Buttons that users see when visiting the account:

Understanding how to properly configure the buttons that are visible to the visitor of your page.
After switching to a business profile, you can add or change communication methods in the settings. Click "Edit Profile" and go to "Methods of communication".
Here we indicate the data whose buttons you want to add to the profile.
1 of 3
Please note : If you enter your email and phone number, the "Contacts" button will be displayed in the profile, when clicked, a panel with the "How to call" and "Email" buttons opens. address".
Under the main communication methods, below there is an additional option "Action button". If you set it up, then you will be able to connect online registration and booking, another button will appear in your profile, and the “Subscribe” button will become large.
Now you can use the services of only some services that allow you to connect an action button. And to set it up, you must have an account in his system. The problem is that most services do not work in the CIS and Russia, and there are only a few options: SimplyBook, Setmore and Acuity Scheduling.
Accordingly, to use the "Action Button":
1 of 4
The following buttons are currently available: Register, Book, Buy a ticket . It is possible that only buttons in English will be available to you - Instagram is such Instagram.
Depending on the selected buttons, statistics for them will be available. To view it, go to the Instagram account statistics section from the main profile page or from the main settings menu. Open the "Actions" tab and scroll down to the "Interactions" section - all the statistics for the buttons will be shown there.
Well, now we figured out how to set up and add the necessary buttons to your Instagram page. If the article was helpful, share it with your friends on social networks!
Useful links :
Comparison of online courses
Before you buy any course, compare conditions from different schools - tuition fees, discounts, duration, whether there is an employment program.