Add products to a Facebook Page shop | Help Center
Do you want to log in or join Facebook?
Add products to a Facebook Page shop
This content is only relevant to businesses that already use Facebook Page Shops and haven't yet been transitioned to Facebook Shops.
If you don't have a Facebook Page shop but want to sell products from your Page, you should create a shop instead.
After you’ve created a Page shop, add some products for customers to browse. Remember that you can only sell physical goods that comply with our commerce policies. You can add and manage the products in your shop in two ways:
Learn more about these options below.
Add products using Commerce Manager
With this option, add and manage products in a catalog using Commerce Manager, Facebook’s inventory platform. We recommend Commerce Manager if you want to bulk upload many products or use your inventory across different ads and commerce channels on Facebook and Instagram.
If you already added at least 1 product to the Shop tab on your Page, we automatically created a catalog for you. To add more products to your catalog:
Return to Commerce Manager when you want to manage your products. Keep in mind that:
Add products in the Shop tab on your Page
With this option, add products one by one in the Shop tab of your business Page. We recommend this option if you don’t have many products to manage and they don’t change often.
Note: If selecting this button takes you to CommerceManager, it means you can’t add products directly to your Shop tab. You’ll need to use Commerce Manager instead. Learn more about adding products to a catalog.
 We recommend using a short title without symbols like ! * $ ?. Follow our product title guidelines.
If your product complies with our policies, it usually appears in your Page shop within 24 hours. Some products may take longer to review.
Related Articles
Get help for other devices:
Ads Help - Desktop
You’ve got to be proactive.
If you want to be successful, you can’t sit back and wait for customers to come to you – reach out to them.
So where are they? Facebook.
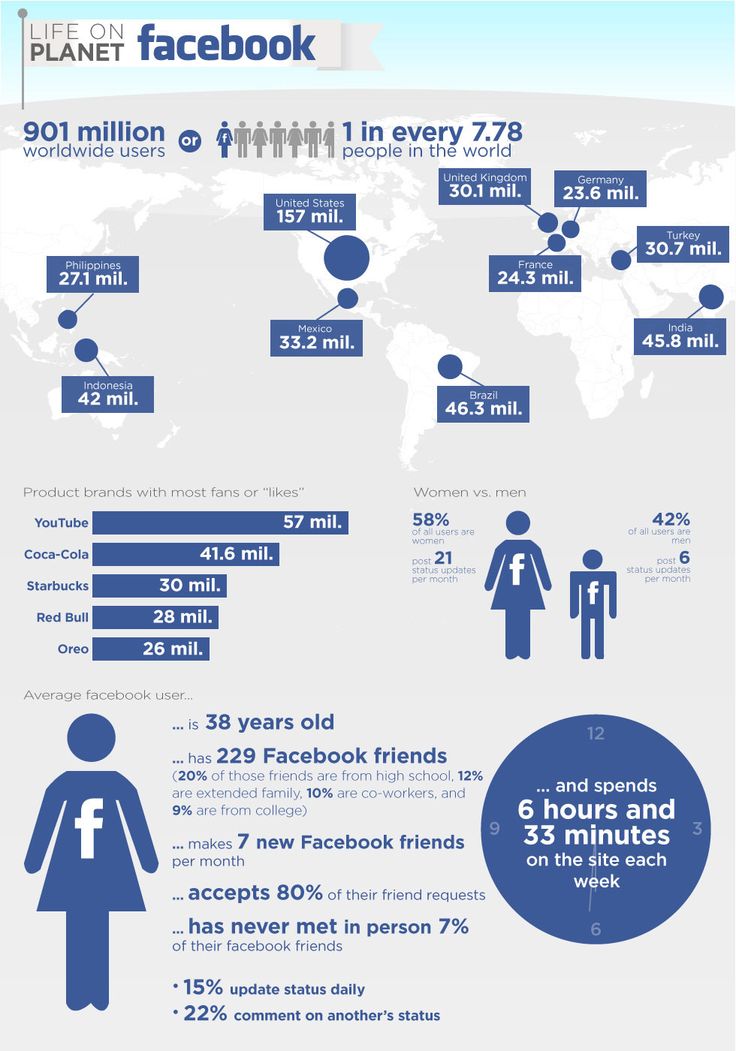
Facebook is the largest social network in the world, with more than 1.70 billion people logging on daily to spend an average of 58.5 minutes on the platform.
That’s insane.
If you sell products online and you don’t have a Facebook shop, you’re missing a huge opportunity.
The Facebook shop feature isn’t just available to major retailers – anyone can get in on the action. For ecommerce store owners, it’s one of the most no-brainer ways of using social media marketing.
Plus, Facebook now allows you to set up a mobile-optimized store for people to access on both Facebook and Instagram. Its new feature, called Facebook Shops, makes it easy for users to discover, browse, and purchase your products on the platforms they use daily to enjoy new experiences.
In this article, you’ll learn everything you need to know about the new Facebook Shops feature. We’ll then show you the traditional way of creating aFacebook shop and how to integrate your Shopify store with Facebook. Plus, make sure that you stick around until the end to learn how to tag your products in Facebook posts.
Post Contents
Start selling online now with Shopify
Start your free trial
Facebook Shops is a recently introduced feature that aims to ease the disruption caused by the COVID-19 pandemic.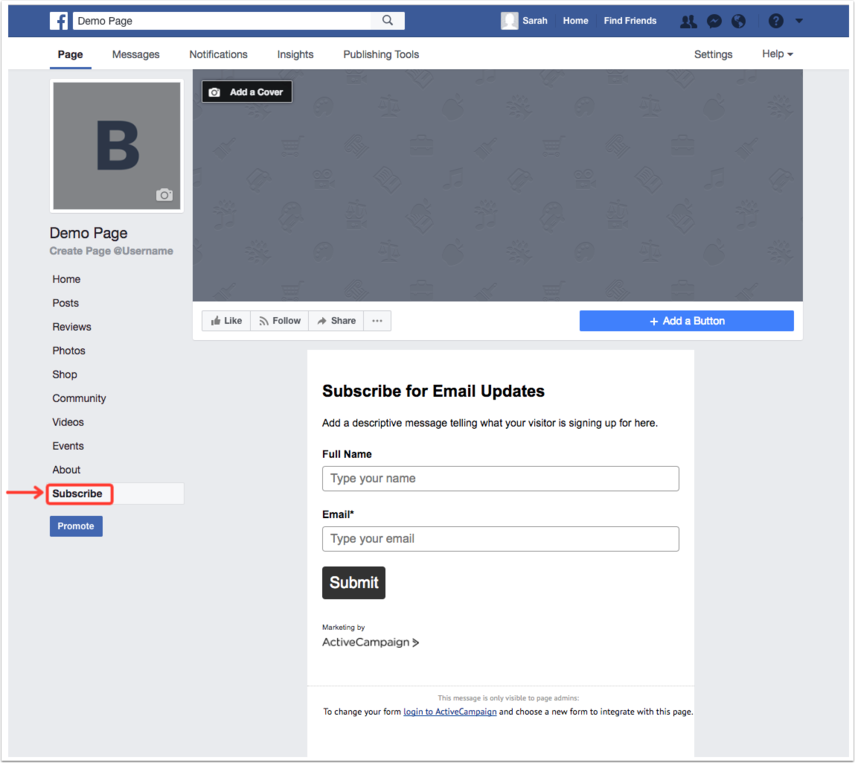
It allows you to showcase your products on your Facebook page and Instagram profile in a way that offers a native shopping experience.
Facebook Shops give you the ability to create custom collections by grouping items from your inventory, making it easy for customers to discover your products.
Plus, you can present a distinct brand and storefront by customizing the layout and colors of your Facebook shop.
With full-screen images and customizable design, Facebook Shops lets you create a brand identity across Facebook and Instagram.
Small businesses typically struggle to move their business online, and right now, many of them are worried about the state of their storefronts.
As people are being ordered to stay at home, they are having a hard time staying open and making enough money to stay in business.
With Facebook Shops, smaller retailers have an opportunity to weather the COVID-19 storm and gain even more customers than before.
After using Facebook Shops, customers will be able to access your store and see your collections from your Facebook business page, Instagram profile or Instagram Story.
And just like when you’re in a retail shop and offer support to potential customers, you’ll be able to connect with people through Messenger, WhatsApp or Instagram Direct to answer questions, provide tracking updates, and more.
Facebook also said that in the future customers will be able to view a business’ Facebook store and buy products right within a chat in these communication channels. Meaning you’ll get more opportunities to make sales via upselling and cross-selling.
Shopify has been working with Facebook since 2015 to provide sellers with the best multi-channel commerce solutions. Now the company has partnered with Facebook to bring the new, mobile-first shopping experience to Shopify merchants.
Here’s what you can expect: If you’re already selling products on Shopify, Facebook Shops will become available to you as an additional sales channel and you’ll be able to use it to create a branded storefront on Facebook and Instagram.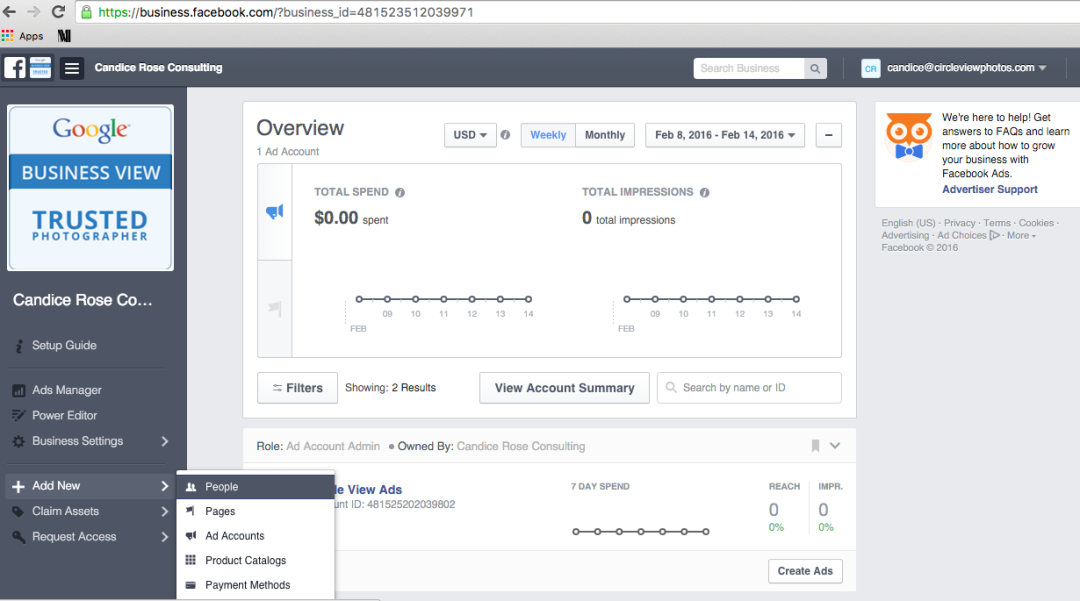
After publishing your shop, you’ll also be able to customize it as well as curate product collections directly inside Facebook and Instagram.
And with Shopify’s integration, your inventory and items will stay in perfect sync with your ecommerce store, so you can manage your business from one place while providing an omnichannel customer experience.
Product checkout will also be powered by Shopify for store owners, with the company also offering Instagram Checkout to some merchants experimenting with the new feature.
Facebook Shops is expected to roll out to every merchant in the next few months, but you can get a head start by adding a Facebook channel on Shopify. Keep reading to learn how to set it up and how you can sync your existing products through the channel so you can customize your Facebook Shop once it becomes available.
Before Facebook Shops, the only way to create a Facebook storefront was to use the “Shop” tab on your Facebook Page.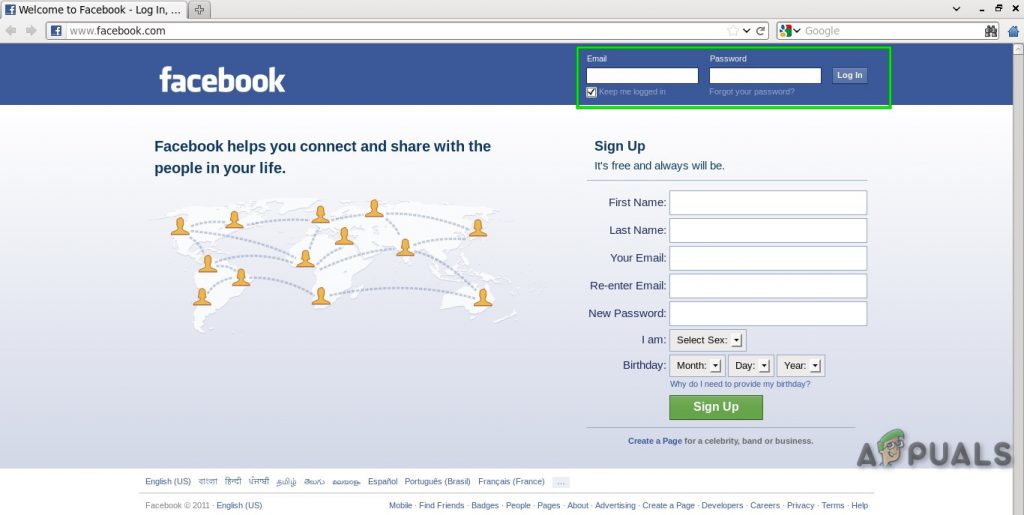
Although a small number of businesses that use the Facebook Shop tab will be migrated to Facebook Shops, the majority will still need to wait for a global rollout.
Meaning that if you’re based in a country where Facebook’s features are slow to reach, you will have to take the traditional route to set up a Facebook shop.
Shop is a tab which you can configure on your Facebook page to promote and sell your products directly to Facebook users on the platform itself.
Here’s an example of a Facebook store from Shopify user Best Self Co:
When Facebook users click on a product, they’ll be shown an expanded product page. On this page, they can see product pictures and videos, and read the product description.
Before we look at how to create a Facebook shop, it’s important to understand exactly how a Facebook store can help you grow your ecommerce business.
Here are the three main benefits of having a Facebook store, traditional or mobile-first:
 You Can Tag Your Products in Facebook Posts to Boost Sales
Once you have a Facebook shop set up, you’ll be able to start tagging any of your products featured in your images.
This ensures that everyone who views your posts will become aware of the products you have available.
In the example below from Nike, you can see product listing thumbnails under the heading “Products shown.”
Plus, notice how each product in the image has a price tag icon? When users hover their mouse over the icon, product information is displayed.
Here’s the best part: Once you’ve set up your Facebook shop, tagging products in posts is quick and easy.
More on that in a minute.
People hang out on Facebook.
Remember, the average daily user spends nearly an hour on the platform every day.
By using Facebook Shops or adding a Facebook Shop tab to your page, you can capitalize on the way users engage on Facebook.
Unlike your website, when people view your products on your Facebook store, they can Like them, save them for later, share them with friends, or leave a comment asking a question or sharing their thoughts.
Also, if you’re in the U.S. and have checkout enabled, customers can place an order without having to leave the platform.
Each of these actions will help to expose your brand to new people in the best possible way – through a friend.
These engagements work as a powerful form of social proof – meaning that people are heavily influenced by the opinions and actions of others.
You want to make it as easy as possible for people to purchase your products.
The more hoops you make customers jump through, the more likely they’ll give up or get distracted and not complete their purchase.
Simply put, a Facebook store makes life easier for Facebook users.
They can browse your products in the same window they’re using to chat with friends. Plus, they can add products to their cart and then check out on the platform, or head to your website to finish purchasing your products.
Unfortunately, the Facebook Shops feature isn’t currently available in all countries. So, which countries can access the feature?
Good question – no idea.
Facebook isn’t super helpful in this regard, saying only, “Shops are being rolled out to businesses who sell with Instagram Shopping, a Facebook Page shop or both. We’ll send you an email when yours is ready.”
What’s more, even if you can access the Facebook Shop tab feature, Facebook only provides a shopping cart and checkout service for sellers in the U.S.
And once again, we don’t know when other countries can expect access to this feature.
However, it’s not all bad news.
If you’re not based in the U.S., you can still use a traditional Facebook shop as a sales channel to hook in new customers and send them to your website to check out by using the call to action, “Check Out on Website.”
Okay, now let’s look at how to set up a Facebook store with Shopify. Then, we’ll take a look at how to create a standalone Facebook store using the Shop tab on a Facebook page.
We recommend this route for serious sellers (and for existing Shopify users).
Why?
Firstly, you’re in control – your business won’t be completely dependent on the whims of future Facebook policies.
You’re also able to utilize Shopify’s powerful ecommerce management software.
#Win
Plus, Shopify allows you to integrate multiple sales channels.
This means that you can sell on your own website, Facebook, Messenger, Instagram, Amazon, eBay, and more, all from one dashboard.
In other words, it will make your life way easier.
Okay, ready to get to work?
If you don’t already have a Shopify store, head to Shopify.com and create an account.
Thankfully, Shopify offers a free 14-day trial, so you can test it out before committing.
However, to create a Facebook shop, you’ll need to sign up to one of Shopify’s plans, which start at just $29 per month.
When you’re done, you’ll be taken to your new Shopify dashboard – A.K.A. the command center of your future ecommerce empire:
At this point, Shopify will prompt you to add a product, customize your theme, and add a domain name.
It’s best to get your store set up now – for more help, check out: How to Set Up Your Shopify Store.
Also, if you don’t already have a Facebook page for your business, you’ll need to set one up before we can continue. For help, read our guide, 19 Easy Steps to Setting Up a Killer Facebook Business Page.
Done? Awesome!
Head to your Shopify dashboard, click “Sales Channels,” and then click the plus icon to add Facebook as a new sales channel.
Once you’ve done that, click “Connect Account” to connect Shopify with your Facebook account.
Facebook will ask you to allow Shopify to “manage your Pages and publish as Pages you manage” – click “OK” to continue.
Next, use the drop-down menu to select the Facebook page that you want to create a Facebook shop for. Once you’ve done that, click “Connect Page.”
At this point, you’re asked to read and agree to Facebook’s Seller’s Terms and Policies. Make sure to read these before clicking “Accept Terms.”
All done?
Okay, it can take up to 48 hours for Facebook to review and approve your store. In the meantime, let’s break down what you’ll do once you get the green light from Facebook.
Once Facebook has approved your store, you’ll need to sign up for one of Shopify’s plans and click “Enable” before you can start selling through your Facebook store.
Now that you’ve linked your Shopify store to your Facebook page, it’s time to set up your Facebook shop.
To add products to your Facebook store, click the “Products” tab in your Shopify dashboard and select the products you want to add.
Next, click “Actions” to open the action menu, and then click “Make products available.”
A popup window will ask you which sales channels you want the products to be displayed on. Check the box next to Facebook and click “Make products available.”
You can also add collections to your Facebook shop in the same way. Just click the “Collections” tab in the Shopify dashboard and repeat the process.
Now, to edit how products are arranged in your Facebook store, head to the “Publishing” tab under “Facebook” in the sidebar.
Here you can add, remove, and arrange collections of products shown in your Facebook shop.
Once you’re done, head to your Facebook page and you’ll see a new “Shop” tab featuring your products and collections.
Here’s an example from Shopify user KKW Beauty:
If you’d like to change the order of your Facebook page tabs, read “Step 1” of the next section.
Congratulations, you’re now the proud owner of a Facebook shop!
In this section, we’ll work through how to set up and manage a Facebook store using only the platform itself.
Again, if you don’t yet have one, make sure to set up a Facebook business page before continuing.
Okay, let’s jump in.
Navigate to your Facebook page and click “Settings.”
You’ll then be presented with a huge menu of Facebook page options. Now, click “Templates and tabs” so that we can add the Facebook shop tab.
This will show you all of the tabs you’re currently using. Scroll to the bottom of the list and click “Add a Tab.”
Now, find “Shop” and click “Add Tab.” This will add the shop tab to your Facebook page.
If you’d like to rearrange the order of your tabs, just click the three horizontal lines and drag your tabs into your preferred arrangement.
However, when doing this, make sure that your shop tab is in the top three. This will ensure that it’s still visible when your tab list is shortened by the “See more” link.
If your shop tab isn’t displaying correctly, head back to “Templates and tabs,” click on “Settings,” and make sure “Show Shop tab” is on.
Once you’ve done this, head back to your Facebook page and click on “Shop.”
To continue, you must agree to Facebook’s Seller’s Terms and Policies. Make sure to read these through before agreeing and clicking “Continue.”
Next, Facebook will ask you how you’d like people to purchase products from your shop.
Anywhere outside of the U.S. has two options: “Message to buy,” or “Checkout on another website.”
If you live in the U.S. you’ll also be given the option to accept payments directly from your Facebook page by linking your bank or Stripe account. (Click here to learn how to do this.)
Once you’ve chosen your payment method, it’s time to add products to your Facebook shop!
Step 3: Add Products to Your Facebook Shop
To start, head to your Facebook shop tab and click “Add Product.”
Next, upload your product photos and videos. Then, type in your product name, price, and include a compelling product description.
In this example, I opted to send buyers to a website to complete their purchase, so I would need to add the website’s URL for this specific product.
Now, Facebook has detailed guidelines and recommendations for product listings. Let’s take a quick look at some of the most important points.
You must:
Ideally, you should use images that:
Don’t use images that contain:
 g., calls-to-action or promo codes)
Your descriptions shouldn’t include:
Ideally, your descriptions should:
When you finish, make sure to click the toggle to enable sharing and then click “Save.”
At this point, you’ll need to wait for Facebook to review and accept your products. This usually takes a few minutes and Facebook will notify you when processing is complete and your products are visible.
Once your products are approved they’ll look like this:
Then, simply repeat this process until all of your products are added.
To manage your products and orders, click the “Publishing Tools” tab at the top of your Facebook page, and click “Shop” near the bottom of the sidebar menu.
If you’re based in the U.S. and opted to allow users to checkout on Facebook, you’ll get a notification each time you receive a new order.
You also have an addition tab under the “Shop” menu to manage your orders.
Next up:
Let’s quickly run through how to tag your products in Facebook posts.
First, share a new Facebook post or bring up an old post featuring products that you’d like to tag.
Now that you have a Facebook shop tab with products on it, there’ll be an option to “Tag products” next to the usual “Tag photo” button.
Simply click “Tag Products,” select the product you’d like to tag and click “Finished Tagging.”
That’s it!
Now, whenever a user views your post, they’ll be shown thumbnails of your Facebook shop product listings alongside the image.
A Facebook store is an incredible opportunity to place your product offerings inside the most popular social media platform in the world.
Whether you create one through Facebook Shops or using the Shop tab on your Facebook page, you’ll get the opportunity to:
If you’re serious about selling online, it’s best to create a Facebook store using a service like Shopify.
This way, you’ll retain complete control over your business while also getting access to a suite of features designed solely to help you grow your bottom line.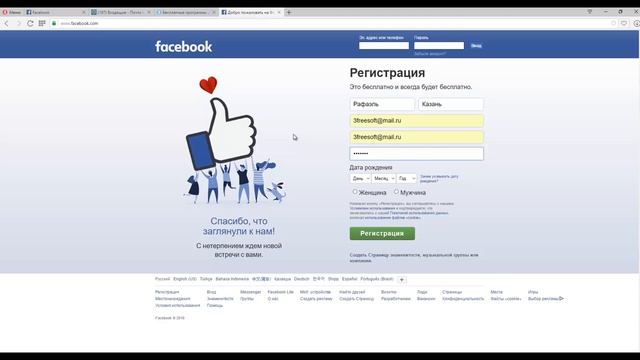
If you’re based in a country without access to the Facebook Shops, don’t worry – it’s on its way. And in the meantime, you can set up a Facebook Page shop and take advantage of other features like Facebook Stories and Facebook Live to grow your store.
Do you have a Facebook store? Let us know about your experiences in the comments below!
Start selling online now with Shopify
Start your free trial
September 18, 2019 Social Networks
Why is a personal page on Facebook not always enough for promotion? What do you need to do to advertise your products and services in one of the most influential and largest social networks in the world? Why do experts advise starting a business page for promotion and how to work with it in general? With Natalia Pryadka's step-by-step instructions, you will learn how to create a business page on Facebook, set it up and start promoting today.
With a business page, you can openly advertise your products and services. Today we will discuss the nuances in the design and maintenance of business pages for a competent and quick start.
At the end of the article or right now, download the recording of the video lesson on the content plan
Download video tutorial
A business page is the territory of your business in one of the largest social networks. Imagine the Internet as a huge mall. Your Facebook page is your representation on it. It is needed in order to:
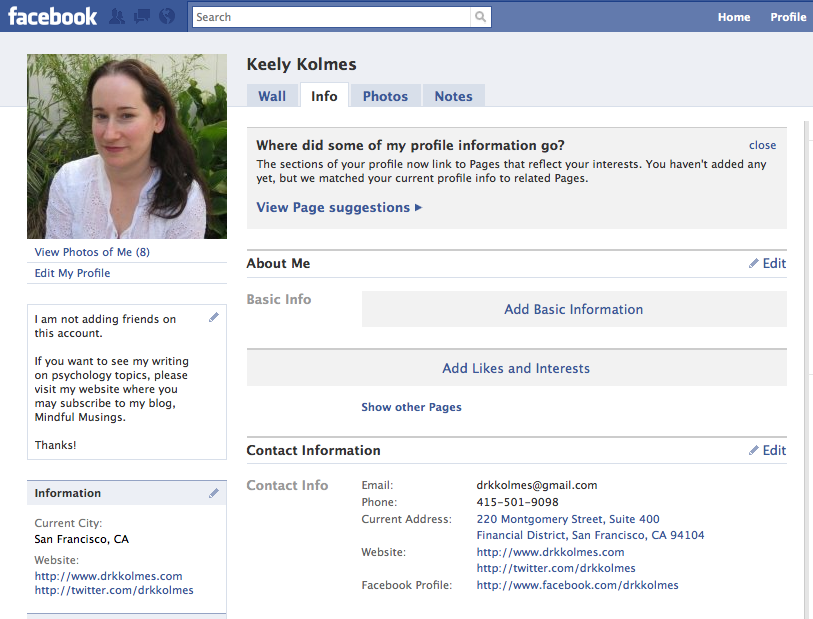
Important: a personal Facebook profile is not a business profile. It is limited in the possibilities that business pages have. Many people confuse business pages with groups. But they are completely different instruments. Groups are created for communication, community and mass discussions. Business pages are the showcase of a business. The platform from which a person or brand broadcasts information.
A big plus of a business page is the ability to set up “roles” for those who will lead it. So you don't have to do everything yourself. Part of the processes can be given to the advertiser, editor, administrator and other assistants.
Do not rush to register a page right now. There are some nuances that you need to know in advance.
Before you create a business page on Facebook, you will enter the name of the company in the corresponding field. Keep in mind that it will be very difficult to change it later. You will need to write to technical support, present documents, prove that you are really the owner of this page. It's troublesome. Therefore, if you are promoting a personal brand, it is logical to indicate in the title not only the business, but also your first and last name.
The login cannot be changed at all. Therefore, come up with a short and capacious name in advance, written in Latin letters. This could be your company name or another word that people might use to search for it.
Prepare a text in advance about what your company does. It's important not to brag about yourself. Show how you are useful to society. What will subscribers get from contacting you.
Some countries have arrangements with Facebook to pay VAT (Value Added Tax). When creating a page, it is important to take this fact into account. For example, Ukraine does not pay, but the Russian Federation does.
Cover and profile photo can be changed, there are no restrictions. But still, prepare visual content that best represents your company in advance. Decide if you need to involve a designer to create it or if you can do it yourself with the help of graphic services.
For example, many companies upload their logo as their profile photo. But for the cover photo, you can choose an image of the store, your products or a recognizable picture. For example, the one that you would put in an advertising campaign.
On the screen is just an example, when the photo of the assortment was used for the cover, and the company logo on the avatar. Pay attention to the blue button "Shop". The button text for your page is the next thing you need to think about.
 For example, he can “Visit the site” or “Call”.
 Now let's start creating a business page without being distracted by searching for information and thinking “okay, I'll add it later”.
Login to Facebook with your username and password.
There are two ways to create a page.
First : in the top menu, select “Create” —>> “Page”.
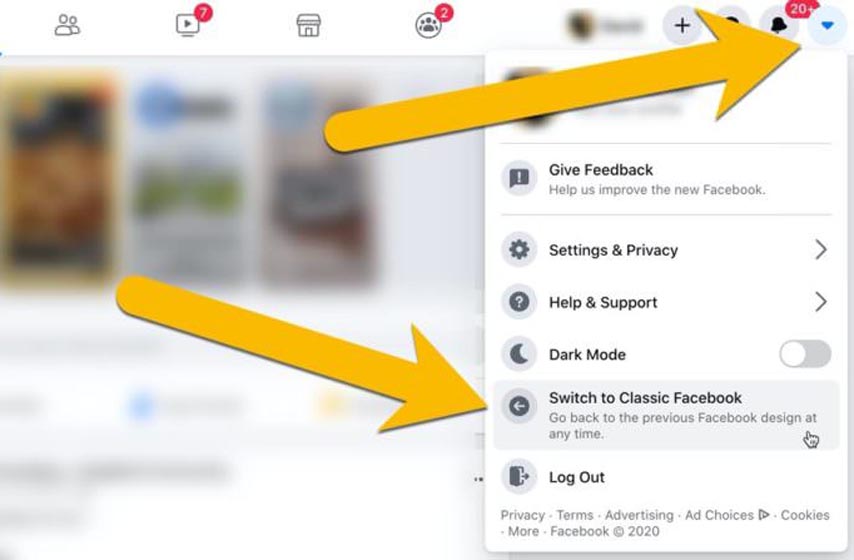
Second : click on the inconspicuous arrow in the upper right corner. In the list that opens, select the “Create Page” or “Manage Page” item (highlighted by the cursor). Next, the “+Create Page” button.
Next, Facebook will prompt you to choose a business type: “Company or brand” or “Community or public figure”.
The difference between them is not only in the direction of activity, but also in the functions that are available for each form of business.
| Company or brand | Community or public figure | |
| Brief description | ✔ | ✔ |
| Site | ✔ | ✔ |
| Services | ✔ | ✔ |
| Ratings and reviews | ✔ | ✔ |
| Email contact | ✔ | ✔ |
| Telephone | ✔ | ✔ |
| Address | ✔ | |
| Card | ✔ | |
| Visits | ✔ |
Suppose we have a “Company or Brand”. Next, a form for entering data opens. You have already prepared the information, so you simply copy and paste some fields.
The category describes the general direction of your business.
This is how the completed form for registering a business page looks like.
Follow the Facebook prompts. Next, you will be prompted to pull up a photo and cover. If they are not ready yet, you can skip the step.
This is how the installed page avatar looks like, in this form it will appear in the messenger and in the comments.
As an example, I will put the same picture as the cover of the page.
Add an "Add cover" button, select the desired file and click "Save".
By the way, you can create Facebook covers yourself on canva.com in the “Facebook Cover” section. The service is adapted for non-designers. It offers many ready-made and beautiful templates in the right size and with selected fonts.
Your page has been created.
Now Facebook will constantly suggest and recommend changes and settings. I recommend that you go to the “Welcome to your new Page” tab and read carefully how to describe your activity.
Customization is not a static activity. You need to constantly monitor the status of your business page, as Facebook is constantly changing: it adds some functions, but removes something. We will go through the main settings that are relevant at the moment.
We discussed above what the target action your customers will take on the page. In order for them to do it, you need to set up a button.
To do this, under the cover, click “Add button” and select the desired option from the list.
Page visitors can:
Click Finish.
There are two ways to do this. The first is through the “Settings” function, and the second is through the quick menu, on the left under the photo is the “Information” section.
Fill it out following the prompts on the screen.
Here you will see fields that already contain information. But you will also encounter empty lines that are better filled. Among them will be a suggestion to create a quick name in the “Facebook Username” tab. It is also important to choose the right one.
First, it will be displayed in the browser when searching.
Secondly, if you named the business page in Cyrillic, then it will also be in the browser link. And we know that when copying, Cyrillic letters are converted into a three-kilometer link from a meaningless character set.
Therefore, enter the name in Latin letters next to the dog “@”. Facebook inserted it so that someone could tag your page in posts or comments.
On the right side of the business page, there is a “Our Story” section. It is better to include your services and the benefits that customers receive in it. This field is always in sight, it is a quick advertisement for your project. You can change the information in it at any time.
When setting up, it is important to remember that customers are your users, readers, participants. Therefore, on your business page, it should be convenient and understandable first of all for them.
Ask the question: “What is the first thing the customer is interested in? What benefit does he expect from my business?”. Write down the answers for yourself - they will be beacons in filling the page. And you will fill in all other sections based on this point.
Go to the “Settings” tab:
This is how the office looks like, the left column in it is what we will work with below.
Facebook tells you how to fill in the fields in each section.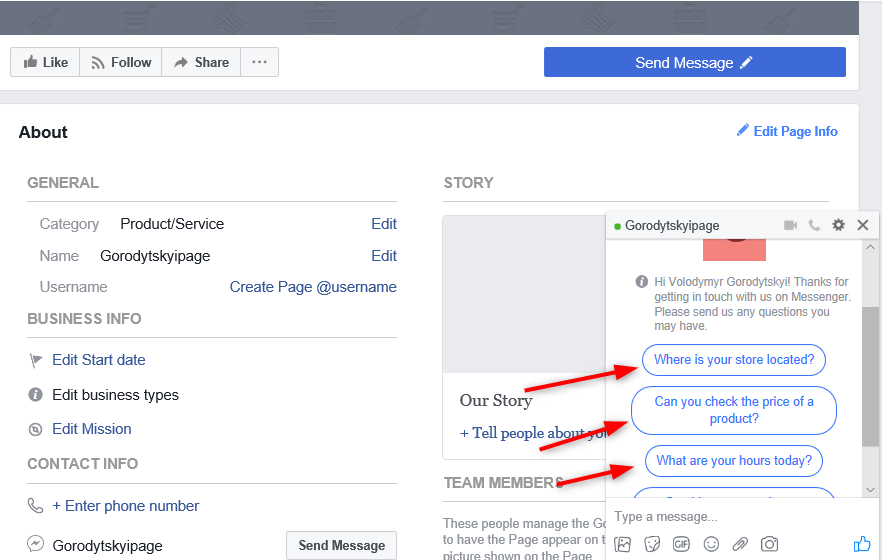
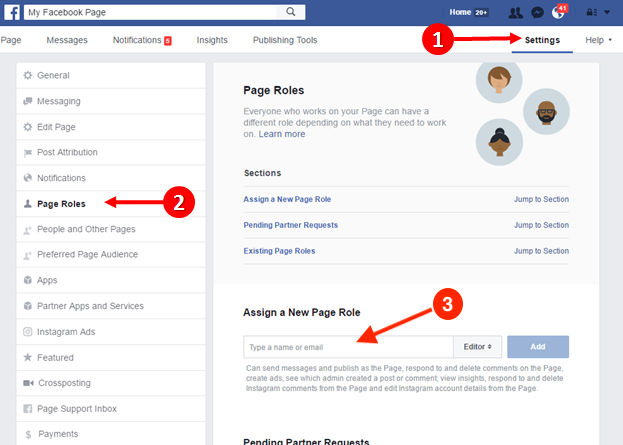
In order for your employees to manage the page, distribute functions and responsibilities among them in the “Page Roles” section.
Important! Under no circumstances should you share your username and password with anyone else. Facebook bans for this, and then it takes a very long time to restore access. Think of your Facebook as a safe, from which you can not give anyone the key.
In the field for choosing a new role, enter the first and last name of the person you want to add. It is necessary that he be registered on Facebook - once, and be your friend - twice.
You can always go to the section, see what roles you already have, who to add, who to remove.
A template is what your page might look like through the user's eyes. How the blocks will be located in it and what kind of information it will be. For different lines of business your template.
Services . The template is designed to help people find you, use your services and stay in touch with you. Suitable for private professionals, helping practitioners, consultants, tutors and so on.
Company . Designed to make it easier for you to manage your company, including posting jobs and special offers.
Platforms . The template is needed for those who care about showing the opening hours of your establishment, its location and upcoming events. Suitable for those who have shops, concert venues, coworking spaces and other facilities.
Non-profit organization . The template allows you to promote your initiative and encourage people to raise funds and donate to your nonprofit organization.
Policies . A template for politicians to communicate with their electorate and convey their ideas to them.
Movies .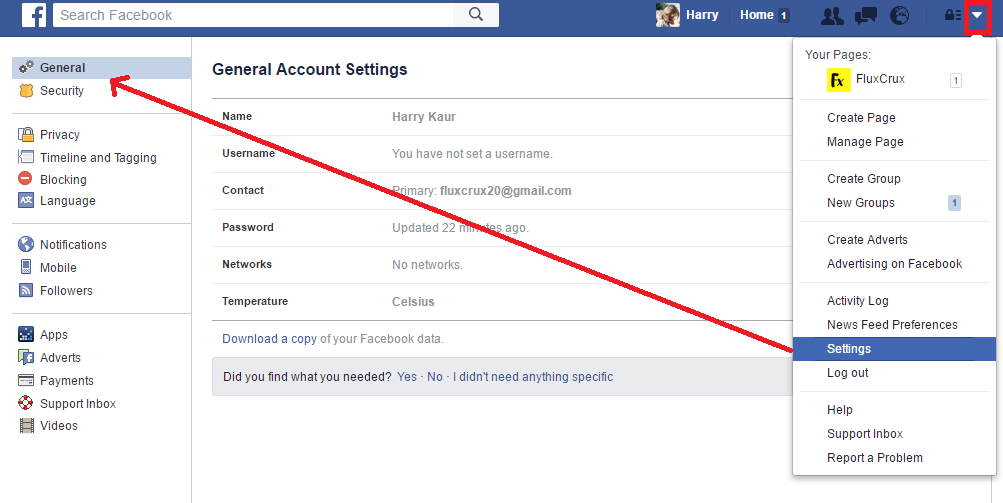 Template for screenings/announcements coverage.
Restaurants and cafes . Designed to highlight photos and important information about your menu, opening hours and location.
Shopping . A template to showcase products and simplify the online ordering process.
Video Page . Designed to showcase video content on your page.
Standard . General template, suitable for all types of pages. Buttons and tabs help showcase everything that matters to your followers.
The choice of template determines which tabs will be available to you next.
Important! Before accepting a template, make sure it's the right one for you. You can change the template later, you just have to check whether all the information entered is saved and displayed correctly.
Your page has a Services section on the left.
Give each service a name and a short description to help your customer navigate.
If you have a material product, then you need to fill out another tab on the business page - “Shop”.
Be sure to read the terms of publications. It's important to know what Facebook allows you to do and what it doesn't. Then click "Continue".
Next, you need to choose where exactly the product will be sold: on a third-party site or inside Facebook.
Choose the type of currency. By the way, the Ukrainian hryvnia has recently appeared in stores.
Fill out product cards. So far, one-touch selling is not available for RuNet, as in the USA, but there is a promise that it will be possible soon.
Please check the tips and requirements for stores before listing items.
On your Facebook business page, you can set up automatic interaction with subscribers and potential customers.![]() Go to Settings —>> Messaging —>> Reply Assistant.
Go to Settings —>> Messaging —>> Reply Assistant.
Write a short welcome text for those who write messages and ask you questions.
Your page is now ready to be published.
Facebook Pages is a business environment. In this regard, there is an opinion that useful and interesting material should be given on a business page. And reflections, disputes, points of view - leave for personal pages.
But everything needs to be tested. Because if you provide dry value, you will overfeed subscribers with it very quickly. And hardly anyone will visit your business page. We recommend leaving only 10% of the usefulness of all content, and use the rest to entertain and engage your readers.
When creating content, keep in mind the information about your target audience and the needs of potential customers. This is a key parameter in running a successful business. Read more useful materials in the Marketing from the Basics Club and the Telegram channel.
Natalia Pryadka, marketing director at Dinara advertising agency
There are already more than 20 thousand of us on the social network. Join us to receive business development tips and useful links
* If the social networks Facebook, Instagram are mentioned in the text, we notify: the activities of the Meta company (Facebook, Instagram) are recognized as extremist and are prohibited on the territory of the Russian Federation.
The Facebook catalog is a place where the seller uploads data about products: size, color, price, etc. Items of several topics can be added to the catalog: online stores, offers with flights, hotel reservations and tours, offers for renting and selling real estate, cars, etc.
Facebook catalogs are created in the Commerce Manager assortment service, available at business.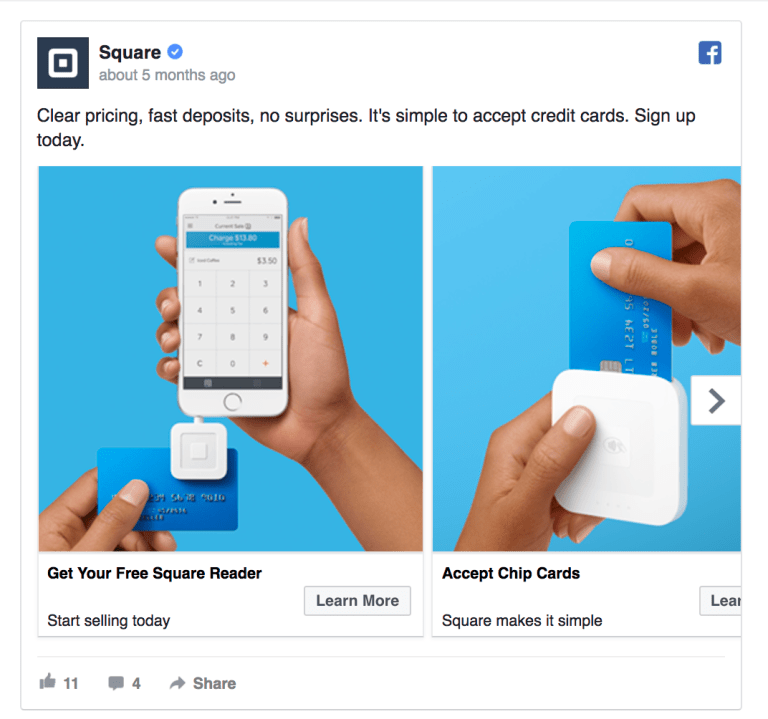 facebook.com/commerce.
Thanks to the catalog, the company will be able to:
Add products to Facebook, specify and manage information about them. In the catalog, you need to specify the name of the product, add its image, description, cost, various options, etc. Products and data about them can be uploaded individually or in bulk.
Create groups for listings and collections in stores. Groups and collections are a set of items from the catalog.
Share with colleagues and partners to collaborate on the catalog.
Specify country and language data. This will allow users to display correct information about products regardless of their language and country.
Facebook recommends adding all line items to one feed rather than creating multiple feeds. The presence of all positions in one catalog allows:
it is easier to manage information about products, since they are all in one place;
Create audiences based on pixel events associated with catalog positions.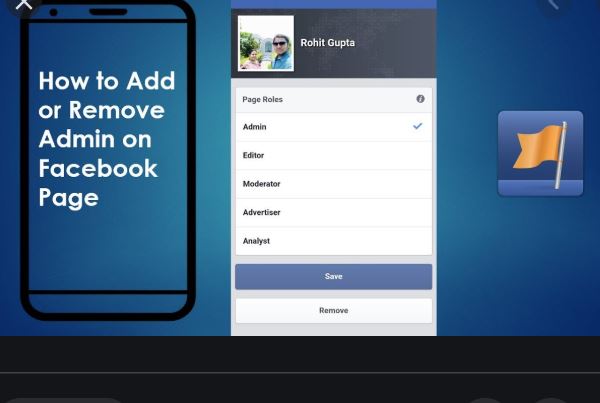 Since all products will be in the same directory, events for them will not be separated;
sell all available items in Facebook stores (according to the rules, only one catalog can be connected to a store created with the help of Facebook Shops).
Products from the catalog can be advertised on Facebook and Instagram. Facebook Ads types available for catalog line items:
Dynamic advertising. Shows users items from the catalog that they were interested in on the advertiser's website or on the Internet.
Advertising with a selection. The ad includes several items from the catalog below the main image or video. By clicking on a product, the user can learn more about it or see similar products.
Advertising with a carousel. Items from the catalog are dynamically loaded into carousel cards.
Advertising with shopping tags. Products from the catalog are marked with special tags in the ad. By clicking on the label, the user goes to the product page with information about it and can place an order.
Affiliate advertising. Brands that sell products through merchants can run direct sales campaigns. The merchant must give the brand access to the relevant catalog segment, which the brand can use to set up dynamic ads.
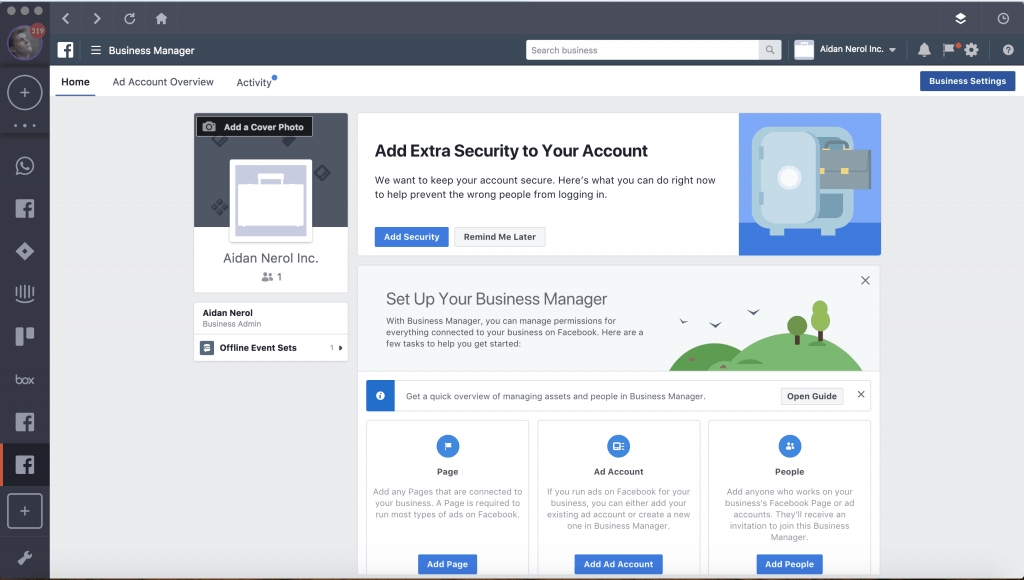
Before setting up the catalog, create a company business page and a Business Manager account to link the catalog to the business page. Next, open Commerce Manager.
Click "Add Catalog" and select a topic from the proposed list, which includes positions in the catalog, for example, e-commerce.
Next, specify how you want to add products to the catalog - upload the information yourself or use a partner platform, such as Shopify or Big Commerce.
For self-download, click "Download product information". You can add products one at a time manually, add products in bulk using a feed, or use the Facebook pixel to import and update line items from your site.
If using a partner platform, click "Partner platform connection", select the desired platform, go to the site and complete the setup. This option only works for e-commerce.
Next, select the Business Manager account that the catalog is linked to to access more options for using the catalog than with a personal account. It will also be possible to give access to work with the catalog to other employees and partners. Only a user who has been assigned the administrator role can select a Business Manager account.
After that, enter the name of the directory and click "Create". The catalog is ready. Now it needs to be filled. To do this, go to it, click on the "Add Products" button and select the desired option.
You can upload one product by manually adding a description. To download several products, the system will prompt you to select one of the methods.