Instagram launched its live video feature in late 2016. Since then, the social media company has built up the function by adding other features like questions and the option to add friends to the live video, too.
Going live on Instagram can be a fun way to let your followers see events happening in real time, like a concert or special event.
Here's how to go live, go live with a friend, or request to join another user's live video.
How to go live on Instagram1. Open the Instagram app on your iPhone or Android.
2. Tap the plus sign "+" icon in the top-right corner of the homepage. Alternatively, you can swipe left to get to the same screen.
Click the plus sign icon or swipe left. Grace Eliza Goodwin/Insider3. After tapping the plus sign or swiping left, you'll be taken to a New Post page. In the menu bar at the bottom of the page, swipe all the way to the right to select Live.
Select Live. Grace Eliza Goodwin/Insider4. A camera screen will open up. On the left side, tap the icon of four lines to add a title to your live video. You can also tap the icon of a circle with a heart in it to make your video a fundraiser.
5. When you're ready to go live, tap the circle icon at the bottom of the screen and you'll be live. Active followers will be notified that you're now live. As followers begin to watch your live video, you will see their usernames appear at the bottom.
Click the circle icon to go live. Grace Eliza Goodwin/Insider
 6. To end a live video, tap the "X" in the top-right corner and select End Now in the pop-up. Once the live video has ended, Instagram will show you how many people viewed your video and give you the option to share the video for the next 24 hours so those who missed it can see it via your Instagram Stories. Or, you can choose to Delete video.
Click the X in the top-right corner. Grace Eliza Goodwin/Insider How to go live on Instagram with a guest1. Open the Instagram app on your iPhone or Android.
2. Tap the plus sign "+" icon in the top-right corner of the homepage. Alternatively, you can swipe left to get to the same screen.
3. After tapping the plus sign or swiping left, you'll be taken to a New Post page. In the menu bar at the bottom of the page, swipe all the way to the right to select Live.
4. A camera screen will open up. On the left side, tap the icon of four lines to add a title to your live video. You can also tap the icon of a circle with a heart in it to make your video a fundraiser.
5. When you're ready to go live, tap the circle icon at the bottom of the screen and you'll be live.
6. Once you're live, tap the icon of a video camera at the bottom of the screen. From here, you can type in the username of someone to go live with, or search for them in the list of viewers. Select a user to invite them to join your live video.
7. You can only go live with someone who is already watching your live video. But, you can invite someone to join your live video who isn't already watching — to do so, type in their username, tap the circle button next to their name, and select Send Request.
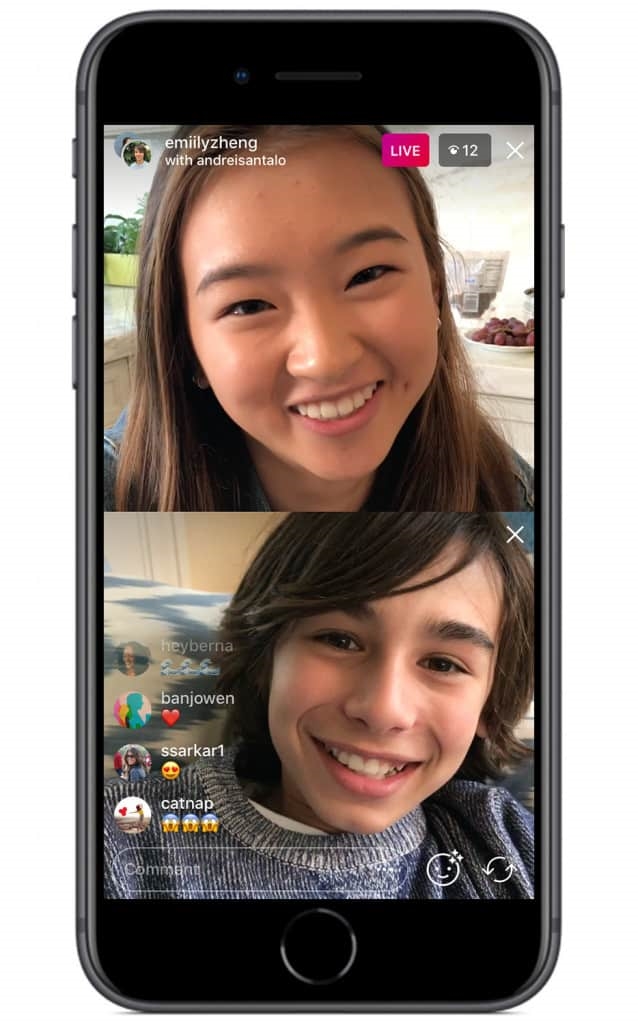
Send a request to your guest and go live in a room. Grace Eliza Goodwin/Insider8.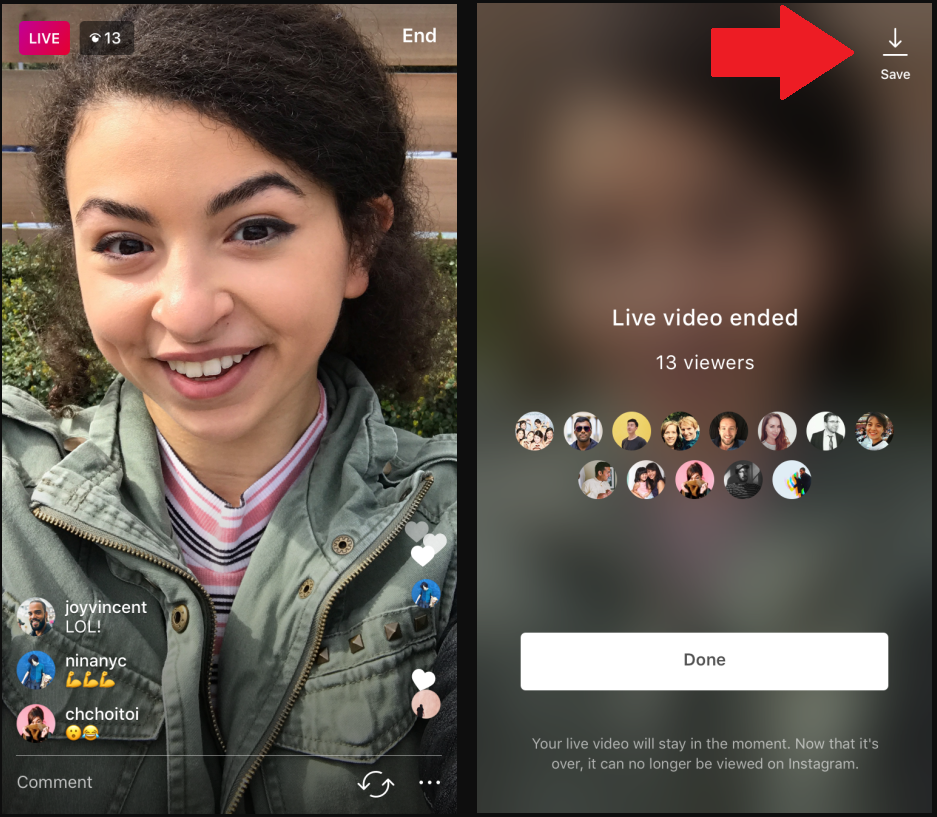 Once they've accepted your request, their video should appear alongside yours in a split screen. To remove your friend from the Live video, tap the "X" at the top-right of their screen.
9. To end your live video, tap the "X" in the upper right-hand corner and choose End Now in the pop-up. Once the live video has ended, Instagram will show you how many people viewed your video and give you the option to share the video for the next 24 hours so those who missed it can see it via your Instagram Stories. Or, you can choose to Delete video.
Note: To use Instagram's Live Rooms feature for creators, you can follow this same process to add multiple guests.
How to request to be in another user's live video on Instagram1. Open another user's live video and tap Request to join.
2. Then, tap Send request to request to be in their live video.
3. You will then receive a notification letting you know if your request has been accepted or denied.
Meira Gebel
Meira Gebel is a freelance reporter based in Portland, Oregon. She writes about business, culture, and technology for Insider. Her work has been featured in Digital Trends, Willamette Week, USA Today, and more. She is a graduate of Columbia Journalism School and San Francisco State University. Feel free to reach out to her on Twitter, where she can be found most of the time, @MeiraGebel.
Read moreRead less
Instagram Tips & Resources
By Jillian Warren
•
Updated on March 15, 2022
•
10 minute read
Now's the perfect time to experiment with Instagram Live!
Published March 15, 2022
Instagram Live is an incredible channel for driving new followers, engagement, and even selling products.
But there are no retakes on Instagram Live – so preparation is everything!
We’re covering everything from how to kick off your first Instagram Live to our top tips for hosting next-level broadcasts that drive real value for your business.
Ready to jump right in? It’s time to go live!
Why Should Instagram Live Be Part of Your Strategy?Going live on Instagram is one of the best ways to connect with your followers in a direct, transparent, and authentic way.
Unlike pre-recorded Instagram Stories, Instagram Live is a totally unedited stream for your followers to tune into and engage with — which can be a great way of showcasing the more human side of your business for your audience to connect with.
And that’s not all. Instagram Live allows your audience to submit their comments and questions in real-time, making it one of Instagram’s most interactive video platforms.
This can be a hugely beneficial tool for building a stronger connection between your brand and potential customers, allowing you to gain valuable feedback and insight — straight from the people that matter most!
Hosting an Instagram Live can also help boost your discoverability on Instagram. For example, every time you go live on Instagram your followers will receive an in-app notification, and your Live will be bumped to the front of their Instagram Stories feed.
With all this in mind, Instagram Live is an awesome tool to promote your products, engage with potential customers, and increase your reach.
TIP: Give your Instagram Live a boost by promoting them on Instagram Stories in advance! Storyboard and schedule your Instagram Stories with Later today, available on all paid plans.
How to Go Live on Instagram: A Step-by-step GuideInstagram Live is an incredibly easy tool to use! But before you start broadcasting, there are a few administrative items to take care of.
Step 1: Adjust Your Instagram Live SettingsBefore you jump into your Instagram Live, it’s a good idea to check your camera settings.
To do so, open the Instagram Live mode view. Then, tap the wheel icon in the top right-hand corner to open your controls.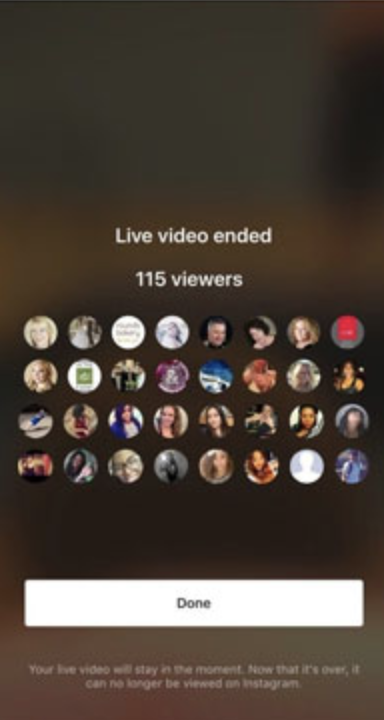
From here, you can select if you'd like to hide your Live from specific people, along with other tools like which side of the screen you want your camera toolbar to be on.
You can also select one of the icons on the left-hand sidebar to add the title of your Instagram Live, set the audience (either Public or Practice mode), or schedule it for a future time and date.
TIP: Practice mode is a great way to alleviate any technical difficulties or pre-show nerves before you go live (more on that later!).
If you’d rather not see inappropriate words in the comments on your Instagram Live, you can automatically hide offensive comments, and manually filter comments that contain specific words or phrases.
Open your Instagram settings, scroll down to “Privacy,” select “Hidden Words,” and then toggle “Hide comments” from “Off” to “On.”
You can even take it a step further by using the "Advanced comment filtering" option, or manually adding words, phrases, and emojis that you don't want to see to a list.
And even better, with Instagram's new "Live Moderator" feature, you can appoint someone to be a moderator during the livestream.
Streamers + Mods = Dynamic Duo ❤️
We’re launching Live Moderator on Instagram Live, where creators can assign a mod and give them the power to:
✅ Report comments
— Instagram (@instagram) March 11, 2022
✅ Remove viewers from Live
✅ Turn off comments for a viewer pic.twitter.com/S9j7s4dInB
Your moderator will have the power to report comments, remove viewers from the Instagram Live, and turn off comments for a viewer — making one less thing for you to worry about.
Step #3: Check Your Live Stream in Practice ModeWith Instagram's “Practice Mode” tool you can test out your Live setup in advance.
Before you go live, select the eye icon on the left-hand corner of the screen. Toggle from "Public" to "Practice." That's it!
This feature is perfect for ironing out any kinks before you go live to the masses.
Once you're happy with your practice session and ready to go live, it's quite simple.
Tap the “Live” icon at the bottom of your screen to start your broadcast, and get ready for your close up!
Step #5: Use Instagram Live's Interactive FeaturesOnce your live is underway, you can choose from a number of features to make your broadcast more engaging:
Share questions from your viewers to the screen by tapping the question mark-speech bubble icon at the bottom of the screen. You can only share a question once a viewer has submitted it during the broadcast.
Send a Direct Message to someone about your Instagram Live by tapping the paper plane icon at the bottom of the screen.
Invite someone to co-host your Instagram Live by tapping the person icon at the bottom of the screen.
Apply an Instagram Stories filter to your broadcast by tapping the filter icon on the right-hand side of the screen.
Tap “Comment” to add a comment to the live stream. You can also pin a comment to the top of the feed by tapping and holding it.
Disable your video feed by tapping the camera icon on the right-hand side of the screen.
You can also share an image or video to your broadcast screen.
First, tap the picture icon in the top right-hand corner of the screen:
Then, choose an image or video from your photo library:
TIP: Use this feature to share educational content like an infographic or a collection of recent photos. Think of it as giving a mini live presentation!
Step #6: End the Live BroadcastOnce your Live is over, tap “End” in the top right corner and then “End Now” to confirm.
From here, you can tap the save icon in the top left to save it to your camera roll to re-use elsewhere. You can choose a cover, write a caption, add a location, and tag other users.
We love repurposed content.
Now that you know how to go live, we can dig into what makes for a really great strategy!
Here are our top 6 tips for hosting next-level Instagram Lives that drive real value for your brand:
Tip #1: Hype Up Your Instagram Live in AdvanceRegularly and strategically promoting an upcoming Instagram Live can make all of the difference when it comes to securing those all important views!
You can now schedule an Instagram Live up to 90 days in advance, which is great for building hype and creating more of an "event" out of your upcoming broadcast.
Going Live hits different when your followers come through 🙌
Live Scheduling lets you schedule your stream up to 90 days in advance and followers can set reminders to tune in ❤️🔔 pic.twitter.com/8t7BWmjEL7
— Instagram (@instagram) October 13, 2021
By scheduling a Live, you can share reminders and countdowns directly to your their Instagram Stories and feed.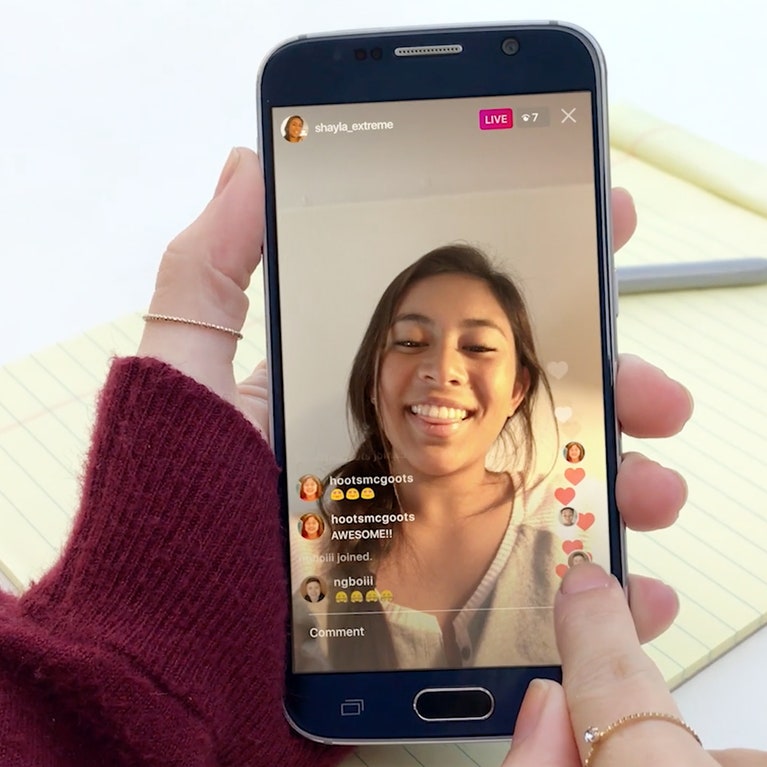
Tell your audience what they can expect in the live broadcast, and invite them to share any questions they have in the comments. This can help your followers feel more engaged, and ultimately more likely to tune in.
Tip #2: Go Live When Your Audience is Most ActiveGoing live when your followers are most active is one of the easiest ways to make your Instagram Lives more successful.
But how can you predict when your audience will be online ahead of time? The best way to do this is by studying historical data trends to understand when your audience are typically most active on Instagram.
Take a look at your Instagram Insights. Under the Audience tab, you’ll find a breakdown of when your followers are most active online broken down by day of the week and time of day.
And if you’re looking for even more detail, you can use your Later Analytics to hone in on your audience’s behaviors.
Your Later analytics dashboard has a super-detailed breakdown of when your audience is online — and you can use that info to tailor your Instagram Live schedule.
PRO TIP: Use Later to discover your best time to post based on audience engagement trends! Upgrade now to find the best days and times to post on Instagram for maximum engagement.
Tip #3: Consider Your Lighting and LocationPlanning the location and lighting for your Instagram Live can have a huge impact on how professional your broadcast looks.
Consider how the backdrop of your Instagram Live supports your brand’s message. For example, a minimal white setting with plants will create a totally different aesthetic to a wall with scrapbook-style photos on it.
If your brand is fun and playful, consider how to reflect that with your use of color. For example, a bright pop of pastel can instantly shift the tone of your Instagram Live and make it feel more on brand.
In terms of lighting, natural light is always the most affordable (and often the best) option.
Tip #4: Have a Clear Content PlanAs with any video content, it’s super important to have a clear vision of what you’re going to cover in your Instagram Live broadcast. Having a clear plan will help prevent any awkward pauses, and will also make sure you’re hitting all the important points for your business agenda.
One of the best ways to plan your live stream is to think of it as having a beginning, middle, and an end — or more specifically, an introduction, focal point, and conclusion — and making a note of the most important messages to get across during the broadcast.
It’s also a good idea to consider what could go wrong in a “worst case scenario.” For example, if your live broadcast relies on viewers’ questions, have a backup plan in case you don’t receive any. This could be a list of questions that you’ve gathered earlier from Instagram Stories, or an alternate talking point.
Tip #5: Introduce Branded ElementsOne of the main advantages of going live on Instagram is that you’re providing an unedited and direct channel for your audience to engage with your business.
However, that doesn’t mean that you can’t introduce some branded elements to make your live broadcast feel more aligned with your brand values.
This could be as simple as having cue cards in your brand color palette, holding a branded mug, or choosing a backdrop that fits with your creative aesthetic.
At Later, we’ve created a range of branded templates especially to use on our Instagram Live broadcasts — with a colored border in exactly the right place for the camera screen to sit on top of in the top right hand corner.
Watch our TikTok video to discover exactly how to do this here:
TIME-SAVING TIP: Add your customized templates to a dedicated folder so you can easily find and select them during your live broadcast!
Tip #6: Keep Your Business Goals Front and CenterThere are hundreds of reasons to go live, so nailing down what matters the most can help keep your broadcast focused, effective, and measurable!
This could be building hype around the launch of a product, spreading the news about an important company update, getting real-time customer feedback, driving sales for an existing product line, or positioning your brand as an expert on a certain domain.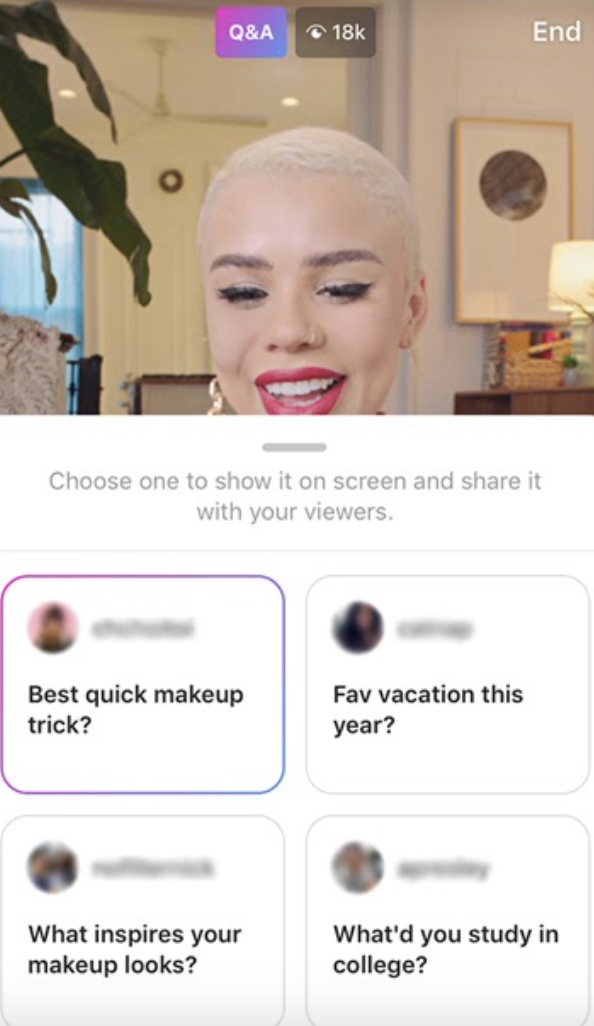
With clearly defined goals, you can regularly step back and make sure your Instagram Live content plan is fully supporting them.
How to Repurpose Instagram Live VideosOnce you’ve ended an Instagram Live, the fun doesn’t have to end there!
Tap the “Share" button to repurpose your Live as an Instagram Video. Live broadcasts have to be at least 1 minute in length in order to be shared.
If you haven’t started using Instagram Live for business yet, now is the time!
Only a small percentage of businesses are going live, so there’s a ton of opportunity to grab your followers’ attention, build brand awareness, and even make some sales!
Ready to jump-start your Instagram strategy? Later makes it easy for you to plan, preview, and schedule your Instagram content!
About the Author
Jillian is Later's Editor. A go-to expert in social media strategy and content marketing, she has worked in both London and New York.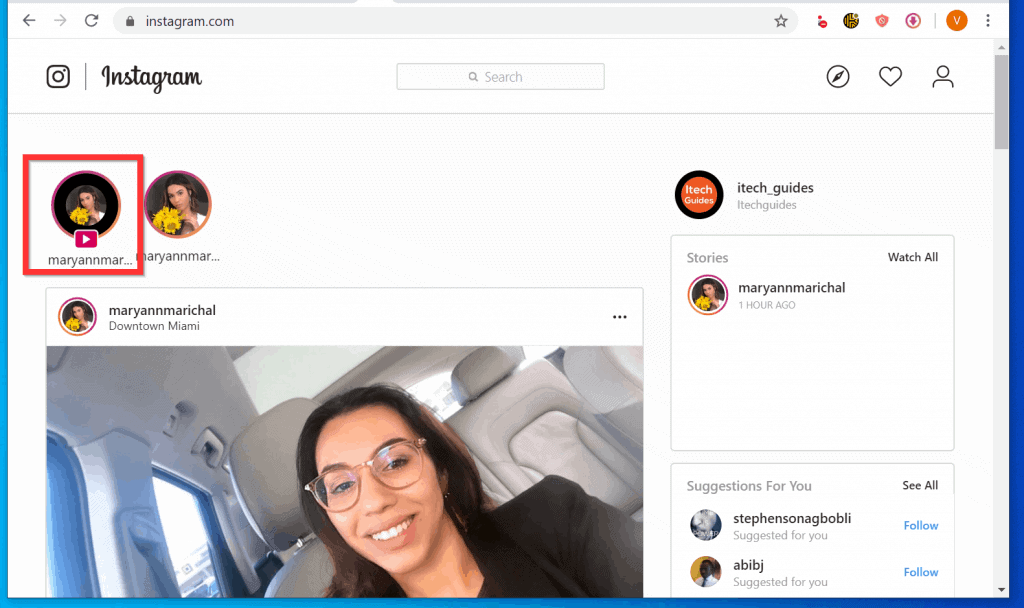 Next up? Lisbon and Paris! You can reach out to her on Instagram here: @jillwrren.
Category Instagram Tips & Resources
•
4 min read
By Jillian Warren
Category Instagram Tips & Resources
•
7 min read
By Monique Thomas
Category Social Media & E-Commerce Blog Posts
•
3 min read
By Jillian Warren
© 2022 Later. All Rights Reserved.
You can start broadcasting and chat with your followers in real time. When the broadcast is over, you can post it or find it in the live stream archive.
Start Live on the Instagram app
Instagram app for Android
In the feed, swipe right and select Live from the options at the bottom of the screen.
To add a title, click Title on the left side of the screen and enter it, then click Add Title.
Press at the bottom of the screen. The number of viewers is shown at the top of the screen, and comments are shown at the bottom.
To add a comment, click Comment at the bottom of the screen.
To pin a comment at the top for viewers, click on it and select Pin Comment.
When you're done, tap in the top right corner of the screen and select Finish to confirm the action. You can then click Share to post the live video to your profile.
Instagram app for iPhone
In the feed, swipe right and select Live from the options at the bottom of the screen.
To add a title, click Title on the left side of the screen and enter it, then click Add Title.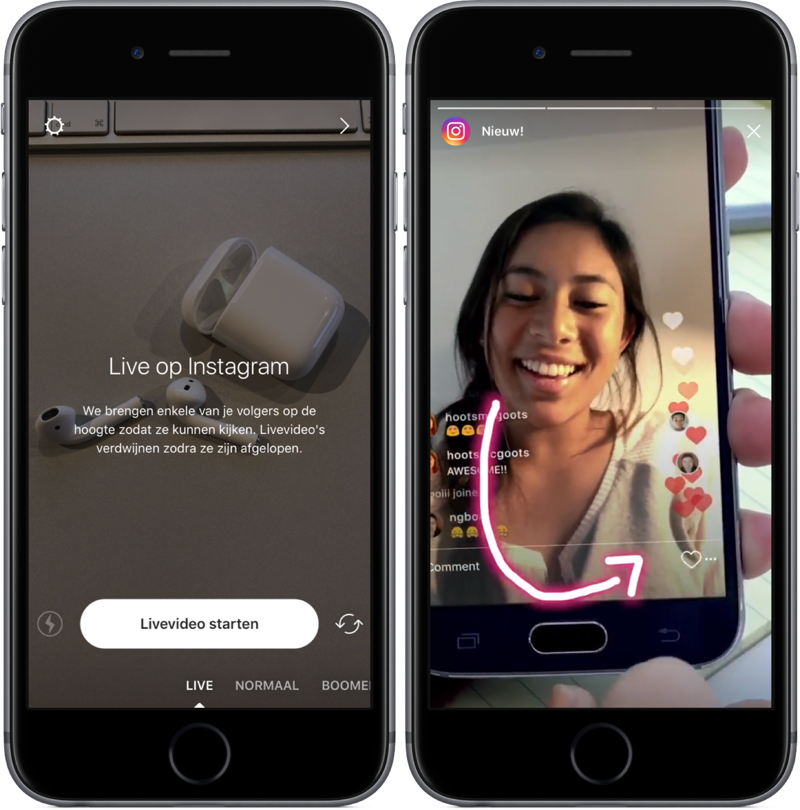
Press at the bottom of the screen. The number of viewers is shown at the top of the screen, and comments are shown at the bottom.
To add a comment, click Comment at the bottom of the screen.
To pin a comment at the top for viewers, click on it and select Pin Comment.
When you're done, tap in the top right corner of the screen and select Finish to confirm the action. You can then click Share to post the live video to your profile.
Note. When you save a broadcast to a profile or download a video from a live stream archive, only the video is saved, not the comments, viewer information, or likes. It may take some time to save the broadcast to your phone, especially if it is long.
Live stream management
Instagram app for Android
To turn off comments, tap the icon at the bottom of the screen and select Turn off comments.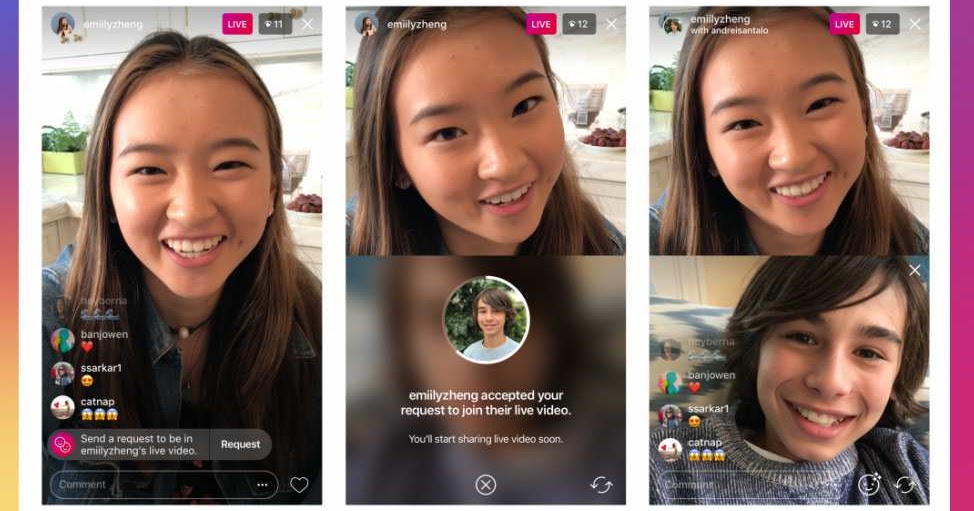 If you have applied keyword filters, they will also apply to comments on the broadcast.
To turn off live stream requests, tap at the bottom of the screen and select Turn off live stream requests.
Instagram app for iPhone
To turn off comments, tap the icon at the bottom of the screen and select Turn off comments. If you have applied keyword filters, they will also apply to comments on the broadcast.
To turn off your live stream requests, tap at the bottom of the screen and select Turn off live stream requests.
If you are using an iOS device, tap in the lower right corner of the screen to add a photo or video from your camera roll to live stream. To stop showing a photo or video, swipe right on the camera roll at the bottom of the screen and tap . During a live broadcast, photos and videos in your camera roll are only visible to you.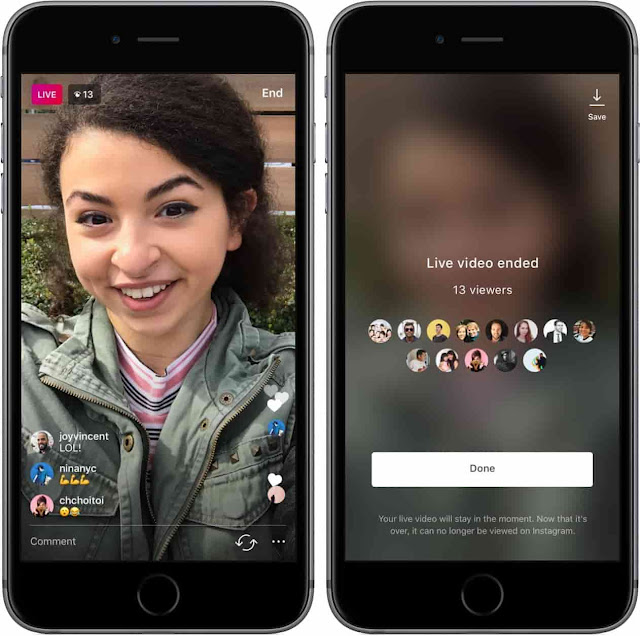 This feature will not be available live in a room with friends.
Note. You may not be able to go live on Instagram if we have previously removed content you posted for violating Community Guidelines.
Live broadcasts on Instagram are an excellent business promotion tool that allows you to keep in touch with your followers, create “live” content, convey the necessary information to the audience and receive feedback.
Livestream to:
- increase the activity of subscribers;
- to attract new customers;
- show your expertise and increase the level of trust in your organization;
- Promote your services for free.
In the educational business, live broadcasts will help expand the scope of classroom activities and supplement the educational process with master classes, lectures, and online training. In some cases, Instagram can be a worthy alternative to offline classes and be used as a full-fledged learning platform.
Tips for broadcasting
Prepare for the speech in advance:
- announce the performance in the feed, publish Stories, tell about the events in other social networks and on the website;
- select the location of the broadcast - it can be an auditorium or a sports hall of your school;
- define the broadcast time. View account statistics and find out what hours your audience is most active;
- write the timing of the speech, noting in it all the key points that you want to cover. The recommended broadcast time is 40 minutes;
- check the technical readiness - the quality of the camera, the absence of unnecessary noise, stable Internet.
During the broadcast:
- introduce yourself to the audience and indicate the topic of the speech;
- fix the topic of the broadcast in the comment;
- activate the "hide offensive comments" filter;
- watch the time.
After the broadcast
- publish the entry in Stories among the actual;
- save the video to IGTV and launch its announcement in the feed;
- upload the video to video hosting sites and tell about it on social networks.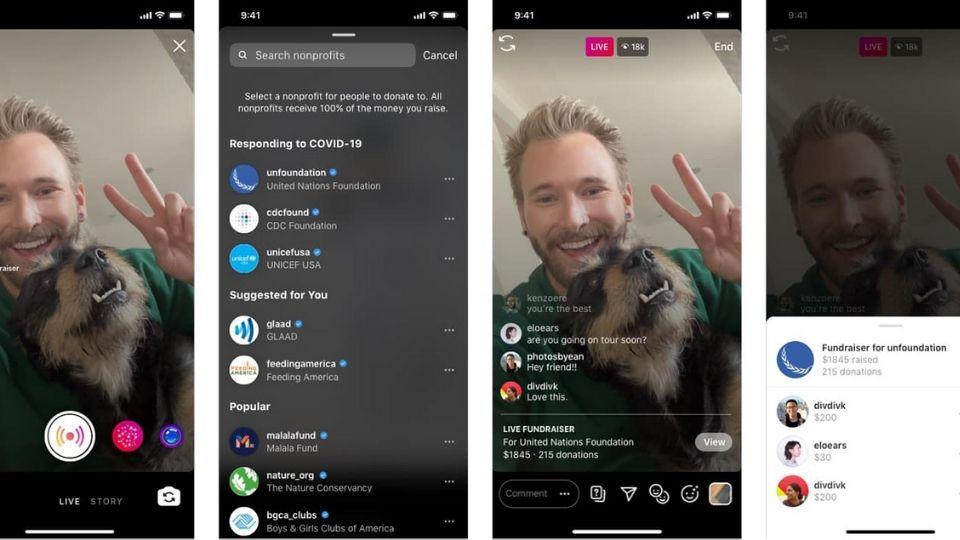
5 ideas for interesting broadcasts
Live broadcasts should not be limited to online training or lessons. Try to diversify the content of your broadcasts. Here are some useful ideas:
1. Feedback format. Analyze the comments and the most frequent requests from clients and students, prepare answers and voice them on the air.
2. Presentation format. Are you planning to open a new direction of study or want to add a new workout or class to your schedule? Show your ideas to your subscribers and get the first feedback from them.
3. Interview format. A famous athlete, coach, teacher, psychologist, any other expert or even a client can become your guest. The main thing is to build a conversation interesting and useful for the audience.
4. "Getting to know the team" format. Tell us about the people you work with. Let employees share their impressions, talk about their achievements and work plans.
5. Master class format.