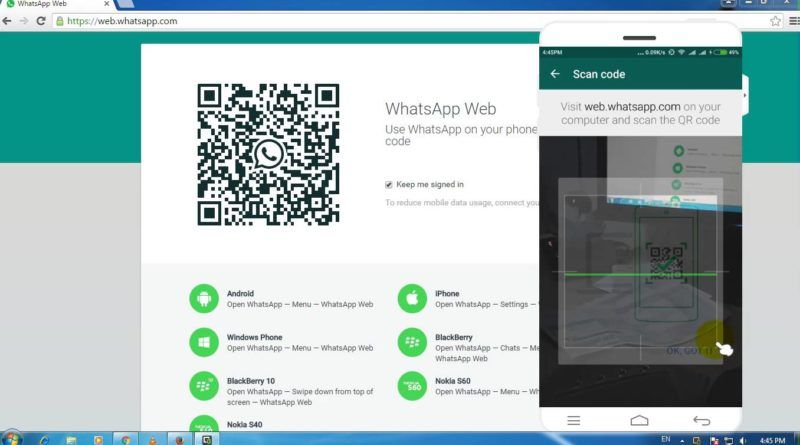
Instagram is undoubtedly one of the most powerful social media platforms to increase brand reach and drive new business — but it can be time-consuming and expensive to consistently create the type of high-quality content you need to see long-term results.
Which is why reposting on Instagram is a powerful option for brands.
But, unlike other social platforms, Instagram doesn't offer a native tool to repost. Fortunately, we've got you covered. Here, we'll show you four different free ways to repost on Instagram in a few simple steps. Let's dive in. (Interested in why brands should repost on Instagram? Skip ahead to that section.)
(Note: While these reposting apps are all free, some require you to download the app from the iOS App Store or Google Play.)
Free Templates
To repost someone else's Instagram post, it’s best to obtain permission first to ensure you are not infringing on someone else’s copyright or license.
Additionally, giving the creator credit for their work is recommended. Once permissions are squared away, repost using one of the methods below.
The screenshot method doesn't require other websites to repost on Instagram. It's worth nothing that this method only works for reposting photos, not videos.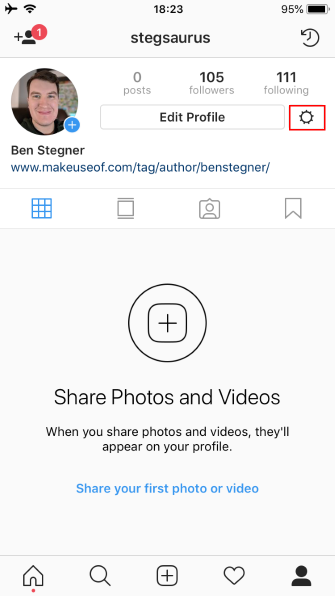
Here's how to do it.
Once you've got your screenshot, return to your Instagram account. Tap the "new post button" in the top right of your Instagram screen (the plus sign inside a square).
Then select "Post" (other options include "Story" "Reels" or "Live").
Keep in mind that your phone will take a screenshot of everything on your screen, not just the photo you want to repost. So, be prepared to crop the sides of the screenshot to capture just the image you want to share with your followers.
After you've cropped or resized the photo to your liking (by pinching the image and then widening your fingers apart), click "Next" in the top-right of your screen.
Edit and filter the post like you would any other Instagram post.
The repost won't include a citation, so we suggest adding one by typing "@ + [username]" to credit the original poster with the photo you're reposting.
At the top you'll see a preview of your post along with space for a caption. You can choose to tag people or organizations, and add a location.
Once you've finished customizing the post with the options above, click share at the top right corner. The post will be live.
Here's how the finished product looks:
In addition to using the screenshot method, you can also use a third-party app. The options below are our favorite apps for reposting on Instagram.
Download Repost: For Instagram for iOS or Android. The app integrates directly with Instagram so you can share content from other Instagram users from your mobile device.
Open your Instagram app and find a photo or video you'd like to repost from your own Instagram account. Tap your chosen photo from the original poster's photo gallery to see its full view, as shown below.
(Psst — do you follow HubSpot on Instagram?)
Once you're on the photo's or video's landing page, tap the "..." icon in the upper-righthand corner of the post. Then, tap "Copy Link."
4. Open Repost: For Instagram.Once the photo is copied to your phone's clipboard, open Repost: For Instagram. The post you copied will automatically be on the app's inbox, as shown below.
Tap the arrow on the right hand side of the post. There, you can edit how you want the repost icon to appear on Instagram. The app also allows you to add an Attribution mark directly on the image.
You can choose to copy the original caption to your post or add a new one later.
Next, tap "Share."
For our purposes, we'll click "Post".
Write a caption and click "OK" when finished.
When you're ready to share the post, tap "Share" as you would a regular Instagram post.
Download Reposta for Android or Apple devices to get started.
Open your Instagram and copy-and-paste the URL like you did for the instructions for Repost: For Instagram (Step #3, above).
Reposta automatically opens a URL once you've copied it.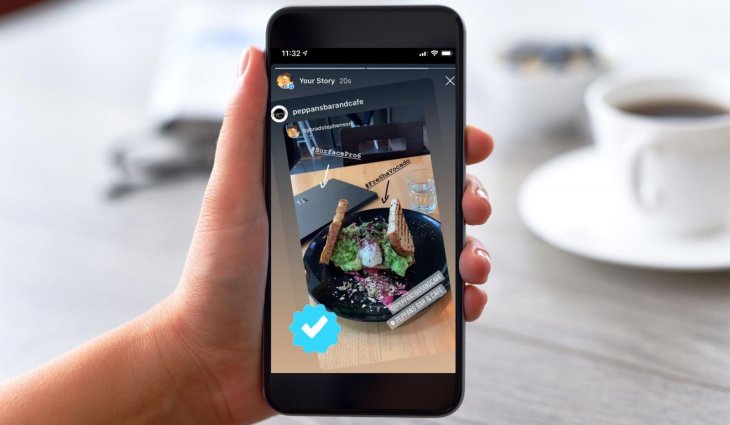 Now, in Reposta, you can edit the attribution (including the color and positioning), as well as the caption itself.
You'll see a few options below your image. For our purposes, choose "Post to Instagram". (Alternatively, you can save the image to use on a different date.)
You have two options here: Story or Feed. Click "Feed".
Feel free to adjust the size or cropping of your image in this step. When you're ready, click "Next".
Here, you'll choose a filter and edit the image like you would any other Instagram image. When you're ready, click "Next".
Feel free to give credit to the image owner in your caption — but remember you've also given them credit in the image itself.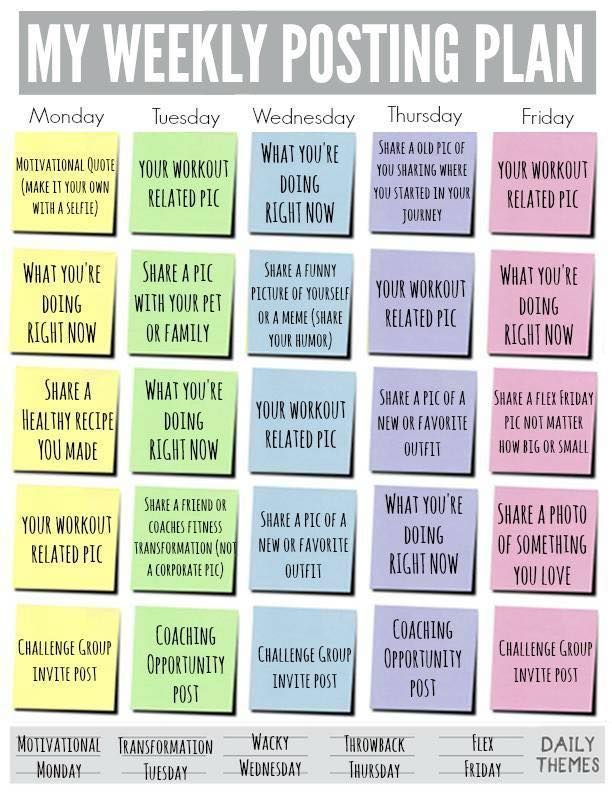 Add a location and tag people if you'd like, and then click "Share" when you're ready.
Here's how the post appears on your Instagram profile:
DownloadGram lets Instagram users download high-resolution copies of Instagram photos and videos to repost from their own accounts. Luckily, there isn't an app you need to download to repost using this process. Here's how to do it:
Open your Instagram app and find the post you want to repost. Tap the "..." icon in the upper righthand corner of the post and click "Copy Share URL" (this button will be the same for both iOS and Android mobile devices).
Open your mobile internet browser and navigate to DownloadGram — or simply, downloadgram.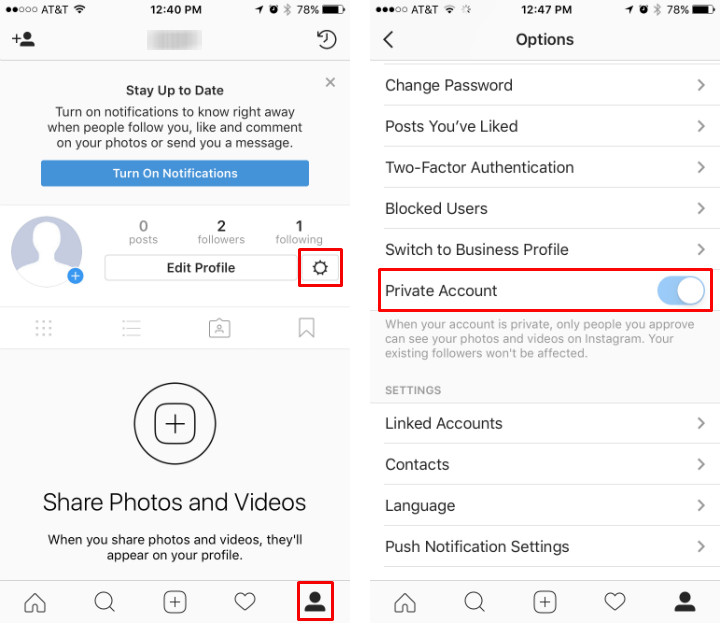 org. Paste the URL into the text box that appears on the website's homepage. Then, tap "Download."
Tap the "Download Image" button that appears further down DownloadGram's homepage.
You'll be directed to a new webpage with the content ready to download. Tap the download icon — the box with an upward-facing arrow, as shown below — then tap "save image."
Return to your Instagram app. The image will be saved to your phone's native camera roll, so edit it as you would any other Instagram post.
The repost won't include a citation, so we suggest adding one by typing "@ + [username]" to credit the original poster with the photo or video. Then, press "Share." Here's how the post appears on your Instagram profile:
 Open the instagram app and find the photo or video you'd like to add to your story.
You should see a draft of your story. Use the icons at the top to modify text, color, stickers and other animations.
You also have the option to click "close friends" on the right, bottom corner (shown above) if you only want a select group to view your story.
Once you click "Your story" you'll see the option to click "Share" to repost your image to your Instagram Story.
With stories, the same best practices should be followed as for sharing a post. If you don’t know the person and suspect the content you’d like to re-share might be licensed material, ask for permission first. Give credit to the original posters whenever possible.
First of all, it's important to understand the benefits of reposting images and videos.
Simply put, it takes a lot of time, effort, and resources to consistently create high-quality social content. And since most marketers post between 3-4 times per week, it's vital you have a backlog of content to keep up with demand.
Additionally, user-generated content (UGC) performs exceptionally well. In fact, 90% of consumers say UGC holds more influence over their buying decisions than promotional emails and even search engine results.
Reposting to Instagram can help you highlight brand endorsements from your customers, brand loyalists, and employees. UGC is typically considered more trustworthy, since a consumer isn't gaining anything by promoting your product or service (unless it's an advertisement) — they're just doing it to tell their audiences that they like your product.
For instance, consider the power of Warby Parker reposting this funny image from one of its customers, @cjronson:
View this post on Instagram
A post shared by Warby Parker (@warbyparker)
Not only does the image likely appeal to Warby Parker customers, but it ultimately makes Warby Parker marketers' jobs easier — now they don't need to create all their own content in-house.
Now that you've learned how to repost on Instagram, you can diversify your profile with content sourced from friends, family, and brands. Use the methods above — being sure to cite the source of the original post — to quickly and easily reshare your favorite content.
This article was originally published November 18, 2020 and has been updated for comprehensiveness.
Topics: Instagram Marketing
If Instagram isn’t yet a major part of your marketing strategy, it should be (these Instagram statistics explain why!).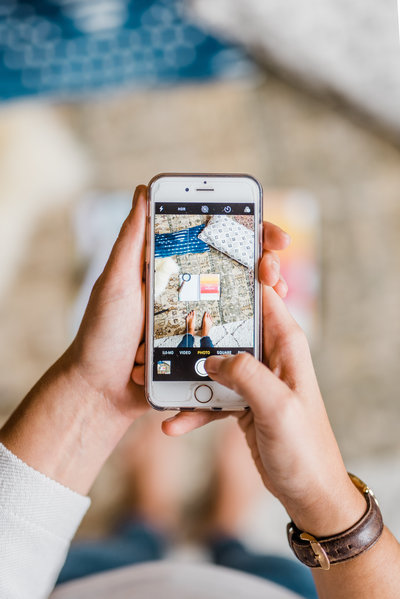 Instagram is the perfect platform on which to tell your brand story and show your audience a different side of your business.
So, let’s dive into the basics of using it by explaining how to share a post on Instagram – both your own and someone else’s.
Screenshot via Repost
You can also share posts from other users on Instagram – in some cases. Instagram doesn’t have a “share” button per say, but it does have that lovely little arrow icon underneath every post. However, that only allows you to share another user’s Instagram post to your Instagram Story as a sticker, and only if they haven’t disabled the ability for other users to reshare their posts.
You’ll know right away if this is the case because once you click the arrow icon, the sharing menu appears, which will either have the option to “Add post to your Story” or not. If it’s not there, the user either has a private account or has turned off the ability for others to reshare their posts. If the option is there, click “Add post to your Story” and then add any text or other effects you want. When you’re ready, click “Your Story” to add it to your Story for everyone to see or choose “Close Friends” if you just want to share it with a select list of your friends and family.
Using this same method, you can also send Instagram photos to other people on Instagram from within the Instagram app regardless of your device or platform (iOS / iPhone, Android).
Sharing posts to your feed from influencers or an original poster is a little trickier. While there are several Instagram scheduling apps, they don’t necessarily have the capability to reshare another user’s content, and you can’t just open Instagram to execute the task. You’ll need to use a resharing app, like Repost, that connects to Instagram to help you share the post. There are other apps that function in similar ways. Still, the process is a little clunky because you need to use the app to copy a post’s link and reshare it. In other words, there’s no way to share posts from other users to your Instagram feed without leaving Instagram.
You can also take a screenshot of someone else’s post or use screen-recording to record another user’s video and then share it like you would your own posts and videos, but this should only be done when you’re following all the sharing etiquette rules (which we’ll discuss below) to the letter.
The primary way you’ll use Instagram is to share your own posts to show up on your Instagram profile. These posts will, of course, display in other Instagram users’ feeds, too.
To share a photo, you’ll click the + shape outlined by a box in the upper part of your screen, left of the heart icon and message icon. Choose from a photo that’s already in your gallery or take a new photo or video. You can also select multiple photos to upload. Instagram will place them together in a slideshow post for others to scroll through (this is helpful if you want to tell a story with your photos or show multiple photos from the same event). Instagram also lets you upload or shoot a video to add to your feed, but it can only be up to 60 seconds long.
Uploading photos or videos to your story is a little different. Stories are beneficial for you because they sit at the top of Instagram, right in front of your followers. Each video or photo you add remains in your story for 24 hours, giving most people time to see them.
To upload to your story, you can either:
You can either use the app to create new content for your Story or upload a photo or video from your device’s camera roll. You can only upload content created within the past 24 hours if you’re using an existing photo or video. You can also share different types of posts to your Instagram Story, such as text-based posts with a colorful background, posts with background music, Instagram Live videos, Boomerang posts (a burst of looping photos that has an animated effect), and more.
After playing around with text, stickers, and other special effects, click the “Your Story” or “Close Friends” button (depending on who you want to share it with) and then the “Share” button. To use the “Close Friends” option, you’ll need to create a list of the people you want to share these exclusive close friends-only Stories with.
Sharing Isn’t Simple on InstagramFYou might be wondering why something as seemingly simple as sharing a social media post warrants an entire blog post. The answer: There’s no obvious share button on your own posts or even the posts of other users that makes it easy to repost content to your Instagram feed, although you can now share posts to your Instagram Story, which we’ll get into in more detail below. Whether you want to repost your own or someone else’s post on your Instagram feed or share it to your Story, we’re going to show you how to get it done. In fact, Instagram doesn’t allow you to share content (photos or videos) from outside the platform, which is why you won’t find an Instagram share button among the many social media buttons available (although you can add an Instagram follow button to your website). You can only add photos and videos directly from your smartphone or tablet.
If you have a post in your Instagram Feed that you want to share to your Instagram Story, locate the feed post you want to share and click on the arrow icon located under the post. You’ll find it to the right of the heart icon and the message icon. Once the sharing menu opens, you can select “Add post to your Story,” which uploads your post as a sticker that you can customize before adding it to your Story. You can add stickers and other effects on the next screen, and then when you’re ready to share it, choose “Your Story” or “Close Friends” depending on whether you want to share it with everyone or just your nearest and dearest.
It’s a general rule of thumb on Instagram – and anywhere you want to use someone else’s photos – to ask the creator if it’s okay to repost their content. Most people will be happy to grant their permission if you contact them first and give them credit for the photo when you reupload.
Some people choose to screenshot other photos and upload them to their feeds. Although this could be a simpler method than using a reposting app, it’s only okay if you’ve asked permission and credit the creator. The benefit of reposting apps is that many of them copy the original caption and tag the creator for you when you repost.
Contacting other Instagram users before using their content has benefits that reach further than preventing a breach of copyright laws. It’s also beneficial in building connections on Instagram. By sparking a conversation with another user whose content you admire, you’re also putting yourself on their radar. They might even ask to use your content soon, which could boost your exposure!
Finally, avoid sharing any photos from a private Instagram account.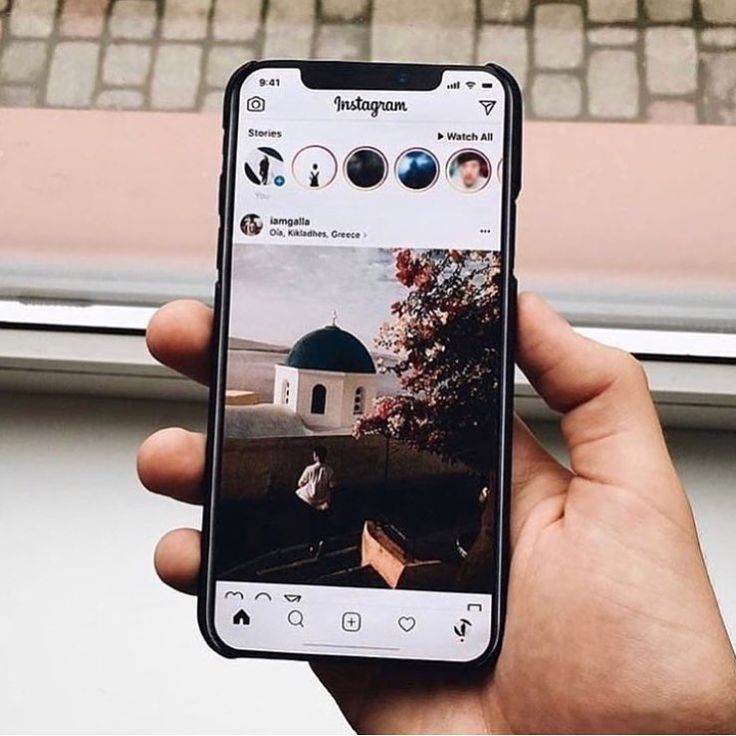 The users who choose to keep their accounts private do so for a reason, so they probably won’t want their posts reshared to the public.
Sharing relevant content from other Instagram feeds is an excellent way to build your brand on Instagram and give your audience more of what they want to see. Although it’s not as simple to do as it is on other social media platforms, it’s possible to weave other content into your feed.
Be sure to add the Instagram follow button to your website to continue growing your number of followers effortlessly. It’s easy to install (in just minutes!) and makes it easy for your website visitors to follow you on Instagram with a single click, and without ever leaving your website. Plus, it’s totally free to use! Additionally, if you’re looking for more information on how to grow your Instagram following you can check out our post on Instagram giveaways to find out how to craft a perfect giveaway caption.
Get Instagram Follow Button
Click on Instagram's signature camera icon in the top left corner of the screen, or simply swipe right across the screen anywhere in your feed. To take a photo, tap the circle icon at the bottom of the screen (Normal) - for video, you need to hold it with your finger. To select an existing photo/video from the gallery on your phone, tap on the gallery thumbnail at the bottom left, or simply swipe up anywhere on the screen. You can select multiple photos and videos at once.
After taking or selecting a photo, you can apply one of the filters to it by swiping right or left on the photo. To add typed text, a freehand drawing (or again text), a sticker (on Instagram in Russia it is called a “sticker”) and emoji, tap the corresponding images at the top right of the screen. By selecting the sticker icon, you can also specify a location, mention a user with the @ tag, add a hashtag, add a gif, take and add a photo from the front camera of the phone, ask a question or invite other users to ask you a question, conduct a poll with two answer options (instead of the default "yes" and "no" you can write your own).
You can delete an added item by dragging it down to the trash can icon at the bottom of the screen.
Then you can either save your story or publish it right away by clicking on "Your story" below the "+" sign in a dashed circle. This will make it available to all subscribers. Or you can pre-select a particular recipient or a group of recipients at the bottom right.
To share a published story in Direct, tap the paper airplane icon in the bottom right corner of a photo or video, select the people you want to share, and click Share. In order for a story to be seen on Facebook, Twitter, Tumbler or Odnoklassniki, your account there must be linked to Instagram. Then, after creating a story, click on it and click "More", select "Share in the publication ...", "Next" and mark the desired social network. In the "Advanced settings" you can select "Share posts on Facebook" - then your photo and video stories will appear on this social network automatically.
In a hurry, accidentally submitted a story for publication, or just changed your mind? No problem - just click on your own story, tap the vertical ellipsis "More" icon in the bottom right corner of a photo or video, and then select "Delete".
If, on the contrary, you want to save what you have created (not only in the feed and then in the archive), in the same "More" select "Save photo / video" - this is how it will appear in the gallery on your phone.
In your story, you can repost someone else's post from the feed - but only if the user's account is public and reposts of his posts are allowed. Click on the paper airplane icon below the photo or video in the feed and select "Add post to your story." At the same time, everyone who views your story will see the signature of the real author of the content (Instagram profile name).
Stories can only be reposted using a third-party app — search Google Play or the App Store using story saver, story repost, etc. You can only repost other people's stories on Instagram if you are tagged there with the @ tag. In this case, you will receive a corresponding message in Direct and you will be able to add this story to yourself, editing, if necessary, in preview mode.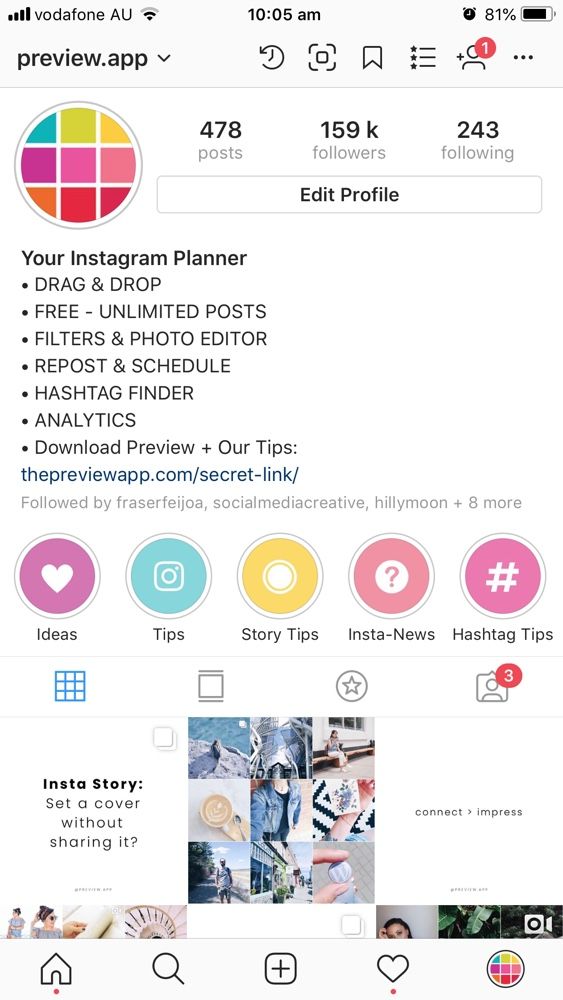
You can add multiple photos and videos, repeating the algorithm from the previous section over and over again, but they will all be combined into one common "Your Story" and displayed sequentially. You can switch between stories by touching the screen on the left or right side.
Not all users can add a link in history - only owners of verified accounts and business accounts with at least 10 thousand subscribers (if you have a personal account, when you reach this number of subscribers, it will automatically get business status).
In this case, when you create a story, at the top right, in addition to the usual icons, you will see an image of a pair of chain links. After clicking on it, a new window will open where you can add the URL. In the history, the link itself will not be visible, but a label will appear at the bottom: "More", "More", "Install", "Register", etc. , depending on the content. You can go to the address only by swiping up on this mark with your finger.
In this case, the user viewing your story will be able to follow the link only by swiping up on it.
Keep in mind that Instagram does not track conversions and does not analyze URLs, so either put a link with a redirect or shorten the link with a UTM tag using a special service: Google URL Shortener, "Clicker" from "Yandex" , vk.cc from VKontakte, Bitly, etc.
The easiest way to tag another Instagram user in your story is to click on the sticker icon in the upper right when creating a story and select the ready-made @mention sticker ': All you have to do is enter your username.
But you can type the name in a different font size and/or highlight it in a different color (by clicking on the eyedropper image — any available on the photo/video). To do this, click on the text icon in the upper right, select the desired font size and color, and then put the @ symbol immediately before the username.
After that, you can click on the username in the story and follow the link to his profile page, and the person himself will receive a notification that he was mentioned. In total, no more than 10 people can be mentioned in one story.
The photo or first frame of the video of the stories that you have added to the Highlights section automatically becomes the cover (and this can be done when viewing a story by clicking on Select at the bottom right). If you want a different cover, click on the story in the "Actual" and select "Edit cover" - this way you can change the look of the photo or video frame (for example, zoom in and move) or select any photo from your own photo gallery on your phone.
At the end of June, Instagram added a new feature to the app - the ability to add music to a story right at the moment the story is created. To do this, click on the sticker icon at the top right, and then select the appropriate Music sticker. This will open the audio library, where you can search for tracks or select something in the categories “Popular” (Popular), “Moods” (Moods) and “Genres” (Genres). The track can be trimmed and added to the story with a passage lasting from 5 to 15 seconds. At the same time, while viewing a story, a person, by clicking on a music sticker, will see the name of the track and the name of the artist.
The feature is currently unstable and not available at all in many regions, including Russia, due to music licensing issues. Therefore, not only will you not be able to add music when creating your story, but you will not be able to listen to it in the stories of other users. In this case, the only way to make a musical story is to record a video with music playing behind the scenes or choose a finished video with music already overdubbed on it. Well, or use a good old VPN so that the application does not recognize your region ;-)
However, even in the US, many users complain that even the latest iPhone and the latest version of Instagram do not have a music sticker, and contacting Instagram support remains unanswered.
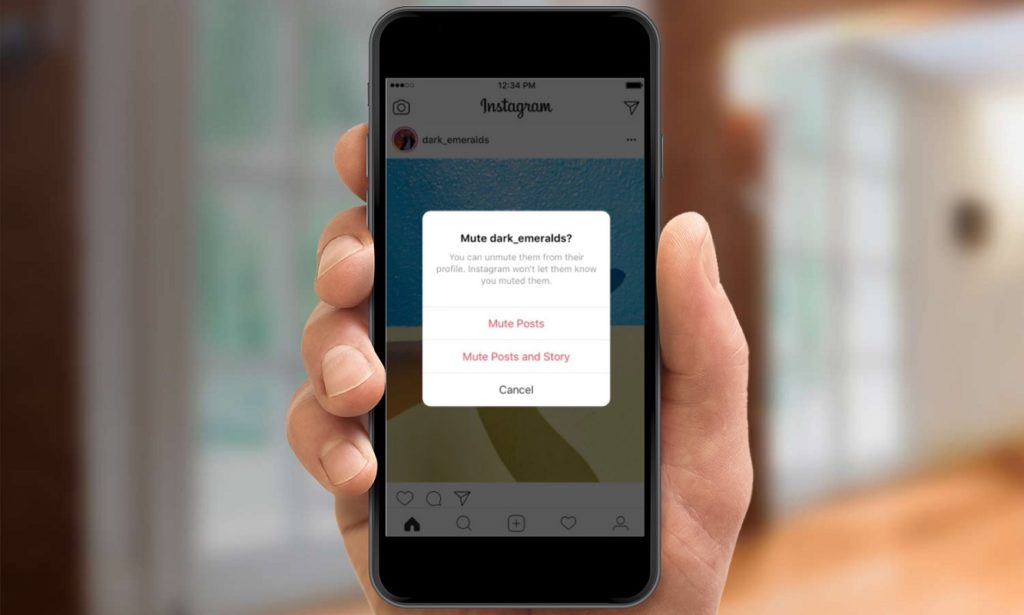
Tired of the intrusive flow of stories in the feed from overly active users? You can easily cover it up. To do this, tap and hold on the photo of the person whose stories you no longer want to see at the top of the feed, select "Temporarily block" and then "Hide story." The same can be done in the user profile by opening the context menu at the top right. To turn back stories, repeat and select Unblock Story (Android) or Show Stories (iPhone).
If you want to hide your own stories from someone, click on the context menu icon, select "Settings" at the bottom left, find "Story Settings" (Android) or "Manage Stories" (iPhone), and then tap "Hide My stories from. Here you will see a list of your subscribers, among which you can select those from whom you want to hide your stories. To show them your stories again, do the same and uncheck the box.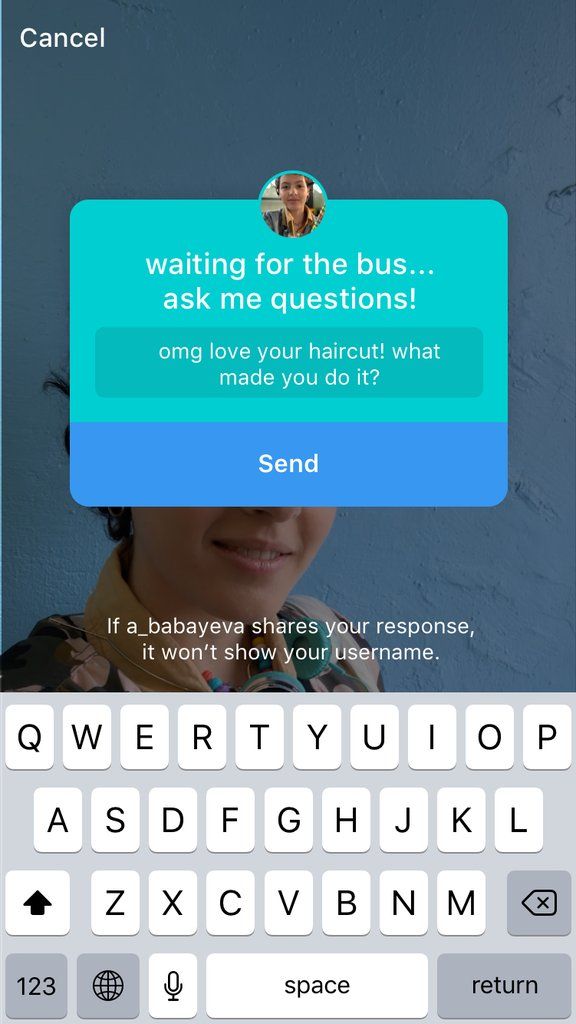
To find out who actually viewed your story (and this information is only available to you), open it and swipe up. Here, in the list of users that appears, you can also block unwanted viewers - click on the context menu icon to the right of the person's name and select "Hide my stories from username". In the same way, you can hide your story from the page of the place or hashtag that you tagged in it.
Related content:
Previously, if you posted an article on Instagram, it would be visible to everyone unless you hid it using your privacy settings. You had to blacklist the people in your stories if you didn't want them to see your story. Now Instagram has launched a new feature where you can whitelist your stories.
In other words, you can now share your stories with a select few. This feature is called "Close Friends" and is available for Android and iPhone users. This is a special list of subscribers with exclusive viewing permissions. You get this feature on both your personal and business profiles.
As with any new Instagram feature, there is a slight learning curve before you can get the most out of it. So, let's start with this tutorial and fully understand how to use this new close friends feature like a pro.
Note . Most screenshots are taken on an Android device, but the steps for iOS are the same unless otherwise noted.
If you notice the close friends feature on your Instagram profile, it should show zero close friends. Don't be disappointed. This is because it is not an auto-generated Instagram list. You need to add people to this list manually.
To do this, follow these steps:
Step 1: Launch the Instagram application and go to the Instagram profile screen. Then click on the icon with three stripes in the upper right corner.
Step 2 : Select Close Friends from the list.
Step 3 : On the Close Friends List screen, use search to find the people you want to add to this list. Then click Add Gift next to their name.
You can also use auto-generated suggestions from Instagram to find people easily. Just click on the Offers tab.
Step 4: After adding people, click on the "Done" button at the top.
The close friends feature is not a permanent list. You can add or remove people at any time. To remove people, follow these steps:
Step 1: Navigate to the "Close Friends" option from the three-bar menu at the top of the Instagram profile screen.
Step 2: Click on the Remove option next to the person you want to remove from the list.
Thankfully, Instagram doesn't send a notification to people when you add or remove them from close friends.
The close friends function is strictly based on the creator's choice. People can't ask to join a close friends list. Sure, they can send you a DM asking you to add them as a friend, but Instagram doesn't have a dedicated request button.
Click here to see our Instagram articles page
As with regular stories, you will be able to view people who have seen your story posted under close friends.
The list is visible only to the creator. No one can see who you have added to the list. In other words, no one can see other members of the close friends list, even if they are on the list.
Instagram provides a step-by-step method for creating stories for close friends only. Once you've created your list, click the "Story" icon to create a new story as usual. Then, instead of clicking on the "History" or "Send to" options, click on the new green "Close Friends" option.
Once you publish a story, only members of the list can see it.
So you open Instagram and see a green circle around one of the stories.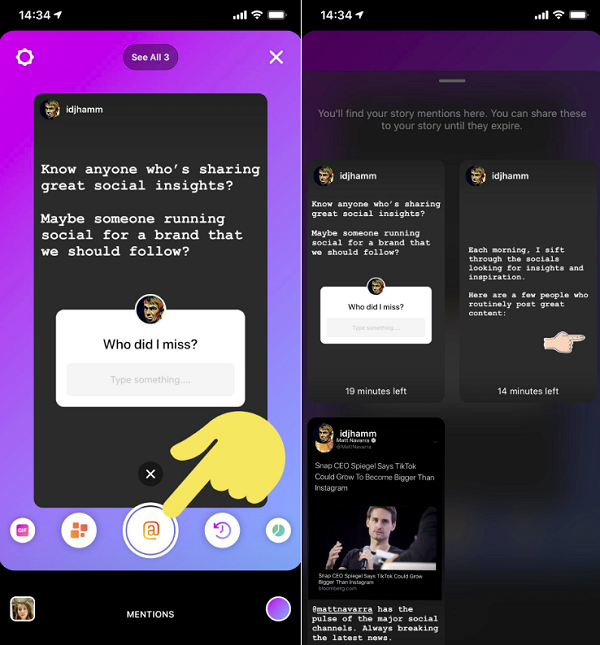 Now what is it? Well, the person has added you to close friends.
Instagram lets you know that you are viewing exclusive content in two ways. With the first method, you will see a green circle around their profile picture on the taskbar. If you somehow miss the green circle, Instagram also shows the "Close Friends" icon on the story when you're viewing it. Click on it to reveal the options.
If you see a green circle around a story once, but the same person's next story has a normal red circle instead of a green circle, what does that mean? It would seem that the person removed you from close friends. This may be the case, but it doesn't have to be. It could also mean that the person has uploaded a regular story that is visible to everyone.
Just like normal stories, you can create highlights from stories posted by close friends. However, they will not be visible to everyone. Only members of your close friends list will be able to view them on your profile.
You get all the features available in regular stories for close friends. However, you won't be able to share the stories of close friends with others. Of course, you can still take a screenshot and share it with others. In case you're wondering, no, the other person won't be notified if you take a screenshot of their story.
Currently, Instagram supports only one list, that is close friends. This is one personal list. You cannot create multiple versions of this list.
Although you can't completely remove the list from your profile, you can clear it. To do this, simply remove everyone from the list as shown above.