Want to how to post on Instagram from PC or Desktop? This step-by-step guide gives you 11 different methods for posting on Instagram from PC. Let’s get started!
When Instagram first launched in 2010, it only allowed users to post photos from their mobile devices through the Instagram app. Since then, Instagram users have been searching for options to post on Instagram from PC.
If you’re wondering “how can I post pictures on Instagram from my computer?”, we’ll cover 11 different options to post on Instagram from your computer in this article, with updates for 2022. In addition, we’ll list the pros and cons of using each tool to post on Instagram so you can choose the best option for you.
There are 6 ways to use a laptop or desktop computer and Windows or Mac to create IG posts photos and videos on Instagram.
You can grow your Instagram by planning your posts ahead of time. Using an Instagram scheduler lets you:
Hopper HQ lets you focus on content quality. With features such as bulk content creation and scheduling ahead of time, all from your desktop.
Hopper HQ is a company founded in 2014 tailored for brands, agencies, and creators to grow on Instagram. They also have an outstanding live chat to help you on the go.
You can schedule and post on Instagram from PC with the Hopper HQ desktop app. Hopper HQ allows you to visually plan and schedule your social media campaigns automatically with tailored insights, all from your computer. Scheduling your posts saves you precious time that you can use to focus on other aspects of your growth.
1. Create an account at HopperHQ.com
After logging in to your new account, you are greeted with a visual dashboard with four sections:
When you Log in to Hopper HQ from your desktop computer, you will see the Hopper HQ Dashboard | How to post on Instagram from PC.In the left corner, you can see your Instagram handle. You can add other social networks too, such as LinkedIn, Facebook, and Twitter accounts (Stay tuned for more social networks soon 👀)
From the menu, you can create and manage your feed posts, calendar, analytics, and settings.
View your scheduled and drafted posts ready to be posted on Instagram.
Look at your Instagram feed posts, exactly how they will appear on your IG profile once published.
2. Create posts and upload Instagram photos, videos, stories, and reels
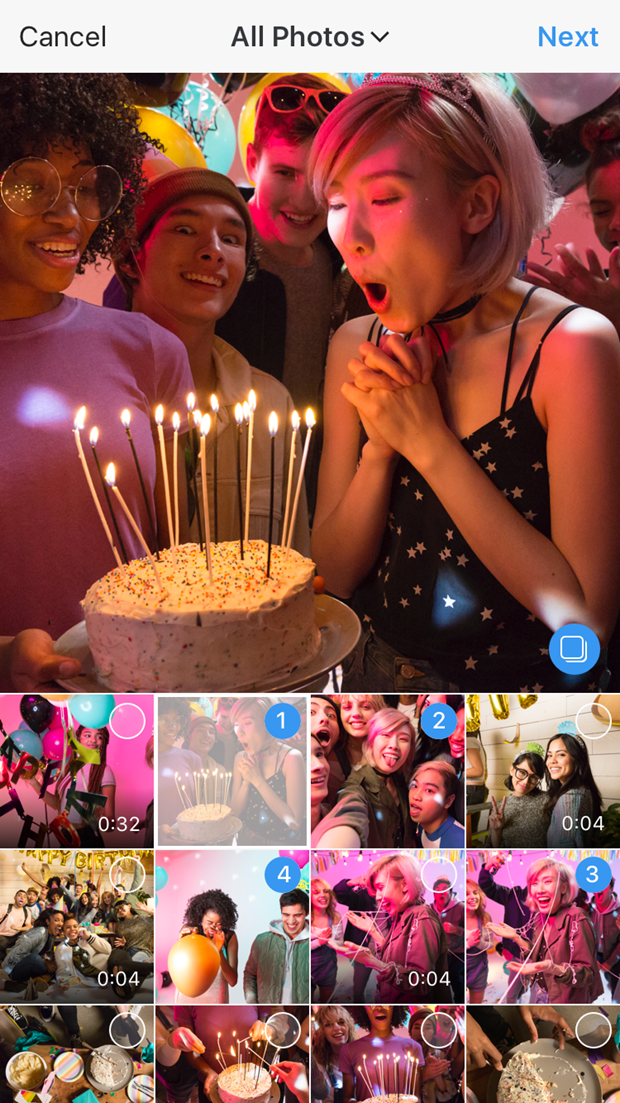
In the top-left corner, click “create posts” and you are taken to a window where you can upload 50 photos or video posts at once directly from your desktop browser in one swoop.
Take a look at the video uploading photos from Unsplash. As a result, fill your calendar in seconds.
3. Edit your Images
If your images are not in the correct Instagram size dimensions, a pop-up alert will take you to the photo editor with pre-set dimensions for portrait and landscape photos, and apply any filters or edits.
Add frames, text, stickers, and more to get your images looking their best from your desktop with Hopper HQ.4. Write captions and schedule your first comment with hashtags
Once you’ve made your edits, you can write captions (including emojis) for all uploads, and schedule the first comment where you will add all your hashtags.
Here is the best part, you can choose between Post Now or Schedule a time in the future.
If you decide you want to publish the same post to another social network then, you can choose to send it to multiple platforms at the same time. This includes Instagram, Facebook, Twitter, LinkedIn, and more social networks coming very soon in 2022.
Hopper HQ Dashboard to schedule IG posts | How to post on Instagram from PC (Windows or Mac)5. Drag and drop grid planner
Once all your photos and video posts are in the dashboard, you can easily make changes by dragging and dropping the posts. The Instagram Grid Planner displays an accurate view of what your IG feed will look like.
Using drag and drop option to move posts | How to post on Instagram from your Windows or Mac6. Calendar View
Hopper HQ also includes a calendar view in a clean and aesthetic arrangement.
7. Monitor your social media analytics
User-friendly Analytics to measure the success of your content and stay informed about your audience demographics!
Hopper HQ Analytics Dashboard, to keep track of your growth. | How to post to Instagram from PC and Mac.
Hopper HQ allows uploading up to 50 high resolution pictures or video clips while editing your posts in bulk.
Hopper HQ works on a subscription basis by the number of social accounts sets. Pricing starts at $19 monthly or $16 monthly if paying annually for 1 set of social accounts.
1 social set = 1 Instagram account, 1 Facebook account, 1 Linkedin account, 1 Twitter account.
If you are an agency or you manage multiple accounts, there is a bulk discount. 🎉
Pros and cons of using an Instagram scheduler tool to post on Instagram from PCA set of accounts include 1 Instagram + 1 Facebook + 1 Twitter + 1 LinkedIn, but if you are an agency or you manage multiple accounts, there is a bulk discount.
 Additionally, we recently launched Instagram Story scheduling AND Instagram reels scheduling.
Hopper HQ does far more than post to your Instagram from PC or desktop. It is a complete social media management tool built to automate and manage Instagram and other social networks to scale. It offers a visually appealing dashboard with an easy-to-use drag and drop interface, resulting in an attractive grid and consistent Instagram aesthetic in no time.
| 🚫 Free | ✅ Hashtag Tool |
|---|---|
| ✅ Photo AND Video Posts | ✅ First Comments |
| ✅ Instagram Stories & Reels | ✅ Editing Tools |
| ✅Carousel Posts | ✅ Filters |
| ✅ Windows | ✅ Cropping |
| ✅ Mac | ✅ Tag Images |
| ✅ Bulk Upload | ✅ Tag Locations |
| ✅ Captions | ✅ Multiple Accounts |
| ✅ Feed Grid Preview | ✅ Bulk Edit |
This method changes the user agent on your browser for posting on Instagram from PC (Mac or Windows) and does not require a website or software download, plus it’s free to use. Here are the ways to use it, explained depending on your favourite operating system!
How to change the user agent in Google Chrome when using Mac?
1. Open the Developer Tools Window.
Changing the view of your browser to see as your mobile device but from your PC and Mac.2. The console will open. Then, by clicking this icon, you can change the view to a mobile device.
3. In this drop-down menu, select a mobile model from the list of devices. This will change the browser’s view to a mobile screen, and the upload button will appear.
Tip: if it does not appear straight away, navigate to a different page and come back, or refresh.
4. The upload button will automatically open your computer’s files. Select a photo. You then have the option to rotate and also to zoom out.
How to post on Instagram from PC or Mac.5. You have a range of Instagram filters available, although not the editing tools. When you’re ready, press next as you would on mobile.
6. Add a caption and location on the review page. Thereafter, click share, and the post will be published on your profile!
7. Additionally, publish to your profile using the Share button in the top right-hand corner!
How to change the user agent in Google Chrome from Windows?
If you are running Chrome, click on the ‘three dots’ icon on the top right section of your browser. Despite it for windows, actually works in Mac too. Find the steps explained.
(1) Click on ‘More tools’ and pick “Developer tools”.
(2) Go to the “Toggle Device Toolbar” option in the console window.
How to post on Instagram from PC or Mac.(3) Go up to the dropdown to pick a mobile device user agent and set the user agent to the mobile device that you wish.
(4) After that, launch IG on the browser.
How to post on Instagram while using a PC or Mac.Thereafter, you can click the + button to start posting photos or videos on Instagram from your desktop or laptop computer.
How to change the User-Agent in Safari from Mac?
This is a handy quick fix if your photos are ready to go on your desktop or USB and you don’t have time to transfer them to your phone.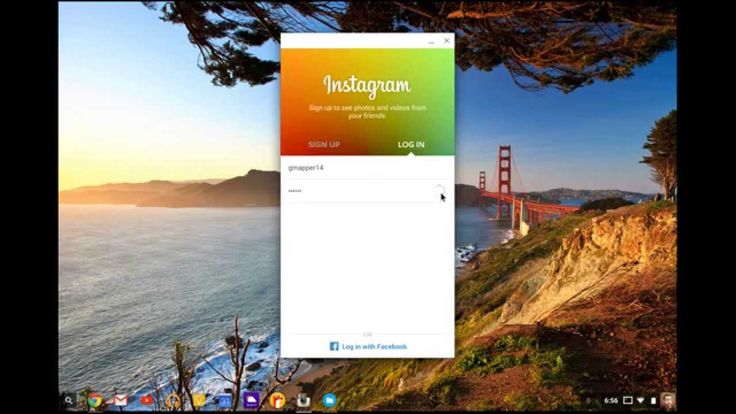 While this is relatively simple and free, there are many limitations.
Check out this in-depth guide where David Coleman explains “what the user agent is.”
Option 3: The Inspect methodTo post to Instagram using the Inspect method, open your browser’s search bar and type Instagram.com
Use the right-click and select Inspect; subsequently, a code screen should appear where then you can select Toggle Devices. Now, you can follow the instructions above.
Pros and cons of using the inspect method to post on Instagram from PCThis is a quick and easy way to post to Instagram from any browser. Nonetheless, this method has limitations like editing your videos and photos, scheduling in advance or managing multiple IG accounts.
With Instagram’s latest update, everyone can post from PC whether with Mac or Windows; therefore, allowing to upload Instagram posts from the web version of Instagram (Not the mobile app).
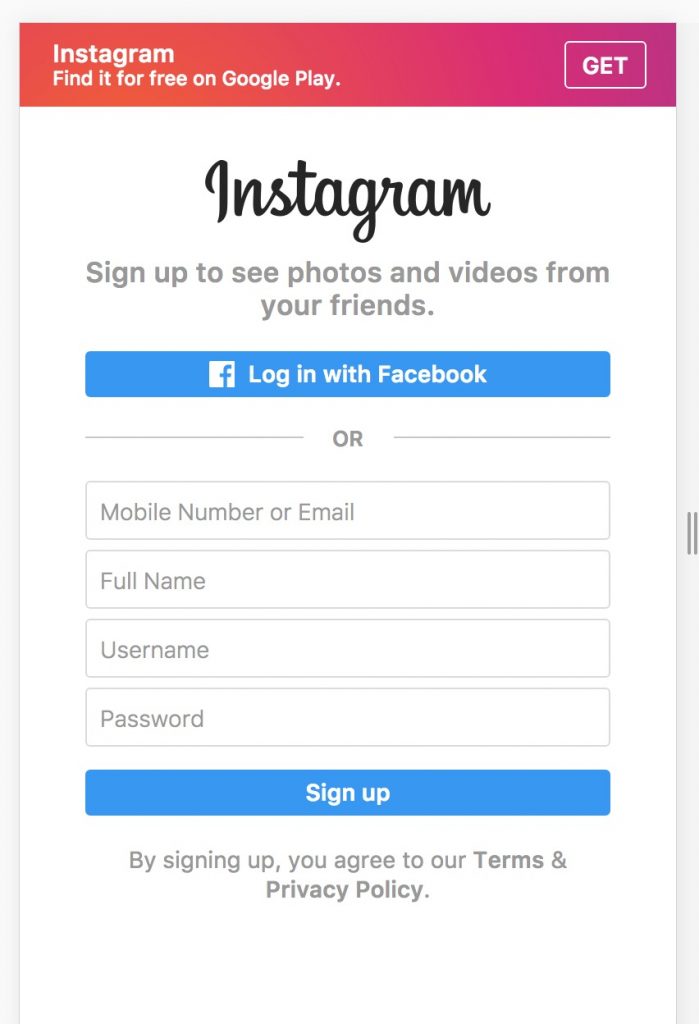
Visit the Instagram website and log in with your credentials. Once inside, click the + icon in the upper-right corner of the menu bar (next to the Messenger icon). Here, you can edit the photos, and add your caption, for instance. In addition to changing location, Alt text, and advanced settings.
Publish your Instagram Post while using your PC or Mac.Pros and cons of using the Instagram web version to post on Instagram from PC The Instagram web app allows users to add captions, locations, tags, and hashtags. Additionally, this is an option that’s easily accessible from any browser (Safari, Google Chrome, Bing, etc.)
Using the Instagram web version is beneficial if you are looking to upload one picture on the go or see your Instagram feed on a bigger screen. However, you can’t upload Instagram Stories and there is no scheduler!
Bottom line: limited and difficult to scale your Instagram account.
In August 2019, Facebook launched the option to post to Instagram on their Creator Studio platform. Consequently, users with a business Instagram profile can link to their business Facebook page and can publish posts from a desktop.
Connect to business Creator Studio by using your Facebook credentials. Then, go to the Instagram section (Instagram – camera icon) and click on it.
Introduce your Facebook Credentials using the Creator Studio to publish your photo and video posts.Pros and cons of using Facebook Creator Studio to post on Instagram from PCThis is a great free alternative to posting on Instagram from computer. However, it is limiting if you’re managing Instagram content in batch, as it is time-consuming to find workarounds.
Option 6: Using other third-party tools to post on Instagram from PCHow to post to Instagram while using a PC or Mac.
Using other tools created by independent developers is another way to create Instagram posts from PC. Keep reading for an overview of some other programs available online.
Bluestacks is an Android emulator that allows Android applications to run on PCs running Microsoft Windows and macOS. All you need is a Google account, after that, you can download a version of the Instagram Android app;
Bluestacks requires you to download an app to your computer, find their webpage, type Instagram in the search bar and click Install from their App Center. Log in and you’re ready to post on Instagram from PC.
Pros and cons of using Bluestacks to post on Instagram from PC
The verdict
BlueStacks lets you post on Instagram from your Windows or Mac PC but with limitations on working with multiple accounts and scheduling posts in advance.
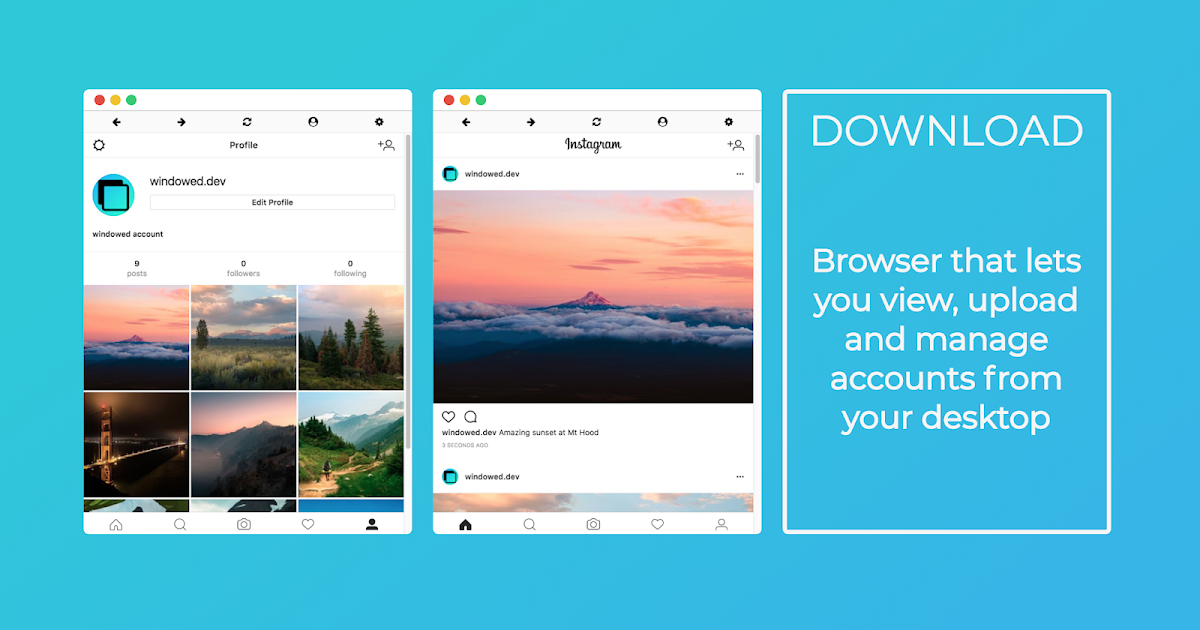
Using Deskgram lets you post on Instagram from your Mac PC, as well as view comments and likes, just like the mobile app.
You need to download the app on your computer. Drag to the applications folder and upload your photos and videos to Instagram from Mac and you’re all set to use it.
Pros and cons of using Deskgram to post on Instagram from PC
The verdict
Deskgram’s $2.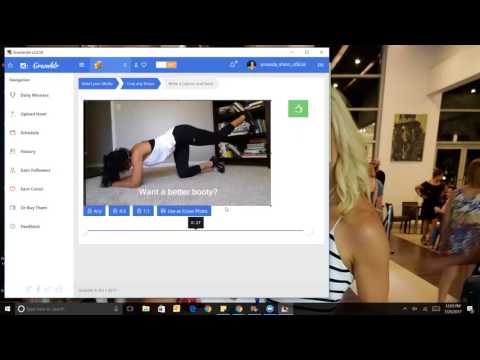 99 monthly price seems fair for unlimited use on one device, but don’t forget it’s limited to use just on Mac.
This Instagram Uploader was developed by Eltima Software and, like Deskgram, works only with Mac.
You need to download Uplet to your desktop, drag it to the Applications folder and upload your photos and videos to Instagram from your Mac.
Pros and cons of using Uplet to post on Instagram from PC
The verdict
The license cost ranges from $19.95 to $49, paid as a one-time fee. Despite covering the basic options, there are some drawbacks, such as the need to download an application, lack of some features, and it only works with Apple computers.
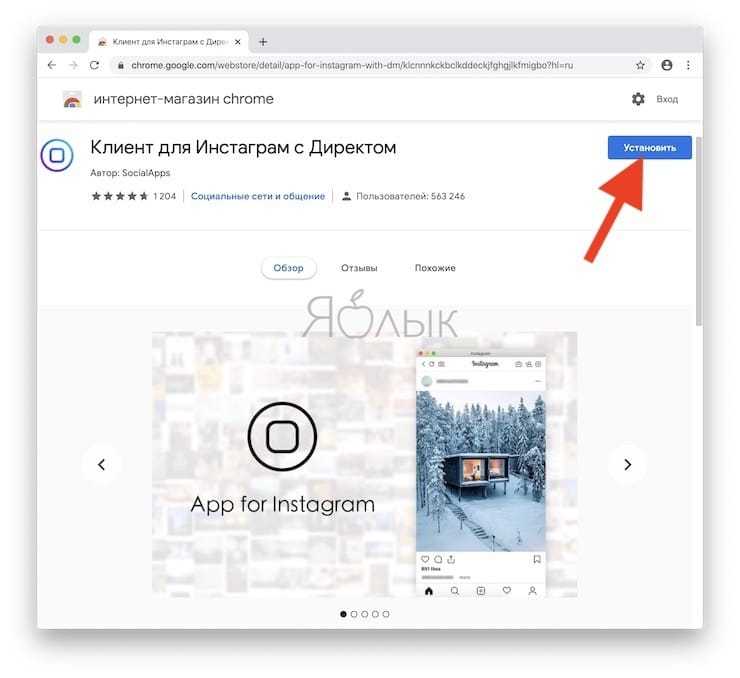
This Google Chrome extension lets you use Instagram as you would on your cell phone. As revealed by their website in a disclaimer, this Chrome extension is not an official app from Instagram, but from independent developers.
Install the Instagram extension by searching it on the Chrome web store. Thereafter, you click on the extension icon, you will be prompted to sign in to Instagram again, allowing you to post from your PC as you would on mobile.
Pros and cons of using the DMI Chrome extension to post on Instagram from PC
The verdict
The extension allows you to send direct messages to other Instagram users, view photos, follow links from others just like the web version of Instagram.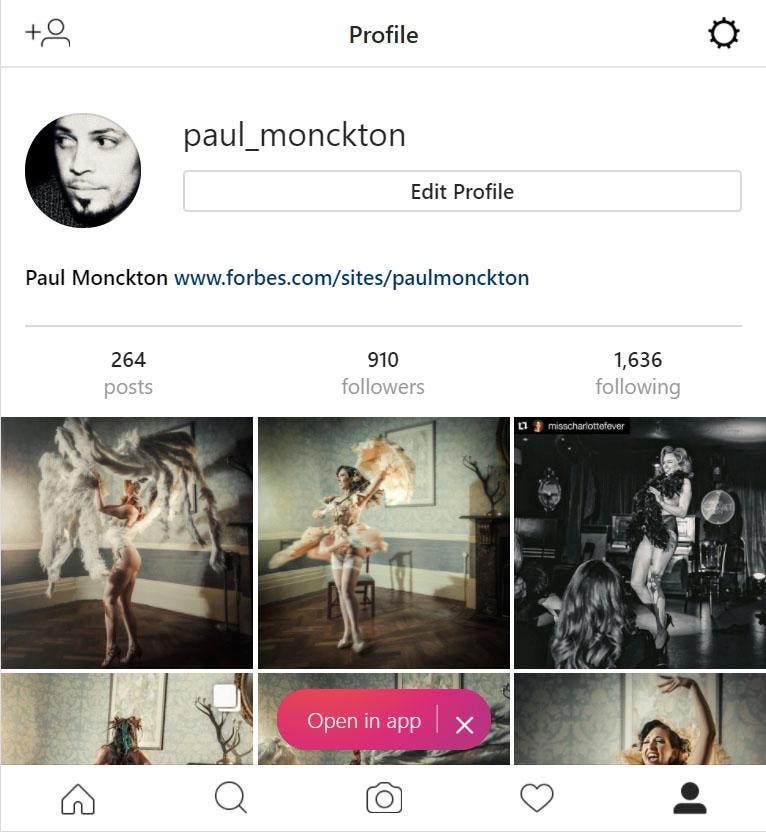 It does, however, have its limitations when it comes to uploading videos.
Whether you’re using Windows or Mac, you have plenty of options to post on Instagram from PC. Your method of choice will depend on what you’re looking to achieve; do you just want the ability to post on Instagram from computer? Or are you looking for a tool that you can use to upload, edit, and schedule multiple posts from PC?
In conclusion, based on your goals and individual needs, you’ll be able to decide on the best option for you.
Do you have a touchscreen Windows 10 computer? Find out how to post to Instagram directly from it!
Tired of posting on Instagram from your phone? Wondering how to post on Instagram from your PC or Mac instead?
You’ve come to the right place. Posting on Instagram from your desktop can save you time and offer more flexibility in what you can upload (such as edited videos and images).
And you can do it without having to upload them onto your phone first.
Below we’ve outlined three different ways to post on Instagram from your computer.
How to post on Instagram from your computer
Method 1: How to post on Instagram from your computer using Hootsuite
Method 2: How to post on Instagram from a PC or Mac
Method 3: How to post on Instagram from your computer using Creator Studio
How to post an Instagram Story from desktop
How to post an Instagram carousel post from desktop
How to edit an Instagram post from desktop
Bonus: Download a free checklist that reveals the exact steps a fitness influencer used to grow from 0 to 600,000+ followers on Instagram with no budget and no expensive gear.
How to post on Instagram from your computerBelow, you’ll find ways to post on Instagram from your PC or Mac. We’ll also show you how to post via Hootsuite which works on either operating system.
If you’re more of a visual learner, watch this video from our pals at Hootsuite Labs to see how easy it can be:
You can schedule feed posts, Stories, carousel posts, and Instagram ads with Hootsuite.
The instructions below will walk you through the process of posting to your Instagram feed. We cover Instagram Stories and carousels a little further down in this article.
To post on Instagram from a PC or Mac using Hootsuite, follow these steps:
 If you don’t have an account yet, create one here for free.
For a quick summary of how to post on Instagram from Hootsuite, watch this video:
Voila! Posting photos and videos to Instagram from PC or Mac is that easy.
Method 2: How to post on Instagram from a PC or MacAs of October 2021, all Instagram users can create and publish feed posts from the browser version of the app.
To post on Instagram from your desktop computer (PC or Mac), follow these simple steps:
 If you want to create a carousel post, you can select up to 10 files.
And that’s it!
At the moment, only feed posts can be created and published directly from Instagram on desktop.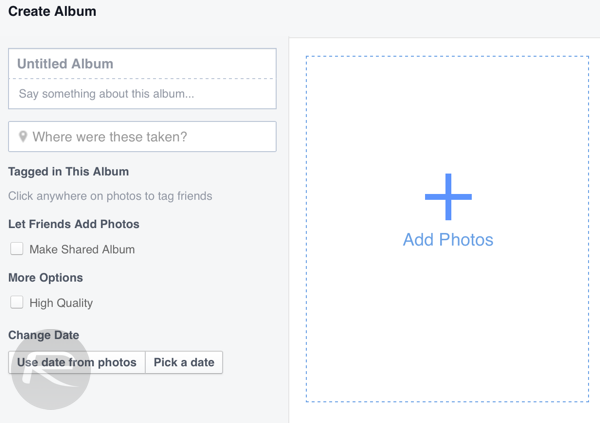 Keep reading to find out how to post Instagram Stories from a PC or Mac computer.
If Instagram is your social network of choice and you don’t mind not having all your social networks in one dashboard, Creator Studio could be a good option for you.
Note that when using Creator Studio, you can post and schedule all types of posts other than Instagram Stories.
How to post on Instagram using Creator Studio:
You can post an Instagram Story from your computer using a third-party social media management tool like Hootsuite. Just follow the steps outlined in this short video:
Or, read our step-by-step article on how to post an Instagram Story from your computer.
If you don’t have Hootsuite, you can post an Instagram Story from your PC or Mac through the following steps:
You’re done! It’s practically the same steps as if you were using the Instagram app on a mobile device.
Growth = hacked.
Schedule posts, talk to customers, and track your performance in one place. Grow your business faster with Hootsuite.
Free 30-Day Trial (risk-free!)
With Hootsuite, you can also create and easily publish carousel posts (with up to 10 images or videos) directly to Instagram.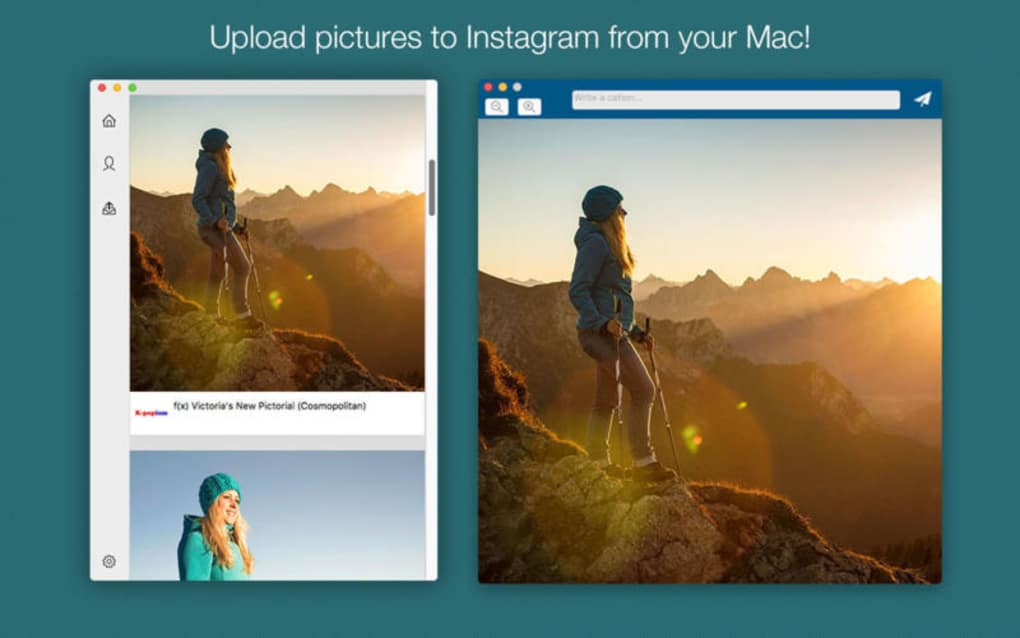 Here’s how.
1. Go to Planner and tap New post to launch Compose.
2. Select the Instagram account you want to publish to.
3. Include your caption in the Text box.
4. Go to Media and tap Select files to upload. Select all the images you want to include in your carousel. All selected images should appear under Media.
5. Use the yellow Schedule button to select a date and time to publish your post.
6. Tap Schedule. The post will show up in your Planner at the time you have scheduled it for.
That’s it! Your post will go live on the date and time you selected.
How to edit an Instagram post from desktopHootsuite Compose allows you to edit any image directly on your dashboard before you post it. Unfortunately, you won’t be able to edit the image once it’s posted.
Follow these steps to edit:

Voila! You just edited your image from your desktop.
Post to Instagram from your PC or Mac using Hootsuite. Save time, grow your audience, and measure your performance alongside all your other social channels. Try it free today.
Get Started
Easily publish and schedule Instagram posts from your computer with Hootsuite. Save time and get results.
Try it for Free
Many people ask themselves: “Is it possible to post a photo to Instagram from a computer?”. We have collected in this article methods that give a 100% guarantee that your publication will appear in the feed if you add it from a PC. Let's move on to detailed instructions.
To post an image to Instagram from a computer, use your browser. For Google Chrome and Opera, right-click on the "View Code" option, and in "Yandex Browser" - "Explore Element". Now let's see how it looks in practice.
Go to the browser, go to the Instagram page and connect your account.
Right-click and select View Code. We used the Google Chrome browser.
An example of how to enable "View code" in the browserIn the window that opens, select the display of the page in mobile phone format.
Selecting the page format in the browserRefreshing the page and using all the functionality of the application from Facebook.
Mobile version of Instagram on PCAnd now we can send a picture.
An overview of working with an imageNext, let's look at several options for loading images using browser extensions.
This application helps you quickly upload a photo without you needing any extra effort.
Installing the extension.
To access Google Chrome extensions, click on the three dots at the top of the screen, select "More tools" and then find the "Extensions" line.
After installation, an icon will appear in the extension bar:
Web Instagram icon in the extension barClick on it, a separate tab will open in front of you in a vertical size. Now you can work with the service, as in a mobile phone.
A separate tab with an applicationThe screencast shows the mechanism of the application - press the "+", select a photo and send the picture to the feed. The only downside is that you will not be able to edit the image with the built-in Instagram functionality.
Screencast of available featuresThe second extension we are looking at allows you to add images and work with stories.
Installing the extension.
Open an Instagram account in a browser. After connecting, several icons will appear on the page: a camera - uploading images, a smartphone - opening a separate tab in the mobile phone format, a bright circle with an arrow - stories. And the last symbol allows you to download all publications.
Click on the "camera" and select "Add to Profile" - this function allows you to publish an entry in the feed.
Selecting a button to publish to the feedThe overview below shows how the extension works. You are only allowed to resize the image, tag people and make a note.
An overview of how to post a picture from a PCThe third extension is a separate application through which you can add photos, videos and stories.
Install and run the extension.
In the browser, click on the application icon at the top right.
Application iconWhen clicked, a separate tab will open. Here you need to connect your account and work with the profile, as from a smartphone.
The checkbox for uploading photos is checked by default, as is access to the full image format.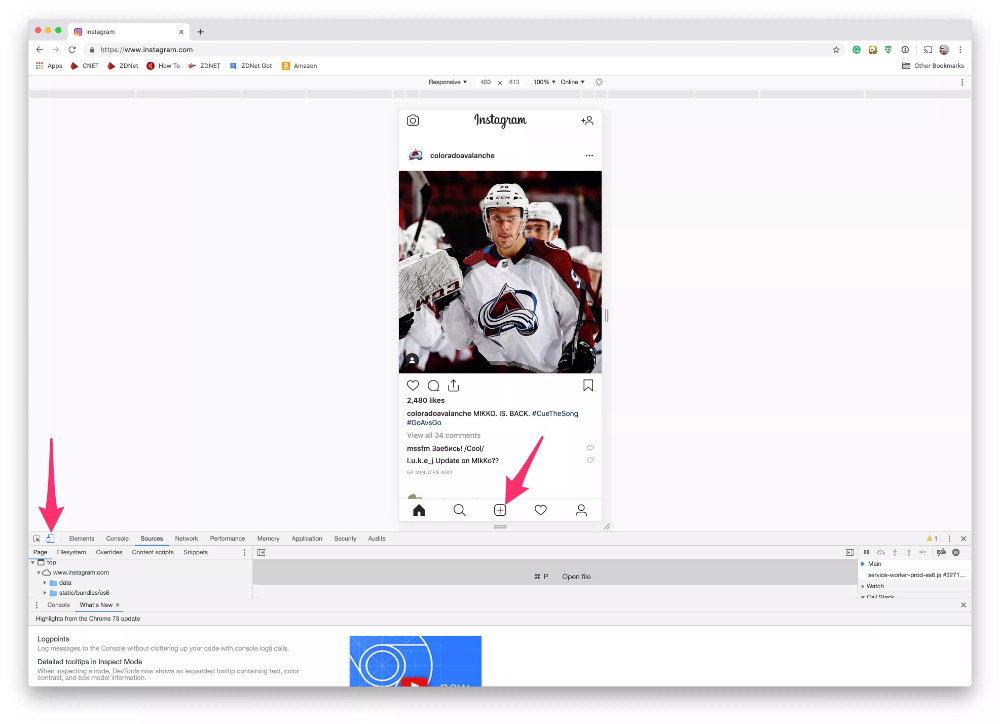 Additionally, through the Desktopify extension, you can upload videos to IGTV.
The overview below shows an example of how the application works when the Desktopify extension is connected. You can apply a filter to adjust a photo, but you can't edit—to change the brightness, contrast, or saturation of an image.
Application overviewAnd now let's move on to the emulator service that displays the smartphone screen on a PC - use mobile applications or run games.
Of all the emulators on the market, BlueStacks is the most convenient. The application automatically adjusts to the screen, optimizes games and works without delay.
Download and install the emulator. In the program window that opens, connect your account to Google Play. We install the application.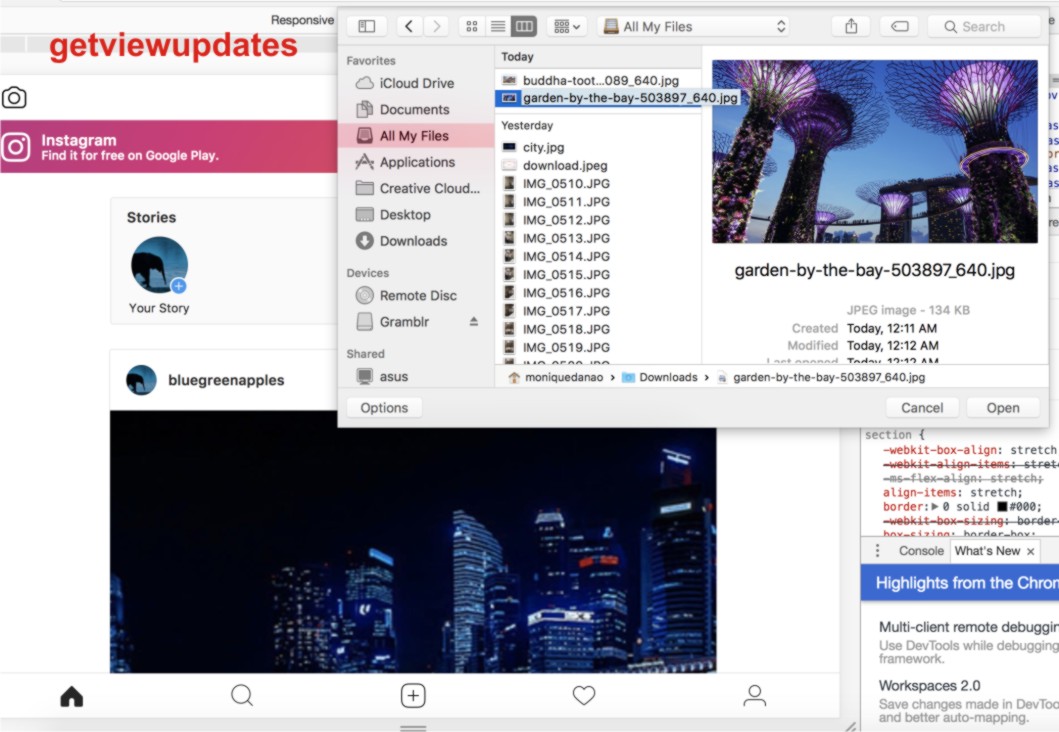
Go to the main page - this is a tab located next to Google Play at the top of the screen. Open the "System Applications" folder and turn on "Media Manager".
We will need this step to upload photos that we will publish in the feed.
Important! Emulators do not have a function to open computer system folders. All images must be uploaded to the server in advance.
Path to the image upload folderIn the file manager, click on "Import from Windows" and select the images that we want to place in our Instagram account.
Importing photos from WindowsReturning to the application page and loading a picture.
An example of how the emulator worksA feature from Facebook that allows you to work with two social networks at the same time. Let's see how to link accounts and add images.
Go to the Facebook Creator Studio page. At the top of the screen, switch to the Instagram icon.
Important! Check that your Facebook and Instagram accounts are linked.
A page where you can link the accounts of two servicesAfter clicking on the button, a window will appear - agree to the terms and add profile data.
Request for accessNow you can add entries: click "Create publication" and start registration.
Create Post button on FacebookThe example below shows how the service works. The only thing is that you can’t edit a photo here, but you can prepare it in advance in image editors: for example, in Canva, Photoshop or Figma.
An example of how the service worksIn the following sections, we'll look at how to set up a delayed write in the scheduling services. They are used in their work by SMM specialists, marketers and bloggers.
Important! Please note that all planning services provide free access for a limited period of 7 to 14 days. If it is more convenient for you to send photos via PC, we recommend purchasing a paid subscription.
In this section, we will look at a simple and convenient program for scheduling posts.
Go to the SMM Planner website and register.
Main page of the site SMM PlannerGo to the dashboard. Select the "Accounts" tab and connect your profile to Instagram.
Steps for connecting an account in the plannerThe added profile should look like the screenshot below:
Connected account in SMM PlannerNext, go to the "Posts" tab. Here we form publications and plan the time of sending.
Desktop for working with records Click on the "Schedule a post" button. It will be posted on the feed. In the window that opens, add a photo and text, and check the boxes where necessary: disable or add comments, send a picture to stories or IGTV.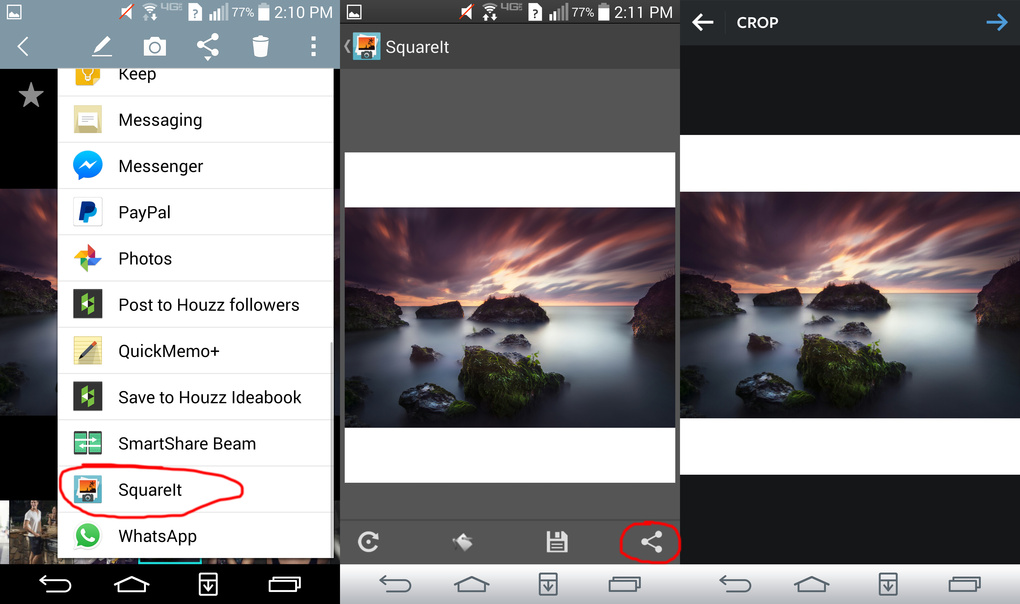
After publication, the entry will appear in the dashboard, and the post in your account.
Example of displaying scheduled postsAnd here we looked at a program through which you can not only publish images, but also track analytical data for each post.
Register on the Parasite website.
Parasite website home pageAdd an Instagram account.
An example of what the dashboard looks like after adding an accountClick on the green button labeled "Add post" and make an entry.
Edit publicationAt the appointed time, the entry will be published.
Quiz passed - post publishedAnd here we show you how to post with a promotion program.
Create an account on the Tooligram website.
Add an Instagram profile. Go to the "Features" tab and find the "Delayed Posting" item.
Delayed posting in the Tooligram serviceWait until the service connects your account. Then click on "Auto Posting". You will see a window with an authorization request, agree and proceed to the registration of the record.
Dashboard with a connected accountThe review below shows how to work with the functionality of the service - selecting and editing an image, adding text and setting the date and time when a publication appears.
Overview of the serviceAn example of our publication being successfully sent to the feed:
Successful sending of the post If you want to send a post quickly and without problems, use browser extensions. Are you ready to take the time to install and register? Create a link of accounts through Facebook Creator Studio. And if you plan to constantly upload images from your PC, connect online services for scheduling posts.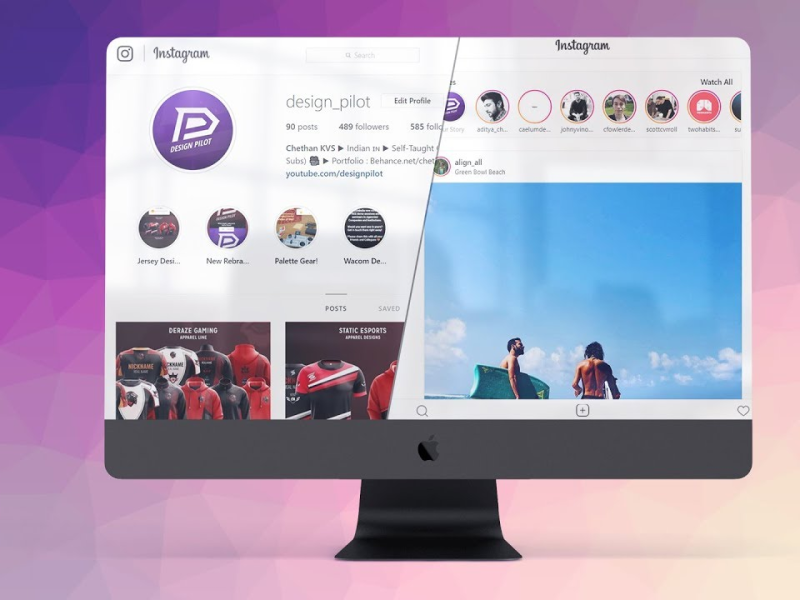
Recommended reading! You can read about how to design Instagram in our article.
Register with SendPulse and use methods for promotion: email campaigns, web push, Viber and SMS campaigns and chat bots in Telegram messengers, Facebook Messenger and VKontakte!
Unfortunately, you can't just open the Instagram website in your browser and post a photo through it. This is because the application is closed source: the system must detect the camera and touch screen in order to allow the publication. This condition greatly complicates the download of photos from a computer. But there are several ways to get around it.
Here's the easiest way: it does not require installation of additional programs and applications. We describe how to post a photo through the Chrome browser.
1. Go to the Instagram website and log in to your profile.
2. Press the key combination Ctrl+Shift+I . With this action, you will call the developer console. Another way to call the console is to right-click anywhere on the page and select View Element Code or View Code in the window that appears.
3. Look for the icon , which is indicated by the arrow in the picture below. Clicking on it will turn on the smartphone screen simulation mode. In the settings above the "screen" you can select the type of device that you want to simulate.
4. Reload the page. After that, a button for adding a photo will appear at the bottom of the screen. By clicking on it, you can open a window with computer media files. Select the desired photo and upload it as you would normally do on a smartphone. Mission accomplished!
The second method is more reliable, but also more laborious. For it, you need to install additional software: emulator Nox Player or BlueStacks .
1. Install Nox Player. The easiest way is to download it from the official resource.
2. After installing , enter the Play Market . The app will ask you to sign in to your Google account. Find the Instagram app in the store and install it.
3. Place the photos you want to publish in the folder C:\Users\your username\Nox_share\Image .
4. Go to the installed Instagram application, log in to your account. The steps for publishing must be the same as in the mobile version. The only difference is that the photos will be located at: Gallery –> Others –> Internal memory of the device.
1. Install the emulator.
2. Also install Instagram from Play Market.
3. Click on the icon shown below in the photo. In the window that appears, select the desired photo.
4. Next, the program will ask which application to use to launch, select Instagram.