Long gone are the days of lugging around a DSLR to take gorgeous Instagram photos.
You can get the perfect Instagram shot by using what you already have on you at all times — your phone!
We’ve put together this handy guide to taking, editing, and sharing Instagram photos all from your phone. With our tips and tricks, you’ll be getting that A+ content in no time.
Step #1: Check Your Camera Settings for Higher Quality Instagram PhotosBefore anything else, in order to level up your Instagram photos, you have to check your camera settings.
Most phone cameras are super-powerful, with a 12-megapixel front-facing camera and a ƒ/2.2 aperture, but the tricky part is learning how to use them.
So the first rule of Instagram photography is to always look at what you’re working with before you begin shooting.
#1: Turn HDR OffHDR — or High Dynamic Range — is a feature on both iPhone and Androids and it’s basically there to help you take better-looking photos.
It takes a few of the same photo at different exposures and puts them together in one, so the final photo has a ton of detail.
If you’re confident in working with HDR, it can be awesome. But, it’s hard to get right and can sometimes actually make your photos look unnatural and off.
To make things easier, let the camera do the heavy lifting and turn your camera’s HDR setting off. You’ll still get high-quality images without the need to think too deeply on your exposure levels.
#2: Check the Photo ModeThere are so many different settings on phone cameras these days that sometimes it’s hard to know what settings are useful and which ones aren’t.
One popular photo mode is “portrait mode”, which automatically detects a well-lit subject within a certain distance from the camera and creates a bokeh effect (depth of field).
Portrait mode is great when you’re taking — you named it — portraits. But that’s not all it’s good for! Many bloggers and influencers use portrait mode for food or product shots too!
View this post on Instagram
A post shared by Later: Visual Social Marketing (@latermedia)
Now, let’s talk about the photography pitfalls — portrait mode isn’t great when you’re shooting inside or in low light.
This photo mode also requires a subject that is still. For example, if you’re shooting someone jumping or walking, you’re going to want to turn off portrait mode and switch to another mode.
But don’t let that dishearten you, portrait mode should still have a place in your photography arsenal — just be selective on when you use it!
TIP: If you’re using an iPhone and are shooting a moving object like someone posing against an Instagrammable wall, try shooting in live photo mode or holding down the shoot button to enable burst.
With burst, your iPhone will shoot up to 10 photos allowing you to sift through and choose the best one after.
Don’t worry, if you’re using an Android, you can also enable the burst feature by holding the shutter down.
Step #2: How to Capture the Perfect Instagram Photo on Your Phone#1: Understanding Depth of FieldCreating DOF (or depth of field) with your phone camera is a really cool way to up your Instagram photo game.
It’s not too difficult and once you get the hang of it, your followers will be asking what camera you use to take your photos!
View this post on Instagram
A post shared by Later: Visual Social Marketing (@latermedia)
Let’s say you’re taking a picture of a person facing the water and you want the person in focus and the background blurry, tap your subject and wait for a yellow square to appear (if using an Android, tapping the screen to focus works too!)
Where you see the yellow square shows who/what is in focus.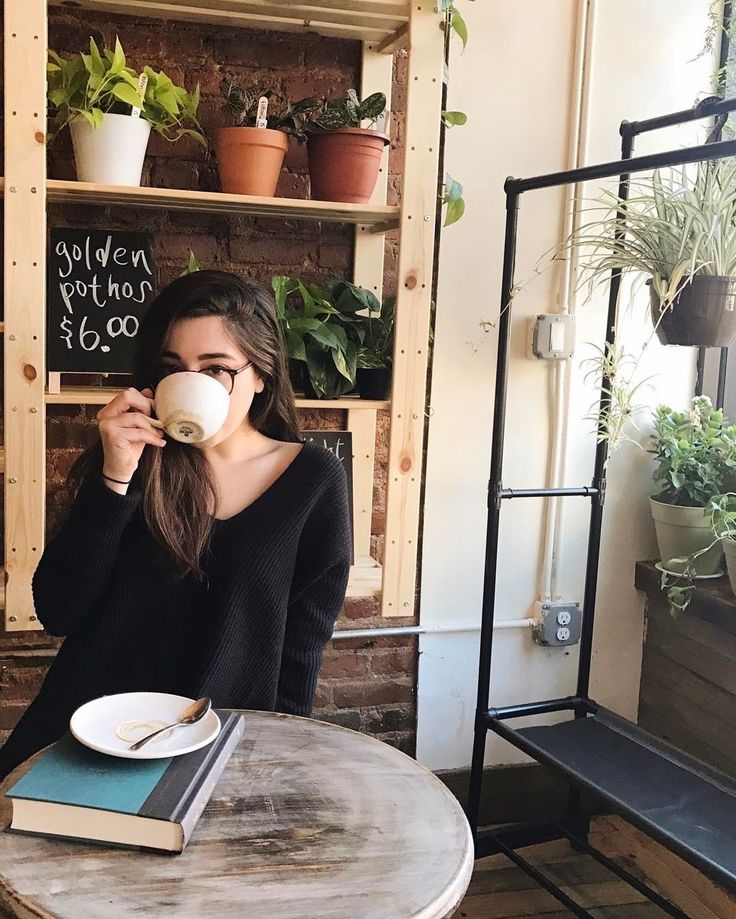 You’ll have to move around to get that perfect DOF.
The best photos take trial and error, but we’ve no doubt you’ll find your mojo soon enough.
#2: Get Your Composition RightGorgeous Instagram photos direct viewers to the subject of the photo while capturing an emotion or a story.
When you’re taking a photo with your phone camera, the composition is what will help your picture go from “good” to “great”.
So, how do you get the composition on point? With something called the rule of thirds.
Known as the golden rule of photography, the rule of thirds helps break down your image into (you guessed it) 3 portions or sections.
The goal is to put the most interesting aspects of the photo in the intersections of the grid to create a balanced and natural-looking photo.
If you can’t imagine the grid yourself, both iPhone and Android cameras have an option to turn the grid on when shooting.
Note: If you’re working with an Android phone, go to your Camera Settings, and select Grid Lines
Like any rule, they are made to be broken, right? You don’t need to follow the rule of thirds when taking Instagram photos with your phone camera. But it’s just there to help you as a guide if you need it.
You know when you take a photo outside you’re excited to post it, only to realize later that it’s totally overexposed? It can happen to the best of us!
One of our favorite photography hacks is to combat this: underexpose your camera!
View this post on Instagram
A post shared by Later: Visual Social Marketing (@latermedia)
When you’re shooting, it’s always better to have an underexposed shot to fix in post, rather than having a blown-out photo.
This is super easy to do on both iPhone and Android. If you’re using an iPhone, tap your phone screen when you’re taking the shot and wait till the yellow box appears.
Once it’s there, move the little sun on the right of the box and you’ll see the exposure lowering and keep moving the yellow sundown until your liking.
It’s basically the same deal on Android — just tap the screen on darker and lighter parts of the shot and it’ll manually balance the exposure.
TIP: The absolute best way to get a killer Instagram photo is to shoot in natural light! If you’re able to use natural sunlight or actually be outside, do it. You’ll notice your photos will look so much more professional than shooting inside or with flash.
View this post on Instagram
A post shared by Later: Visual Social Marketing (@latermedia)
Once you’re ready to post the photos, you want them to stand out on your feed, right? Plan and re-arrange your feed posts with Later’s Instagram Visual Planner.
Later’s Visual Instagram Planner is the best way to plan your Instagram feed and make sure all of your photos are flowing together — it’s an aesthetic game-changer!
Use Later’s Visual Instagram Planner to see where your new photos will sit in your Instagram Feed.
Plus, you can do it right on mobile (iOS and Android).
With Later’s Visual Instagram Planner, you can Quick Schedule new posts, see what your scheduled posts will look like on the feed, and drag and drop scheduled posts to rearrange them.
Ready to nail down your Instagram aesthetic? Design, curate, and plan your feed with Later!
Step #3: Learn How to Set Up the ShotYou’ve got your camera settings down and now it’s actually time to take the photo.
Whether you’re taking a selfie, a flat lay, a picture of your lunch or a picture of a blogger in front of a mural wall, it’s important to consider the art direction of your shot!
On Android, you can set up and capture your shot with voice control. Take a photo by saying “smile”, “cheese”, “capture”, or “shoot”.
The voice control feature can be helpful for selfies and those moments when you have the perfect shot but don’t want to push the button and ruin the moment.
Mastering The Flay Lay:Flat lays have always been super-popular on Instagram, but nothing looks better than food in a dreamy flat lay set up!
When you’re taking pictures of food, there are a few things you have to remember. Food looks best from above and with natural light.
View this post on Instagram
A post shared by Later: Visual Social Marketing (@latermedia)
Think of using textured backgrounds when you’re planning your shot. Whites, light concrete, marble, wooden tables, and pastels are great options.
Jenna Rae Cakes, the cute aesthetically pleasing Canadian bakery, does a great job of photographing their baked goods.
View this post on Instagram
A post shared by Later: Visual Social Marketing (@latermedia)
Of course, it’s not just food that works in flay lay setups — product shots, and the fun “deskie” always works well in your grid!
View this post on Instagram
A post shared by Later: Visual Social Marketing (@latermedia)
You don’t need to have a professional photo studio or photoshoot to take killer content for your brand or business. With a minimal budget, you can set up your own at-home photography studio.
Ready to take beautiful product shots at home? Check out all of our tips and tricks here.
Finding the Perfect Backdrop:If you’re looking to capture scroll-stopping Instagram photos, you’ve got to find the best photo spots. But, remember, you can make any spot Instagrammable using your creative eye.
View this post on Instagram
A post shared by Later: Visual Social Marketing (@latermedia)
Whether it’s the city you live in or are traveling, you can browse locations and hashtags on Instagram for inspo!
Studio DIY Wall Crawl is a great place to start to find those awesome backdrop walls for your next shot!
View this post on Instagram
A post shared by Later: Visual Social Marketing (@latermedia)
Tip: Posing in front of the camera is hard, instead, ask your photographer friend to take bursts of you and just keep moving in front of the camera — some of the best shots are taken while in motion.
Whether you’re going to be the subject of your photos, or you’re capturing some product shots, a prop or two can go along way in building a better photo.
From holding a cute coffee cup, to green foliage and plantlife, having something “extra” to your frame can bring it to life.
Step #4: Editing and Post ProductionView this post on Instagram
A post shared by Later: Visual Social Marketing (@latermedia)
You’ve captured the photo and you know it’s the one, but now it’s time you bring it to the next level.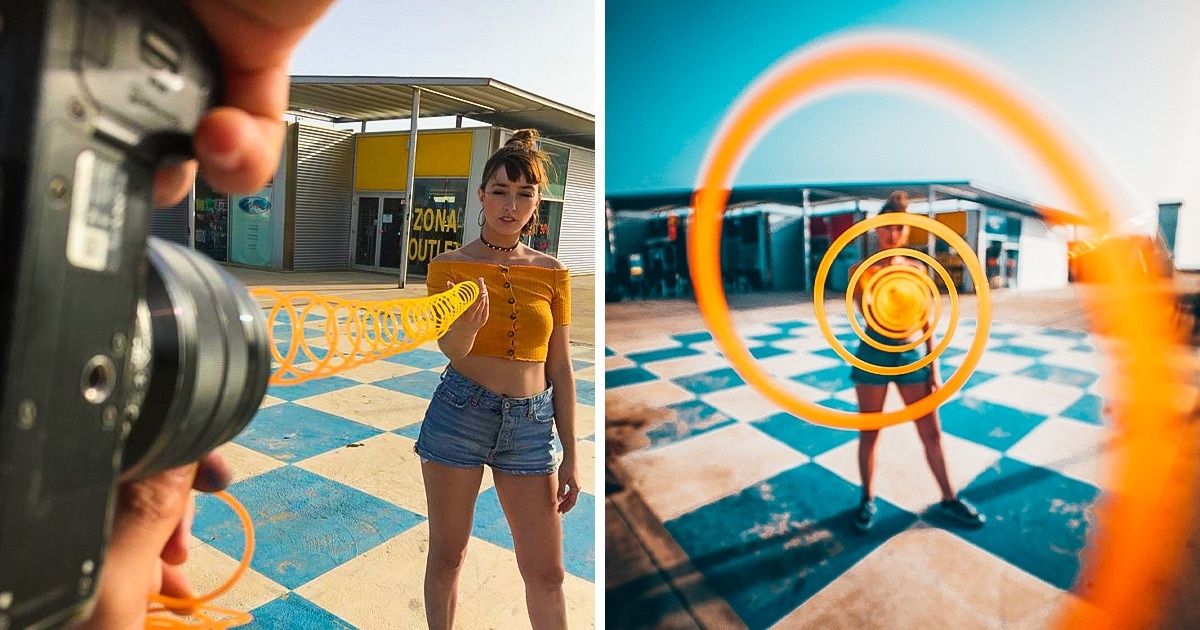
Using Lightroom to edit your photos is one of the best ways to get your photos looking beautiful for Instagram. And, on top of achieving super trendy beautiful photos, Lightroom presets make the editing process super easy and fast.
Plus, you can edit with Lightroom CC on your phone for free!
Once you start editing with Lightroom, even just by using the in-built Lightroom presets (which are like “filters”), you’ll start to see your image quality drastically improve, and you’ll start to develop a style that is unique to you and your Instagram feed!
View this post on Instagram
A post shared by Later: Visual Social Marketing (@latermedia)
When you’re happy with your content and feel ready to post, save time by scheduling, and auto-publishing your content with Later.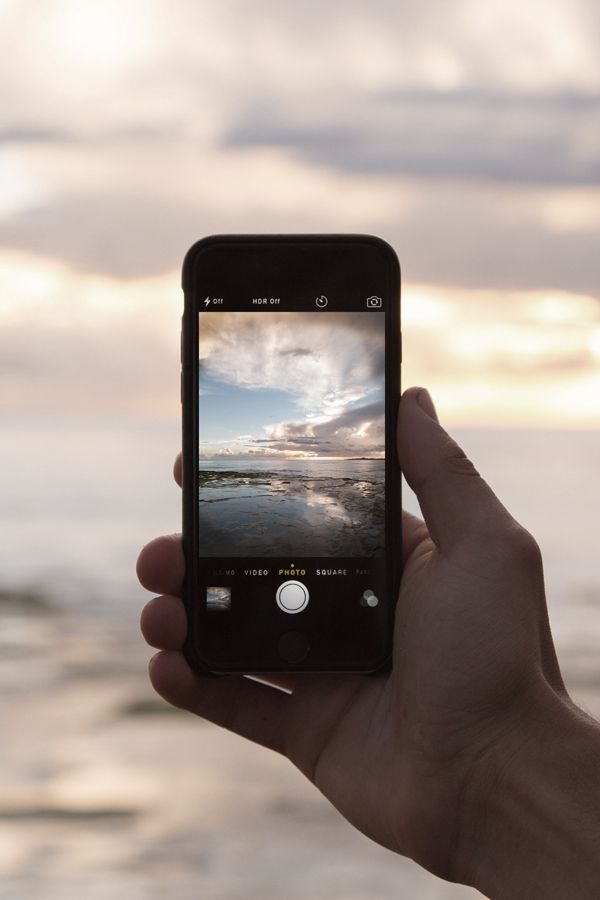
Taking the time to schedule a few days’ posts all at once is a great way to batch posts at the beginning of each week so you can spend more time shooting and planing your content without having to spend so much time on your social channels each day!
On mobile, view your scheduled Instagram posts in a list, preview, or on a calendar (iOS only).
With Later’s Visual Instagram Planner, you can Quick Schedule new posts, see what your scheduled posts will look like on the feed, and drag and drop scheduled posts to rearrange them.
Ready to nail down your Instagram aesthetic? Design, curate, and plan your feed with Later!
#2: Edit Using Editing AppsLooking for quick-as-a-flash edits to help you level up your photos? There are tons of apps that can help you do that — with on-trend filters, clever editing, and perfect color correction tools.
These are some of our favorite photo editing apps to try.
VSCO
Tezza
Snapseed
A Color Story
But the editing fun doesn’t stop there, check out our 12 Best Photo Editing Apps for Instagram blog post for more great photo editing tips and tools!
#3: Stand out from the Rest with Collages and StickersInstagram overlay stickers and collages are the new creative trend on Instagram.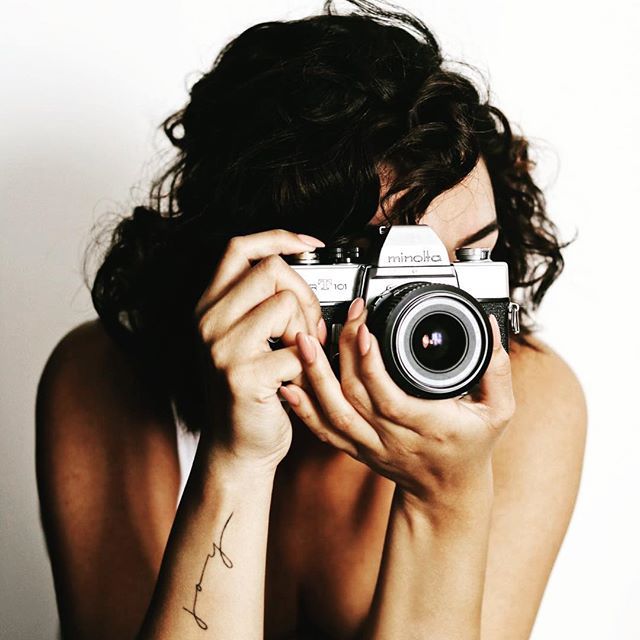
Many users are hopping on the trend and it’s working! If it’s in line with your brand, consider adding overlay stickers to your photos for a little fun touch.
View this post on Instagram
A post shared by Later: Visual Social Marketing (@latermedia)
In fact, we love the Instagram overlay sticker trend that much, that we created our very own stickers for you to use on your posts!
Instagram photography shouldn’t feel overwhelming, or out of your reach — with just a phone you have all the tools you need to create standout images and posts for your profile.
But the first step to getting that gorgeous grid is to getting out and snapping your content!
To spend more time shooting and planning your photos, Auto Publish your content with Later!
Plus — if you have an Instagram business profile — you can enable Auto Publish right on your mobile (for both iOS and Android).
If you’re a beginner, stick to these tips and you’ll soon be feeling confident in your photography skills.
Ready to start posting your gorgeous Instagram photos to your grid?
Don’t forget you can plan, schedule, and automatically post to your Instagram account with Later for FREE. Sign up today!
Like This Post? Pin It! ????Remember the first mobile phone cameras? And the grainy, blurry, low-quality photos they produced?
Well, these days phone photography is capable of some pretty impressive feats. Plus, unlike that bulky DSLR that you haul out for vacations, it’s always at hand.
Learning how to take incredible shots using only your phone is the best way to stand out and build a strong presence on Instagram.
In this post, you’ll learn how to take good Instagram photos using only your phone, and some Instagram picture ideas to inspire your feed.
Learning how to take good photos on your phone requires understanding some basic principles of composition and lighting, and honing your own instincts as a photographer. You just need to follow a few simple rules.
Lighting is the foundation of a good photo. Understanding how to use light is the first and most important rule of getting great photos using only your phone.
Avoid using your flash in favor of natural light, which creates photos that are richer and brighter.
View this post on Instagram
A post shared by LIZ (@really_really_lizzy)
A flash can flatten out your photo and wash out your subject. If you can’t shoot outdoors, take photos near windows or in well-lit rooms. Even at night, it’s preferable to find sources of ambient light, like street lamps and store windows.
You can brighten up a photo that’s too dark with editing tools, but there’s nothing that can fix a photo that’s overexposed.
Prevent overexposure by adjusting the lighting on your screen: tap and slide your finger up or down to adjust exposure.
Another way to prevent overexposure is by tapping your finger on the brightest part of the frame (in the case above, it would be the windows) to adjust the lighting before snapping your photo.
There’s a reason photographers love golden hour. This time of day, when the sun is low on the horizon, makes every photo more beautiful. It’s nature’s Instagram filter.
View this post on Instagram
A post shared by Peter Yan (@yantastic)
If you’re shooting at midday, clouds are your friend.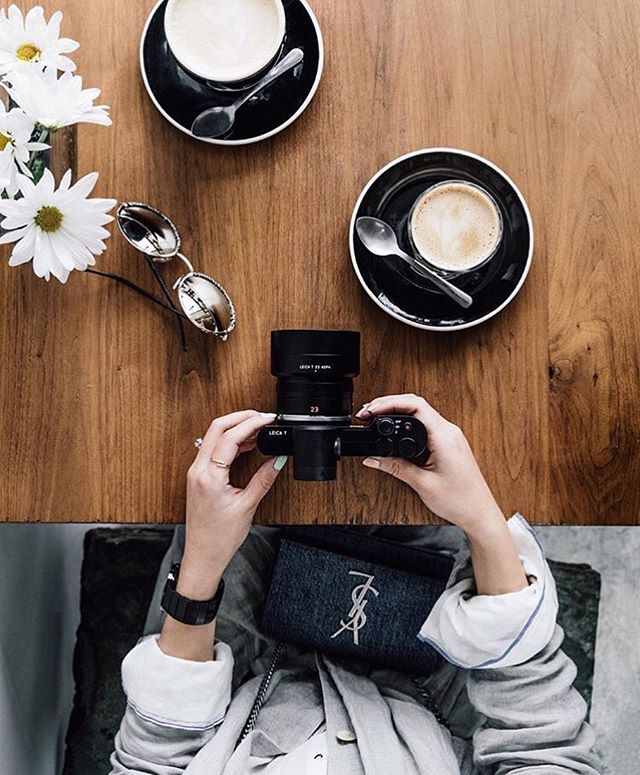 It’s hard to get a good shot under direct sunlight, which can be harsh in photos.
Clouds diffuse the light from the sun and create a softer, more flattering effect.
Composition refers to the arrangement of a photo: the shapes, textures, colors and other elements that make up your images.
The rule of thirds is one of the most well-known composition principles, and refers to a simple method of balancing your image. It divides an image into a 3×3 grid, and aligns the subjects or objects in a photo along the grid lines to create balance.
For instance, you can center your photo:
View this post on Instagram
A post shared by Valley Buds Flower Farm (@valleybudsflowerfarm)
But you can also achieve a pleasing effect with “balanced asymmetry”, where the subject is off-center but balanced out by another object. In this case, the flowers are arranged in the lower-right area of the photo, and are balanced by the sun in the top-left corner.
View this post on Instagram
A post shared by Valley Buds Flower Farm (@valleybudsflowerfarm)
Pro tip: Turn on the gridlines for your phone camera in settings, and use them to practice aligning your photos.
When you take a photo on your phone, you probably hold it up around eye level and snap, right? That’s what everyone else does, too. Resist this natural tendency if you want to take interesting, unexpected photos.
Taking photos from a different vantage point will provide fresh perspectives, even when it comes to a familiar place or subject. Try shooting from above or below, crouching low to the ground, or scaling a wall (if you’re feeling ambitious).
Don’t break your leg in pursuit of the perfect shot, but challenge yourself to see things from a new perspective.
View this post on Instagram
A post shared by demi adejuyigbe (@electrolemon)
Leaving space around the focal point of your photo can add more visual interest than zooming in. Sometimes you get a surprising detail that makes the photo even better, like the moon high in the sky of this photo:
View this post on Instagram
A post shared by nicole wong 〰 (@tokyo_to)
Unlike a camera with an adjustable lens, your phone camera “zooms in” by shrinking your field of view.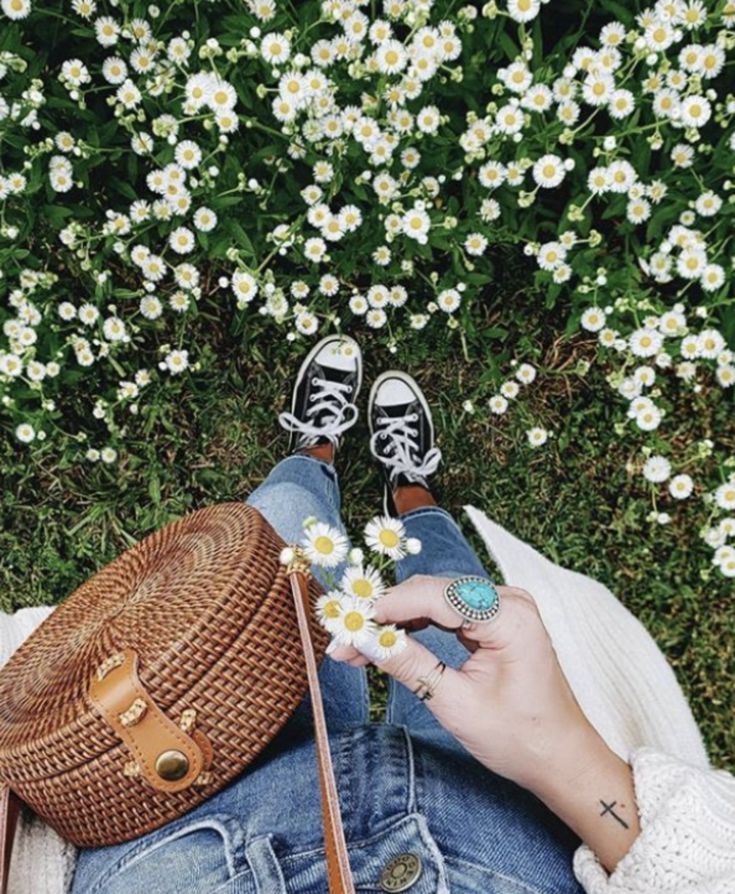 In effect, you are just pre-cropping your image. This can limit your options for editing later, and you might miss interesting details, so avoid doing it.
Instead, just tap your photo subject or focal point to focus the camera.
If you want to give yourself even more options, you can buy an external lens that fits on to your phone.
In photography, “leading lines” are lines that run through your image that draw the eye and add depth. These might be roads, buildings, or natural elements like trees and waves.
Keep an eye out for leading lines and use them to add motion or purpose to your photo.
You can use leading lines to direct the viewer’s gaze to your subject, as in this shot:
View this post on Instagram
A post shared by Daichi Sawada (@daiicii)
It’s easy to focus solely on the subject of your photo, whether that’s a person or a handsome slice of pizza.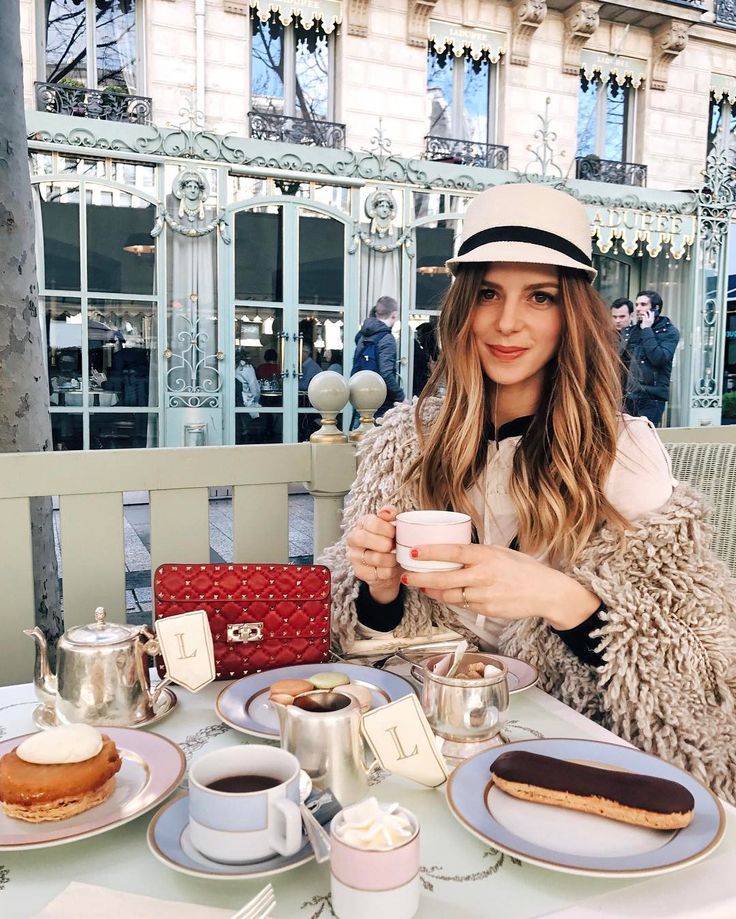 But photos that include layers, with patterns or objects in the background as well as the foreground, are naturally interesting because they offer more depth.
This photo, rather than just cropping tightly on the flowers, also includes the railing behind them, a tree beyond that, and then a sunset and horizon. Each layer of the photo offers something to look at, drawing you in.
View this post on Instagram
A post shared by ALICE GAO (@alice_gao)
Some photos on Instagram are so popular that they become cliches, inspiring an entire Instagram account dedicated to repeat images. Don’t get so caught up in Instagram photo trends that you lose your creativity.
You want to stand out from other brands on Instagram, so always challenge yourself to find a fresh angle on a common subject. This will also help you establish a distinctive and memorable brand identity.
Watch this video for even more tips on how to take good Instagram photos on your phone:
Now that you understand the principles of photography, let’s talk about subjects.
There are certain subjects and themes that perform well on Instagram because they offer wide appeal and tons of visual interest. Take note, because posting engaging content boosts your visibility on Instagram.
Here are a few Instagram photography ideas to consider:
Symmetry is pleasing to the eye, whether it appears in nature (Chris Hemsworth’s face) or the man-made world (the Royal Hawaiian Hotel). Symmetrical composition often enhances a subject that might not be exciting otherwise.
View this post on Instagram
A post shared by ALICE GAO (@alice_gao)
You can also break up your symmetry to add interest.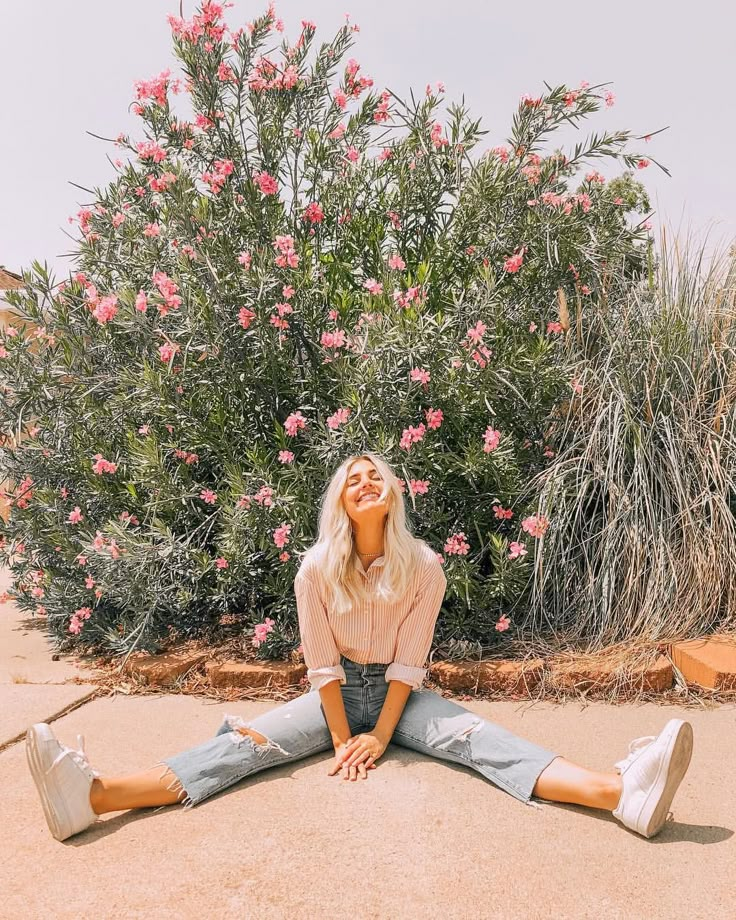 In this photo, the bridge creates vertical symmetry while the trees and sunlight break it up.
View this post on Instagram
A post shared by scottcbakken (@scottcbakken)
Our brains also love patterns. Some Instagram accounts have even amassed huge followings by documenting beautiful patterns, like I Have This Thing With Floors.
View this post on Instagram
A post shared by I Have This Thing With Floors (@ihavethisthingwithfloors)
Our universal love of patterns also explains the viral appeal of Japanese artist Yayoi Kusama’s mirror rooms, which create infinitely repeating patterns of simple shapes and colors:
View this post on Instagram
A post shared by USA TODAY Travel (@usatodaytravel)
Look around yourself for inspiration. Architecture, design and nature are all sources of mesmerizing patterns.
Minimalism and neutrals are trendy, but sometimes you just crave a pop of color. Bright, rich colors make us happy and give us energy. And when it comes to Instagram photography, they make a big impact on a small screen.
They can even make a plain high-rise building look beautiful:
View this post on Instagram
A post shared by Zebraclub (@zebraclubvan)
If you want to be depressed about the state of the world, go to Twitter.
Instagram is a happy place, which means humor plays well here. Especially in contrast to the perfectly composed and edited photos that proliferate on the platform. Funny photos are a breath of fresh air for your audience, and they show that you don’t take this whole thing too seriously.
View this post on Instagram
A post shared by Caroline Cala Donofrio (@carolinecala)
Capturing your subject in motion is tough, which is what makes it so impressive. A compelling action shot is exciting and arresting. It turns even an ordinary subject into something lovely:
View this post on Instagram
A post shared by stella blackmon (@stella.
blackmon)
You don’t always need to strive for perfection either. Sometimes a little blurred movement adds an artistic, dreamy touch:
View this post on Instagram
A post shared by Valley Buds Flower Farm (@valleybudsflowerfarm)
When taking action photos, take multiple options to increase your odds of an amazing shot. You can use burst mode (by holding down your camera button) to capture 10 photos per second.
A sharp focus on an unexpected or interesting detail can be attention-grabbing, especially in a feed full of busy, dynamic photos. It’s like a palate cleanser, offering a sense of stillness and calm.
View this post on Instagram
A post shared by Truvelle | For modern brides (@truvellebridal)
Using Instagram editing tools like vignette (dimming the edges of your photo) or tile shift (which creates a soft blur around your focal point) can enhance detail photos.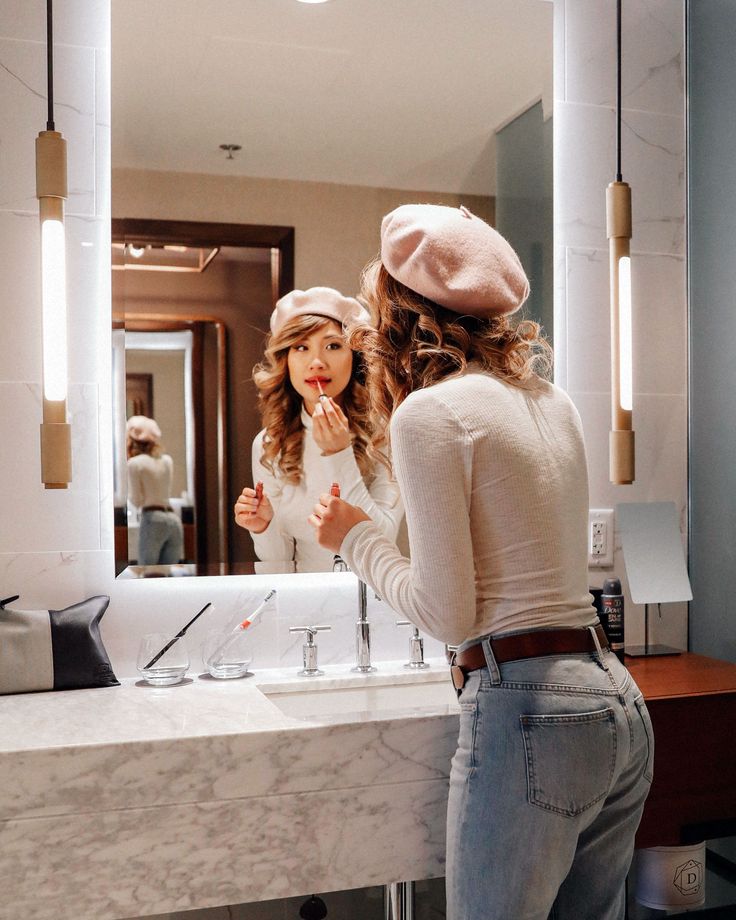
Take your photo from a close distance to preserve quality. Shooting from far away and cropping lowers the image resolution, leading to grainy, lackluster photos that damage your brand. Make sure you’re uploading images that are sized for Instagram.
View this post on Instagram
A post shared by Caroline Cala Donofrio (@carolinecala)
This is a simple technique, but it works: take advantage of an awesome background! It’s the reason you always want to take a selfie in a restaurant bathroom with killer wallpaper. People curate good photo walls for a reason.
The more creative your background, the better. As in this example, a gorgeous background can be the perfect complement to a product post.
View this post on Instagram
A post shared by Charlie & Lee (@charlieandlee)
Some things are true, even if we don’t really understand why. Yawning is contagious. Light is both a particle and a wave. Instagram photos are better if there’s a cute animal in them.
It would be fair to say this is the cheapest trick in the book. But if you have an adorable pup at your disposable (or, just putting this out into the universe, a miniature pony) it would be a mistake not to use them.
View this post on Instagram
A post shared by Kaia & Nicol 🇨🇦 (@whereskaia)
Did your mom ever tell you that your eyes were bigger than your stomach? Nowhere is that more true than Instagram, where we can’t get enough of food photography.
View this post on Instagram
A post shared by Great White (@greatwhitevenice)
The secret to an excellent food photo? Shoot from above, take advantage of photogenic surroundings, and use natural light. The last one is especially important, because the people eating next to you definitely don’t want to be interrupted by your flash.
Research has found that people love looking at faces on Instagram (hello once again to Chris Hemsworth). In fact, photos with people get up to 38% more likes than photos without.
To take a stunning portrait, follow the principles above: use natural light, choose an appealing background, and explore shooting from different angles to capture a more interesting shot. Some phones even include a portrait mode, which will optimize lighting and focus.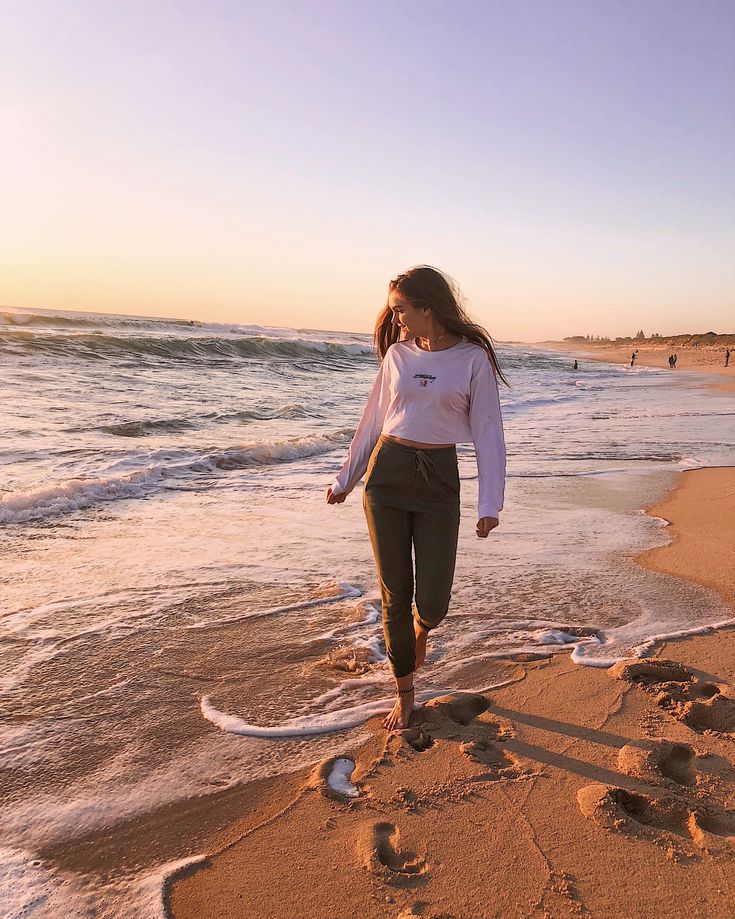
View this post on Instagram
A post shared by Tidal Magazine (@tidalmag)
Now that you know how to take amazing photos using your phone, learn how to edit them using our step-by-step guide, or watch this video tutorial that walks you through the foundations of how to edit your photos for Instagram using Adobe Lightroom on your phone:
Save time managing your Instagram presence using Hootsuite. From a single dashboard you can schedule and publish photos directly to Instagram, engage the audience, measure performance, and run all your other social media profiles. Try it free today.
Get Started
InstagramProduct belongs to an organization recognized as extremist in the Russian Federation. remains a social network about beautiful photos, so you can't do without good shots. Amplifer support manager and InstagramProduct belongs to an organization recognized as extremist in the Russian Federation.-blogger Anastasia Chernykh has already told how to blog in InstagramProduct belongs to an organization recognized as extremist in the Russian Federation., and now explains how to learn how to make cool photos, find your style and make publications more attractive.
You don't have to use a camera to take beautiful photos for Instagram* - your phone's camera will often suffice. But getting basic knowledge about photography is still worth it.
First, get familiar with the basic concepts:
 The exposure determines the brightness of objects in the frame.
 This knowledge will help you avoid mistakes at the very beginning.
20% discount for the first two months in Amplifer with the promo code AMPLI20
Composition is the arrangement of objects in the photograph, which helps to make the frame harmonious and interesting. If you are not going to do photography professionally, then basic knowledge will be enough for you. I'll tell you about two options for the arrangement of objects in the frame that I use:
Rule of thirds .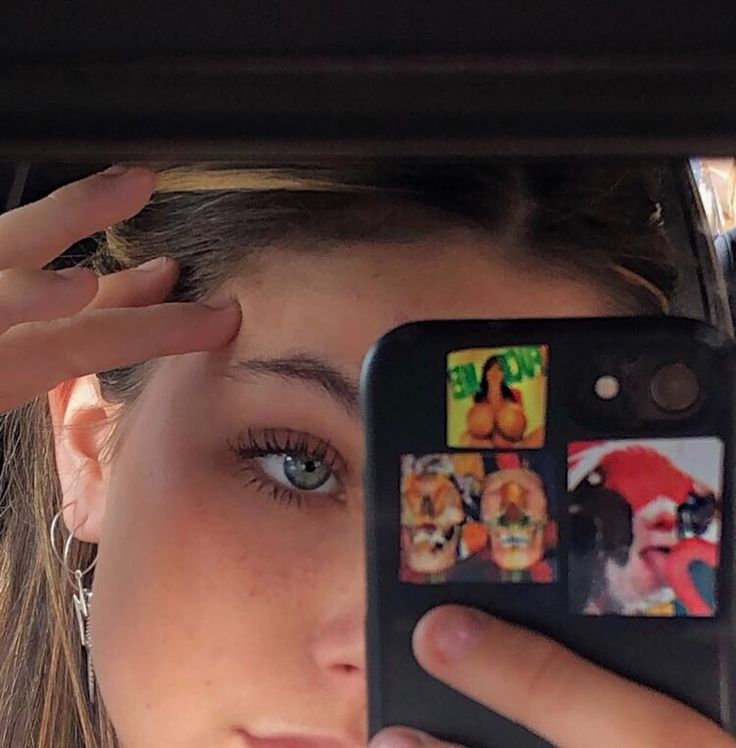 Divide the frame into 3 equal parts horizontally and vertically so that the main objects are located at or along the intersections of the lines.
The subject is at the intersection of lines
Diagonal rule . Draw a diagonal from one corner of the photo to the other. The diagonal from the lower left corner to the upper right is more "calm" and is called descending , and the opposite, from the lower right corner to the upper left - ascending , it is more "active".
An example of a composition with a descending diagonal
This means that if you place objects along an ascending diagonal, the frame will be more dynamic, and if you place it diagonally downward, it will be harmonious and peaceful.
An example of a composition with an ascending diagonal
You can turn on the grid in the camera settings on your smartphone - turn it on and it will be easier to deal with the composition.
A photo in good light is good for an avatar - it's an important part of your profile. Light is the basis of everything. When it is good, the photo does not require additional processing.
Good lighting on the left vs bad on the right
For beginner photographers, daylight will be a real help and will do most of the work - the frame will be rich, with natural light and shadows.
In winter it is better to take pictures from 10 am to 3 pm in clear weather, and in summer there is much more time - suitable light from 7 am to 9 pm. These recommendations are suitable for most residents of the European part of Russia.
Photographers have the concept of "golden hour" (Golden Hour) - this is the hour after sunrise and the hour before sunset. At this time, the light is soft and especially suitable for shooting.
Photos taken during the golden hour
Important: You can shoot during the daytime and when there is no sun. Moreover, taking pictures in bright sunny weather is much more difficult than in cloudy weather - extra shadows and sharpness appear.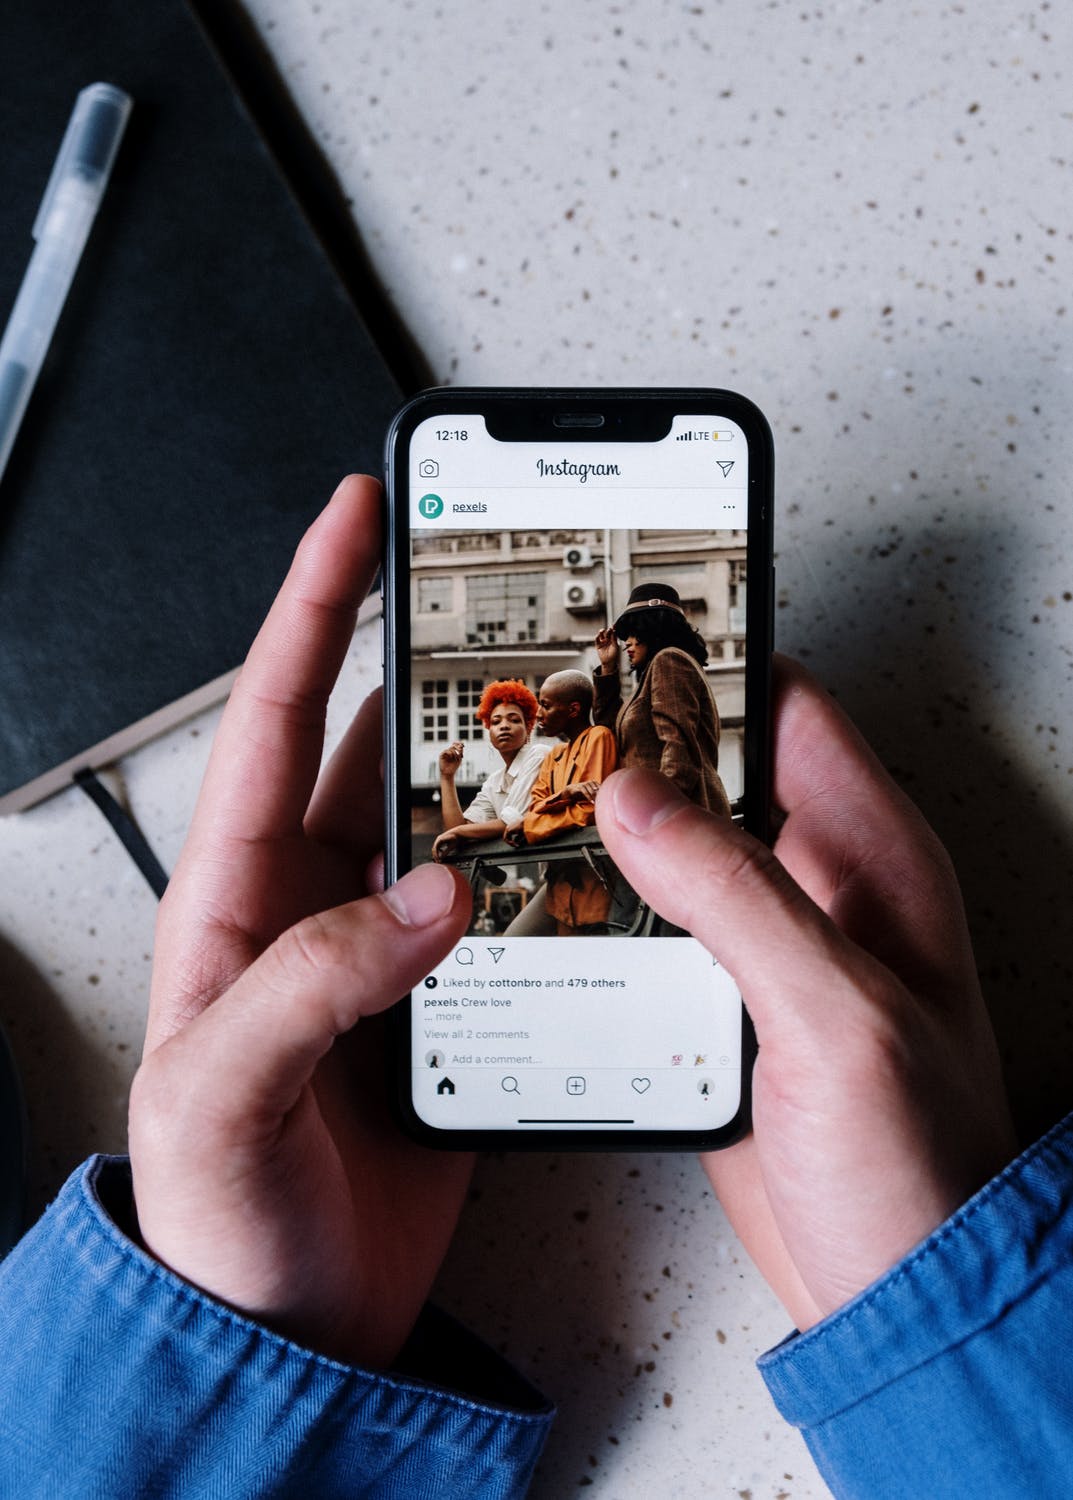
And it is better to publish beautiful photos on Instagram* through Amplifer. Add a description, hashtags, and tags so you don't forget anything. Try it for free for 7 days
Often your smartphone can do more than you think - be sure to explore the camera's settings and features and see what it has to offer. Portrait mode, stabilization, optical zoom, reticle or HDR will all help you when shooting.
For example, HDR is available on almost all smartphones - it creates several frames with different exposures and combines them into one shot, so the photo is clearer and more contrasty.
On the left is a photo without HDR, on the right is with HDR
Be sure to wipe the camera before shooting - such a trifle, but the frame will definitely be better 🙂
 We have compiled a selection of apps for beautiful photos in Stories.
 And to decorate your photo, try using apps to create beautiful "Stories" in InstagramThe product belongs to an organization recognized as extremist in the Russian Federation.
Applications help you correct light, remove excess, make your photo brighter, emphasize details and bring frames to a unified style. Here are my favorite apps and why:
VSCO is the most popular and easiest photo editing app. It has 15 free and more than 100 paid filters, you can edit the exposure, contrast, sharpness, saturation, add graininess.
Snapseed is a simple application for editing basic parameters with filters (“styles”). From interesting:
Lightroom is one of the coolest applications for light and color correction, which spoils the quality of the source the least. There are curves for editing here - they help distribute the brightness of each pixel in the photo.
In Photoshop Fix , you can not only edit light, colors, brightness, temperature, but also remove unnecessary details from photos using the Recovery tools.
Here you can choose point restoration or the stamp function - in the first case, you just need to swipe over the object and the program will delete it for you, and in the second case, you yourself choose from which part of the photo you will take the part for replacement.
Also in this application there is a Liquify function that will help you adjust the shape of objects and add volume. Do not abuse, please - real photos always look more interesting than retouched ones to the ideal.
Removing silhouettes of people in the background in Photoshop Fix
To maintain an account on Instagram*, try Amplifier: it publishes photos, videos and carousels to the feed, collects statistics and suggests the best time to post. 7 days free
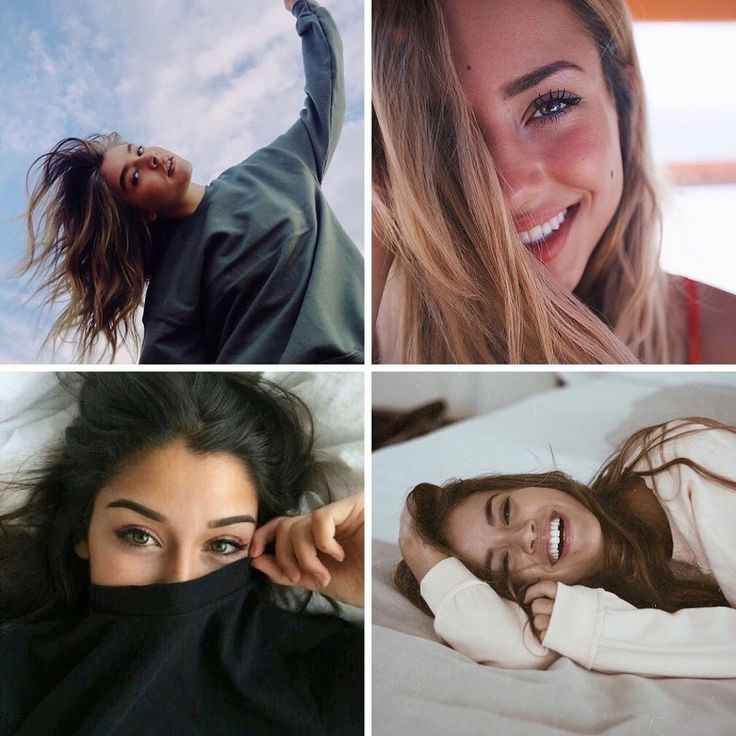
It is very important to find your style, then your photos will catchy. Think about what profiles you enjoy looking at? Through which photos would you like to present yourself? What do you like to photograph?
And go in search of inspiration in InstagramThe product belongs to an organization recognized as extremist in the Russian Federation. and Pinterest - find a few blogs whose style is close to you, save photos and take note of interesting ideas. Then try to repeat and turn on your fantasy. You should not get an exact copy, because each author brings something of his own to the frame 🙂
For example, I really like the profiles snova_nastia, vicky_od, kate_voina - sometimes I take note of ideas for a photo from them.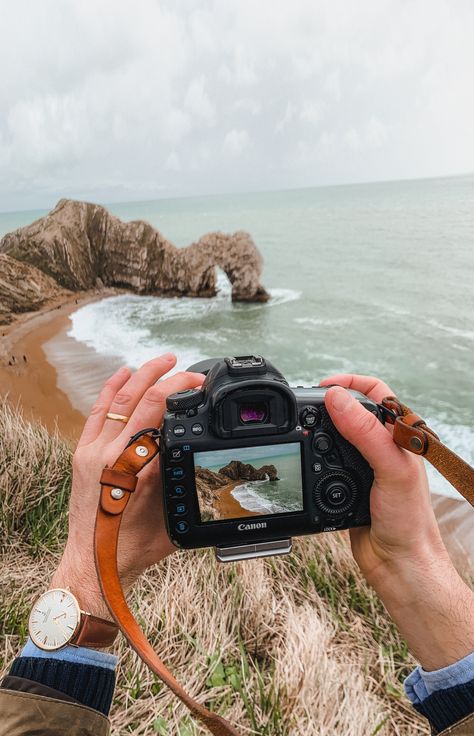
Publications snova_nastia
Another way to develop your style is to shoot everything that seems beautiful to you. Take 10-15 frames, process them and evaluate the result. What photos came out? What color is dominant? Is it possible to group them and get a beautiful picture?
Through the search for inspiration and daily practice, you will find what you can call your style 🙂
Nowadays, a person photographing food, the city or himself does not surprise anyone. There is nothing like stopping, taking a picture, setting the timer on your phone, or asking passers-by to take a picture of you.
Get ready to experiment and look for unusual angles in pursuit of a beautiful photo.
Feel free to ask friends or passers-by to take a photo. The main thing is to explain what you want to see in the frame - then everyone will be satisfied.
Try different styles and don't get stuck on one thing - shoot portraits, food layouts, selfies, architecture, landscapes. Don't be afraid to shoot close-ups - this way you can get more interesting angles.
The more diverse your content, the more interesting the feed looks, and the higher the engagement of readers will be - everyone will want to go to your feed, view an interesting frame and leave a comment.
InstagramProduct belongs to an organization recognized as extremist on the territory of the Russian Federation. and other popular social networks are conveniently managed in Amplifer. Make posts for all platforms in a convenient editor and schedule posts directly from your computer. Try a trial period of 7 days, no card needed
InstagramThe product belongs to an organization recognized as extremist in the territory of the Russian Federation.: 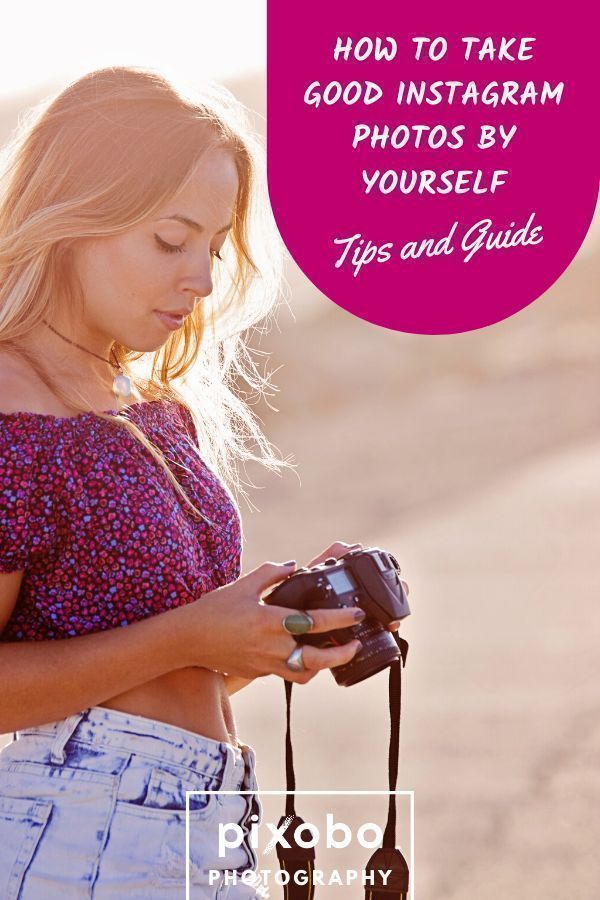
Amplifer works with Instagram* and other major platforms to help you create better content and achieve results. Evaluate the effectiveness of posts, get recommendations on the best time to post. Take advantage of the 7-day trial to evaluate its benefits.
We will show you how to take cool photos for Instagram using your phone. We will suggest ideas for cool stories and attracting subscribers.
Learning how to take incredible pictures using just your phone is the best way to stand out and gain popularity on Instagram.
To learn how to take good photos with your phone, read about the basic principles of composition and lighting. And then practice to hone your own photography instincts. Follow a few simple rules and you are guaranteed excellent results.
Lighting is the foundation of good photography. Realize that using light is the first and most important rule for getting great photos with your phone.
The flash can smooth the photo and blur the subject. If you can't shoot outdoors, take photos near windows or in well-lit rooms. Even at night, it is desirable to find sources of light. For example, street lamps and shop windows.
Make an album Light out of cool photos. You don't need to print the photos separately for this.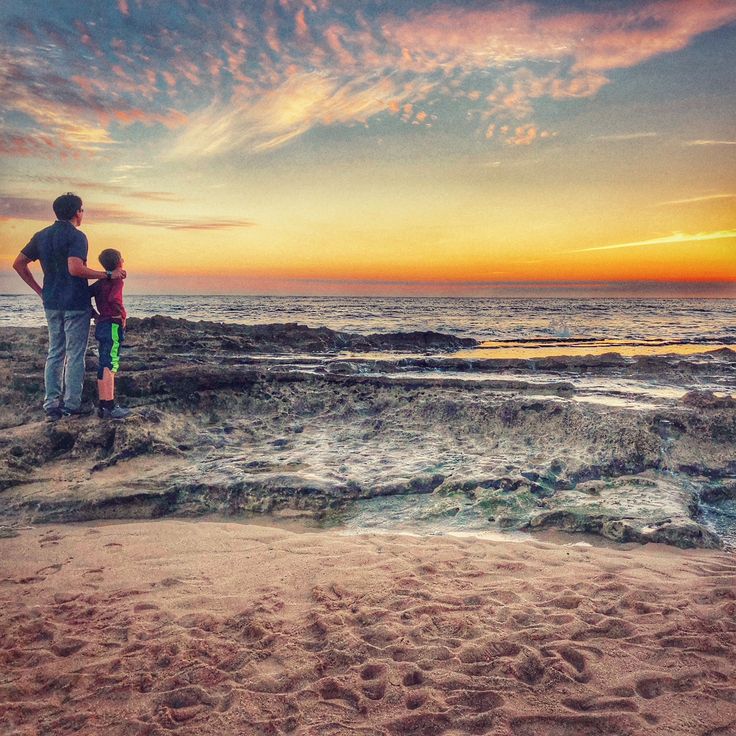 We will print your photos directly on the Light album pages. Upload images to the free Mapi7 editor and create a Light themed album. You can upload photos from your phone.
Make Album Lite
You can change a photo that is too dark with the editing tools, but nothing can fix a photo that is overexposed.
Prevent overexposure by adjusting the lighting on the screen. Tap and swipe up or down to adjust the exposure.
When taking a picture on the iPhone, tap the screen and wait for the yellow frame to appear. Once it appears, move the small sun to the right of the window. The exposure will begin to decrease. Move around until you get the perfect result.
There's a reason photographers love golden hour. At this time of the day, when the sun is low on the horizon, every photo becomes more beautiful. This is a natural filter for Instagram.
If you're shooting at noon, clouds are your friend.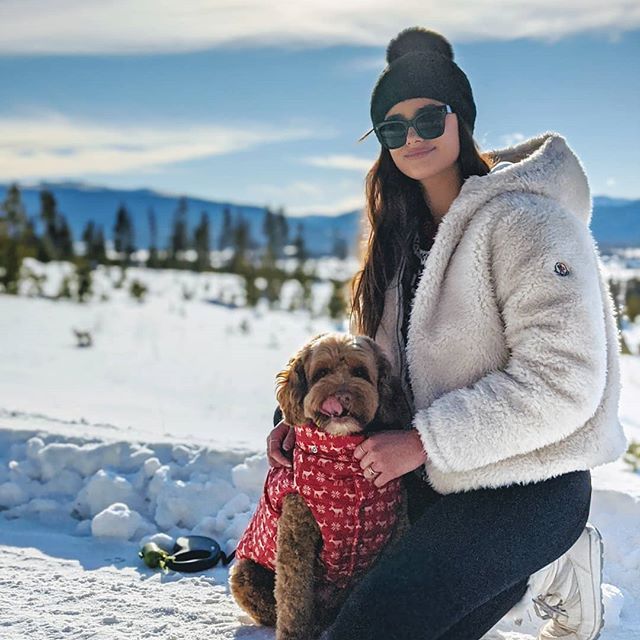 It's hard to get a good picture in direct sunlight. Objects come out sharp. Clouds scatter light from the sun and create a softer effect.
The photo is composed of shapes, textures, colors and other elements. The rule of thirds is one of the most well-known principles of composition and refers to a simple method for balancing your image. Divide the image into a 3×3 grid and align the objects in the photo along the grid lines to create balance.
You can center your photo. Or achieve a pleasing effect with "balanced asymmetry", where the object is not in the center, but is balanced by another object.
When you take a photo on your phone, you probably hold it at eye level and take it, right? That's what the others do too. Don't fall for this trend if you want to capture interesting, unexpected shots.
Taking pictures from a different angle gives new perspectives, even when it comes to a familiar place or subject. Try shooting from above or below, crouching low to the ground or zooming into a wall (if you're feeling ambitious). Just don't break your leg looking for the perfect shot
In photography, "leading lines" are lines through the image that draw the eye and add depth. These can be roads, buildings, or natural features such as trees and waves.
Follow the leading lines and use them to direct the viewer's eye towards the subject.
It's easy to focus solely on the subject of a photo, whether it's a person or a beautiful piece of pizza. But photos that contain layers, with patterns or objects in the background, are more interesting because they offer more depth.
Some Instagram photos are so popular they become clichés. They inspire followers to repeat images.
Don't get so caught up in other people's photos that you lose your creativity.
If you want to stand out on Instagram, challenge yourself to find a new take on a common theme.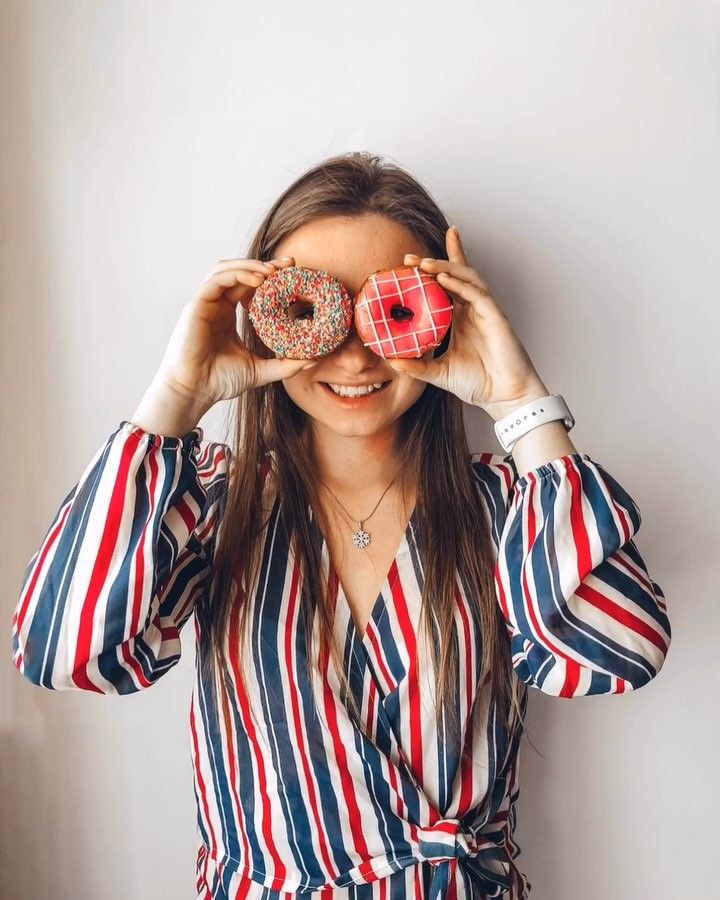 This is how you create a distinctive and memorable individual brand.
Now that you understand the principles of photography, let's talk about subjects.
There are certain subjects and topics that work well on social media. Because they are visually interesting. Posting such content increases your visibility on Instagram.
Here are some Insta story ideas.
Symmetry is pleasing to the eye, whether it appears in nature or in human creations. A symmetrical composition often emphasizes a subject that does not in itself arouse interest.
Symmetry breaking can also attract the viewer's attention
Our brain loves patterns. Our universal love for patterns explains the viral appeal of Japanese artist Yayoi Kusama's mirrored rooms, which create endlessly repeating patterns of simple shapes and colors.
Look around. Architecture, design and nature are sources of mesmerizing shots.
Minimalism and neutrality are fashionable, but sometimes you want a flashy color. Bright, saturated colors make us happy and give us energy. And when it comes to Instagram photography, they make a big impact on the small screen. Even a high-rise building can be beautiful.
For depression, go to Twitter. Instagram is a happy place, which means humor works great here. Especially unlike the perfectly composed and edited photos that are circulating on the platform. Funny photos are a breath of fresh air for your audience. They show how easy you feel about life.
Some things work even if we don't understand why. Photos on Instagram look more if they have a cute animal on them.
To be fair, this is the cheapest trick. But if you have an adorable puppy, it would be inexcusable not to take a picture of him.
The secret of great food photo? Shoot from above, use photogenic surroundings and natural light.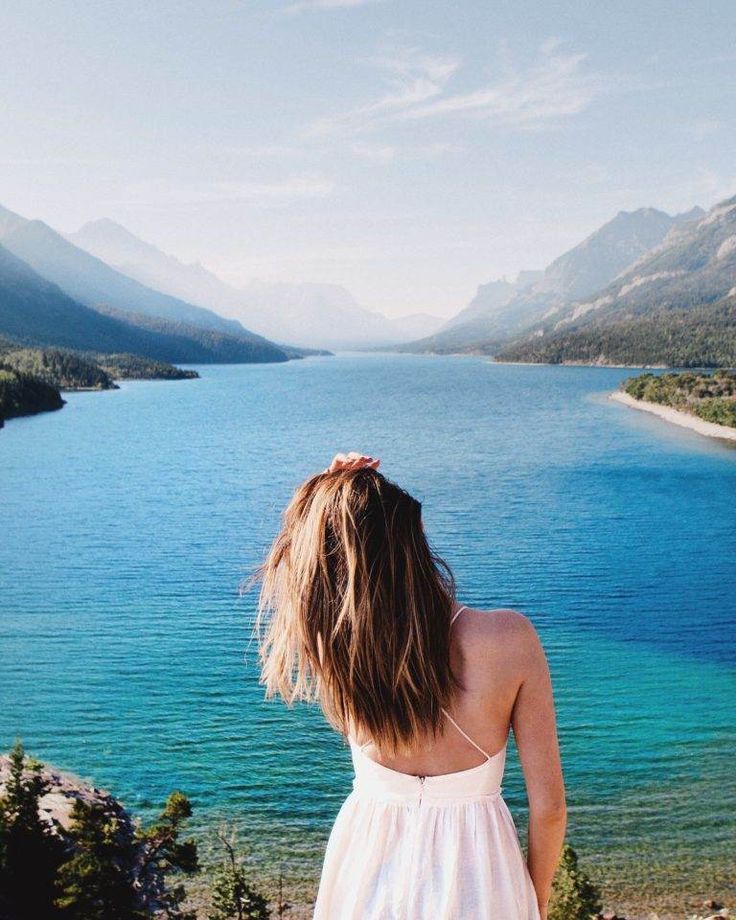 The latter is especially important because the people who eat next to you definitely don't want to be disturbed by outbreaks.
Each photo is a masterpiece! Do not hide unique pictures in your phones and cameras from the audience. A worthy way to show off your talent and keep the memories alive is to have your photo printed on canvas.
Order photo
on canvas
Studies have shown that people enjoy looking at faces on Instagram.
Photos with people get almost 40% more likes than without them.
To make a stunning portrait, follow the guidelines above. Use natural light, choose an attractive background, and explore shooting from different angles. Many phones have a portrait mode that optimizes lighting and focusing. Use this setting.
When you're ready to post the photos to your account, take another skeptical look at them. On the phone, viewing images will be biased. Upload pictures to the Mapi7 editor, create a Light album and order a print.