Alexandra | Apr 18, 2021
Want to add multiple photos in one Instagram Story?
I’m going to show you how to do it on iPhone and on Android.
You can use this trick to create photo collages, add background photos in your Stories, or create any aesthetic Insta Stories you want.
Ready?
First, let’s look at how to do it on an iPhone.
Click here to use it
Instagram has a feature called “Photo Sticker” on Instagram Stories.
You can use this feature to add multiple photos in one Story.
Here’s how to do it:
Open your Story in your Instagram app.
For this example, I’m going to choose a background color (see tutorial).
Now press on the “Sticker” button on top of your screen.
The “Photo” sticker will allow you to add multiple photos in your Instagram Story.
Tip: If you don’t have this feature yet, check this blog post to see how you could get it.
Now just choose the photo you want to add in your Story.
At the moment, you can only add one photo at a time.
Instagram will automatically make your photo with rounded corners.
If you don’t want rounded corners, tap on the photo and they will be square.
You can do the “zoom” in and out motion with your fingers on the photo to resize it and place it wherever you want on the screen.
And you’re done!
Watch how I created a beautiful Insta Story using this trick.
Now let’s look how to do it on Android phone.
Instagram doesn’t have the “Photo Sticker” feature for all Android phones at the moment.
So you just need to download an app that will allow you to add your own Sticker Photos in your Stories.
It literally takes 30 seconds to add multiple photos to your Stories on Android using this method.
This app will allow you to add multiple photos to your Stories.
Download it and follow the steps on the screen to activate it on your phone.
That’s how the app works:
One screenshot = one sticker.
So just take screenshots of the photos you want to add in your Story.
Once you’ve taken your screenshots, you can open your Story on the Instagram app.
You have 2 choices:
I’m going to make the background brown.
Press on the “aA” at the top of your screen.
Now press on the “camera” button on the top right corner to add a photo.
Select the photo you want to add in your Insta Story, and you’re done!
Just like on iPhone, you can resize and move your photos.
Repeat the same steps to add more photos in your Insta Stories.
Was it helpful?
Let me know if you have any questions about this trick.
More tips:
Click here to use it
There are several different ways to add multiple photos to an Instagram Story at once.
The first method allows you to select up to 10 photos and videos from your camera roll, which get uploaded to your Story as 10 separate slides.
The second method is layering several photos on the same slide as stickers, and the last method is creating a collage using Instagram's built in feature called Layout.
Here's how to do it all.
1. Open the Instagram app. Tap the plus (+) button over Your Story or swipe right on the home screen to open Stories.
If you don't currently have any live posts in your Instagram Story, the plus button will appear at the top of the screen. Abigail Abesamis Demarest/Insider2. Tap the photo icon on the bottom-left of the screen to open your Camera Roll.
A preview of the last photo you took will appear at the bottom-left. Abigail Abesamis Demarest/Insider
 3. Tap Select, then select up to 10 photos and videos. Then, tap the arrow at the bottom-right of the screen to continue.
Tap "Select" to upload more than one photo at a time. Abigail Abesamis Demarest/InsiderQuick tip: Like an Instagram post, the order that you select the photos will be the order that they appear in your Story.
4. On this screen, customize each photo or video with text, stickers, or drawn lines. When you're finished, tap the arrow at the bottom-right of the screen.
5. Tap the circle next to your intended audience (Your Story or Close Friends), then tap Share.
Close Friends will share your Stories with a smaller audience of your choosing. Abigail Abesamis Demarest/InsiderQuick tip: Adding multiple photos to the same Story at once isn't available everywhere in the world just yet, so if you don't see this option you'll have to upload photos to your Story one at a time.
1. Open the Instagram app. Tap the plus (+) button over Your Story or swipe right on the home screen to open Stories.
2. Tap the photo icon on the bottom-left of the screen to open your Camera Roll. Select a photo.
3. Tap the sticker icon at the top of the screen. Scroll down and tap the photo sticker.
Instagram sticker icon highlighted in a hot pink box with an arrow pointing at it. Abigail Abesamis Demarest/Insider4. Select the photo you want to insert. Repeat this process until you have all the photos you want to include.
5. Tap each photo to change the shape, drag them to change the position, or pinch them to change the size.
6. Once you're finished, tap Your Story or Close Friends to share the post.
Share your post once you're finished editing. Abigail Abesamis Demarest/Insider1. Open the Instagram app. Tap the plus (+) button over Your Story or swipe right on the home screen to open Stories.
2. Tap the Layout icon on the left side of the screen. Tap the Change Grid icon to select the option you want.
Layout is a collage creator built into Instagram. Abigail Abesamis Demarest/Insider3. Tap the photo icon on the bottom-left of the screen to open your Camera Roll. Select a photo to add it to your collage.
4. Once you're finished creating your collage, tap the check button at the bottom of the screen.
5. Add any additional elements as desired (text, stickers, etc. ), then tap Your Story or Close Friends to share the post.
In addition to posting multiple photos on your Instagram Story, you can also do it on a regular post. Here's how:
1. Tap the New post icon.
2. Tap on the photos icon, which is located in the middle right of the screen.
3. Tap the multi-photo select icon and select the photos that you want to have appear in the post.
Quick tip: The order that you tap on and select the photos is the order that they will show in your finished story. You can tell the order based on the number in the corner of the photo's icon. You can include up to 10 photos.
4. Tap the Next icon and, if desired, add any filters you wish to apply and tap Next again.
5. Write a post caption and fill in the optional settings if desired.
6. Tap Share.
Write a caption and share your Instagram post. Kyle Wilson/Insider
 Abigail Abesamis Demarest
Abigail Abesamis Demarest is a contributing writer for Insider based in New York. She loves a good glazed donut and nerdy deep dives into the science of food and how it's made.
Read moreRead less
Kyle Wilson
Kyle Wilson is an editor for the Reference team, based in British Columbia, Canada. Outside of Insider, his work has also appeared in publications like The Verge, VICE, Kotaku, and more. He periodically guest co-hosts the Saturday tech show "Tech Talk" on the iHeartRadio station C-FAX 1070. Feel free to reach out to him on Twitter, where he can be found most of the time, @KWilsonMG.
Read moreRead less
Contents:
Instagram is a social network that focuses on visual content. Apart from online stores, the lion's share of business accounts on this service belongs to bloggers and photographers. This activity involves the creation of high-quality and attractive content. But the site forces users to play by their own rules and fit into the framework. Let's talk about how to post a photo in full size on Instagram.
Users of social networks often notice that the quality of photos drops when uploaded to the Internet. Why is this happening? Is it really a conspiracy of the owners of communication services to worsen the quality of life of people? In fact, this is of course not the case. And in 2019, everything is much better in this regard - for posts, the maximum resolution is 1080 by 1920, and for stories 600 by 1067, which is often quite enough for most modern mobile devices. Modern users, moreover, can post images in any orientation, unlike the early days of the social network.
Of course, I can write that this is done in order to save space on the site's servers. Think for yourself, if there are no restrictions, people will also upload 4k photos, which weigh quite a lot. But these are just my conjectures, there is no official information confirming this idea. Although, of course, lower quality = lighter weight = faster loading. This is the first reason. Let's move on to the second.
What is the feature of Insta? in publication format. They are displayed correctly and uniformly on devices of any year of manufacture and with any operating system. And this is achieved precisely by limiting the uploaded photos.
Formats, restrictions, resolution, yes, yes, yes. But you can somehow upload a large photo, it’s impossible that people don’t come up with some tricks for this. In fact, this section is here to warn you. There are many articles on the Internet about how to supposedly add an image without losing quality, without cropping it. They mention applications, and the same ones that promise to help you in this situation. But I don’t really understand why people write about these tools over and over again, because no matter how we process the image, or make a panorama, in the end everything will rest within the framework of the social network itself.
For example, the NoCrop application, which is often recommended in such articles, only helps to fit the photo to the required extension. Of course, when uploading an image processed in this application, its quality will not drop. But since it has fallen to this, it cannot be said that the photo will be uploaded in full size. But, again, why download third-party software for this if the service does it on its own? Therefore, alas, 1080 by 1920 is our limit.
As we have already understood, it is unrealistic to fully preserve the quality. But do you need something more than FullHD? Of course, 4k technology is already being introduced into phones, but there are only a few such devices, and it will take some time before a full transition to a new generation of screens. Therefore, under “How to upload a photo without losing quality on Instagram?” I mean, first of all, maintaining the original orientation, and not adapting to the standard square format.
Go to instructions:
So, as we understand, there is no way to get around the restrictions of the social network. But what if you post the image as it is? Let's discuss a few ideas that might come in handy.
If you look at the situation soberly, then the answer to the question “How to post a photo in full size on Instagram?” one is nothing. There are, of course, many articles on the Internet on this topic. But most of them cite applications that only fit photos to the format of a social network. That is, Insta does not crop anything, because everything has already been compressed to a photoset.
#1. Why does Instagram cut photos?
The resolution limitation allows you not to stretch the image loading time. And it ensures the uniformity of publications, which allows them to be correctly displayed in the feed of users, regardless of what device they use.
#2. Hello! I tried to upload a small photo, it is stretched to a size of 1080 on the larger side. How to make sure that the original size of the photo does not change? For example, I have a photo of 600x700, how can I leave it the same?
Add a white border to it, adjusting the photo in this way to the standard size of Insta.
#3. How to upload a photo in the correct orientation?
Now there are no problems with orientation. You just need to click on the icon with two arrows in the lower left corner of the photo when creating a publication.
Do you still have questions? Write them in the comments! Also watch videos on the topic.
[Total: 1 Average: 5/5]
Did you like the material? Share with your friends!
At first, we conceived this collection to help students of SMM and targeting courses at MAED. But it turned out to be a useful thing for both experienced SMM specialists and entrepreneurs to simplify the preparation of a visual for posting. And of course, for those who are passionate about mobile photography in earnest, who are looking for, experimenting and creating, inventing, trying all their free time. The point here is not even the desire to make a pretty Instagram profile, but the endless possibilities to be creative without leaving your smartphone. Links to each application are found, you do not have to bother. For your convenience, we have made this list in the form of a tablet.
61 139 views
We strongly advise you not only to save the article, but also carefully read the descriptions of applications. You are sure to find what you need: for photos, videos, gifs, simplified editing, collages, virtual reality, and even for creating simple price tags instead of shopping tags. Let creativity go hand in hand with common sense.
For convenience, we made an active menu. And if you missed something, then welcome to the comments :) Take the tools:
For photos
For videos
For Stories
For feed
For working with text
For creating a Landing page on Instagram
For creating animations
2 For creating collages For 3 Instagramming 3For photographs
Photos are the backbone of Instagram content. It is the quality of the photo that largely determines whether the user will go from the feed to the profile and whether he wants to subscribe to the account. With these 👇 tools you can create amazing images.
Snapseed. IOS / ANDROID
Powerful and intuitive photo editor for all occasions from Google. 29 tools and filters. Allows you to fine-tune photos, apply various effects, customize saved styles, remove unwanted objects, add text and frames, crop pictures, adjust exposure and color, enlarge an image, and much more. The application is free . The selected settings can be saved to a preset and applied to other photos, speeding up the processing of a large number of shots. The application works with all modern formats, including RAW files.
A Design Kit. IOS . "Designer's Kit" offers many different tools for working with photos. Draw textures and colors, add fonts and stickers, create collages, change backgrounds and textures.
PicsArt. WEB / IOS / ANDROID . Free photo and video editor helps you bring your most creative ideas to life. Creating professional collages, adding stickers, changing the background, using filters, adding designer fonts, retouching selfies, cropping - these are just a few of the available actions . There is a PicsArt Gold subscription without ads.
VSCO . IOS / ANDROID. Paid photo editor with the possibility of a family subscription (6 people). Filters are really cool. Allows you to experiment with colors, add various effects, imitate the use of analog Kodak, Fuji, Agfa films, create moving collages with overlaying images and layers. Access to a complete collection of presets for community members.
Lumyer. IOS / ANDROID. Application for adding special effects to photos and videos. You can animate photos, point-to-point animation of objects in a photo, add special effects and filters in real time. This app makes great GIFs.
Meitu . IOS / ANDROID. Free photo and video editor for mobile devices. Contains many beauty filters. There are different effects for selfies that can be added immediately during the shooting process. You can turn portraits into illustrations or bring images to life.
Afterlight . IOS / ANDROID. A photo editor with a fairly wide range of tools: 59 filters, 66 textures, a cropping tool with 15 presets, and more. But the main feature of Afterlight is its unique retro effects. In addition to standard processing and color correction, here you can add vintage filters and rare film effects to the image.
Lens . IOS / ANDROID. The perfect selfie app. Retouching looks natural due to the use of machine learning algorithms. Here you can even out skin tone, correct imperfections, add contrast, blur the background, and adjust the optimal lighting. At the same time, you can choose automatic refinement and take cool selfies literally on the go. You can create art with your photo or take a traditional portrait - take your pick.
PhotoRoom . WEB/IOS/ANDROID. Application for creating complex graphics. Cut out images, change the background, adjust lighting, add text, logos and stickers, create collages. The uniqueness of PhotoRoom is that the application edits objects, not pixels. The tool is useful for e-commerce and just for creating cool images.
Instasize . IOS / ANDROID. Professional film filters, creative stickers, unique collage frames, perfect retouching and more help you create professional-quality photos.
PhotoCompare . IOS / ANDROID. This application helps you to choose the best photo by comparing "before" and "after". For example, you can compare images before or after processing, or compare different versions of captured photos. In the settings, you can select the selection criteria.
Lamem . WEB. An interesting web service that allows you to evaluate the degree of memorability of an image. The algorithm evaluates the uploaded photos using a heat map: the warmer the colors of the fragments, the better they are remembered by people.
Tokkingheads. WEB/IOS/ANDROID. A tool for creating moving images. You can revive any portrait photo with the help of AI, make it move, sing, speak. The result is quite photorealistic. You can also add animated effects.
Color Pop . IOS / ANDROID. Color by effects photo editor that allows you to create very interesting images. In particular, Color Pop highlights selected parts of a photo, keeping those areas in full color and converting the rest to black and white. Thus, you can focus the attention of users on certain objects.
Kirakira+ . IOS / ANDROID. Application for adding a shimmering effect to photos. You can select any object in the image and add sparkle to it.
Avatan . WEB/IOS/ANDROID. The developers wanted to make a social networking app for collaborative editing. You can use the built-in effects or create your own. Stickers, textures, backgrounds, frames are available. There is a retouching function to correct imperfections in the face or shape of the figure. The necessary tools can be added to favorites.
Lens Distortions . IOS / ANDROID. Editor for creating cinematic photo and video content. The tool allows you to add dynamic light rays and atmospheric textures, create your own gradients, masks and tone settings, use a variety of photo effects and add text. Do you want to be creative? Try it.
Levitagram . iOS. Application for photography with the addition of the effect of levitation. Create photos with people floating in the air. The advantage of Levitagram is automatic image alignment: you don't need a tripod or photo post-processing.
PhotoScan . IOS / ANDROID. Photo Scanner from Google Photos helps to digitize physical photos not only without loss of quality, but also with the improvement of the digital copy. Useful if you decide to post old photos.
Color Accent . iOS. A tool to add an accent effect. Allows you to select individual objects in different colors, making the rest of the fragments black and white.
Visage . iOS. An application for automatically improving selfies and adding various effects: background change, stylization, lighting adjustment, color correction.
Price tag for Shop . iOS. Adds price tags, fonts and stickers to photos. This is especially true for Instagram accounts that do not have access to the Shopping Tags feature. You can create a product showcase right in your profile.
MOLDIV. IOS / ANDROID. Professional photo editor for stunning selfies, photo editing and collage making. 190+ filters, editing tools, frames, layouts, stickers, background patterns. There is a pro-camera that allows you to shoot immediately with the use of beauty filters.
Photoleap . iOS. Unlimited creativity combined with an intuitive interface. Working with layers, special effects, film textures, gradients, brushes, filters, quick retouching, color correction and much more - all this allows you to take cool photos even for an absolute beginner.
Adobe Lightroom . IOS / ANDROID. A multifunctional photo editor with many styles and presets, cropping and color correction tools, filters and a variety of effects. Professional settings for the camera are provided. For more experienced users, there is a WEB version of LIGHTROOM CLASSIC.
Zoetropic . IOS / ANDROID. Bring photos to life and add amazing effects with Zoetropic. Here you can take photos with the parallax effect (3D), use the slow motion mode and the effect of camera movement.
Desygner . WEB/IOS/ANDROID. Editor to create a variety of graphics on any device. You can create social media posts and banners using the built-in templates (1,000,000+ layouts) or create your own. Plus, millions of images and fonts are available for free.
Clos . WEB/IOS. Mobile and web application for virtual shooting. Allows you to take perfect photos via video link. AI Camera can automatically determine the best moment to press the shutter button. You no longer need to go anywhere if you need to shoot products or people far away from you. Just shoot remotely and get high-resolution photos.
Ask Lisa.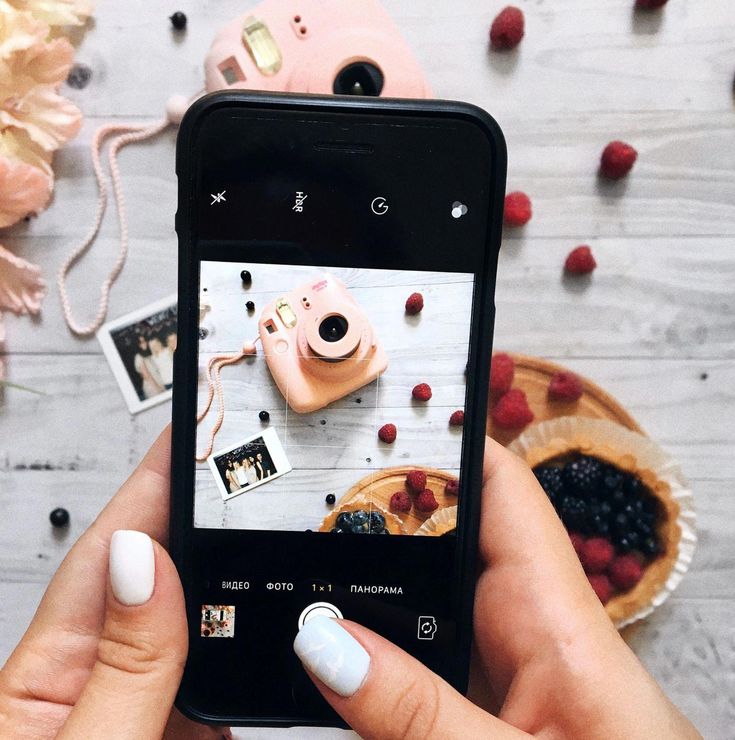 IOS / ANDROID. A smart assistant for choosing the perfect photo. Just upload a few photos and get a prediction of which photo will get the most attention.
Colourkuler . WEB. Web application for selecting the color palette of the account. Defines the main color of your account so you can stick to the right hues when processing.
AR Social - View Social in AR . iOS.
AR application that shows photos of Instagram in augmented reality placed around the city according to the specified geotags. You can choose the placement of photos.
AfterFocus . IOS / ANDROID. With AfterFocus, you can create a DSLR-style blurred background by simply selecting a focus area. Various filter effects allow you to create the most natural and realistic photo.
Filterstorm Neue . iOS. Photo editor with a large list of tools. In addition to simple ready-made filters, there are powerful masking tools.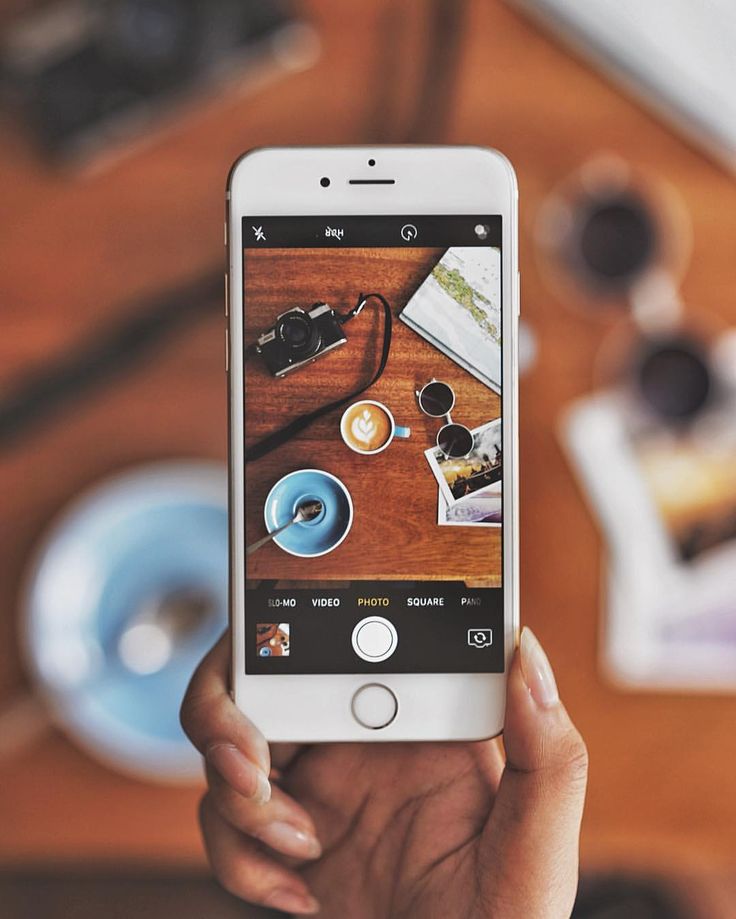 You can adjust colors and lighting, crop and rotate images. There are tools for working with metadata, code replacement and export.
AirBrush . IOS / ANDROID. Beauty photo editor to create perfect images. You can correct facial features, eliminate skin defects, apply various effects and filters.
Rookie Cam . IOS / ANDROID. A photo editor that allows you to apply various filters while shooting with your camera and provides advanced options for editing images. Camera with real-time filters, collages and burst shooting, tons of photo effects, professional editing and much more - all this will help you create truly high-quality images.
TimerCam . iOS. A self-timer camera that allows you to take pictures of any object, including yourself, without assistance. Just set your smartphone at the desired distance, set the countdown time and get ready to shoot.
Adobe Photoshop Fix . IOS / ANDROID. Retouch images in one touch. You can create stunning images by coloring, highlighting, adjusting, distorting, and restoring photos, then easily transfer finished projects to Adobe Creative Cloud apps for desktop and mobile devices
BodyApp .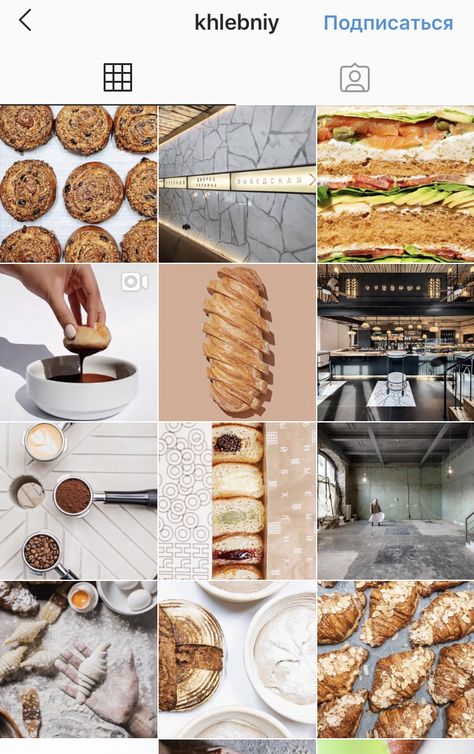 iOS. A body photo editor that allows you to reduce body parts, build muscles, change height, improve curves, change skin tone and much more. With powerful body editing and retouching tools, the perfect look is realized in a few clicks.
VIMAGE . IOS / ANDROID. Bring and animate photos to life. Use hundreds of photo effects, presets and filters. Get instant exposure. Create dynamic images, slideshows and gifs.
Pixelmator . iOS. Incredibly powerful photo editor. It allows you to enhance the colors of an image using pre-designed color adjustment presets. Contains a full set of powerful painting features such as outstanding dual texture brushes, innovative color picker tools and an impressive, ultra-fast Paint engine.
Comica. ANDROID. Turn ordinary photos into interesting comics. You can add inscriptions, arranging them as a direct speech of the hero of the created comic book.
For video
Instagram videos can be used to solve a variety of tasks — sell goods and services, entertain followers, increase brand awareness, and much more.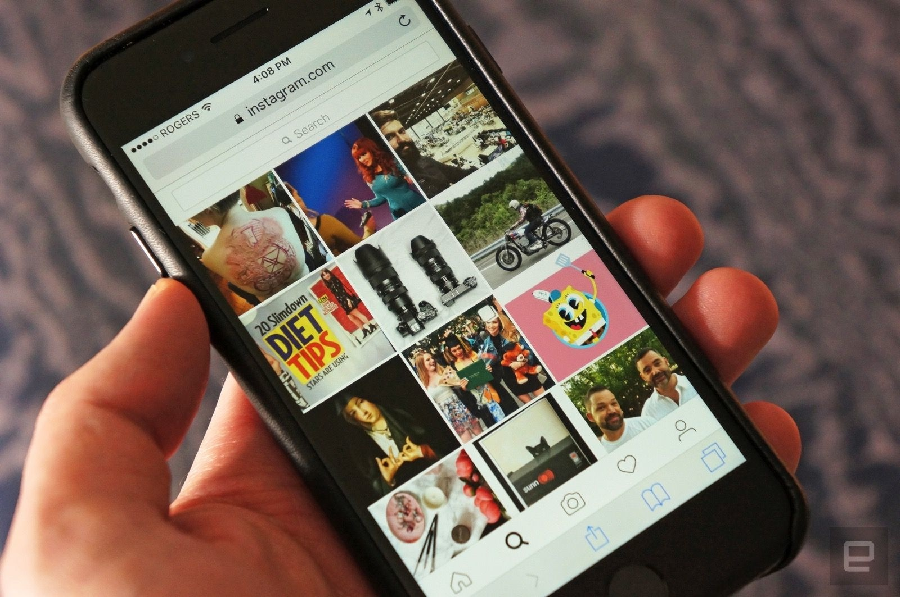 But the videos should be really interesting and of high quality. And here are the tools for creating cool videos.
InShot . IOS / ANDROID. Video editor with music and sound effects. Various video editing functions are available in the application, there are functions for joining two videos, blurring borders, changing playback speed and adding text.
Crello. WEB/IOS/ANDROID. A free image editor with ready-made professional templates that allows you to create spectacular videos. Many photos, fonts, stickers and other elements are available for free.
Efectum . IOS / ANDROID. An application that allows you to edit videos or record videos. The main functions are to slow down or speed up playback. If necessary, you can trim the video, add music, turn the sound on or off, adjust the display quality.
Slow Shutter Cam . iOS. An application that can replace a digital SLR camera. The main feature is a camera with a slow shutter and the ability to create various effects in the process of shooting.
Life Lapse . IOS / ANDROID. A camera with the ability to create a frame-by-frame video and a video editor that allows you to stitch videos and photos, apply filters, adjust the display size. No tripod is required to align images while shooting.
Dolly Zoom . IOS / ANDROID. A mobile camera for creating video with the vertigo effect, a cinematic Dolly Zoom special effect not previously available without special equipment. You can shoot an object while zooming in or out without the object changing its size. The zoom function allows you to shoot at a considerable distance from the subject.
Record it . IOS / ANDROID. A tool for recording video from the screen of a mobile device. You can record the screen, record games, video presentations or training videos. During the recording process, you can add audio comments and a window with video explanations.
CapCut. IOS / ANDROID. A simple yet feature rich video editor that allows you to create professional-quality videos. You can trim the video, change the speed, add filters and effects, overlay music, stickers and text.
Filmm . IOS / ANDROID. An application that allows you to easily mix and stack professional color grading filters with authentic film textures, lighting effects and subtle distortions. You can join clips with spectacular transitions, add stills from movies or music, upload your own audio files.
Crystaliq . IOS / ANDROID. A tool to create a kaleidoscope effect on photos and videos. Exclusive filters help you create near-3D videos with specular reflections, broken glass, or other eye-catching effects.
Vochi. IOS / ANDROID. Video editor for creative video editing. The peculiarity is that effects can be applied to individual objects. The use of AI technologies allows even a beginner to work with the application. Just select the moment and object and apply the effect.
MixCaption. IOS / ANDROID. Application for adding subtitles to finished videos. You can choose the format and font of subtitles, specify any of your text. If necessary, you can start the automatic addition of subtitles. There is a Russian language.
Videoleap by Lightricks. iOS. A powerful video editor that supports professional shooting and editing with many effects. Double exposures, layered editing, changing layers, adding animation, format selection, special effects, text, color correction are just some of the available features.
Dazz Cam . IOS / ANDROID. A vintage camera for creating realistic film shots with the effect of a retro 80s film camera. The finished video does not require post-editing. But you can upload your video and apply the desired effects.
SUPA. WEB. An online video maker to create 40-second videos in the browser. There are many templates that you can edit. Various video formats are available. The premium version can create videos up to 90 seconds.
Just a Line . IOS / ANDROID. Draw in augmented reality and create extraordinary videos from your drawings. You can draw on your own or with friends.
Lomotif . IOS / ANDROID. Allows you to literally add music to videos, do square cropping and edit video files in seconds. You can add any song from millions of tracks. There are cinematic filters, slow motion effect and adding titles. You can make slideshows of photos.
VidLab . iOS. Easily create beautiful, funny videos and photo stories by adding text, illustrations, music, videos, sound effects, overlays, voice-overs and more. Video effects, filters, video collages, adding your own fonts, masks and overlays, adding music, sound effects and your own audio recordings - these and other features will help you create amazing videos.
Action Movie FX . IOS / ANDROID. "Movie editor" to create videos with Hollywood special effects. Choose any frame from a large collection and add it to your video. Create animation from photos.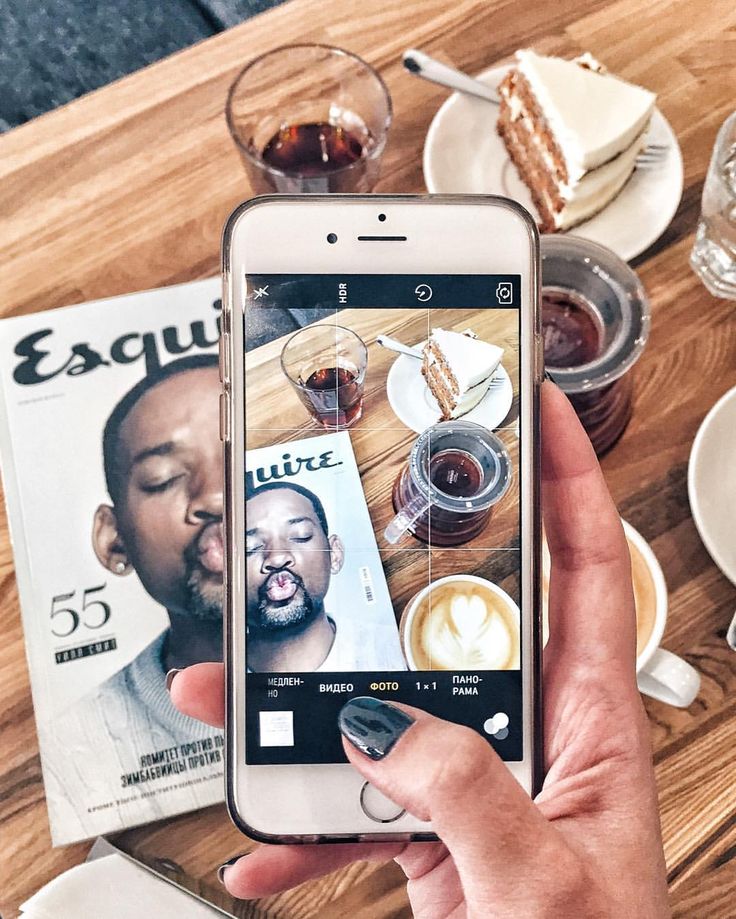 Turn your videos into real action games.
VideoShow . IOS / ANDROID. A minimum of effort and an amazing video with special effects is ready. You can add text, stickers, filters, transitions, music, sound effects, real-time dubbing. A special plus is the lack of a limit for the exported video.
Boomerang. IOS / ANDROID. A very simple application for creating looped mini videos. Find an object and click the button. Boomerang itself will take 10 photos and make a video of them that automatically scrolls forward and backward.
there could be an advertisement for the most wonderful courses, but it will not be. Subscribe to our VC account, we plan to surprise you more than once :)
For Stories
Instagram stories have long become an independent promotion tool and a way of natural communication with the audience. But stories need to be beautiful in order for users to watch them. There are more than enough tools to create amazing stories.
CutStory. iOS. Video cutting app. Import a video of any length and cut it into 15-second segments for sharing in Stories. Additionally, you can add stickers, text, music, and more. You can cut the video into fragments up to 15 minutes or 1 minute for IGTV or posts.
Unfold . IOS / ANDROID. A tool for creating stories from templates. There are 400+ templates. There are also various special effects, filters, unique fonts. Additionally, it allows you to plan your Instagram feed and create biosites to increase the number of links in your profile description.
Mojo . IOS / ANDROID. A simple video editor to create Stories from animated templates. You can add text by selecting the appropriate style.
Canva. WEB/IOS/ANDROID. Multifunctional service for professional work with design. Among other features, there are editable templates for Instagram stories. You can use a ready-made design or come up with your own.![]()
StoryLuxe. iOS. Create Instagram stories using movie stills, a variety of templates and designer fonts.
Smoozly . iOS. Application for creating unique animated stories and posts with the ability to choose a professional template. Manual editing of the template is available.
Clipomatic . iOS. A smart video editor that automatically turns everything you say into live subtitles. All you have to do is press the magic record button, speak clearly and your words will appear in stylish captions right on your record.
Fastory. WEB. A web service that allows you to create high-quality stories for Instagram. There are many templates, effects and detailed instructions. In addition, you can broadcast stories to your site.
Storeo Stories Maker . iOS. Allows you to create long seamless videos for stories. You upload a video, the app cuts it into 15-second fragments for uploading to Instagram Stories. Viewers see one long video.
Nichi: Collage & Stories Maker. IOS / ANDROID. Tool for creating collage-style stories with editable templates. There is a large selection of fonts, filters, stickers and backgrounds.
Pixaloop. ANDROID. Turns ordinary photos into vibrant 3D images by adding animation and art effects. There are many filters, graphic effects and ready-made art templates. You can create looped videos with a boomerang effect.
Sparkar Ar Studio
ANDROID+WINDOWS / IOS+MAC
Program for creating AR masks for Instagram stories. Allows you to create augmented reality effects from scratch, adds 3D objects, JavaScript codes, camera and light effects, animation, head and hand trackers, and more. works in conjunction "smartphone + PC".
Hyperlapse . iOS. Camcorder with the ability to create slow motion videos. Thanks to the built-in stabilization system, the need for tripods and expensive equipment disappears. You can also increase the video speed up to 12 times and fit long stories into short videos.
StoryArt. ANDROID. Intuitive story editor with wide functionality. 1000+ collage templates, 60+ themes, animated story templates, various fonts and stickers.
Design Lab. ANDROID. A simple tool for creating photo stories. Just choose a template, add a photo and change the text. You can create stories from photos by connecting them with great transitions.
Storybeat . IOS / ANDROID. A tool for adding music to stories. Choose any track from the extensive music library, use sound effects or upload your own audio recordings. You can create slideshows and loops from your photos.
Snapmusical. ANDROID. Application for adding music to Instagram stories. In this case, the tracks can be cut and select the desired fragments. There is also a video cutting function.
For the compatibility of images in the account
Even the coolest photos need to be combined correctly in the feed. Special tools will help determine the compatibility of images by color.
Preview. IOS / ANDROID. Instagram feed planner. Helps determine image compatibility and compose the look of the ribbon to create the perfect visual.
UNUM. IOS / ANDROID. A simple ribbon planner that allows you to add any photo and drag it from place to place in search of a harmonious combination. Here you can also process the photo to bring it to a single style.
Inpreview . IOS / ANDROID. A feed planner that can be synced with Instagram. You can plan a feed, edit images, add filters, and create collages from selected feeds.
Feed Preview for Instagram . IOS / ANDROID. Plan your feed, add and remove posts, use various filters. You can also schedule a post to Instagram here, because the images you add to your feed preview are automatically saved locally and can be used later when you want to post them to Instagram.
Planoly. IOS / ANDROID. A planner that helps you view the appearance of the ribbon using drag and drop functionality. You can save images in folders and set up automatic placement of publications.
Sked Social. WEB/IOS/ANDROID. Content scheduler with automatic placement feature. Schedule posts for the feed, edit photos, and set up a posting schedule. The app will automatically post at the scheduled time.
For working with text in Instagram posts
The attention of Instagram users is attracted not only by photos, but also by the appearance of the account as a whole. For example, an unusual text in a picture or in the description of a photo will become an additional element to attract attention and add a plus to your karma.
Type Loop . iOS. Application for adding text to photos and videos. You can animate text, change the color and background of fonts, use various special effects for text.
MOTT . iOS. A tool that animates text. You can use preinstalled designer fonts or upload your own fonts. Text can be given movement or made three-dimensional using the 3D effect.
Over. IOS / ANDROID. Choose from an extensive font library, apply various effects to it, and add captions to your stories or photos.
AppForType . IOS / ANDROID. 60 professional fonts, including those with Cyrillic support. 750 ready-made inscriptions and stickers. Create your own signatures. Add text to your photos to make them unique.
Fotext. WEB. Online service for creating strikethrough, underline, inverted or mirrored text. Ready text can be transferred to your account.
Spectrox. WEB. A very simple online service for creating strikethrough text. There are no other functions provided here.
Lingojam. WEB. Online font generator for Instagram. But to get an unusual font, the source text must be written in Latin. It can be useful if you need to insert English phrases or words into the publication and highlight them against the general background.
To create a landing page on Instagram
Insta-landing in the profile or an extended description in the bio significantly increase the account conversion. And creating a landing page on Instagram is not at all difficult. Here are some tools to help you.
Milkshake. IOS / ANDROID. Create a mini-site and include a link in your profile bio to tell more about your products and services. A free alternative to a service like Taplink.
Pinetools . WEB. An image cutter that allows you to cut the finished landing page into fragments of the desired size. By publishing these fragments on Instagram in the right order, you can get a landing page image in your profile.
Grid Post . IOS / ANDROID. An application that can divide a photo into fragments adapted in size for publications on Instagram. This allows you to create an Instagram landing page or an endless feed.
For creating animations
Even if you came to Instagram to do business, do not forget that many users come here primarily to relax and have fun. Don't be too serious, dilute strict content with fun posts using the following tools.
Plays . iOS. Allows you to animate texts and images. You can create animated posts and stories.
GIPHY Cam. IOS / ANDROID. Create GIF from photos, add various effects and animated stickers. Copy and publish finished material or save for future publications.
GIPHY World . iOS. An application that allows you to place GIFs in the surrounding space. Create videos with AR elements or share created scenes with your friends.
For making collages
Collage creation is available in many photo editors. But we liked a service created specifically for creating collages. Here he is.
April - Layouts Photo Collage . IOS / ANDROID. Choose the layout you like, add a photo and make a collage. Add effects and captions. Specify the desired layout size and share the result on Instagram.
For posting on Instagram
Finally, a trio of services that will make it easier to maintain Instagram: they will help with storing interesting posts, reposting UGC and searching for pictures.