Home »
Misc »
How to share an album on facebook 2018
How to share an album on facebook 2018
Facebook Marketing: How to Share Your Photos and Albums
By: Amy Porterfield and Phyllis Khare and Andrea Vahl and
Updated: 03-26-2016
Social Media Marketing All-in-One For Dummies
Explore Book Buy On Amazon
The marketing strategy behind sharing your albums and photos on your Facebook marketing Page is something that you need to sit down and design. Maybe every Friday you send out a new album or every Tuesday, you post an image of your products that you found around town or in another city.
You can also share this album or individual pictures again, after publishing, from two places:
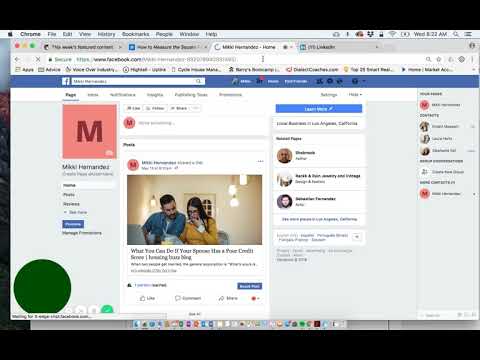
Your business Page Timeline: If you see your album or photo on the Page Timeline, you can click the Share link below the photo.
You can put a call to action in the Message field when you share, asking people to share the album with their Friends.![]()
The album itself: The second way is to go through the album.
To share an album (or individual pictures) after publishing, follow these steps:
Go to your Page, and select the Photos app box.
Select the album you want to share.
Click the Share link below the images.
Choose where to share the album by clicking the drop-down arrow:
If you share in a private message, the link to the photo or album will go to the recipient’s Messages section. You can also send the album to folks outside the Facebook platform by using an e-mail address, but they will need to join Facebook to see the picture(s). See the following section for more details.
Select a viewing option: Public, Friends, Friends except Acquaintances, Only Me, or any of your personal lists..jpg)
Click the Share Photo button.
You can send any photo or album directly to anyone other than your personal Facebook Friends by following the steps listed above, except this time instead of selecting to send it to your own Timeline, choose In a Private Message from the drop-down menu and type an e-mail address rather than a Facebook name. Facebook sends an e-mail with a link to the photo.
If the person you send it to is on Facebook, he’ll be able to view it. If he doesn’t have a Facebook account, the link will take him to a Page with the message that he can’t view the photo unless he joins Facebook.
You also have a direct URL to each album that you can send to anyone, and those people will be able to view it. Or you can post anywhere online. To find this direct URL, follow these steps:
Go to your Page and select the Photos app box.
Select the photo that you want to share.
Make sure that you’re viewing the photo (it will be in a lightbox setting).
Copy the URL of the image from the browser bar.
Paste the URL in an e-mail message.
Send the e-mail.
If the person to whom you sent the URL to doesn’t have a Facebook account, she can view the photo anyway as long as you have viewing set to Public. An invitation to join Facebook will be there too.
This article can be found in the category:
How To Share an Album on Facebook?
FacebookSocial Media
By Steve Kuhn
September 21, 2022September 21, 2022
We are social creatures, so we always find ways to maintain our social interactions. Social media platforms like Facebook help us cultivate these relationships through sharing messages, life events, and memories.
You might know how to share photos with friends on Facebook, but do you know you can share an album too?
This guide will show you how to share an album on Facebook.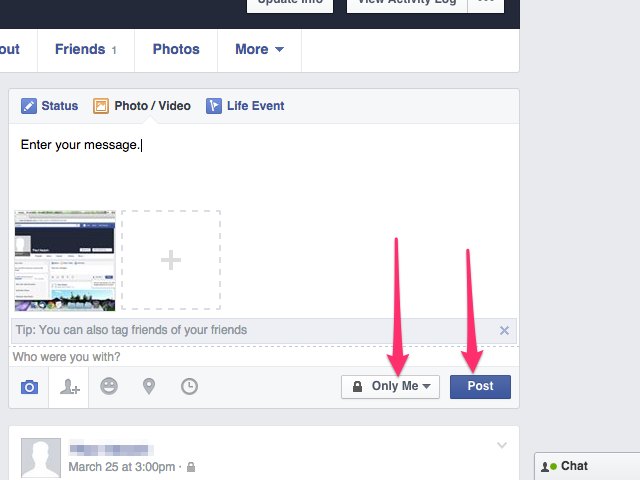
Table of Contents
- Overview of Sharing an Album on Facebook
- Sharing an Album on Facebook
- How To Share an Album on Facebook Desktop Version?
- How To Share an Album on Facebook Mobile App?
- Setting the Privacy of Your Shared Albums on Facebook
- How To Change the Privacy of Your Albums on Facebook Desktop Version?
- How To Change the Privacy of Your Albums on Facebook Mobile App?
- Winding Up
- FAQs
Overview of Sharing an Album on FacebookSharing life events, memories, and lifestyles with the people in our social circles is natural as it cements these relationships.
Facebook is a popular social platform where you can share your photos and videos with friends and followers.
If you want to share multiple photos at once, you can create an album and share it on your timeline, in a group, on a page, or through direct message.
These can be photos you took in a life event such as a wedding, book launch, birthday party, or business event. Whatever the memories you want to create in the form of images or clips, Facebook lets you share them as an album.
However, sharing an album on Facebook varies depending on your device. Let’s look at each device below.
Sharing an Album on FacebookBelow are the two ways to share an album on Facebook, depending on your device.
How To Share an Album on Facebook Desktop Version?Below are the steps to follow to share an album on the desktop version of Facebook:
- Navigate to Facebook on your favorite web browser.
- Click on your username in the top left corner.
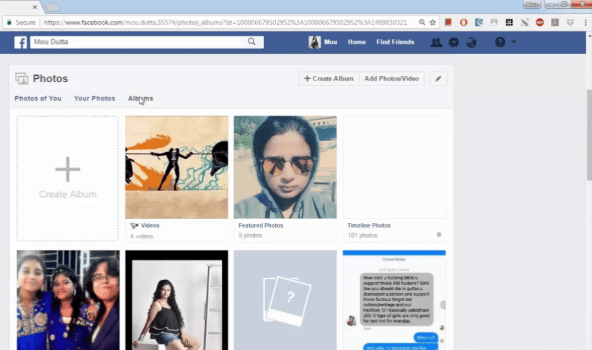
- Select the “Photos” tab.
- Click on “Albums.”
- Click on the album you want to share.
- Click “Share” at the top right.
- Select where you want to share the album:
- Feed
- Messenger
- Community
- Friend’s profile.
- Follow the onscreen instructions to complete the sharing, depending on where you want to share the album.
How To Share an Album on Facebook Mobile App?Follow the steps below to share an album on the Facebook mobile app:
- Open the Facebook app on your mobile device.
- Tap on the “Menu” tab in the right corner.
- Tap on “See your profile.”
- Scroll down and tap the “Photos” button.
- Select the “Albums” tab.
- Open the album you wish to share.
- Tap the “Share” button at the top.
- Choose your sharing method and follow the onscreen instructions.
Setting the Privacy of Your Shared Albums on FacebookAs you share photos or videos on Facebook, the platform lets you choose the audience. It’s not different when sharing an album; you can tweak your settings to set who you want to see in the shared album.
How To Change the Privacy of Your Albums on Facebook Desktop Version?
Here are the steps to set your album’s privacy on the Facebook desktop version:
- Navigate to Facebook on any web browser.
- Click on your profile picture in the top left corner.
- Navigate to the “Photos” tab.
- Click on “Albums.”
- Open the album you wish to edit.
- Click the three dots on the top right.
- Select “Edit album.”
- Click on the current privacy setting.
- Select the new audience.
- Click “Done” at the bottom.
How To Change the Privacy of Your Albums on Facebook Mobile App?
For the Facebook mobile app, use these steps to set your album’s privacy:
- Open Facebook on your smartphone.
- Tap on the “Menu” tab in the right corner.
- Tap on “See your profile” at the top.
- Scroll down and tap the “Photos” button.
- Navigate to the “Albums” tab.
- Open the album you wish to edit.
- Tap the three dots in the top right corner.
- Tap the “Edit album” option.
- Tap the privacy section and set your preferred audience: Only me, Public, Friends, Friends except.
- Go back to the Edit album section and select “Done.”
Winding UpAs we’ve learned, you can share several photos and clips as one album on Facebook. You can share an already existing album or create a new one and then share it.
The sharing is as easy as navigating to the album, hitting the share button, and choosing the sharing method. Remember that you cannot share an album on most Android devices.
FAQsTo create an album on Facebook, go to your profile, click on “Photos,” click “Albums,” select “Create album,” and add photos or clips as you please.
The album folder is under the photos tile on your Facebook mobile app. To access the folder, go to your profile, click “Photos,” and you’ll find three folders, “Photos of You,” “Your Photos,” and “Albums.”
Upload photos to Facebook automatically and in the blink of an eye with these tools
Whether it's auto uploading photos on the go with your phone or auto uploading from your computer, there are some handy ways you can do the hard work of transferring photos to your Facebook profile with a few simple steps. With most of these options, all you have to do is set up the automatic photo upload option on Facebook, and then you can forget about it and leave your photos to automatically sync. nine0003
Unlock your free "Facebook Security Checklist" now!
This will sign you up for our newsletter
Read our privacy policy
While there are some issues to consider - that not everyone on Facebook is secure and that many of these services are in use - you are giving them access to your personal photos and Facebook profile.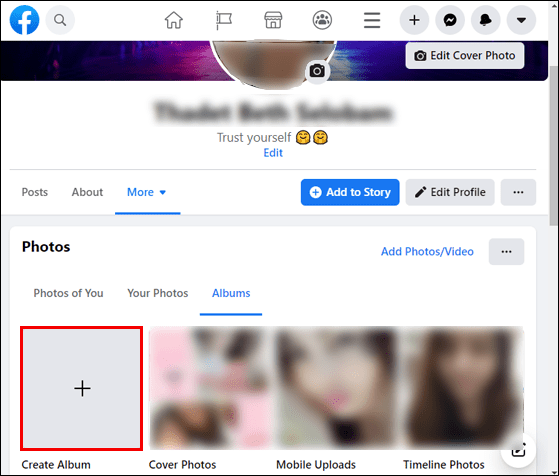 As with any cloud service, you must decide if the convenience outweighs the risks. nine0003
Upload your iOS and Android photos
If you want to automatically upload photos from your phone, Android and iPhone users can use the built-in feature of Facebook's official mobile apps.
For both Android and iOS, the way it works is that you can automatically sync all the photos on your phone with your Facebook profile, but they are uploaded privately. You can then choose which photos you want to post to your friends and followers. iOS users must be on iOS 6 to use this feature. nine0003
To enable this feature using your phone, launch the Facebook app and go to the timeline. Click "Photos" - there you will find three tabs - "Photos", "Albums" and "Synced". By clicking "Synchronized", you will be taken to a window where you can enable automatic downloads. All your photos will start uploading automatically, but Facebook limits you to only 2GB photos. You can sync photos over Wi-Fi only or Wi-Fi and cellular, and choose whether to sync all photos on your phone or just new ones. nine0003
As photos are uploaded, you'll get a notification in your desktop browser telling you how many have been uploaded.
Once you open the photos in your Facebook profile on your computer, you can choose which of those photos you want to post. The album of synced photos will be marked with a checkmark. Click on the checkmark and click "Share Photos".
Some people voiced their concerns when Facebook first introduced this feature, and there are a few things to consider before enabling it. nine0003
Sync folders on your computer
SocialFolders is another easy way to sync photos with your Facebook profile by simply copying the photos to a folder on your computer. We introduced you to SocialFolders in the past. simple, focusing on the feature in the app that allows you to easily and automatically backup photos from Facebook to a folder on your computer. The great thing about SocialFolders is that it can be used in reverse. nine0003
To upload photos to Facebook, you can create subfolders and the album will take the folder name. You can also automatically set these folders as public or private in the SocialFolders settings. With these privacy settings, SocialFolders gives you complete control over how you choose to share the photos you sync with your Facebook profile.
From Dropbox to Facebook in one step
Using the handy free Dropboxautomator service, you can set up an automatic rule. Every time you upload a photo to a specific Dropbox folder, it is automatically uploaded to a specific Facebook album. Dropboxautomator works with both Facebook profiles and Facebook pages. Of course, as with any online service, you must take into account the fact that you will be granting third parties access to your Facebook and Dropbox accounts. nine0003
With Dropboxautomator you can set it up once and forget about everything. Select a folder in Dropbox (you can also create a new folder directly from Dropboxautomator):
And then select the album where you want to show photos. (You can also create a new album from the app):
Automate with IFTTT
Needless to say, IFTTT is a great way to automate just about anything - and syncing your photos to Facebook is no exception.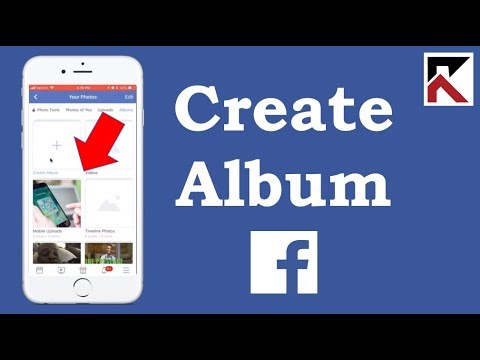 There are several different ways to use this when it comes to your Facebook photos. You can use a recipe that will automatically upload photos from various photo sharing services or backup services. Here are some helpful recipes you can use:
- Instagram? Facebook wall
- Instagram? Facebook album
- Dropbox? facebook
- Flickr? facebook
- Tumblr? facebook
- Pinterest? facebook
If you're looking for a way to easily download your Facebook photos to your computer, check out some options here. .
Do you have any tips or tricks for automatically uploading photos to Facebook? Share them with us in the comments. nine0003
How do I add music, videos, photos, and other media to Facebook?
09:00, September 9, 2018
FB
Author: Amelie
Content
Social networks are famous for their versatility.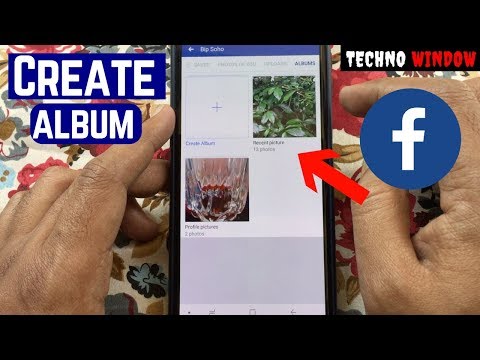 In them, you can not only communicate with friends and make acquaintances, learn new information and notify about events from your life. Facebook, for example, also offers to listen to your favorite music, watch videos, share photos. nine0003
If you still do not know how to add these materials to Facebook, then it's time to start mastering it. In this article, we will provide the main ways to add photos, videos and audio files to your page. And also tell you how to create a group and add friends.
How to add music to Facebook?
Facebook in the matter of adding new files is rather complicated than, for example, the same VK, in which everything can be uploaded in a few simple steps. This is explained by the fact that FB strictly protects copyrights, tries not to violate them and does not allow its users to do so. That is why you will have to tinker with the process of adding music. nine0003
So, to add your favorite songs to your FB page, you can go in three ways:
- Use the official search box.
 It's simple - enter the name of the artist and add his work to yourself.
 - Insert a link to music from a third-party site. Copy in one place, paste into your FB post.
- You can use a dedicated program such as SoundCloud:
- Register in it.
nine0065 Share your Facebook account, - Select music from the suggested options or upload your own from your computer via the "Upload File" section.
- You can edit the name and availability of the file.
- Click the Facebook icon and share the music on your page.
How to add video to Facebook?
If Facebook does not want to meet the needs of its users with the addition of music and ignores millions of complaints and suggestions to simplify the process, then there is no problem adding a video to your profile. You just need to go to your page and in the place where a new publication is being created, click on the "Photo / Video" icon. For details on how to upload a video to Facebook, how to download it from Facebook, and how to send a video to a friend, see the article “Ways to view and upload videos to Facebook“. nine0003
Next, upload the required file from your computer.
Wait for it to load and click on the Share button.
The uploaded file can be shared in the Instagram story if it is linked to FB.
Next, your video must be moderated. As soon as processing is completed, you will be notified.
To watch the downloaded video, you need to go to the "Photos" section and select a video album. You can also edit or delete it there. To add a video from YouTube you need:
- Go to YouTube and find the video you want to add.
- Click on the share icon below it.
- Select the Facebook icon and publish.
How to add a photo to Facebook?
On Facebook, you can not only share pictures and photos in private messages, but also add them to your page. You can create an infinite number of folders for each photo series.
- Go to your profile.
- Select the Photos section.
 nine0066
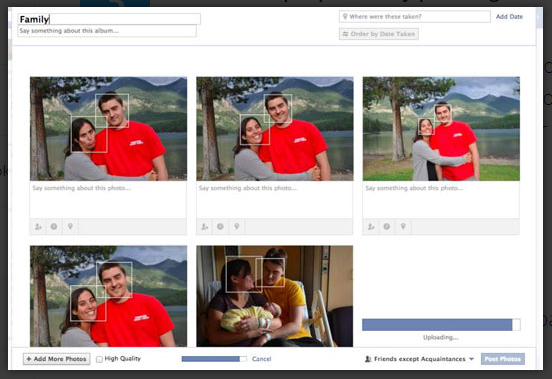
- Next, select the files on your computer that you want to share.
- After they are loaded, go to the album settings. You need to add title, description (both album and photo), location, date, tag a friend. Here you can also set the privacy of a photo or picture: can the marked friends add it to themselves and to whom the photo is visible - to everyone, only to you or a limited circle of users. nine0066
How to create a group on Facebook?
To create a Facebook group, follow these steps:
- Go to the main page.
- The column on the left has a Create section. Here you can select an ad, page, group, or event. We need a group, click on it.
- You will see a window where you need to enter the following information:
- Group name. nine0066
- Who will be in it (add people).
- Select the privacy level - will the community be private or public.
- Quick links can be added.
- After filling in the lines, click on the "Create" button.
- Your group page will open. Proceed to its design: upload photos, videos, add more friends. It allows you to broadcast live, categorize publications, connect with other communities, ask for recommendations, arrange polls and watch movies together. An interesting feature is the scheduling of publications - you can add a photo, video or text and choose the date of posting. nine0066
How to add friends on Facebook?
The original idea of the creator of Facebook was to find friends. And she is still the main one in this social network. To add new friends, you need to do the following:
- Go to your page and select the "Friends" section.
- Start your search via the "+Find Friends" button.
In this section, you can view the suggested options from the "You may know them" collection or search for friends through VK, Yandex, Mail, iCloud, Rambler or other e-mail.