Wenn du eine E-Mail sendest, kannst du automatisch einen entsprechenden Beitrag auf Facebook, Instagram und Twitter veröffentlichen, um deine Marketingbemühungen aufeinander abzustimmen und Zeit zu sparen. Füge Inhalte aus deiner E-Mail-Kampagne oder Website hinzu oder teile ein Bild, um deine Social-Media-Follower auf deine Marke aufmerksam zu machen.
In diesem Artikel erfährst du, wie du einen Social-Media-Beitrag zu deiner E-Mail hinzufügst.
Bevor du mit diesem Vorgang beginnst, solltest du einige Punkte beachten.
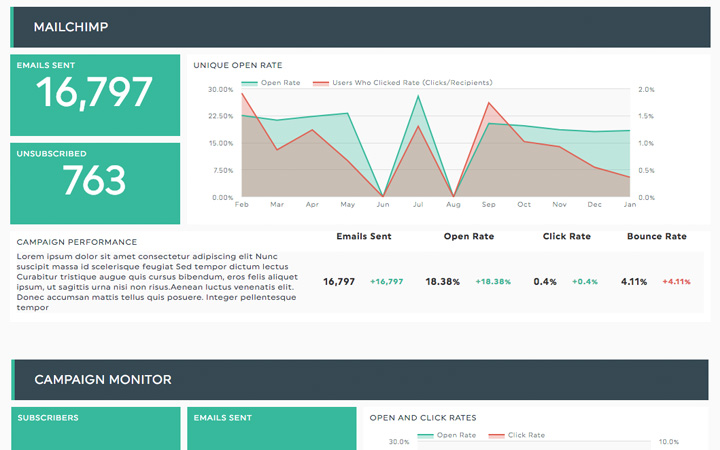
Nachdem du deine E-Mail mit deinem Social-Media-Beitrag gesendet hast, kannst du dich über den Social-Media-Beitragsbericht über die Performance des Beitrags auf Facebook und Instagram informieren.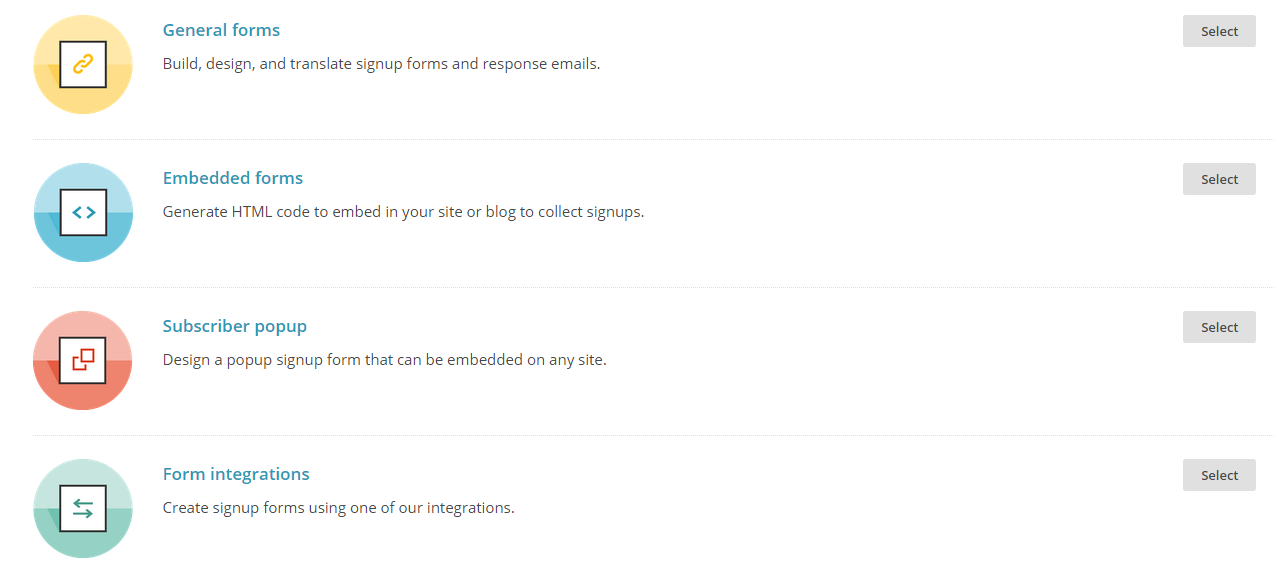 Dieser Bericht zeigt an, wie viele Personen sich deinen Beitrag angesehen haben, wie viele Likes und Kommentare dein Beitrag erhalten hat und vieles mehr.
Informationen zu Social-Media-Beitragsberichten
Let me tell you what’s annoying.
I create email newsletters for my company using MailChimp. I work hard to make them look beautiful.
After I have sent the email newsletter I want to get more reach out of it so I share it to Facebook, Pinterest, my website, Twitter, and Google+, etc.
To do this, I choose one photo from the newsletter and link it to the email newsletter archive URL.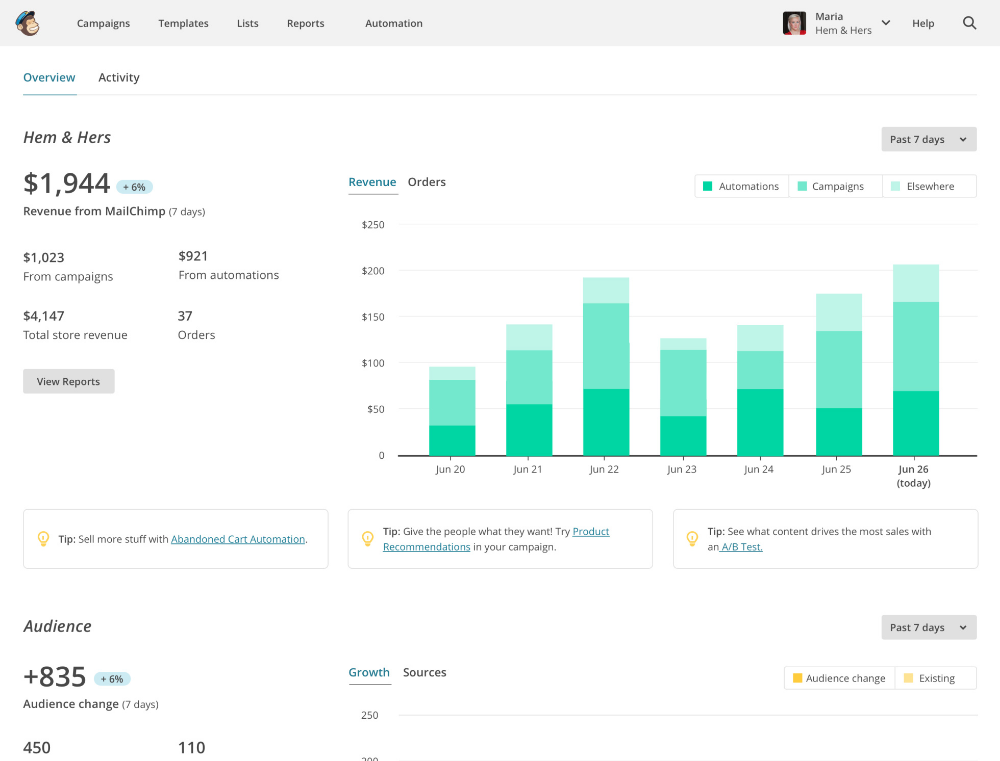 Done.
Done.
The photo that I choose is appealing to 3 out of 5 of my viewers. The other 2 out of 5 viewers would be interested in a photo halfway down the newsletter. But because they only see the one photo I selected to link, they never see the photo halfway down, because they never opened up the email newsletter in the first place.
For example, suppose I want to share this email newsletter:
If I chose just the top image for Facebook or Pinterest, and said, “Read this newsletter!” then people will think the newsletter is about bread.
Top imageBut what about the viewers who don’t care about bread but love piano music? They would love the bottom photo!
Bottom imageThe point is that by choosing one image from the newsletter, you limit the open rate when you share it on Facebook because people are different. The photo great for one viewer is not great for another viewer.
Turn the email newsletter into an infographic image. This way the newsletter is fully viewable in Pinterest, Google+, and your website. And because it’s based on an email, let’s call it an efographic.
This way when someone sees the “efographic” they see all the photos at once.
Now, you may say, “Okay, so an infographic may fit in Pinterest or Google+ just fine but an infographic doesn’t fit in Facebook, Twitter, or Instagram because it’s too long.”
You are right. Please proceed to problem #2.
When I want to share an infographic on Facebook or Instagram, it looks UGLY. Because of the post parameters of Facebook, if I upload the image, it looks like a toothpick and there’s oceans of grey space to the right and left.
Facebook uploadOr, Facebook will take just take a snapshot of the middle section of the infographic and display it.
For example, in this infographic “What to wear to a Business Meeting” it shows a man and a woman dressed professionally.
Look where Facebook zooms in! Do you think a woman will ever click to read this?
Now. Let’s put the same infographic through the efographic. com share tool:
Better.
Efographic allows the user to fit the long infographic into a box, forming columns that display the entire infographic. The fit to box tool is adjustable so that content is not cut off awkwardly.
A woman is more likely to click to read this infographic because she sees that it contains a female example whereas before, she thought it was just for men.
Infographics and email newsletters are so damn long; I hate scrolling forever.
Efographic puts infographics and email newsletters into embeddable scrollboxes. You choose the size of the box. This is great for a email newsletter visual archive on a website or next to an opt-in box.
Instead of taking up incredible amounts of valuable webspace, an infographic in a scrollbox is much more manageable for content writers to put together a post.
More on this feature coming soon.
Read next: What is efographic?
MailChimp is one of the most popular mailing services. We asked Anna Melnichuk, email marketer, certified specialist of this service, copywriter and author of the blog “MailChimp Universal Guide” , to tell us about it. Read how the service works, how to create a newsletter using it step by step, and what features MailChimp has. Anna also describes what not to do so that the account is not banned. nine0023
I've been an email marketer for nine years and have been using MailChimp for email marketing all that time. Over the years, I have never once wanted to change the mailing service to another, because it has quite a few advantages.
There are usually three disadvantages of MailChimp:

Let's take a closer look at the service. Personal account looks like this:
At the top left side - number 1 in the figure, the MailChimp functional menu is located, where the main functions are collected. Top right - number 2 in the figure, the account management menu is located.
Campaigns - campaigns. This is the territory of letters, landing pages and advertising campaigns.
Templates - this link stores email templates.
Lists - here you can find information about your subscribers. nine0009
Reports - reports. All information about the effectiveness of newsletters and landing pages can be found here. You can view analytics for each sent email.
File manager - file storage. The section contains pictures and documents that you used for mailings.
MailChimp does not have the ability to attach documents to an email, but you can upload a document to the file manager and link to it in the email.
To create a campaign, click on the button Create Campaign . MailChimp will clarify exactly what you want to create.
In addition to the standard email, the following options are available for creating newsletters.
We are only interested in the first point. Click on Email.
Regular - a regular letter. This is a standard html mailing, and I recommend setting up the first letters here.
Automated - automatic letters. Letters that are sent automatically without your participation, depending on the user's actions. Welcome and educational series of emails, feedback request after purchase or birthday greetings are configured here. I will tell you how to create autoresponders in the next article. nine0009
In the meantime, read about examples of automatic mailings in the article "6 trigger mailings for an online store that will increase sales."
Plain-text - mailing without formatting, a clean letter without html. Suitable for creating short and quick notifications and for mailing when the reader does not have html support. But this is a rare case.
A/B Test - testing. Learn which topics, senders, send times, and the emails themselves work best with your audience. nine0009
Let's move on to setting up.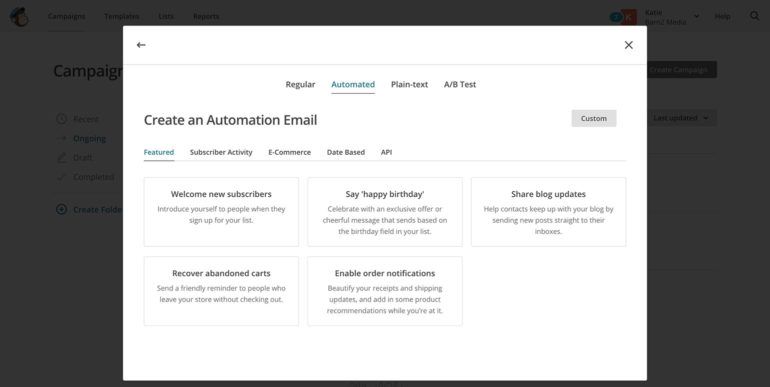 The first thing you do is select senders in the To field. Click on Add Recipients .
In the drop-down list List select the list for which you are preparing a mailing list. The drop-down list Segment or Tag allows you to select the audience more precisely by adding segments.
Check the checkbox Personalize the "To" field . The function allows you to personalize the "to whom the letter is" field. nine0009
MailChimp pulls information about the mailing list sender from the list settings. You can change the name and email address for each newsletter. The new email address will need to be confirmed.
If you use an extension for automatic page translation, disable it. The plugin conflicts with MailChimp and won't let you specify a subject.
Emoji can be added to the subject. Here, fill in Preview text, next to it, it is displayed immediately after the topic.
Now you can start writing the letter. Click on Design Email.
MailChimp has prepared templates for you. In the Layouts tab there are ready-made layouts for letters. Replace empty blocks and you will have a responsive email.
For the first mailing, choose any layout (background) you like and go to the design.
See what the mail editor looks like. On the left is the template itself, on the right is the menu and available blocks for editing. Blocks can be dragged from the right window to the left window. The content of the blocks in the right window is being edited. In addition to the blocks in the Content contribution, there are also the Design and Comments tabs.
In Comments you can discuss the letter with other team members. Click on the Add Comment button to start a discussion. nine0009
Tab Design contains global settings — page background, footer, header. I always recommend changing settings and experimenting with designs only if you have the taste and skill of . I've seen letters with acid pink Comic Sans text, colorful headlines, giant photos of the authors. But it is better to use the default settings than to create a "creative".

 nine0016
 Mailchimp allows you to thoroughly check your email before sending. Click on Preview and Test in the dark bar at the top.
Enter Preview mode shows how the letter will look on a computer and on a mobile phone.
Send a Test sends a test message to the mailboxes specified in the Send a test to field. So you can check the letter for display in different mail clients. nine0009
If you have Mailchimp installed on your mobile phone, send an email to your phone using Push to Mobile . So you can check the display of layout in a mobile device.
Link Checker checks for broken links in the email. A real lifesaver for link-heavy emails and tired marketers checking emails at 3am.
In Social Cards you can configure the display of email previews for social networks. On Facebook, the email will look like a beautiful post with an image, text, and a link.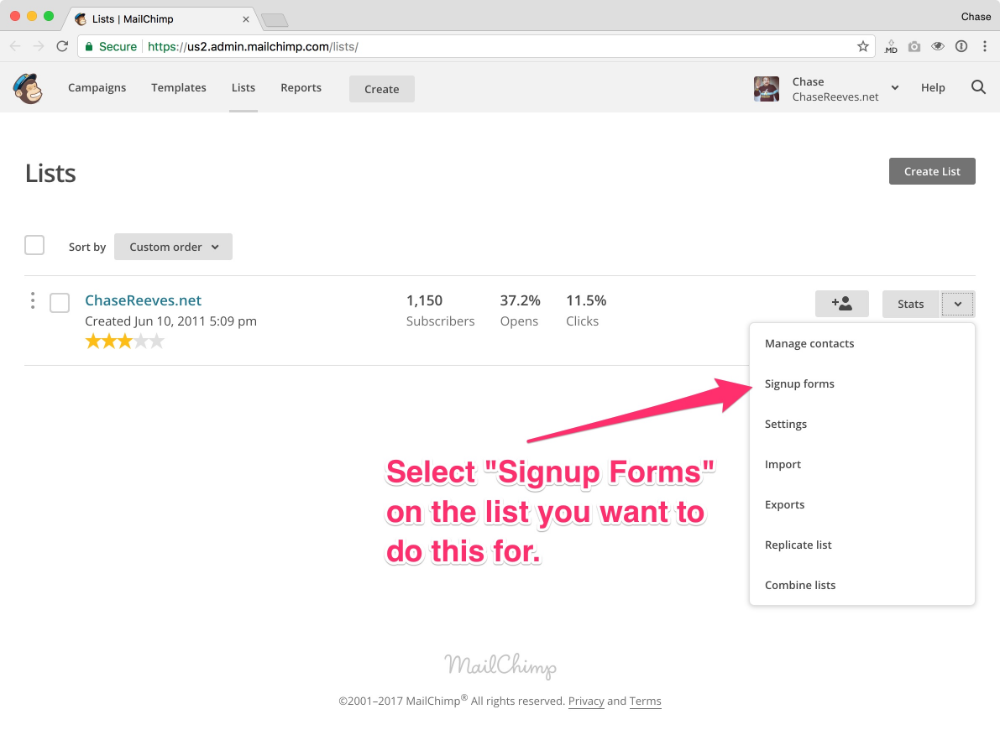 nine0009
When you have created a letter template, checked if everything is fine, you can start sending.
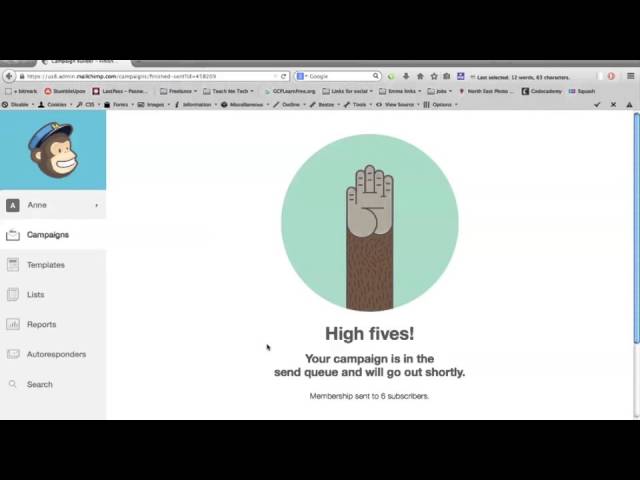
The newsletter can be sent right now, to do this, click the blue button Send . MailChimp will check your confidence and after confirmation it will start sending emails.
If you are not yet ready to send the letter, click on the link Finish later . The campaign will be saved as drafts and you can send it later.
With function Schedule you can schedule the mailing to be sent on a convenient date. A friend of mine sets up several campaigns in one day and sets up an email schedule for a month in advance.
To make your mailing list work, read the article "How to make an effective email campaign: 6 principles".
MailChimp is a convenient and simple mailing service, but it is merciless to spammers. If you have a low-quality subscriber base, most likely your account will be quickly blocked.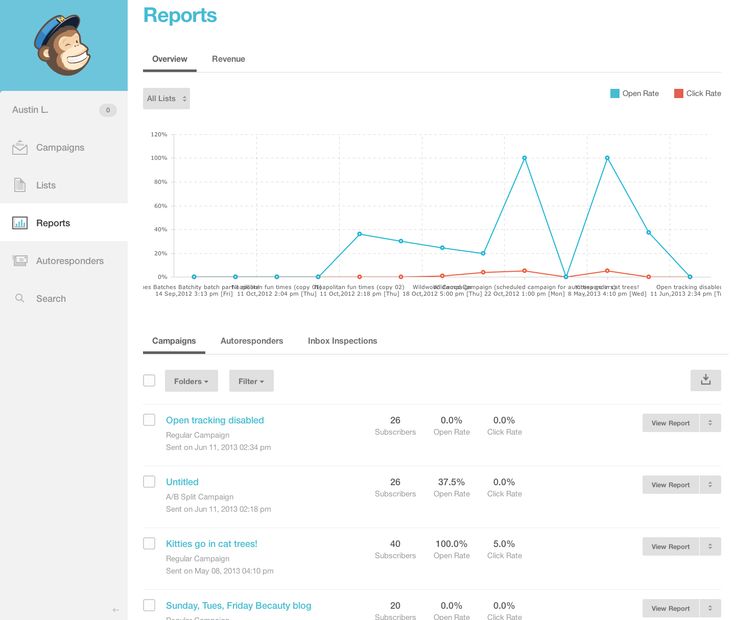 I recommend always checking the database before starting to work with the service. To do this, you can use the Datavalidation service. If you have any questions, write them in the comments - I will be glad to answer. nine0009
Do you want to create a mailing list? Want to send email updates to your subscribers when you publish a new blog post? MailChimp is one of the leading email service providers in the world and is very easy to use. In this guide, we will show you how to use MailChimp and WordPress to get more followers.
MailChimp and WordPress Image from wpbeginner.comOver 70% of users who leave your site will probably never return unless they buy something from you or you convince them to subscribe to your mailing list.
Email is private, personal, and by far the most direct form of communication on the Internet. Most people check their inbox more than their social media feed. The email will remain in the inbox unless the user takes action on it. On social networks, your message will be placed in the user's timeline. nine0009
Check out our guide on why you should start building your mailing list right away.
Over the years, we've found MailChimp to be one of the most beginner-friendly email marketing services. What for? Because it is very easy to use and has many integrations with WordPress.
It's also by far the most accessible for newbies because it's free if you send less than 12,000 emails per month or have less than 2,000 subscribers. This means you can get started right away without paying anything. nine0009
Now that your subscribers are growing (over 2000), you will be prompted to upgrade to a paid plan.
In addition to simply collecting and sending emails, some of MailChimp's other cool features let you customize RSS for email subscriptions, create beautiful email templates, set up autoresponders, and track the performance of your email campaigns with detailed analytics reports.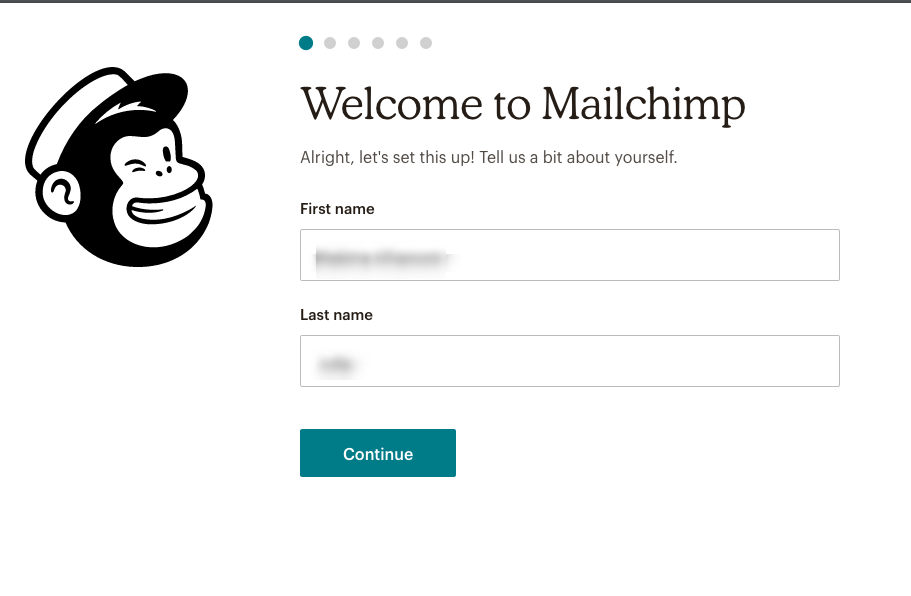
To connect MailChimp to your WordPress site, the first thing you need is a MailChimp account.
Visit the MailChimp website and click the Sign Up Free button.
Fill in your email address and create a username/password for your account.
MailChimp Register Image from wpbeginner.comAfter logging in, you will be redirected to the MailChimp control panel.
The first thing you need to do in your MailChimp account is set up a mailing list. On the MailChimp control panel, click the "Create List" button.
Creating a mailing list in MailChimp Image from wpbeginner.comYou will be asked to provide information such as a name for your mailing list, an email address that users can reply to, a reminder for people how they got on your list , etc. Fill out the form and click the "Save" button. nine0009
That's it, you've successfully created your first mailing list.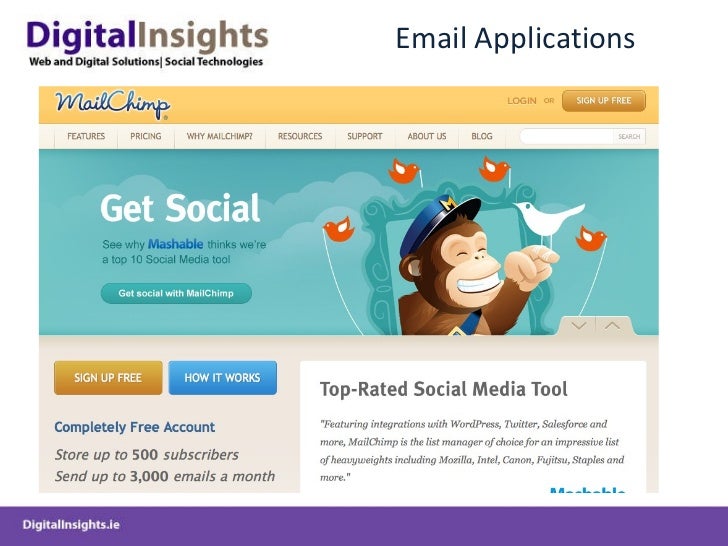 Now you need to connect your mailing list to your WordPress so your website visitors can subscribe.
MailChimp comes with a built-in basic subscription form. All you have to do is go to the listings page in your MailChimp account. Then click the down arrow button next to the mailing list and select subscription forms. nine0009 Getting the registration form code from MailChimp Image from wpbeginner.com
On the next page, you'll see some of the types of forms you can create. You need to click on the select button next to Embedded Forms.
Select inline forms Image from wpbeginner.comYou will be taken to a settings page where you can choose which fields you want to display in the form, adjust the form width and other settings. When you're done, just copy the embed code. nine0009 Copy the registration form embed code from MailChimp Image from wpbeginner.com
Now you need to visit the WordPress admin panel and click on Appearance » Widgets. Add the text widget to your WordPress sidebar and paste the registration form code into it.
That's it. You can now visit your site and see the MailChimp signup form in action.
MailChimp Email Subscription Form Image from wpbeginner.comWhile adding a basic MailChimp signup form to WordPress is easy, getting people to join your mailing list is not.
OptinMonster (@optinmonster) allows you to add various types of signup forms such as a popup with a highlight, a floating footer bar, post-post forms, sidebar forms, plug-in forms, and more.
You can do A/B testing, page level targeting, choose from many different templates, and even use an exit intent. nine0009 OptinMonster popup exit Image from wpbeginner.com
We created OptinMonster because we needed a WordPress lead generation solution that was easy to use and delivered results.
OptinMonster works with all major email marketing providers, including MailChimp.
Now that you have visitors subscribed to your mailing list, it's important that you send them regular updates. nine0009
You can always log into your MailChimp account and manually send an email to your subscribers, but with MailChimp you can also set up automatic campaigns that email your latest blog posts. This is called an RSS newsletter. (See our guide to WordPress RSS Feeds.)
If you've been using FeedBurner to send emails to your RSS subscribers, then you need to read why you should stop using FeedBurner and move on to Feedburner alternatives. It also shows how to move FeedBurner subscribers to MailChimp. nine0009
To set up an RSS email campaign, you first need to sign in to your MailChimp account and then click Campaigns » Create Campaign.
Creating Campaigns in MailChimp Image from wpbeginner. com
com On the next page, MailChimp will show you the different types of campaigns you can create. You need to select an RSS driven campaign.
Create an RSS campaign in MailChimp Image from wpbeginner.comEnter the RSS feed URL and choose when you want to send an automated email. You can send emails daily, weekly or even monthly. You can also choose the time for email. Once you've selected your settings, click the "Next" button at the bottom right corner of the screen to continue. nine0009 Enter the URL of the RSS feed and select the time and frequency of the feed. Image from wpbeginner.com
MailChimp will ask you to select a list. Select your list and click the "Next" button to get to the campaign details.
First you need to enter a name for your campaign. After that, you will notice that MailChimp has automatically filled in most of the fields for you. These default settings are suitable for most websites. However, feel free to customize it to suit your needs. Click the "Next" button to continue. nine0009 Setting up an RSS Feed Image from wpbeginner.com
The next step is to choose a template for your email. MailChimp offers many different options for this. Choose the one that suits you best by clicking on the select button next to it.
Choosing a MailChimp RSS Campaign Template Image from wpbeginner.comMailChimp allows you to customize your email design. You can add your logo, header image, change the text according to your website requirements. Basically you need to add an RSS header and an RSS Items field to your email template. nine0009 RSS Email Design Image from wpbeginner.com
When you're done, click Next. Finally, click "Save" and exit at the top right corner of the screen.
That's all you have successfully created your WordPress RSS Feed Newsletter with MailChimp.
We hope this article helped you learn how to use MailChimp with WordPress. Now that you've started building your mailing list, you can take a look at our guide on how to grow your mailing list.