Staying in touch has never been easier.
Viber is a secure, private, fun messaging and calling app, connecting over a billion people worldwide!
With group chats, disappearing messages, reminders, and more, you can do it all with Viber!
Make Free Audio and Video Calls
Enjoy unlimited Viber-to-Viber calls with up to 50 people and make crystal-clear audio and video calls to anyone in the world. Great for connecting with friends, family, and colleagues!
End-to-end Encryption
On by default for all 1-1 calls, chats, and group chats, end-to-end encryption allows to you to communicate with confidence knowing that all private messages are, well, private. No one, not even Viber can read your messages.
Open a Group Chat
Catch up with friends, family, and coworkers by opening a group chat for up to 250 members. Use polls and quizzes, @mentions and reactions to get the most out of your group!
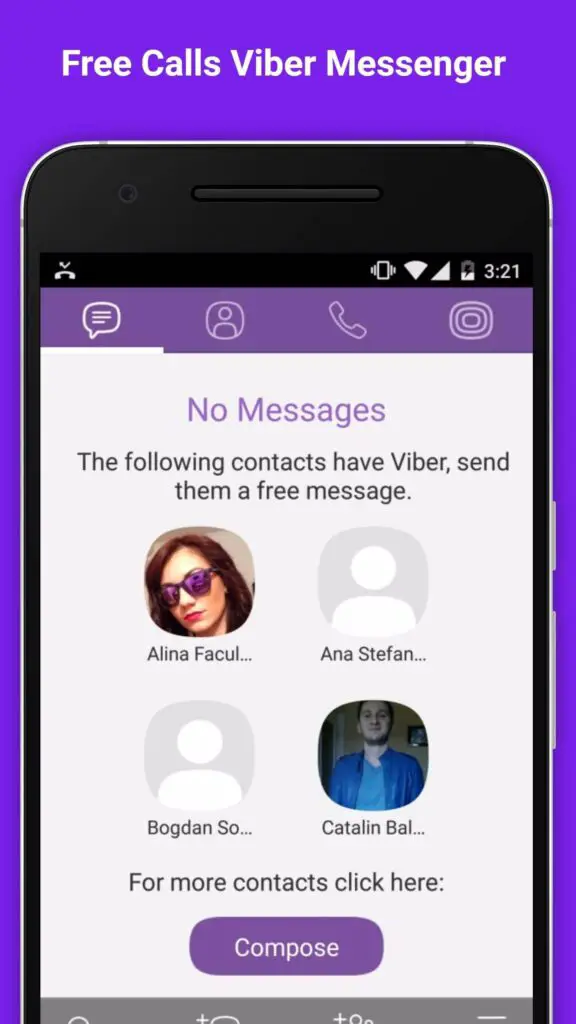
Send Free Messages
Staying in touch has never been easier. Send a free text, photo, sticker, GIFs, or video message, along with many other types of files. Viber is a great alternative for fans of SMS texting!
React to Messages
React to messages with emojis to express exactly how you feel in your 1-on-1 and group chats!
Self-Destructing Messages
Send Disappearing Messages in your 1-on-1 and group chats by setting a timer for each message. Choose how long the recipient has to read your message - 10 seconds, 1 minute, or up to 1 day!
Express Yourself with Lenses GIFs and Stickers
Characters are unlimited on Viber! Get creative with fun, funny, and beautifying Viber lenses. GIFs and over 55,000 stickers also await you - you can even create your own!
Communities & Channels
Whether it's sports, news, cooking, travel or entertainment, get the content you really want and connect with others with similar interests. Interact with an unlimited number of people, about a shared topic or passion. Start your own, and enjoy more ways to engage your members and subscribers!
Make Low-cost Calls to Landlines with Viber Out
Call any landline or mobile phone with Viber Out’s low-cost international calling service.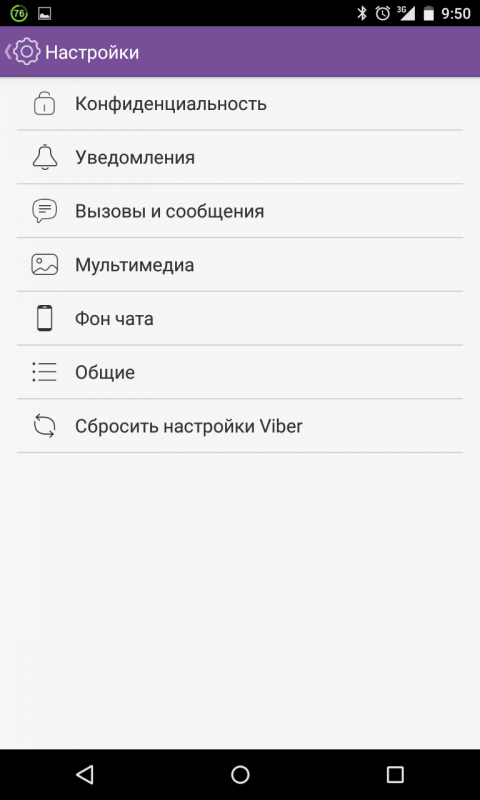
Viber Out Subscriptions are bundled minutes to call a specific destination, which can be purchased in-app and be renewed monthly or weekly depending on your plan. If you subscribe via iTunes, payment will be charged to your account when the purchase is confirmed. Subscriptions automatically renew unless auto-renew is turned off at least 24 hours before the end of the current period. Your Account will be charged for this renewal up to 24 hours before the end of the current period at the rate of your selected plan. You can manage your subscription and turn off auto-renewal at any time by going to your iTunes account settings on your device.
Viber is part of the Rakuten Group, a world leader in e-commerce and financial services. Start using your unlimited call app for free today!
Terms & Policies: https://www.viber.com/terms/
Version 18.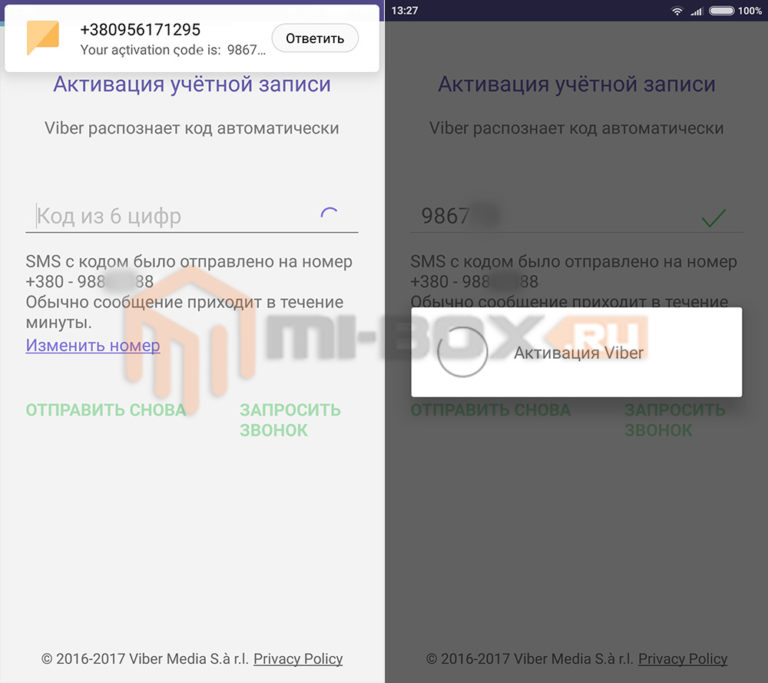 7.0
7.0
Every update has behind-the-scenes upgrades to make Viber better ;) Always get the latest version for the best Viber experience
Viber respects your privacy and it is a top priority for us, just like it is for you.
425.3K Ratings
UPDATE: I’ve been contacted by support, it seemed like they really care to fix the problem. With new update my Viber is working without any problems. I really hope that they will not have any problems like this in the future. So… because support contacted me within 24hours, because they tried and care to resolve problem I changed my review to 5 stars.
I’ve been using this app over 6 years. I was even recommending it to all my family and friends.
It is awesome, fast, never any problems with audio or video calls until the latest update. Since I updated it to the newest version it went down the hill. App start kicking me out, then it finally stopped doing that but then it start freezing. It froze for few minutes and then crash. I can’t do anything. I can’t back it up, I can’t report a problem, I can’t contact support… Nothing! I even tried removing the app and downloading it again. Even that didn’t help. It is so frustrating! I saw in the comments that I am not the only one with this problem. I really hope you will fix this problem soon.
We've heard about this from other people as well. We're collecting information from people who are experiencing this issue and would be really glad to hear more about it from you. Could you provide some more detail? You can do that here: https://vb.me/store-en
I have been a loyal and frequent user of Viber for at least a decade now.
Viber has been my app of choice over all other chat services, including phone text. Viber has been serving me great until recently. The most recent update has deleted my account from my secondary device (iPad). After several unsuccessful attempts to log back in and restore my chat history, I found an article on the Viber support pages which clearly states that it is no longer possible to restore 1-on-1 chats and group chat history on a secondary tablet device. Which is very strange, because chat history actually syncs perfectly on a secondary computer device. Why was this important functionality suddenly removed? What is the point of backing up chat history if I can’t sync with my secondary tablet devices? When I start a chat on the primary device, I am no longer able to pick it up on my secondary device. This makes the app on the secondary device useless, so unfortunately I had to change my previously solid 5-star rating to 3 stars. App developers - please fix this problem, and re-enable seamless chat history sync across all devices, as it works on the competitor apps.
Otherwise the Viber app becomes completely pointless on the secondary devices. Thank you.
Hello Anika,
Thank you for reaching us, please share the details with our support team by opening a ticket mentioning Play Market and adding all relevant information to escalate the feedback and assist you: vb.me/store-en Thanks!
I have been an avid user of the app for 7 years and it’s been great with the stickers and gifs that make messaging interesting. But I’ve had problems receiving and sending messages in the past month. I made sure I am using the latest version of the app and iOS software. So when that did the fix my problem, I opted to delete and reinstall the app since that seemed to fix the issue for some people.
However, when I tried to restore my chat history, the app would crash after 1% and revert to my phone’s home screen.
When I try opening the app, the restore screen would pop up and again crash after 1%. Granted I have about 28gb of chat history, but I have enough phone and iCloud storage that it shouldn’t be an issue. I reached out to the Viber support team, but after the quick initial response with their “solutions” and me answering “No, tried it, still crashing on me,” I haven’t heard back from them which has now been 5 days.
I really hope that they are working on the issue and not just keeping me on a shelf of “to-work-on-later” issues. But until I receive a viable solution to the problem, the app will remain deleted for me since when (and if) the restore eventually chooses to work for me, I don’t want new messages to be erased.
Hi,
Thanks for taking the time to let us know. We're actively investigating this issue and collecting information from people who are experiencing it. Would you mind sharing more details? You can do so here: https://vb.me/store-en
The developer, Viber Media SARL., indicated that the app’s privacy practices may include handling of data as described below. For more information, see the developer’s privacy policy.
The following data may be used to track you across apps and websites owned by other companies:
The following data may be collected and linked to your identity:
The following data may be collected but it is not linked to your identity:
Privacy practices may vary, for example, based on the features you use or your age.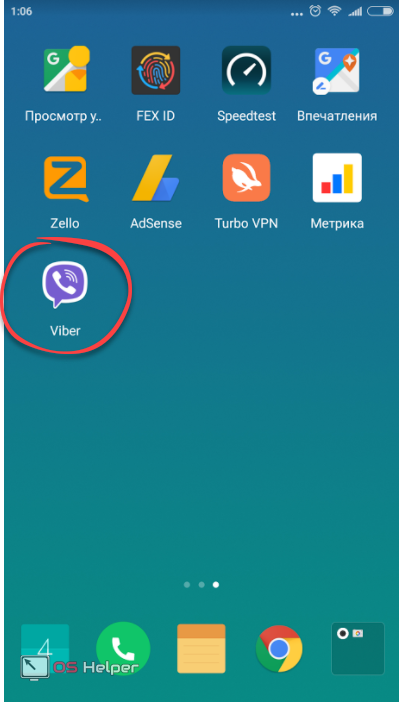 Learn More
“How to use two Viber in one phone? I have a dual SIM phone so that I can have two Viber accounts, but I can’t seem to configure two apps in a single phone!”
As surprising as it might sound, this is one of the many queries we receive from Viber users who wish to use two accounts on one phone.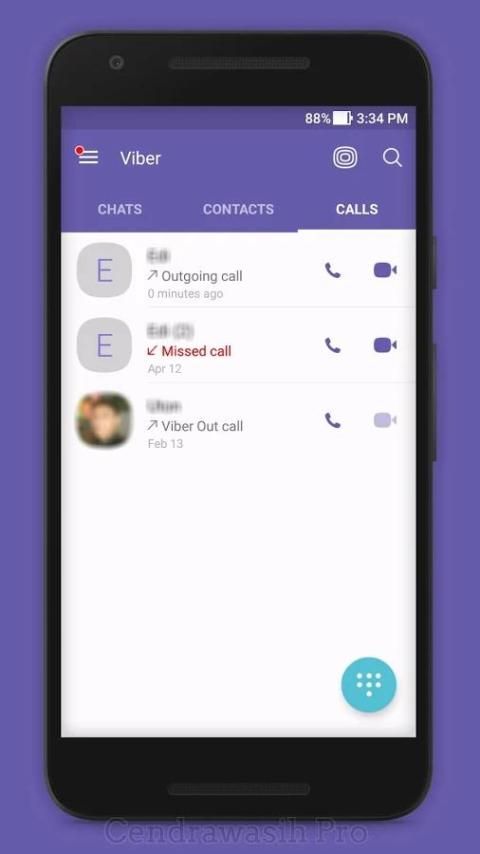 For instance, you might want to keep one Viber account for your work and the other for your chats. While it might sound tricky, some workarounds can help you do the same. To do this, you can use an inbuilt feature of the device or any third-party application. In this guide, I will teach you how to use two Viber in one phone with some other Viber tips to consider.
Free DownloadFree Download
safe & secure
When we talk about running dual apps on a single device, Parallel Space is one of the first solutions that come to our mind. Being an extremely popular app, it is already used by millions of users to duplicate several applications. Furthermore, Parallel Space is compatible with every primary social application like WhatsApp, Facebook, Instagram, and more, so it can easily help you run two Viber accounts on your phone.
After getting to know these prerequisites, you can learn how to use two Viber in one phone by following these steps:
Step 1: Download Parallel Space on your Android
To start with, install Parallel Space on your Android phone by visiting its App Store page. Once it is installed, launch Parallel Space and agree to its terms and conditions to get things started. The basic services of the app are free, but you can also make in-app purchases for its advanced features.
Step 2: Create dual space for Viber
Whenever you wish to have two Viber apps on your phone, launch the Parallel Space application and select Viber from the list of apps it supports. Please tap on the add icon and include Viber in its dual space feature.
Step 3: Access two Viber apps
That’s it! Once you have added Viber to its dual space, you can go to your phone’s home and access both apps. In addition, you can link both these apps to different Viber accounts.
Just like Parallel Space, you can also use Clone App – App Clones & Dual App to run two Viber accounts on your phone. Apart from having two Viber accounts on your phone, you can also have another layer of security to keep your chats safe.
Here’s how to use two Viber in one phone using the Clone App:
Step 1: Install Clone App on your Android
If you don’t have Clone App installed on your phone, then go to its Play Store page and download it on your Android.
Step 2: Create the dual Viber app
Launch the app and go to its “Clone App” feature, where you can see all the available apps that can be cloned. Just add Viber to the list and create its clone.
Step 3: Use two Viber accounts
In the end, you can have the cloned Viber app installed on your phone. Then, you can launch it and connect it to your second phone number.
You may also be interested in How to Use Two LINE Accounts on iPhone and Android Phone?
I’m sure that by now, you can teach anyone how to use two Viber in one phone easily. However, if you are an avid user of Viber, you should take some preventive measures to keep your data safe. I recommend using MobileTrans - WhatsApp Transfer that can backup your Viber chats with just a single click. The application can save your Viber conversations, group chats, shared attachments, and so on. Later, you can restore the previously taken backup from your computer to your iOS device.
Step 1: Launch the Viber backup tool
To begin with, just connect your iOS device to the system using a working cable and launch MobileTrans on it. Then, visit the “Backup&Restore>App Backup&Restore” and go to the Viber section from the sidebar.
Step 2: Backup your Viber chats
Click on the “Backup” button and start the process to save your Viber data on your computer.
Wait for a while and disconnect your device when the backup process is completed.
Step 3: Restore Viber backup (optional)
You can restore the existing Viber backup to your iOS device if you want.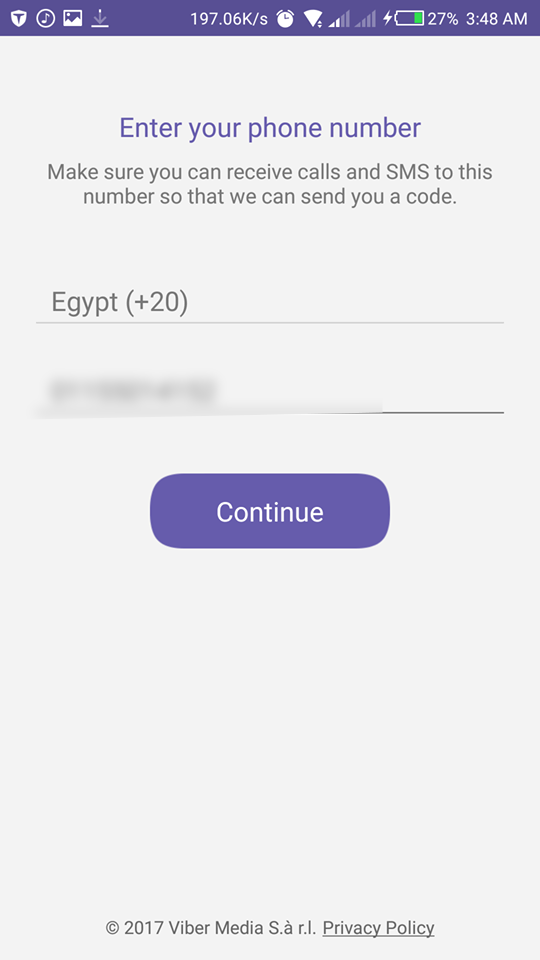 Connect it to your system and select the “Restore” feature of the MobileTrans Viber module. From the provided backup list, just select the file of your choice.
Start the restoring process and ensure your device stays connected to the system. When the process is completed, you can safely remove your device.
That’s a wrap, everyone! I’m sure that after following this guide, you can run two Viber apps on your phone. To do this, you can try any other application or even explore your phone's native dual apps feature. If you don’t want to lose your Viber chats, then use MobileTrans to take a backup of your device. Then, try MobileTrans to manage other social apps like WhatsApp, LINE, WeChat, and Kik or share this guide with others to teach them how to use two Viber in one phone.
Back up all content on Viber to PC quickly and easily. You can restore the backup to any iOS/Android device.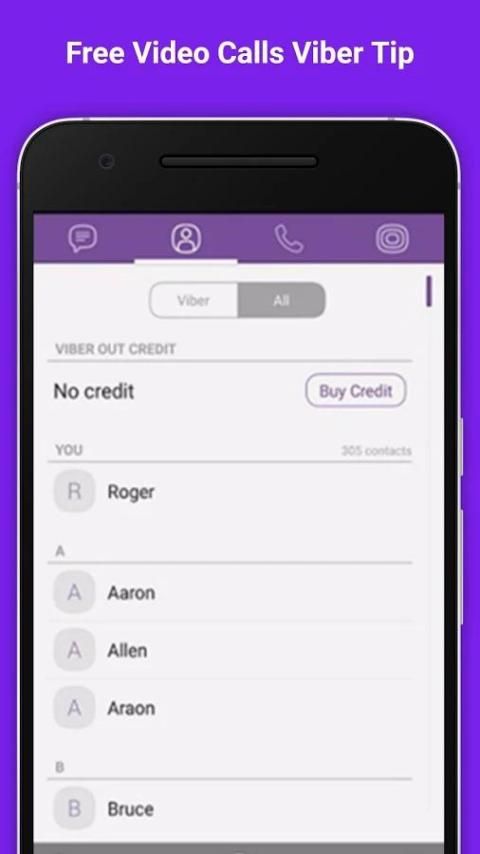
Try it FreeTry it Free
safe & secure
New Trendings
Viber is one of the most popular applications for Android. By installing this messenger on your phone, you can chat and call your friends for free, you just need to have a stable Internet connection. Other useful features are also available for Viber users - public accounts, file sharing of various formats, group chats and video calls. But those who first encounter Viber should understand in detail its features - the main functions and settings for comfortable work. 9Ol000
After you have downloaded and installed Viber, you need to configure it. Below are the main settings sections that you can adjust to your personal preferences and comfortable work in the application.
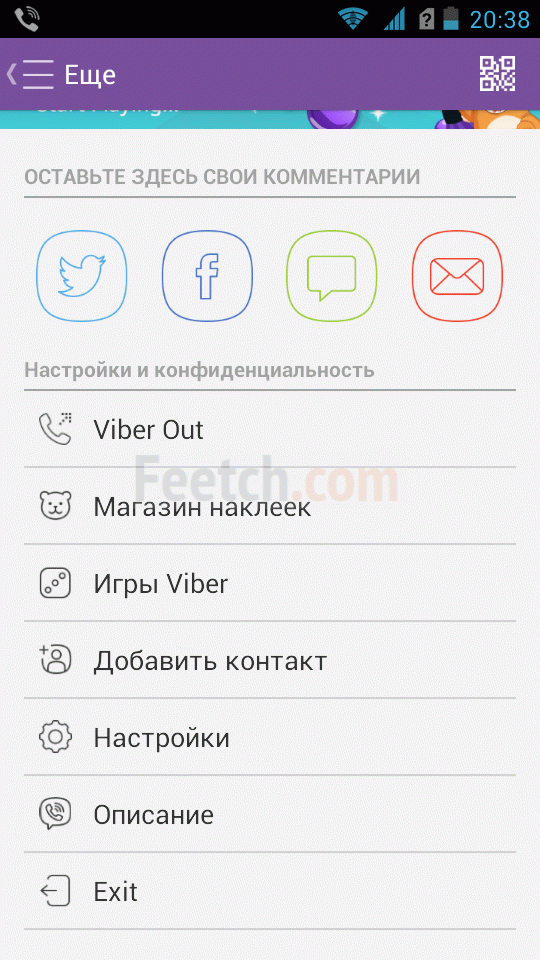
The first thing to start with is to fill in the profile data, as your personal information is displayed to other users and affects not only yours, but also someone else's convenience. Therefore, after you have downloaded and installed Viber, go to the application and go to the "More" tab at the bottom. A page will open in front of you, and the first part of the screen is your account card, which is also displayed to other Viber members. Here you can:
To start editing your account, you need to click on the icon similar to a pencil in the upper right corner. To add a screensaver, you need to click on the highlighted space under the photo or on the camera icon in the lower right corner. The system will offer you two options - "Gallery" or "Camera". If you want to add a photo or a picture from the phone's gallery, then select the appropriate item, and if you want to take a photo right now, then go to "Camera".
Once your card splash screen is ready, all that's left is to write the name you want other users to see. It can be both your personal and fictional. Most often, users simply indicate their personal name or surname with a given name.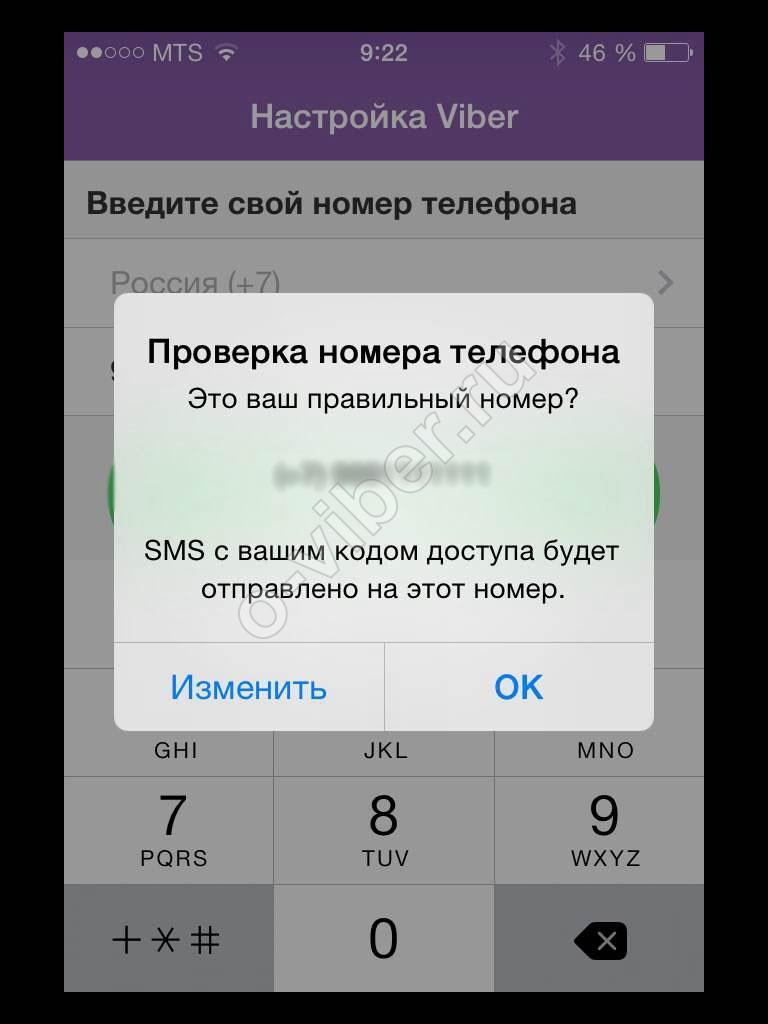 To enter a name, you need to put the cursor in the line, which is located under the photo. Click "Finish" to save all settings.
In Viber, you can also change the usual appearance. This condition will not affect the operation or functionality of the application, but it will look interesting and special. So, to change the background of the interface, you need:
You can turn on a dark background instead of a white one, and then the correspondence will also change to another contrasting color. Looks very stylish. Under the "Dark Theme" feature, there's an option at the bottom to "Change default background". It allows you to change the canvas in the chat. If you want to get away from the standard background in correspondence, then check the box and select the screensaver you like in the Viber gallery. Changing the background can be applied both to all chats, and individually to a specific one. However, to do this, you need to configure it in the chat window itself, through the function button (three vertical dots).
In addition to the standard backgrounds from the application, you can also use any photo or picture from your phone gallery as a screensaver.
One of the most important settings is privacy. To go to the Viber menu and manage privacy settings, you must again select the "More" tab, then "Settings", "Privacy". In this menu, the following items will be available to you:
Under each function there is a brief description, and if you want to use this or that option in Viber, simply activate it by moving the lever until it turns lilac, or check the box (depending on the installed version of the application). For example, “Online” shows when you last logged into Viber, and “Blocked numbers” or “Hidden chats” will reflect users added to the “black” list or correspondence that are not available in the general chat history.
Many users, after installing Viber on their phone, encounter intrusive notifications, as a result of which they either stop using the application altogether or delete it. To work in the messenger in a way that is comfortable for you, set it up based on your preferences. Most often, the notification setting is responsible for this:
Check out all the items that are responsible for alerting the Viber app. If you want to always be aware of incoming messages and calls, then turn on the necessary positions, and if you don’t want notifications to distract you, you can turn them off completely or turn off the sound. In this section, you can also set up a ringtone for notifications and for an incoming call.
Based on the name of the section, it is responsible for the operation of chats and calls. It is also located in the Viber settings, the "Calls and messages" item. What can be enabled or disabled here:
Under each function there is a short description of the setting. You get acquainted with each and by ticking the checkbox activate the option. In a similar order, you will eventually be able to deactivate it if it does not suit you. As for the “Viber In” function, before turning it on, be sure to familiarize yourself with its purpose through the “Details” button, since in some cases ordinary phone calls can be forwarded to Viber.
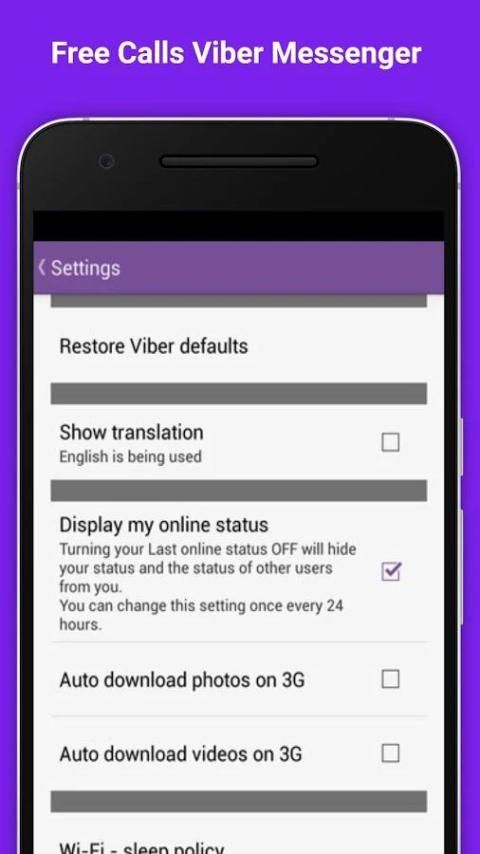
Viber multimedia settings Through the "Data and multimedia" section, you can configure the sending and receiving of media files via Viber. Read all the positions in detail, as the activation of some functions can lead to clogging the phone's memory with unnecessary information. Go to the "Data and multimedia" menu, also through "More", then "Settings". What is there:
If you enable "Auto-download via Wi-Fi" and "Auto-download via GSM", then all photos, pictures and videos received from other users are automatically saved in your phone's gallery, in the "Viber" folder.
The best option would be to turn off the auto-download functions, as an unlimited number of media files accumulate in the phone and clog up the memory, which can affect the operation of the device and the application. Therefore, it is better if you selectively save only the necessary photos, videos and pictures from Viber. To do this, just click on the selected file, and resave it to the device in the available functions.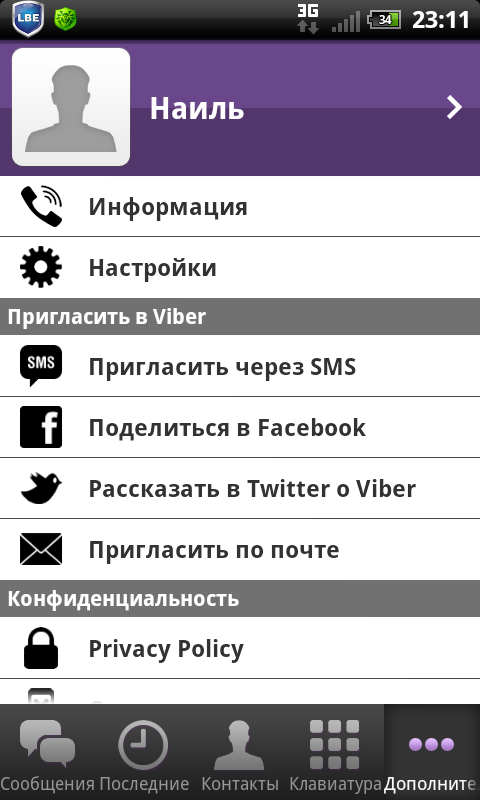
To protect yourself from losing important data in Viber, it is best to enable the "Backup" function. If you accidentally delete a message or an entire conversation, you can easily restore them. This option will be useful if you decide to reinstall the application on your phone or switch to a new smartphone, then all your correspondence can be transferred under one account. To regularly archive all messages and restore them if necessary, follow these steps:
Only text messages are saved in the chat backup. Transferring media files and the call log to the storage will not work. Therefore, in order not to lose important information, save the files manually, each separately.
The archive of your conversations is stored in the storage of your Google account.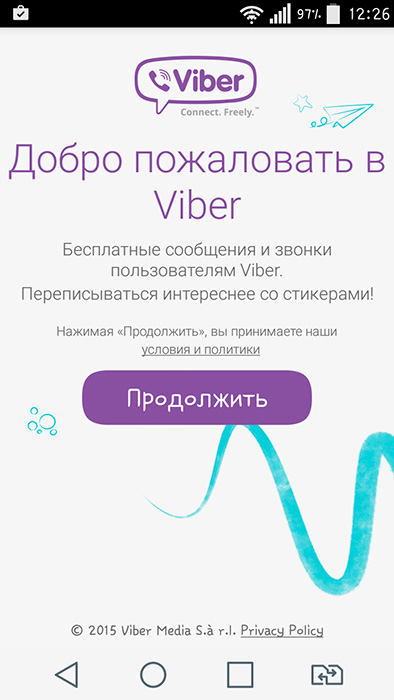 The archive is updated with a certain frequency - a month, a week, a day. You can set the frequency yourself, in the same section, above the "Create a copy" button. If Google mail is not tied to your phone, then this must be done through the "Settings" on the phone. If you need to find deleted messages or a whole chat, you need to select "Restore" in the "Backup" section in Viber.
To finally set up Viber, it remains only to look at the "General" section. What is available here:

If you doubt the need to activate a particular function, then you can turn it on and after a certain time of using Viber, understand whether it interferes with your comfort in working with the application or not. If anything, you can turn it off at any time in the general settings of the messenger. Once you have checked the box next to the desired option, it takes effect immediately and does not require you to restart the application or phone.
After you have made all the necessary settings in Viber, you can start working. With the release of the new version of the application, you can find new functions for yourself in the "Settings" section, which you can also familiarize yourself with and connect. If for some reason the selected parameters do not suit you or interfere with comfortable work, then you can return everything back. You will be able to get the application as it was immediately after installation. To reset all the settings you have made, you need to go to the “More”, “Settings”, “General” section and select “Reset settings” at the bottom. After confirmation, all the parameters configured earlier by the user, return to the original ones. Save only the list of contacts, the history of correspondence, as well as blocked users and hidden chats.
Author admin Reading 12 min Views 597 Published
Viber has gained a lot of popularity in recent years. It is used by both adults and children. And not only for everyday communication, but also for doing business. A lot of goods are sold through Viber today, etc. Installing the program is not so difficult, but you need to be able to set it up correctly and transfer all the data in case of a move. Today we will just talk about how to do this on an Android smartphone.
Content
 This is easy to do: carefully follow the step-by-step instructions below.
You can launch Viber directly from the store. There is an "Open" button for this.
The program shortcut will also appear on the home screen, if, of course, the corresponding option is activated in the Google Play settings.
On this we have finished installing Viber, we can move on to why we are all here, in fact, gathered. We begin the review of the messenger.
In the course of the material presented, we will talk about the functionality of the program and at the same time consider how to use it.
As soon as the software is launched for the first time, we will have 2 options: either start using it from scratch, or restore existing data. So you can copy the history of correspondence, photos, contacts and other objects that were in your previous Viber. This is necessary, for example, when we change the phone.

After that, if the data is correct, activation will start. You do not need to enter any codes, Viber and the GSM module of your gadget will do everything themselves.
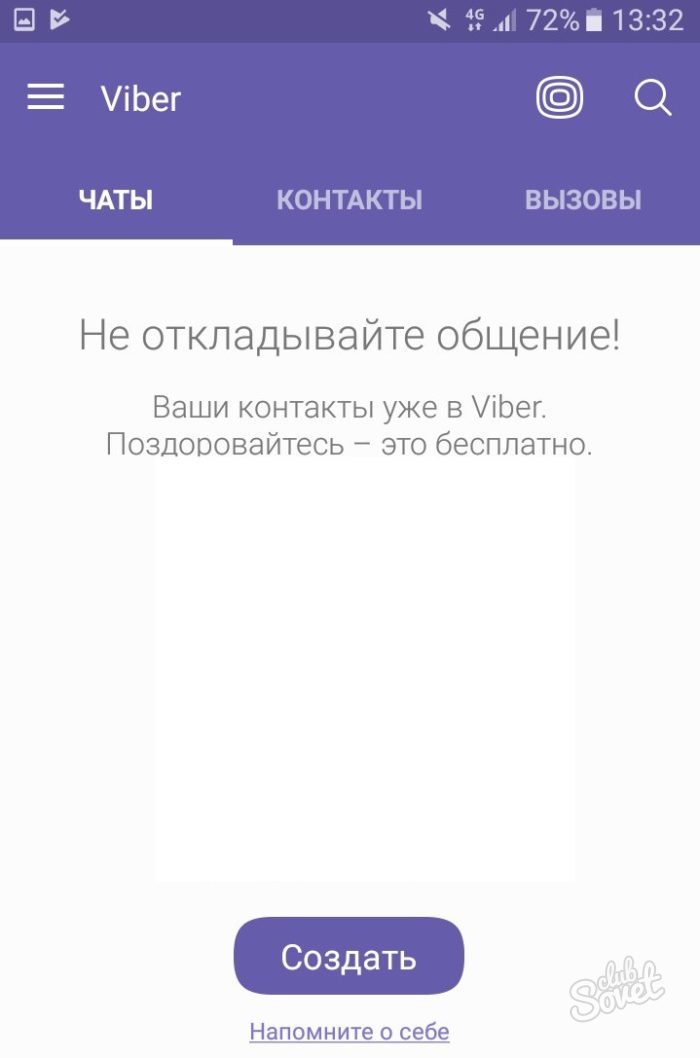
This is what the Viber software interface looks like. In its upper left part there is a menu button, and in the main work area there are 3 tabs, such as: "CHATS", "CONTACTS" and "CALLS".
This section of the main working area of our messenger stores all the correspondence that was started or accepted by us for the entire time of work. Next to each object is the time of the last message.
In the "CONTACTS" tab we see our entire phone book. People who use Viber will be marked with the corresponding icon here. So you can understand which of your friends is online and write to him.
The last tab is CHALLENGES. Since here you can not only write, but also make voice and video calls, the developers have provided this section.
In Viber, as well as in other combine messengers, there are groups and public pages that can have subscribers and, accordingly, be viewed. Below you will find a button surrounded by a red frame: it is this that opens the public menu.
The section is made in the form of a tiled menu, and the tiles here, as in the Windows 10 Start menu, are of different shapes. Naturally, there is a search function.
We went to one of the public and see that there are a number of auxiliary tools to work with it. Here is a list:
 Here you can complain about the activities of the group, start reading it, turn on the dialogue, learn more about publics or return to the search screen;
 It all looks like this:
All the settings of our messenger are concentrated here, as well as its main functions. Let's take a closer look at the Viber main menu, which can be launched using the button marked below.
The first thing that catches your eye is the absence of a photograph. Since our article is not just a review, but also an instruction for setting up the program, we will tell you how to create your own avatar and thus decorate the messenger for us and for the interlocutors.
Done. As you can see, the data from Facebook was pulled up to our profile without any problems.
Going further, we have to consider the functionality of the main menu.
In addition to the standard functionality inherent in other messengers, Viber has one interesting and useful feature. Directly from the program, we can call any mobile operator in the world anywhere in the world. Naturally, not for free. You can see the prices for this pleasure on your screens. At first glance, it is a little expensive, but not more expensive than international calls at the rates of your operator.
Stickers are almost the same as emoticons, with the only difference that they are larger, much better drawn and more diverse. Viber has both paid and free stickers. You can install them in your set with a simple tap on the download arrow on the right side of each item.
In order to add a new person to your phone book, you need to know his number. In the field located in this menu, there is a column for entering it. Enter your opponent's mobile number and click "CONTINUE".
You can also add a person as a friend by scanning a QR code (a fairly universal method). The user you want to authorize must open the main menu, or rather, its “QR-code” section, and allow it to be scanned. After that it will be automatically added to contacts.
All the settings present in the program will be discussed in detail below. For greater clarity, we will attach a screenshot to each of the points.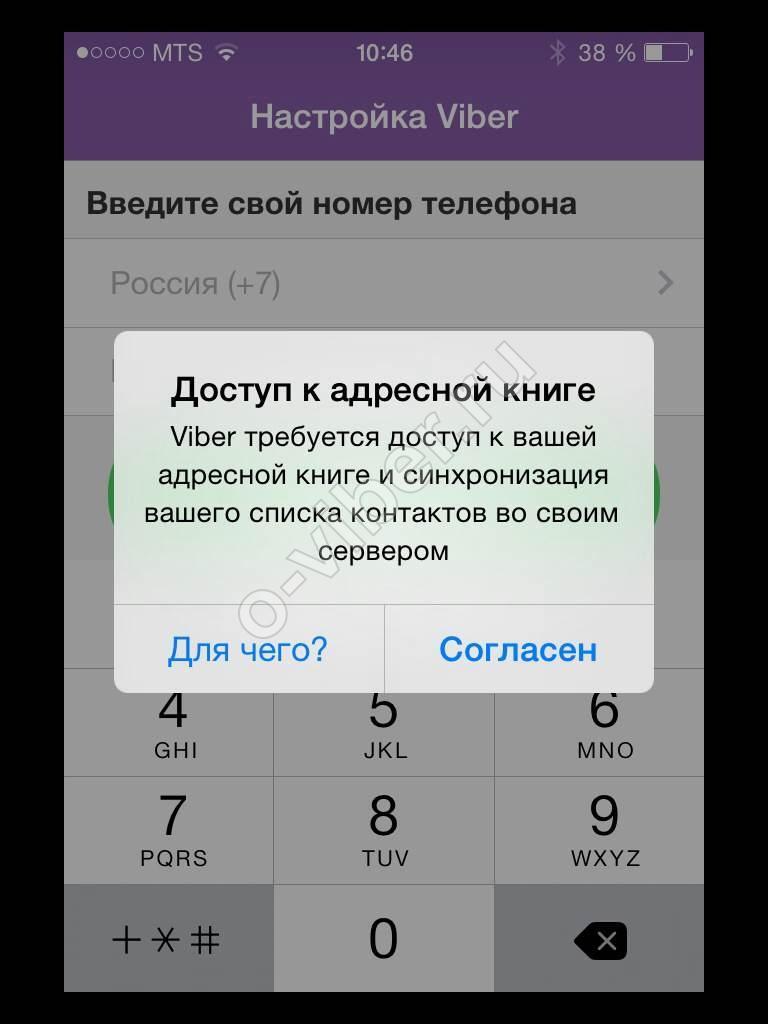
The first thing that catches your eye is the backup functionality. Let's open it.
We do not have copy buttons. This is because the program is not connected to a Google account. Let's fix the situation: click the item marked in the screenshot.
There can be multiple Google accounts on the same Android smartphone. If so, then choose one of them. When the choice is made, click "OK".
You will also need to confirm your intention to Google.
Now we will have a button "Create a copy" and we can start backing up the data.
The process does not last long, and its progress can be tracked by the progress bar available right there.
The second item in our settings is changing the phone number. If for some reason you had to change it, this functionality will come in handy.
The last section in the "Account" menu is the toolkit for disabling it. It is not clear why such functionality is needed, but, nevertheless, it is there.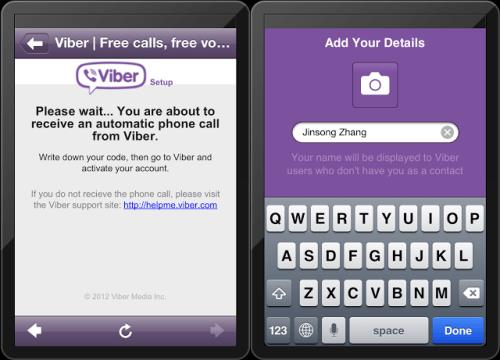
Next we have privacy. That is, everything related to the security of your personal data. We can turn off notifications about our appearance on the network, uncheck the box that shows that we have read the message and access the blacklist.
You can also prevent people who are not in your contacts from seeing your profile picture. Even lower, you can turn off the collection of data that is anonymously sent to the Viber servers or view synchronization with the social network that you have installed.
If you want the messenger to always notify you of important events, you can use this menu:
This is what our settings screen looks like:
Next we can set up calls and messages.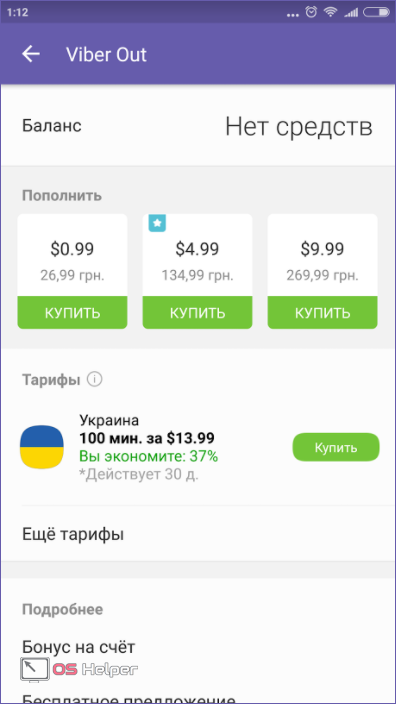 First of all, Viber In is turned on and off. This is a functionality that allows you to forward incoming calls to your phone directly to Viber. Next comes the activation of the mode of receiving service messages, as well as sending and clearing the history of correspondence.
Even further down, we can disable or enable video calls, activate the proximity sensor, and configure chat messages to be sent on pressing the "Enter" button.
Next comes the section responsible for processing media data. Its functionality is as follows:
 It is precisely in order to prevent this that this paragraph is needed;
Here we can change the chat background by selecting a new picture from the existing collection or adding our own. Initially, click on the indicated item.
This is a gallery of ready-made solutions - we can choose one of the drawings available here.
Clicking on the button marked in the screenshot below will allow us to add any picture from the phone's memory.
If we tap on the icon with the image of the camera, the camera will open, which can be used to take a picture of the future background.
The changed background will be displayed in the same menu, and your communication will become much more pleasant.
We go further and proceed to the consideration of the settings item called "General". Here you can turn on the Viber icon in the Android status bar, activate the display of all contacts, set up their synchronization, turn on the English interface language, or put Wi-Fi into standby mode. There is also an item to completely reset all program settings.
This is the last section of the Viber main menu. There are official product communities from Racuten, as well as their website and support service.
The main working area of Viber, where, in fact, all correspondence is conducted, is the dialogue. Below we will describe in detail all its features and available functionality.
By tapping on the icon with three dots, we will open the messenger's auxiliary menu. The function is located in the upper right corner.
Here you can make an outgoing Viber Out, create a dialogue, edit messages, go to a secret chat and get basic data about the correspondence.
Secret chat is a special type of conversation that supports additional features:
We made sure the features worked well, we weren't even able to take a screenshot of the secret chat.
Let's move on to another moment for which users love Viber so much. These are, of course, his stickers. At the bottom of the screen, you can switch between them and regular emoticons. As new stickers are added, tabs will immediately appear to switch between them.
There is also a button to access the gallery. With its help, you can send your interlocutor a picture or video.
By tapping on the camera start button, we can take a picture and immediately show it off to a loved one.
The next section is about additional functions. There are a lot of different add-ons, for example, YouTube, Booking, Movies, Gfycat, etc.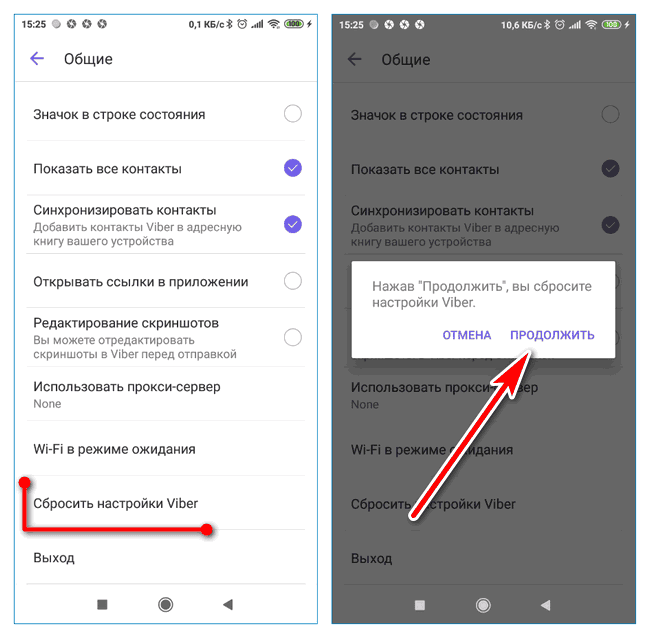
Another distinctive feature of the messenger is handwritten stickers, which are called doodles here. We can choose the color, size and shape of the pen, and then sketch something freehand and send it right away.
The last item we have is the file menu. Through it, you can send a file, location or contact.
As we said, short voice messages are supported in Viber. To launch them, you need to hold the button indicated in the screenshot and speak.
But if you do not hold the icon, but simply tap it, the short video message mode is activated, which makes communication even more fun.
The manual is suitable for all Android smartphones and tablets, such as Lenovo, Fly, Samsung, etc.
So, we have fully reviewed the functionality of Viber. In our opinion, this application is undoubtedly good, but by no means the best: Telegram is inexorably on its heels.


:strip_icc():format(jpeg)/kly-media-production/medias/1567268/original/088714700_1492236294-facebook_setting3.jpg)