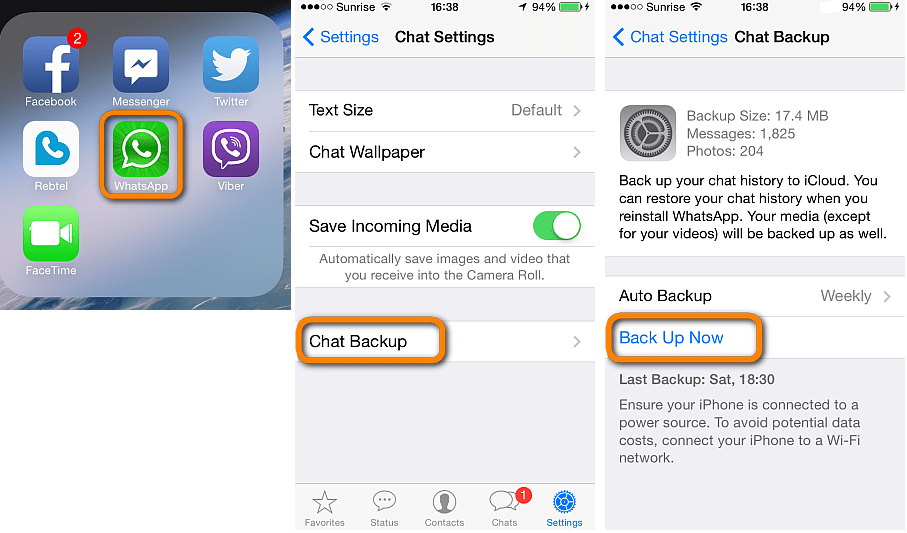
By default, WhatsApp saves all incoming downloaded pictures to the iOS Photos app. As a result, a single image has two copies – one in the chat and one in the Camera Roll. To keep the Photos app decluttered and maintain free space, you may want to stop WhatsApp from automatically saving images and videos to the iPhone Photos app. Let me quickly show you how to do this for all chats or specific ones.
Have a friend who spams you with irrelevant photos, videos, memes, etc.? Here is how to stop them. Repeat the steps for multiple chats/persons.
In the above steps, you saw how to prevent media from automatically saving to the iPhone Photos app. But what if you receive a useful photo or video that you want to save to the Photos app. Well, don’t worry. It is easy to save media manually even after turning off automatic saving.
 This will save the image to the iPhone Photos app.
Now you know how to stop media from automatically saving to the Photos app. But did you know that you can also prevent WhatsApp from downloading photos and videos automatically over cellular data or Wi-Fi?
This will help save your iPhone storage and net allowance if you are on a limited data plan.
This is how you can prevent WhatsApp chat pictures and videos from saving automatically to the iPhone Photos app. It will help keep your Photos app organized with media that matter!
Have further questions? Feel free to reach us via the comments below.
Other useful WhatsApp related posts:
Author
I have been an Apple user for over seven years now. At iGeeksBlog, I love creating how-tos and troubleshooting guides that help people do more with their iPhone, iPad, Mac, AirPods, and Apple Watch. In my free time, I like to watch stand up comedy videos, tech documentaries, news debates, and political speeches.
After you set up WhatsApp and allow it to access your photos, it starts saving all the incoming images and videos to your iPhone Photos app. If you’re annoyed by this, here’s how to block WhatsApp from saving media to your iPhone’s Camera Roll.
WhatsApp automatically downloads media and saves them to your iPhone Photos app. These are kept in an album titled WhatsApp and also appear in the Recents or All Photos sections. This makes things cluttered locally as well as in iCloud Photos. If you’re a part of several groups or have many family members, your Photos app will become a mess due to all these incoming images.
Related: Starting with iOS 15 update, Apple’s iMessage does the same. If you aren’t a fan, here’s how to stop iMessage photos from showing in the Photos app.
When you receive an image or video on WhatsApp, one copy is saved in your Photos app. And the same is also kept inside WhatsApp. This means the same image occupies twice the storage.
To check, open your iPhone Photos app and delete an image saved from WhatsApp. Now, open the WhatsApp chat and tap the person’s or group’s name. From here, tap Media, Links, and Docs, and you will see the deleted image saved here!
Related: How to know which app created or saved that photo or video on your iPhone
Being an encrypted chat app, you might receive sensitive images and videos on WhatsApp. You may not want them in your Photos app.
Following these steps, you can block WhatsApp from saving images and videos from every person and group to your iPhone’s Photos app.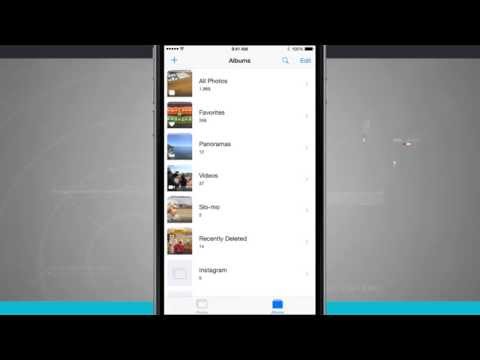
1) Open WhatsApp and tap Settings.
2) Tap Chats.
3) Turn off Save to Camera Roll.
Suppose you have a friend or family group that sends tons of pictures and videos. Here’s how to prevent only media sent by them to be saved to the iPhone Photos app.
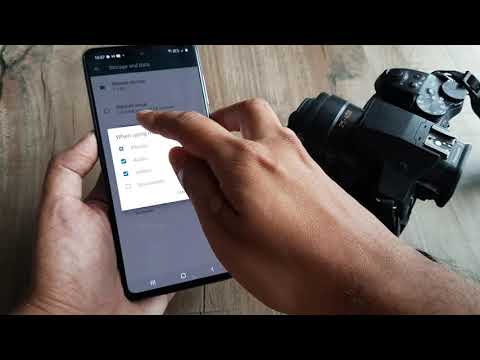
1) Open the person or group chat inside WhatsApp.
2) Tap the person’s or group’s name from the top.
3) Tap Save to Camera Roll and choose Never.
In addition to the above two methods, you can also block WhatsApp from accessing your iOS Photos app. After this, the app can’t save any incoming picture or video to your iPhone’s Photos app.
Since WhatsApp no longer has access to any picture, you can’t send images or videos to someone from inside the chat. But you can do that from the Photos app > iOS Share Sheet > WhatsApp.
Here’s how to stop WhatsApp from accessing iPhone’s Photos app:
1) Open the Settings app and tap Privacy.
2) Tap Photos.
3) From the bottom, tap WhatsApp.
4) Select None.
Suppose you blocked WhatsApp from automatically saving images to the Camera Roll. But then you receive a nice picture or video that you wish to have in your iPhone’s Photos app. You can save it manually. Here’s how to do that.
1) Open the chat inside WhatsApp.
2) To save a single image: Tap the image > share icon > Save.
3) To save multiple images: Tap the person’s name from the top > Media, Links, and Docs > Select > choose the photos > share icon > Save [number] Images.
This obviously won’t work if you block WhatsApp from accessing your Photos app.
Tip: If you just want to insert the image into a document, note, or elsewhere, press the image inside WhatsApp and tap Copy. Now, go to the destination app and paste it there.
By now, you know how to prevent the world’s most popular messaging app from saving media to your iOS photo gallery.
Another thing you can do to reduce the number of incoming images is to exit inactive groups. You can also politely ask people not to forward you daily unnecessary Good Morning or Good Night images of little relevance.
Fun fact: Most WhatsApp users are from India (around 480 million). The global internet slows down due to Indians sending Good Morning texts and images! Here’s a report by the WSJ about this.
More WhatsApp tips:
The Photos app makes it easy to organize and easily access your photos and videos. It can even provide a custom view of your photos, and Smart Search helps you quickly find exactly what you're looking for.
Photos are organized into sections "Library", "For you", "Albums" and "Search". When iCloud Photos is turned on, your collection is constantly updated across all your devices. And with advanced search features, you can easily find photos by person, place, object, or event.
Browse specially prepared moments in the Library tab, then view photos by year, month, day or all. As you scroll and browse, you'll see Live Photos and videos come to life.
 Tap and swipe up on a photo to see its location on a map and the people shown.
 In iOS 14 and later, you can set a display filter to make browsing your library easier. For example, you can choose to display only photos or only videos. To set a display filter:
To cancel a filter, click the Filters button at the top of the screen, then select an option and click Done.
When in power saving mode, Live Photos videos and photos will not automatically play.
In the For You tab, the Photos app finds the highlights in your photos and videos, then presents them in collections called Memories. You can also view shared album activities, favorite photo effects ideas, and share suggestions, which are collections of photos you can share.
The Albums tab contains albums you've created, shared albums you've created or joined, and various types of photo and video collections, such as selfies, portraits, and time-lapses. You can also organize your photos by location on a world map in the Places album, or by people in them in the People album.
The Recent album shows your entire collection in the order you added it to your library. When you use iCloud Photos, changes you make to albums on one device show up on other devices.

To change the name of an album:
To rearrange your albums:
In iOS 14 and later, you can also sort photos within albums. Here's how to use this feature:
You can share photos, videos, and albums with your favorite people, and then allow them to add their own photos, videos, and comments. The Albums tab displays shared albums that you've created and joined. Learn more about Shared Albums in the Photos app.
The Photos app makes it easy to find photos of a specific person, place, thing, or event. Tap the Search tab and type what you're looking for in the search bar.
The Search tab also offers Moments, People, Places, Categories, and Groups to search. Click a suggested search option, such as "one year ago" or "animals" to see your photos.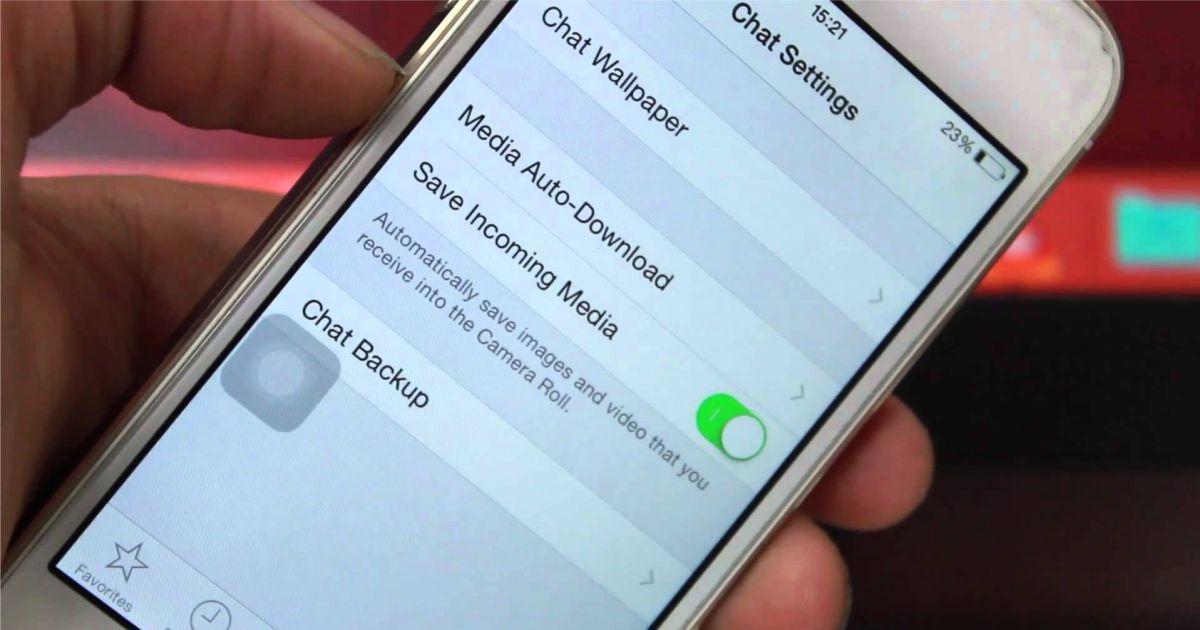
When searching for photos, face recognition and scene and object detection operations are performed exclusively on your device. More information about photos and privacy.
Publication date:
Skip to content
Dmitry Khmurov
In iOS 16, which is currently in beta testing, Apple enhanced the visual search for photos by adding the ability to separate the subject of a photo from the background so you can copy it to the clipboard for use elsewhere or share it in another app .
This feature is powered by advanced machine learning and Apple is experimenting with it in iOS 16, allowing for very accurate recognition of objects and people in photos.
Since the function works simply in the future, to select and copy objects from photographs, it will be possible to do without professional graphics programs such as Photoshop. Here's how it works in iOS 16.