Skip to main content
The VergeThe Verge logo.The Verge homepage
The VergeThe Verge logo./
By Lauren Goode / @LaurenGoode
|
Unroll.me
A New York Times report revealed, as part of a broader story about Uber’s recent troubles, that analytics firm Slice Intelligence sells the data it gathers from your inbox with its Unroll.me app. And some people, understandably, are Mad As Hell and Not Going to Take This Anymore.
By now it’s safe to assume that almost every free internet service that provides some kind of utility isn’t really “free,” and that the price you pay, if it’s not in the form of an actual withdrawal from your bank account, is in the currency of your personal data. Unroll.me, which scans people’s inboxes for marketing emails and newsletters and offers to unsubscribe them in big batches, fits this bill: it is helpful, and it is “free.”
But Unroll.me never made it abundantly clear that it was looking at other emails in your inbox, like receipts, and selling that data to other firms. And the company’s apology, issued earlier this week, reads more like a “Sorry we’ve been caught” note (We don’t read Terms of Service agreements either! But really, you should) rather than expressing any kind of chagrin over its practices.
So now seems like as good of a time as any to go through your Gmail, Facebook, and other services you might have given third-party apps access to, and revoke app access if you’re really not using said apps anymore — or if you just don’t want them having access to more of your data. Here’s how to do this in a few short steps:
From the dropdown menu of your Google profile picture, go to My Account —> Sign-in & security —> Connected apps & sites —> Manage apps. From there, click on the apps or devices you no longer want to have access to your Google accounts, and hit “Remove.”
From your home page, go to the dropdown menu on the upper right-hand side of the screen. Select Settings —> Apps —-> App Settings —> Show All. Click the “X” next to each app you no longer want to have access to your Facebook friend list or other profile information.
From Instagram on the web, go to your own profile and click on the Settings gear next to Edit Profile. From there, go to Authorized Applications and click on “Revoke” Access for the apps you want to get rid of. Another tip: the interface here is a little confusing, because of a line that’s drawn under each app name; the blue Revoke Access button for each app falls below the app name, lengthy app description, and listed permissions.
From your Twitter profile, go to Setting —> Apps —> and hit “Revoke Access” on the apps you no longer want connected to Twitter. Tip: if the “Revoke Access” option isn’t there, say, for certain iOS apps, you have to look revoke all access for “iOS Twitter integration” first, and then the associated apps should be disconnected from your Twitter account.
Most internet services have similar taxonomies when it comes to settings and third-party apps, so if you regularly use another service that isn’t listed here, poke around the main menu and look for “Settings,” “Apps,” “Security,” or “Connected sites.” It should be easy enough to revoke access to any app that you no longer want connected to your everyday services.
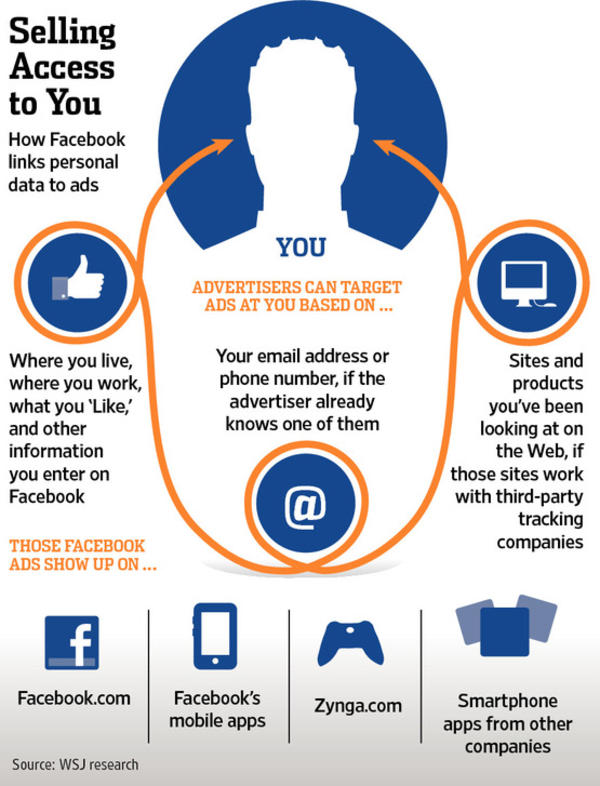
If you follow the directions above, data from your accounts should no longer be accessible by third-party apps... but on their own, Gmail, Twitter, Facebook, Instagram are still free services that use advertisements as a way to make money. Remember that even though they may not be directly selling your personal data to other firms, they are still selling access to you by slapping targeted ads on your feed. That is the price of free.
Most Popular
Just like Facebook, Instagram lets you connect your account with third-party apps and services. Now, you might have used your account to log in into some app in the past, and even if you’ve stopped using it now, it’s likely to remain authorized to your profile.
For instance, you may have used your account in apps to see your unfollowers, manage multiple social media accounts, for feed automation and scheduling, or logging into dating platforms. These apps stay linked and can access your personal information even after you’ve uninstalled them from your phone.
Therefore, to keep your privacy and get rid of services you no longer use, it’s essential to revoke these services from your account. In this article, let’s see how you can remove authorized apps on Instagram. Read on.
While Instagram does offer an option to remove authorized apps from your account, it’s currently limited to the web version. And hence, you won’t be able to do this on the Android or iPhone app except for your phone’s browser.
1] On your PC or Mobile, open the web browser of your choice and head to Instagram Web.
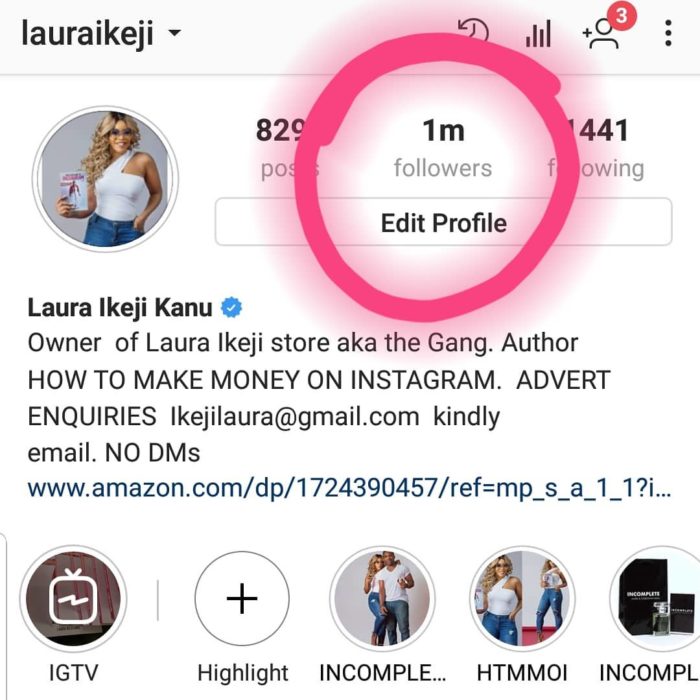
2] Hit your avatar on the top right of the screen to go to your profile section. Here, tap the Gear icon next to the ‘Edit Profile’ button.
3] A pop-up menu will appear on your screen. Choose Apps and Websites from the list of available options.
4] On the next screen, you’ll see the apps and websites that are currently authorized to access your account.
5] Look for the app that you no longer use and want to revoke access for. Then, click the Remove button under the app and confirm when prompted. Do the same for other applications if required.
That’s it; the app you disconnected from your account will no longer be able to access your profile information. Though, it may still have access to the info you previously shared.
As a matter of fact, Instagram automatically marks apps as expired if you haven’t used them in a while. They can be seen in the Expired section under Apps and Websites menu.
So, this was a simple guide on how you can remove third-party apps from your Instagram account.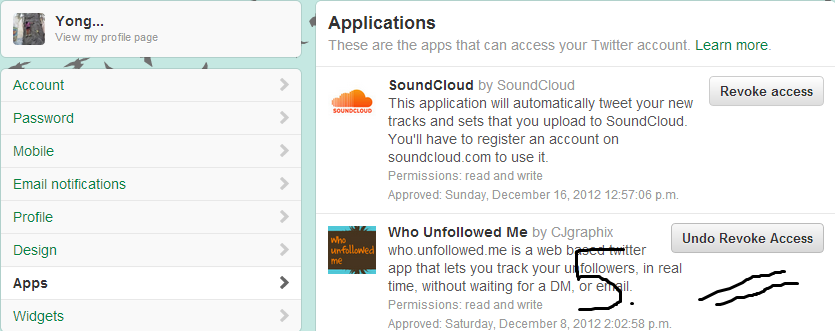 If you find that a malicious app had entrance to your account, make sure to change your password once after revoking its access token.
Moreover, avoid using your Instagram account in unknown third-party applications. Even if you choose to, do check reviews before proceeding. Keep a tab on your privacy settings and do not enter your account credentials on links sent by someone else, unless you verify the site URL and security certificate. Follow the necessary precautions, and you’re good to go.
Also read: What is Instagram’s Restrict Feature and How to Use It?
Use the recommendations provided to improve the security of your Instagram account and protect against hacking and fraud.
The Instagram social network provides a great way to develop the creative side of a person. On Instagram, you can create author's photos and videos and share them with friends and acquaintances.
In addition, Instagram is an excellent platform for sharing content with unknown people who are your followers. Your publications can be found by hashtags if you actively use them. Thus, your photos and videos become available to people from all over the world.
Modern users perceive social networks as an integral part of life and they often have no concerns about security or privacy. Many create an imaginary sense of security in social networks. They believe that they are surrounded only by familiar people and friends, which means that nothing bad can happen.
If you are concerned about privacy and do not want to expose yourself to the whole world, then the recommendations below can significantly increase the security of your account.
Before reading the instructions, please answer a few simple questions:
Are you a public person? Do you want to work on developing your personal brand online?
If the answer is no, and your friends are already following your account. is it important for you to use your real name?
Is it really necessary to disclose your location, your place of work or place of residence?
Before you post a new photo on Instagram or allow your children to use the social network, you should have a good understanding of what security and privacy features the service provides and how these features can be used to increase your online protection.
If you do not want your photos to be public and accessible to all Internet users, you can make your profile private.
To share photos and videos only with users you choose yourself, follow these steps:
After activating this option, only subscribers of profile
will be able to view your publications After creating an Instagram account, you usually want to get more followers. Because you subscribe even to unknown people. In turn, some of them respond by mutual subscription. However, after a while, they may start leaving inappropriate comments under your photos and videos. Or vice versa, they may not interact with you at all, but only observe.
Even if you have closed your account from prying eyes, your old subscriptions will still follow your publications.
In this case, the unwanted subscribers must be manually removed.
To remove one of your subscribers, follow these steps:
How to delete Instagram followers
Do not include too much personal information in your profile. especially in the "Edit account" area.
Do not write personal information that can be used against you in the profile summary (Bio) field.
Another important step that can save you from personal property theft is hiding your personal information from potential criminals. Make sure location services are disabled on Instagram.
Very often check-ins made at home, at work or while on vacation can provide valuable information for representatives of the criminal world. There have been many cases where thieves were able to rob homes thanks to social media geo-tagging. Naive users simply shared the place of their vacation, and at that time their houses and apartments were noticeably devastated.
In order not to become a victim of cunning modern thieves, refuse to specify geotags on certain photographs.
You can also remove location tags from previously added photos and videos.
To do this, you need to follow simple steps:
Let's imagine that someone tags you in an inconvenient Instagram photo that your parents, kids, or wife shouldn't see. Unpleasant situation? But there is a way out.
If you are concerned about your reputation and social status, such unwanted publications can harm your image.
To protect yourself from such surprises, activate the feature on Instagram that allows you to manually approve your photo tags.
Choose a complex password for your Instagram account.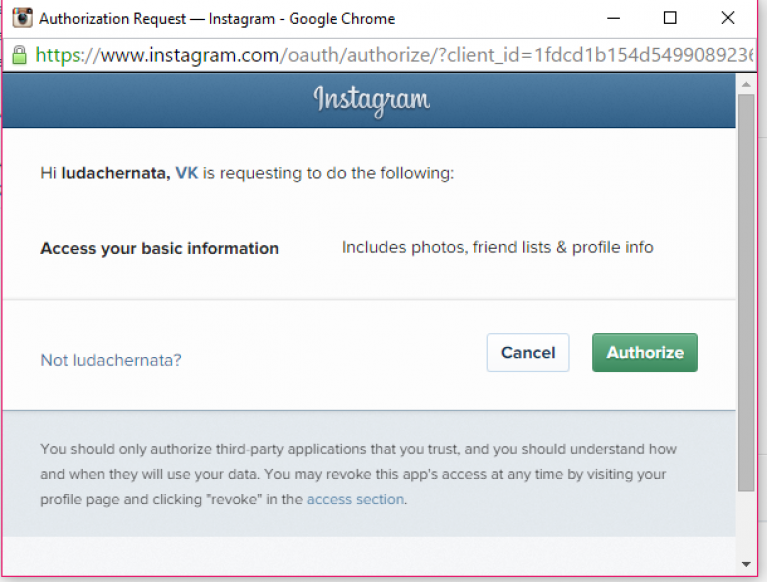 Use different sets of characters to compose a password: uppercase letters, lowercase letters, numbers, and special characters (punctuation marks). Do not use a password that is already used to log into accounts on other services and sites.
Keep your password in a safe place, such as a password manager, and don't share your password with anyone you don't fully trust. Change your password periodically. If there is information about your password being hacked, Instagram will automatically show a warning about the need to change your password.
Two-factor authentication works as an additional shield of protection for your account. If a cybercriminal somehow finds out the password for your account, he will not be able to access the account, because a second factor is required for successful authentication.
The second factor may consist of a unique one-time password that you receive on your mobile phone via SMS. You will be able to enter it every time you want to log into your account from a new device.
To enable two-factor authentication on Instagram, follow these steps:
After that, every time you try to log in to your Instagram account from a new device, you will need to enter the password from the SMS message or a unique backup code provided on the Instagram Two-Factor Authentication setup page.
Detailed instructions: how to enable two-factor authentication on Instagram
Sign out of Instagram when sharing a computer. tablet or smartphone with other people. If you are logging into your Instagram account from a public computer, never check the "Remember my details" checkbox. Use the private browsing tabs in your browsers and don't forget to log out of your account when you're done using the social network.
Take care of the security of your email account. Create a unique, complex email service password and enable multi-factor authentication.
Many users use an Instagram account in third-party apps and services. For example, these may be other social networks or services that analyze the number of subscribers, publish posts on your behalf, or perform other functions.
For security and privacy reasons, you should only allow access to trusted apps (especially those created by the Instagram and Facebook teams). Keep in mind that these applications have access to your profile and personal information, which makes you vulnerable.
Thoroughly check all applications that have access to your Instagram account. Revoke access for apps you no longer use, look fishy, or you can't even remember.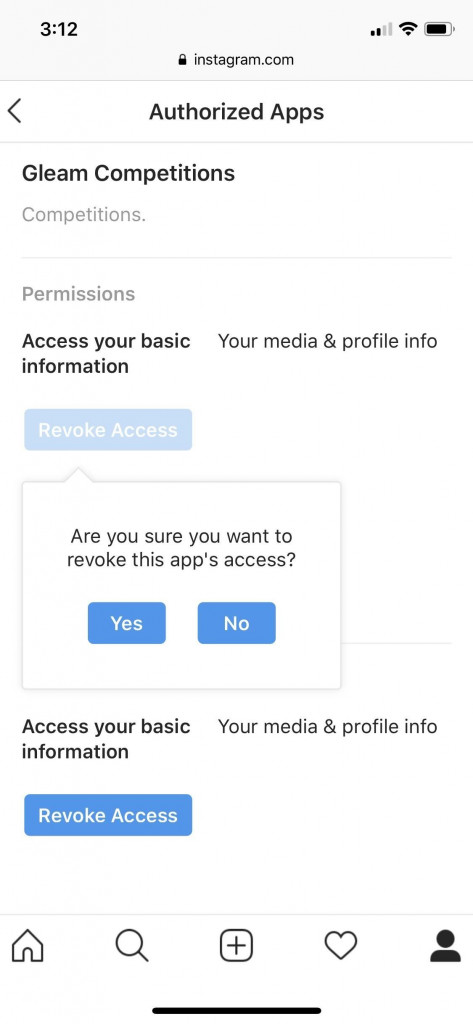
To do this, follow these steps:
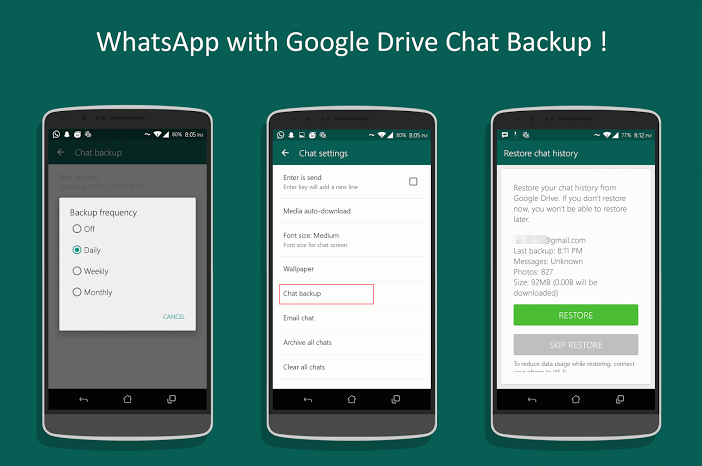
One should always be prepared for even the worst scenario. Agree, it will be a shame to lose all your publications for several years in case of an account hack. Of course, likes and comments are unlikely to be saved, but you can take care of your expensive content.
Back up your Instagram posts so you don't lose your data. The social network Instagram does not have a built-in function for creating a local archive of its publications, but you can use numerous third-party services and applications, such as Instaport.
Conclusion:
Instagram offers few security options compared to Facebook, LinkedIn or Twitter. However, we can make full use of the available opportunities to avoid unwanted surprises.
Remember that by collecting all available information about you from various social networks, criminals can create a complete picture of your person and use this data to carry out their heinous activities.
Linking your Instagram account to other apps is the most normal thing in the world. Both in personal profiles and in company profiles, it can come in handy at some point. connect our account to external services to expand the possibilities that the social network gives us. These apps can help us keep track of our profile, schedule the content we post across different accounts, run contests, or simply "repost" images.:no_upscale()/cdn.vox-cdn.com/uploads/chorus_asset/file/15987337/Instagram_revoke_access.png) However, we may end up with Forget about how many applications we have connected to our profile, or we might even security problems with our account.
However, we may end up with Forget about how many applications we have connected to our profile, or we might even security problems with our account.
The first thing that may come to mind in order to solve this problem is to close the Instagram session or remove the corresponding third-party application. While this may seem like a quick fix, we cannot deny you access to our Instagram data. The next thing we might think about is that there might be an option to exclude these calls in the mobile configuration tab, but that's not the case either. So if you are looking for track the apps that you have authorized access your account or if you want to remove a specific permission, we will tell you where and how you can access this information by following these steps.
Postcode
As we already mentioned, you will not find this option in the settings tab of your Instagram account from your mobile phone. You will have to open Instagram in your browser and enter the following address: instagram.com/accounts/manage_access. The first thing you need to do is login with the Instagram account you want to know which apps you have connected to your day. For security reasons and to prevent your browser from saving your login information, do not save your passwords when it asks. After entering 9 keys0250 voila , you will see a panel where all the applications that you have given permission to access your profile are displayed.
Subscribe to our Youtube channel
If we remove any access by mistake, we will have to re-link our account to the application in question.