Facebook is one of the most popular social media platforms for live streaming video — which means there’s a lot of competition. If you’re looking to expand your reach with live video on Facebook, how can you stand out? Customization. In this guide, you’ll learn how to level up your live streaming game on Facebook using customization options like overlays, titles, logos, backgrounds and more. If you’re new to streaming on Facebook, check out our ultimate guide to live streaming on Facebook first.
Multiply your views and engagement
Reach a wider audience by streaming to multiple platforms simultaneously.
Get Started
Facebook Live is a live streaming platform that allows you to broadcast live video with your Facebook account. You can live stream from your personal account, as well as to a page or a group on Facebook. Live streaming on Facebook is 100% free; all you need is an account and some basic live streaming equipment.
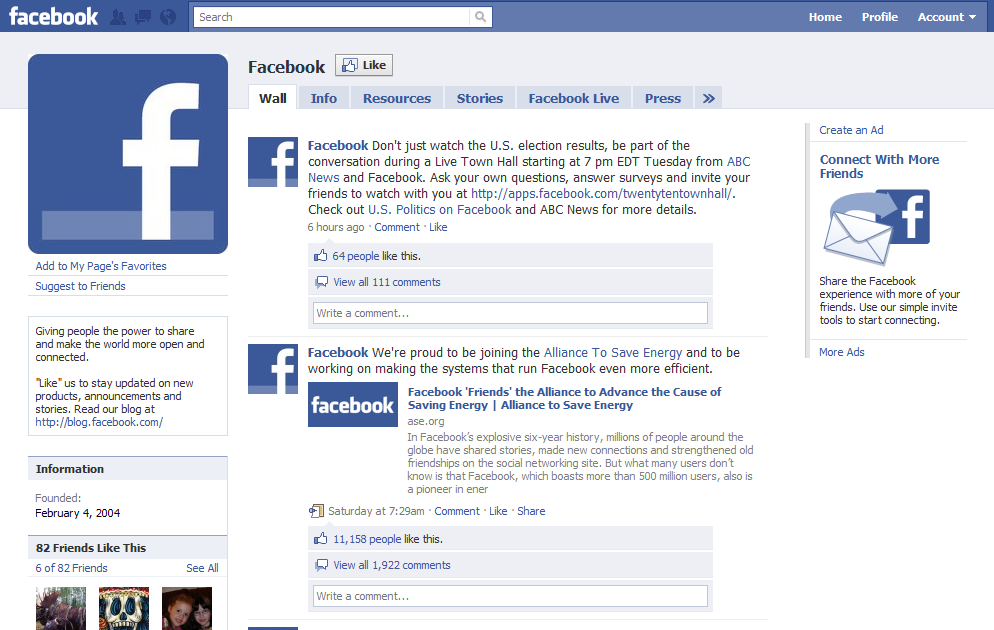
One reason why Facebook Live is so popular among streamers is because you can go live from the Facebook app or a browser on your desktop. Live streamers also like Facebook because it’s a social network with 2.93 billion active monthly users; the potential to find an audience for live video is greater, especially if you’ve already built up a network.
Just having followers on Facebook isn’t enough to make it as a live streamer on the platform, however. You need polished content that’s professional and appealing to your target audience. If you want to capitalize on your existing Facebook network to spark engagement for your live videos, there are tried-and-true use cases that can help you achieve your goal. The most common ones are:
 Live streaming also contributes to your event’s goal of reaching a wider audience and promoting your brand or organization.
You can customize your live stream and make it more engaging by using overlays, split screens, background music, animated backgrounds and other graphics. These features make your stream more interactive and eye-catching.
 If you have a presentation to show or are doing a tutorial, sharing your screen is an important feature. Formatting your live stream so viewers can see your screen and still view your video feed keeps the live stream engaging as well.
Want to delight your audience & keep them engaged?
New animated backgrounds in Restream Studio are here.
Choose your favorite in the Backgrounds tab or upload your own! 🌈🎉
Try Now 👉 https://t.co/Ni3AsLVndc pic.twitter.com/oYzVPLEt3N
— Restream (@Restreamio) May 11, 2021
There are many options that let you enhance your live stream on Facebook. You can modify all the features listed above with Restream Studio, an all-in-one live streaming solution.
There are plenty of design tools out there that can help you create custom elements for your Facebook live stream — and you don’t need design skills to use them. Here are some of the most user-friendly design tools for making custom graphics for your Facebook live stream.
Canva is the non-designer’s design tool. You can design almost anything on Canva, from logos and flyers to resumes and invoices. With thousands of free templates for hundreds of different project types, you can create the overlays, logo, background, captions and other graphics to personalize and brand your Facebook live stream. You have to pay a monthly subscription to get Canva’s premium features but there are a lot of great resources and features with the free plan too.
Features
Snappa has a huge image library that you can draw from to create custom overlays, banners and other Facebook live graphics. The drag-and-drop editor also lets you repurpose designs for multiple uses so you can create lower-thirds captions, backgrounds, a logo and more using the same style and branding. You can choose the paid subscription or the free plan and still have plenty of designs to work with.
Features
Easil is a design tool that lets you choose from a library of graphics or create custom designs from high-quality templates. You’ll find designs ready to go for your Facebook live stream, with an easy-to-use editor. If you’re working with a team, you’ll love Easil’s design approval workflow, ensuring designs are finalized before being downloaded.
Features
Once you’ve created your custom graphics with one of the design tools above, you need to add them to your live stream on Facebook. One of the easiest ways to do this is with encoding software such as OBS. With OBS, you have more control over how your stream and your graphics look than if you streamed directly to Facebook. If you’re new to using OBS, read our getting started guide.
When you create your designs for your stream, you’ll have to save them as image files to use them with OBS. If you’re doing an overlay or a graphic that doesn’t take up the entire screen, be sure to save it as a PNG file so the background remains transparent.
After your designs are ready to go, you can open OBS and add your image as a source. OBS lets you create scenes for your live videos as well, so if you have an image that you don’t want to display for the entire broadcast, like an intro screen, you can create a separate scene for it.
OBS is a free encoding software that’s widely used by live streamers. But it’s not the most user-friendly if you’re just starting out. If you want an even easier way to customize your Facebook live stream, without having to download any software, then you can use Restream’s browser-based live streaming tool, Restream Studio.
Easy live streaming for everyone
Run professional live streams from your browser.
Get Started
From the Restream Studio dashboard, you can navigate to the Graphics tab. Here, you can choose the primary color for your captions and upload a logo, overlays, video clips and backgrounds. Once your custom graphics are uploaded, you can easily toggle them on and off throughout your stream.
If you navigate to the Captions tab in Restream Studio, you can create lower-third captions with custom text. You can also add a ticker, or scrolling text, to the bottom of your live video.
Finally, with the Chat tab, you can select comments from the Facebook live chat to display on screen during the stream, simply by clicking on them.
Some Facebook live video creators don’t have the time to create custom designs but still want their stream to look professional. With the default graphics available in Restream Studio, you can broadcast a high-quality, professional-looking video that still shows off your brand personality.
Streaming to Facebook has several advantages for live streamers, but what if you could stream to Facebook Live and other major platforms simultaneously?
With Restream, you can.
Multiply your views and engagement
Reach a wider audience by streaming to multiple platforms simultaneously.
Get Started
Not only does Restream’s browser-based Studio help you add customizations to your stream, but it also lets you broadcast your stream to multiple platforms at the same time. You can choose from Facebook, Twitter, LinkedIn, YouTube and more than 30 other platforms to stream to simultaneously. Once you have a Restream account, connecting it to your Facebook, Twitter and other profiles is simple:

To add your customizations to Restream Studio, click the Start with Studio button on your Restream dashboard. Once you’re in Studio, you can add destinations for live streaming, upload and select your graphics, toggle your split-screen options, invite guests, and access all the customization features your stream needs.
You can either create graphics in Facebook’s Live Producer and add them to your stream, or you can use a third-party streaming tool like Restream to broadcast your live video with your graphics to Facebook.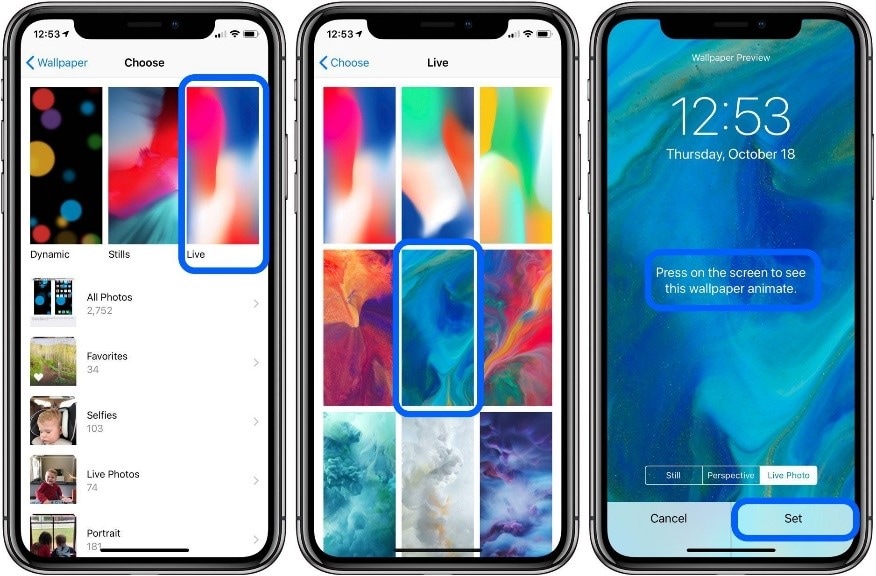 Learn more about adding graphics to your live stream with Restream Studio with this Help Center article.
Facebook Live supports green screens, so you can add a virtual background to your stream. Most basic webcams support green screens as well. Learn more about how to use green screens on a live stream here.
You can add a logo and other custom graphics to your Facebook live stream by using a third-party streaming tool like Restream. You can connect your Facebook account to Restream so your live video will broadcast to Facebook. Inside Restream’s live streaming studio dashboard, you can navigate to the Graphics tab, then click the Upload logo button.
You can add captions, chat overlay and even a ticker (scrolling text at the bottom of the screen) to your Facebook live stream by using Restream.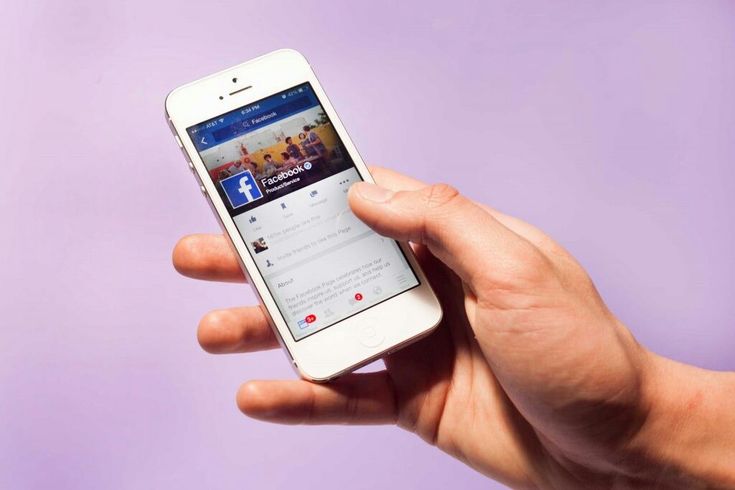 Connect Restream to your Facebook account, then go live using Restream’s Live Studio. Inside the Studio, you can customize your captions, toggle chat overlay options, and configure your ticker text.
Customization options can help take your Facebook Live broadcast to the next level. Make your live stream professional and engaging, and stand out from the millions of other live streamers on Facebook. Restream Studio makes customizing your stream easy. Add stream graphics, titles, guests and more in just a few clicks. To make your next Facebook Live stream a success, broadcast with the all-in-one, browser-based Restream Studio.
Changing your Facebook profile picture to a video is a great way to stand out from the crowd. A regular video file isn't the only option, though — if you're an iPhone user, you can also upload a Live Photo as your new profile picture to add more pizzazz to your Facebook page.
Unfortunately, you can't just snap a Live Photo and post it as your new FB pic right away — you first need to convert your Live Photo into a Facebook-compatible file. So below, I'll show you three different methods to turn your Live Photo into a video, then once you've got that sorted out, I'll show you how to upload the converted video to use it as an animated Facebook profile pic.
Don't Miss: How to Set Video Profile Picctures on Facebook Using Any Phone
Before going over the different ways to convert a Live Photo into a Facebook-friendly profile video, you might want to edit your Live Photo first, if necessary. There's plenty of features you can use to accentuate your Live Photos, from adding filters, tweaking adjustments, cropping, and rotating. If that weren't enough, you can go a step beyond and pick new thumbnails, trim the clip, or make them loop or bounce.
Since a Facebook profile video already loops, however, using a looping or bouncing Live Photo may be unnecessary. And you can trim clips, crop them, and choose a thumbnail image in Facebook before setting them as your profile video, so you don't have to worry about that too much beforehand.
A really easy way, though not without losing some image quality, is to convert your Live Photo into a Boomerang within Instagram Stories. So, If you don't already have Instagram, be sure to download the app to try this method out.
Once signed up and in Instagram, tap your profile icon at the top of the main page to access Stories, then swipe up to see your Story feed. If you have taken your Live Photo within the last 24 hours, then you should see it there. Tap on the Live Photo you want to use to edit in Stories.
Image by Amboy Manalo/Gadget HacksFrom there, turning your Live Photo into a Boomerang is easy, and basically entails long-pressing on the photo to convert it into a Boomerang, and downloading into the Photos app. Of course, we have an in-depth guide on this topic, so feel free to tap on the following link to learn more.
Don't Miss: Turn Your Live Photos Into Boomerangs on Instagram
If you'd rather preserve your Live Photo in full quality before uploading it as your Facebook profile pic, then I have two more options for you. First up is an app from Google called Motion Stills, which you can download from the App Store for free.
All your Live Photos will be shown within Motion Stills' main feed, so tap on the Live Photo you want to convert for Facebook. Your Live Photo will now be shown in constant motion, and the "Motion Stills" icon (two half circles) will be set to reduce shakiness in the video. Tap that icon to remove the effect, which will give you your original Live Photo, shakiness and all. Also, you can choose to set the video as normal (the two triangles icon with the left side in white) or bounce it (with both triangles white).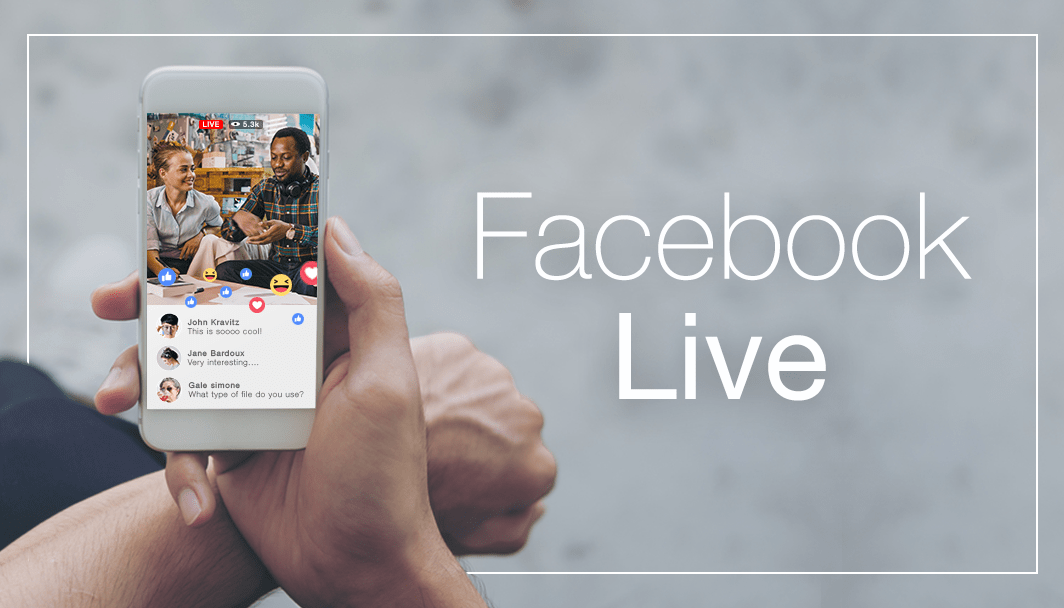
Once you've set the Live Photo's effects to your liking, tap on the arrow along the bottom right-hand side of your image, then tap "Share Video" to convert it as a video. When the share sheet opens up, select "Save Video" to save it to the Photos app. Once you've done that, skip ahead to the "Uploading Your Live Photo" section below.
Images by Amboy Manalo/Gadget HacksIf neither of the first two options worked for you, then an app called Lively is your best bet. You can download the Lively app either by going to the App Store or simply tapping on the link below.
Once installed, you'll see all your Live Photos in a homepage feed within the app. Tap on the image that you would like to convert, and your Live Photo will now be shown as a GIF. Tap on "Movie" at the top, and if you want to crop your Live Photo and haven't done so already, Lively will let you do so before saving it as a video. You can also do this later on Facebook, as you'll soon see.
When ready, tap on "Export Movie" at the bottom. From here, hit "Save" to add it to your Photos app, then move on to the next section in this article.
Now that you've converted your Live Photo, open up the Facebook app, then tap on the hamburger icon and hit "View your profile" at the top. Once there, tap on "Edit" at the bottom right of your profile icon, or you can just tap on the profile photo itself, then you'll see a menu of options. Tap on "Select Profile Video."
Here, you'll be able to select the video you want to upload from your Camera Roll in Photos. Tap on the new video that you just converted, and you'll be presented with some decent options for it. You can trim the clip, crop it, remove sound, and/or change the thumbnail image. You can also tap on "Make Temporary" to make the profile video last only 1 hour, 1 day, 1 week, or a custom amount of time. When you're satisfied, tap on "Use" to upload it as your new Facebook profile video.
Don't Miss: This Boomerang Hack Lets You Post Apple's Live Photos on Instagram
Images by Bettina Mangiaracina/Gadget HacksAnd that's all there is to it. Your Facebook profile video will now loop endlessly while someone is looking at your profile. Profile videos are public, so keep that in mind when doing this.
Uploading a moving image to your Facebook profile picture is a good way to stand out among other accounts. It also hasn't really caught on yet, so this is a good time to get creative with the feature and get ahead of the pack. As always, stay tuned with us as we uncover more Facebook tips and tricks to amp up your profile page.
Amboy Manalo contributed to this story.
Don't Miss: How to Turn GIFs into Live Photos on Your iPhone
Keep Your Connection Secure Without a Monthly Bill. Get a lifetime subscription to VPN Unlimited for all your devices with a one-time purchase from the new Gadget Hacks Shop, and watch Hulu or Netflix without regional restrictions, increase security when browsing on public networks, and more.
Buy Now (80% off) >
Other worthwhile deals to check out:
Facebook already has over 2. 3 billion users, and 80 million of them are SMBs. Facebook for them, if not the only one, then one of the key points of contact with consumers in the social media universe. For some brands, the Facebook page even becomes the main platform: here they talk about themselves, immediately communicate with the client, announce events and sell goods. If most often the first meeting of a consumer with a brand on Facebook takes place in the feed - through an advertisement or a post shared by friends - then a detailed acquaintance begins with the profile page. And the page, in turn, begins with the cover. Let's figure out how to make a Facebook cover video that will help create a good first impression, be informative and truly exciting.
In order for the dynamic cover video to load and display properly, the recommended cover video size is by 820 x 312 pixels . This is the minimum allowed size. But it's still better to use a video size of 820 x 462 or 851 x 315 pixels . If the dimensions and proportions are larger than recommended, don't worry - during the addition, you can select the desired part of the video to display, and the excess will be "hidden". Facebook cover video format is not limited to pixels – length and weight are also important. Roller must be from 20 to 90 seconds - files longer or shorter than Facebook will simply not be allowed on the cover. In addition, the video must be of high quality - 1080p . If you don't want to overwhelm users with information, you can simply duplicate a short video element (for example, make a 10-second video with two repetitions). That's what WeWork did
: Source: WeWork page
Having dealt with the technical part of the process, we move on to the creative one. With this, everything is much more interesting - there are no rigid frameworks and limits. You can create an extremely ascetic cover or organize an explosion of colors and emotions - everything is appropriate. Most importantly, start from the style of your brand and the tasks that the cover should solve. With the help of a motion cover, you can, for example:
Tip #2. If you don't have a separate Facebook cover video, use a pre-made dynamic brand video that conveys the brand vibe in a concentrated manner. This is what Red Bull did:
Source: RedBull page
Video covers grab attention by default - even today this is unusual because many brands (including the biggest ones) still use static. In order to use the attention of subscribers to the maximum benefit, when creating a cover, rely on the following basic principles:
 If you are announcing a new advertising campaign, it is hardly appropriate to talk about the team at the same time or share the joy of a new industry award.
 Tip #3. Don't overload your cover video with details and use simple animation if you can't make a cool studio clip.
Source: M&M's page
To put a video on the cover, you can either select the desired file from those already uploaded or add a new one.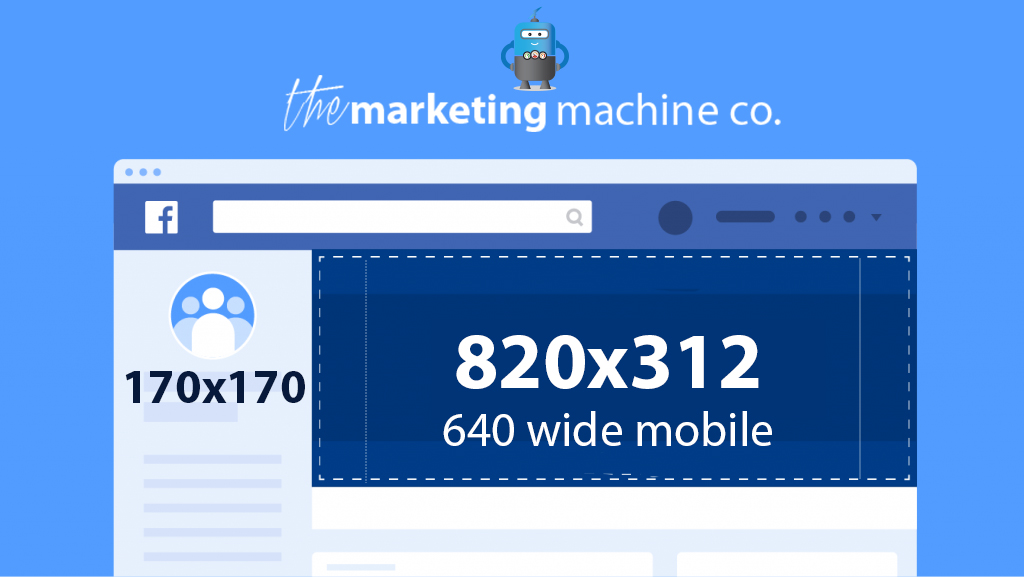 These options open when you click on the "Change cover" button in the upper right corner of the cover. If you don't have the budget or time to create a clip, use Facebook cover video templates. There are more than 1000 of them in VistaCreate (and the collection is constantly updated), for any task and purpose.
Here is a step-by-step guide on how to make a professional cover based on a template in VistaCreate:
Step 1. Select a template
Select a template with a design of your choice from the gallery on the left.
Step 2: Customize the design
Once you've chosen the template that best suits your theme or style, move on to editing. You can change everything from colors to objects and photos. Usually they start with text, VistaCreate has several hundreds of Latin and Cyrillic fonts and it is possible to upload your own. You can add not only static objects, but also videos. Select a video from the VistaCreate media collection or upload your clip to your My Files folder and replace the video from the template with one click. If you're adding your own video to VistaCreate, make sure it's in MP4 or MOV format and doesn't exceed 200MB. The size is not so important - you can move the video and choose which part of it will be displayed in the template. The minimum video length is 3 seconds, and the maximum length is 60 seconds, but it can be trimmed directly in the editor.
Step 3. Download the design
After changing the design, you can download it in MP4 format by clicking the corresponding button at the top of the editor interface. If you want to show the design to the team, click "Share" and select the "Send Link" option. Editing even the most complex video template usually takes no longer than 10-20 minutes - depending on how many changes you plan to make. It's much easier than putting together the right file in a video editing program and definitely cheaper than hiring a professional designer for this task. To make it easier for you to get started, we have compiled a selection of 20 of the most interesting templates. You can start creating your cover video or animation right now.
[button text="Use Template" url="https://create.vista.com/artboard?template=5c6c268085ea3c16f9ead02e/" background="red"/]
[button text="Use Template " url="https://create.vista.com/artboard?template=5bcdc54778e1194aa6524caa/" background="red"/]
[button text="Use Template" url="https://create.vista .com/artboard?template=5bfd30d68caf671e1cd7294d/" background="red"/]
[button text="Use Template" url="https://create.vista.com/artboard?template=5c13adec133a785392e84104/" background="red"/]
[button text="Use Template" url="https://create.vista.com/artboard?template=5bd8502378e1194aa6e58179/" background="red"/]
[button text="Use Template" url="https://create.vista.com/artboard?template=5bfc23e08caf671e1c267605/" background="red"/]
[button text="Use Template" url="https://create.vista.com/artboard?template=5bcdc21078e1194aa64829e5/" background="red"/]
[button text="Use Template" url="https://create. vista.com/artboard?template=5b7c25f11cc8aa5429258dc0/" background="red"/]
[button text="Use Template" url="https://create.vista.com/artboard?template=5b91004818654940f72e13c3/" background="red"/]
[button text="Use Template" url="https://create.vista. com/artboard?template=5b7d84f81cc8aa5429cab4c3/" background="red"/]
[button text="Use Template" url="https://create.vista.com/artboard?template=5b869eb21cc8aa5429b7b2cb/" background="red"/]
[button text="Use Template" url="https://create.vista.com/artboard?template=5b7c21721cc8aa54290601dd/" background="red"/]
Read our article on how to design social media for business without a designer and go to a collection of 25 free Facebook cover templates
Content
Changing your Facebook profile picture to video is a great way stand out from the crowd. A regular video file isn't the only option - if you're an iPhone user, you can also upload a Live Photo as your new profile picture to add more pizza to your Facebook page.
Unfortunately, you can't just take a photo of a Live Photo and immediately post it as your new FB photo - you first need to convert your Live Photo to a Facebook compatible file. So below, I'll show you three different ways to turn your Live Photo into a video, and then once you've figured it out, I'll show you how to upload the converted video to use as your animated Facebook profile picture.
Before moving on to various ways to convert Live Photo to Facebook profile video, you can edit Live Photo as needed. There are many features you can use to accentuate your live photos, from adding filters, tweaks, cropping and rotating. If that's not enough, you can go ahead and select new thumbnails, trim the clip, or make them loop or bounce.
Because the Facebook profile video is already looping, looping or Live Photo bounce may not be necessary. And you can trim clips, crop them, and select Facebook thumbnail images before setting them as your video profile so you don't have to worry too much about it beforehand.
A really easy way, although not without loss of image quality, is to convert a live photo into a boomerang in Instagram Stories. So, if you don't have Instagram yet, be sure to download the app to try this method.
After signing up for Instagram, tap your profile icon at the top of the homepage to open Stories, then swipe up to see your newsfeed. If you've taken a Live Photo within the last 24 hours, you should see it there. Click on the Live Photo you want to use for editing in the Story.
Image by Amboy Manalo / Gadget Hux
From here, it's easy to turn your live photo into a boomerang, and basically it takes a long press on the photo to convert it into a boomerang and upload to the Photos app. Of course, we have a detailed guide on this topic, so you can click on the following link to learn more.
If you'd rather save your Live Photo in full quality before uploading it as your Facebook profile, I have two more options for you. First up is an app from Google called Motion Stills that you can download for free from the App Store.
All your live photos will be displayed in the main Motion Stills feed, so click on the live photo you want to convert for Facebook. Your Live Photo will now appear in constant motion and the Motion icon (two semi-circles) will be set to reduce video shaking. Click on this icon to remove the effect, which will give you the original Live Photo, shaking and all. In addition, you can set the video as normal (the icon of two triangles with the left side in white) or mirror it (both triangles in white).
Images Amboy Manalo / Gadget Hacks
Once you've set the Live Photo effects to your liking, click the arrow at the bottom right of the image, then click "Share Video" to convert it to a video. When it's shared, select "Save Video" to save it to the Photos app. Once you've done that, proceed to the Upload Your Live Photo section below.
Images Amboy Manalo / Gadget Hux
If none of the first two options worked for you, then the best choice is an application called Lively. You can download the Lively app by visiting the App Store or by simply clicking on the link below.
Once installed, you will see all your Live Photos in the home page feed in the app. Click on the image you want to convert and your Live Photo will now be displayed as a GIF. Click on "Movie" at the top, and if you want to crop your Live Photo and haven't already done so, Lively will let you do so before saving it as a video. You can also do this later on Facebook, as you'll see shortly.
When you're ready, click "Export Movie" at the bottom. From here, tap Save to add it to the Photos app and then move on to the next section of this article.
Now that you've converted your Live Photo, open the Facebook app, then click on the hamburger icon and click "View Your Profile" at the top. Once there, click "Edit" in the bottom right corner of your profile icon, or you can just click on the profile photo itself, then you'll see a menu of options. Click on "Select Video Profile".
Here you will be able to select the video you want to upload from your Camera Roll in Photos. Click on the new video you just converted and you'll be presented with some decent options for it. You can trim the clip, trim it, remove audio, and/or change the thumbnail of the image. You can also click "Make Temporary" to make your profile video only last 1 hour, 1 day, 1 week, or a custom amount of time.