With over 1 billion active users, Instagram is one of the best social media networks to advertise your business, reach new audiences, and grow brand awareness. So even if you aren’t active on the website yet, it’s never too late to adopt an Instagram strategy in your marketing plan.
If you're ready to start sharing content through this channel, we've got you covered. Here, we're sharing a quick-and-easy guide to posting on Instagram, to ensure you can begin attracting the attention of your audience with Instagram marketing.
Posting to Instagram consistently can help businesses find resonance with their audience and grow better, but doing it right is just as important. Here's how to post to your Instagram account step-by-step.
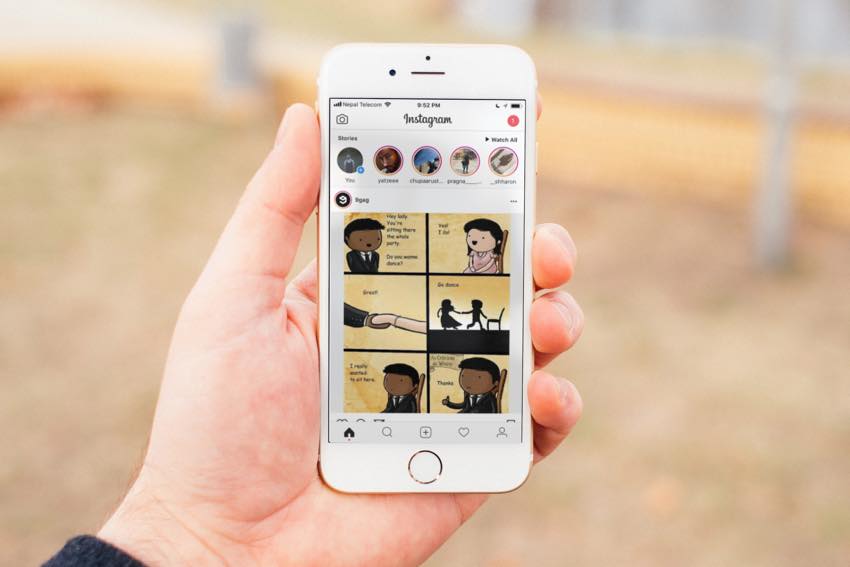
See that plus sign [+] in the image above? That's your starting point. Click that plus sign and you'll be ready for the next step, below.
Instagram will show you the photos already saved to your phone. Choose one of those to post. Alternatively, you can click on the camera icon to take a photo or video within the Instagram app itself, if you don't already have an image you want to use.
Once you select and crop an image (or carousel of multiple images), click the Next button in the top right corner of the app.
Do you have multiple photos and want to highlight them all? Instagram allows you to do this with its carousel feature.
As you go to tap a photo or video, first tap the icon just above your photos to the right that looks like stacked squares. Once you tap this, you'll see a number on the corner of every image or video you tap. This number notes where the content will show up in the carousel.
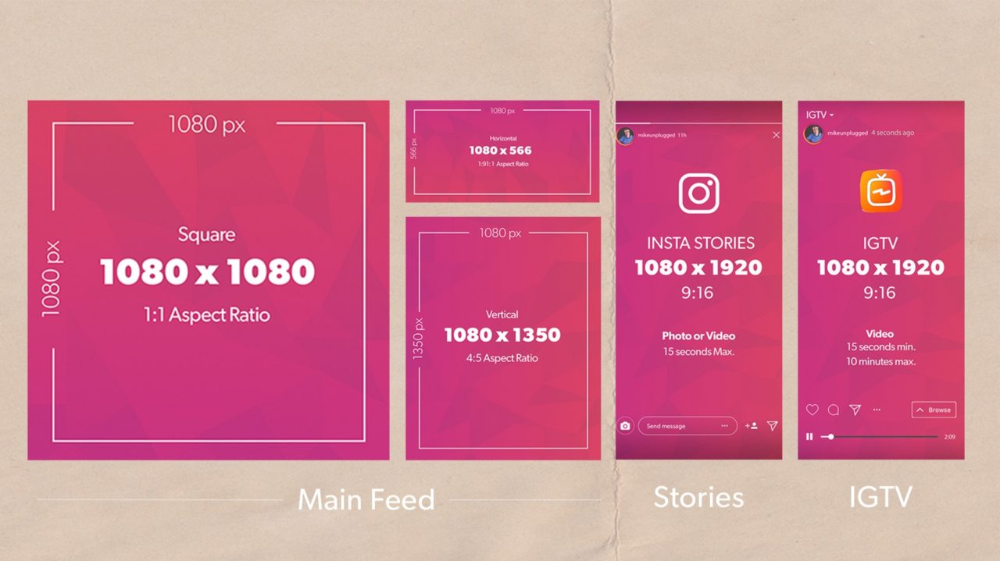
You aren't limited to just a square image on Instagram. You can actually share horizontal or vertical images as well. To get more of your image seen, pinch the screen of the photo you've selected on the Library screen (play the video below to see it in action).
However, while Instagram does allow vertical and horizontal options, the images still need to fit into some specific dimensions. So, you might still need to crop a tiny bit of your photo to get it to fit.
Instagram offers a wide variety of filters — scroll to the right to peruse your options, and click on one to preview how it will look on your photo.
By default, the filter will be applied by full strength. However, if you want to scale back the intensity of the filter, double-click the filter tile once it's been applied, and a scale selector will appear, allowing you to downplay the effect.
You can also tap the magic wand at the top of the screen to adjust the photo further.
(Take a look at our Ultimate Guide to Instagram Filters to learn more).
You can also click "Edit" at the bottom right to adjust the image to your specifications.
Here are the editing options that come built into Instagram for you:
 Drag the selector to the left to desaturate the image (all the way to the left if you want a monochrome look), or drag the selector to the right for extremely saturated colors.
 Dragging the selector to the left will darken the shadows in your image while dragging the selector to the right will lighten the shadows in your image.
Featured Resource
Get creative and write a nice, interesting Instagram caption to go with your photo. Since text can help optimize your post in Instagram's search, writing something can only benefit you.
With Instagram's search feature, users can search by hashtags. So, you should make sure to write relevant hashtags in your caption. If someone does a search of a hashtag you placed in your caption, they might find your post as well as others that included the same one.
Want your friend or their followers to see a photo that you posted of the two of you? Tag them!
On the new post page, you can click "Tag People" to tag other Instagram accounts in your post. Alternatively, you can include their handle (or their username beginning with an @ symbol) in your caption.
If you're on a fun vacation or at a neat event and you don't feel like including that information in your caption, you can mark where you are in another way. On the new post page, tap "Add Location" to put a location on your image (which makes it easier for people to find your post).
When you post an image or video with a location, it will show up between your name and the block of content on the feed.
Emojis are fun and can make your caption more eye-catching. If you know of a few relevant emojis that could fit with your post, stick them in the caption area. For example, if you're posting a vacation photo, you could include a palm tree 🌴 or a plane ✈️ to show you flew somewhere.
Here are the top Instagram emojis you can use:
However, keep in mind that there's a multitude of choices to add flair to your posts, from keeping it real 💯 to the cringe face 😬.
Be sure not to go overboard and post emojis just for the sake of posting them. If you post a bowling emoji along with a photo of a beach, that obviously won't make sense to people.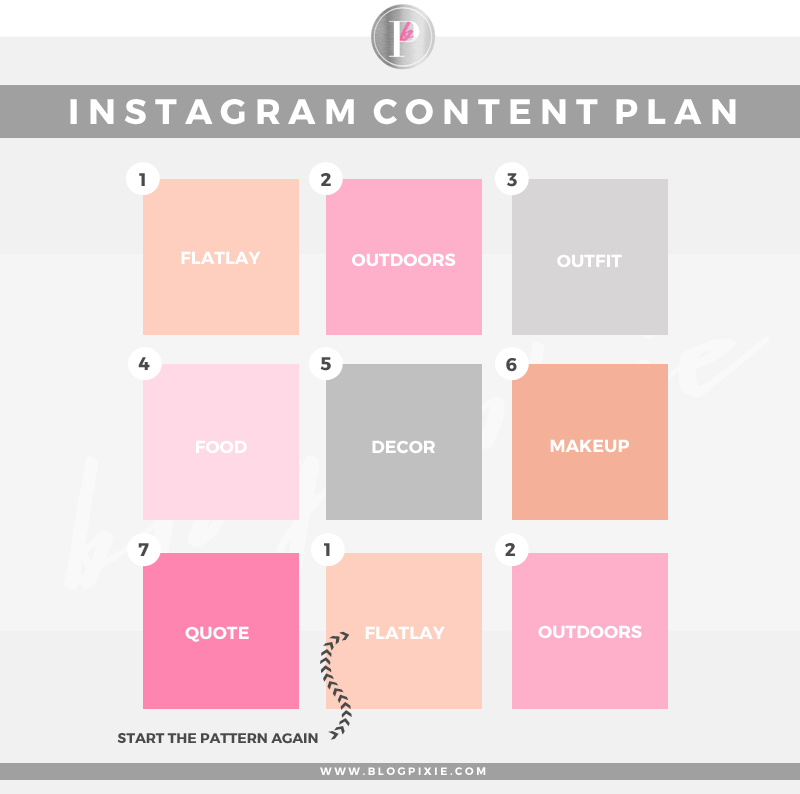 Similarly, if you post 20 emojis that loosely relate to a post, you might just annoy your followers or come off as desperate.
Finally, if you want to share your content on your other, connected social media sites (like Facebook or Twitter), simply toggle the button from the left to the right.
When you're ready to post, click "Share" in the top right.
Instagram Saved DraftsIf you're not ready to post right away, you can also save it to your Instagram Saved Drafts. Simply go back to the filtering and editing step, tap the back arrow in the top left, and select "Save Draft."
Typos happen to everyone! If you just posted something and notice a glaring spelling error, don't panic. Simply tap the three dots that appear on the right across from your name, then tap "Edit."
Make the adjustments you see fit and save them so it reflects on your Instagram.![]() Otherwise, your post is complete and live for everyone to see.
Otherwise, your post is complete and live for everyone to see.
Now that you know how to post to Instagram, you can begin creating content for the platform and connecting with your audience. If you're a business or brand, you'll want a solid strategy for earning engagement and awareness.
Editor's note: This post was originally published in November 2019 and has been updated for comprehensiveness.
Topics: Instagram Marketing

While photos are a great way to capture a specific moment, videos are better at showing movement, the process of making something, or capturing events where sound plays a significant role.
In addition to photos, Instagram is well-suited to share video content.
You can post recorded moments to your feed and stories, and Instagram also allows you to privately send videos to friends through a direct message.
Here's how to do all three.
Check out the products mentioned in this article:1. Open the Instagram app on your iPhone or Android phone.
2. Tap the "+" icon at the bottom center of your screen.
3. You can either select a pre-recorded video from your library or take a video in the moment to post. For the former, tap on "Library" at the bottom of your screen and then tap on the video you'd like to post. For the latter, tap on "Video" then press down on the circle toward the bottom of your screen to record.
4. Tap "Next" at the top right corner of your screen.
5. You'll be brought to a screen where you can edit your video. Once you've made any desired changes, tap "Next" again.
6. Now you'll be brought to a screen where you can add a caption, select a location, tag people, and simultaneously post the video to another social media network. Once you've completed the desired fields, tap "Share" to post your video to your feed.
1. Open the Instagram app.
2. Swipe right from anywhere in the feed or tap on the camera icon at the top left corner of your screen.
3. Your screen will now show your camera's view. Press down on the white circle at the bottom of your screen to begin recording a video. Alternatively, swipe up on the screen to pull up your library where you can select a pre-recorded video to post.
Swipe up to choose a video from your library. Christina Liao/Business Insider4. Once you've recorded a video directly from the app or selected one from your library, tap "Send To >" at the bottom right corner of your screen.
5. On the "Share" screen you'll have the option to post the video to your story for all of your followers to see — and if you have a public profile, for anyone who comes across your account. You can also choose to share it with a specified list of "Close Friends." Tap "Share" or "Send" to select where and who you'd like to send the video to.
6. Tap "Done" at the bottom of the screen.
How to send a video in a direct message on Instagram1. Open the Instagram app.
2. To access your direct messages, swipe left from anywhere in your feed or tap the paper plane icon at the top right of your screen.
3. Find the person you'd like to send a direct message to by tapping on the pencil icon at the top right of your screen, selecting them from your existing list of messages, or via the "Search" bar at the top of the screen.
4. A chat screen will open up. Tap the camera icon at the bottom left corner to begin recording a video directly from the app or the photo icon at the bottom right corner to select a pre-recorded video from your library.
You have the option to record a new video or send an existing one through direct message. Christina Liao/Business Insider5. If you're taking a video directly from the app to send to someone, their profile photo will appear at the bottom of your screen above the words "Send" once you've finished recording. Tap on the person's profile photo. If you're selecting a video from your library, tap on the video(s) you'd like to send and then tap "Send.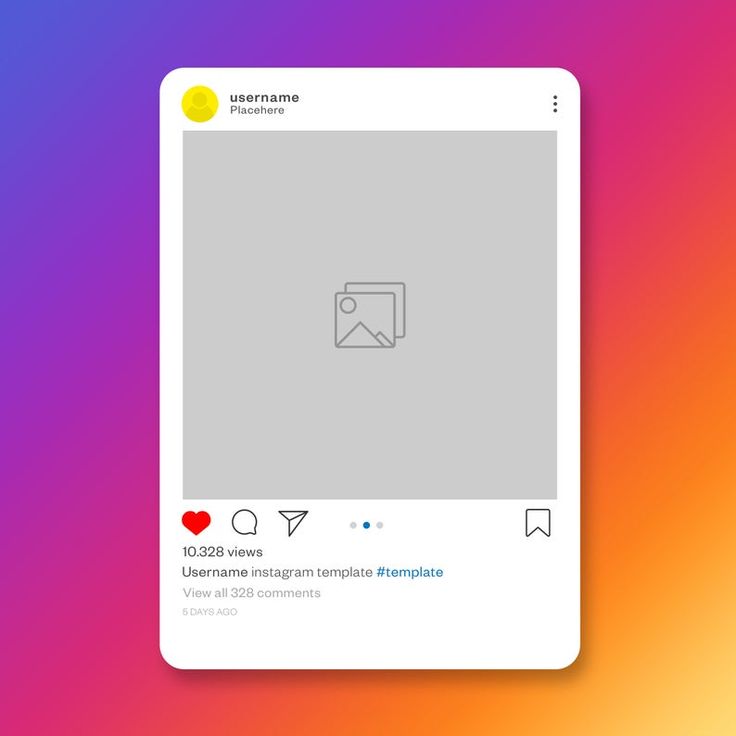 "
"
Christina Liao
Freelance writer
Christina Liao is a freelance contributor for Business Insider.
Read moreRead less
Insider Inc. receives a commission when you buy through our links.
There are 3 main ways to add a photo to Instagram* from your phone: upload via the Instagram* mobile app, from your phone gallery, or via third-party apps. We will analyze separately how to publish a photo in a post and a story.
Download the Instagram app* from the AppStore or Google Play. After registering or logging into your account, you will see the [+] icon in the upper right corner, click on it, and then in the menu that appears, click on the "Publish" button.
Interface for adding a new post to the feedNext, you will open the interface for adding a post, you need to go through several steps:
 ;
; Let's take a closer look at how to post photos on Instagram* from your phone.
Select media files. After pressing the "Publish" button, you will be taken to the gallery on your phone. Select the photos or videos you want to post. At this stage, you can also change the resolution or select multiple files for one post.
Basic buttons for setting up a future publicationEditing files. After selecting all the settings, click the "Next" button in the upper right corner and go to the editing interface - here you can apply filters, adjust contrast, add sharpness, level the horizon, and so on.
Photo and video editing tools Add text and labels. Once you've finished editing your media, click the Next button again and the last settings will open: select other social networks for publication, add text, geotag, user tags. Read more in our article “Instagram tags*: how and why to use”.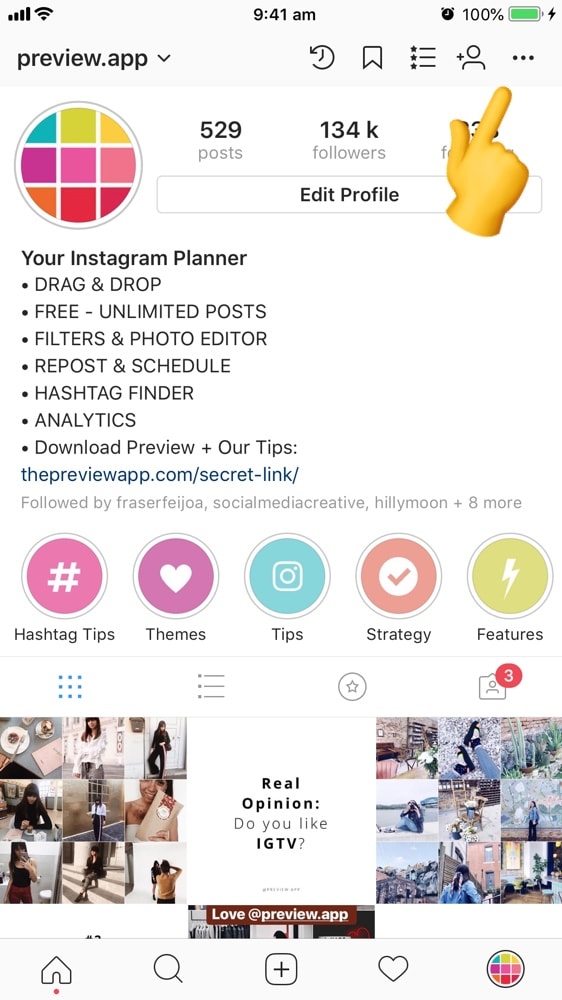
Big text cannot be posted on Instagram*, the limit is 2200 characters. But if you really need it, we have an article with recommendations for the design of such publications.
Publication . When you're done with the settings, click "Share" in the upper right corner and the post will appear in your account feed and in the news feed of your followers. Hooray!
The process of loading a post and its display in the news feedThis is a quick way when you just need to post one file with a caption, because this way you can not customize the display format, add multiple files to one post, edit media files, add geotags and tag other users.
How to post photos on Instagram* from your phone using the gallery:
That's it - the publication has been uploaded to your profile!
Step-by-step process of publishing a photo in the feed through the phone galleryIf you do not know what, why, why to publish and how to design, I recommend our free course "7 Steps of Content Marketing". In the course, we tell you what content marketing is, how to create, design and promote content on the Internet. All this will help you understand how content works, why publish posts and how to make them beautiful and interesting.
You can upload photos to Instagram* from photo and video editing apps, feed maker, and so on. Almost all of these applications have the ability to automatically add media files to Instagram*.
For example, the Canva photo and video editor app has a Share button in the top right corner. In the additional menu, the Instagram icon appears *, when clicked, it transfers to the social network application with the option to select a placement: Stories or feed. After clicking on the "Feed" button, the standard Instagram interface * opens to add a post to the feed.
You can upload a photo to Instagram stories* from your phone either directly from the Instagram application* or through third-party applications.
There are 3 ways to post a Story via the Instagram app*:
After clicking, the interface for creating Stories will open. By default, the camera opens, and you can immediately take a picture or video for stories. If you want to add files from your phone's gallery, tap the button in the bottom left corner of the screen or swipe up from the bottom of the screen.
The story editing interface also has many useful features:
 There are masks both from Instagram* itself and from users. To get as many creative masks as possible, subscribe to major bloggers who create such masks. For example, bloggers ya.molli or georska.
 Once you're done with your stories, select the publish option at the bottom of the screen:
Stories, like posts, can be posted from other applications, only when choosing a placement, you need to click "Stories".
Check out the Instagram Stories* section of our blog for inspiration on how to use Stories on both your personal blog and brand account.
If you feel uncomfortable publishing posts and stories from your phone, use services for publishing from your computer, such as SMMplanner. With it, you can design and post posts and stories from your computer and specify the time at which they will be automatically published.
Scheduling a new post on Instagram* from a computer via SMMplannerWhat is the convenience of delayed posting and how to post on Instagram* from SMMplanner, read in our article "Delayed posting services on Instagram*: why they are needed and how they work".
Universal algorithm of actions for posting photos on Instagram* from the phone:
Done! Your first story or post is already in the feed.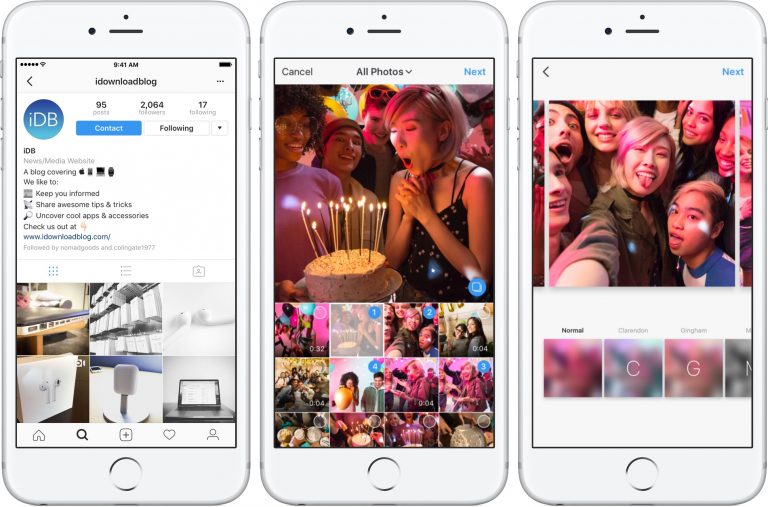
.
Post-gallery can be posted on Instagram: several photos and/or videos at once in one post. In such a gallery, there can be up to 10 photos and videos in total. First, we will tell you how to make a post from several photos, and then how to use it to promote on Instagram.
.

When the first gallery post appears on your blog, there will be a few dots under the photo. These points mean that there are several photos in this publication. In your mosaic account, gallery posts will have a gallery icon in the upper right corner. To view the gallery, swipe from right to left.
You can comment and like a post with several photos and videos as usual.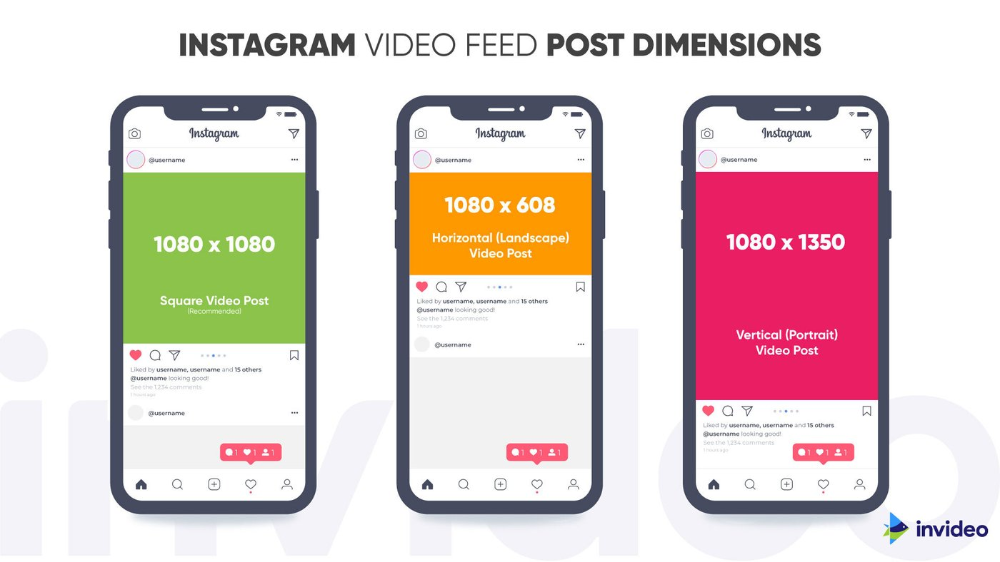 But these comments and likes will not be for each individual photo, but for the entire gallery.
Edit like a normal post. Photos and videos, their order and tagged people cannot be changed. But you can geolocation and signature.
Fitonies
Beauty bloggers Travelers Sale of goods (shops, needlewomen, etc.) Sale of services Posts with several photos and videos are a logical continuation of stories.
Business accounts