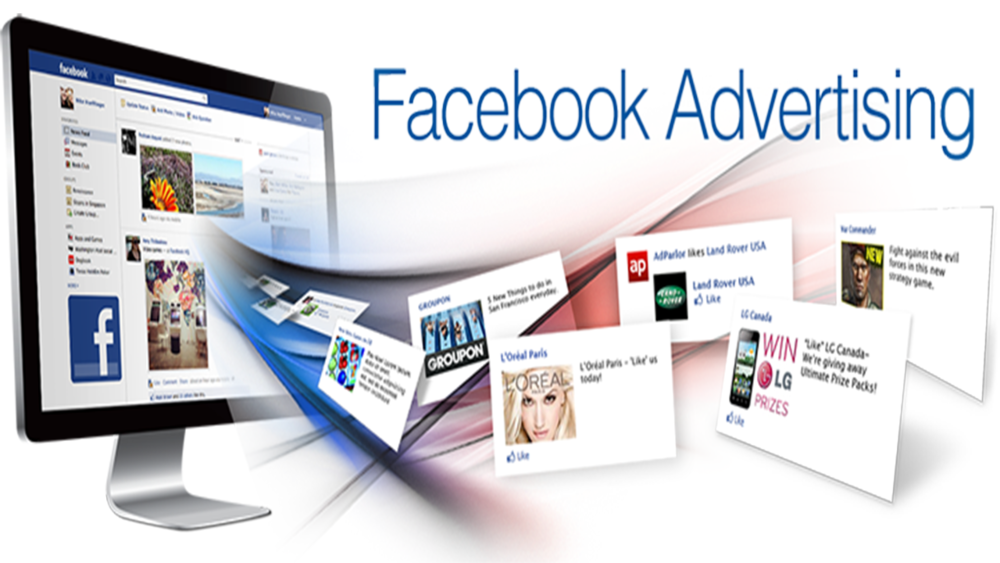
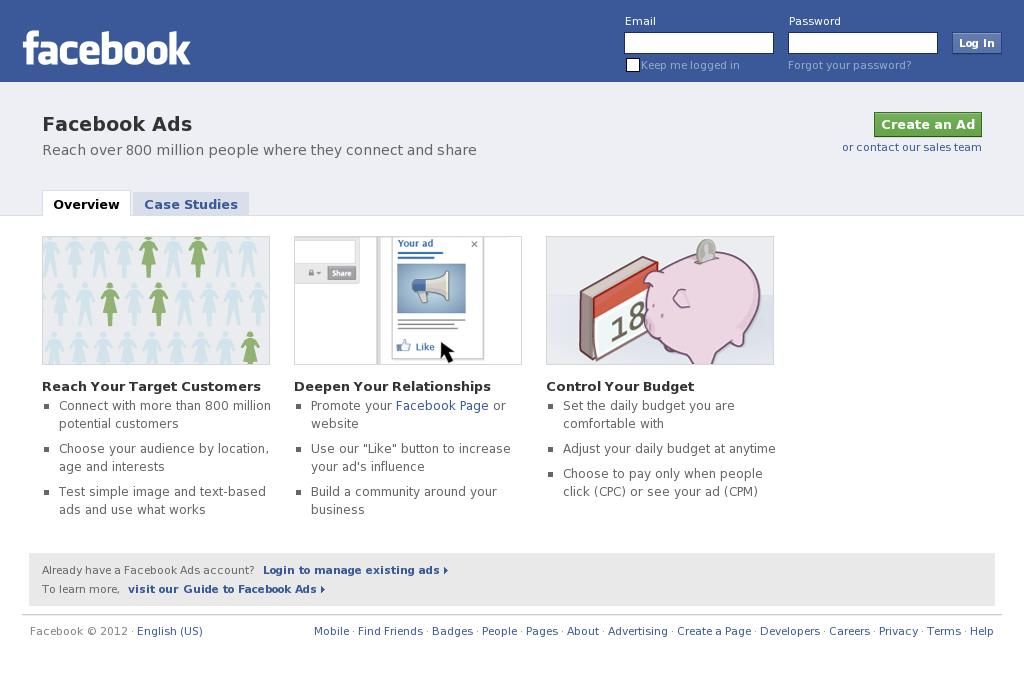
When setting up a paid Facebook ad, there are a lot of boxes to check. Are you targeting the right people? Did you choose the right bidding model for your ad? Are you running the right type of ad? If we’re being honest, it can get a little confusing.
To help simplify the process for you, we’re breaking down the step-by-step process of running an ad on Facebook. And to make it even better, we put together a checklist to help you keep all of your campaign details straight.
With this resource in hand, you can build the right ad for the right audience on this expansive platform.
With more than 2.9 billion people using Facebook every month, and nearly 1.9 billion users every day, Facebook offers a unique opportunity for marketers to augment their organic efforts.
The trouble is, with both time and money on the line, there’s not much room for oversight. To capitalize on this platform’s audience and effectively run Facebook ads, you must first learn Facebook Ads Manager.
Facebook Ads Manager is a sophisticated dashboard that provides users with an overview of all their campaigns.
Facebook Ads Manager’s offerings, otherwise labeled Ads Center features, are divided into four parts:
 This offering is best fit for beginners and those looking for a simple way to gain exposure. The trade-off: You lose the precision you may achieve manually. This section will list all your Automated Ads and a summary of recent results.
To use the Facebook Ads Manager, you’ll need a Facebook Business Page (learn how to set one up here). This is because you can’t run ads through personal profiles.
Then, follow these steps:
 facebook.com/business/tools/ads-manager.
Once set up, the Ads Manager becomes the control center for your Facebook ads.
Once you log into the Ads Manager, you’ll see a performance dashboard where all of your campaigns, ad sets, and ads will be listed, including the results they’ve driven for your Facebook page.
Unless you’ve already created an ad for your Facebook page, this dashboard will be empty.
To create a new campaign, ad set, or ad through the Facebook Ads Manager, tab over to the type of ad you want to create. Click the green “Create” button to the far left of these ad types, as shown below. You can see from this screenshot that we’re currently set to create a New Campaign.

Facebook Ads Manager, like many social media advertising networks, is designed with your campaign objective in mind. Before getting started, Ads Manager will prompt you to choose an objective for your campaign:
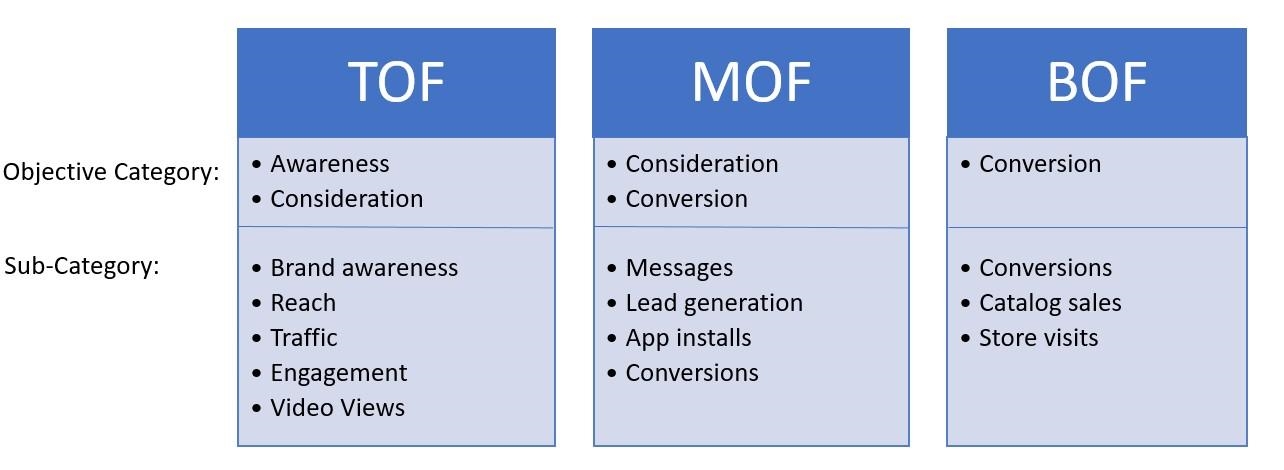
There are 11 different objectives to choose from. The list includes everything from general brand awareness, to getting installs of your app, to increasing traffic to your online store.
By choosing one of these objectives, you’re giving Facebook a better idea of what you’d like to do so they can present you with the best-suited ad options. As shown in the screenshot above, Facebook’s ad options include:
Let’s say, for the sake of this blog post, you’re looking to drive more traffic to your website. When you select this option, Facebook will prompt you to enter the URL you’re looking to promote.
If you’re using marketing automation software, be sure to create a unique tracking URL with UTM parameters for this to ensure that you’ll be able to keep track of traffic and conversions from this ad. For HubSpot customers, this can be done using the Tracking URL Builder.
Once selected, Facebook will then display the ad option that makes the most sense in terms of achieving this objective.
Don’t forget to download the Facebook Ads Checklist and save it for Facebook ad campaign best practices.
Your next step is to configure your target audience. You can do this for each ad set that belongs to the same campaign.
If you’re just starting out with paid advertising on Facebook, you’ll likely have to experiment with several different targeting options until you reach an audience that fits just right.
To help you narrow your focus, Facebook’s targeting criteria are accompanied by an audience definition gauge. This tool — located to the right of the audience targeting fields — takes all of your selected properties into consideration to come up with a potential reach number.
If you’re wavering between choosing a specific audience over a broad one, consider your objective. If you’re looking to drive traffic, you’ll probably want to focus on the type of people you know will be interested in your offering.
However, if you’re looking to build brand awareness or promote a widely appealing offer, feel free to focus on a more general audience.
Facebook’s built-in targeting is vast, including options such as:
You also have the option to select a Custom Audience. This allows you to target people on Facebook who are in your company’s contact database, visited a page on your website that has a tracking pixel, or used your app or game.
To learn more about how to set up a Custom Audience on Facebook, check out these instructions. (And for more on the specifics of these criteria, visit this Facebook targeting resource.)
Once you find a group that responds well to your ads, Facebook allows you to save these audiences to be used again later — so you may not need to repeat this step once you’ve been running Facebook ads for a while.
Facebook allows you to set either a daily budget or a lifetime budget. Here’s how they differ from each other.
 00 and must be at least 2x your CPC.
The cost of advertising on Facebook isn’t bound to a set price but instead differs on the scope and type of bidding model and strategy your business uses.
These numbers are based on approximate rates derived from a 2020-2021 AdEspresso study on Facebook Ads cost.
| Bidding Model | Average Facebook Advertising Cost |
| Cost-per-click (CPC) | $1.00 |
| Cost-per-like (CPL) | $1. |
| Cost-per-download (CPA) | $5.47 |
| Cost-per-thousand-impressions (CPM) | $7.19 |
| Bidding Types | Bid Strategy |
| Spend-Based Bidding Based on spending full budget for the most value possible | Highest Volume Reach as many prospects as possible. Highest Value Using the budget to maximize high-value sales over quantity. |
| Goal-Based Bidding Based on the value you want to achieve | Cost Per Result Strive to keep costs amount to the cost per purchase to stay profitable, but not guaranteed to adhere fully. Return On Ad Spend Aim to keep ad spend average to a ROAS control, but not guaranteed to adhere fully. |
| Manual Bidding Based on how much you can bid dynamically | Bid Cap Setting a maximum bid across auctions; good for advertisers who understand predicted conversion rates. |
Once your model and strategy are determined, you can further specify your budgeting and turn to the advanced options. This section allows you to specify the following.
ScheduleChoose whether or not you want your campaign to run immediately and continuously, or if you want to customize the start and end dates. You can also set parameters so that your ads only run during specific hours and days of the week.
Optimization and PricingChoose whether or not you want to bid for your objective, clicks, or impressions (This will alter how your ad is displayed and paid for. )
)
By doing so, you’ll pay for your ad to be shown to people within your target audience that are more likely to complete your desired action, but Facebook will control what your maximum bid is.
If you don’t want Facebook to set optimal bids for you, you’ll want to opt for manual bidding. This option awards you full control over how much you’re willing to pay per action completed. However, Facebook will provide a suggested bid based on other advertisers’ behavior to give you a sense of what you should shoot for.
DeliveryDelivery type falls under two categories: standard and accelerated. Standard delivery will show your ads throughout the day, while accelerated delivery helps you reach an audience quickly for time-sensitive ads.
Note: this option requires manual bid pricing.
What do you want your ad to look like? It all depends on your original objective.
If you’re looking to increase the number of clicks to your website, Facebook Ads Manager will suggest the Clicks to Website ad options. Makes sense, right?
This ad option is broken down into two formats: Links and Carousels. Essentially, this means that you can either display a single-image ad (Links) or a multi-image ad (Carousel) with three to five scrolling images at no additional cost.
A Links ad will be displayed like this.
A Carousel ad will be displayed like this.
Once you decide between the two, you’ll need to upload your creative assets. It’s important to note that for each type of ad, Facebook requires users to adhere to certain design criteria.
For single-image ads, Facebook asks that users adhere to the following design recommendations:
For multi-image ads — also known as Carousel Ads — Facebook provides the following design recommendations:
Remember that these are the ad options for the “Traffic” objective.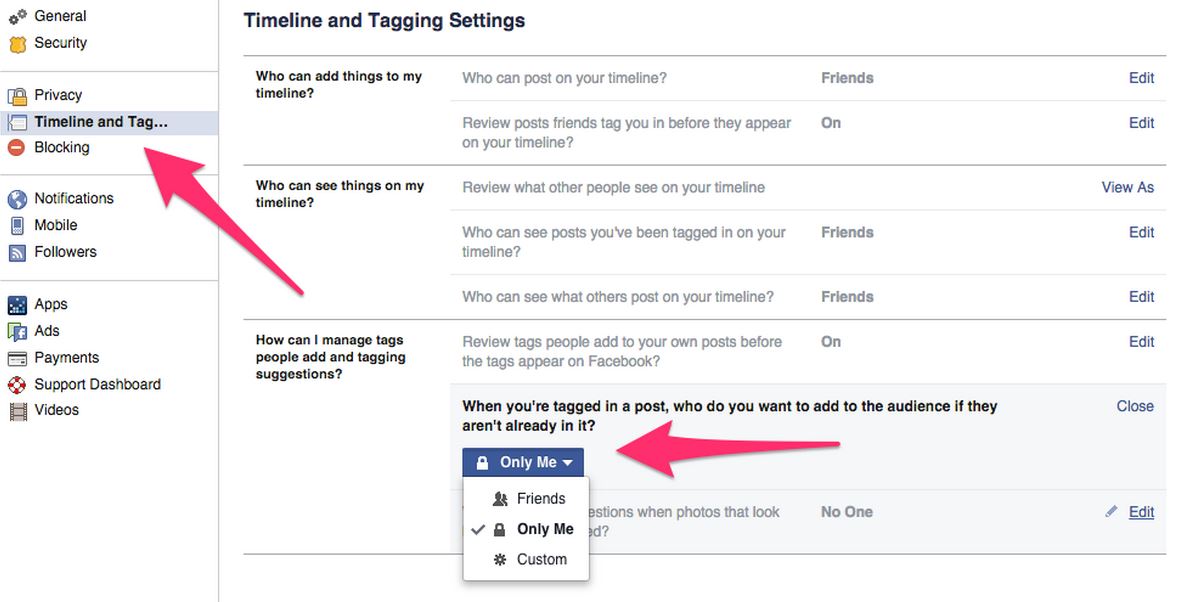
If you selected “boost your posts,” you’d be presented with different ad options like the Page Post Engagement: Photo ad. This ad has a unique set of design recommendations.
Once you select an ad type, the Ads Manager will prompt you to identify how you’d like to display your ad. The options they provide are as follows: Desktop News Feed, Mobile News Feed, and Desktop Right Column.
Here's how each ad would appear.
Desktop News FeedMobile News FeedDesktop Right ColumnBe aware if your ad isn’t associated with a Facebook page, you’ll only be able to run Desktop Right Column ads. To leverage all three display locations, you can learn how to create a Facebook page here.
Once your ads are running, you’ll want to keep an eye on how they’re doing. To see their results, you’ll want to look in two places: the Facebook Ads Manager and your marketing software.
According to Facebook, here are some of the key metrics to look for (and their definitions).
Regardless of which of these metrics you use to measure the success of your advertising efforts, you can find the data in the Ads Manager.
You can receive custom reports via email as well. Here’s how to set it up:
While there are certainly a lot of details to keep straight when planning a paid Facebook ad, it’s important that you don’t lose sight of the big picture. Reporting on clicks and conversions from Facebook is important.
However, if you’re using URLs with specific UTM codes, you have an opportunity to measure your ads’ full-funnel effectiveness using your marketing software.
Tracking URLs will help your marketing software keep track of how many leads, or better yet, how many customers you’ve gained from your advertising efforts. This information is useful in determining the ROI of this source, and can also be used to inform your overall Facebook marketing strategy.
If you’re a HubSpot customer using our ads tool, this process is already taken care of for you. You can also create unique tracking codes for your Facebook campaign by navigating to the “Tracking URL Builder” on the Reports homepage.
All you’ll need to do is plug in the URL, attach a campaign, and choose the source you want the URL to be attributed to in your Sources Report.
Once your ad launches and you start getting conversions on your website, you’ll be able to easily track how many visits, contacts, and customers you’re generating.
To create a Facebook ad that drives measurable results, follow these tips.
While creating ads, it’s tempting to make your messaging vague enough to resonate with everyone. But if you want your Facebook ads to be effective, tailor them to a specific audience.
Before you start creating images/videos and writing ad copy, figure out who is most likely to become paying customers. These are the people you should try to persuade with your ads.
To take things up a notch, use Facebook’s advanced targeting feature to add (or remove) people who follow certain apps, events, or pages. This may take a bit of time, but you’ll increase the ROI of your ad campaigns.
Although Kylie Haack is a real estate company that sells properties, this ad is targeted specifically toward people who want to appraise their homes — not people who want to buy.

Your headline is usually the first thing people will see on your Facebook ad. If it doesn’t catch people’s attention, it will reflect negatively on your click-through rate (CTR) and conversion rate.
With headlines, don’t try to shove your offer down people’s throats. Instead, be clear and conversational, and try to communicate your product’s benefits, if possible.
In this ad, HubSpot is urging people who need help with Facebook or Instagram marketing to check out their free guide on the topic. Their headline for this ad is: Maximize Lead Generation.
This simple, but powerful, headline summarizes the benefits people would get if they read and apply what’s in the free guide.
Pro tip: To improve your headlines and get better results, run split tests (more on that below). These tests can help you determine the messaging that gets people to convert.
According to Facebook, images with less than 20% of text perform better.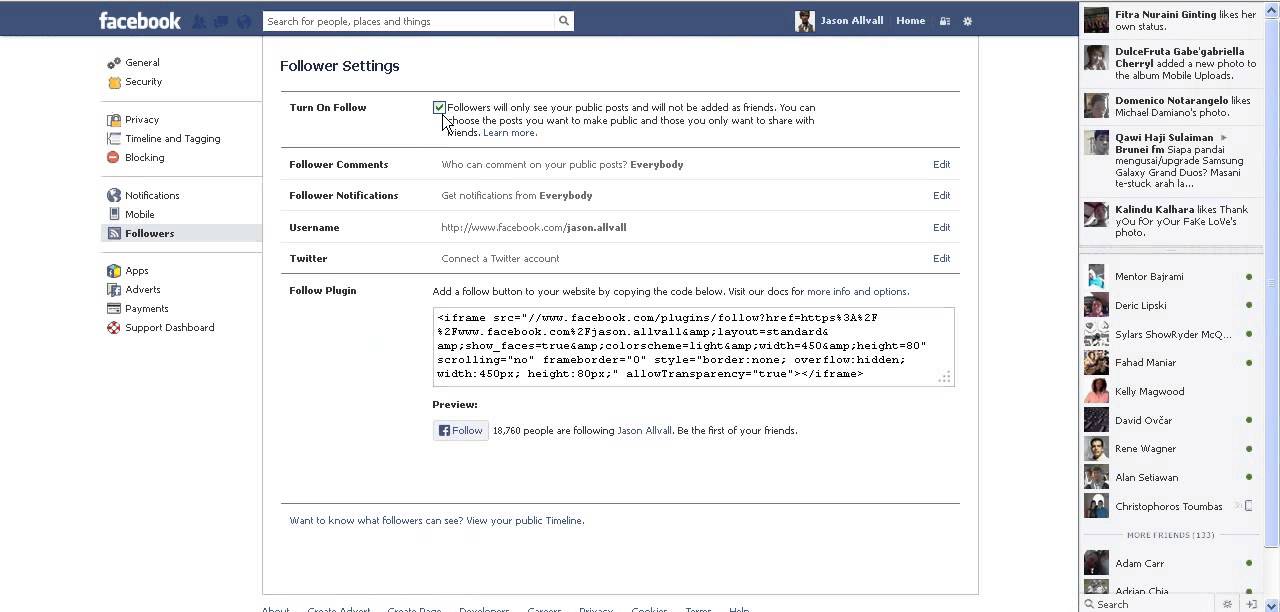 So try not to design graphics with too much text on them.
Text-heavy graphics can distract a prospect from your message, so it’s best to let the graphics speak for themselves. For example, the ad below has too much text.
Image Source
To prevent this from happening, you can use a longer ad caption. But if you must use text on your image, try using a smaller font and fewer words to reduce the proportion of text to image.
Ad copywriting is not an avenue to channel your inner Victorian author. It doesn’t matter if you’re an Insta-famous poet or you’ve won a Pulitzer — using verbose language in your Facebook ads will confuse your prospects.
When writing ad copy, the main goal is to make it easy for anyone to understand. When a prospect sees your ad, they should instantly know:
That’s why I love this Mailchimp ad, which helps people with online stores automate their marketing.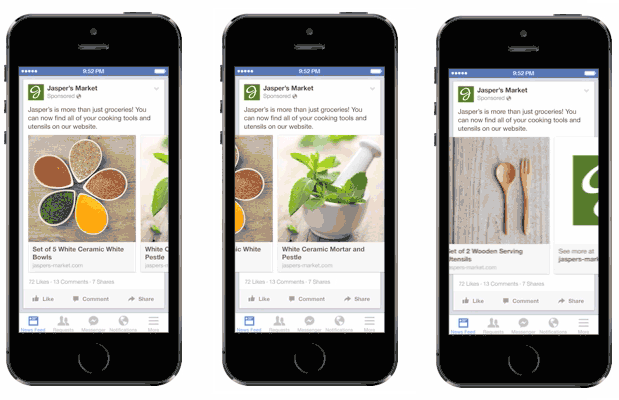
The copy in this ad is simple and to the point: “Automate your marketing with Customer Journey Builder and watch your orders grow.” Then, Mailchimp gives a simplified visualization of what the automation process looks like.
This helps prospects understand exactly how the Customer Journey Builder feature can take things off their plate and help them grow their business.
When a prospect sees your Facebook ad — especially if it’s the first time — they may not trust your brand or offer immediately. And that's okay.
It’s your job to convince them that you’re the real deal. A great way to do this is to use social proof in your ads.
Social proof comes in many forms — reactions, comments, shares, testimonials, and reviews. Featuring these in your ads shows prospects that other people have worked with your brand and purchased your offer without any regrets. Once they see this, they may be convinced to be your customer, too.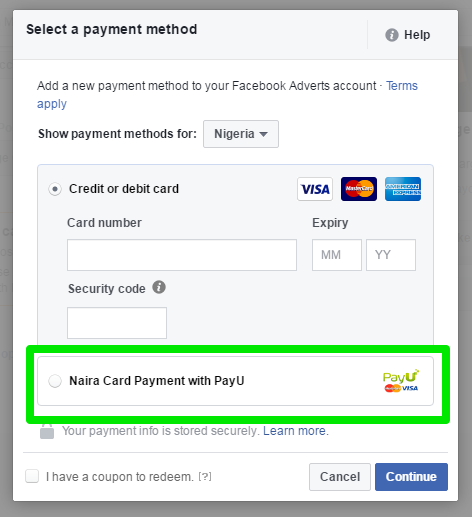
Before Adobe acquired the company, Figma was really good at using social proof in their Facebook ads.
In the ad above, the product design lead at Onfido, Steve Denis, walks people through how Onfido uses Figma to organize and scale its design systems. The message is simple: If other companies trust Figma to meet their design needs, you can too.
When you run ads on Facebook, you’re essentially telling your audience that if they click your ad, they’ll get exactly what you’re offering on the page your ad leads to.
There’s no quicker way to lose the trust of your audience and increase your bounce rates than to send people to a landing page that has absolutely nothing to do with the offer they were interested in.
When designing your ad and landing page, ensure that the offer promised in the ad is the same as the one on the landing page. You should also include common elements, such as colors, fonts, and images, that will make it easy for people to recognize your offer and convert.
Here’s a great example of ad-landing page sync.
Here, Yoga International is advertising their free breathwork classes that can help people “unwind tension and improve self-healing.” The ad and the landing page it leads to share several design elements.
That includes brand colors, image choices, and fonts. These common elements help prospects feel like the landing page is an extension of the Facebook ad, rather than a new offer entirely.
The perfect Facebook ad should have a clear action the prospect should take.
Some ads are designed to spread awareness about a brand. Other ads lead users to installs, ebook downloads, or sales.
Ideally, ads do both. But to be on the safe side — and to get results that move the needle toward business growth — be clear on exactly what you want your prospects to do after they see the ad.
Calls to action like “Sign up,” “Follow,” “Download,” “Install the App,” and “Shop Now” clearly communicate the desired course of action to a prospect. Without a good CTA, people would see your ad, but they’ll have no idea what to do next.
In this ad, Dermalogica, a skincare company, advertises a power trio of three products. Plus, the bundle is less than half of the original prices of the individual products.
The ad is straightforward. It says what the product is, what the discount is, and the perk (free shipping) you get if you buy the product.
The “Shop Now” call-to-action is direct. This indicates that Dermalogica’s goal is for people to click the link and buy the product package.
The only way you can improve your Facebook ads is to run split tests on everything — from the headline to ad copy to visuals and CTAs. Sometimes, an ad might not perform well because the copy isn’t convincing enough or the visuals aren’t eye-catching.
To know for sure, create different variations of the same ad — changing one thing at a time — and publish them. Let them run then check to see which version(s) gets the most likes, comments, shares, and conversions.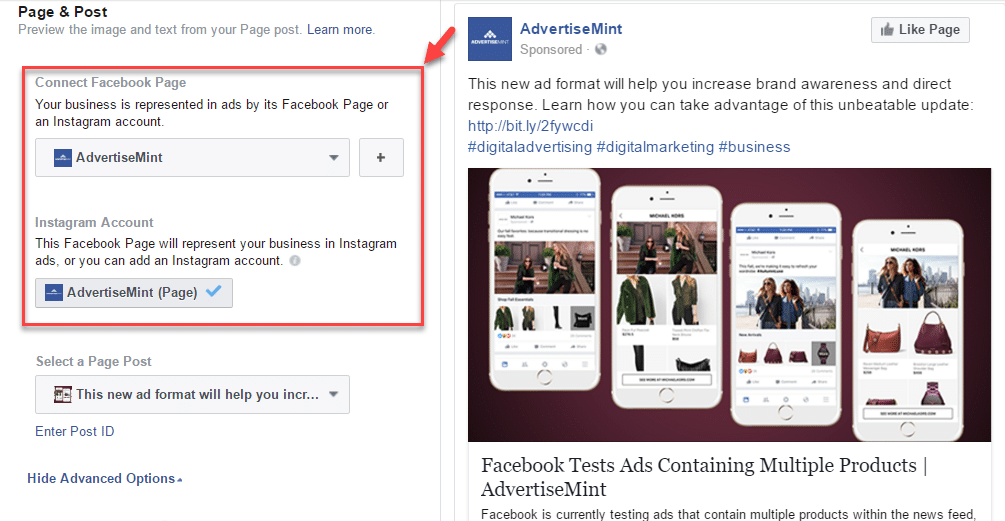
In the instance above, Canva ran A/B tests on the ad creatives. In both ads, the ad copy is exactly the same, but the visual assets are not — one’s an image and the other is a video.
Although the ad copy is the same, the change in visuals can spell a huge difference in the ROI from both ads.
Now that you know how to set up an ad, it’s time to create one of your own so you can spread brand awareness on Facebook, generate traffic, and gather leads from your ideal prospects on the platform.
Editor’s note: This post was originally published in September 2019 and has been updated for comprehensiveness.
Topics: Facebook Advertising
With 2.6 billion people actively using Facebook every day, Facebook has become a go-to component of almost any inbound marketing strategy.
But as more and more Facebook features change, so does the process of setting up a Page.
Don't waste another day aimlessly poking around on Facebook trying to figure out how to get your Page posted. We built this guide to help you avoid wasting time on a marketing asset that should work for you.
(If you're looking for tips and resources for how to leverage your Facebook Page once it's up and running, check out our comprehensive guide to Facebook marketing).
Your Facebook Business Page is essentially your company or organization's "real estate" on Facebook. It constitutes your main Facebook presence — where you'll post updates, share content from employees and customers, and link to when referring to your business elsewhere on Facebook.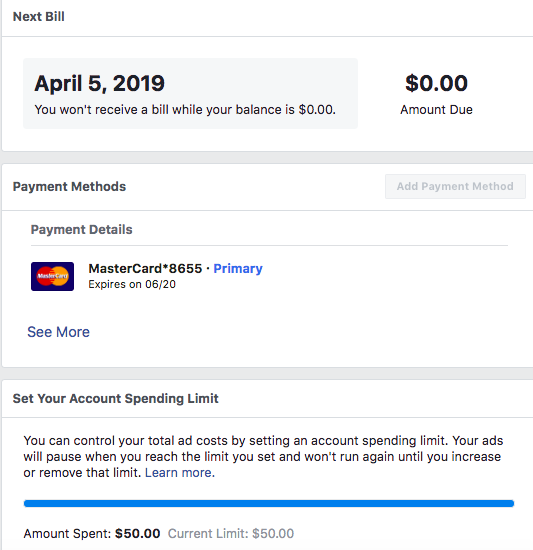
Consider your Facebook Business Page your Facebook "home." Moreover, your Facebook Page is not a static site. Sure, there will be static elements like your About information and cover image, but to manage your Page correctly, it should be consistently updated with content.
But let's not get ahead of ourselves. First, we'll walk you through how to create a Facebook Business Page. We'll discuss what to post on it later.
Follow these steps to get your Facebook Page up and running in no time.
To begin, head to Facebook. On the left-hand menu, choose Pages > Create New Page. This should launch the Page creator within your Facebook interface.
Enter your Page name and choose up to three categories. Type in a brief description — what your business does, the services you provide, or the purpose of the Page in under 255 characters. You should see this information populate the right side of the Page creator.
Once finished, click Create Page.
(Note: I recommend carefully selecting your name. Although Facebook allows you to change your name and URL once, it's a difficult and tedious process.
Clicking Create Page shouldn't move you off the Page creator. You'll see two more prompts added to the left-hand menu: to add a profile photo (170 x 170 pixels) and cover photo (1640 x 856 pixels).
Add a logo or widely recognized image for your profile photo. If you have other social media accounts for your business, consider using the same profile photo from those to keep your online presence consistent.
For your cover photo, choose an image that represents the purpose or theme of your Page
You should see these images populate the right side of the Page creator. When finished, click Save.
After the previous step, Facebook should move you to the Facebook Business Page dashboard where you'll manage all other aspects of your Page.
This interface can feel overwhelming, so bear with me. First things first, choose a username for your Page. A username helps people find your Page in search and allows them to easily tag your Page when posting about your company. Your username also makes up your Facebook Business Page URL.
For the example below, I chose @cloverconsignment. So, my Facebook Page URL would be https://fb.me/cloverconsignment.
Next, click + Add Action Button to add a CTA to your Page. This should be the action you want your visitors to take when they visit your Facebook Business Page.
Facebook offers 10+ different CTA options, from Shop Now to Learn More to Contact Us, and some allow you to input your website to help drive traffic.
 Edit your Page info.
After setting a username and choosing a CTA, click More > About in the main menu. This will navigate you to your Page info, where visitors will go to learn more about your organization.
Click Edit Page Info in the top right corner to update this information.
There are many fields to update here. Here's what to focus on:
 This information will also help drive Facebook traffic to your website and products.
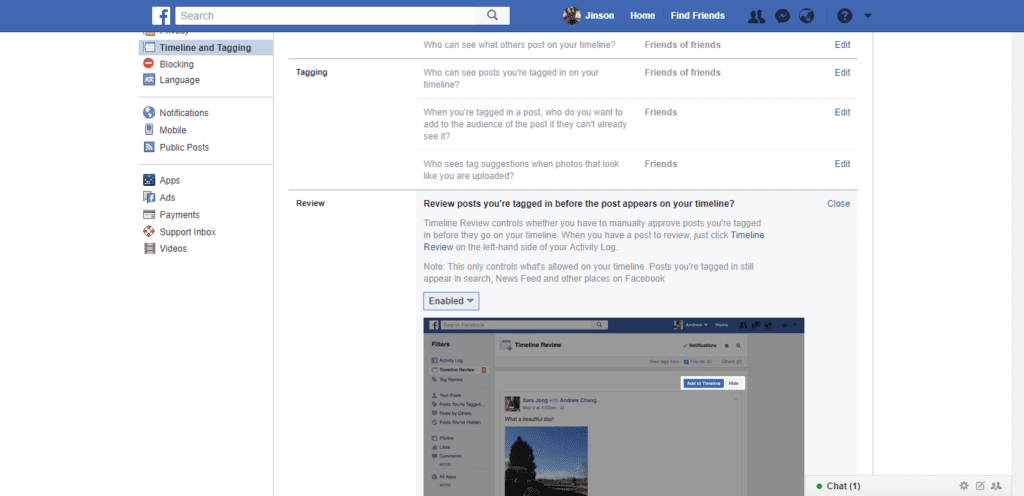
In the left-hand navigation, click Settings at the bottom. The left-hand menu will change to more detailed categories, and the right side interface will list (seemingly) countless options.
I encourage you to skim through these settings and get familiar with what each may change or update on your Page. In the meantime, however, I'm going to unpack a few core settings to know.

Congratulations! Your Facebook Business Page is up and running (just like I promised). Now it's time to work ... and by work, I mean post on your Page, consistently.
As I said in the introduction, your Facebook Page should not be a static site. To manage your Page correctly, it should be updated with content on a regular basis.
Moreover, you should have a good amount of content published before you invite users to be a part of your growing community. Who wants to follow a blank Page, anyway?
When posting on your Page, use a variety of content — images, video, GIFs, memes, shared customer content, or graphs.
What images would your audience like to see? What stats would they like to read? What links would they like to click? Ask these questions to jumpstart a Facebook brainstorm.
If you post a particularly impressive or exciting post, you can pin it to the top of your feed. Do this by clicking the little grey arrow in the top-right corner of the post and tapping Pin to Top to move it to the top for seven days.
You can also use this feature for product announcements, business anniversaries, and other major events pertinent to your brand.
When you have enough content on your Page, start strategically inviting users to Like it. I recommend inviting users in the following cadence:
Promote your Page by sharing its content on your other social networks and including a link to your Page on your website and your email signatures.
The work you put into your Facebook Page should ease over time. How? By keeping an eye on what kind of content your audience prefers and likes to engage with.
To measure your Business Page activity and growth, click Insights on the left-hand menu. From here, you can monitor how people are engaging with your Page and content, thus showing you what content to focus on sharing in the future (and what content you can do away with).
You should also measure your efforts to ensure you're making valuable marketing decisions on Facebook. Under Insights, you should see the following:
 If you notice spikes on a specific day, try cross-checking what you posted that day to see if you can replicate that reach.
Other tabs like Posts, Events, and Stories show you specific activity around those types of Page content.
Facebook is no longer a "nice to have;" it's a necessity for any business developing a strong inbound marketing strategy. Use this guide to build a successful Facebook Business Page to engage your audience and drive traffic to your website.
Want to see how HubSpot uses Facebook? Like our Facebook Page here.
Editor's note: This post was originally published in October 2014 and has been updated for accuracy and comprehensiveness.
Topics: Facebook Business Pages
Contents
 1 Campaign Level Selection
 In this article, we will not only take a detailed look at the process of setting up Facebook ads from the technical side, but also analyze how this knowledge can be applied to create acquisition and retention campaigns. Let's take a look at Facebook Ads Manager first.
Ads Manager is a free tool from Facebook with which you can create and manage ads and measure the effectiveness of their results.
In the advertising account, you can create, view and edit advertising campaigns, ad groups and ads themselves. You can use Ads Manager on both desktop and mobile devices. Please note that not all ad objectives and features are available when creating campaigns on mobile devices.
You can promote posts using the "Promote Post" button below the posts on the business page, but you will have less targeting options if you do so. We recommend launching and maintaining advertising campaigns using the advertising account in the desktop version.
You can access Facebook Ads Manager using one of 3 methods:
Advertising campaigns can be run from a personal account. Thus, you can create only one advertising account and, accordingly, only one Facebook Pixel. To create more than one account and more flexible management of all pixels, pages, applications, we recommend using Facebook Business Manager.
Facebook Business Manager is a tool for managing all Facebook resources and sharing them with other users. In Business Manager, you can manage apps, pages, and ad accounts. You also have the ability to upload product catalogs, create posts, add payment methods, and more. For efficient management of all projects, you can create multiple cabinets.
Find out more: Facebook Business Manager: full overview of features and capabilities
If you are creating an ad on Facebook for the first time, you will also create an ad account.
To create it, you will need to specify its name, the company that will control it, time zone, payment method and currency.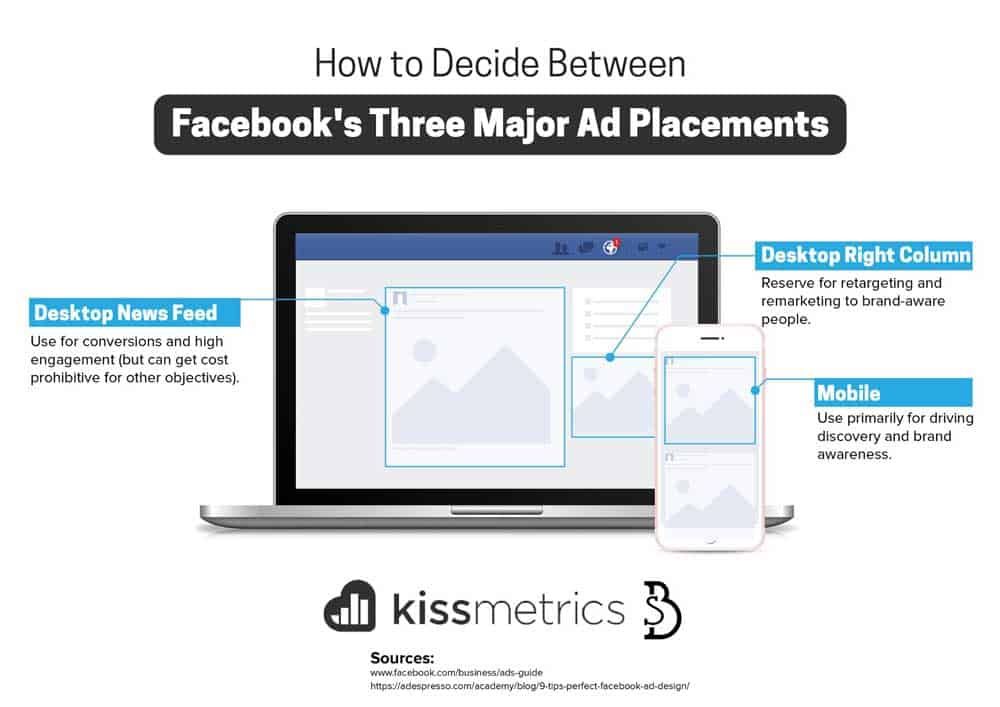
Account currency is the currency used in the ad account for billing. Facebook writes that it regularly adds new payment methods. The Ukrainian hryvnia is not yet available, but the supported currencies are the Russian ruble, euro and US dollar. Once every 60 days, you can change the currency to pay for ads on Facebook, provided that you do not have a current balance. But when you change the currency, you will have a new advertising account created. In some countries (such as Brazil, Nigeria, and Venezuela), the ad account's company country must match the currency.
By creating an ad account in Business Manager, you'll have your campaigns, ads, and billing information all in one place. You can also share it with other people so they can manage your ads.
To prevent your advertising account from being blocked by the Facebook administration, it is enough to follow the advertising rules, which you can read here.
Now let's take a closer look at the functionality of the advertising account.
1. Top navigation bar
Here you will find sections such as "Audiences" and "Analytics", you can set up reporting and set automatic rules, edit settings and much more.
2. Search and filters
The search will help you find the campaigns, groups or ads you need, and the filter will leave those campaigns that you plan to analyze using specific metrics: the names and goals of advertising campaigns, gender and geography of the audience, recent changes etc.
3. Button to create an advertising campaign
With this button you will start the process of creating a new advertising campaign, which we will describe in detail in the next section.
4. Ad account overview
Here you will find general information about your ad account, such as: reach or amount spent on all ads created, a detailed breakdown of the amount you spent on ads in the last 7 days, and any spending limits that you have set for the account.
5. Overview of advertising campaigns
In this tab, you can create and manage advertising campaigns: duplicate and edit existing campaigns, set up columns, and split the results according to the required metrics.
6. Overview of ad groups
Here you can create new ad groups within an existing campaign, edit, duplicate and view results.
7. Overview of ads
In this tab you can create new ads within an existing group, edit, duplicate ads, view their results.
8. Columns
Select one of the columns with the metrics you need or customize them yourself.
9. Campaign Breakdown
Here you can break down existing campaigns based on factors such as age, gender or placement.
10. Date Range
With this feature, you can set a specific date range so that advertisements are shown only for a certain period of time.
11. Campaign results
Here you will see the results of your active and inactive campaigns according to the selected columns.
Reports
Create standard or custom reports, export performance data as Excel or CSV files, and share reports with users who work with your ad account. You can also filter out those campaigns that you want to pay special attention to. If you need to send them to colleagues or a client, you can create a shortened link.
As we mentioned in the first section, you can start creating an ad campaign in Ads Manager using the "Create" button.
At the campaign level, you can name the campaign, define the budget, purchase type and select the advertising objective. Let's take a closer look at target selection.
The first step is to select a target. It is chosen according to your tasks - what you want to achieve. Choosing the right target will help you get the most effective results.
What are the goals?
The target list is subject to change. If you have a new ad account or use its functionality infrequently, you may have fewer options. With its active use and taking into account many other aspects, you will probably be the first to receive all updates to the advertising account.
The goal you choose is also your way of optimizing. If you select the "Traffic" goal, the algorithm is optimized for those users who are more likely to click on the site, if "Application Installs" - for those who are more likely to download the application.
A little test of practical understanding: Let's say you've posted a blog post and published it on your business page. You want to promote it to increase the reading of the article.
What advertising goal will you choose?
If you select Engagement, you will get interactions: ads will be optimized for those who like, share, comment, and make any other interactions. This means that if 9 out of 10 interactions are likes, then with this chosen goal, you will get a lot of likes for the article, but not transitions to the site.
If you want to get readers, then you should stop at the "Traffic" goal. In this case, the algorithm will be optimized for those users who click on the article.
If you want blog subscribers, for example, then your goal is Conversion. It will allow you to optimize impressions for those who subscribe to your blog. To do this, you need to use Facebook Pixel. About what a pixel is and why you need it, read our article.
⇨ The target is selected for optimization, but it is important to understand what you need to optimize for.
Another situation is also possible - adjacent goals with the same result.
For example, your task is to get leads. These can be collected through goals such as Lead Generation and Conversion. What to choose in this case? Let's simulate:
First, let's look at the cost per conversion:
↳ Lead Generation goal — $1. Goal "Conversion" - $3.
In this case, it is logical to choose the Lead Generation goal.
Next, we proceed to the analysis of the validity of leads:
↳ "Lead generation" - 10%, a valid lead will be $10. The “Conversion” goal is 50%, a valid lead will be $6.
Lead Generation loses in cost per valid lead.
But the analysis does not stop there, if you control the unit economy and end-to-end analytics.
The average check for valid leads through the Lead Generation objective, for example, may be higher, but CLV lower. Then, if we measure the average check and we have a one-time purchase, then perhaps the goal of "Lead Generation" can be more cost-effective. In any case, measure everything in terms of money.
If you're measuring results by taking into account the total amount of revenue for a customer, then you should stick with the Conversions goal.
⇨ The main point of your campaigns is profitability. Therefore, it is important to test the goals and see the results for different metrics.
Budget is the amount of money you will spend showing ads to people. It is also a price control tool.
By setting the budget at the campaign level, the system spends it automatically on the best results among all ad groups within the campaign.
But the best results for the system may not necessarily be the best for you. Let's imagine that you have created several personas, and the results in groups of some persons are more expensive than the results in others. In this case, the system will spend the budget on the group with cheaper results. But after analyzing the groups, you can see that the cheaper groups have much lower CLVs. To manage this, set a budget at the ad group level.
For example, select the "Conversions" goal at the campaign level and start creating an ad group and give it a name. Next, select the place where you want to drive traffic - website, application, Messenger or WhatsApp. Having determined the required entry point, the system will request clarification. For example, if you select "Website", the system will ask you to select a Pixel with events to track and optimize for conversions.
Next, Facebook suggests creating dynamic creatives or offers.
You just need to upload images, headlines and other creatives, and the system will automatically create combinations, selecting several components (for example, images, videos, headlines, descriptions, etc.) for a given audience. You can read more about them here.
Offers are discounts that you offer Facebook users to encourage them to make a purchase online and/or offline. When a person sees your offer in the feed, a person can not only like it and leave a comment, but also save it in the Offers tab. Facebook will remind the person of the saved offer up to three times, depending on their personal notification settings.
Here you define how much you want to spend and set the period for which the ad will be displayed. The budget can be set daily or immediately for the entire duration of the advertising campaign. If you select "daily budget" your bid can be correlated throughout the week, and if you select "lifetime budget" - throughout the entire period. You can also set an end date for your campaign, which will be disabled automatically.
Next, we move on to choosing the target audience: create a new one or use the saved one.
When you create a new audience, you include or exclude the collected audience lists for retargeting or look-alike audiences.
You can also specify socio-demographic (social) targeting:
When creating multiple ad groups and using detailed targeting in them, audience saturation is possible. This issue can occur if you are targeting with different conditions by including and don't use exclusions. For example, the same user can simultaneously be included in an interest group and in a group who visited the site. How to prevent the problem of audience attrition in advance, read our article “Audience satiety: How to avoid early and correct it in time”.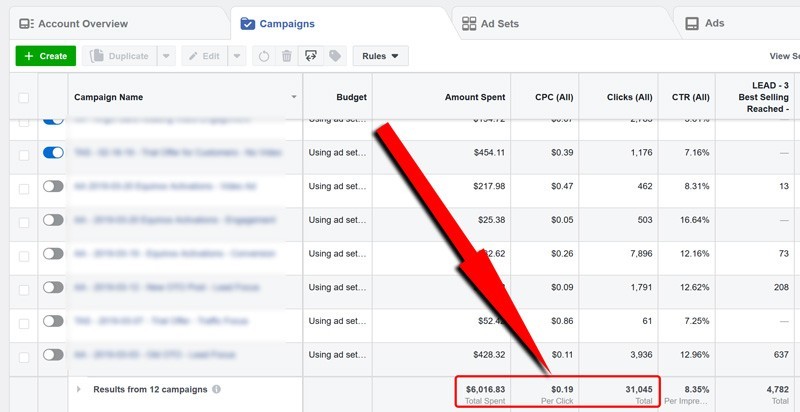
You have the option to include, exclude, or target friends of users who follow your business page or use your mobile app. You can also include or exclude people who checked in to the event.
Placements include 2 categories: device types and platforms.
In device types, you can select desktop and/or phone to select the devices on which ads will be displayed. On the platforms, you define the ad zone (location) where your ad will be shown - on Facebook, Instagram, Audience Network or Messenger. When editing placements, you can select not only certain devices and platforms, but also configure additional settings.
Platforms and device types can be separated into different ad groups for content customization and testing. But we recommend combining them for more effective optimization. However, it is important to see how ads will look on all devices beforehand at the ad level.
Next, we move on to choosing the option to optimize ad display. It will help the system understand how to deliver your ad. If you select "Conversions", the algorithm will select the audience that is more likely to make the specified conversion on the website. Delivery options depend on which advertising objective you are using.
When creating a Facebook ad campaign with the Conversions ad objective, you can choose the following types of bids to optimize: your ads with different intensity to all users from your targeting. "Impressions" - with a frequency of up to 4 per day, "Daily reach among unique users" - up to 1 per day.
One of the important steps in setting up an advertising campaign is choosing a bid strategy.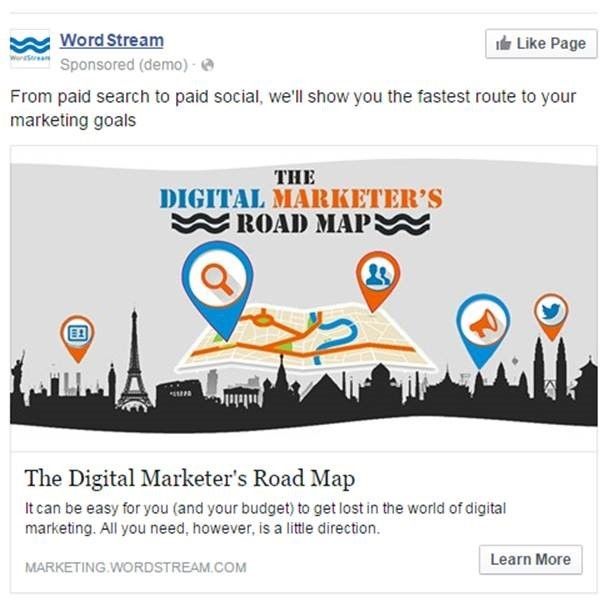
In order for the right audience to see your ad, you must win an auction with other advertisers. In the Facebook auction, the ad with the highest "total value" wins. The total value is not the amount you are willing to pay to display your ads. When determining this indicator, 3 factors are taken into account:
Rate is how much you are willing to spend. It controls the cost per result in case the auction wins and the impression is completed.
There are 2 bid strategies: Low Price and Target Price. Read more about them in our article How to Choose a Facebook Bid Strategy.
This parameter determines how fast your ad will be shown. You can use standard mode or set up accelerated impressions to get results faster. In the second case, your bid will be raised in order to get a higher place in the auction and get more impressions.
Let's start creating an ad creative.
First you need to choose from which page the advertisement will be shown. If you have specified Instagram as one of the placements, you must also specify the desired account here.
Facebook offers several ad formats to choose from. Choose the appropriate format depending on the purpose of promotion and content.
Upload your own photos or use stock. On the right, you can find the image parameters recommended by the social network for the best selection of pictures. You can create up to 6 ads at the same time. You can find all the recommendations from Facebook on creating creatives in the "Creative Center" section.
All ad settings occur on the left side of the page. On the right is a preview of your creative in different placements.
Next, you fill in the required fields: title, text, link to the site, call to action, etc.
When the ad is ready, click the "Confirm" button and your advertising campaign will be sent for moderation.
It is important to remember that the effectiveness of an advertising campaign is determined by the communication in your creatives - the settings only correlate the cost per result. The target audience makes decisions according to what they see in the advertisement.
We have analyzed the creation and setup of an advertising campaign from A to Z. But how to apply this knowledge correctly and get effective results?
If you have a website or mobile app, before launching an acquisition campaign, start by setting up a retargeting campaign.
For this you need:

Why start with retargeting? While you are setting up an advertising campaign for a cold audience, you will be able to start communicating with existing traffic.
Retention (retargeting campaigns) is a system promotion. And its task is to reach all relevant users/visitors and lead them to the final goal. At the same time, each stage of the funnel needs to be improved by increasing the Conversion Rate. In the case of acquisition campaigns, it is important to test in order to find the most profitable cost for achieving the goal.
If you are sure that your audience is of high quality, then the percentage of the target audience tends to 100. In this case, you do not need to worry about the type of delivery and optimization of the advertising campaign. In this case, the goal is to reach everyone. Choose the Reach objective to reach everyone in your sample and get a lower CPM.
If someone has already worked with the sample before you and you are not sure about its quality, then stop at the “Traffic” goal and optimize for clicks to reach only those who are more likely to want to receive your offer.
If the audience is of poor quality, then select the "Conversions" goal and optimize for conversions. You will lose volume, but at the same time you will not spend money on inappropriate impressions.
To be sure that you have chosen the right goal, we recommend testing and analyzing the results. The selection of an advertising goal for retargeting is the search for the ratio of the optimal price per result to the number of results received.
If you're getting sales for, say, $10 per unit for the "Conversions" ad objective, but your KPI is $15, try switching to the "Traffic" ad objective. The cost per result will likely fall while still being within the KPIs, but sales volumes may rise as more people see your ad.
If you are not planning active promotion, you should definitely launch retargeting campaigns. This will help you reach the entire loyal audience and lead the funnel to the result for a penny. Most of the spending is always on acquisition campaigns. If you don't have enough budget, run only retargeting campaigns.
Planning and implementing acquisition campaigns is completely different from retention campaigns.
The first stage is testing. Persons are created, a number of messages for each of them, a list of target groups, and saved audiences (targeting combinations) are loaded. Additionally, saved audiences are created based on data, and not only on portraits of the target audience (lookalike audiences from the base, lookalike audiences from events, etc.).
When testing is in progress, you need to move on to stabilizing the results and optimizing them. How to do this, we described in detail in the guide “Optimizing and scaling Facebook advertising campaigns”.
With the help of this article you will be able to create and set up an advertising campaign without any experience with Facebook Ads Manager. In the process of improving your skills, you will understand how you can manage the settings to get more effective results from communication with the audience.
Important points we would like to recap:
Effective results for you! 🙂
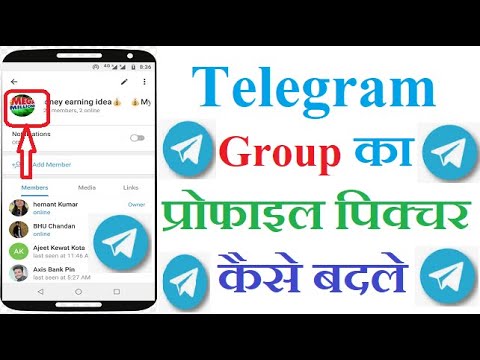
To be the first to receive fresh content from Median ads, subscribe to the Telegram channel and Messenger chatbot.
If you find an error, please highlight the text and press Ctrl+Enter .
To change the title and URL, under the page icon, go to the "About" section and click "Edit" next to the page name. Please note that the system allows you to change the name only once a week.
This method is so effective that our business page (the restaurant Ile-de-France does not actually exist) has already ranked fourth in the search results for the query "French Restaurants in Springfield" (the first three positions are top 3 real restaurants with address and customer reviews).
Secondly, you need to add information about your business to the cover of the Facebook page, to the description and other similar fields. So, in the case of our restaurant, the cover can be a beautifully designed menu (not all, but key dishes), information about promotions, prices, or key benefits of your business. If we are talking about an online store, then there may be information about promotions, unique offers, contests, sales, and more.
To add text to the cover, you need to click on it and then on the right select "Add a description". Here you need to write about what is posted on the photo, and about other current offers. The text must contain keywords.
More business information should be added to the short description of the page. And there you also need to use keywords: service or product + location.
Here you need to remember and use a simple rule: it is important not just to write, but to collect a reaction. If posts do not collect comments, likes and reposts, then Facebook will not promote them in the dynamic feed and, therefore, no one will see these posts. Therefore, you need to write not only about what you sell, or about professional, but also about what is interesting for your target audience.
Anything can come into play here. From well-formed quotes, as Free People did:
To beautifully crafted calls to share your post like Jim 'N Nick's Bar-BQ did:
To add naturalness to your posts, you can take pictures of your customers, as they did at The Bistro.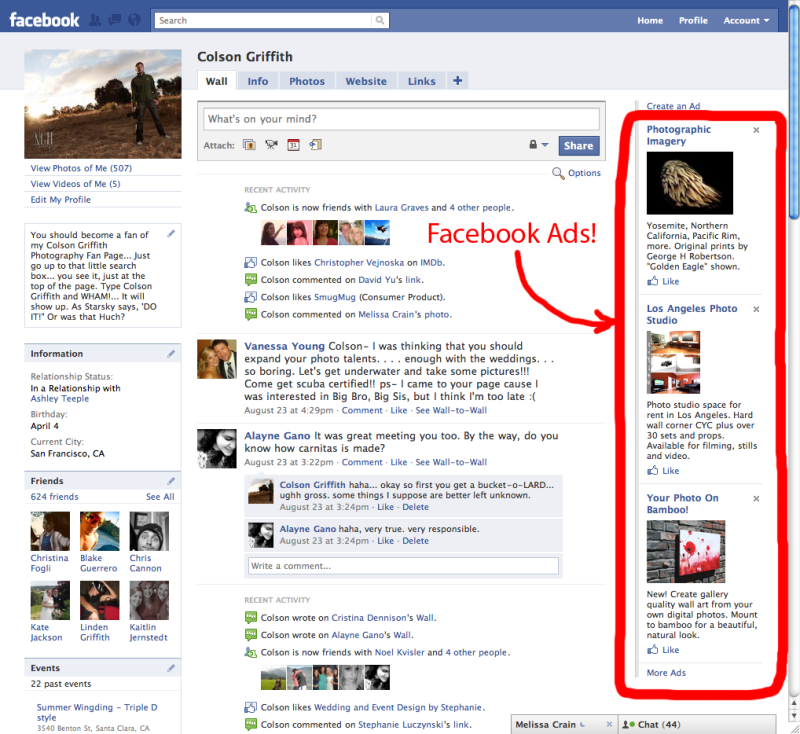 This is not only a great post for your feed, but also free likes and reposts, since the hero of the photo is unlikely to refuse to share it with his friends. Online stores can use a similar technique, only in their case it will be a discount or a bonus for a live video of the unboxing of the goods - this is also, in fact, free advertising.
More Facebook statistic says that users of this social network really enjoy watching videos: on average, each user watches at least one video per day, while organic video has 43% of "full views", while paid video has 31% . This is also worth using when posting short videos or using live broadcasts.
In addition to the above, you can also ask questions, write guides, give interesting statistics or make funny memes (photos or gifs), where 9 is somehow beaten0513 your business or industry. Posts like this attract users and help you grow your following.
But here you need to strike a balance between:
You need to start with posts about what the target audience wants to read about. In some of these posts, you need to add text or pictures with messages that are useful for your business (brand information, links and calls for a targeted action, etc.). Direct advertising should be up to 20%.
At the same time, it is desirable that all images and texts be optimized for the Facebook and Google algorithms (organic traffic can also come from here). For example, you can use Google Trends to find out what is trending right now, the Keyword Tool to search for keywords, Canva or Crello to create and edit photos and other images.
This includes everything that benefits the visitor: promotions, discounts, bonuses, limited offers and more. All this can be used as free advertising on Facebook, if you link the benefit to a like or a repost. For example, everyone who likes will receive a 5% discount, and who reposts - 10%.
Such discounts may be temporary or permanent. You can ask for more for permanent discounts: “1% discount forever for every 1000 invited subscribers, maximum 10%. The promotion is valid until the New Year. Similar offers are marketing with elements of gamification, which even more encourages people to advertise your business for free (discount cards offer everything, but not everywhere you need to “pass the quest” and earn a reward).
Tips on how to use discounts and promotions for free advertising on Facebook:
 In this case, you should always make a note or give a link to the rules.
 Another way for free to advertise on Facebook is groups. You can create your own group and use it to communicate with customers or use others to attract users to your page or perform a targeted action (purchase, go to the site, download the application, etc.).
To create your own group, go to the home page and click on the "Groups" icon on the left side of the screen.
Then press "Create Group" and in the window that opens, specify the name of the group, add those users from the list of friends whom we want to invite to the new group, and also indicate which group we need: private or public, visible or hidden (business needs a public, visible all group).
Next, you need to add a cover and enter information about the group. After that, you can add posts designed not so much for sales, but for increasing the loyalty and involvement of people. In fact, a group for business is another means of feedback, which is also useful for brand promotion.
When it comes to promoting your business with the help of other people's groups in Facebook, , the first thing to do here is to determine which groups your target audience is following. To do this, you need to spend some time studying groups according to the following criteria:
 For example, if you are repairing a car, then you need to look for groups where they discuss the purchase, repair and operation of a car. If you sell pizza, then you need groups in which people from your region sit and, for example, discuss infrastructure, local elections, local business, fishing on a nearby lake, and the like.
  Here we are talking about both the administration of the public and its subscribers. You should not use sites where the vocabulary of posts and comments contains a lot of swearing, insults and discrimination, even if all this is said in jest.
 It is worthwhile to advertise your business in such publics carefully and unobtrusively, participating in discussions, creating non-advertising posts that are interesting to users and giving useful advice. If your comments and answers are interesting to people, then they will open your page, where you can pin the first post with advertising. You can also answer on behalf of your business page or use its name and logo in the avatar.
This is another not entirely ethical way to promote on Facebook (and other social networks). Its essence is quite simple: you repost someone's post and in return they repost your post.
 07
07