Today, I wanted to look at some photos that I had posted on Facebook back in 2014. I knew the year, not the exact date, but I spent up to an hour trying to find out how to search through my Facebook photos by date or year. And I am here to tell you exactly what to do if you have the same problem.
Unfortunately, there doesn’t seem to be an option to only look at your photos on Facebook and sort them by year or search them by year or date. This is something everybody wants, yet for some reason there still isn’t an easy way to do it.
However, you still have an option to reduce the amount of scrolling needed and that is achieved by controlling your timeline – and I will share with you everything you need to do in order to quickly find a photo you published on Facebook in the past.
As long as you know the year when the photos were published, you’ll have an option to narrow down your search and make your life a lot easier.
The entire process is relatively simple once you know it and I will tell you how to do this, which is the only way right now to search your photos on Facebook by year or date.
1. Note that this only works on a PC or Laptop (so not on the mobile phone app). It might work if you log in to your Facebook account using a browser on your mobile – but it’s a lot easier on PC / Laptop.
2. Log in to your Facebook account and go to your Timeline by clicking your name in the upper left corner.
3. Right under your name, there is a bar with various tabs. Hover your mouse over the “Timeline” tab and select “Grid” view:
4. Now look at the left sidebar: a new menu will be there somewhere, with a button you can click under the “Date posted” category. Click that, like seen below:
5. Now all you have to do is select the year you know that you have published the photo in and scroll down through your timeline until you find that particular post. It’s really easy to navigate through those thanks to the thumbnails you can see.
What if you have a ton of things posted on your timeline, by both yourself and your friends?
You can still narrow down things a little bit more and make it even easier to find what you’re looking for. Here’s what to do:
1. Log in to your Facebook account and go to your timeline following all the steps above, basically seeing all the posts on your timeline published at a specific date.
2. On the sidebar to the left, right above the area where you selected the year, you have a few more options:
As you can see in the image above, you can look at posts on your timeline that were published by yourself only, only by yourself or all the posts. Additionally, you can only look at posts you are tagged in: these are all useful options that make searching for that particular photo or link you shared years ago a bit easier.
So this would be how to search your photos on Facebook by date. Not the easiest method, especially if you use to publish a lot of things on your timeline, but at least it’s easier that having to aimlessly scrolling down through years of photos until you find the one you are looking for – and the only method that exists so far.
In my case, it got the job done relatively fast – it took me longer to figure out how to do it, but in your case, since you’re reading this, you are already ahead and will get there sooner rather than later.
Share this article!
Cameras are everywhere today, which means you’re likely to come across an image that interests you. There are plenty of reverse image search options on Google. But what do you do if you see an image on Facebook and want to locate its origins?
Fortunately, there are ways to do a reverse image search for Facebook. Although Facebook doesn’t have a reverse image search feature, you can use the unique numerical ID that Facebook assigns to every image on Facebook to identify the source of the photo. Alternatively, you can use Google Image Search to do a reverse image search outside of Facebook.
Here’s how to find the origin of a photo you find on Facebook.
How to Reverse Image SearchOne of the easiest ways to find information about an image is by doing a reverse image search.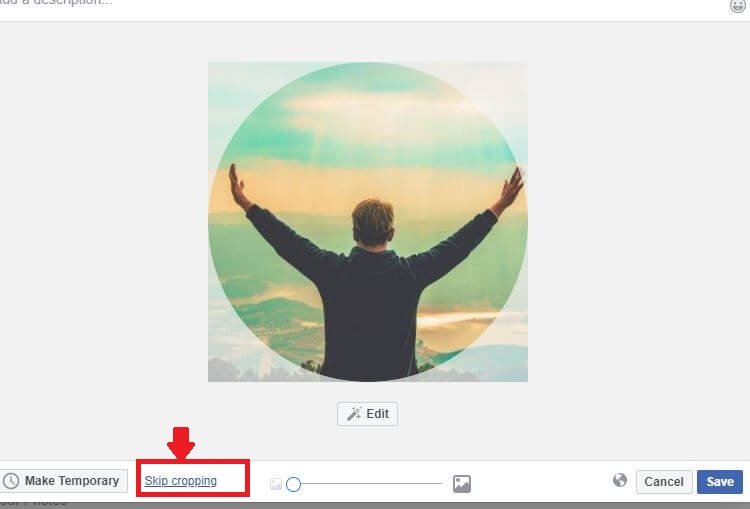 You can use search engines like Google Images or TinEye to quickly find the source of a picture.
To use a reverse image search engine, you need the image location or the actual image. You can also download the image and save it. To save an image from Facebook, you can either right-click and tap “Save Image As” from the web browser or open the image on the app and tap the three vertical dots in the upper right-hand corner and click save.
For Google, you can either paste the image URL or upload the image you downloaded and saved.
Remember, though, that your reverse image search results may vary depending on the profile settings of the profile from which the photo originated. If the user has their privacy locked down, you may be unable to figure out whose profile the image originated. You may find information about the photo from sources other than Facebook, leading you to the source of the photo.
Instead of or in addition to a reverse image search, there is a method you can use within Facebook to trace a photo back to the originating profile.![]()
Read on for instructions on how to match an image to a profile on Facebook.
Did you know that some Facebook images have a photo number embedded in the file name? Using this method is relatively simple.
However, if you choose to use this method, there are a few things to keep in mind.
First, the profile you find may not be the person in the photo. It may be where the photo originated, but that photo may have been taken and shared by someone else.
Also, it’s important to remember that you may get to a Facebook profile, but the information you see may be limited. It depends on the person’s privacy settings. For optimal results, the profile needs to be public, which of course, isn’t always the case.
With that in mind, here’s how to use this method to find specific Facebook profiles.
First, you need to locate the Facebook photo ID number on the image. To do this, right-click on the image and choose “View Image/Photo.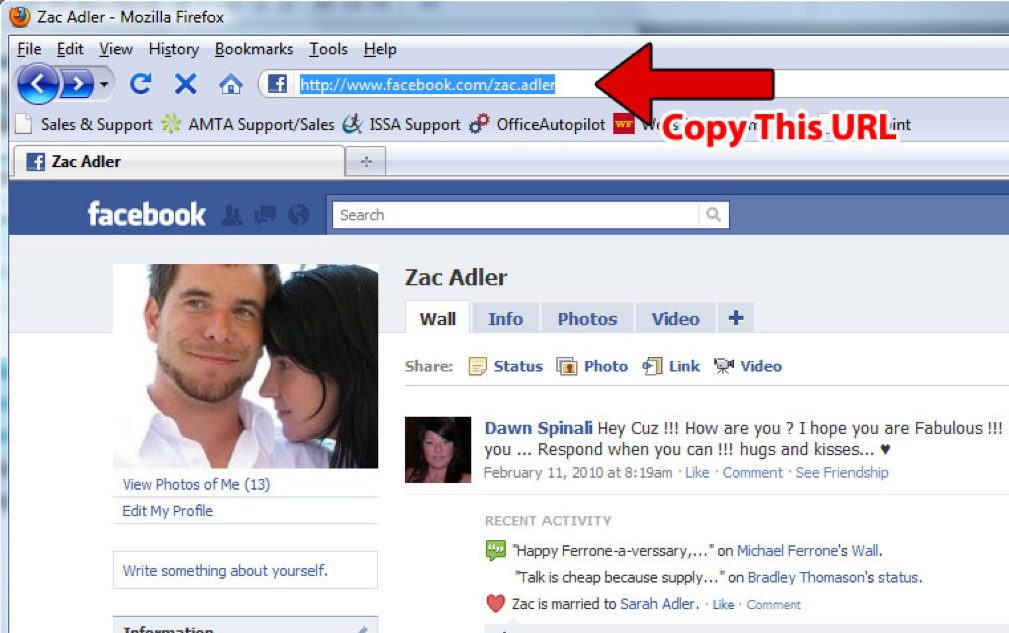 ” Doing this may reveal the original link for the image. Alternatively, you can right-click on the photo and choose “Copy image address.”
Somewhere near the beginning of the link, you should see the letters “fb.” That stands for Facebook, and it confirms that is where the image originated. But you’re not done yet. You still need the find the photo’s unique number assigned by Facebook.
In the link address, you should see three sets of numbers followed by “jpg” or “png.” For example, you may see a URL that looks similar to this:
fbid=65502964574389&set=a.105484896xxxxx.2345.10000116735844&type
The sets of numbers may also be broken up by underscores to look like this:
fbid=65502964574389&set=a_105484896xxxxx.2345_10000116735844&type
Either way, it’s the second or middle set of numbers that you want. This is the profile number for the person’s photo on Facebook. In this case, it would be 105484896xxxxx.
Every Facebook user and every photo on Facebook has a unique number, so by matching the image’s ID with the profile ID, you now have a match.
Your next step is using that second set of numbers to locate the Facebook profile where the image originated. To do this, open up another tab and paste the following link with the photo ID number:
https://www.facebook.com/photo.php?fbid=[insert photo ID number here]
Make sure there are no spaces or decimals when copying the id number. The actual number of digits may vary from the example, so you may get one that’s shorter or longer. Press Enter to open the Facebook profile where the image may have originated.
There’s a lot to learn about what you can find on Facebook. We’ve included this section to answer more questions.
Yes. One of the rules of Facebook is that all profile pictures must be public.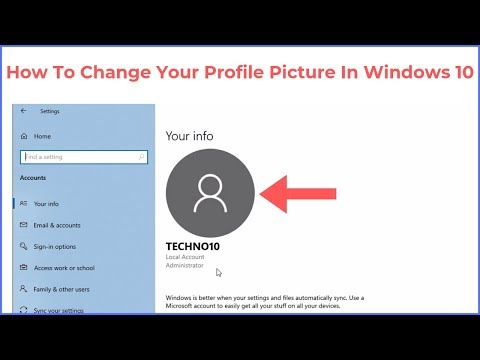 Therefore, if you see a photo that appears to be a profile picture, you should be able to find the image’s source.
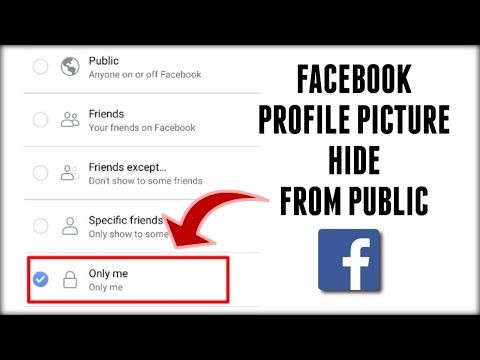
The only way to see someone’s private photos on Facebook is if you’re friends with their friends (and their settings allow it). Searching photos on Facebook can be quite difficult if the original poster has a private account.
If you’re friends with someone on Facebook and want to view all of their photos, you can. You can also do this for Public accounts. Here’s what to do:
1. Visit the person’s profile (use the search bar at the top to type their name).
2. Click on Photos/Video.
Here, you can see all of your friend’s photos and videos.
Using a reverse image search may be the easiest way to look up information. It’s not the most comprehensive, especially for social media websites.
Instead, check out the name format. See if the photo comes from Facebook or another website. If it is from Facebook, you can try locating the photo ID and using the generic URL to bring you to the right Facebook page.
Keep in mind that neither method is completely reliable. Both results may vary depending on many factors. But you may luck out and be one step closer to putting a name to a face, and that’s a step closer than you were before you tried.
Removing a frame on Facebook is possible only if the user has previously added it for his profile picture. Several options are available, which change depending on events, subscriptions.
Table of Contents
To find a frame for an avatar, the user needs to proceed to editing or adding a new photo.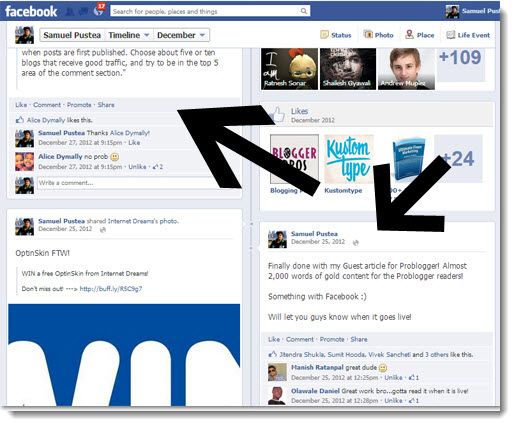
A list of tools appears, among which are:
From the computer version, go to the section: "Update profile picture" and see one of the options. From mobile - just go to edit mode and upload a new picture. The added avatar will be additionally published in the profile, separately - the original.
To add frames from the PC version and view them, you need to go to your account and click on the main picture.
Further, the user will be able to view all publications by going to the tab: "Album". To restore the original photo, you need to click on the bottom "Return the old photo through".![]() You can specify from one hour to a month, "User settings" are highlighted separately.
You can specify from one hour to a month, "User settings" are highlighted separately.
From the mobile version:
The appearance can be set as a temporary avatar. As on the computer version, after the specified time it will be deleted and replaced with the previous one.
The page owner can change the profile picture by deleting the current one and using the previous picture. There is no separate delete for the frame, but Facebook keeps the originals of the edited ones. nine0003
How to change the picture:
Next, you need to return to the album where the profile pictures are stored and select the one that was installed before the changes.
From the mobile version there is a function: "Set previous": click on the avatar and the option at the end of the list. If the user simply deletes the current one, an empty circle will be shown, without any images and stickers. nine0003
Before adding a picture to Facebook, the user can edit it.
To do this, you need to use the button: "Change" and select:
The filter list includes non-standard editing elements. The user can choose one of the options and publish in his album. The same design is for Stories. nine0003
How to proceed to photo editing:
In addition to stickers, you can crop a picture, make a collage.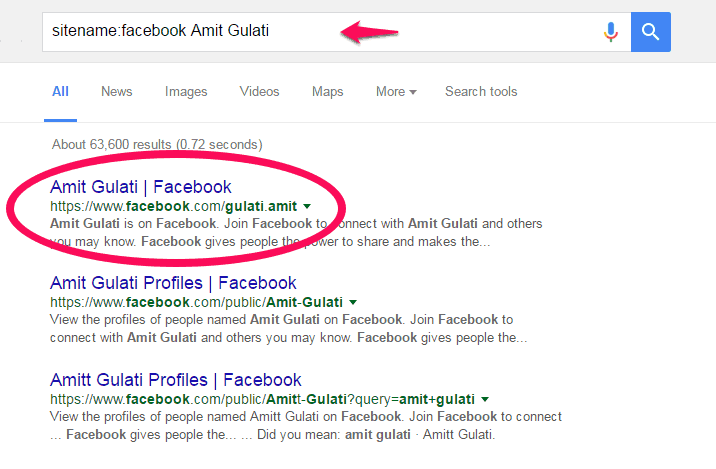 With the help of the “More photo” sticker, a menu with the Gallery appears, where you need to specify one more image to add to the first picture. Up to five additions are available and the subsequent upload of the result to a profile, albums or History. nine0003
Business Manager - a tool for companies, brands to manage pages, advertising cabinets, directories centrally.
What is this tool for and what problems can it solve?
The problem that business owners face is that they do not have all the rights to their Facebook resources. The page was created by an SMM specialist, the advertising account was created by a former marketer and now cannot transfer it to the client's ownership. nine0003
The only correct solution in this case is as soon as you have created a company page on Facebook, immediately create a Business Manager and manage the company's resources centrally. The issue of restoring access to company resources when changing a marketer or agency will also be resolved.
To create a Business Manager, follow the link and watch the video on how to create a Business Manager:
Resources in Business Manager are managed in Settings. nine0003
There are two ways to create an advertising account - using a profile or in Business Manager.
What are the advantages of an advertising account that you create through Business Manager over an advertising account created by a profile?
A profile can only be created by one account, but in Business Manager you can create several, the available limit of new advertising accounts can be viewed in the Company Settings.
This is handy if your company has multiple pages and you need to split their budgets. Or when individual specialists or agencies work on advertising for different areas of the company. At the same time, all advertising accounts of your Business Manager can use the pixel to create custom audiences. Within one Business Manager, you can share resources, for example, individualized audiences between advertising accounts. nine0003
The Business Manager admin can grant access to Facebook ad cabinets to profiles that are added as employees.
The Business Manager administrator can assign partner access to the advertising account of his BM to other Business Managers with whom they cooperate.
And another significant advantage is that it is possible to create individualized audiences based on data about users and clients only in an advertising account created through Business Manager.
! It is important to remember that an advertising account created in Business Manager cannot be transferred to the ownership of another Business Manager.
In the case of the Company's cooperation with an agency or outsourced marketer, the Company provides partner access, and after the end of the cooperation cancels the access. All resources of the company remain in his ownership.
So, in Business Manager you can:
Watch the video on how to create an advertising account in Business Manager:
An important point that you should pay attention to is the payment method. As a payment method in Ukraine, you can use:
Help about available payment methods in your country at
Video on how to add a payment method:
However, if you add a legal entity card to close accounting, you need original documents from Facebook that you will not receive, you can only print invoices electronic.
That is why the card of an individual is used more often. In this case, this user must be the owner of the advertising account or the administrator of Business Manager in order to control the spending of the budget from his card.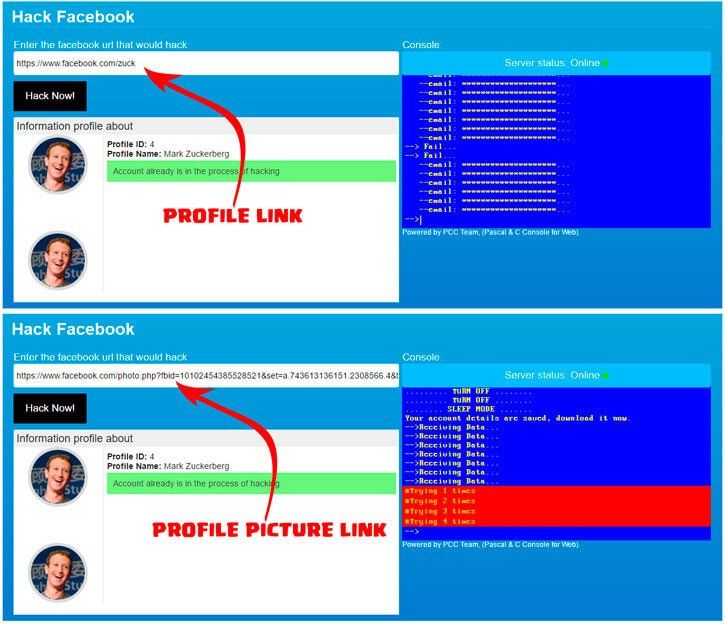 nine0003
You can add an additional payment method, and if there is no money on the main card, the charge will be made from the additional card.
If Facebook fails to withdraw funds, it stops all advertising campaigns in this account and blocks some of the functions for setting up ads and transferring rights. As soon as you top up the card and make a payment, the ads will be displayed again and all the functions of the advertising account will work correctly.
! A Business Manager that has Ads Manager with outstanding debt blocks the ability to create new ad accounts. nine0003
We recommend creating Ads Manager, Business Manager using the profile of a real person, whose identity can be confirmed by documents, the profile avatar must have his photo. Everything related to the promotion of a business, the launch of advertising, Facebook carefully checks, and for any suspicious activity, a hint of a violation of the rules, it can be blocked. In the case of a real profile, you can easily resolve this issue with support, you will only need to send documents.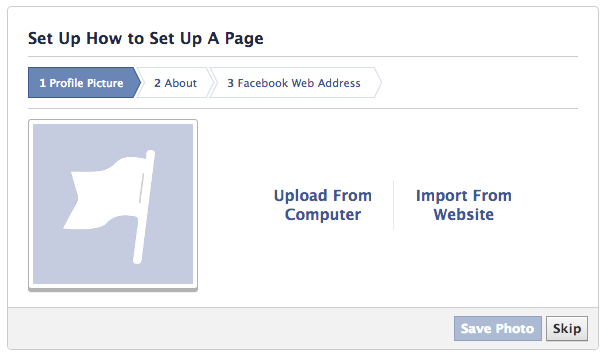 If the Facebook profile has a fictitious name and a cat on the avatar, the issue will take much longer to resolve, or the problem cannot be solved at all. nine0003
Managing pages through Business Manager is no different from managing them directly. The convenience is to grant or remove access rights.
In Business Manager you can:
If necessary, you can transfer a page that belongs to one Business Manager to another Business Manager.
Video on how to request and approve Page access:
To manage resources in Business Manager, user profiles must be added as employees. An employee can be presented with both the standard access of the Business Manager employees and the administrator access. In this case, he gets full access to all aspects of the Business Manager and can remove and appoint other administrators. Administrator access is the highest level of access in Business Manager. nine0003
To add an employee, you need the email to which his profile is registered. If the profile is registered to a phone number, you need to link your mail to the profile.
The next step is to assign access to resources to an employee. One employee can be assigned access to several resources at once, for example, pages or advertising accounts. You can also adjust the level of access, depending on the tasks performed. Next, the employee must approve the invitation to the business manager, it will be sent to the mail. nine0003
One resource can be shared with multiple employees.
Help about employee roles in Business Manager at
Video on how to add an employee to Business Manager and grant them access to resources:
Business Manager resources can be shared with other Business Managers. Once this access is approved, the Business Manager with partner access can assign its employees to manage the resource. Partner access can only be assigned to resources that this Business Manager owns. nine0003
You can open access to a partner in 2 ways:
At the time of assigning a partner, you regulate the level of access, which depends on the goals of cooperation and the tasks that the partner will perform. nine0003
Partner access can also be opened in the Settings/Users/Partners section. It can be of two types:
Video “How to unlock or request Affiliate access to Facebook Business Manager”: