With over 1 billion active users, Instagram is one of the best social media networks to advertise your business, reach new audiences, and grow brand awareness. So even if you aren’t active on the website yet, it’s never too late to adopt an Instagram strategy in your marketing plan.
If you're ready to start sharing content through this channel, we've got you covered. Here, we're sharing a quick-and-easy guide to posting on Instagram, to ensure you can begin attracting the attention of your audience with Instagram marketing.
Posting to Instagram consistently can help businesses find resonance with their audience and grow better, but doing it right is just as important. Here's how to post to your Instagram account step-by-step.
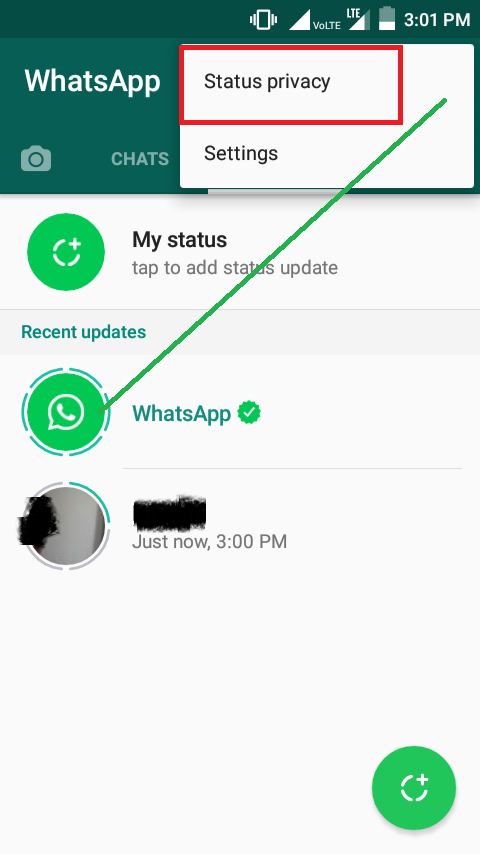
See that plus sign [+] in the image above? That's your starting point. Click that plus sign and you'll be ready for the next step, below.
Instagram will show you the photos already saved to your phone. Choose one of those to post. Alternatively, you can click on the camera icon to take a photo or video within the Instagram app itself, if you don't already have an image you want to use.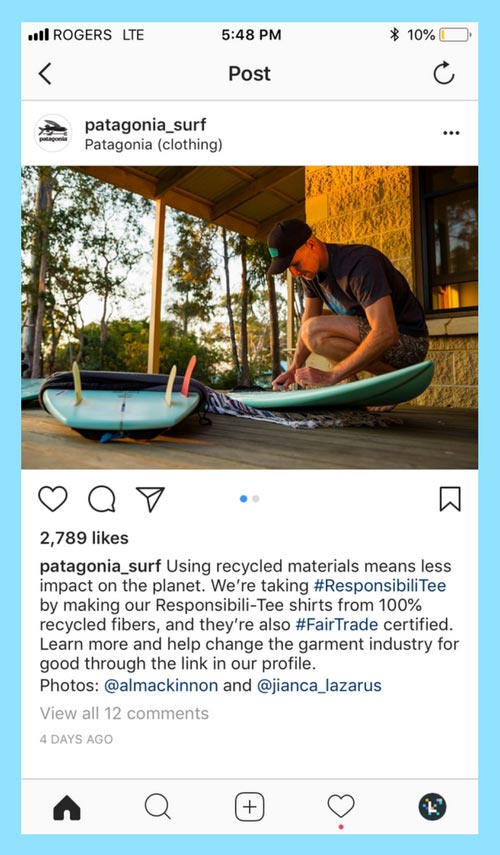
Once you select and crop an image (or carousel of multiple images), click the Next button in the top right corner of the app.
Do you have multiple photos and want to highlight them all? Instagram allows you to do this with its carousel feature.
As you go to tap a photo or video, first tap the icon just above your photos to the right that looks like stacked squares. Once you tap this, you'll see a number on the corner of every image or video you tap. This number notes where the content will show up in the carousel.
You aren't limited to just a square image on Instagram. You can actually share horizontal or vertical images as well. To get more of your image seen, pinch the screen of the photo you've selected on the Library screen (play the video below to see it in action).
However, while Instagram does allow vertical and horizontal options, the images still need to fit into some specific dimensions. So, you might still need to crop a tiny bit of your photo to get it to fit.
Instagram offers a wide variety of filters — scroll to the right to peruse your options, and click on one to preview how it will look on your photo.
By default, the filter will be applied by full strength. However, if you want to scale back the intensity of the filter, double-click the filter tile once it's been applied, and a scale selector will appear, allowing you to downplay the effect.
You can also tap the magic wand at the top of the screen to adjust the photo further.
(Take a look at our Ultimate Guide to Instagram Filters to learn more).
You can also click "Edit" at the bottom right to adjust the image to your specifications.
Here are the editing options that come built into Instagram for you:
 Drag the selector to the left to desaturate the image (all the way to the left if you want a monochrome look), or drag the selector to the right for extremely saturated colors.
 Dragging the selector to the left will darken the shadows in your image while dragging the selector to the right will lighten the shadows in your image.
Featured Resource
Get creative and write a nice, interesting Instagram caption to go with your photo. Since text can help optimize your post in Instagram's search, writing something can only benefit you.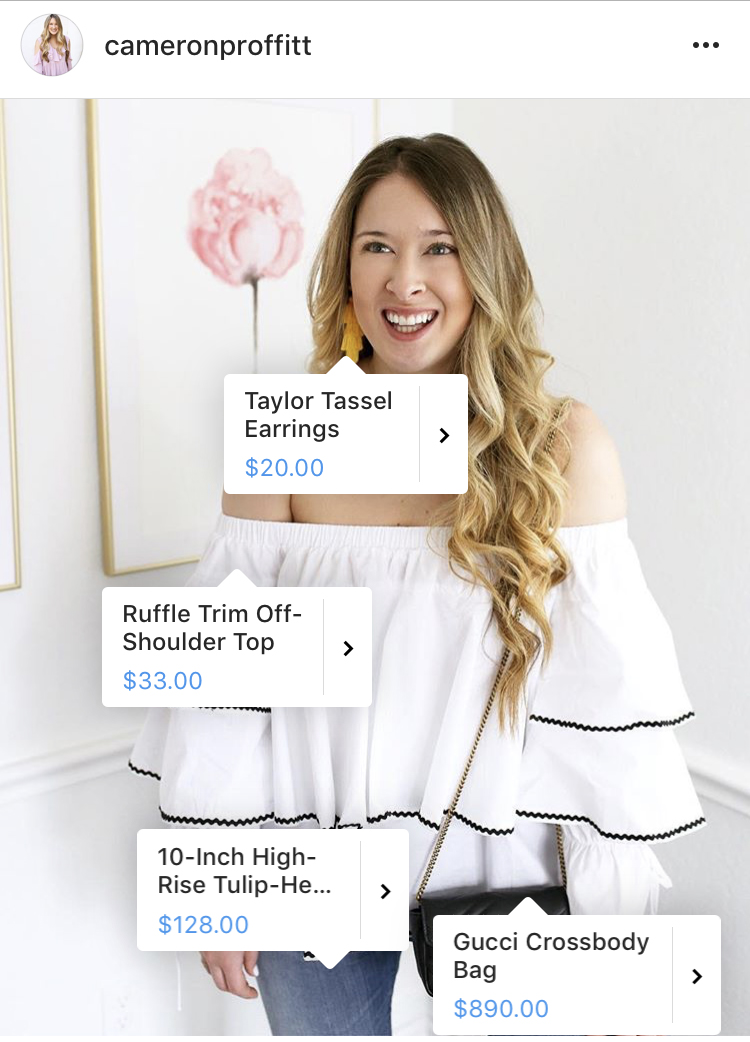
With Instagram's search feature, users can search by hashtags. So, you should make sure to write relevant hashtags in your caption. If someone does a search of a hashtag you placed in your caption, they might find your post as well as others that included the same one.
Want your friend or their followers to see a photo that you posted of the two of you? Tag them!
On the new post page, you can click "Tag People" to tag other Instagram accounts in your post. Alternatively, you can include their handle (or their username beginning with an @ symbol) in your caption.
If you're on a fun vacation or at a neat event and you don't feel like including that information in your caption, you can mark where you are in another way. On the new post page, tap "Add Location" to put a location on your image (which makes it easier for people to find your post).
When you post an image or video with a location, it will show up between your name and the block of content on the feed.
Emojis are fun and can make your caption more eye-catching. If you know of a few relevant emojis that could fit with your post, stick them in the caption area. For example, if you're posting a vacation photo, you could include a palm tree 🌴 or a plane ✈️ to show you flew somewhere.
Here are the top Instagram emojis you can use:
However, keep in mind that there's a multitude of choices to add flair to your posts, from keeping it real 💯 to the cringe face 😬.
Be sure not to go overboard and post emojis just for the sake of posting them. If you post a bowling emoji along with a photo of a beach, that obviously won't make sense to people.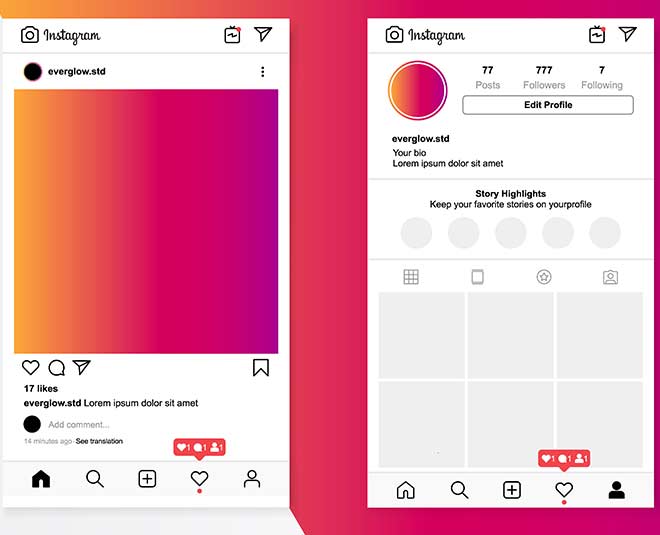 Similarly, if you post 20 emojis that loosely relate to a post, you might just annoy your followers or come off as desperate.
Finally, if you want to share your content on your other, connected social media sites (like Facebook or Twitter), simply toggle the button from the left to the right.
When you're ready to post, click "Share" in the top right.
Instagram Saved DraftsIf you're not ready to post right away, you can also save it to your Instagram Saved Drafts. Simply go back to the filtering and editing step, tap the back arrow in the top left, and select "Save Draft."
Typos happen to everyone! If you just posted something and notice a glaring spelling error, don't panic. Simply tap the three dots that appear on the right across from your name, then tap "Edit."
Make the adjustments you see fit and save them so it reflects on your Instagram. Otherwise, your post is complete and live for everyone to see.
Now that you know how to post to Instagram, you can begin creating content for the platform and connecting with your audience. If you're a business or brand, you'll want a solid strategy for earning engagement and awareness.
Editor's note: This post was originally published in November 2019 and has been updated for comprehensiveness.
Topics: Instagram Marketing
Instagram is the fourth most popular social media platform with over 1.4 million monthly active users. If your business hasn’t added Instagram to your social media strategy yet, we’re not surprised you’re now considering it.
But it’s one thing to create a random Instagram post. It’s another to fully flesh out your post and create a multi-faceted Instagram content strategy.
To help out, we created a step-by-step guide for how to post on Instagram: How to create your caption, how to post each different type of content that Instagram supports, and more.
Ready to dig in?
Posting to Instagram regularly is essential to make sure you create a consistent and high-performing Instagram marketing strategy. While there are several steps to creating high-quality posts, if you follow our guide, you’ll be able to master them in no time.
Your first step is to open up your Instagram app and then click the + sign in the top-left corner of your screen.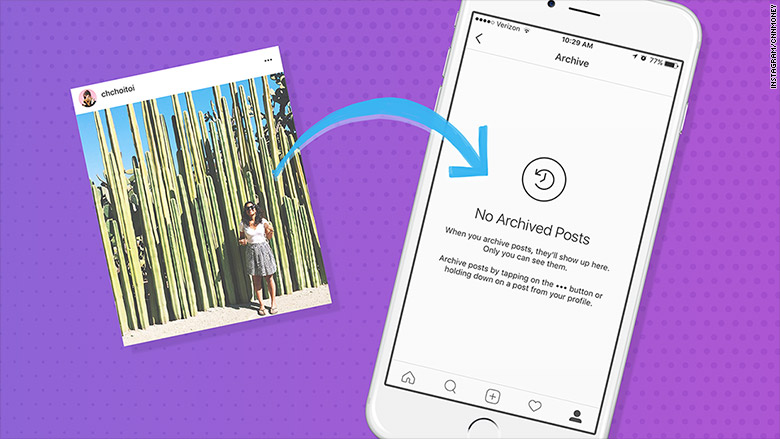
From here, you need to decide which type of content you want to create. There are four main types: a post, story, reel, or live video.
Select your chosen option from the drop-down menu and follow along with our how-to guides for each one.
Create an Instagram Feed PostThe first type of Instagram post you might want to create is a regular Instagram feed post. This could be either an image or a video—both are great options to add to your feed.
To get started, click the Post option from the list of options. Your camera roll will pop up so you can select a photo or video you’ve already created—although you do have the option to tap the camera icon and take a photo or video right in the app.
(Side note: we don’t recommend doing this. If you want to create a high-quality Instagram feed, you’ll want to create your content outside of the app and then post it separately. )
)
There are three types of feed posts you can create:
While in your camera roll, you can select the photo(s) or video(s) you want to add to your post. If the ones you choose are horizontal or vertical, you can choose to keep them that way or crop them into square images.
Tap Next to choose a filter. There are over 20 different filter options inside Instagram. Or you can tap the Edit tab at the bottom to access more customizable photo editing options.
Once your photo looks how you want it, tap Next again. This is where you’ll create your caption and add your hashtags—but more on that in a bit.
Instagram stories are temporary stories that stay on your profile for 24 hours. You can also add them to different story highlights that remain at the top of your Instagram profile for followers to check out after the initial 24 hours is up.
Stories can be great ways to engage even further with your audience. Because they appear at the very top of the Instagram feed, users may be more likely to see your stories than your actual feed posts.
To post a story, you’ll tap the second option from the “Create” drop-down menu. Or, you can swipe right on your home screen to access the stories camera.
From here, you can either take a photo or video right inside the app, or you can upload a previously created graphic, image, or video.
You can publish your story as is, or you can customize it in Instagram. There are several options in the top-left corner of the screen to help you decorate your story or add more information.
First, you can tap the “Aa” icon to add text on top of your story. There are a number of different fonts and font decorations to choose from—sticking to just one or two font choices across all of your stories is a great way to stay consistent and recognizable.
The second option is stickers. These range from fun GIFs and illustrations to a location sticker, hashtag sticker, question sticker, mention sticker, poll sticker, or link. You can even add a music sticker to attach a song to your story.
Next, you can add filters or animated effects to your story. Some of these work on any image while others are specific to images with faces.
If you click the icon with the three dots, you can choose to save your story (i.e., if you took the photo/video in the app and you want to save it to your camera roll) or you can access the draw feature.
There are several options: pen, arrow, highlight, neon, and eraser. You can choose from a number of different colors and even use the color dropper to pull a specific color right from your image or video.
Then, click the share button to add to your story. You can link your Facebook page to your Instagram business profile in order to share the story to both platforms at once.
An Instagram reel is a short-form video similar to TikTok videos. They help to engage audiences and build a bigger following on Instagram.
To create an Instagram reel, you’ll select the third option from the drop-down. If you have already created your 90-second or less video, you can select it from your library to upload.
If you expand all the customization options on the left sidebar, you’ll see the ability to add or adjust the video’s audio, length, speed, or layout. You can also set a timer before it starts to record or swipe through filter tiles and effects to add onto the video as you record.
Once you’ve recorded or imported your video from your camera roll, you can add stickers, text, or drawings just like in your stories.
After you’ve finished customizing your reel, you’ll create your caption and share it to your Instagram account by clicking the blue button.
We’ll talk about creating a great caption in just a bit.
The last option is to go live on Instagram. This creates a live video broadcast on your Instagram account that your followers can tune into and watch. They can also leave comments, giving you a great opportunity to interact with your audience in real time.
To create a live video, you’ll tap the fourth option in the drop-down. At the top of your screen, you’ll get to see how many of your followers are currently active so you can gauge whether it’s a good time to go live or not.
You can create a title for your live video and link to a fundraiser if you’re partnering with a charity. Tap the Audience button to choose between going live in front of your audience or creating a practice broadcast.
Or you can choose to schedule your live video for a later date, but still letting your audience know when they can expect you to go live.
Scroll through the built-in Instagram filters if you choose, then tap the button in the button of your screen to start broadcasting.
Now that you know how to post each of the main content types to Instagram, let’s talk caption-writing. You’ll need to add an interesting caption to both Instagram posts and reels, but you can skip this step if you’re simply posting stories or going live.
To get you started, check out some of our Instagram caption ideas. Then we’ll go over strategy.
Your caption can be up to 2,200 characters, but you don’t want to use all of that. Research shows that posts perform best with around 70 words in your caption.
However, that’s not always the rule. If you don’t have a story to tell with your Instagram post, don’t force it.
We’ve put together a few tips to ensure your Instagram captions grab attention and get your audience interested in learning more about your post—and your business.
 Don’t use words and phrases you would never say out loud. Instead, be relatable by creating captions that sound like something a human would actually say.
Keep these tips in mind and start creating fun captions that your audience enjoys reading.
After you write your caption, you’ll want to add hashtags. Each Instagram post can have up to 30 hashtags, and a recent analysis showed that posts with 20-30 hashtags generate the most reach. 20 hashtags is the sweet spot, so try to stick around there.
So how do you find relevant hashtags that will help your post reach the most users?
First, search through the most popular Instagram hashtags to see if any fit your business or your post. Incorporating those can help you reach a much wider audience.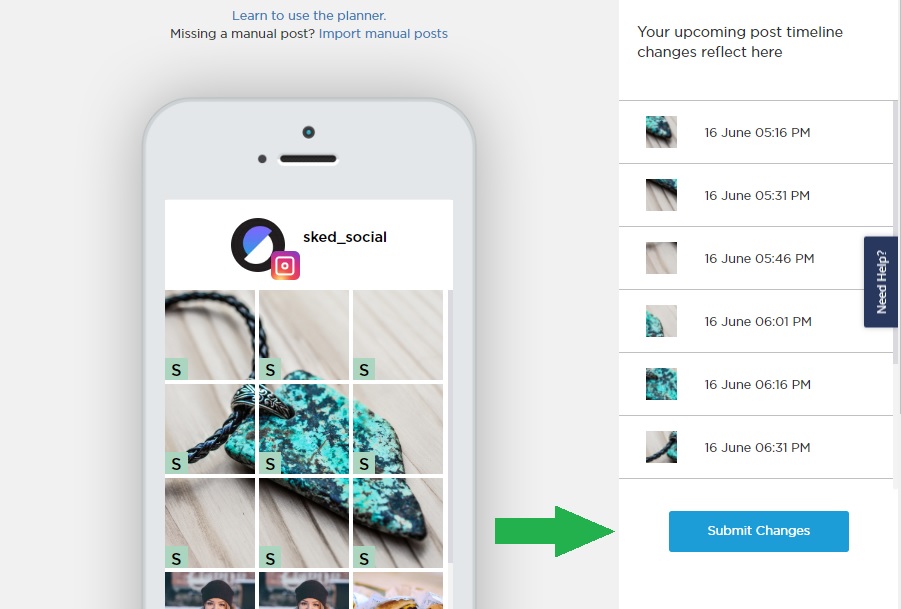
Next, consider using a hashtag suggestion tool to help you find even more great hashtags for your post. You can also check out competitor posts to see what hashtags they use. Click on each one to see how popular they are and if they’re worth adding to your post.
Another tactic is to search for keywords relevant to your business and see which top hashtags pop up in Instagram search.
Add a list of hashtags to a document or note on your phone or computer so that you can refer back to them each time you create a new Instagram post.
When you’re adding hashtags to your post, there are a couple different ways to make sure they’re hidden from view and don’t make your post look spammy:
This will ensure your hashtags don’t appear above the “See more” button so that your actual caption stands out most.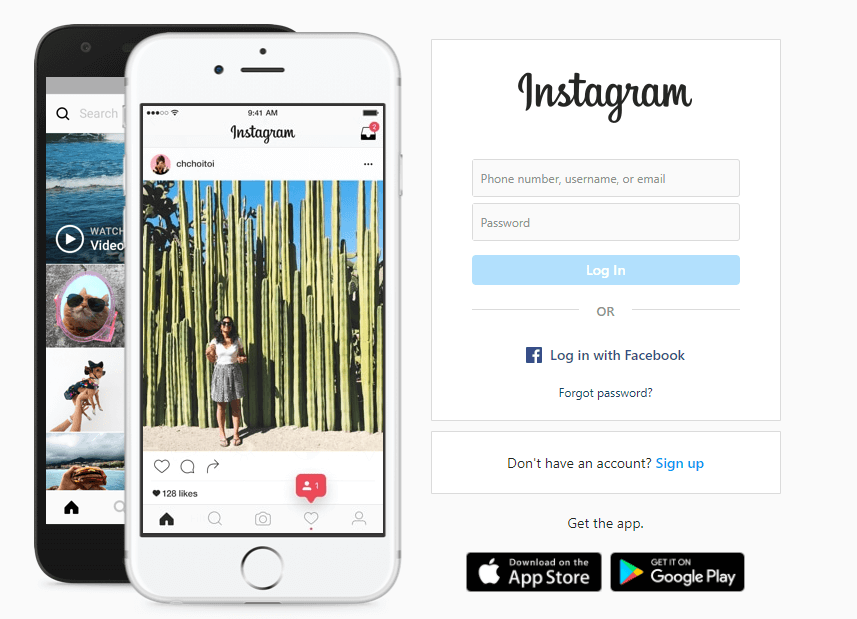
You’ve done it! You’ve gone through all of the steps to creating an awesome Instagram post. The last step is simply to hit publish.
Keep in mind that you can also use scheduling tools to create multiple Instagram posts at once and have them automatically publish to your profile on the dates and times you set.
Now that you know how to post on Instagram, it’s time to start creating stunning and engaging content for your audience. Grow your following and use Instagram to promote your products and services.
Yes, posting to Instagram from the desktop browser is a recent addition to the software.
To do so, head to Instagram.com on your desktop computer and click the + sign icon. A pop-up appears with an upload button or you can drag-and-drop your photo/video onto the screen. Then follow all of the steps above to publish your post.
You can add up to 30 hashtags into the bottom of your caption or as a comment on your Instagram post.
To get access to the best features, post to Instagram from the mobile version.
If you see a colorful circle around a profile photo, that means that profile has posted an Instagram story in the last 24 hours. You can tap the profile photo to view the story.
Edit your profile, tap Business Information > Contact Options > Add an action button. From here, you can choose what type of button you want to add based on how you prefer potential customers to contact you or access your products/services.
Instagram has gained popularity among hundreds of thousands of users in just a few years. Every day, millions of people post photos and videos about their personal lives, while other millions of users look at other people's pages. Here everyone can become a star in a short time. Post videos that are stored on the page for exactly a day and catch likes. You can always see how many people and who viewed your story. If you want to join the ranks of famous people, then read how to add a post to your Instagram story. This is not difficult to do, you just need to take a few steps on the way to popularity. nine0003
Sometimes you want to share your favorite photos or videos with your followers. To do this, you can repost someone else's story on your Instagram. This can only be done from an open page from which reposts are allowed. Such an opportunity has appeared relatively recently. Many bloggers use stories for advertising.
To add a publication you like or place an ad in your own story, you need to find the necessary information. Under each picture or video on the open page is a special symbol in the form of a paper airplane. nine0003
By clicking on the footnote, a pop-up window appears, where the first line appears "Add to your story" or share information via direct. After clicking the airplane, the photo or video will appear on the blogger's personal page.
It is worth noting that the storage period of stories is limited - exactly 24 hours. In a day, storis will be deleted.
Moderators went to improve Instagram services and created the ability to save eternal stories. To do this, when publishing, you must indicate that you want to save the photo or video. Another point is the ability to combine the necessary into one topic and gradually add new photos there. Such innovations were greeted with enthusiasm by Instagram fans and bloggers. nine0003
Attention! The listed updates will become possible after updating the mobile application.
Instagram stories are very popular with absolutely everyone. They allow you to upload videos about recent and highlight events, talk about the event and share emotions. To post a story on an iPhone or Android, you will have to follow identical steps.
Log in to your mobile account. A special window will appear at the top, where the stories of the people who are following the account are displayed. Here, in a round window, a user photo and a symbol in the form of a “+” sign with the inscription “Your story” appear. nine0003
By clicking on the window, you will be asked to add a photo or video from the gallery on your phone, or take a photo again. After selecting a publication, click "Next". A window will appear asking you to share storis. To publish a story, you need to select the line publish a story.
After a while the information will be loaded and will appear on the personal page. Subscribers will be able to view the publication during the day, and the user can track information in real time. In addition, at any time, stories are deleted by the user himself. You can also add several stories at once, with time intervals. nine0003
For publication, Internet users and analysts allocate even the best time for publication. This is due to the fact that in some time frames more people appear on the Internet and, accordingly, more views.
To make stories look high quality and attractive, it simply needs to be designed. There are several ways to do this. Before the final upload, the application will prompt you to use:
The latest updates allow you to use various decorations in the form of masks, hearts and other curly frames. Most users are happy to use effects for personal stories. To share a publication you like or post stories, you only need to skillfully use the offered opportunities.
When creating a storis, remember that there are time and size limits for photos and videos. So that stories are displayed as you need to follow the rules. Otherwise, the program will crop the pictures and videos on its own.
A beautiful and relevant post in history is the key to numerous views and attracting subscribers. Particular attention should be paid to stories, as they appear first of all in the feed of subscribers after the update. Numerous views and subscribers guarantee bloggers and other users that the page will be displayed in the first place to subscribers. nine0003
Clipchamp - Free online video editor Try it for free
Share this post
On this page
Instagram users recently got a reason to be happy! The new feature Collab ("collaboration") allows you to publish joint posts even faster and without unnecessary troubles. The function is available to both regular bloggers and business account holders. nine0003
Posting a collaborative post to your feed or Reels is now just a few clicks away. This will add the names of both authors of the publication in the title, which will provide content creators and business owners with even more attention from Instagram visitors.
Read on to find out how to start an Instagram collaboration!
Collab, a new feature from Instagram, will soon change the way we approach collaborative posts. Previously, Reels posts, stories, texts, and videos mentioning your nickname could easily escape the attention of subscribers. How so? The thing is that users scroll through the feed and stories at the speed of a tsunami. On the other hand, these meek Instagram runs add up to more than 32 minutes a day. This is the average amount of time spent on the platform by people over the age of 25. nine0003
The introduction of collaboration will allow authors to be in the field of view of users more often and more effectively than traditional publications and stories.
The co-author's nickname will go right into the title, so you don't have to worry that someone forgot to tag someone in the text under the publication. The post itself or the Reels video will appear in the feeds of both authors and will be accompanied by general comments and a single counter of views and likes.
If you already have access to the Collab feature, this guide will help you create a collaborative post on Instagram.
First, launch the Instagram app. Click on the + icon in the upper right corner of the screen.
Click on one of the options - publication, story, Reel or broadcast . Select the image or video you want to post to Instagram and press "Next" . The editing options will appear on the screen. Correct the material before publication or, if you do not want to change anything, click "Next" .
Click "Tag people" and select the option "Invite collaborator" .
Find the person you want on the tag screen. By accepting your co-post invitation, the collaborator will be able to post to their own Instagram followers. After that, he will be marked as one of the authors of the publication. nine0003
The list of collaborators is displayed under the tabs Add Label and Edit Collaborators . The co-author tag will automatically appear in the publishing center. To save your changes, press Done .
After the publication of the post, all users marked in it will receive an invitation to become its co-authors. The invitation can be accepted or declined.
Yes. The collaborator can post your video or image on their Instagram for their own followers. Both authors will receive the same comments, and the summary of the number of likes and submissions will also be the same.
The first step is to check if the Collab feature is running in your country. If so, try updating the Instagram app from the App Store or Google Play. The collaboration is only available to those who have the latest version of Instagram installed. nine0003
Yes. The new feature works with both images and videos. By the way, a spectacular video for Instagram can be created in just a few clicks in the free online video editor Clipchamp, and then published directly on your Instagram.
The Collab feature is a very handy gadget that will save you time in various situations, for example, if you want to promote a fashion duo or a YouTube video together, or just confess your feelings to your favorite brand.