One of the most frustrating parts of many social media apps is the fact that you can't edit something once you've posted it.
But when it comes to Instagram, even those of us who always seem to fall victim to auto-correct errors are in luck. The platform allows users to edit posts quickly and easily.
For example, you can change things like the caption or the alt text that accompanies a photo or video posted to the platform.
Instagram uses object recognition technology to create automatic alt text, which is meant to aid those who are visually impaired. But those auto-descriptions aren't always as helpful as they could be for those individuals, so editing your alt text could go a long way in making your profile more inclusive and accessible.
If you have an Instagram post that could use an edit or two, here's what you'll need to do, whether you're using Instagram on an iPhone or Android.
How to edit an Instagram postEditing posts you've already added to your profile is a simple process.
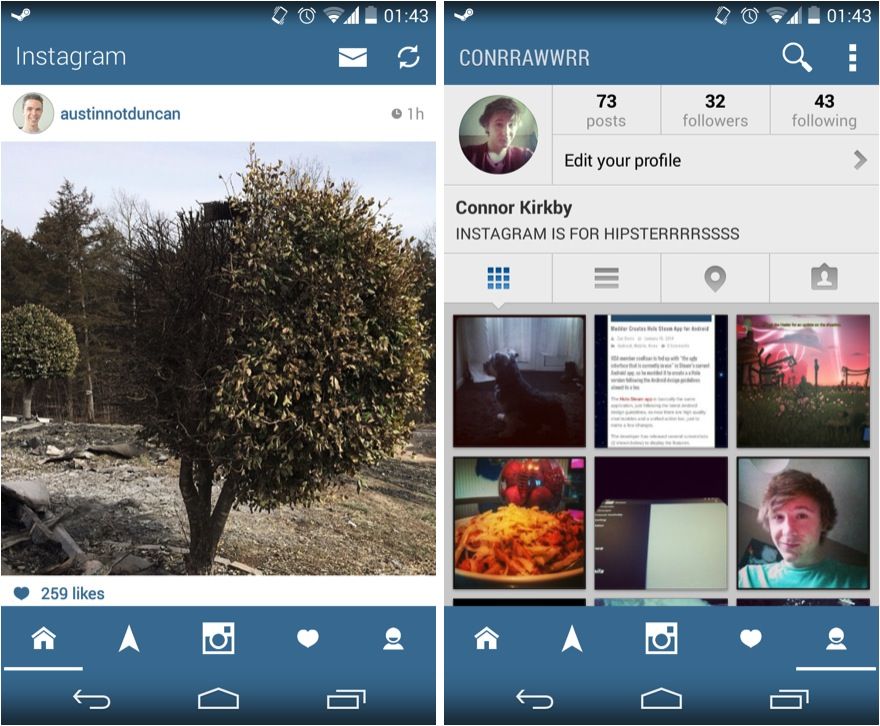
1. Open the Instagram app on your mobile device.
2. Tap the small circular icon of your profile picture (in the bottom right corner of the screen).
Tap this icon in the bottom right corner of your screen. Stefan Ionescu3.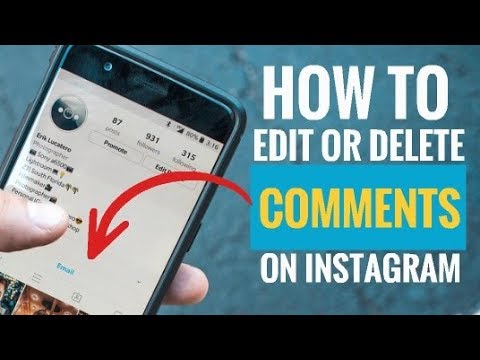 Tap on the post you want to edit.
4. Tap the more icon – the three horizontal dots – in the top right corner of the post.
5. In the pop-up menu, tap Edit.
Tap "Edit." Stefan Ionescu6. Edit the caption as you see fit — from this screen, you can also tag people (by tapping the icon at the bottom-left corner of the photo or video), edit the alt text (by tapping the bottom-right "Aa" icon), and add a location marker (by tapping Add Location at the top of the post).
7. When you're finished, tap Done in the top-right corner of the screen to save the changes you've made to the post.
Of course, you can also delete your Instagram post and make a new one. Creating a new post on your Instagram profile is quite easy.
1. Open the Instagram app on your mobile device.
2. Tap the plus icon in the top right corner of the screen.
Tap the plus icon in the top right corner. Stefan Ionescu3. Select the photo or video you want to post and tap Next in the top right corner of the screen.
After selecting the post you want to edit, tap "Next. " Stefan Ionescu
 4. Add filters and edit the post as you see fit, and when you're done, tap Next in the top right corner of the screen.
Select a filter to add to your post. Stefan Ionescu5. On the next screen, write your caption.
You can also tag people, add a location, post to other social media sites, and more. Stefan Ionescu
 6. Tap Share in the top right corner of the screen.
If you've published the Instagram post and spotted errors afterward, you can quickly edit it to make it perfect.
Devon Delfino
Devon Delfino is a Brooklyn-based freelance journalist specializing in personal finance, culture, politics, and identity. Her work has been featured in publications such as The Los Angeles Times, Teen Vogue, Business Insider, and CNBC. Follow her on Twitter at @devondelfino.
Read moreRead less
Published on Nov 30 2021 All Categories, Branding
So you have just posted an Instagram photo or video, but you suddenly realize something is off, or you’ve had a better idea for your catchy caption? You find yourself wondering “Can you edit photos on Instagram after you’ve posted?”. There are many reasons why you are wondering how to edit an Instagram post. We’ve got you covered.
In this blog, we will take you through how to edit your post on Instagram as well as how to edit Instagram photos to look even better! Knowing how to edit a post on Instagram can make a world of difference to your engagement, and it’s not that complicated either.
Instagram is a major force in the social media world. To date, there are over one billion users on the platform. That’s a lot of scrolling, engaging, and posting at any one given time. That said, one of the more common questions that tend to come up regarding Instagram posts involves the editing process after a photo or caption has been posted. Here is where some confusion lies for many, for example, whether or not you can add another picture, if you can change the text, or if you can adjust filters.
Of course, you want to put your best foot forward with anything you put on Instagram. Especially if you do have numerous followers—they are going to be seeing everything you decide you want your social media world to see. And yes, sometimes mistakes are made, typos can creep in, or perhaps the photo you posted doesn’t look as sharp as it could. Don’t panic! You can get back in there and rectify some mistakes. Below are answers to a few of the more pressing questions regarding how to modify an Instagram post.
Before we take a deep dive into how to edit photos on Instagram after posting, when you feel like they need some tweaking, let’s go through the basics of posting to the popular social media platform. If you’re not a beginner anymore, skip this part and scroll down to our comprehensive guide on how to change various parts of your Instagram post.
If you’re just starting out with your new social media profile, here’s how to post on Instagram from the app:
Tap the Plus icon in your Instagram app and choose your snapshot from your image library.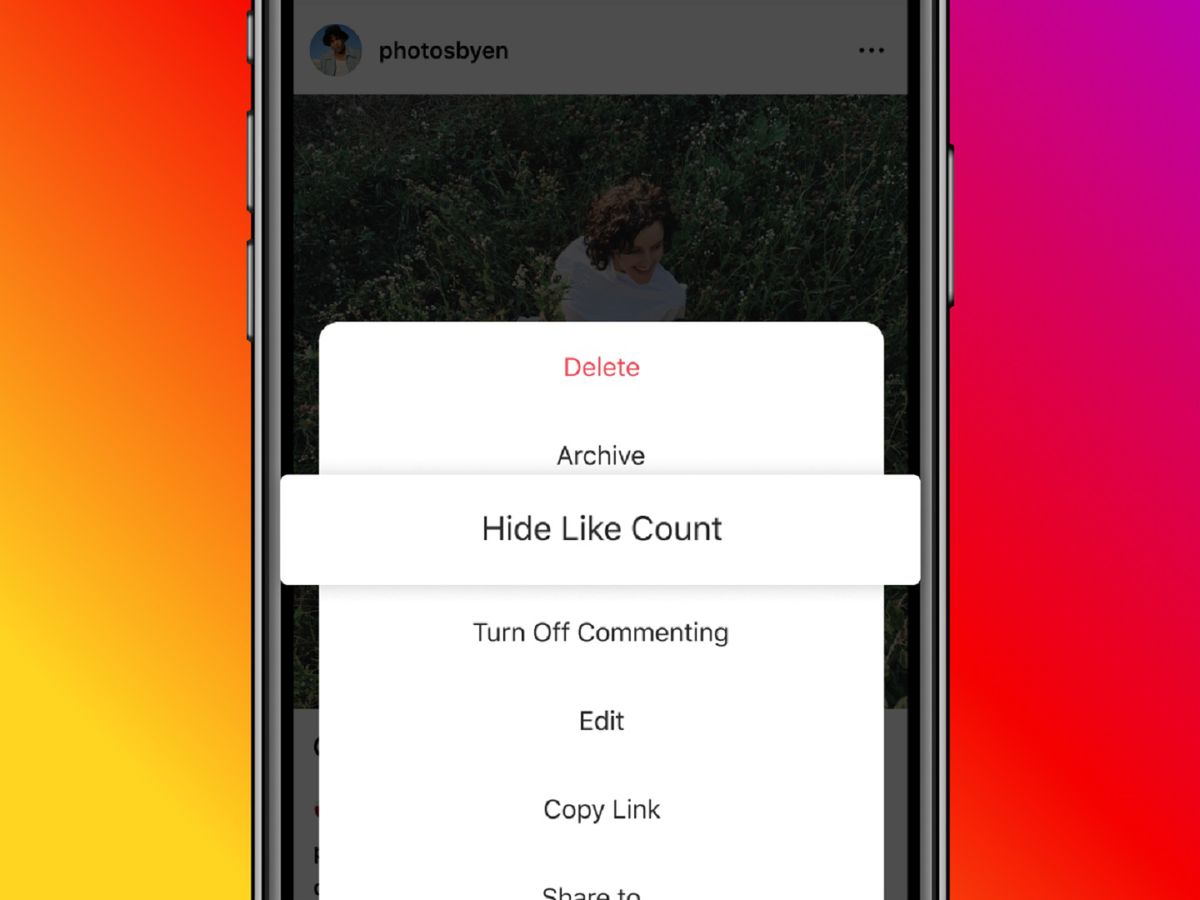 You can also choose to take a picture within the app.
Are you finding it hard to choose only one of many great snapshots? Use Select Multiple below your first chosen image to pick more photos and create a carousel post.
To crop images, use both fingers to pinch the screen and zoom in or out of your photo as needed. Tap the Arrow icon on the top right of the screen to move on to the most popular Instagram filters. Scroll through the filters at the bottom and tap to apply your favorites. See which one fits best and tap the Arrow icon.
If you want to edit your image further after applying filters or explore more design options, tap Edit at the bottom right of your screen. You get the following options to experiment with:
Once you’ve completed all your edits, tap the Arrow icon.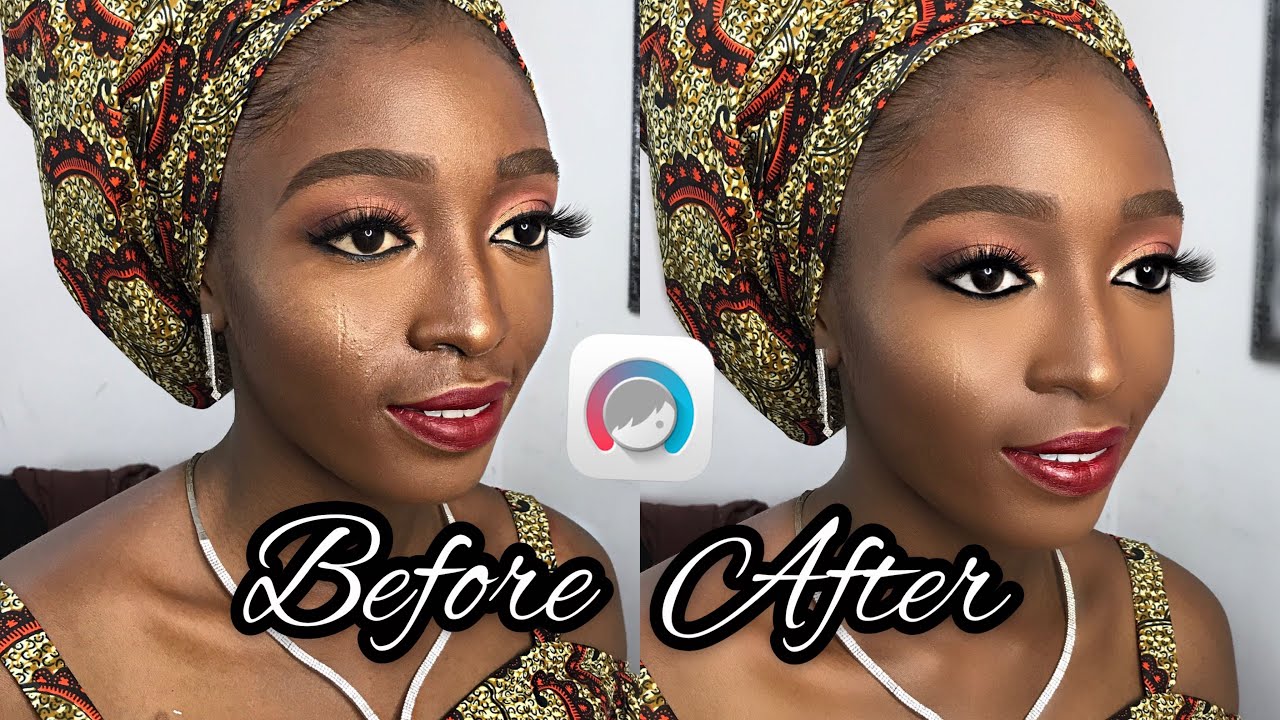 Write your caption, tag your friends, and add your location. If you’ve got your other social media platforms linked to Instagram, toggle Facebook, Twitter, or Tumblr on to send your Instagram post to these social networks. Tap the Checkmark icon to post.
There are two schools of thought on how to edit an Instagram post. One being, yes if you see that there’s an error or if you’re not totally satisfied with how the photo or video turned out upon revisiting it, then by all means go ahead and make it perfect. Your account is reflective of you and therefore, you want to ensure that it truly is eye-catching and, well, correct. If it’s an account for your business, it needs to look professional.
The second school of thought on how to edit photos on Instagram after posting is a bit more technical. That is to say, in terms of ranking and gaining exposure for a given post perhaps you should just let it lie in a manner of speaking.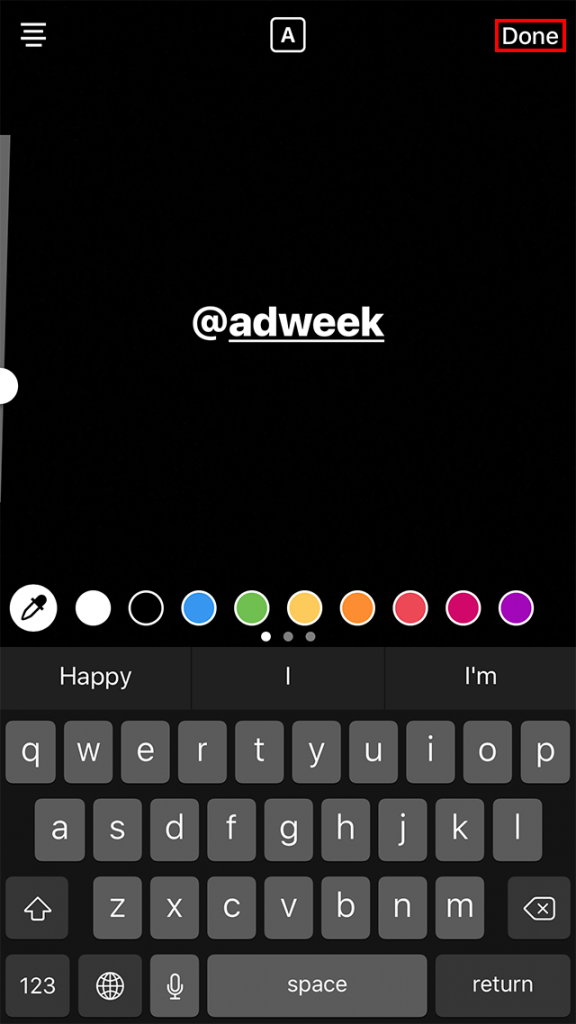 Any content you post is ranked according to engagement rates. So let’s say within a couple of hours you’re already racked up over 1000 likes. If you go back in and change and then repost, this effectively wipes out the progress you’ve thus far made. It’ll be like resetting the proverbial clock and starting from zero all over again. You will basically lose credit for the original 1000 users who did respond to your Instagram post.
So to edit or not to edit…that’s totally your call. Just be sure to weigh the plusses and minuses first. Ideally, prior to posting anything, check your image and copy, double-check it, and yes, even triple-check it for accuracy and quality. This way you won’t have to worry about going back and editing. But if you do want to know more about how to edit Instagram photos after posting…
Perhaps the number one question users have when it comes to how to edit an Instagram post: can I go back in and change the caption once it’s been posted. Usually users want to edit a post because of misspellings or typos. Why wouldn’t you want to change if there’s an error?
You want your followers to see perfection, right? The other reason for wanting to tweak the text is the poster’s remorse. Perhaps it was late at night, or maybe a heat of the moment situation…whatever the cause, you let your heart get the better of your head and now you regret what you posted, so much so that you most definitely want to go back in and change it. Here’s what you do!
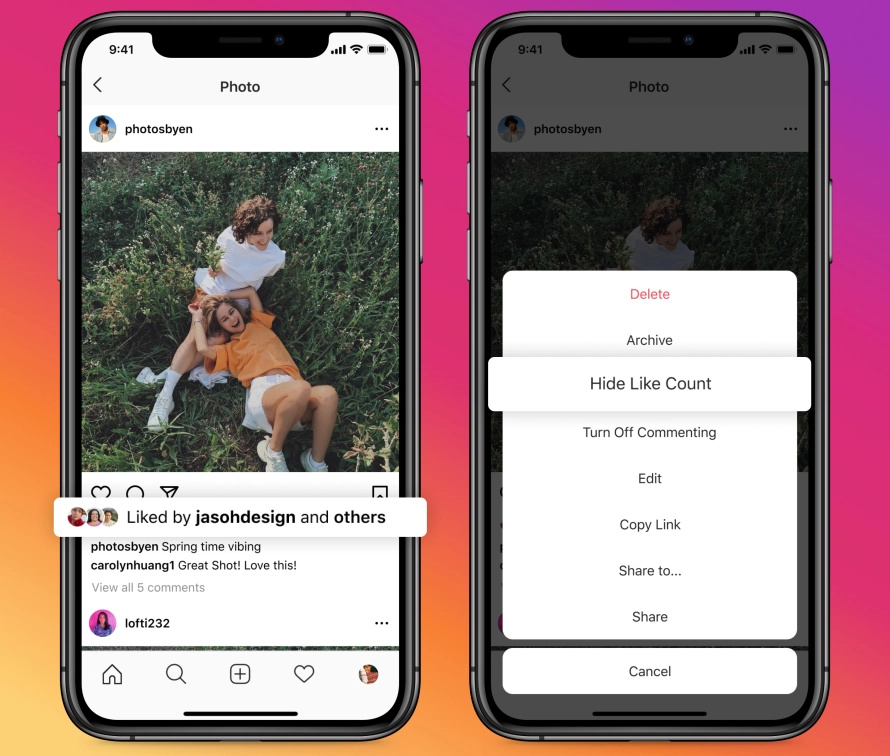
Once you do find the photo that needs some caption editing, you tap the three dots menu in the upper right corner of the image. Tap Edit to go back into the text box and work your editing magic.
Go ahead as far as correcting your mistakes or righting the wrong that got away from you. When you’re done, tap done for iOS or the Checkmark in the upper corner for Android.
This is a common complaint of many users, who want to edit a post on Instagram. You’ve written this brilliant and beautifully captivating post. It’s eloquent and meaningful and utilizes just the right combination of emojis and hashtags.
It’s Instagram-hall-of-fame-worthy, it’s that good! You put it out there, lo and behold, it comes out as one giant jumble, a wall of text if you will that is tedious to read because it lacks formatting. Adding spaces to your Insta posts can be challenging, but without them especially for longer posts, your words can look a mess.
This will actually serve to erase any relevant formatting within your caption. Instead when you get to the point where you want a line break, hit “Enter.” You can then type in a symbol such as a dash or period. Following this symbol hit “Enter” again and this will allow you to start typing your next paragraph with a visible line break in between the two. Keep in mind, whatever symbol you do input will be seen. There are also some Instagram caption apps or space generators available that make all of this a bit easier.
That’s a very good question! Hashtags can be incredibly important. Many businesses for example will utilize key hashtags in order to promote a product or service. Additionally, hashtags can help users cut through some of the digital clutter in a manner of speaking.
And also, for newer users—individuals and businesses—the use of strategic hashtags can help you gain more followers quicker than you otherwise might. So if you’ve gone ahead and posted and yet, after the fact decide that you want to hone in on a more specific or relevant hashtag, then follow the caption editing steps in order to go back and input some additional hashtags.
With marketing for instance, if you want to target a town or city, then utilizing geographical hashtags can really help draw attention. If you’re a brick-and-mortar business, localization becomes increasingly important.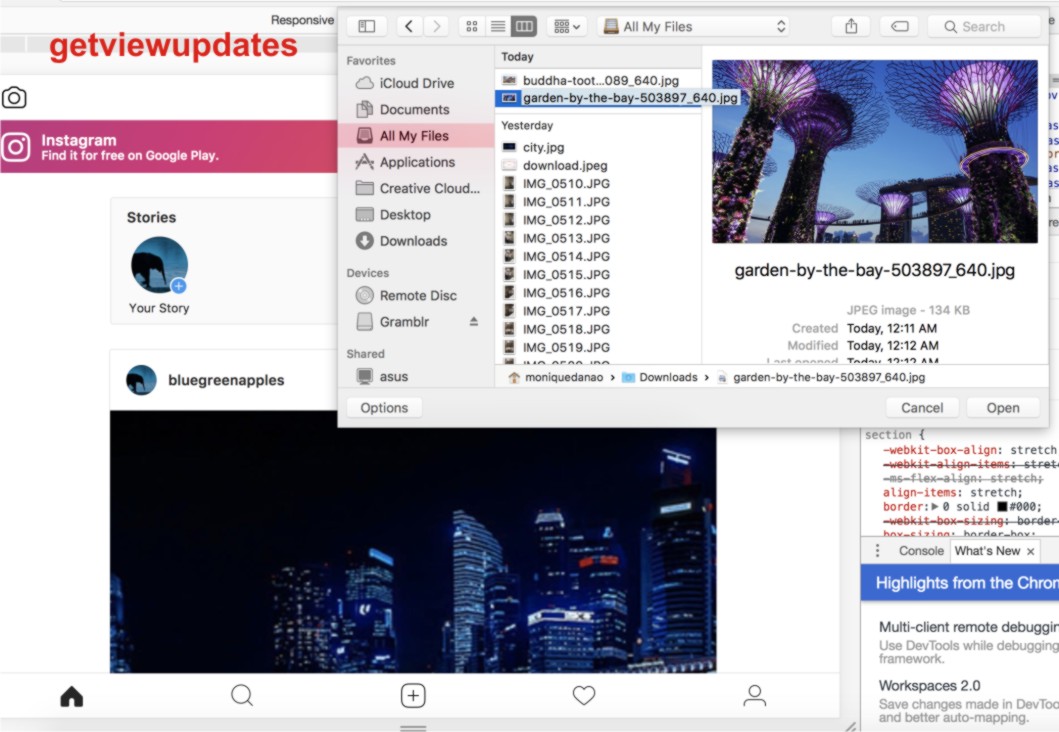 Adding those geographic hashtags helps draw in the most relevant customers in your area.
Sometimes the quality is just not where we want it to be. People are attracted to images. Eye-catching, bright, fun, vibrant, even quirky images are what capture users’ attention and hopefully gain you some more followers in the process.
Some reports have estimates of 40 million photos per day being uploaded to the platform. Certainly not a small number. This is why you want to be at your best as far as what you put online. It’s a crowded field out.
Perhaps that’s the problem you wish to correct; the filter you’ve chosen, you realize now, is entirely wrong for what you’re trying to convey. Maybe the cropping isn’t up to par. And so you’ve somehow skewed the picture in an unflattering way. Whatever the issue with the photo, here’s the bad news. You can’t go back and change a picture after it is posted.
Why don’t they allow this type of editing? In part, it has to do with Instagram’s policy. Given that certain types of images are prohibited, for example, explicit pictures, the fear is that a user might upload a passable image and then go back in and under the guise of editing, swap it out for something that violates house policy. This is one of the reasons photo editing is prohibited.
Replace your photo by deleting your post. That is to say, currently, the only true way of editing any already posted image is to simply delete the entire thing and then reload with the adjusted image. And certainly, if you really are unhappy with the final product, then by all means you should delete it and redo it, perfecting your photo so that it looks precisely how you want it to.
Again, however, this will mean that any user engagement will be effectively erased. You’re starting from square one as far as accumulating likes and comments. So if a particular post does in fact seem relatively popular, you may just want to let it go as is—despite how much you cringe upon looking at that imperfect picture.
Unfortunately Instagram doesn’t allow you to change the order of your images after you’ve posted. If you’ve created a post with multiple images and you’re unhappy with the order of your images, consider deleting your post and starting from scratch. Whether you want to delete the post, depends on how long it’s been published.
If you’ve already seen it gain some traction with likes and comments, have a think about how important the order is to you. Be aware that once your post is deleted the engagement you had on it vanishes with it. If your photos have only been live for a few minutes, you can delete them quickly and make sure you get the order right on the new one.
It’s always a good thing to look back at your past and think, “can I do better than that?” If you’re considering how to edit a posted photo on Instagram by adding a filter or adding a frame, then do it.
Or perhaps you simply want to add text to a video or image. It can be very worthwhile refreshing old content to improve your Instagram account. Instagram photo editing is for anyone who just wants to take their Insta game to the next level. There are many ways of doing it, from Photoshop to adding text and text animations, and effects. Instagram photo editing is a good choice to make your Instagram stand out.
When you’re trying to find out how to edit Instagram posts, you’re probably also looking for some guidance on video. Before we get into how you can edit videos in the Instagram app, let’s be clear that your editing options once you’ve posted your video are limited to changing the caption, hashtags, and adding a location. Make sure you get all the editing work done before you post, so you don’t have to delete your fresh content and start again.
Here’s what you can do to edit your video directly on the Instagram app before you post it:
Tap the Plus icon in your Instagram app and choose a video from your image library. You can also choose to take a video within the app by tapping Video. Tap the Arrow icon.
On the next screen, tap a filter of your choice to apply it. If there’s a part at the start or the end of the video you don’t want to post, tap Trim and move the timeline to get it right. To choose a cover image that your followers will see first in their feed, tap Cover. Tap the Arrow icon.
In the New Post screen, write your caption, tag your friends, and add your location. If you’ve got your other social media platforms linked to Instagram, toggle Facebook, Twitter, or Tumblr on to send your Instagram post to these social networks. Tap the Checkmark icon to post.
Your editing options in the Instagram app itself are quite limited. On Design Wizard, you can choose from a library of high-quality and editable video templates for a sleek and professional-looking feed and Insta profile.
Perhaps you uploaded a video and you think the video would be clearer and easier to consume by your audience if it had text in it. You can add animated text to your video or subtitles to help with this.
Many videos are played without volume as people scroll through their feeds. Some animated text or subtitles could help convey the message better.
Unfortunately, the only answer here is that you will have to delete it and then re-upload with the added images now included. You lose any engagement and will be starting from scratch, but if you really do want to add pictures, be sure to try and do so as quickly after your initial posting as you possibly can.
Even though you may lose a ton of likes by having to redo everything, there are still some benefits to going back and including those extra images. First off, if you are a business for example, and have a promo running, the use of numerous images will tell a much more comprehensive story.
Also, by including more than one image, the spamming factor gets minimized as you’re not posting photo after photo with the same theme. Instead, you’re including all images together in one single upload. So if you do rethink your initial upload and want to go back and add in those other photos, then do so. Again, just do it sooner rather than later.
It would stand to reason that ideally, the best editing advice is not to have to change in the first place. For whatever social media channel you plan on posting to, the key to an effective and edit-less upload is to proof everything thoroughly prior to clicking that “share” button. This way, you don’t have to worry about the hassle of having to go back in and change something or delete the entire post and start again.
Especially if you’re a business or an influencer, this is a huge part of your job after all—getting that brand exposure and doing so in the most professional way possible. Having an error-free upload lends a great deal to your overall credibility. Avoid trying to do things on the fly if at all possible. The best posts are done in a composed manner when you’re not feeling rushed to just “get something out there.” When you have time to actually reflect upon the photo and words associated and ensure they are something you can be proud of, your posts should visibly improve. Pick the ideal time to create your caption and upload, to ensure you’re not in a rush.
This may feel a little funny, but you’d be surprised at how much reading the words you’ve typed out loud can help catch errors. When reading anything out loud, the way in which it sounds to the ear can be quite different from the way in which the eyes scan it. You’re forced to slow down a bit and in doing so are likely to catch mistakes or other errors that you might have missed when scanning it.
By this token, you might want to enlist the assistance of a friend or colleague. A second set of eyes never hurts. Particularly, if this is for a business or is otherwise important to you, allowing someone else to take a look is a smart move. Again, that second set of eyes could easily catch a typo that you overlooked.
Play around with your photos for a bit—don’t be too hasty in getting them out there. Look at them using different filters. Crop more than once. Ask someone to take a look at the photos in question and get their opinion. The key is not to just rush through for the sake of posting.
Your Instagram uploads say a lot about you—in some ways you might say they are you. That being the case, you don’t want the images and words that you put out to the social media world to be fraught with errors and inconsistencies. Taking the necessary time beforehand to proofread and carefully review the caption will help cut down on the number of edits or re-dos that you undertake.
Having a friend or co-worker take a look doubly helps to minimize the likelihood that you have to go back and edit that Instagram post. The more thorough you are in this case, the better off you will be! This way, you might not need to know how to edit an Instagram post after you’ve posted anymore.
For more social media tips, including Instagram, read our ‘Creative Ideas to Increase Sales‘ e-book.
instagrammarketing tipssocial media marketing
Understanding the Marketing Funnel | 12 Ways to Engage Your Customers
How to Become an Influencer | A Step-by-Step Guide
Contents:
How to edit a post on Instagram? There are many reasons for editing posts: typos, a stylist, or a banal “changed my mind”.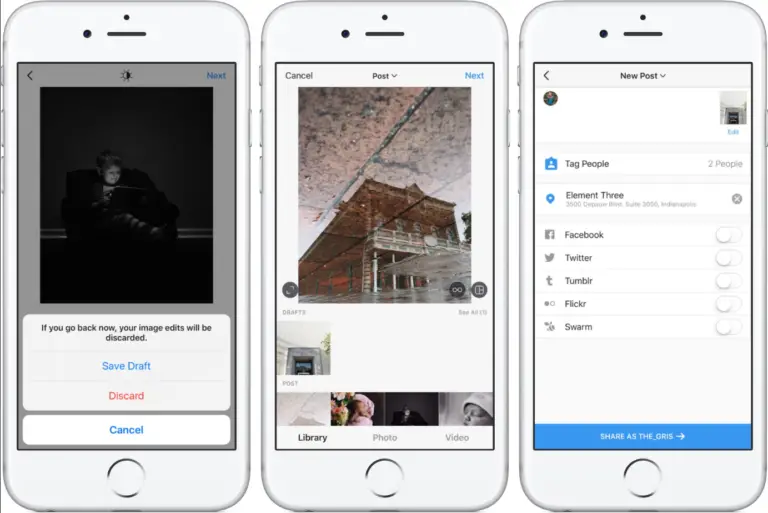 Corrections are needed by everyone and everywhere, so to make your photo captions perfect, let's look at how you can quickly correct the entry and not make yourself laugh.
So, if you need to edit a post on Instagram, the first thing to do is open it. Now carefully look at the record, there should be three dots or stripes on top, depending on the device. We click on them.
A window with available options opens in front of you. Select the "edit" button. After that, you will be able to change the text.
You can add several sentences to your text or delete them. It's great to make changes to annoying records, isn't it? After improvement, just click "done" and enjoy the results.
Tested this feature on a year old publication. There is also an option to edit the post. Therefore, I can safely say that you can change fresh and even last year's entries.
You can also change the photo, correct hashtags or other details, and then republish. Everything depends on your desire. And how to bring them to life, you have already learned.
Before you learn how to edit a post on Instagram, you should think about what kind of result you need. To do this, let's talk about what a quality post is and how to create it.
Three main aspects of writing a high-quality post:
Before posting and seeing user reactions, check:
 Most likely, this information will be of more interest to users of business accounts or those who consider themselves a blogger. However, ordinary people will be interested to know. It's about contact information.
  Use the natural expressions that you use in everyday life. Your post should look like you just met a friend on the subway and tell how your day went or what delicious coffee you drank.
Get in the habit of checking your post for quality before posting, whether you're a business account owner, a blogger, or just sharing important events in your life.
If you like to experiment, or want to test all the new strategy in practice, use the statistics in Instagram. It is needed to evaluate the effectiveness of your actions and analyze the reach of the audience. By studying the data, the profile owner will understand what his audience likes, what hours she is most active, what type of content she likes more, and so on. One caveat: you can view the required values and analyze the coverage only from a business account.
In the post statistics you will see:
 In other words, you observe the number of actions taken.
 The higher the indicators of all parameters, the more popular your record, and, accordingly, the better the selected material.
#1. Why is there no edit button?
Most likely, your post was published before 2018, so there is no editing function.
#2. What can be changed in a post?
In a post, you can change the text under the photo, hashtags, add or change geolocation, edit alternative text for people with visual impairments, and tag a person. Unfortunately, the image cannot be changed.
#3. Why is the post not saved after editing?
Instagram sometimes has such a glitch. Turn the Internet on and off, and then log out of your profile and log in again. After the done manipulations, you can edit the post again.
Do you have any questions after reading this? Ask them in the comments! And also watch an important video on the topic.
[Total: 0 Average: 0/5]
Like the content? Share with your friends!
2812
6
6 Reading Min
How to edit the Instagram
9000 9000
PHOUSED PHOTO PHOTO PHOTOS9 Instagram and only after posting did you realize that you forgot to enter a description representing the uploaded image. In that sense, since you are a true perfectionist, you are looking for a solution to this little problem.
What do you say? This is the case, but being new to this social network, you do not know how to edit a post on instagram ? If yes, then you will be glad to hear that I am going to tell you how to proceed. In fact, in the following lines, I will show you the steps to follow to change the description of an Instagram post from mobile phones and tablets, as well as from PC. I'll also cover how to edit a post's photo before posting and how to edit a sponsored Instagram post.
With that said, if you want to get started right now and can't wait to see what tips I've put together for you, sit comfortably and comfortably in front of your PC and grab your mobile phone or tablet. Carefully follow the instructions I am about to give you in order to succeed in your intention. I can only wish you a good reading and, above all, a good edition of your publications!
Index
 1 from mobile phones and tablets 9000 9000.2 ° C 9,0006 ° C 9,000,000 ° C. 2 Edit Instagram Post Photo
 to edit post description in Instagram First of all, it can work as a mobile phone and tablet, through Instagram for Android e iOS In addition, it can also act as a PC using the photo social network application to Windows 10. In the following lines I will explain how to proceed.
If you are going to change the description of an Instagram post from mobile phones and tablets, first launch the photo social network application by clicking on its icon ( camera symbol on a purple background) located on the home screen and / or in the drawer of your device.
Then login to your account and go to your profile screen by clicking small person icon located in the menu below. After that, find the post you published and click on it to view it. Then click the icon (...) which you can see in the top right corner of the image, and in the menu that appears, click the item edit .
At this point, all you have to do is change the description using the appropriate text box shown to you. Then, tap the text field to add your own description or, if necessary, edit an existing one. At the end of the operation, to confirm the changes made, press the button. √ is located in the top right corner (it's called final on iOS).
If, on the other hand, you want to change the description of the publication in Instagram acting as a computer, you must use the photo social network application to Windows 10, because it is not possible to perform this operation through the social network's official website.
Then Instagram on your computer and sign in to your account. Then go to your profile screen by clicking on the little man icon located in the menu below. After that, find the content you want to edit, click it, and then click the 9 icon0099 (...) which is in the upper right corner.
Now in the menu you are shown, click on the item edit and click on the description text box to change the previously entered or add it in place. Finally, to complete the operation and confirm the changes made, click the final button located in the upper right corner.
If your intention is to edit a photo of a post you posted on Instagram , you must do so before posting content on a photographic social network. In fact, once a photo or video has been posted, it cannot be edited or retouched with filters and effects.
However, for photo editing, you have almost a lot of options to choose from. If, for example, you want to act like a mobile phone and tablet, you can take advantage of the most famous editing apps such as Google Photos (Android / iOS) or Snapseed (Android / iOS). Alternatively, you can edit the photo from your PC with the main photo editing software like Photoshop, or you can use an online tool like Pixlr.
In this sense, for more information on this subject, I suggest you read my guide on photo retouching applications, editing programs for Windows and macOS, and finally photo editing tools on the web.
But if you don't want to use third-party tools, edit a photo from a post on Instagram You can directly use the editor integrated in the photographic social network application. If yes, start Instagram on Android or iOS and sign in to your account if you haven't already.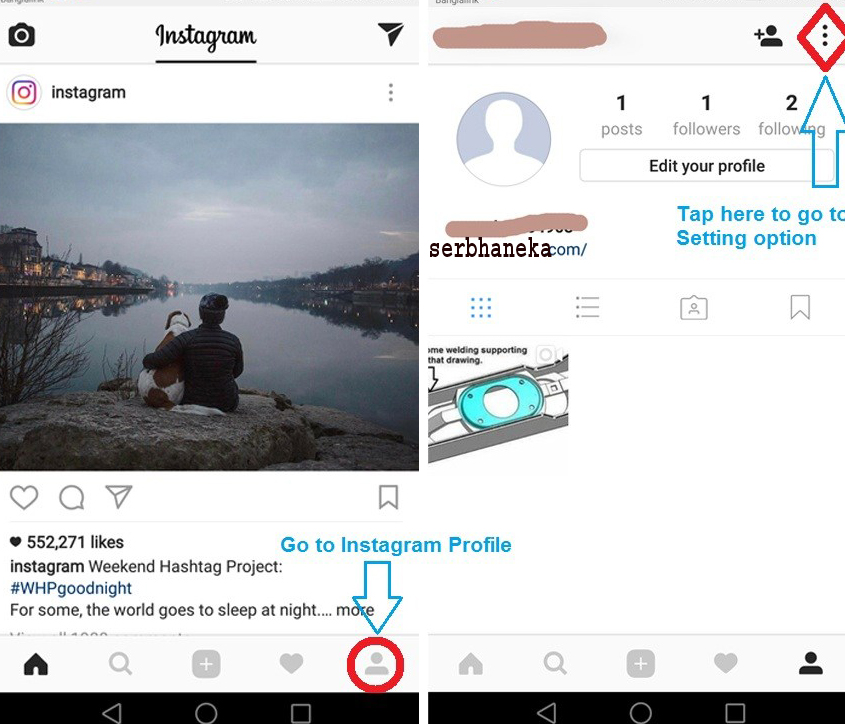
At this moment, press the (+) button located in the bottom menu and select the media item you want to publish in publications by taking it from your device's gallery. You can also take a photo or video on the spot using the built-in camera displayed on the screen.
After selecting a media item, press the Venga button, then press the edit button. At this point, use the editing tools shown on the next screen. For example, you can adjust brightness es contrast but also color y el saturation by pressing the corresponding buttons, you can see the screen.
When you're done editing, just post to Instagram : To do this, first click on Venga and then on Share . If you have any questions or concerns, check out my guide on how to post on Instagram.
to Edit Sponsored Instagram Post Instead, you must operate through the Ads Management tool, which is only available from a PC and is used to create and modify ads made in Instagram (o Facebook ).
To continue, connect to your ad management site and sign in to your Facebook account. After that, first click on the tab Ads and then on the button edit which you will find according to the ad you created earlier.
At this point, click on the list name created and link to the various panels displayed on the screen to be able to modify all the elements that make up the advertising campaign.
For example, through the card Identity , you can select the Instagram account in which to advertise.