Started in 2009 by Jan Koum and Brian Acton, WhatsApp has taken the world by storm. A widely popular instant messaging service, it boasted over 400 million users by the time Facebook acquired it in 2014 for 19 billion dollars — the highest price paid for any startup up until then.
Today, WhatsApp has over 1.5 billion users and is the most popular messaging app in the world. It supports text messages, images, calls, video, voice notes, group conversations, and much more. The key to WhatsApp's popularity is its ubiquitous availability on any device, whether it's iPhone, Android, Windows, web, and even Nokia.
For a long time, however, people have been confused whether there's a WhatsApp Mac app or not. Read on as we clarify this issue below alongside some tips and tricks for making the most out of your WhatsApp-heavy day.
Yes, of course, there is. Facebook released the official WhatsApp Mac app back in 2016 when the service was already hugely popular worldwide. Perhaps it's the app's absence from macOS between 2009 and 2016 that has contributed to the widespread conviction of not being able to download WhatsApp for Mac.
Anyway, to install WhatsApp on your Mac right now:
WhatsApp Desktop Mac app is also available through the official App Store, with all the installation steps being largely the same.
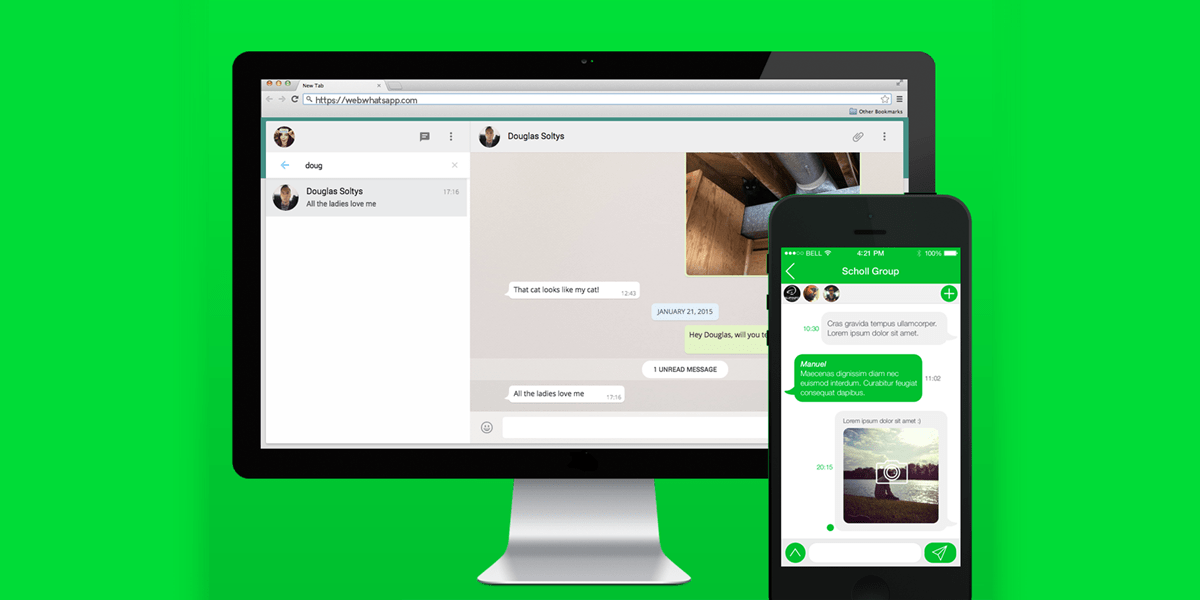
Another way to use WhatsApp on Mac is through the browser. To do that, just navigate to the WhatsApp Web tab on the official WhatsApp website and repeat the steps above once again. WhatsApp for MacBook and web are very similar in their functionality and allow you to send messages, post Statuses, and share attachments. Sadly both versions are somewhat limited, so WhatsApp video call on Mac and web aren't possible as of early 2019.
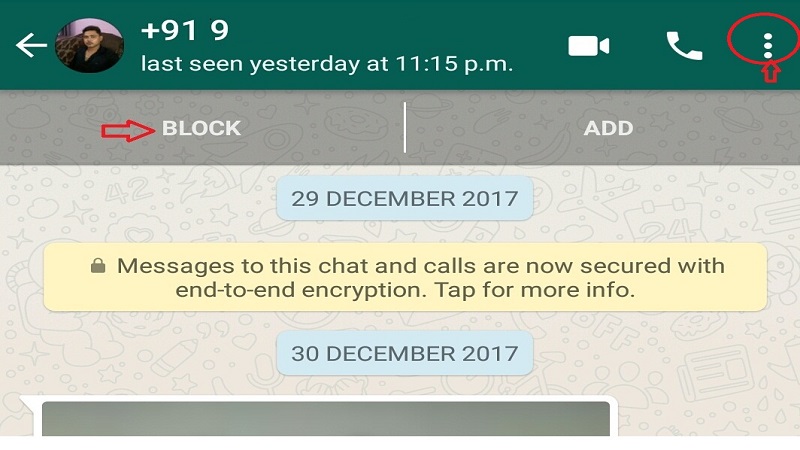
Another major drawback of WhatsApp for Mac is its inability to add new contacts. As the WhatsApp desktop Mac version is designed to be just simply complementary to your smartphone, and the main user ID is your phone number, you need to have all your contacts saved in your phone before you can start conversations on the WhatsApp Mac app.
Overall, the default WhatsApp desktop Mac client is not great and feels rather unfinished compared to its full-featured iOS counterpart. The good news is you don't have to use the official WhatsApp Mac app, as the company allows any third-party developer to build their own ideal version.
ChatMate for WhatsApp is a brilliant alternative to the default WhatsApp for MacBook. Similarly constrained in terms of adding new users, it manages to compensate beautifully with forward-thinking features, such as Stealth Mode, that respect your privacy.
Briefly, Stealth Mode turns on a transparency layer and makes the app increasingly see-through, which hides your messages from prying eyes.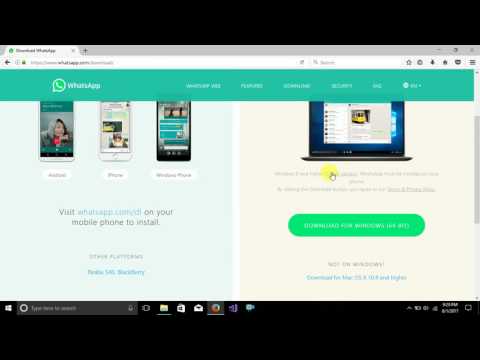 You can also set your messages to only be shown upon a cursor hover. And on top of that, ChatMate for WhatsApp supports Touch ID and can automatically lock the app after a certain time interval.
To turn on Stealth Mode:
In addition to valuing your privacy, ChatMate for WhatsApp includes a Do Not Disturb mode that mutes notifications when turned on as well as a Dark Mode to ease eye strain, especially if you find yourself using the app a lot at night.
So if you're really keen to use WhatsApp for Mac, ChatMate is a much better choice. Unless WhatsApp is just one of many instant messaging services you're logged into. Then, a messaging aggregator might do the trick.
Using WhatsApp Mac app wouldn't really be a problem if it would be the only messaging app you needed. But in the time when you're getting constantly pinged from the likes of Slack, Facebook Messenger, Instagram, and Twitter, maintaining separate applications for each service can become a serious drag.
That's exactly where using IM+ can make your life so much more sane. IM+ is a messaging aggregator, letting you combine 18 different messaging services — some even more than once — into a single intuitive app. Through IM+ all services still retain their full functionality, with support for messages, images, and videos.
One of the best differentiating IM+ features is the ability to tag services or accounts as Work or Home, and then easily switch between them so that even with all the messaging services in one you can still maintain your work-life balance.
When seemingly every app makes constant demands for our attention, it can be hard to concentrate on what actually pays the bills. A five-minute chat with a friend on Facebook, a quick Skype call with mom, a funny GIF on Slack — they all add up to hours of wasted time every day.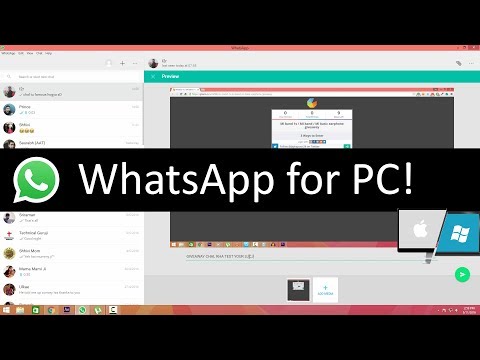 It's likely that you don't even notice how much time you spend on social media. Because if you'd track it, you'd be horrified.
Timing is an automatic time and productivity tracker. It works mostly in the background by observing which apps you use and how much time you spend in them. Timing then prepares daily reports that provide a clear reflection on your day and even gives you a productivity score.
You can use Timing for your work too, by creating projects and manually adding tasks to them. That can be done in several ways:
You can fine-tune Timing even further in Preferences. For example, specify what time the day starts and ends, and whether to track productivity on weekends. In addition, you have the option to integrate your calendar right into Timing, so that you see all the upcoming events right in the app's timeline.
In the end, if you need to use WhatsApp on Mac as your primary communication tool, download a more flexible ChatMate client to make your experience better. Although neither of them offer WhatsApp desktop video calls, so you have to choose another messaging service for that. And if you find yourself constantly switching between different messengers, unite them all under IM+ to avoid mental fatigue. Finally, keep yourself on a productive track by monitoring how much time you spend on all the social apps through Timing and make sure to course-correct when things get out of hand.
Best of all, the apps mentioned above are available to you on a free trial through Setapp, a platform of over 150 useful apps and utilities that strive to improve your Mac experience.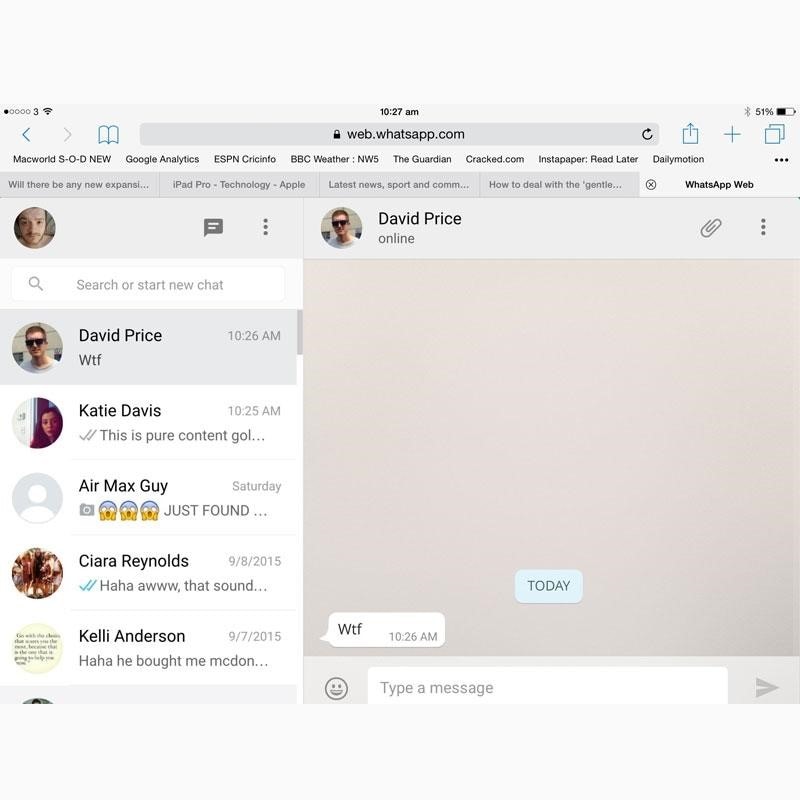 Become a Setapp Member and get unlimited access to them all. Now, that's productivity worth mentioning!
By Mahesh Makvana
Updated
If you haven't got WhatsApp because you're a Mac user and think it doesn't work with Macs or iPhones, you're mistaken. Let's get WhatsApp working on OS X, shall we?
Are you finding it frustrating to reach for your phone each time there’s a new WhatsApp message? Don't worry, you can stop doing that. It's entirely possible to use WhatsApp on macOS.
WhatsApp is a mobile-only instant messaging app but you can get it to work on your Mac as well, using both official and unofficial methods. Just keep in mind you can’t install WhatsApp as an actual app on your Mac.
The following covers a method for when you want to use WhatsApp on your Mac without a phone as well. So, let’s get started.
 Use the Official WhatsApp App for Mac
 WhatsApp has actually developed a desktop app for Mac as well. This means you can grab this app from the App Store, link it to your WhatsApp account, and start using WhatsApp on macOS just like that.
Again, this won’t be a separate WhatsApp app or account. This is just an app-wrapper that shows your phone’s WhatsApp messages on your Mac.
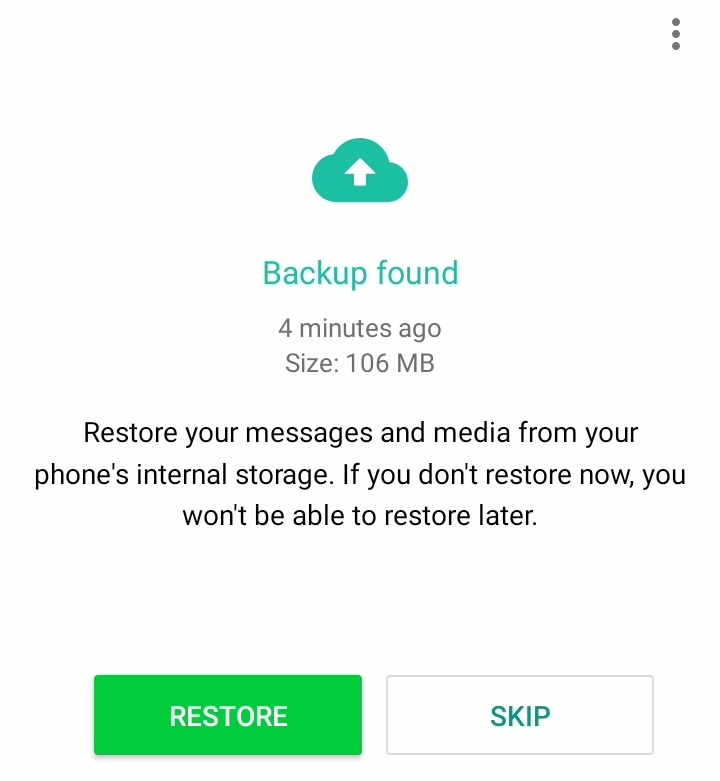
You'll need access to your phone to scan a QR code that appears after installing the app on macOS, so be sure to keep it handy.
Here’s how you get started with WhatsApp for Mac:
2 Images
WhatsApp for Mac will log you in, and you can now start sending and receiving messages from your desktop.
If you don’t want to install an app, you can use WhatsApp inside a browser. This works pretty much the same as the WhatsApp Desktop app, except you don't need to install it. This could be an advantage if you're trying to use WhatsApp on a work computer, for example.
If you’re interested, here’s how to set WhatsApp Web up on macOS:
You can now access the service from your browser on your Mac. As long as you're not using an Incognito or Private Browsing mode in your browser of choice, you should stay logged in.
Related: WhatsApp Web Tips and Tricks All Users Should Know
There are some third-party WhatsApp clients as well that you can install on your Mac.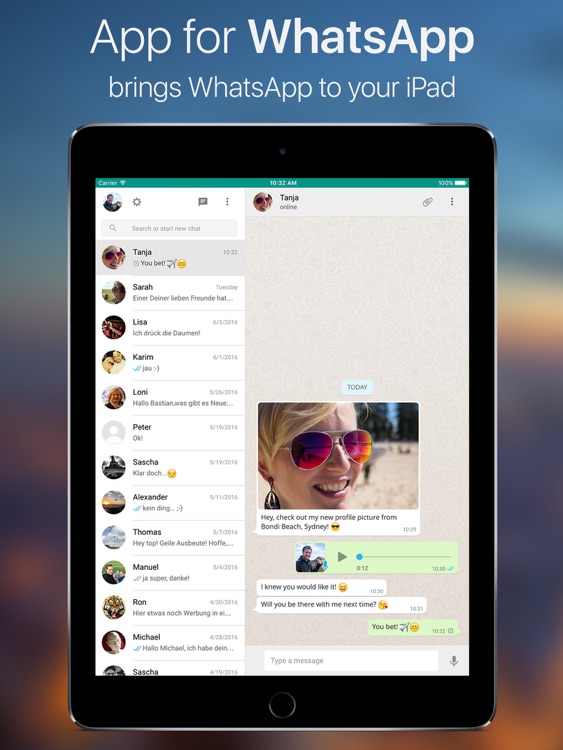 These clients work like the WhatsApp for Mac app, but these offer a few extra features that the official one doesn’t.
FreeChat for WhatsApp is one such client that lets you access your WhatsApp messages on macOS. The tool offers various customizable options, like the ability to reply to messages from the notifications and enabling a dark mode theme.
You can install and configure this client as follows if you’re interested:
Using an Android emulator to access WhatsApp on your Mac is a completely different procedure than any of the procedures outlined above. In this method, what you basically do is you actually install the WhatsApp mobile app and create a new account to use with it.
If you’ve used an emulator like BlueStacks to run Android apps on your Mac before, you know you need to log in to your Google account, and the emulator then lets you load whatever apps you want. You can install WhatsApp using this method and then create and use an account with it.
A major drawback of this method is that you won’t be able to use WhatsApp on your phone if you register the same phone number in this Android emulator.
If you’re okay with that, here’s what you need to do to get WhatsApp running on your Mac:
Now you can message your friends and family as if you were doing so from your phone. Make sure to keep BlueStacks running to ensure you don’t miss out on any notifications for WhatsApp.
One more thing you need to know is how to share files in BlueStacks. Since you’re in an emulated environment, you need to use BlueStacks’ Media Manager to send and receive files in WhatsApp. This tool will allow you to send files from your Mac to your WhatsApp recipients and to get files from them to your Mac machine.
No, WhatsApp currently doesn’t allow you to place voice or video calls from a Mac. You must use the mobile app to make any kind of calls with WhatsApp.
If you find you’re spending quite a bit of your time looking for your phone to see new WhatsApp messages, it’s time to bring that whole WhatsApp experience to your Mac.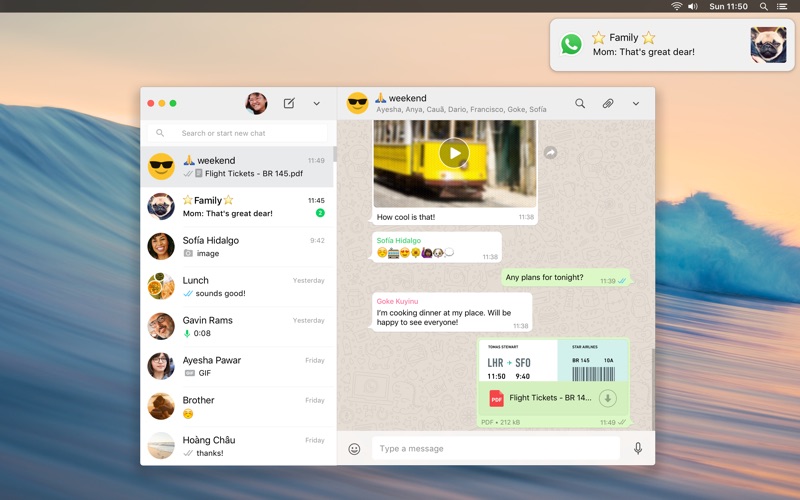 Use one of the methods above to get this widely popular chat app running on your Mac machine.
You can use WhatsApp on Windows computers as well, in case you don’t use macOS exclusively. Most features of WhatsApp for mobile should work just fine on the Windows version.
Do you feel uncomfortable reaching for your phone every time you receive a new WhatsApp message? Don't worry, you can stop doing it. It is entirely possible to use WhatsApp on macOS.
WhatsApp This is a mobile instant messaging app, but you can make it work on your Mac using both official and unofficial methods. Just be aware that you cannot install WhatsApp as an actual app on your Mac.
Here are ways to use WhatsApp on Mac without a phone. So let's get started.
WhatsApp has already developed a desktop app for Mac. This means you can get this app from the App Store, link it to your WhatsApp account, and start using WhatsApp on macOS just like you would on your phone.
Again, this will not be a standalone app or WhatsApp account. It's just an application shell that displays your phone's WhatsApp messages on Mac.
You must have access to your phone to scan the QR code that appears after you install the app on macOS, so be sure to keep it handy.
Here's how to get started with WhatsApp for Mac:
WhatsApp for Mac will log you in and you can now send and receive messages from your desktop.
If you don't want to install the app, you can use WhatsApp in a browser. This works just like the WhatsApp desktop app, except you don't have to install it. This can be a plus, for example, if you are trying to use WhatsApp on a work computer.
If you're wondering, here's how to set up WhatsApp Web On macOS:
You can now access the service from a browser on your Mac. If you are not using incognito mode or private browsing in the browser of your choice, you must remain logged in.
There are also some third party WhatsApp applications that you can install on your Mac. Which works like WhatsApp for Mac but offers some additional features not found in the official app.
FreeChat for WhatsApp is one such application that allows you to access WhatsApp messages on macOS. The app offers various customizable options such as the ability to reply to messages from notifications and the inclusion of a dark mode theme.
If you are interested, you can install and configure this client as follows:
use Android Emulator Accessing WhatsApp on Mac is a completely different procedure than any of the above. In this method, you basically already install the WhatsApp mobile app and create a new account to use it.
If you have used an emulator like BlueStacks to run Android apps on your Mac before, you know that you need to sign in with your Google account and then the emulator will let you download any apps you want. You can install WhatsApp using this method and then create and use an account with it.
The main disadvantage of this method is that you will not be able to use WhatsApp on your phone if you have registered the same phone number in the Android emulator.
If you're happy with that, here's what you need to do to get WhatsApp running on your Mac:
Now you can send text messages to your friends and family just like you would from your phone. Make sure BlueStacks is still running so you don't miss any WhatsApp notifications.
You also need to know how to share files on BlueStacks. Since you are in a simulated environment, you need to use the BlueStacks media manager to send and receive files on WhatsApp. This tool will allow you to send files from your Mac to WhatsApp recipients and transfer files from them to your Mac.
No, WhatsApp does not currently allow you to make voice or video calls from your Mac. You must use the mobile app to make calls of any type using WhatsApp.
If you find yourself spending a lot of time looking for your phone to see new WhatsApp messages, then it's time to get the most out of WhatsApp on your Mac. Use one of the above methods to get this popular chat app running on your Mac.
You can also use WhatsApp on a Windows PC if you're using something other than macOS. Most WhatsApp mobile features should work fine on the Windows version. Check out the Best WhatsApp Alternatives That Really Respect Your Privacy.
Source
Use WhatsApp Business on PC with BlueStacks – the App Player trusted by 500M+ users.
WhatsApp Business is an application in the Communication category developed by WhatsApp LLC. BlueStacks is the best platform to run Android apps on PC or Mac. Get an unforgettable gaming experience with us!
WhatsApp Business is a free business messenger that was released in 2018 for Android, iOS, Windows and MacOS owners. If you want to use all the features of the mobile client on your computer and get more stability in your work, download WhatsApp Business on PC with BlueStacks!
Launched in 2009, the most popular instant messenger, WhatsApp, was created solely for people to communicate with each other, without any commercial purpose. However, business gradually began to move here too: many professionals began to leave WhatsApp contacts as accounts for communication. This gave impetus to a new direction in communication.
WhatsApp Business meets all business requirements for a convenient platform for working with customers. A new type of communication channel made it possible to send mailouts, share the status of orders, and create something like an FAQ - answers to frequently asked questions. At the same time, users still have the ability to communicate directly with each other - a phone is also attached to business accounts, which you can call. This addition to an already functioning application made it possible to simplify the communication between the seller and the client. If you haven't used it in your business yet, it's time to start: download WhatsApp Business on PC with BlueStacks!
Download and install BlueStacks on PC.
Sign in with your Google account to access Google Play, or sign in later.
In the search field on the right side of the screen, enter the name of the game - WhatsApp Business.
Find the WhatsApp Business game in the search results and click on the "Install" button.
Complete your Google login (if you skipped this step at the beginning) and install the WhatsApp Business game.
Click the WhatsApp Business icon on the home screen to start playing.
WhatsApp Business makes it easier for merchants to connect with their customers. This is a great addition to the main messenger, able to send out newsletters, share information about the shipment of goods, as well as perform other corporate actions that help the business grow.
This great application has several versions: mobile and desktop (for Windows and MacOS). However, there is a big difference between them, and for most users it is critical. Many would like to transfer the Android version to a computer, but it is not possible to do this directly. Luckily, we have a solution for this problem: download WhatsApp Business on PC with BlueStacks!
BlueStacks helps you run Android apps on Windows 7, 8, 10, 11 and Mac. To install the emulator, a computer with 4 GB of RAM, a quad-core processor from Intel or AMD and a 2 GB video card is enough.
All functions of the mobile version of WhatsApp Business will now be available on your PC. You can not be afraid for the safety of your data, as our emulator uses the latest security protocols and complies with all standards. Install WhatsApp Business on PC with BlueStacks and grow your business easily and conveniently with the best app emulator!
Microsoft Windows 7 and above.
Intel or AMD processor.
Minimum 4 GB RAM
5 GB free disk space.
Note:
* You must have administrator rights on the PC. Up-to-date graphics card drivers from the chipset manufacturer or Microsoft.
View All
Launch WhatsApp Business on your PC or Mac by following these simple steps.