It won’t be wrong to say that Instagram is a go-to socializing platform for millions of people. Ever since its debut, popularity hasn’t been an issue. You can post photos, videos, reels, stories, etc.
With all of its other features, Instagram also has a direct messaging section where you can chat with someone. This includes both text and audio messages. However, it doesn’t allow any direct saving of audio. Therefore, one might ask, how to save voice messages on Instagram?
You can save any Instagram voice message on any device, including Android, iOS, and PC. No need to worry because none of the ways will cause any problem to your device or account.
Table of Contents
In this method, you will be doing screen recording. It will be great if you have a Xiaomi, Samsung, LG, or a OnePlus device since they have a built-in screen recorder.
Even if not, then you can download any screen recorder that supports internal recording. The AZ Screen Recorder (Android / iOS) is a good choice. As for the built-in ones, follow the steps below:
Once done, you can easily locate and listen to the audio on your music player.
Pretty straightforward method, you might have guessed. It’s similar to the above procedure. Simply screen record the messages from the pre-installed screen recorder in iOS devices and convert them to mp3.
As for the video conversion, you can also download a video to mp3 converter from the App Store. Otherwise, many are available online, so it won’t be an issue anyway.
In this method, you’d be requiring a Google Chrome extension by the name of Chrome Audio Capture. It records the audio that is played on the screen and stores it at the selected location.
Afterward, you can simply go to the audio file and play it.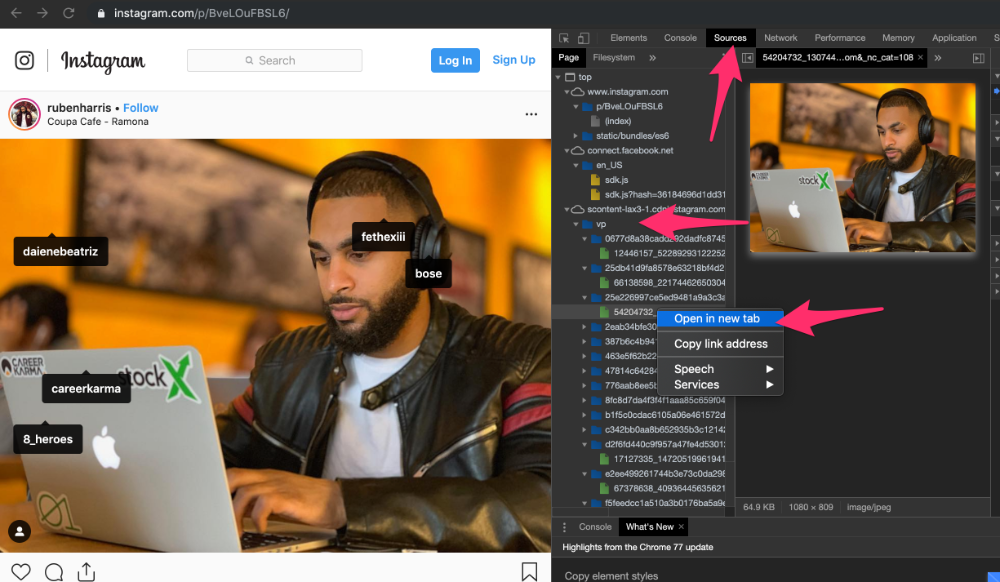
Here’s how to do the rest:
For downloading the extension, all you have to do is search the extension’s name on Google and install it. It will hardly take a minute to do so.
Apart from the three approaches that were discussed, there are a couple more.
Firstly, there is another way to record Instagram voice messages on your mobile device. This one demands you to play the audio on one phone and record it on another — a handy and straightforward method.
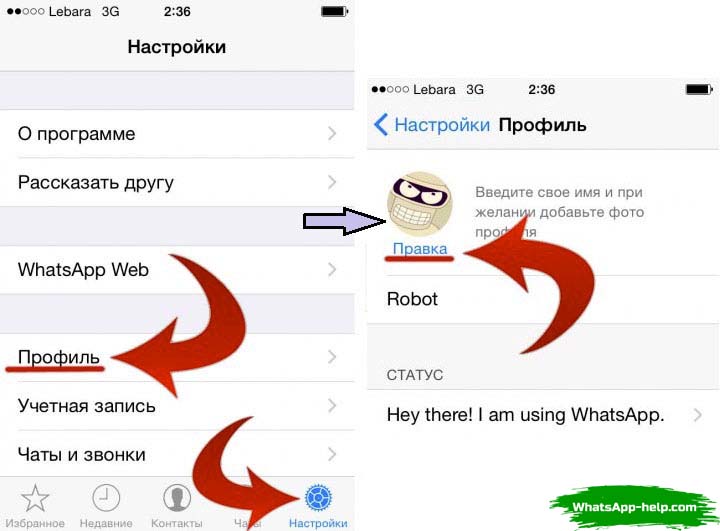
Moreover, you can download your entire Instagram Data as well.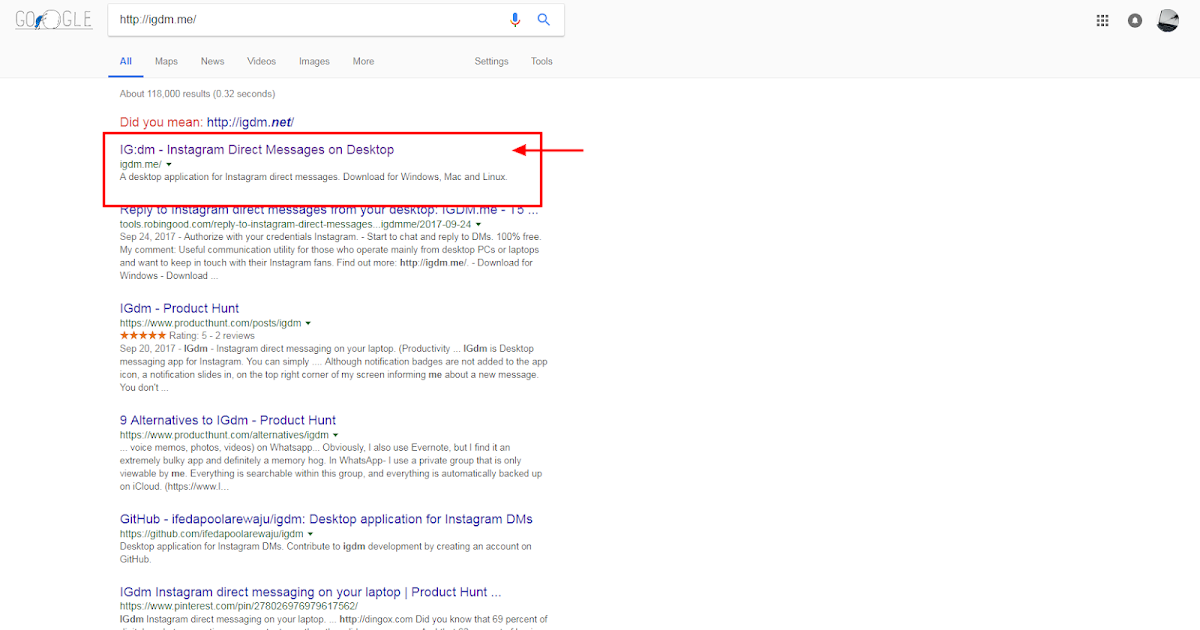 Open Instagram and go to Settings > Security > Download Data. Type in your Email and tap on Request Download.
Afterward, you will receive an email with the download link. Click on it, and all of your data will be downloaded, including the audio messages.
As discussed, the methods are pretty simple and convenient to save any voice message on Instagram. You can save the audio using any platform that you want, and it will be a matter of seconds before you will have it saved.
No, there is no such option on Instagram. You’d need to follow any of the above methods.
Yes, you can easily do it by installing the Chrome Audio Capture extension.
Yes, you can record as much as your screen recorder limit allows.
There can be an end number of reasons why you want to keep the messages received on Instagram save with yourself.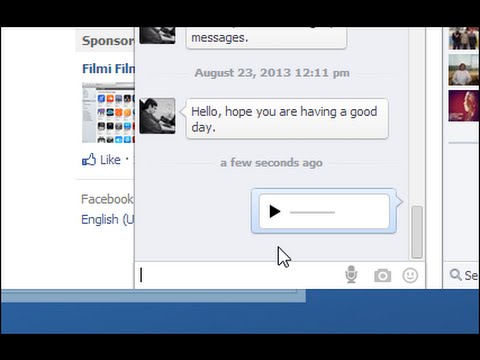 If the messages are received in the form of text or an image, then a simple screenshot will do the job of keeping the messages saved on the phone locally. But this trick can not be used when a message is received in the form of a voice note.
What makes the downloading of voice messages harder is the fact that there is no option available right inside the Instagram DM to save the voice notes on the phone. Secondly, there’s not even a search option inside the Instagram chats so you can easily lookup up the voice messages whenever you need them. So if a voice message was received a long time ago, you don’t have any other option left except for scrolling through the huge pile of messages that you receive after that voice message.
But here on Geek Instructor, we have a solution to all your tech problems, and today in this article we will showcase that how to download Instagram voice messages with some simple tricks. Continue reading further to know how to achieve this impossible-looking but a simple task.
Table of Contents
If you use Instagram on your desktop PC or laptop, you can use a Chrome extension to download audio messages from Instagram DM. There is an extension named Instagram Voice Downloader on Chrome store. As you install it on your browser, you would start seeing the download button under the voice message on your Instagram DM. Here’s a step-by-step guide for this method –
 Use CTRL+S shortcut key or right-click and choose the “Save Audio As” option.
The voice messages on Instagram are private and they can’t be downloaded by third-party apps by copying the link as it is possible in the case of Instagram reels. Unfortunately, there isn’t any app for iPhone that can help you to download audio messages from Instagram DM directly, however, we have a simple workaround to achieve this task.
The idea behind this method is to do the screen recording of your Instagram chat when the voice message is playing. So what this will do is, it will also record the audio. The built-in screen recorder on iPhone also supports internal audio recording. Later, you can convert the recorded video to MP3 audio by using an online converter tool. Isn’t that good?
This step-by-step guide will show you the practical implementation of this method. Follow these simple steps to download Instagram voice messages on your iPhone by using the built-in screen recorder –

The task is almost done but if you need to convert the video to audio, you can use an online converter tool. You will find so many websites by searching these terms on Google. Just choose anyone you like and upload your video on it. You can also select your preferred audio format. Once the conversion is done, download the audio file and save it to your Files app. Now you can share it with anyone via WhatsApp, Gmail, or any other app.
Downloading Instagram voice messages on Android is not possible by screen recording as it doesn’t have a built-in screen recorder. There are several third-party apps available on the Google Play Store but they are not allowed to do internal audio recording. Luckily, we found two other workarounds specially for Android users.
As you may already know Chrome extensions aren’t compatible with the mobile Google Chrome, however, there are other web browsers such as Kiwi and Yandex that can make Chrome extensions work on your Android smartphone. These browsers are based on Chromium, the same platform on which Google Chrome is built. As for this tutorial, we will be using Kiwi Browser. It is very similar to Chrome in user interface and provides some extra features also such as extensions support, ad blocker, dark mode, and pop-up blocker among many others.
In this method, we will first install the Instagram Voice Downloader extension on your Android phone by using the Kiwi browser and then download audio messages from Instagram DM. Here are the steps you need to follow –
Another way to save Instagram voice messages on Android is to record them from another phone. This is one of the easiest methods as it doesn’t require you to install an extension or third-party app. Every smartphone has an in-built voice recorder tool. Just go to the app drawer and use the search feature to find it. After that, play the audio message on your Instagram and record it with the voice recorder. As simple as that. It will be saved in an audio format (mp3 or aac) so you don’t even need to do any conversion.
Typing long text messages can be a tedious task sometimes as it takes a lot of time and handwork. The voice messaging feature comes in handy while chatting with someone. You would need to download an Instagram voice message on your phone for various reasons. We have shared some of the best methods that you can use to get this task done. If you are facing any problems with this guide, let us know in the comments below. By the way, which method you are going to use personally?
UPD:
9000
31.7K
Content
In December 2018, Instagram launched voice messages in test mode. Now this function has successfully taken root and is available to every user of the social network. Not surprisingly, communication has become much easier and more convenient.
Now, instead of a long message typing, it is enough to pinch the microphone icon with your finger. Let's take a closer look at voice messages and how to work with them.
It's worth mentioning right away that the length of voice messages on Instagram is limited. The message is sent immediately after recording.
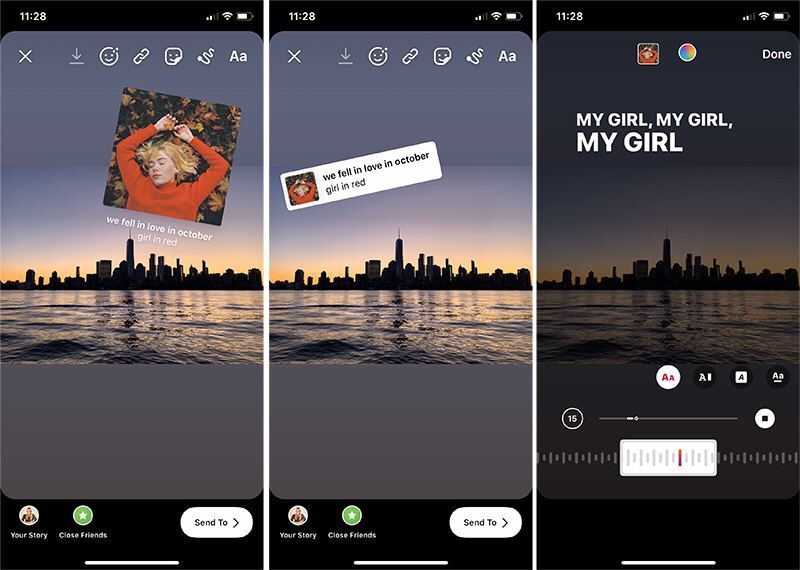
An interesting fact - you can add animations, images or stickers to the audio
You can communicate with voice messages both in personal and group chats. However, for those who are used to talking in messengers, at first it is unusual. The fact is that Instagram shows unread messages in blue, and read messages in black.
There are two ways to do this. Let's talk about each of them.
Method #1. You need to go to direct and go to chat with the person you want to record a voice message. Then just press and hold the "Microphone" icon.
Record audio and release the microphone icon.
Trash icon - delete audio message, up arrow - send messagePlease note that the message will automatically be sent to the recipient. You can't listen to the recording before.
Method number 2. A more convenient way is to hold down the microphone button and pull your finger up. After that, a lock icon will appear on the screen.
Lock icon - hands-free modeYou can now remove your finger and write a message safely. To send, click on the arrow icon.
This "hands-free" method is useful for long messages or when you can't keep your finger on the button all the time. For example, while driving. Automatic recording will not distract from the road.
Listening to a voice message is even easier than recording it.
To listen to the voting message:
☝️ An important point - you do not need to hold the message, just click on it once, and the message will start playing. You can stop playing the audio message at any time by clicking on it again.
"play" button - listen to a voice messageTo rewind, turn on the playback of the message, and then, moving your finger over its contents, roll it back or forward (left and right, respectively).
👂 Some messengers have this feature: you put your ear to the phone, and after that the message starts playing automatically, without any pressing. On Instagram it works differently. As soon as you put your ear to the smartphone, not an audio message will start playing, but a recording of your answer (the microphone will be activated). That is, by putting your ear to the phone, you can record your voice message, and not listen to the message of the interlocutor.
💡 Life hack: Sometimes you really need to listen to a message without the interlocutor knowing about it. But as soon as you enter the chat, he will display "read", and you can no longer say that you have not seen his messages. There is a trick to this case. As soon as you received a message from a person:
Now update the dialog feed in the direct (by dragging the screen down). The dialog will move to the "Requests" folder. We go there, open the dialogue, listen to the audio message. Done, you listened to the message, and your interlocutor did not know about it. Do not forget to remove the restrictions from his page: go to the page, click "…", select "do not limit".
You can delete a voice message immediately after sending it. To do this, simply click on the message itself and hold for a couple of seconds. Next, you will see a menu in which you need to select "Cancel sending message."
The "Unsend message" button will delete the audio message from both the sender and the recipient.Confirm the deletion. Of course, you can cancel the voice only until the interlocutor has opened it.
Please note: the interlocutor may receive information about deleting the message
Unfortunately, saving voice messages is not provided by the official Instagram functionality 😟. If this is possible to do, then only with the help of various tricks and tricks. One of them is to view the element's code.
You can get unavailable functions using the emulator. You can find many of them on the Internet. But not all of them are reliable. Some do not work well enough, while others will bring viruses to the computer. To prevent this from happening, you need to download only reliable and proven emulators. Which? Read below.
Instagram for Windows 10 is a specially released app for Windows. With it, you can:
The application has wide functionality, almost the same as the mobile version. The only exception is the publication of photographs.
The first step in downloading the app is to go to the Microsoft Store. If you do not know how to do this: just enter the name in the search on your computer through the Start menu. Then, in the store search, enter "instagram". The first app that pops up is exactly what you need.
It remains only to download and run. Then simply register or enter your existing username and password.
Perhaps the main disadvantage of the application is its outdated design. But that's not such a big price to pay for free access to the useful features of the phone version of Instagram.
If your computer does not have Windows 10, but another operating system, then you will not be able to download the application to it. In this case, we recommend using an Android emulator. One of them is BlueStacks.
Bluestacks is an Android emulator.By the way, by downloading this application, you will get access not only to the mobile version of Instagram, but also to other mobile applications. For example, your favorite games or readers.
To download, you need to go to the official website of the application. Then everything is simple: click on the big green button and download. After that, the installation will begin. It usually takes a little time. After installation is complete, launch the program.
Please note that the first launch may take up to 5 minutes depending on the performance of your computer.
In the process of using the application, you will need to enter data from your Google Play account. When the program is finally installed, click on the new shortcut on the desktop. Enter "instagram" in the search and download the app. Done, now you can use the mobile version of the social network through your computer!
There are several reasons why voice messages are not played on Instagram:
Sometimes voice messages are not sent. The most common reason is an internet connection problem. Also, users often exceed the limits set by the social network. It is important to remember them, because if they are exceeded, the account can be blocked. Instagram limits are as follows:
If everything is in order with the Internet connection, the limits are not exceeded, and messages still cannot be recorded or listened to, then check the phone itself. The problem might be a faulty microphone or speaker.
In case the problem persists, contact Instagram support. Depending on the workload, they can respond within one to two days.
* The Meta company, which owns the social networks Facebook (Facebook) and Instagram (Instagram), was recognized as an extremist organization by a court decision dated March 21, 2022 and banned in the Russian Federation.
In this manual, we will consider the option of recording voice and transferring the resulting audio file to computer using Voice Memos.
This app is included with the preinstalled apps that came with iPhone. This is what the program icon looks like on the iPhone desktop:
Open Voice Memos.
Press red button 1 to start recording.
Voice recording starts. During the recording process, you will see a changing diagram and a working counter.
You can use the built-in or external microphone or headset for recording. Control the recording level. It can be adjusted by changing the distance to the microphone and the volume at which you speak.
Stop recording by pressing the red button again. After the recording is stopped, the trimming tool 2 becomes available. It can be used to cut off unnecessary fragments at the beginning and at the end of the recording.
Click on this tool. The diagram on the screen will change - now the recorded fragment will be shown in full. Along its edges there will be red vertical lines with small circles 3, which act as markers for the beginning and end of the final record.
Click on one of the circles and move it to cut off the empty space on the diagram. After the extra parts on the diagram are removed, click the Trim button 4 and confirm this action 5.
To save the audio file, click the Done button 6, in the window that opens, enter its name 7 and click Save. The newly recorded file will appear in the list of voice memos.
Now you need to transfer this file to your computer
Audio files recorded in Voice Memos can be transferred to your computer in the following ways:
In order for audio files recorded with Voice Memos to sync with iTunes, this option must be set in iTunes.
Follow these steps to set up Voice Memos sync:
After that, start synchronization by pressing the "Sync" button 5 located in the lower right corner of the iTunes window.
When you sync iPhone with iTunes, audio recordings made using Vioce Memos are placed in the playlist of the same name. Click the "Music" button 6 to go to the iTunes Music Library and select the "Voice Memos" playlist in the sidebar 7. In the list of audio files, you will see a line with the name of the audio file 8 that was recorded using Voice Memos.
As such, this file is stored in iTunes. But, in the file system, this file is stored with a completely different name. To see this file in the file system, select its row in iTunes 8, right-click and select the command “Show in Finder” from the context menu 9.
A file manager window will open with the file highlighted 10. The name of the file reflects the time it was created , but not the name given to it in Vioce Memos.
Rename the file using standard operating system tools to make it easier to find it later in the file manager. You can also move it to a special folder created for virtual museum or tour audio files.
Highlight the line of the audio file that you want to transfer to your computer and in the panel that opens, click on the Share icon 1.
Select the e-mail icon 2 from the suggested options for sending the file. with an attached audio file of your choice. The "From" field will contain your e-mail address, and the subject field of the letter will contain the name of the phonogram to be sent.
Enter the recipient's address in the To field 3. This may be the same address if you use the same address on both your computer and smartphone. Either another. It is important that the letter can be opened on a computer and the file attached to it can be saved.
Click the "Send" button 4.
After you open the letter on your computer, save the attached audio file to the prepared folder.
iMessage only works with Apple devices, so you can only use it if you have a Mac OS X computer in addition to your iPhone.
You can read about iMessage settings here: https://www.apple.com/ru/ios/messages/
To send an audio file via the iMessage service, click on the line with its name and select the Share 1 icon in the panel that opens.