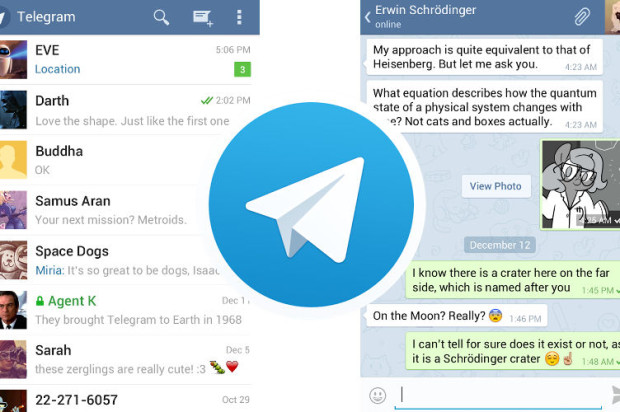
Telegram is a cloud-based messaging app that adds a lot of convenience to your communication. The platform lets you transfer conversations between computers, smartphones, and tablets. It also provides great security, owing to the secret chats feature. But how exactly do you send messages on Telegram?
In this entry, we’ll go through all intricacies of Telegram messaging.
Quick Links
Sending a message on Telegram is just as easy as with other similar apps:
You can send a message to yourself with the “Saved Messages” function:
Once Telegram bots are set up, users can interact with them by sending commands, messages, or requests. Here’s how the process works:
If you’re too busy to type, sending a voice message to your friend will save you some time:

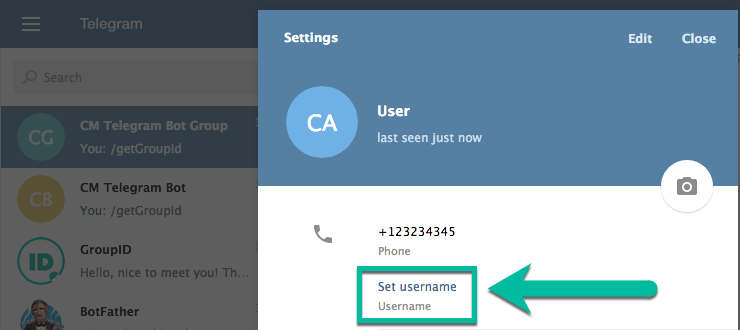
Direct messages are also referred to as private messages on Telegram. Sending them is relatively straightforward:
Telegram doesn’t lag behind other platforms in terms of the media you can send through the app. One of your options is a video message:
Using an API to send your Telegram message is a bit more complex. You’ll require the services of a bot:
curl https://api.telegram.org/bot%7BYOUR_API_KEY_HERE%7D/getUpdates>>> import requests>>> token = {YOUR_API_KEY_HERE}>>> url = f'https://api.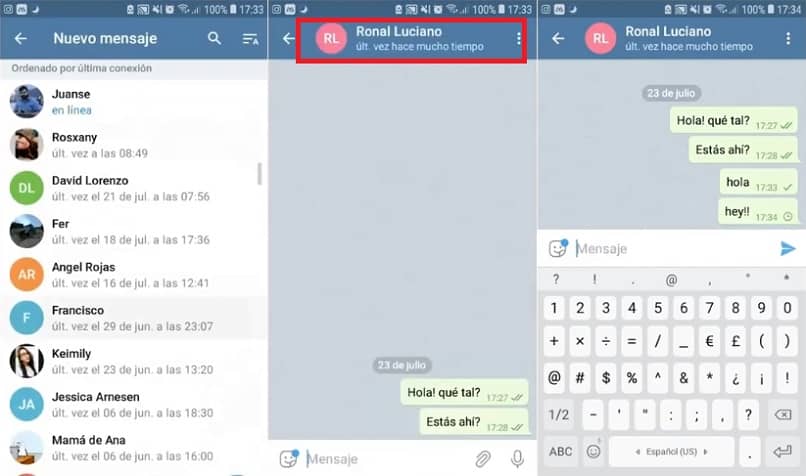 telegram.org/bot{token}/getUpdates'
>>> requests.post(url).json(){"ok":true,"result":[{"update_id":12671344, "message":{"message_id":30,"from":{"id":{YOUR_ID},"is_bot":false,"first_name": "{YOUR_NAME}" ,"username":"{YOUR_USERNAME}","language_code":"en"},"chat":{"id":{YOUR_CHAT_ID},"first_name":"{YOUR_FIRST_NAME}","username":"{YOUR_USERNAME}","type":"private"},"date":1560719493,"text":"{YOUR_SENT_MESSAGE}"}}]}curl -d chat_id={YOUR_CHAT_ID} -d text="test msg from curl" https://api.telegram.org/bot{YOUR_API_KEY_HERE}/sendMessage>>> import requests>>> token = {YOUR_API_KEY_HERE}>>> url = f'https://api. telegram.org/bot{token}/sendMessage'
>>> data = {'chat_id': {YOUR_CHAT_ID}, 'text': 'python msg'}>>> requests.post(url, data).json()If your Telegram doesn’t send a message for some reason, two simple solutions might do the trick:
If you can’t send your message and the problem persists, your best option is to reach out to Telegram’s customer support. You can describe your issue here, enter your phone number, and leave your email address. Hopefully, their team will feed you a viable solution.
Sending a message to Telegram’s API requires you to set up a bot.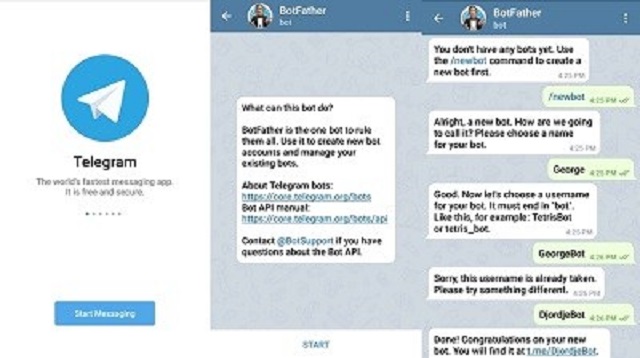 Next, you’ll need to use curl or Python 3 to generate your chat_id and send your message using the sendMessage command.
Unfortunately, you can’t send an SMS using Telegram. The app still doesn’t support this feature.
If you thought you might not be into Telegram due to cumbersome messaging features, all your worries are now dispelled. The app is easy to use, and once you’ve activated it, texting is just as easy as on any other platform. Best of all, you can send videos, voice messages, and even set up bots and issue various commands. The options are nearly endless.
Have you set up your Telegram profile? Do you find the interface user-friendly? Are all the features easily accessible? Let us know in the comments section below.
Read Next
This guide explains how to use the Telegram bridge from the EMS Integration Manager to integrate your Telegram chats with your EMS server.
It requires your EMS server to have federation on.
The following instructions are done with the Element Desktop on the Element side and on Element iOS for the Telegram side. Element Android should be almost identical to Element Web.
Open the EMS control panel at: https://ems.element.io/user/hosting
Click the Integrations tab and if you have more than one server, select the server you wish to add the Telegram integration to.
Click on Telegram Bridge in the list of available Bridges.
Enter the maximum number of users in Maximum Telegram users.
Please note: this is the maximum number of Telegram users who actually send messages over the bridge each month. You are only billed for the number of Telegram users who are active. Once you exceed the maximum, then the bridge will be disabled until you increase the maximum.
If you wish to allow Matrix users who aren't logged in to Telegram to participate in bridged Telegram chats, follow the steps in this section.
Once you have entered Maximum Telegram users, click Purchase (remember you can always go back to this step and increase the maximum number of Telegram users if you need more in the future).
A dialogue will remind you of the price per user and ask if you wish to proceed. Click Purchase if you wish to proceed with the Telegram Integration.
You will have to wait a few minutes while your host is reprovisioned. Once reprovisioning is finished, you are able to bridge Telegram to your EMS server using your Element client.
Once the bridge is running, open your Element app. Click on the + next to People.
Create a Direct Message conversation by typing @telegram:example. (replace the domain with the one of your homeserver). Then click  ems.host
Go.
Wait for the bridge account to join your room.
Open Telegram on your mobile device (iOS or Android) and tap on ≡, go to Settings, and then Devices, and then Scan QR Code to start the Telegram QR code scanner. You will use this QR code scanner to scan a QR code displayed by your Element client in the next step.
From your Element client, send a login-qr message to the bot to connect to your Telegram account.
A QR code will be displayed. Quickly scan the QR code with Telegram on your mobile device.
On your Element client, you will see Successfully logged in as <username>.
To send a message to a Telegram user, you must first be connected to the bridge (see above).
On your Element client, open the "Telegram bridge bot" room.
Say pm followed by the phone number or username. The phone number must exist in your Telegram contacts.
You will be invited to a DM with that user, and can send messages to them.
By default, a Matrix user will have to connect their Telegram account for their messages to be bridged to Telegram. If you provide a bot token, we will use this bot to relay the messages of any Matrix users to Telegram. (Note: relaying is supported for Telegram groups, but is not yet supported for Telegram channels.)
Follow these steps to register a bot account with Telegram.
With your Telegram account, message @BotFather. If talking to BotFather via the bridge using Element, note that all "slash" command messages (eg. /start) sent to BotFather must begin with two slashes instead of one (eg. //start).
Create a new bot by sending the message /newbot to BotFather. The created bot will be the Telegram relay bot used by your bridge. Follow the subsequent prompts to give your bot a display name and a username.
Wait for BotFather to provide you a bot token.
Send the message /setprivacy to BotFather and follow the prompts to set your new bot's privacy settings to "Disabled". This allows your relay bot to bridge all messages sent in a Telegram group, not just messages that mention the bot by name.
Open the EMS control panel for your Telegram bridge and enter the token you received from BotFather in the "Bot token" field, then wait for the page to notify you when your bridge is ready.
In your Element client, view your DM with the Telegram bridge bot and send the ping-bot command. The bot should respond with the ID of your relay bot in Matrix, which indicates that the relay bot has been set up correctly.
In your Element client, invite the Matrix relay bot to any room that bridges a Telegram group that should relay Matrix users' messages to Telegram. A convenient way to do so is to send a message of
 !tg ping-bot in such a room (which will be intercepted by the bridge bot & won't appear in Telegram), wait for the bridge bot to respond with a "pill" of the relay bot's Matrix ID, click on the pill, and then click "Invite" on the sidebar that appears.
In Telegram, confirm that your Telegram relay bot has joined the group. If it hasn't, you may manually invite your bot to the group (as long as you have permissions to do so) by viewing the group's details, selecting "Add Members", and entering the username of your relay bot that you chose in step 2.
Skip to content
Last update - October 20, 2017 at 12:00
article on how to send messages .
It would seem that this is quite simple, but still I want to tell you about some interesting nuances that you might not know.
[adsp-pro-1]
To begin with, I propose to figure out how to send messages to other users of the messenger:
1. Open the application on your device and click on the edit icon
, which is located in the lower right corner.
2. Next, select a contact from the list or find the user through the search / mobile phone number.
3. Now we write a message and send it by clicking on the icon
located in the lower right corner of the dialog.
4. If desired, you can attach attachments by clicking on the three dots
[adsp-pro-2]
After sending a message before it is read, you can edit or delete it. To do this, just click on the message itself.
[adsp-pro-3]
That's all you need to know about writing a message in Telegram.
The main thing is not to delete important messages, because it will not be possible to restore them.
Telegram / FAQ No comments
Here we tell you how to send private messages to Telegram using a bot.
If you want to send messages not to private messages, but to a group in Telegram, then refer to this instruction.
To send something to Telegram, we first need to write information to a variable. You can collect several parameters, write them into variables, and transfer all these variables to Telegram. Before sending data, you must have a script section with writing to variables.
Complete this lesson to build a scenario.
After completing the tutorial, you will have 5 variables:
Follow the instructions to publish the bot on Telegram.
If you have already published a bot in Telegram, go to the next step.
In order to receive a message in Telegram, the bot must know who to send it to. You can get
 chat_id of your account (or the account of the person you want to send this information to) so that you can send messages using the bot.
To get chat_id create a new screen in the script with the text:
$rawRequest.message.from.id
Place this screen at the beginning of the script so that this screen is in the upper left corner . Thus, this screen will be the first one when the bot starts.
Click Publish and wait for the message that the script has been published on the Telegram channel.
Now go to your Telegram bot ( not in the test widget! ) and send to the bot:
/start
If you want messages to be sent not to you, but to another person, then simply send this person a link to the bot. If this user communicates with this bot for the first time, the bot will immediately send the value
chat_id.If this user has already chatted with this bot before, then ask the user to send
/startto the chat to get the chat_id.
The bot will send you the required value:
Copy and paste the number sent by the bot into notepad .
Remove screen with text $rawRequest.message.from.id . He is no longer needed.
The next step is to send the data received from the client. To do this, in the script, after collecting all the necessary information , there must be an HTTP request block. With a single request, you can pass several variables at once:
The block must be formatted as follows:
GET
To create a URL, copy the line into notepad: https://api. telegram.org/bot
Then go to Telegram to the Botfather channel and copy the token of your bot, which was generated when you published the channel:
In a notebook select
and inste Telegram:
You will get something like this:
Now select the entire line and paste it into the HTTP request URL field in Aimylogic
BODY In BODY we need to specify:
chat_id that we received earlier

If you repeated the lesson on collecting contact data, then in the script you received the following information:
Your name: $name Your last name: $lastname Your phone number: $PHONE Your email: $EMAIL Type of service: $service
That's why we use these variables now.
So, you need to insert the value chat_id and list the variables that were in the script before sending.
Pay attention to indentation and punctuation! We recommend not typing, but copy and paste.
{ "chat_id": 123456789, "text": "Customer name: $name $lastname, phone number: $PHONE, email: $EMAIL, Service type: $service"}
Press Save .
Done, we have issued an Http request to send data.
From the "Completed successfully" logic, we add a link to a new screen containing a message that the data was successfully sent. For example, “Thank you, your data has been successfully sent!”
From the logic “Completed with an error” we make a connection with the screen containing the text block “Error $httpStatus ”. This block will help us understand what the problem is if the http request is not successful.
Click Test and talk to the bot.
As a result of the dialogue, the necessary information should come to Telegram.
Note that the bot will send a message to your conversation with the bot. If you expect to receive a private message from some other account, you may be confused by this behavior. But in the future, when other people write to the bot, and you will receive messages from the bot, it will be more clear to you what is happening. Ask another person to send their name and phone number to the bot, and then you will receive a message from the bot.