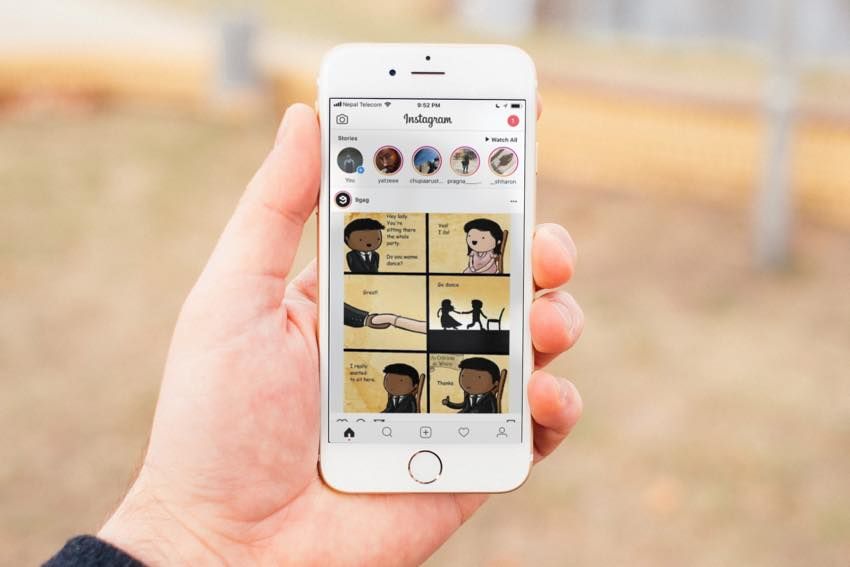
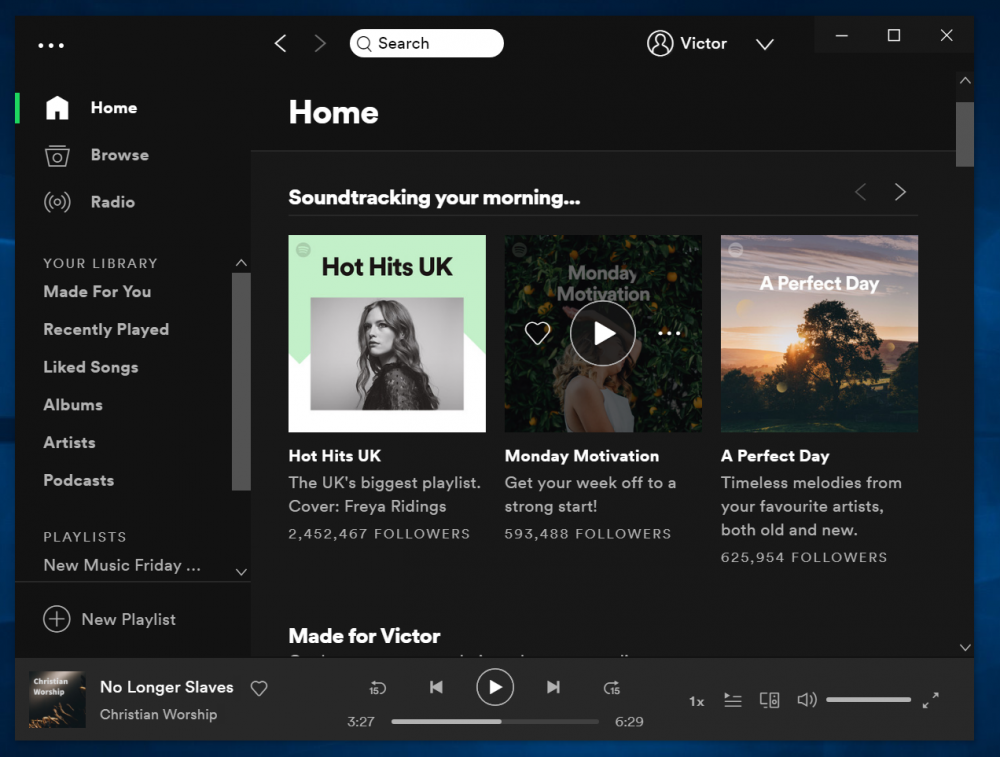
If your brand uses Instagram for business, you’re probably already aware that Instagram Stories is an effective way to engage with young users. In 2019, 500 million accounts used Instagram Stories every day and 67% of all Instagram users are ages 18 to 29. Stories’s interactive features—like polling, questions, and Instagram AR filters—are fun ways for brands to engage those users. (Not sure how Instagram Stories can build your brand? We’ve got tips to help you use it like a pro.)
Augmented reality (AR) sounds futuristic, but Instagram Stories has used augmented reality filters since 2017 when it launched its face filters. And recently, Instagram Stories took augmented reality to a new level. The Facebook-owned platform Spark AR Studio lets users create their own interactive AR filters. In August 2019, that platform was opened to the public.
Now, anyone can create custom AR filters for Instagram Stories.
Here, learn what Instagram AR filters are, why creating unique filters might be right for your brand, and how to get started with Spark AR Studios.
Download your free pack of 72 customizable Instagram Stories templates now. Save time and look professional while promoting your brand in style.
Augmented reality (AR) filters are computer-generated effects layered over the real-life image your camera displays. In Instagram Stories, an AR filter alters the image your front or back camera displays.
Think of Instagram’s face filters. For example, the puppy filter superimposes a dog’s ears and nose over top of your image. Those digital effects move with you as you move.
Or its “Hello 2020” filter: 2020 glasses are superimposed onto your face and digital balloons fall down the screen.
Keep in mind that Instagram AR filters are different from its preset filters. Instagram’s preset filters elevate the quality of photos in one click, so you don’t need to spend lots of time editing photos for Instagram. In contrast, Instagram AR filters are an interactive element only for Instagram Stories.
At its F8 Conference in May 2019, Facebook announced that anyone can build custom AR filters using its Spark AR Studio platform. This new platform allows users to create original augmented reality effects for Instagram Stories, Facebook Stories, Messenger and Portal.
Before this platform became public in August 2019, Instagram users had to be invited to use Spark AR. That meant only select Instagram users could design and publish custom AR filters. Now, anyone who downloads Spark AR Studio can get creative with filters.
It’s easy for Instagram users to find these filters. Anyone visiting your brand’s Instagram profile can click the new face icon. All the AR filters you create are compiled here.
Click on the new face icon (third icon from left) while visiting a user’s profile to see all the filters they’ve made.
Plus, Instagram users can discover original filters in the new Effect Gallery. However, branded or promotional posts will not show here.
Original AR filters are categorized in the Effect Gallery. There are categories like “selfies” and “color and light.”
While this tool might not be right for all businesses, it’s a great option for brands trying to reach younger individuals on Instagram. Remember: 67% of all Instagram users are ages 18 to 29. Additionally, one-third of the most viewed Instagram Stories are from businesses.
Here are a few examples of how custom AR filters could leverage your brand:
Show off your brand’s personality
Connect with your audience
Be ahead of the curve
Increase brand awareness
When viewing an AR filter for Instagram Stories, there’s a “try it” button on the bottom left-hand side of the screen. Users can save the filter to use later by pressing the “upload” button. That’s the first button on the bottom right-hand side of the screen.
Here are five examples that show how different brands are getting creative with AR filters.
AritziaAritzia created the SuperGlow filter. This custom filter increases brand awareness and recognition.
Coca-Cola PolandCoca-Cola Poland uses an AR filter to digitally superimpose the brand’s polar bear on top of the real world.
This Paris-based artist publishes artistic AR filters and shows just how creative brands can get with custom filters. She also uses this tool to show her support for social causes.
Ray-Ban’s custom Reindeerized filter is a playful way to interact with the brand. It’s also a way to virtually try on a Ray Bans product, which is super helpful for customers looking to purchase Ray Bans online.
Tiffany and Co.’s custom filters incorporate the business’s branding.
HootsuiteThat’s right! We made our own AR filter for Instagram. It’s called Emoji Roulette and you can try it for yourself by going to our Instagram profile and tapping the smiley face icon.
This step-by-step guide shows you how to start creating custom filters for Instagram Stories.
Step 1: Download Spark AR StudioSpark AR Studio is the easy-to-use platform you need to create custom filters and effects. Currently, it’s available for Mac and Windows.
Step 2: Decide on your effectNext, walk through the tutorials in the Learning Center to get a feel for the program’s interface. Once you’re ready to get started, decide whether you’ll create a filter from scratch or choose from one of the eight templates.
We’re going to walk through the World Object template. This involves putting a 3D object into the real world, just like Coca-Cola Poland did with its polar bear.
Download your free pack of 72 customizable Instagram Stories templates now. Save time and look professional while promoting your brand in style.
Download the templates now!
Step 3: Getting startedYou’ll see a placeholder object in the central panel when you open the template. That central panel is called the Viewport. This is where you’ll build your filter.
The iPhone 8 in the corner is the Simulator. This is where you’ll preview your work. Using the dropdown, you can change the Simulator from an iPhone 8 to another device.
To the left is the Scene panel. You’ll use the options here to edit your Instagram Stories AR filters.
Step 4: Upload a 3D assetChoose a 3D asset for your filter from the AR Library or import your own. For this guide, we are importing a free asset from the AR Library.
The AR Library also allows you to choose from free audio files, animations and more.
Step 5: Edit the behavior of the uploaded graphicNow, you’ll see your uploaded asset—in our case, a rotating pizza—in the Viewport. Using the Scene panel, edit how it looks, moves and interacts with the real-world. The edits will result in your custom AR filter.
For example, you can change the colour and intensity of ambient light. The below images show the 3D asset without ambient lighting (top) and with ambient lighting (below).
As you explore the Scene panel on the left, you’ll see that you can also:
You can send your test file to Instagram or Facebook to see how it works in Instagram Stories or Facebook Stories. Or you can download the Spark AR Player app.
Now, press the “upload” button in the bottom left-hand corner. You’ll find it right below the “test on device” button.
Keep in mind that your new effect won’t be published immediately. First, your creation will be reviewed to make sure it meets Spark AR’s policies and guidelines. This review process might only take a few days, or it could take up to one week.
Spark AR also has more details in its Learning Center on submitting newly created effects for approval.
Step 8: Keep learningAs you familiarize yourself with this platform, you’ll quickly learn how to work with its other templates—or how to create an AR filter on a blank canvas.
Need more guidance? Curious about face filters, lighting filters or other AR effects? Spark AR has tons of useful guides in its Learning Center:
Now, it’s your turn. If you think creating your own AR filter for Instagram Stories is right for your brand, it’s time to get creative. Good luck!
Save time managing your Instagram presence—and all your other social media accounts—by using Hootsuite. Create and schedule posts, respond to comments, track competitors, and measure performance. Try it free today.
Get Started
Easily create, analyze, and schedule Instagram posts, Stories, and Reels with Hootsuite. Save time and get results.
Free 30-Day Trial
Custom Instagram filters are getting more and more popular among Instagram users. The possibilities of AR filters are endless. Instagram AR filters can increase awareness of your brand by bringing emotions and making your audience unique. In this article, you find out what benefits can be derived from using Instagram AR filters and how to create Instagram AR filters by yourself.
Social Media News in a NutshellGet the latest social media news, insights, and marketing tips in your inbox once a week.
What is an Instagram filter (also called AR filter)?Brands are increasingly interested in AR (augmented reality) technology. Big IT corporations and technology companies like Facebook, Google, and Samsung are actively investing in AR. At the moment, one of the most popular AR marketing tools is social media AR filters.
One of the most affordable and easy-to-use promotion tools is Instagram AR filters.
Instagram AR filters first appeared in 2017. Initially, only Instagram’s creative team was engaged in the creation of AR filters. Standard AR filters were available on Instagram stories. Nowadays, Facebook is using a new strategy. Today everyone can upload their AR filters to Facebook and Instagram.
Instagram doesn’t pay accounts for creating new filters. Every time someone uses a customized filter, the account name of its creator is indicated at the top.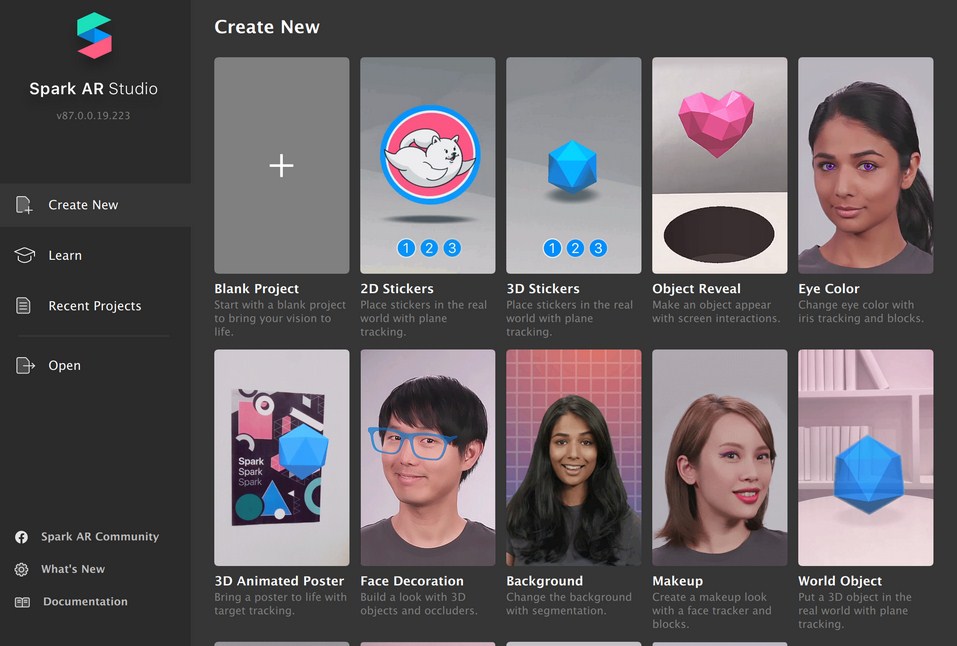 If a filter goes viral, the creator can get new followers.
By August 2019, more than 1 billion people have already used AR effects and filters on Facebook, Instagram, Messenger, and Portal. People use Instagram AR filters because they are fun to use and make Stories more attractive. With Instagram AR filters, there is no easier way to reach your audience and boost engagement.
Instagram AR filters are getting more and more dynamic. By the beginning of 2020, Instagram Stories took over AR filter tests. Users were posting selfies with a filter that randomly determined which Friends characters they were or which Hogwarts faculty they would be enrolled in.
Instagram AR filters can be used in a variety of business areas. Cosmetics companies are releasing AR filters that make it easier for customers to choose the shades of lipsticks and the eyeshadows that are right for them. It’s easier to buy a product if you already know how it looks on you.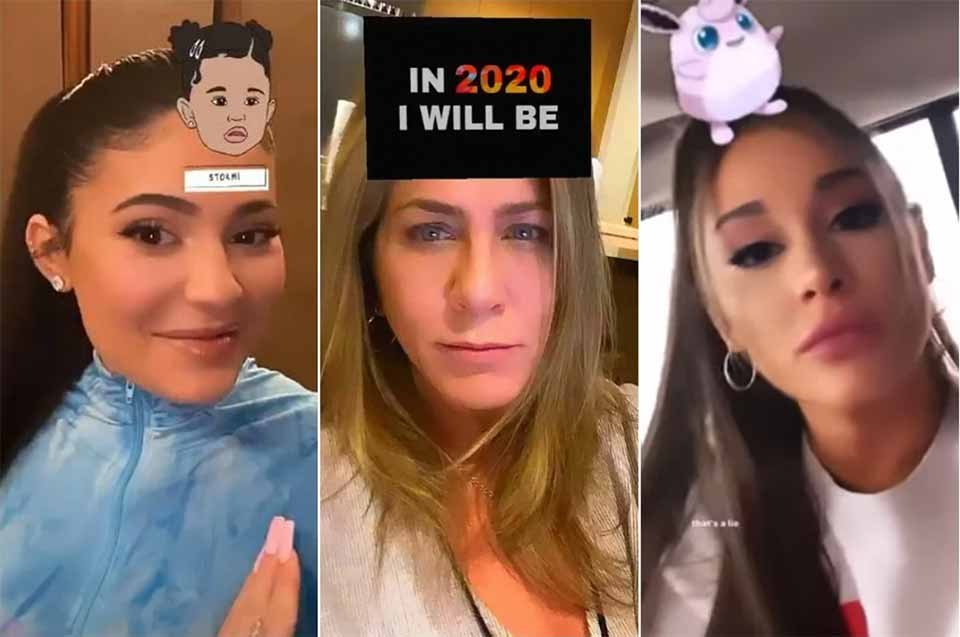
Ray Ban’s custom Reindeerized filter is a great example of how you can promote your product by a fun way of trying it on.
Creative IG filters get shared and get excellent audience reach. With the help of Instagram AR filters, the brand is repeatedly mentioned in Stories, attracting a new audience that can be turned into customers.
By using customized filters, users generate content themselves. It almost sounds like a free advertisement, but a very native one. Adding a native mention of your brand or elements that evoke associations with it can help in building audience loyalty to your brand.
The more people want to talk about the brand themselves, the better for the brand. And IG filters are just the perfect tool for this.
If you select Mac Cosmetics’ AR filters, you find custom filters that allow users to try different lashes, eyeshadows, and lipsticks. Fix Plus Vibes filter is a vibe randomizer. Otherwise way to make a user addicted because you want to try it again and again.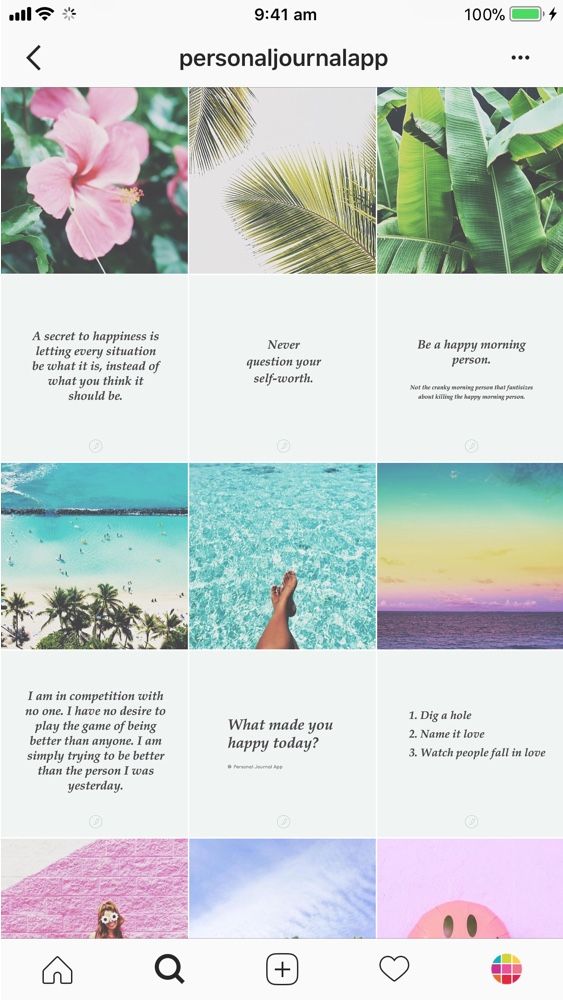
Instagram users love to post themselves, especially when they look good or funny. Instagram filters allow them to be so. Instagram users try to make their Stories more attractive, so they are always looking for ways to diversify them. Thus, Instagram filters are a great medium to increase audience engagement and activity.
So what tool is used for creating Instagram AR filters? Spark AR Studio is a platform where the process of creating an Instagram AR filter takes place.
Once it was made public, everyone came up with new ideas.
The Spark AR team has already done most of the work for you. When Facebook made Spark AR open to the public, it also launched a community of creators to help its members create AR filters. There are many official tutorials and materials on the Spark AR platform that will significantly help newbies.
Step by step guide on creating Instagram filtersHere are the steps to create your own Instagram filters.
Step 1. Download and install Spark AR Studio on your computer or laptop. Also, install the mobile application on your smartphone.
Step 2. Log in to the program with Facebook.
Step 3. Launch Spark AR Studio on your computer. Connect a smartphone and a computer via USB cable so that later we can test our mask on a smartphone, so you will be able to test filters on a mobile device.
Step 4. Click the “Create New” button in the lower right corner of the application window to create a new AR filter. To edit a previously created project, click “Open.”
Step 5. Finding faces in the frame and determining their exact coordinates is one of the essential functions of creating filters. So you need to add a tracker by clicking Add – Scene Understanding – Face Tracker. Now the program tracks all the movements in the frame.
Then click Add – 3D Objects – Face Mesh. The program will select the face in the frame and make a checkerboard mask out of it.
Now you can stretch the mask by dragging the axis arrows. Since this is a 3D object, there is a section with layers to the essential change some parameters. For example, uncheck the “Eyes” or “Mouth” so that the filter completely covers the eyes or mouth, respectively.
Step 6. Go to the faceMesh0 option in the Scene block. Select Create New Material so that material0 appears in the Assets panel. Click on it and try changing the settings. For example, change the color.
To make your filter unique and outstanding, add objects, special effects, and textures. If you want to create something original besides the standard materials available in the program, you need to prepare Photoshop files. Convert files to png format before importing.
Step 7. To test the filter on the smartphone, click the Mirror button in the upper right corner of the Spark AR Studio program. Make sure that the finished file does not exceed 20 MB. Otherwise, nothing will work.
Step 8. When your filter is ready, save it to your computer. Go to the Spark AR Center to upload your AR filter. You need to apply to use the beta version, so other people can use your filter. Upon successful verification, the filter will be available to the followers. Filters can be uploaded not only on Instagram but also on Facebook.
After uploading the IG filters’ statistics of your filter will be available. To see the statistics, go to the Insights in Spark AR Hub. Here you can find out how many times other Instagram users viewed your filter, how many times your filter was shared in Stories, etc.
Instagram filters are gaining popularity and will be in demand for a long time. Therefore, stay on top of the trends and make some excellent Instagram AR filters.
Related article: How to create & upload branded GIFs to Instagram Stories?
In this step, we are aiming to expand both rectangles to cover the entire filter.
4. Set the size of the rectangles. Select the background rectangle (previously known as "Rectangle0") and you'll see its properties in the panel on the right. Click on the boxes next to "Size" to change the width ("Fill width") and height ("Fill height") of the fill and stretch the rectangles to fill the screen of the device. Do the same for the second rectangle. Your viewport will be completely covered by rectangles, which will be displayed as a checkered pattern called "Alpha". This means they are transparent, but they are still there.
5. Separate the layers. By default, any object you add is attached to the layer you last worked on. If you don't need it, move it to another layer. For the segmentation effect to work, you need rectangles on different layers. So the background is "drawn" after the foreground. That's what the background rectangle in the Scene panel is for. In the Inspector panel on the right, click the "Layer" field and select "Create New Layer". You can rename layers if you wish by selecting the Layers tab in the upper right corner of the Scene panel and double-clicking on each layer name in turn.
6. Create new materials. Time to give these transparent rectangles a solid, visible shape. This is what the "Materials" function is for. You can assign each rectangle its own material: select them one by one in the Scene panel, and then in the Inspector panel on the right, click the plus sign next to Materials and click Create New Material. As a result, two materials should appear in the Assets panel (under each rectangle)
Materials can also be renamed. Once you've selected your materials, you'll see a host of new options in the Inspector panel. You can change the color, texture, transparency, blending, and so on. If you want to experiment with your filters, change these settings and see what happens.
7. Create a segmentation texture. This will turn any video taken with your camera into a texture, which means it will separate you (or whoever you're pointing at) from the background. In the Scene panel, click Camera, and in the Inspector panel, click the plus sign next to Segmentation. A new resource will appear in the Assets panel, named personSegmentationMaskTexture0 by default.
8. Add texture extraction to the front of the material. First, click Camera in the Scene panel, and in the Inspector panel, click the plus sign next to Texture Extraction. Another resource named "cameraTexture0" will appear in the Assets panel.
To use it as a new texture, click on the foreground material in the Assets panel. In the Inspector panel, change the Shader Type to Flat, which will give this material the properties of a flat 2D element.
In "Diffuse" (the second item in the "Inspector" panel), find "Texture" and select cameraTexture0 from the drop-down menu. At the bottom, check the box next to "Alpha", in the "Texture" field, open the drop-down menu and select personSegmentationMaskTexture0.
9. Change the background. It may seem like nothing happened, but you're almost there, as you've set the base for your filter. Click on the background material and in the Inspector panel, under Diffuse, change the color to something that contrasts with the object in the camera. This will help you adjust the segmentation edges by changing the mask size and edge softness. You'll find these options in the Inspector panel when you double-click personSegmentationMaskTexture0.
Select a material for the background, and in the Diffuse section, reset the color to white. Below, next to "Texture", click "Choose File From Computer" and upload the image you want to use as the background. Keep in mind that photo files can be too heavy for Instagram or Facebook, so keep them as "light" as possible.
Watch this video tutorial for example, you will learn how to use camera segmentation and texture to create an effect that separates someone from the background. Change backgrounds however you want.
Despite the fact that Instagram filters have moved from the status of innovations to the status of must-haves, the number of cool cases on the Ukrainian market is still not that big.
This is mainly due to the fact that filters are subject to the same production standards that apply to other communication tools - posts, banner ads or packaging. We forget that the main success driver of this tool is consumers and, as a result, Instagram filters need to be created not according to the rules of the brand, but according to the rules of its target audience.
In this article, together with the CEO and co-founder of the FFFACE Instagram filter studio Dmitry Kornilov , we will analyze 10 main mistakes when creating this tool in the format of funny bad advice.
Expectation:
In order for the filter to work, it is desirable to place the logo in the face area. Ideally, if branding completely covers the face, then all Stories from users will be in the same style.
Reality:
Branding is built into every Story created through the Instagram filter by default! Yes, yes, in the upper left corner it says: this filter created your brand. At the same time, this inscription is also an active link to your account, that is, even if your filter does not have branding, it is still there.
Instagram did this so that, on the one hand, the tool would benefit businesses, and on the other hand, so that consumers would not have to blush in front of their feed for the "logo on the forehead."
Here is an example of an effect that looks more natural and still communicates with the product:
FFFACE filter for Samsung - https://www.instagram.com/ar/661364068020551
Reach - 1.7 million contacts1
Expectation:
Reality:
One of the main motivations for a user who shoots Stories with an Instagram filter is the desire to look prettier or cooler in order to get attention. In general, when creating content, a person does not think about who the mask manufacturer is, but evaluates whether the mask will make him more attractive in the eyes of followers.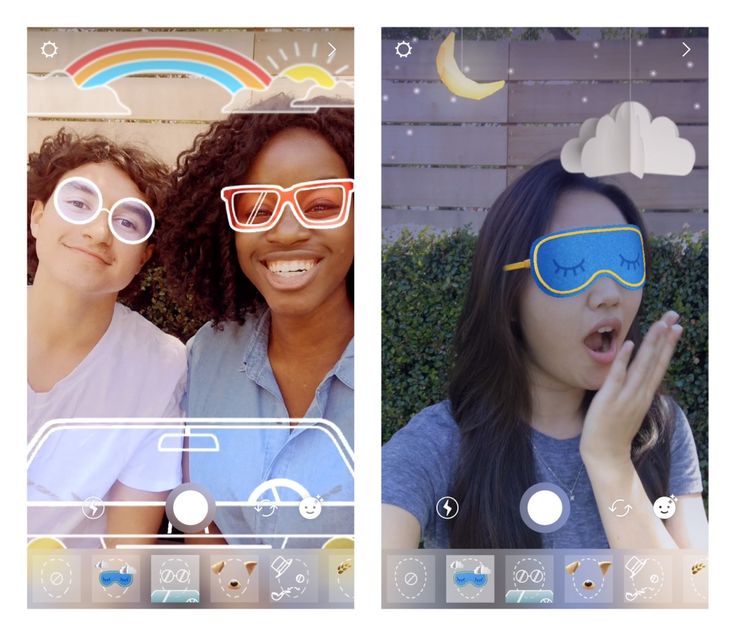 If your Instagram filter fulfills this goal, then the user can become more loyal to your brand and even subscribe so as not to miss new filters that will help him look better in the future.
FFFACE creator filter Ksenia Wondermilk.me-https://www.instagram.com/ar/68989863551885835/
ContactsExpectation:
The Instagram filter needs to include all the functionality of the promo / application / site, it should reproduce each of the communication steps:
As a result, in order to use the filter, the user needs to perform only 5 simple steps, hold down the record button, blink 10 times, open his mouth and make first a long and then a short tap on the screen.
*We could not find a reference for such a filter, but it is available. It is difficult to find just because no one uses such filters and they are buried in brand accounts. Nevertheless, technical specifications for such filters are still slipping through.
Reality:
People don't want to bother creating Stories, your filter should "work" immediately after opening, so that the user just needs to start recording. You can add additional functionality, but the main action should work intuitively, for example: press the record button to start.
FFFACE filter for Beeline – https://www.instagram.com/ar/186588799285572
Coverage – 1.3 million contacts
Waiting:
Let's add color correction, nice 3d models, face plastic and particles and see what happens.
Reality:
There are a lot of masks. So much so that the mere fact of its presence does not surprise anyone, including even exceptionally beautiful visual effects. The combo works - visual + idea, which help to form not just a beautiful design composition, but an image with an idea:
FFFACE filter for Pepsi – https://www.instagram.com/ar/401183534195833
More than 10 mentions of the project in the press and on TV, total coverage of 5 million contacts
. Instagram filters exist outside the information field, seasonality does not matterExpectation:
You can ignore what is happening in the world. As soon as you publish the mask, everyone will run to use it, regardless of what is happening outside the window.
Reality:
Instagram filters help a person to join the current trend, beat a seasonal mood or meme, and also express their attitude to current events.
For example, Dreamtown was the first to launch a filter with beautiful protective masks and got cool situational metrics:
FFFACE filter for Dreamtown – https://www. instagram.com/ar/1174477899567400
5 coverage 3 million contacts
Reality:
Guessing is only suitable for answering questions that REALLY excite the brand's audience. For example, Silpo's audience really wants to get a New Year's prediction after a viral activity with predictions in checks.
FFFace filter for Silpo-https://www.instagram.com/ar/434088447509040
Coverage-250 thousand Contacts
A brand of chips needs to crunch chips, when promoting a brand of chocolate, you need to drink tea with chocolate, an auto brand must show someone behind the wheel, and a brand of diapers - well, you understand.
Reality:
There are no official rules for branded creatives, and they certainly don't always have to be product creatives.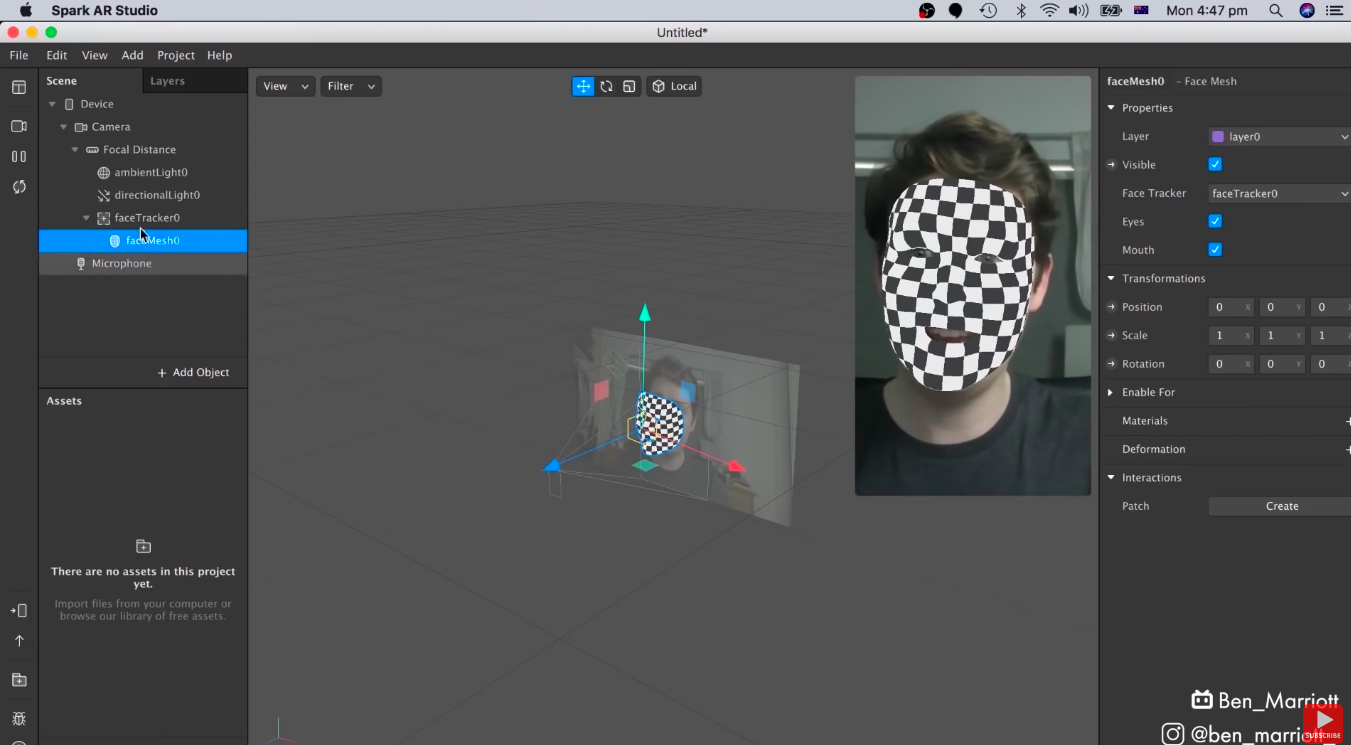 It is worth starting from the mood of your communication in general and the insights of the target audience. As mentioned in the first paragraph, even if your filter does not show the brand obviously, it will still always be there, in the upper left corner.
Can Privatbank just run a filter with Pavel Zibrov? YES!
Privatbank filter – https://www.instagram.com/ar/671072543387006
Reach - N/A
Expecting:
Reality:
You won't believe it, but there are people who don't watch your Stories feed, and there are those who don't read posts. In addition, most people learn about your mask not from your account, but from the Stories of your followers. Therefore, make sure you:
Example of correct filter start:
View this post on Instagram
Posted by UAnimals (@uanimals.official)
Expectation:
Let's launch and come what may!
Reality:
The Instagram filter is part of a communication funnel that generates content from users to promote the brand/communication platform/digital activation/Instagram account. It should be built into the overall digital ecosystem and contribute to solving real problems.
For example, with the help of the filter for Luxoptica, it was possible to make sales for more than 500 thousand UAH.
Expectation:
Content is another matter, here you can and should post it every day, and also run a lot of advertising.
Reality:
Instagram filters are the same content, only content that is self-reproducing with the help of your audience. Look carefully, it even appears in the profile as content in the form of a video preview. Try to look at it this way and it becomes clear that Instagram filters will only work properly if they are fully in sync with your communications strategy and the rest of your content plan.
For lovers of numbers, you can do this exercise:
Most likely, the masks won.