Let's say you've already created a fantastic Facebook cover photo, you're posting engaging social media content on the regular, and your Facebook Page is totally optimized for the Timeline design. You savvy social media marketer, you ;-)
But are you ready to take your Facebook Page to the next level?
If so, we think you might be game for a new Facebook marketing challenge: creating custom Facebook tabs. Tabs give you a way to showcase custom content alongside the default tabs (e.g. "About" and "Likes") and any ready-made apps you may have already added to your page.
Custom tabs are valuable to your social media marketing strategy because they let you create a much richer user experience on Facebook and control the content your visitors and followers see when they come to your page.
So how do you create your very own custom Facebook Page tabs? Just follow these 6 simple steps, and you'll be up and running with a more customized Facebook Page experience in no time.
Editor's Note: This post has been updated to reflect Facebook's custom tab setup documentation for 2015. That said, Facebook has made this setup process somewhat trickier over the years, requiring a bit more tech-savviness then the average marketer may have. If you hit any snags, it might be best to call in a seasoned developer to help you get set up.
Before we get started, let's make sure we're all on the same page (hehe, get it?) about where you even find Facebook Page tabs. Tabs exist under your Facebook cover photo and can be expanded by clicking on the 'More' drop-down arrow on the right. They're something like the website navigation for your Facebook Page, allowing visitors to browse all that your page has to offer. Check out a screenshot of HubSpot's Facebook Page below. Can you spot our tabs? (Hint: We've highlighted them for you.)
Before I discuss some use cases for custom Facebook tabs, let me show you a custom Facebook tab in action. Take a look at Coca-Cola's "House Rules" tab on its Facebook Page (pictured below) ...
Coca-Cola is cleverly using custom tabs as a way to showcase guidelines for how Coca-Cola will govern its page, and how visitors and followers should behave when interacting with it. Smart, especially if you're a big company like Coca-Cola. This is just one way you can use custom tabs on your page.
The possibilities are endless. Okay, now that you understand what a Facebook tab is and how it could potentially be used, let's start customizing!
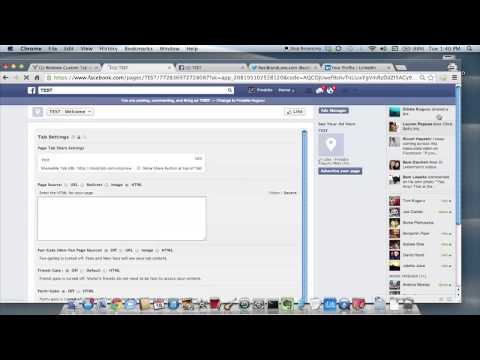
Think of your Facebook tab like an iFrame that loads inside Facebook.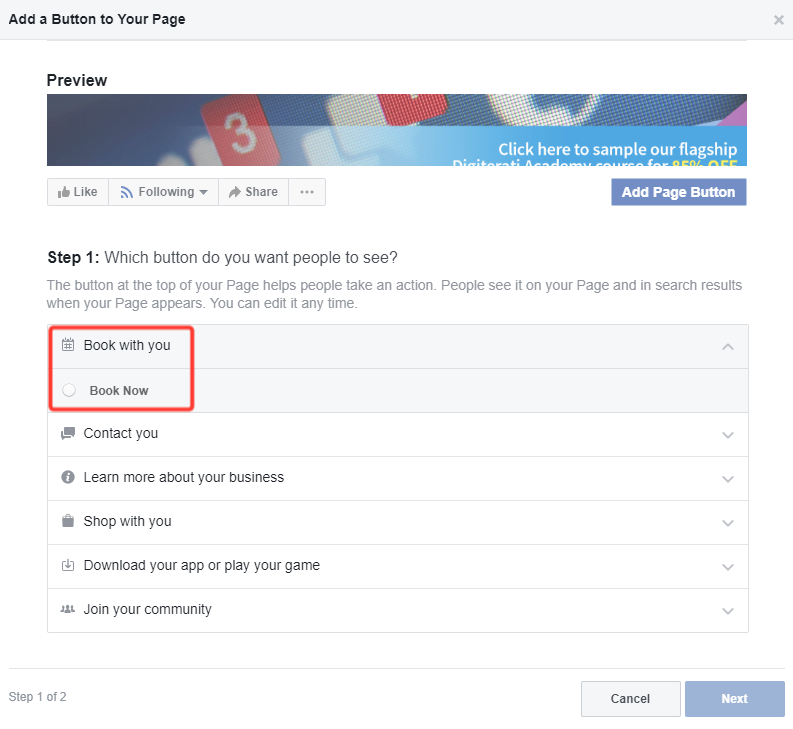 In other words, you can display pretty much whatever content you'd like inside your custom Facebook tab. You do this by creating a web page outside of Facebook. The contents of this page are what you'll tell Facebook to display within your custom tab.
Important: Facebook requires you to provide a secure URL for your web page in order to set up your Facebook tab. A secure URL is a URL with "https://" instead of "http://" at the front. If the website you use to create your Facebook Page tab does not support https, Facebook will not allow you to set up a custom tab, and you'll need to get an SSL certificate first.
To ensure that your page's content displays correctly on Facebook, make sure the width of your web page is either set to 100%, 520px, or 810px. Make sure all images, videos, etc. that you include on your page are also less than either 520px or 810px, depending on how wide you chose to make the content of your tab. You'll also want to get rid of any margin or padding around the body of your content so it's optimized for the space Facebook provides within the tab.
Since Facebook's latest Business Page layout is wider than it used to be, I recommend making the content of your tab 810px. Facebook's previous Business Page layout was much narrower at 520px.
Step 2: Log In to Facebook as a Facebook DeveloperVisit https://developers.facebook.com/apps. You'll be able to log in with your normal Facebook credentials.
Step 3: Create and Name Your New Tab1) Click the green '+ Add a New App' button from the top right-hand corner. Then choose the 'Website' button at the far right.
2) Instead of using the "Quick Start" wizard that Facebook launches (which gets confusing), click on the 'Skip and Create App ID' button at the top right.
3) Here, you'll need to provide a 'Display Name,' which is what your "app," or tab, will be displayed as on your Facebook Page. You can also create a 'namespace,' which is basically just a unique ID for your app -- although this is not required, and you're welcome to leave it blank. Select 'No' for the question about test versions -- this is more applicable if you're creating a Facebook app that you want others on Facebook to use, not if you're just creating a custom tab for your own page. Lastly, choose 'Apps for Pages' as the category, since you're creating this app as a custom tab for your Facebook Page.
4) Click 'Create App ID,' and you'll be taken to your App Dashboard for the next step. (Note: You may be required to enter a captcha first to prove you are indeed human ;-)
Step 4: Configure Your Facebook Page Tab1) Once in your App Dashboard, click 'Settings' in the left-hand navigation; then click the '+ Add Platform' button to start configuring your Facebook Page tab.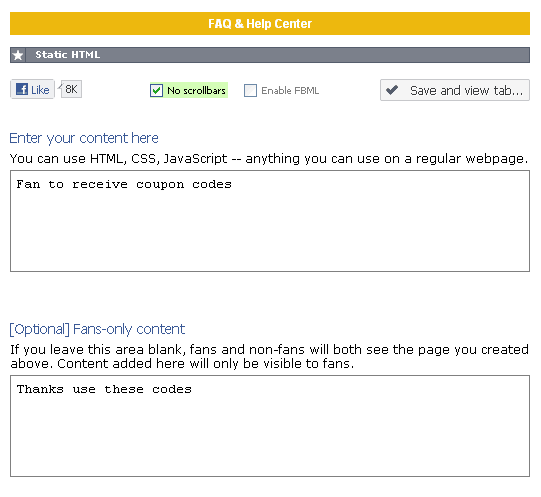
2) When prompted, select 'Page Tab' as your platform.
3) Next, add the 'Secure Page Tab URL' of the external web page you created in step 1. Remember, Facebook requires a secure URL (which starts with https://), otherwise it won't work. (See step 1 for more details.) Then specify whether you want a wide page tab (810px), which I recommend so your content fills the full width of the tab. This should also align with the width of the page you set up in step 1. You can leave 'Page Tab Edit URL' field blank. You can also upload a 'Page Tab Image' here (which must be 111 x 74 pixels), although to be honest, I'm not sure how Facebook uses this image since it no longer uses thumbnails in the Facebook tab navigation on your page.
4) When you're done editing the contents of this section, click the blue 'Save Changes' button at the bottom right.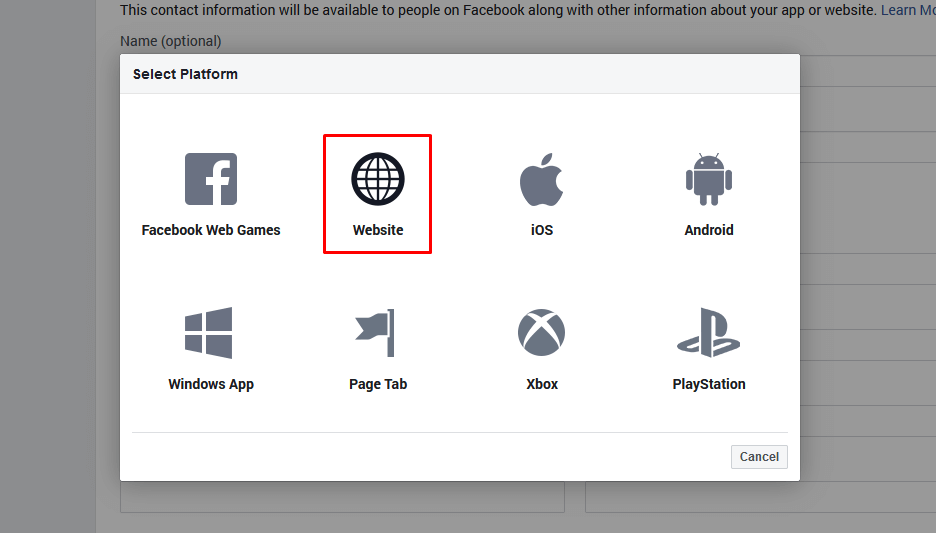
This step can be a bit tricky, so read carefully. In order to add your new tab to your Business Page, you'll need to visit a link with several custom URL parameters. I know it sounds strange, but bear with me. Here's the link you'll need to modify:
http://www.facebook.com/dialog/pagetab?app_id=YOUR_APP_ID&next=YOUR_URL
1) First, replace the parts in red in the URL above -- YOUR_APP_ID and YOUR_URL -- with the 'App ID' found in the basic settings for your app, and your 'Secure Page Tab URL.'
So using my example, my new URL would be:
http://www.facebook.com/dialog/pagetab?app_id=1546958298917818&next=https://www.hubspot.com/custom-facebook-tab
2) One you have your URL, visit it in your browser. When you do, this will pop up ...
3) Last but not least, select the Facebook Page you want to add your tab to. Then click 'Add Page Tab.' Keep in mind that you'll need to be an administrator of the Facebook Page in order to add the tab.
Voila! Your custom Facebook tab should now be added to your page. Go check and see!
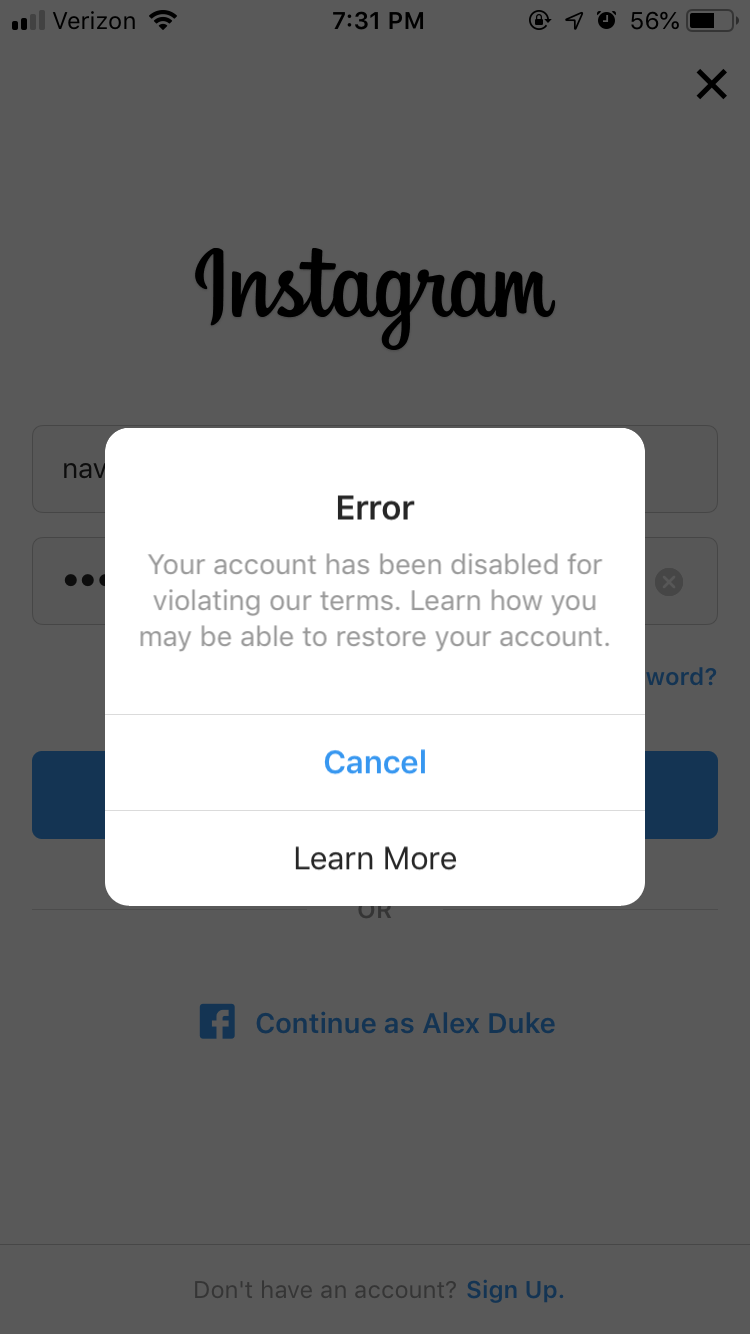
Editor's Note: We've heard rumblings of people getting 405 and 403 "Forbidden" errors within their page tabs once they've been set up. When a Facebook user clicks on your custom tab, their browser sends a HTTP POST request to your tab's Secure Page Tab URL. They'll see this error message if the page you're using to host the content of your Facebook tab forbids HTTP POST requests. If you see these errors, your best course of action is to work with an experienced developer to help you set up your custom Facebook tab.
Because Facebook only allows you to display four tabs before the rest get bucketed under the 'More' dropdown, you can also rearrange the order of your tabs so your new custom tab appears more prominently in the main navigation of your page rather than in the 'More' dropdown. To rearrange your tabs, click 'Manage Tabs' in the 'More' drop-down menu on your Facebook Page, and then drag and drop your tabs in the order you want them to appear. Just note that 'Timeline' and 'About' must appear first no matter what.
Bonus: You can also reorder the content modules that appear to the left of your Facebook Page timeline by hovering over a module, clicking the pencil icon, and selecting 'Manage Sections.'
For Facebook's official documentation about creating custom Facebook Page tabs, click here.
Editor's Note: This post was originally published in 2011 and has been updated to reflect Facebook's custom tab setup documentation for 2015.
Originally published Mar 2, 2015 10:00:00 AM, updated January 08 2020
Topics:
Facebook Business Pages
Facebook Marketing • Apr 12, 2021
Facebook pages are highly customisable in a way that other social media platforms are less so. You can mould them into whatever you want, to showcase your business in the best possible light. Customising your page tabs can help with this.
The structure of your Facebook page is built around tabs. They are situated at the top of your page and act as a menu, leading the viewer to specific sections of content. While the ‘Home’ tab is automatically displayed upon viewing a Facebook page, and your posts and updates in the ‘Home’ tab are in a logical, often chronological fashion, other tabs take the viewer directly to certain types of content e.g. photos, events or shop.
'Shop' tab by @TheFrancoisFourmy (left) and 'Photos' tab by @The02 (right)Each tab groups together content that the viewer is specifically looking for, making your page easier to navigate. As the owner of a page, using various tabs gives you different options to add suitable content, such as showcasing events, featuring products, advertising job listings, highlighting reviews are more.
Whether you want to have a look at your options or remove unused sections, there are many reasons you may want to change your tabs.
It could be to:
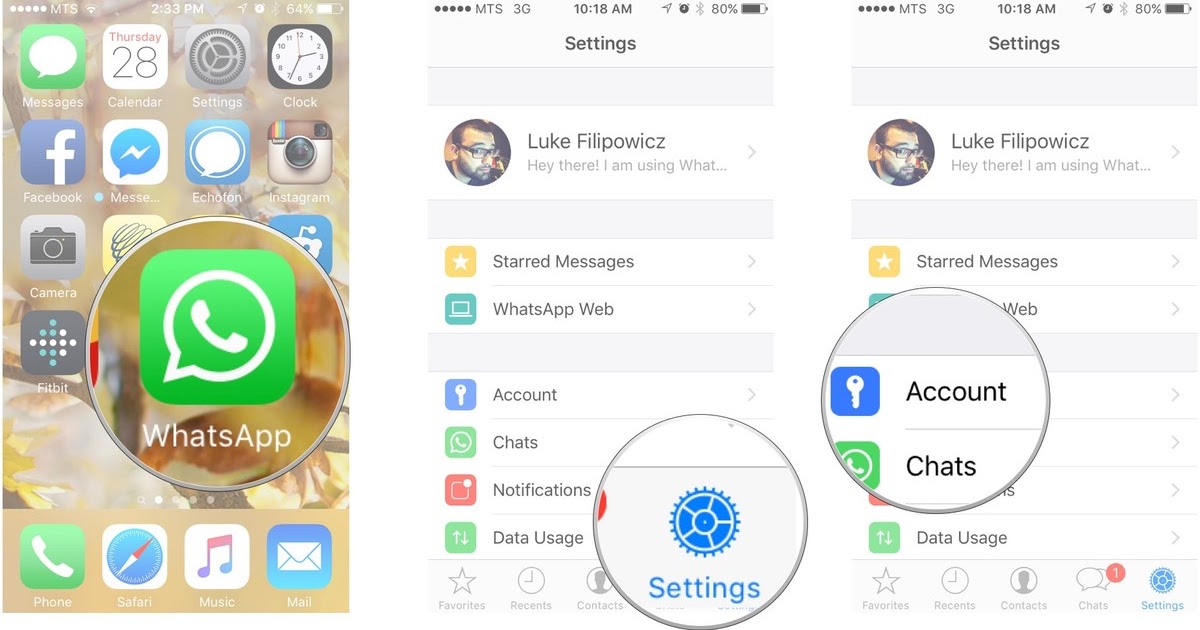
3. Select ‘Templates and tabs’ from the ‘Page settings’ panel on the left-hand side of the screen.
Step 3: Select 'Templates and tabs'You can also get to this page by going to the tabs at the top of your Facebook page, selecting the drop-down menu ‘More’ and selecting ‘Edit tabs’.
This brings you to a page where you can choose a template for your type of business page and customise tabs as appropriate to your needs.
Here you can select a page template that suits your business needs. Different templates use different tabs which align with the type business they are likely to suit. Select the ‘Edit’ button in the ‘Templates’ section to peruse your options and change your business template.
Page TemplatesOnce you have decided on a template, you can toggle additional tabs on and off to get them to appear on your page. You can rearrange the order of your tabs by dragging your chosen tab up or down the list.
Toggle tabs on and offThe tabs you choose will depend heavily on the type of business you own and the information you want to share with your Facebook audience. If you are selling products, you may want a shop tab. If you’re looking to encourage more custom, including a review tab may help this. If you run events, the events tab can help promote events and build a guest list. Build your Facebook tabs around what works for your business and display what matters most to your brand.
Check out the examples below. Notice how the tabs are different. The promotions company has chosen to include the ‘Events’ tab as one of the first tabs, whereas the online retailer has chosen to include the ‘Shop’ tab instead. This is a perfect example of how different tabs work best for different company types.
@livesoundpromotions includes the 'Events' tab (left), @boohoo.com includes the 'Shop' tab (right)
We are dedicated to bringing you information and tools to help you grow your business on social media.
Get the latest posts delivered right to your inbox.
Your email address
Now check your inbox and click the link to confirm your subscription.
Please enter a valid email address
Oops! There was an error sending the email, please try later.
Earlier I had an article about tabs. But Facebook is constantly changing technically, so it's time to write an updated version of the understanding of tabs on a Facebook page. By default, a Facebook page has a lot of functionality that allows us to: view photos, view statistics, notes, videos, etc. features that are available for any Facebook page.
But, it is also possible to extend the standard functionality of the page through additional tabs, which are essentially an add-on above the page (it's like adding a new detail to the designer). You can embed any HTML construct into a tab. Those. everything that is available for web pages, for websites, can also be embedded in Facebook.
According to statistics, people interact more actively with "objects" that are in Facebook. The user is in his protected little world called Facebook and does not really want to leave it. Therefore, if you want to receive subscribers to your e-mail newsletter, then the best solution is to embed a subscription form directly on your Facebook business page.
You can increase conversion by setting a tab that will determine who is currently viewing it: a fan or a non-fan of the page. Accordingly, if not a fan of the page, then he will be asked to "like" the page (become a fan) in exchange for some benefit that is interesting to your target audience. It can be a discount, a free course, a free video, and the like.
Next, you can place important information about your business on the tab, describe your services and also add the Facebook comments plugin there, collect feedback from customers and thereby get more trust in your brand, respectively, more sales.
You can embed a subscription form in order to receive subscribers to your mailing list directly from Facebook.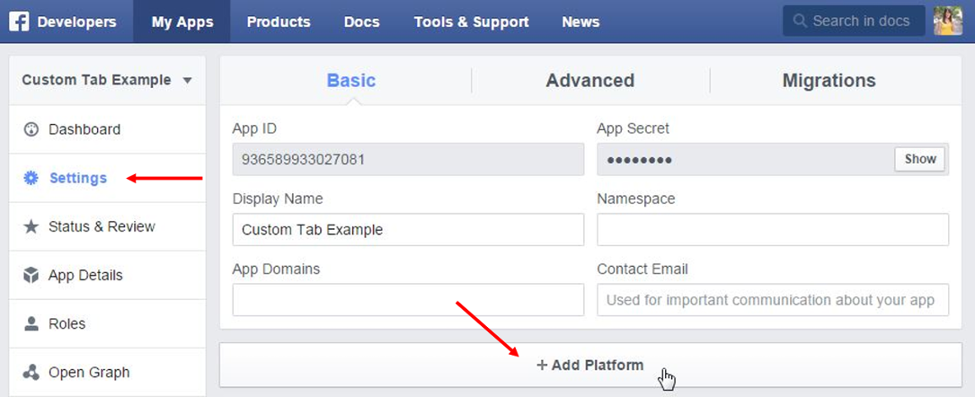
You can insert a form with which you will receive online applications for your products or services.
And many other things that are available for any site. The only limitation is that the embed content is 810 pixels wide. The height is not limited, but I do not recommend making it more than one screen scroll.
In this article, I will consider the option of inserting a subscription form, as well as the option of "increasing conversion".
Installing a tab on your business page.
For this we will use the Static HTML iframe tabs application. In the Facebook search bar, write "Static HTML iframe tabs" and click on it in the list that appears.
Next, click "Add static HTML to a Page". After that, select the page on which you want to insert a tab and click "Add Static HTML ...".
After installation, we go to our page and see that a new “box” has been added to it.
Click on this box to go inside the application (tab).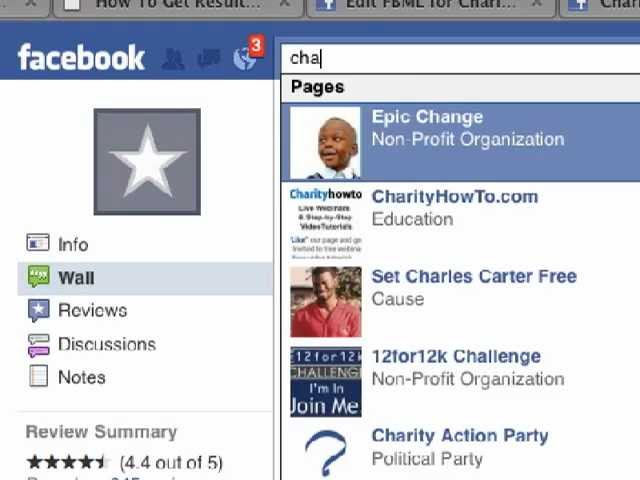
Inside we are offered to choose several options for what will be inside the tab. Select HTML. Click "Use this app".
This field is for those who are fans of the page. Now let's enable the app's ability to detect non-fans of the page. To do this, click on Fangate and click Enable Fangate, select HTML and click "Use this app".
Now we need to insert an image on the page for non-fans of the page (those who have not yet clicked "like" on the page itself), which will show the benefits that a non-fan of the page will receive if he becomes her fan.
The recommended image size is 810 pixels wide by 600 pixels high. Let's create it and upload it to the hosting with an SSL certificate (this is a Facebook requirement, otherwise the tab will not be shown to users with the Safe Browsing feature enabled). If you don't have one, then we use Google Sites.
Go to the Google site service (link). Here you will be asked if you do not have a G-mail account yet, create one. We create it (there is nothing complicated there).
Click create. Enter the site name.
We go to our website. At the top right, select "site management".
Next, select "Applications" from the list on the left. Click on "Download" and upload a pre-prepared image in jpg format so that it loads faster on the tab. I call it nofunkurs.
Now paste this image into the "fangate" section, i.e. to the section for non-fans of the page.
To do this, we use the following html construction:
How to get the address of an image?
Go to your site (on Google Sites). Copy the entire path to the “system” folder from the browser line and add the name of your image at the end (it must be in English).
Now insert this path to the image into the above HTML structure and click "save and publish".
Now you need to configure what will be shown after the user becomes a fan of your business page.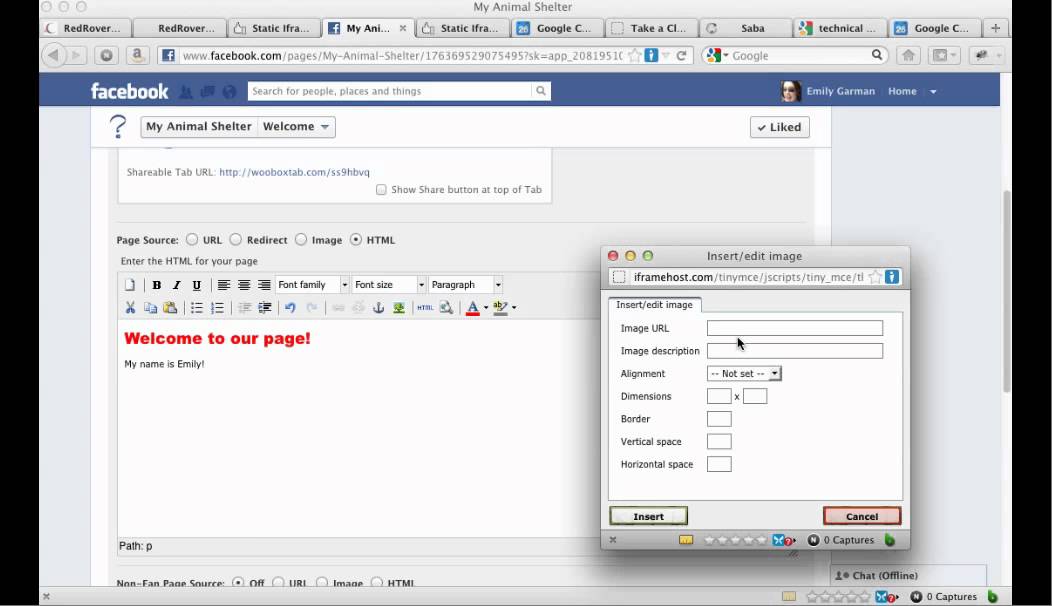 To do this, click on the "Content" section and paste the subscription form code from Smartresponder.ru - a service for automatic mailings and creating your own e-mail database. (referral link).
Click Save and Publish. And then "done" (top left).
Customize the appearance of the "box" of the tab.
Click on the triangle to expand all tabs. Next, click on the "pencil" and select "Edit settings".
In the "arbitrary tab name" field, enter the desired name of the "box". In the "custom tab image" field, upload the desired "box" image (size 111px by 74px; preferably PNG format).
You can swap tabs. To do this, click on the pencil, choose to replace the position with “I liked the number of marks” or any other. The only thing that cannot be removed is the “photos” box. It is pinned in the first place by default.
To get a link to this tab, you can click edit, then "link to this tab". Or you can simply enter this tab and copy the link to this tab in the browser.
How to set up traffic per tab?
Create a post describing the benefits of watching the free video that is on the tab and link to it.
Use Facebook Targeted Ads. In the "destination" section (the place where those who clicked on the advertisement will go), select your tab. Thus, you will increase the conversion to page fans by about 30%. In the advertisement, you are offering a free video. The user clicks on this ad and is taken to a tab that shows an image inviting them to like the page first to access the video course.
We have analyzed the option of increasing conversion using tabs. And the option of getting subscribers to your mailing list right on Facebook.
Another way to use the tab.
You can create any psychological test, where the test results will be available only to page fans.
Find a page with more than 10,000 fans and agree with the administrator of this page (usually for a certain amount) to publish a publication with this test. The user who sees the test will want to know its result and will follow the link. There he will be asked to become a fan of the page in order to get to know them. You get a huge number of new fans. For example, one repost from a page in 9000 people brought me about 1100 new fans.
How to make such a publication, I will tell in the following articles. In order not to miss it, subscribe to my blog updates in the form below:
Enter your email:
If you have any questions or suggestions, then feel free to write in the comment form below.
You can view the answers to previously asked questions about tabs in the article: "Facebook promotion using Landing page".
I also prepared a video version of this article, if you still do not understand something:
Successful business!
Facebook gives us many effective tools for interacting with page readers.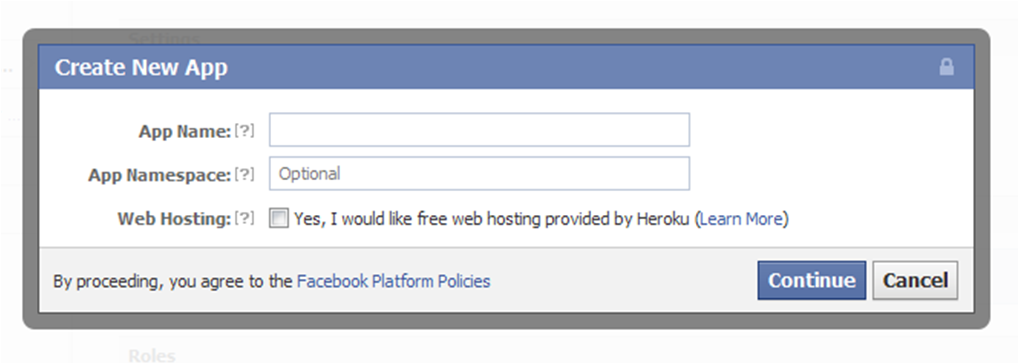 One of these are tabs or, as they are also called, tabs.
In this article you will learn how to quickly and completely free create social tabs (Twitter, Instagram, YouTube, Pinterest, etc.) and other tabs without programming . If you need more complex and personalized tabs, then you can’t do without the help of a specialist.
Update 03/13/2014 Soon Facebook will change the design of public pages, which will greatly affect the way we see and use tabs today, so I recommend you read the article: First impressions of the new page design on Facebook
So, let's start with the definition tabs and their purpose. Tabs are found under the cover of the page below the Like and Post buttons and are small applications that you can use to integrate your social accounts, run contests, showcase your company, products and services, find employees, and more.
The main purpose of tabs is to interest page visitors, increase loyalty and interaction index , and also, in the case of an online store, direct the user to the desired page of your site to make a purchase. Thus, the tabs serve to activate the user and encourage him to take some action : enter a contest, take a look at your Twitter, subscribe to a weekly newsletter, and so on.
Since in this article we are looking at tabs that can be created without any technical knowledge, we will have to resort to specialized services. I'll start with those that I myself used and know how they work in practice.
In my opinion, Woobox is one of the best services for creating tabs, lotteries, contests and special offers for Facebook. Firstly, Woobox has the ability to create free social tabs such as Twitter, Pinterest, Instagram and YouTube, which is especially important for those who are just starting out in social networks or are actively building up user mass on various social platforms.
Since Woobox does not impose any limits on the number of readers, and also because social tabs are free, many companies large and small use this service.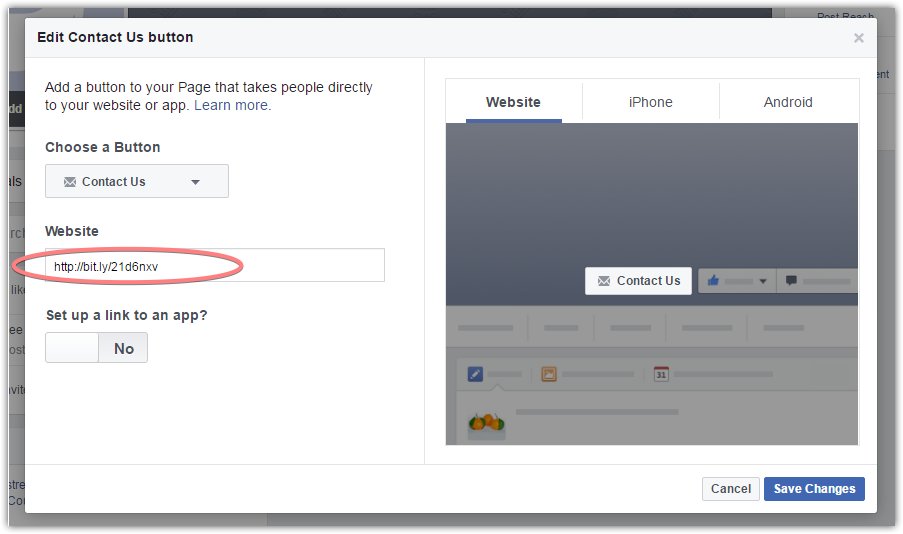 A few examples: Radrr.com (Twitter, Pinterest), Nitto Tire (Twitter, Pinterest, YouTube), GoJane (Twitter, Pinterest, Instagram).
Social tabs look very nice. Moreover, they also have some functionality, that is, they allow you to repin, retweet and like without leaving the checkout, and thus allow the reader to interact with your content from other social networks while remaining on the Facebook page.
You can also create a so-called personalized tab on Woobox for free using HTML or simply by uploading photos, text and/or links to external resources. For example, in such a tab, you can talk about your company, your products or services, call the visitor to some kind of action and send them to your site. An illustrative example of Timbuk2:
Pagemodo gives us the ability to create one free tab, such as Twitter, Google maps, or the most valuable of them - online store . I’ll note right away that this will not be a real online store, that is, the user will not be able to immediately buy and pay for the goods he is interested in in the tab, but will be redirected to the product page on your real online store. This, of course, is not very convenient, but nevertheless, such a tab allows you to familiarize visitors with your products and prices and push them to make a purchase.
The shop created in Pagemodo looks something like this. Note: I created this store purely as an example and did not fit the last images to the desired size, which, of course, does not look very nice. In general, the tab looks pretty good and works fine in Russian as well.
ShortStack is an excellent resource for creating various tabs with a huge selection of ready-made templates . In addition, pages with no more than 2,000 readers can use the templates for free. I recommend!
A finished tab might look something like this:
Another good tab site is Decor Tab Creator. With it, we can create one tab for free. Not much, but still. Decor focuses on the integration of social accounts on Facebook. Here we can link all the same Instagram, Twitter and YouTube to our page.