We’ve shown you how to make your Instagram stories stand out with filters, text, stickers, and even music. But there’s one more built-in feature that can truly make those stories pop. The Effect Gallery in the Instagram app lets you add pizzazz that fits you and your story.
Add some sparkles to your night on the town, hearts to your sweetheart, or flowers to your pet. In this tutorial, we’ll show you how to use the Effect Gallery including seeing how other Instagrammers take advantage of it. You might just be inspired!
If you know ahead of time that you want to use a nifty effect in your story, you can start off with a bang. But not to worry because you can add effects from the gallery after setting up your story too.
When you’re planning to use photos in your story or capture something that isn’t time sensitive, you can start with an effect. Open Instagram on your iPhone and follow these steps.
1) Tap the plus sign and slide to the right to select Story like you normally would.
2) At the bottom of the screen, swipe to the right of the shutter button to see available effects. Some effects will offer more options directly above that you can select.
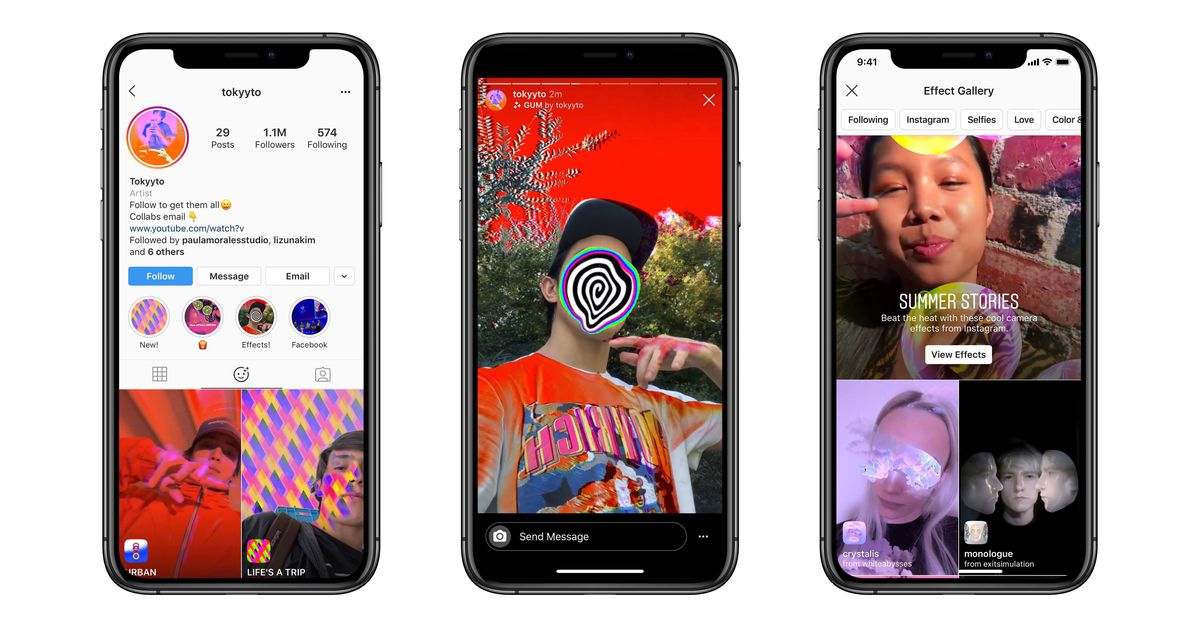
3) You’ll also see the name of the effect at the bottom of the screen. If you tap it, you can pick Browse Effects which takes you to the Effect Gallery.
4) Tap to view an effect, choose a category at the top, or use the Search to find something in particular. You can see how other Instagram users applied the effects to their stories.
5) If you like the effect you see, tap Try It. The effect will be added to your story.
Once you select an effect, continue to edit or share your story as you normally would.
If you’ve already created your story, you can still add an effect to it before you post it. Just tap the filter and effect icon at the top to the right of the download arrow.
The effects will display at the bottom for you to swipe through and try. Tap one to apply it to your story and then tap Done.
You may see some cool effects or filters that you know you’ll want to reuse. You can save them so they’re easily accessible.
Tap the name of the effect at the bottom of the story creation screen or the effect itself on the editing screen. Select Save Effect.
Any effects that you save will appear on the story creation screen to the left of the shutter button.
When you want to create a story that invokes emotion, adds pizzazz to your subject, or simply stands out, the options in the Instagram Effect Gallery are perfect. Try one or try them all and remember to check out how others use them in their own stories.
What types of things do you do to make your Instagram stories pop? Share your suggestions below!
Device Links
Gone are the days when Instagram only offered a scant few filter options for photos. Now, you’ll find numerous ways to enhance your Instagram stories. To use existing filters, you just need to choose from pre-loaded camera options. And finding new filters to save to your camera is also relatively straightforward.
In this article, we’ll explain how to find, save, then add a new filter to your Instagram stories via mobile and desktop.
Here’s how to search for filters to add to your IG stories:


You can now access the filter from the menu.
To add the filter to your IG story:
Your filtered picture or video will be added to your daily story.
To search for filters to add to your IG story, follow these steps:

The filter will now be available from the menu.
To add the filter to your IG story:
Your filtered picture or video will be added to your daily story.
IG’s photo editing feature is supported on Android and iOS only. Therefore, to get Instagram filters on your PC or Mac to apply to your photos and videos requires the help of a third-party app.
Try filter-friendly photo editing apps such as BatchPhoto, Fotor (Windows, Mac), or CameraBag Photo, to create your filters then save them to your desktop.
Since IG is a mobile-focused app, the upload photo feature is also not available when accessing from the web. Therefore, follow these steps to access the IG mobile view, via “Developer Tools” in Google Chrome:
 com and sign in to your account.
Your filtered picture or video will be added to your daily story.
Here’s how to search for an IG filter from a specific creator:
1. Locate the creator’s profile.
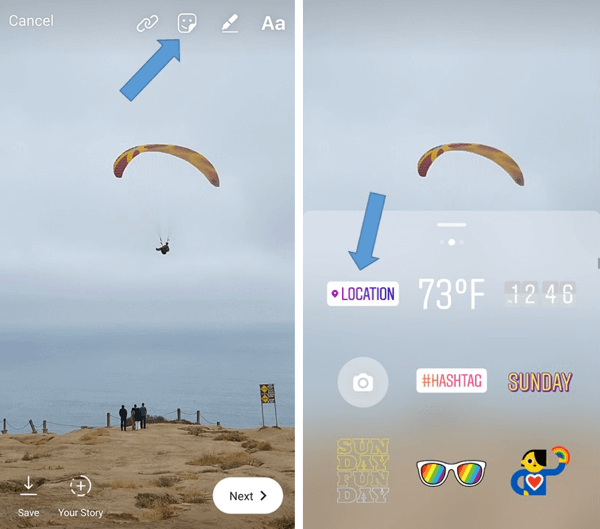
2. Above their grid, tap the smiley face.
3. Select the filter you want, then tap “Try It,” or select the down arrow to download it.
4. Take a photo or video using the filter to share with your friends.
When it comes to selfies and videos that pop, IG is one of the best photo editors for social media. Their filters help make your posts stand out with an artistic finish.
Using the IG mobile app, you’ll have access to all the editing features for adding filters to your stories.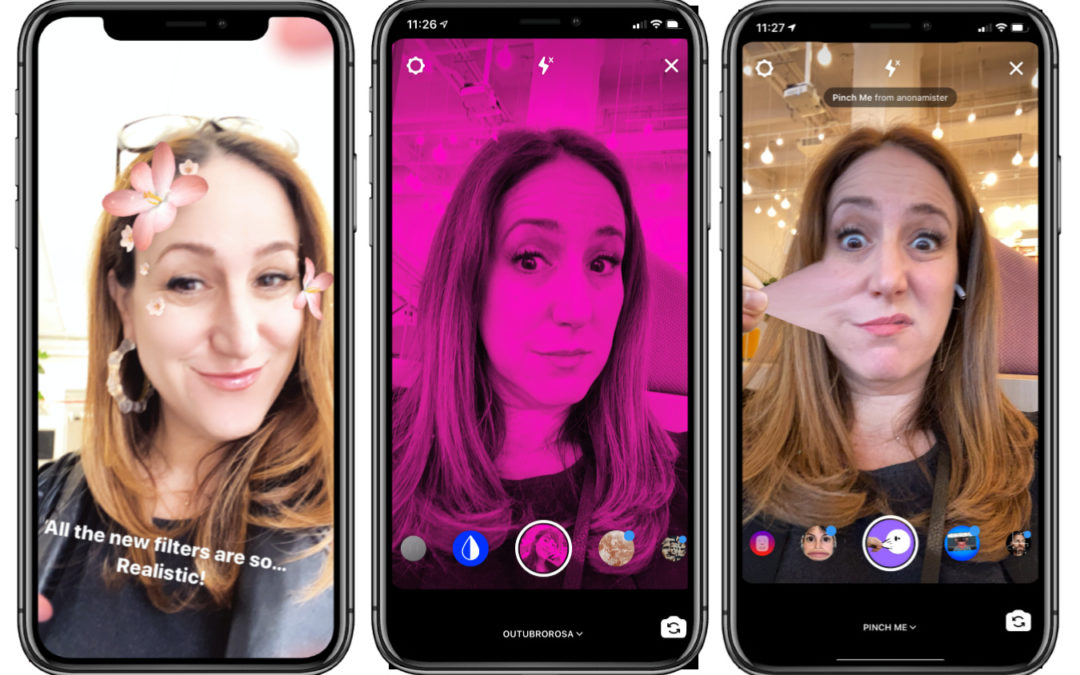 However, since IG is a mobile-focused app, these options are not available using the desktop. Luckily, when accessing your IG account through “Developer Tools” in Google Chrome, the mobile view offers most of the mobile functionality.
What type of filters do you enjoy adding to your photos and videos the most? Tell us in the comments section below.
Today Instagram occupies a worthy place among the most popular social networks. This service is used by hundreds of millions of people around the world. Instagram is loved for visual profiles, which contain many photos and videos, for a convenient system of user interactions with the help of likes and subscriptions. Of particular interest and some innovativeness are masks based on augmented reality technologies. Many have heard of their existence, but they do not know where to get them.
| Apple in Telegram and YouTube. |
To make your Instagram Stories even more colorful, use virtual filters (masks) to process faces. You can only post edited photos to your Instagram Story, or you can also save them and then post them to Instagram, Vkontakte, or Facebook.
Instagram animated masks work on both iPhone and Android.
BY TOPIC: Instagram secrets: 20 tricks that every user of the service should know.
Chances are you already know how to work with selfie filters. The MSQRD app (and many others) offer a similar feature that many users love. Instagram Face Filters work in a very similar way, but are activated a little differently. So, how to use filters.
1. Open Instagram on your mobile device.
2. Open the Instagram camera (tap the camera icon in the top left corner or swipe the screen from left to right).
3. Click on the smiley icon in the lower right corner.
4. Touch one of the patterns at the bottom of the screen.
5. Swipe left and right on the screen to view all faces.
6. Raise your eyebrows or open your mouth to activate some masks.
7. Press the shutter button to take a photo, or long press to take a video.
8. You can use the buttons in the upper right corner to add stickers, pictures or text.
9. Click the " Save " button or the plus sign to add the photo to your story.
The filters work with both the front and back cameras of your mobile device. You do not need to touch the display to brighten a face or activate a function. After saving the photo in the gallery, you can add it to Instagram like any other photo.
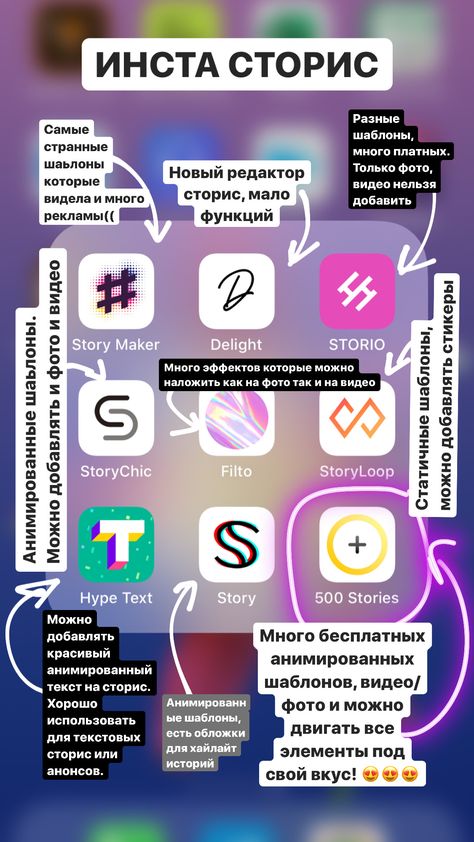
In addition to the templates suggested by the Instagram developers, there are many great masks and filters created by users.
To go to the gallery of custom effects, scroll all available masks to the right to the button More effects .
The same can be done by clicking on any mask and in the menu that appears, select the option View effects .
The effects gallery is divided into many thematic categories that will help you easily find the desired option.
Here you can also view the effect of each effect and, if you wish, try it out by pressing the corresponding button. To save the effect in the camera (in the menu where the default masks are located), press the button with the down arrow in the square.
The masks we are talking about are also offered by users completely free of charge on their pages. If a user's profile page has an emoji section, they are an Instagram effects designer.
Go to the effects section on the user page and select the suggested mask.
If you liked someone's work, we recommend that you subscribe to the account you like, so you will receive new masks immediately after they are published.
Popular filter developers for Instagram
In the assortment of each of them you can find more than a dozen rather interesting AR masks.
In addition, you can try to find masks manually by searching for some specific hashtags. You may find the following useful:
See also:
Please rate the article
Average rating / 5. Number of ratings:
No ratings yet. Rate first.
There are about 40 different color correction options on Instagram. Those that have been added to Stories deserve special attention. There is one way to turn on all filters on Instagram and remove unnecessary ones from the list.
When creating a publication for the first time, the user is offered a basic set consisting of the first ten effects. Installing third-party filters on Instagram will not work, but you can go to the whole catalog with editing.
Where to find the standard ones:
How to find additional filters on Instagram:
The list can be returned to its original form if you go back to the "Management" category and indicate the first ten positions.
Unlike the posts section, you can't set transparency percentage in Stories. Also, it is impossible to edit only individual elements of the image: color correction is applied to all images, including text. The collection of effects is limited, so users are more likely to use editing elements from third-party applications.
Instructions on how to add filters to Instagram Stories:

To select one, the user only needs to stop scrolling. The editing settings are reset by the "Cancel" button or by switching to the first, original one.
While creating a Story and adding an effect, other functions are also available: working with stickers, captions, downloading videos. The filter will be applied to photos and videos added to the Stories section.
The catalog is regularly updated in the "Management" section. To test new ones, you need to visit the section again and see the available options. The user can create personal add-ons by specifying certain settings for editing.
But applying the same settings to other images will not work - the preset will not be saved as a separate adjustment layer.
If all Instagram filters have disappeared:

 Subscribe!