With over 1 billion active users, Instagram is one of the best social media networks to advertise your business, reach new audiences, and grow brand awareness. So even if you aren’t active on the website yet, it’s never too late to adopt an Instagram strategy in your marketing plan.
If you're ready to start sharing content through this channel, we've got you covered. Here, we're sharing a quick-and-easy guide to posting on Instagram, to ensure you can begin attracting the attention of your audience with Instagram marketing.
Posting to Instagram consistently can help businesses find resonance with their audience and grow better, but doing it right is just as important. Here's how to post to your Instagram account step-by-step.
See that plus sign [+] in the image above? That's your starting point. Click that plus sign and you'll be ready for the next step, below.
Instagram will show you the photos already saved to your phone. Choose one of those to post. Alternatively, you can click on the camera icon to take a photo or video within the Instagram app itself, if you don't already have an image you want to use.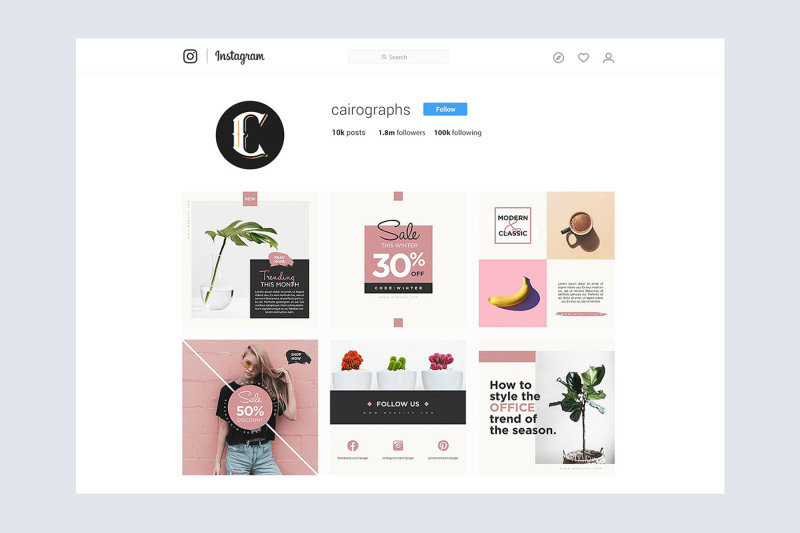
Once you select and crop an image (or carousel of multiple images), click the Next button in the top right corner of the app.
Do you have multiple photos and want to highlight them all? Instagram allows you to do this with its carousel feature.
As you go to tap a photo or video, first tap the icon just above your photos to the right that looks like stacked squares. Once you tap this, you'll see a number on the corner of every image or video you tap. This number notes where the content will show up in the carousel.
You aren't limited to just a square image on Instagram. You can actually share horizontal or vertical images as well. To get more of your image seen, pinch the screen of the photo you've selected on the Library screen (play the video below to see it in action).
However, while Instagram does allow vertical and horizontal options, the images still need to fit into some specific dimensions. So, you might still need to crop a tiny bit of your photo to get it to fit.
Instagram offers a wide variety of filters — scroll to the right to peruse your options, and click on one to preview how it will look on your photo.
By default, the filter will be applied by full strength. However, if you want to scale back the intensity of the filter, double-click the filter tile once it's been applied, and a scale selector will appear, allowing you to downplay the effect.
You can also tap the magic wand at the top of the screen to adjust the photo further.
(Take a look at our Ultimate Guide to Instagram Filters to learn more).
You can also click "Edit" at the bottom right to adjust the image to your specifications.
Here are the editing options that come built into Instagram for you:

 Drag the selector to the left to desaturate the image (all the way to the left if you want a monochrome look), or drag the selector to the right for extremely saturated colors.
 Dragging the selector to the left will darken the shadows in your image while dragging the selector to the right will lighten the shadows in your image.
Featured Resource
Get creative and write a nice, interesting Instagram caption to go with your photo. Since text can help optimize your post in Instagram's search, writing something can only benefit you.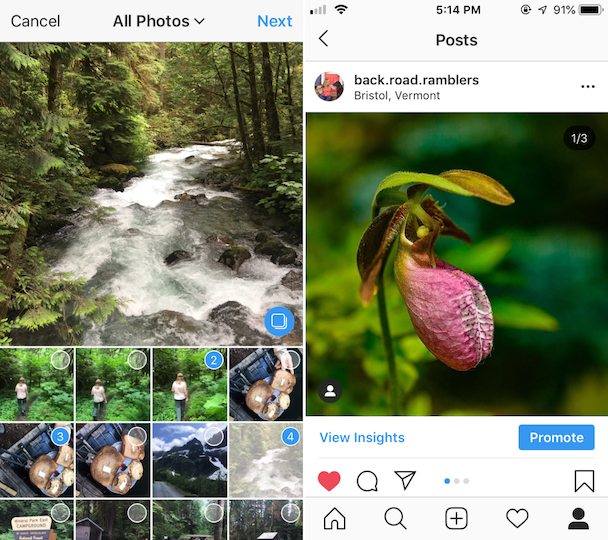
With Instagram's search feature, users can search by hashtags. So, you should make sure to write relevant hashtags in your caption. If someone does a search of a hashtag you placed in your caption, they might find your post as well as others that included the same one.
Want your friend or their followers to see a photo that you posted of the two of you? Tag them!
On the new post page, you can click "Tag People" to tag other Instagram accounts in your post. Alternatively, you can include their handle (or their username beginning with an @ symbol) in your caption.
If you're on a fun vacation or at a neat event and you don't feel like including that information in your caption, you can mark where you are in another way. On the new post page, tap "Add Location" to put a location on your image (which makes it easier for people to find your post).
When you post an image or video with a location, it will show up between your name and the block of content on the feed.
Emojis are fun and can make your caption more eye-catching. If you know of a few relevant emojis that could fit with your post, stick them in the caption area. For example, if you're posting a vacation photo, you could include a palm tree 🌴 or a plane ✈️ to show you flew somewhere.
Here are the top Instagram emojis you can use:
However, keep in mind that there's a multitude of choices to add flair to your posts, from keeping it real 💯 to the cringe face 😬.
Be sure not to go overboard and post emojis just for the sake of posting them. If you post a bowling emoji along with a photo of a beach, that obviously won't make sense to people. Similarly, if you post 20 emojis that loosely relate to a post, you might just annoy your followers or come off as desperate.
Finally, if you want to share your content on your other, connected social media sites (like Facebook or Twitter), simply toggle the button from the left to the right.
When you're ready to post, click "Share" in the top right.
Instagram Saved DraftsIf you're not ready to post right away, you can also save it to your Instagram Saved Drafts. Simply go back to the filtering and editing step, tap the back arrow in the top left, and select "Save Draft."
Typos happen to everyone! If you just posted something and notice a glaring spelling error, don't panic. Simply tap the three dots that appear on the right across from your name, then tap "Edit."
Make the adjustments you see fit and save them so it reflects on your Instagram. Otherwise, your post is complete and live for everyone to see.
Now that you know how to post to Instagram, you can begin creating content for the platform and connecting with your audience. If you're a business or brand, you'll want a solid strategy for earning engagement and awareness.
Editor's note: This post was originally published in November 2019 and has been updated for comprehensiveness.
Topics: Instagram Marketing
Instagram is the fourth most popular social media platform with over 1.4 million monthly active users. If your business hasn’t added Instagram to your social media strategy yet, we’re not surprised you’re now considering it.
But it’s one thing to create a random Instagram post. It’s another to fully flesh out your post and create a multi-faceted Instagram content strategy.
To help out, we created a step-by-step guide for how to post on Instagram: How to create your caption, how to post each different type of content that Instagram supports, and more.
Ready to dig in?
Posting to Instagram regularly is essential to make sure you create a consistent and high-performing Instagram marketing strategy. While there are several steps to creating high-quality posts, if you follow our guide, you’ll be able to master them in no time.
Your first step is to open up your Instagram app and then click the + sign in the top-left corner of your screen.
From here, you need to decide which type of content you want to create. There are four main types: a post, story, reel, or live video.
Select your chosen option from the drop-down menu and follow along with our how-to guides for each one.
Create an Instagram Feed PostThe first type of Instagram post you might want to create is a regular Instagram feed post. This could be either an image or a video—both are great options to add to your feed.
To get started, click the Post option from the list of options. Your camera roll will pop up so you can select a photo or video you’ve already created—although you do have the option to tap the camera icon and take a photo or video right in the app.
(Side note: we don’t recommend doing this. If you want to create a high-quality Instagram feed, you’ll want to create your content outside of the app and then post it separately. )
)
There are three types of feed posts you can create:
While in your camera roll, you can select the photo(s) or video(s) you want to add to your post. If the ones you choose are horizontal or vertical, you can choose to keep them that way or crop them into square images.
Tap Next to choose a filter. There are over 20 different filter options inside Instagram. Or you can tap the Edit tab at the bottom to access more customizable photo editing options.
Once your photo looks how you want it, tap Next again. This is where you’ll create your caption and add your hashtags—but more on that in a bit.
Instagram stories are temporary stories that stay on your profile for 24 hours. You can also add them to different story highlights that remain at the top of your Instagram profile for followers to check out after the initial 24 hours is up.
Stories can be great ways to engage even further with your audience. Because they appear at the very top of the Instagram feed, users may be more likely to see your stories than your actual feed posts.
To post a story, you’ll tap the second option from the “Create” drop-down menu. Or, you can swipe right on your home screen to access the stories camera.
From here, you can either take a photo or video right inside the app, or you can upload a previously created graphic, image, or video.
You can publish your story as is, or you can customize it in Instagram. There are several options in the top-left corner of the screen to help you decorate your story or add more information.
First, you can tap the “Aa” icon to add text on top of your story. There are a number of different fonts and font decorations to choose from—sticking to just one or two font choices across all of your stories is a great way to stay consistent and recognizable.
The second option is stickers. These range from fun GIFs and illustrations to a location sticker, hashtag sticker, question sticker, mention sticker, poll sticker, or link. You can even add a music sticker to attach a song to your story.
Next, you can add filters or animated effects to your story. Some of these work on any image while others are specific to images with faces.
If you click the icon with the three dots, you can choose to save your story (i.e., if you took the photo/video in the app and you want to save it to your camera roll) or you can access the draw feature.
There are several options: pen, arrow, highlight, neon, and eraser. You can choose from a number of different colors and even use the color dropper to pull a specific color right from your image or video.
Then, click the share button to add to your story. You can link your Facebook page to your Instagram business profile in order to share the story to both platforms at once.
An Instagram reel is a short-form video similar to TikTok videos. They help to engage audiences and build a bigger following on Instagram.
To create an Instagram reel, you’ll select the third option from the drop-down. If you have already created your 90-second or less video, you can select it from your library to upload.
If you expand all the customization options on the left sidebar, you’ll see the ability to add or adjust the video’s audio, length, speed, or layout. You can also set a timer before it starts to record or swipe through filter tiles and effects to add onto the video as you record.
Once you’ve recorded or imported your video from your camera roll, you can add stickers, text, or drawings just like in your stories.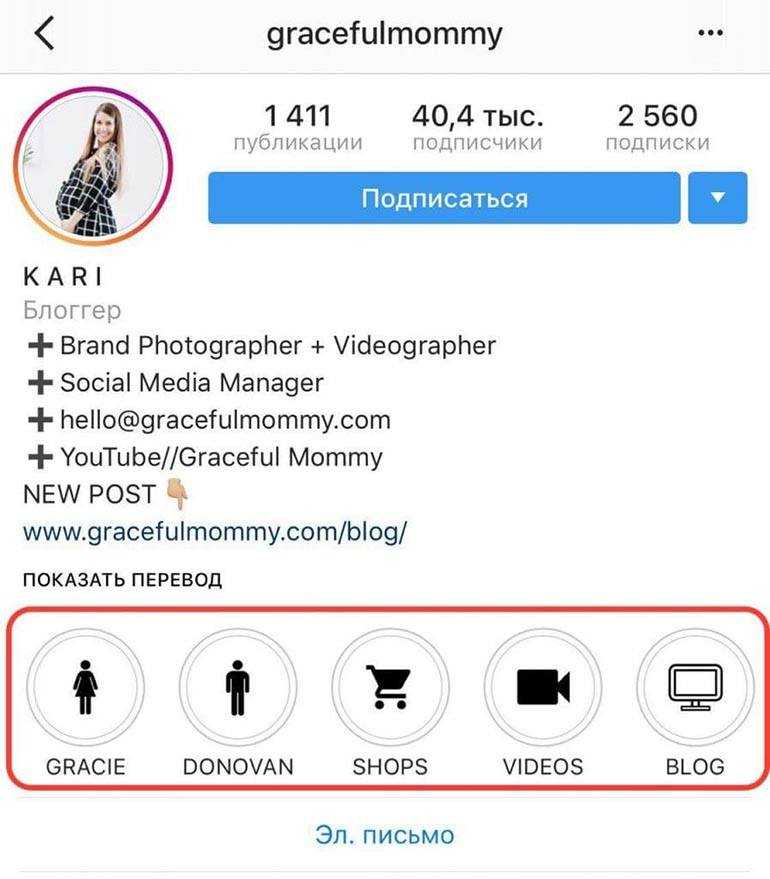
After you’ve finished customizing your reel, you’ll create your caption and share it to your Instagram account by clicking the blue button.
We’ll talk about creating a great caption in just a bit.
The last option is to go live on Instagram. This creates a live video broadcast on your Instagram account that your followers can tune into and watch. They can also leave comments, giving you a great opportunity to interact with your audience in real time.
To create a live video, you’ll tap the fourth option in the drop-down. At the top of your screen, you’ll get to see how many of your followers are currently active so you can gauge whether it’s a good time to go live or not.
You can create a title for your live video and link to a fundraiser if you’re partnering with a charity. Tap the Audience button to choose between going live in front of your audience or creating a practice broadcast.
Or you can choose to schedule your live video for a later date, but still letting your audience know when they can expect you to go live.
Scroll through the built-in Instagram filters if you choose, then tap the button in the button of your screen to start broadcasting.
Now that you know how to post each of the main content types to Instagram, let’s talk caption-writing. You’ll need to add an interesting caption to both Instagram posts and reels, but you can skip this step if you’re simply posting stories or going live.
To get you started, check out some of our Instagram caption ideas. Then we’ll go over strategy.
Your caption can be up to 2,200 characters, but you don’t want to use all of that. Research shows that posts perform best with around 70 words in your caption.
However, that’s not always the rule. If you don’t have a story to tell with your Instagram post, don’t force it.
We’ve put together a few tips to ensure your Instagram captions grab attention and get your audience interested in learning more about your post—and your business.
 Don’t use words and phrases you would never say out loud. Instead, be relatable by creating captions that sound like something a human would actually say.
Keep these tips in mind and start creating fun captions that your audience enjoys reading.
After you write your caption, you’ll want to add hashtags. Each Instagram post can have up to 30 hashtags, and a recent analysis showed that posts with 20-30 hashtags generate the most reach. 20 hashtags is the sweet spot, so try to stick around there.
So how do you find relevant hashtags that will help your post reach the most users?
First, search through the most popular Instagram hashtags to see if any fit your business or your post. Incorporating those can help you reach a much wider audience.
Next, consider using a hashtag suggestion tool to help you find even more great hashtags for your post. You can also check out competitor posts to see what hashtags they use. Click on each one to see how popular they are and if they’re worth adding to your post.
Another tactic is to search for keywords relevant to your business and see which top hashtags pop up in Instagram search.
Add a list of hashtags to a document or note on your phone or computer so that you can refer back to them each time you create a new Instagram post.
When you’re adding hashtags to your post, there are a couple different ways to make sure they’re hidden from view and don’t make your post look spammy:
This will ensure your hashtags don’t appear above the “See more” button so that your actual caption stands out most.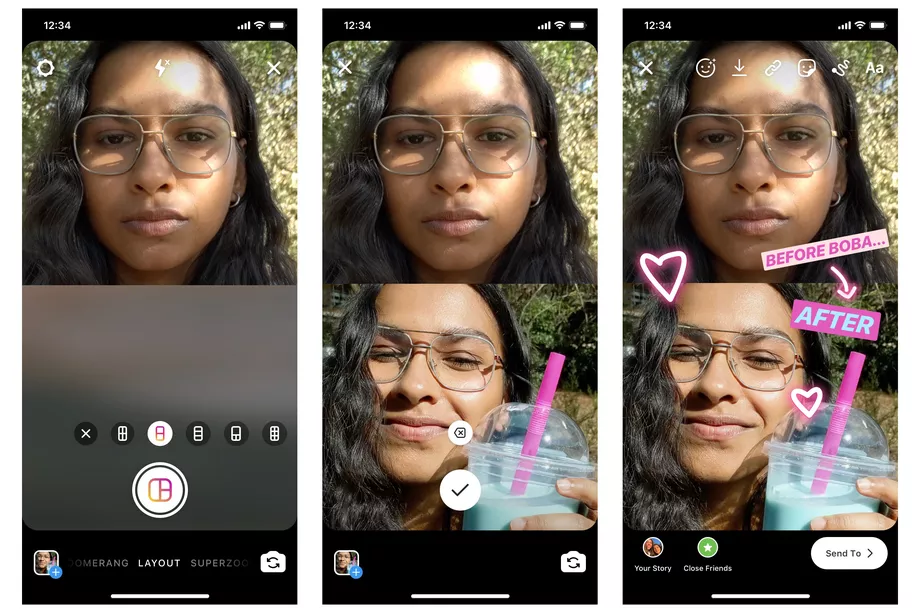
You’ve done it! You’ve gone through all of the steps to creating an awesome Instagram post. The last step is simply to hit publish.
Keep in mind that you can also use scheduling tools to create multiple Instagram posts at once and have them automatically publish to your profile on the dates and times you set.
Now that you know how to post on Instagram, it’s time to start creating stunning and engaging content for your audience. Grow your following and use Instagram to promote your products and services.
Yes, posting to Instagram from the desktop browser is a recent addition to the software.
To do so, head to Instagram.com on your desktop computer and click the + sign icon. A pop-up appears with an upload button or you can drag-and-drop your photo/video onto the screen. Then follow all of the steps above to publish your post.
You can add up to 30 hashtags into the bottom of your caption or as a comment on your Instagram post.
To get access to the best features, post to Instagram from the mobile version.
If you see a colorful circle around a profile photo, that means that profile has posted an Instagram story in the last 24 hours. You can tap the profile photo to view the story.
Edit your profile, tap Business Information > Contact Options > Add an action button. From here, you can choose what type of button you want to add based on how you prefer potential customers to contact you or access your products/services.
If you want your Instagram page to immediately grab attention and "hook" with its creativity and interesting content, you should definitely try Instagram banners. Such an original element will help attract new Instagram followers and increase the number of likes.
An Instagram banner composed of separate elements (mesh banner) is an original way to place one high-quality image. These segments are arranged in the correct sequence, forming a single picture that looks like a puzzle. nine0003
This banner, like other Instagram content, can be scheduled ahead of time using scheduled posts on Instagram.
How to build a mesh banner on Instagram, and why do many brands use this kind of image on their Instagram pages?
Image from Instagram user @gladwellsart
Image from Instagram user @aiste_stancikaite
If you often post on Instagram, then you probably know that the brighter and more creative the photo, the more attention, likes and new subscribers it will attract.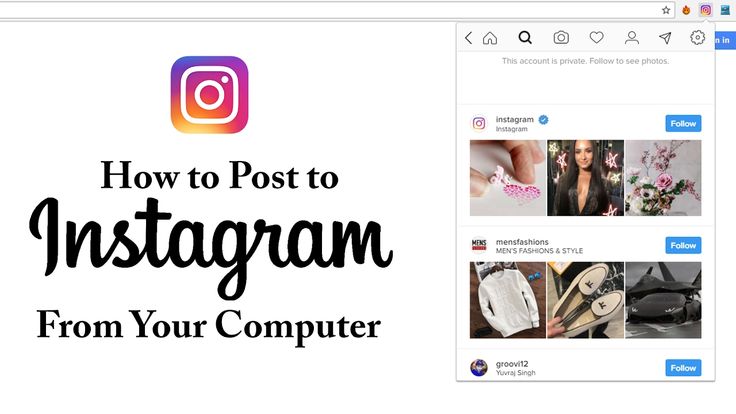 Instagram banners only enhance this opportunity, since they are not a banal and frequent feature. By the way, posts with mesh banners, like regular posts, can be scheduled in advance using auto-posting tools. nine0003
Instagrammers have the ability to create their own mesh banners using the power of Adobe Photoshop.
But if you don't have time to edit photos in Photoshop or lack the ability to do it, you can try special applications and services that will help you quickly create creative banners for Instagram. Your image will be divided into parts and quickly turn into a mesh banner.
Here are some services that can help you quickly and efficiently create a grid banner on Instagram:
Most applications offer special and convenient templates.
We have selected 5 unique examples from areas in which Instagram banners are often used. They definitely stand out from other Insta content with their originality. nine0003
Food
One of the most popular posting topics on Instagram. With the help of banners, restaurants, cafes, chain stores and food bloggers make their Instagram accounts bright, creative and business-attractive, which helps to quickly increase the number of followers.
Image from Instagram user @luca.rosati
Fashion
Also popular among Instagram users. Therefore, Instagram banners can be useful for brands and shops, designers, modeling agencies and fashion bloggers. nine0003
Image from Instagram user @mrhotshoe
Tourism
You probably have at least one travel and tourism profile on your friend list.
Image from Instagram user @kunstphotographic
Photo
Online banners are a great way for photographers to express themselves, showcase their professional capabilities and promote themselves on Instagram. Banners on their pages are always a source of inspiration. nine0003
Image from Instagram user @alexyphotographie
Entertainment
In this area, artists, celebrities and event owners also often post grid images on their pages.
Image from Instagram user page @rizqiabdaziz
Of course, there are many more such spheres. The main thing is that with the help of Instagram banners, users of this social network get the opportunity to surprise and inspire their subscribers. nine0003
Be sure to analyze the results : what happened to your content before you started using banners, and what happened after.
The conclusions should be interesting. Measuring results is very easy with the help of the analytical capabilities of SMM services for social networks.
For example, the KUKU.io service, which allows you to create, schedule and adapt pending posts for different social networks, including Instagram, as well as track and analyze the results. nine0003
If you have tried creating and posting grid images or video banners on Instagram, please share your experience in the comments!
Lazy cabbage rolls is a delicious meat dish that combines all the delights of vegetable stews, meat flavors and kitchen unpretentiousness. Such cabbage rolls are within the power of even inexperienced amateur cooks with up to a year of experience. In other words, lazy cabbage rolls are a dish for those who want to eat deliciously, but do not like to bother with cooking, especially with wrapping the filling in specially prepared cabbage leaves. nine0003
If you have ever searched the Internet for lazy cabbage rolls , you must have noticed that there are two different types of this dish, which differ in the principles of preparation. Yes, what is there, the final look of the dish is different and very seriously. One type is in the form of stew, that is, finely chopped ingredients, the other is in the form of meatballs or cutlets. I won’t undertake to argue how to argue correctly, but it seems to me that hand-molding cutlets somehow doesn’t go well with the word “lazy”. Some people are too lazy to even think about it. So I cook the dish like a stew. Seems to be more correct. nine0003
I don't know for sure, but we can assume that lazy stuffed cabbage came up with in kindergarten. The cooks were too lazy to mess with the stuffed cabbage, they just chopped the cabbage, mixed it with all the other ingredients and gave it to the teachers. It's all the same - children at this age do not really understand food, they are used to porridge and love everything that looks like porridge, that is, mixed. They are not particularly interested in "cutlets" wrapped in cabbage. Why such frills?!
Any dish has three important ingredients for success - speed of preparation, ease of preparation and taste of the end result. In other words - fast, simple, delicious. But, as a rule, for most dishes you cannot use all three components at once, you can choose only two, that is, if it is quick and simple, then it will not taste very good; if it is fast and tasty, then it will most likely be difficult, which not every unprepared kitchen lover will be able to. "Lazy" dishes are a rare exception and combine all three ingredients of a successful dish popular among the masses. Lazy cabbage rolls are prepared quickly and simply, but they turn out incredibly tasty and elegant, it’s not a shame to treat good guests. nine0003
 5 tsp)
 The ratios of cabbage, minced meat and rice can be freely changed according to your taste. I just chose the ratio in such a way that each of these main ingredients does not get lost in the overall bouquet of flavors, but does not dominate too much. In other words, everything is balanced in this recipe. It remains only to trust and prepare. nine0003
Ground beef can be used as well as homemade (mixture of ground beef and pork). It is better to use minced meat, the fat content of which is not more than 15%. Some unscrupulous manufacturers artificially increase the fat content by adding low-use (what to hide - even harmful) cheap oils. After eating such minced meat, an unpleasant aftertaste remains, and orange fat spots appear on the plate. Unpleasant!
Again, you can use any rice according to your taste and mood. I usually take round grain. nine0003
Sugar is not an essential ingredient - it is used to enhance the taste and create an overall positive picture of the dish. You can not put who does not want or reduce its amount.
I use sunflower oil without taste and smell.
If desired, carrots can be added to lazy cabbage rolls. It will not affect the taste in any way, but it will give a pleasant warm color to the dish. But I cook without it.
We prepare all the necessary ingredients for making lazy cabbage rolls. From the dishes we need a large frying pan or a large saucepan with a thick bottom. Yes, you can cook lazy cabbage rolls in a saucepan. nine0207
First of all, cut the cabbage (600 g). The stalk and other hard parts of the cabbage are not suitable for the dish, so we remove them when cutting. By the way, we chop the way you like, there are no strict rules here. Of course, you should not chop too small or large. I usually cut the cabbage into strips, short and not too narrow.
Heat a small amount of vegetable oil in a frying pan and spread the chopped cabbage. Add sugar (10 g) and salt (1/2 teaspoon), mix, close the lid. Simmer at medium power for about 10 minutes, stirring every 3-4 minutes. If the cabbage is not young, then the stewing time should be increased to 15-20 minutes. The cabbage will become soft, give juice, sugar will dissolve in it, and when the resulting syrup is stirred, it will cover all the chopped cabbage, will envelop each piece. This will enhance the taste of the cabbage and give the dish a slight caramel note. Do not be afraid that the dish will be sweet. nine0207
When stewing cabbage, remove the remaining coarse and hard parts of the cabbage from the pan, which we find in the process of mixing. After the cabbage is stewed, we transfer it to a plate, thereby freeing the pan for further work.
While the cabbage is stewing, chop the onion (200 g), for lazy cabbage rolls I usually cut it into quarter rings.
In a frying pan freed from cabbage, heat the vegetable oil (approximately 1-2 tablespoons) and send the chopped onion to the frying pan. Fry the onion for 5 minutes on medium power of the stove, stirring it from time to time. nine0207
When the onion is a little fried and golden, add the minced meat to the pan, mix well, intensively break it into small lumps. We increase the power of the stove to the maximum, add 1 teaspoon of salt, mix and fry the minced meat with onions in a pan for 2 minutes, constantly stirring and loosening it, breaking up the lumps. Also at this stage, add ground black pepper to taste and other spices that you like. The hops-suneli spice is well suited.
Reduce the power of the burner to a level below average, return the cabbage to the pan, stir, close the lid and simmer for 10 minutes. Stir from time to time. nine0207
Rinse the rice (100 g) several times in cold water, each time draining the water, which should eventually remain clear after washing. Thus, we wash out unnecessary gluten and starchy substances from rice as much as possible. This will help the rice to be fluffy later on.
Spread the contents of the pan with a spoon in different directions, making room in the center. We spread rice in this place, fill it with water (250 ml). If you like lazy cabbage rolls with gravy, then increase the amount of water to the required, for example, up to 300-350 ml. Water can be either cold or hot. In the latter case, the rice turns out to be more crumbly, but this has almost no effect on the final result in the dish, so which water to use is up to you.