With over 1 billion active users, Instagram is one of the best social media networks to advertise your business, reach new audiences, and grow brand awareness. So even if you aren’t active on the website yet, it’s never too late to adopt an Instagram strategy in your marketing plan.
If you're ready to start sharing content through this channel, we've got you covered. Here, we've cultivated a quick-and-easy guide to posting on Instagram, to ensure you can begin attracting the attention of your audience with Instagram marketing.
Posting to Instagram consistently can help businesses find resonance with their audience and grow better, but doing it right is just as important. Here's how to post to your Instagram account step-by-step.
See that plus sign [+] in the image above? That's your starting point. See that post from our culture account? That's your endpoint. Click that plus sign and you'll be ready for the next step, below.
Instagram will show you the photos already saved to your phone. Choose one of those to post. Alternatively, you can click on the camera icon to take a photo or video within the Instagram app itself, if you don't already have an image you want to use.
Once you select and crop an image (or carousel of multiple images), click the arrow button in the top right corner of the app.
Do you have multiple photos and want to highlight them all? Instagram allows you to do this with its carousel feature.
As you go to tap a photo or video, first tap the icon just above your photos to the right that looks like stacked squares. Once you tap this, you'll see a number on the corner of every image or video you tap. This number notes where the content will show up in the carousel.
You aren't limited to just a square image on Instagram. You can actually share horizontal or vertical images as well. To get more of your image seen, pinch the screen of the photo you've selected on the Library screen.
However, while Instagram does allow vertical and horizontal options, the images still need to fit into some specific dimensions.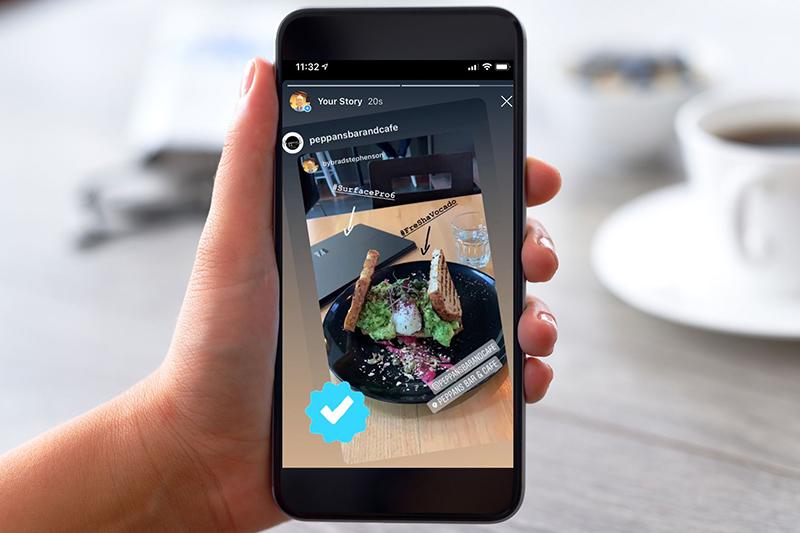 So, you might still need to crop a tiny bit of your photo to get it to fit.
Instagram offers 24 filters — scroll to the right to peruse your options, and click on one to preview how it will look on your photo.
By default, the filter will be applied by full strength. However, if you want to scale back the intensity of the filter, double click the filter tile once it's been applied, and a scale selector will appear, allowing you to downplay the effect.
You can also tap the magic wand at the top of the screen to adjust the photo further.
(Take a look at our Ultimate Guide to Instagram Filters to learn more).
You can also click "Edit" at the bottom right to adjust the image to your specifications.
Here are the editing options that come built into Instagram for you:

 Drag the selector to the left to desaturate the image (all the way to the left if you want a monochrome look), or drag the selector to the right for extremely saturated colors.
 Dragging the selector to the left will darken the shadows in your image while dragging the selector to the right will lighten the shadows in your image.
Featured Resource
Get creative and write a nice, interesting caption to go with your photo. Since text can help optimize your post in Instagram's search, writing something can only benefit you.
With Instagram's search feature, users can search by hashtags. So, you should make sure to write relevant hashtags in your caption. If someone does a search of a hashtag you placed in your caption, they might find your post as well as others that included the same one.
Want your friend or their followers to see a photo that you posted of the two of you? Tag them!
On the new post page, you can click "Tag People" to tag other Instagram accounts in your post. Alternatively, you can include their handle (or their username beginning with an @ symbol) in your caption.
If you're on a fun vacation or at a neat event and you don't feel like including that information in your caption, you can mark where you are in another way. On the new post page, tap "Add Location" to put a location on your image (which makes it easier for people to find your post).
When you post an image or video with a location, it will show up between your name and the block of content on the feed.
Emojis are fun and can make your caption more eye-catching. If you know of a few relevant emojis that could fit with your post, stick them in the caption area. For example, if you're posting a vacation photo, you could include a palm tree 🌴 or a plane ✈️ to show you flew somewhere.
Here are the top Instagram emojis you can use:
However, keep in mind that there's a multitude of choices to add flair to your posts, from keeping it real 💯 to the cringe face 😬.
Be sure not to go overboard and post emojis just for the sake of posting them. If you post a bowling emoji along with a photo of a beach, that obviously won't make sense to people. Similarly, if you post 20 emojis that loosely relate to a post, you might just annoy your followers or come off as desperate.
Finally, if you want to share your content on your other, connected social media sites (like Facebook or Twitter), simply slide the bar from the left to the right.
When you're ready to post, click "Share" in the top right.
Instagram Saved DraftsIf you're not ready to post right away, you can also save it to your Instagram Saved Drafts. Simply go back to the filtering and editing step, tap the back arrow in the top left, and select "Save Draft."
Typos happen to everyone! If you just posted something and notice a glaring spelling error, don't panic. Simply tap the three dots that appear on the right across from your name, then tap "Edit."
Make the adjustments you see fit and save them so it reflects on your Instagram. Otherwise, your post is complete and live for everyone to see.
Now that you know how to post to Instagram, you can begin creating content for the platform and connecting with your audience. If you're a business or brand, you'll want a solid strategy for earning engagement and awareness.
Editor's note: This post was originally published in November 2019 and has been updated for comprehensiveness.
Topics: Instagram Marketing

If you haven't posted on Instagram in a while, you may be confused as to where the button to start a post is, as the mobile app has shifted its appearance numerous times in recent years.
If instead you're familiar with the mobile app and wish you could seamlessly post to Instagram from your computer in the same manner as the app, you're now in luck. Instagram recently added a feature to its desktop website that is analogous to the posting method on mobile.
Here's how to post on Instagram from a mobile device or computer.
How to post on Instagram from a mobile device1. Open the Instagram mobile app and log in if needed.
2. From your home screen or profile, tap the + (plus) symbol in the upper-right corner, and select Post from the dropdown menu.
3. Select the photo (or video) you wish to post from your device's library or tap the camera icon to take a new image with your smartphone camera. To make a multi-image post – you can use up to 10 pictures in one post – tap the circle with an image of layered squares and then tap the images you'd like to use in order. Tap Next when you've selected your media.
Tap the circle with overlapping squares to add multiple photos or videos. Insider
 4. On the next screen, select a filter if you wish to use one, or tap Edit to make other changes to the image's crop, brightness, saturation, and more. Then tap Done.
Tap a filter or select Edit to customize your post. Insider5. You can now add a text caption and location, tag people, and pair other platforms – like Facebook or Twitter – to syndicate your post there, too.
Add a caption, tags, or other elements on the final page before posting. Insider
 6. Tap Share in the top-right corner to set your post live on Instagram.
How to post on Instagram from a computerYou once had to employ a convoluted process to trick Instagram into thinking you were using a mobile device in order to post from a computer.
Thankfully, Instagram has added a new, built-in feature that makes posting from its desktop website as seamless as posting from its mobile app. Here's how to post from a computer.
1. Go to Instagram's website in a desktop browser and log in if needed.
2. Click the + (plus) symbol at the top of the page to start a post.
Click the plus sign. Insider
 3. Drag image or video files into the pop-up window that appears, or click Select from computer.
Click to select images or drag media into the pop-up. Insider4. Your selected image will appear in the window. Use the magnifying glass in the bottom-left corner to zoom in on the image and crop it, or use the two arrow icon to the left of that to select a specific aspect ratio for the post. If you want to add more images, click the circle with overlapping squares in the bottom-right corner and tap the resulting plus sign to add media. When you're done, click Next.
5. Choose a filter or click the Adjustments tab to adjust levels of brightness, contrast, and other elements. Then click Next.
Choose a filter or make adjustments. Insider; Getty Images
 6. Click the photo to tag accounts, or use the form on the right of image to add a caption, location, or alt text (via the Accessibility dropdown), or turn off commenting (via the Advanced settings dropdown). Then click Share to post to your Instagram feed.
Add a caption, tags, and more from this window. Insider; Getty ImagesSteven John
Freelance Writer
Steven John is a freelance writer living near New York City by way of 12 years in Los Angeles, four in Boston, and the first 18 near DC. When not writing or spending time with his wife and kids, he can occasionally be found climbing mountains. His writing is spread across the web, and his books can be found at www.stevenjohnbooks.com.
Read moreRead less
There are 3 main ways to add a photo to Instagram* from your phone: upload via the Instagram* mobile app, from your phone gallery, or via third-party apps. We will analyze separately how to publish a photo in a post and a story.
Download the Instagram app* from the AppStore or Google Play. After registering or logging into your account, you will see the [+] icon in the upper right corner, click on it, and then in the menu that appears, click on the "Publish" button.
Interface for adding a new post to the feedNext, you will open the interface for adding a post, you need to go through several steps:
 ;
; Let's take a closer look at how to post photos on Instagram* from your phone.
Select media files. After pressing the "Publish" button, you will be taken to the gallery on your phone. Select the photos or videos you want to post. At this stage, you can also change the resolution or select multiple files for one post.
Basic buttons for setting up a future publicationEditing files. After selecting all the settings, click the "Next" button in the upper right corner and go to the editing interface - here you can apply filters, adjust contrast, add sharpness, level the horizon, and so on.
Photo and video editing tools Add text and labels. Once you've finished editing your media, click the Next button again and the last settings will open: select other social networks for publication, add text, geotag, user tags. Read more in our article “Instagram tags*: how and why to use”.
Big text cannot be posted on Instagram*, the limit is 2200 characters. But if you really need it, we have an article with recommendations for the design of such publications.
Publication . When you're done with the settings, click "Share" in the upper right corner and the post will appear in your account feed and in the news feed of your followers. Hooray!
The process of loading a post and its display in the news feedThis is a quick way when you just need to post one file with a caption, because this way you can not customize the display format, add multiple files to one post, edit media files, add geotags and tag other users.
How to post photos on Instagram* from your phone using the gallery:
That's it - the publication has been uploaded to your profile!
Step-by-step process of publishing a photo in the feed through the phone galleryIf you do not know what, why, why to publish and how to design, I recommend our free course "7 Steps of Content Marketing". In the course, we tell you what content marketing is, how to create, design and promote content on the Internet. All this will help you understand how content works, why publish posts and how to make them beautiful and interesting.
You can upload photos to Instagram* from photo and video editing apps, feed maker, and so on. Almost all of these applications have the ability to automatically add media files to Instagram*.
For example, the Canva photo and video editor app has a Share button in the top right corner. In the additional menu, the Instagram icon appears *, when clicked, it transfers to the social network application with the option to select a placement: Stories or feed. After clicking on the "Feed" button, the standard Instagram interface * opens to add a post to the feed.
You can upload a photo to Instagram stories* from your phone both directly from the Instagram application* and through third-party applications.
There are 3 ways to post a Story via the Instagram app*:
After clicking, the interface for creating Stories will open. By default, the camera opens, and you can immediately take a picture or video for stories. If you want to add files from your phone's gallery, tap the button in the bottom left corner of the screen or swipe up from the bottom of the screen.
The story editing interface also has many useful features:
 There are masks both from Instagram* itself and from users. To get as many creative masks as possible, subscribe to major bloggers who create such masks. For example, bloggers ya.molli or georska.
 Once you're done with your stories, select the publish option at the bottom of the screen:
Stories, like posts, can be posted from other applications, only when choosing a placement, you need to click "Stories".
Check out the Instagram Stories* section of our blog for inspiration on how to use Stories on both your personal blog and brand account.
If you feel uncomfortable publishing posts and stories from your phone, use services for publishing from your computer, such as SMMplanner. With it, you can design and post posts and stories from your computer and specify the time at which they will be automatically published.
Scheduling a new post on Instagram* from a computer via SMMplannerWhat is the convenience of delayed posting and how to post on Instagram* from SMMplanner, read in our article "Delayed posting services on Instagram*: why they are needed and how they work".
Universal algorithm of actions for posting photos on Instagram* from the phone:
Done! Your first story or post is already in the feed.
We continue the series of articles “Instagram for a teapot”. Simple instructions on how to properly use the functionality and much more. Next topic: “How to add a photo to Instagram”.
Content
Instagram itself is designed to share experiences. You can use the social network from a PC or smartphone. But adding a photo to Instagram through the latter is much easier - apart from the application itself, nothing else is needed for this.
The topic of publishing photos on Instagram from a computer has always been relevant. The Internet is full of different ways, most of which involve installing additional applications. But it is long, and sometimes even difficult. Therefore, we suggest using the following method:0003
2. In the upper left corner of this menu, there is an icon with a phone and a tablet. We press.
3. After clicking, the Instagram view will change. Now press F5 or round arrow in the upper left corner of the browser to refresh the page. On Instagram, the bottom menu will appear, as in the mobile version.
4. Now, if you need to publish a photo, close the menu by clicking on the gray cross in the upper right corner and use instagram like on your phone.
5. If you want to add a story, then leave the menu open and click on the camera icon to the left of the inscription "Instagram" . This function only works when the menu is open.
Posting and sharing your photo from your mobile device is very simple.
1. Enter the profile and look for "+" at the bottom of the screen.
2. Click on it and get access to the gallery and camera. In the first case, we select a ready-made picture from the library, in the second we make a new one online directly in the Instagram account. It looks like this:
If you want to take a photo or shoot a video, go to the corresponding inscription. After selecting or taking a picture, click "next" at the top right.
3. Get into the photo editor. Here you can adjust the brightness of the image. Scroll the ribbon with tools to the left - there are enough filters to get the desired quality. To align it, add or remove brightness, sharpness, contrast, etc. go to the "edit" tab (also at the bottom of the screen). At the end of the correction, we look up and send the “Next” frame.
4. Everything is ready! You can sign - your comment is added right next to in the same window. A little lower is the "tag people" option. Now you can share by clicking the blue button of the same name in the upper right.
Your Instagram photo! The same is done with video.
Posting multiple photos is possible in two ways:
Consider the second option in detail. To do this, in step No. 2 of the previous instruction, before clicking "Next", we activate the inscription "select several" at the bottom.
We get into the general gallery with the ability to select frames:
Mark the ones you need and only after that go up and click "Next". It turns out a carousel of several pictures.
On the web, such a collage looks like this:
Below, in the line with a heart, there is a quadruple. It says that there are several frames in the post. This is also evidenced by the counter in the upper right corner - 2/4. That is, we have the 2nd of 4. Flipping through them is simple - with a light touch on the screen with a shift to the left. In total, you can add up to 10 photos or videos to the carousel.
Until recently, all frames for an Instagram profile had to be cut. The network accepted only square images. Now the restrictions on the dimensions and orientation of the image have been removed. Vertical or horizontal, it doesn't matter.
So, choose a photo through the gallery or take a new camera. Before uploading to the profile, adjust the size. To prevent the picture from looking cropped, use the double brackets in the lower left
corner - . Full size without cropping guaranteed.