When uploading photos or videos to Instagram, you might have noticed that some content changes when you see it displayed on your profile. In fact, Instagram will resize, convert and/or compresses your digital files by default.
Although Instagram will upload your content with decent quality, there’s actually a way to improve them by restricting any sort of changes from ever occurring.
Note: At no extra cost to you, we may earn a commission for purchases using our links. Learn more.
While Instagram seems to try-hard to hide this feature by default, there’s a simple way to enable high quality uploads. Deep within the settings menu in your Instagram app is a simple way to change your upload preferences.
By enabling this setting, your photos and videos won’t experience any change in quality when you upload them. It’s possible to change this setting on Android or iOS; the instructions for each are similar but slightly different. See below.
iPhone or iPad users will need to follow these instructions to enable high quality uploads:
1. Tap the Instagram icon on your Home Screen to launch the app.
2. Tap your profile icon in the bottom right corner so you’re viewing your own profile.
3. Tap on the three dashes in the upper right corner. This will pop-up a list of more options.
4. Tap “Settings” at the very top of the list.
5. Tap “Account” and then “Data Usage”. Alternatively, you can simply search for “Data Usage”.
6. Now, you will see two options. Click the toggle button next to “High Quality Uploads” so the button turns blue upon activation. That’s it. Now your uploads will be higher quality regardless if you’re using cellular or WiFi connectivity.
The process is quite similar but not exactly the same for Android users. Follow these instructions to enable this setting on the Instagram app for Android:
1. Tap the Instagram icon on your Home Screen to launch the app.
2. Tap your profile icon in the bottom right corner so you’re viewing your own profile.
3. Tap on the three dashes in the upper right corner. This will pop-up a list of more options.
4. Tap “Settings” at the very top of the list.
5. Tap “Account” and then “Cellular Data Use” towards the bottom of the list. Alternatively, you can simply search for “Cellular Data Use” back in the Settings menu.
6. Now, you will need to activate the toggle button next to “Data Saver” to unblur the “High Resolution Media” setting directly below. Once you do that, it will let you choose from three options: never, WiFi only or Cellular + WiFi.
Choose “Cellular + WiFi” and now, regardless if you’re connected through your cell service or WiFi, the Instagram app won’t change your uploads or even attempt to compress or distort any of the content you view.
As you can see, regardless of the type of device you’re using, enabling high quality uploads without any restrictions is actually quite easy. Keep in mind, however, that regularly uploading high resolution photos or videos can quickly use a lot of data. In fact, it can easily diminish any data usage you may have through your cell phone or Internet provider. Even browsing around with these settings activated can make a huge difference in your data usage. By enabling, you’re basically telling Instagram to give you the highest quality content without any regard for the amount of bandwidth you’re using.
To be honest, most users won’t find a huge difference by activating high quality uploads on Instagram. Given how advanced Instagram’s default compression algorithm works, the changes they make to your photos and videos are hardly noticeable. But if you have a large following or you’ve got a knack for providing the highest possible quality, it’s a setting that you’ll probably want to keep activated. Either way, trying it out for yourself is the best option.
If you try these settings activated for a few days and you don’t notice a big difference, we recommend leaving the default settings activated. Ultimately, you’ll end up saving a lot of data usage and it may be for the best. After all, load times will likely increase with high quality uploads enabled, which could ultimately put a damper on your overall Instagram experience.
Regardless, learning new things with Instagram is fun and can be quite useful. Whether you’re a personal account user or a manager of a big brand, learning the ins-and-outs of Instagram is a great skill to achieve. Interested in learning more? Be sure to check out our other tutorials such as how to see a list of people you’ve requested to follow on Instagram or how to remove other users likes on your Instagram photos and videos. Enjoy!
Please consider sharing:
Note: At no extra cost to you, we may earn a commission for purchases using our links. Learn more.
By Nicole Pav
Updated ✓ Facts checked by JP Zhang 4 Comments
Instagram is one of the most popular social media platforms available today, and it isn’t always just for personal pictures or fan accounts.
A growing percentage of people actually use Instagram for branding, advertising, or hobbies like photography, making it key that posted images are of high quality.
However, this can sometimes be hard to achieve, and it’s extremely frustrating when a picture that looks great on your phone comes out blurry on Instagram.
Table of Contents
Whether you feel like your photos randomly come out low quality or if it’s happening to everything you upload, there’s actually a very specific reason that a photo looks low quality on Instagram but high quality on your computer or phone—Instagram compresses photos above certain dimensions.
This means that your photo is being forcefully resized to fit their standards, which doesn’t always have flattering outcomes.
This happens no matter what you use to upload the photo, be it your phone or computer, so it’s unavoidable unless you stick to certain principles.
There are a few different ways you can avoid having your photos compressed by Instagram.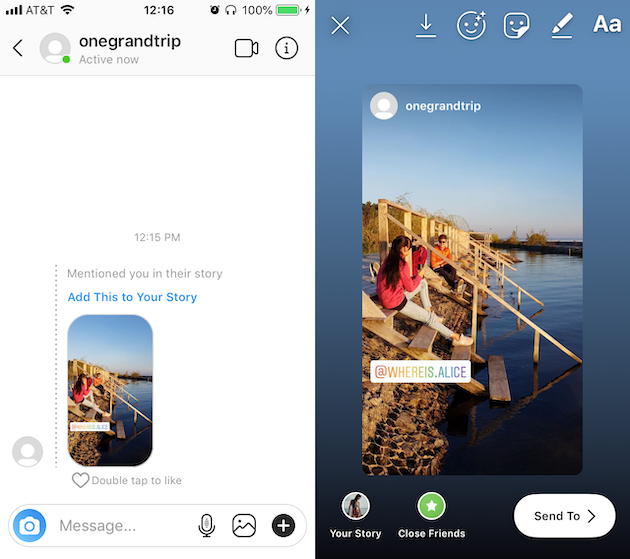 Here’s how to do it.
If you keep your photos within Instagram’s constraints, then you can control the quality and not worry about them being force resized by the app.
These are the guidelines released by Instagram for uploading photos:
Any photo wider than 1080 pixels will be compressed, and you will lose detail. Photos smaller than 320 pixels wide will be enlarged, which will also produce blurriness.
Any photo that doesn’t meet the aspect ratio requirements will be cropped to acceptable dimensions.
Some users have reported that on iPhone, you may be unintentionally compressing your photo before uploading it to Instagram due to a specific setting, particularly if you use iCloud as your primary data backup solution.
To fix this, open your iPhone’s settings and go to “Camera & Photos”. Then (if the option is available), uncheck “Optimize iPhone Storage”.
Photo from AppleAdditionally, if you use an online backup service like Dropbox or Google Drive, check if the photos are not being compressed by these services as well.
If you already know your photo is not going to be an acceptable size, you can resize it ahead of time and retain the quality.
For instance, photos from a DSLR camera are almost certainly going to be higher quality than allowed on Instagram, so you should import them to software like Photoshop, Lightroom, or GIMP (free) and resize them by yourself before uploading.
If you use Lightroom, you can set up a custom export setting that will make sure your photos never exceed 1080 px.
Whether you’re a professional with a brand to market, an aspiring influencer, or just a regular Instagram user, the rules of uploading photos are the same for everyone.
Just make sure to stick to Instagram’s strict pixels requirements and you shouldn’t see any unexpected changes in your photos. It may require a little extra work on your end, but the results will show a clear difference.
Contents:
Instagram is a social network that focuses on visual content. Apart from online stores, the lion's share of business accounts on this service belongs to bloggers and photographers. This activity involves the creation of high-quality and attractive content.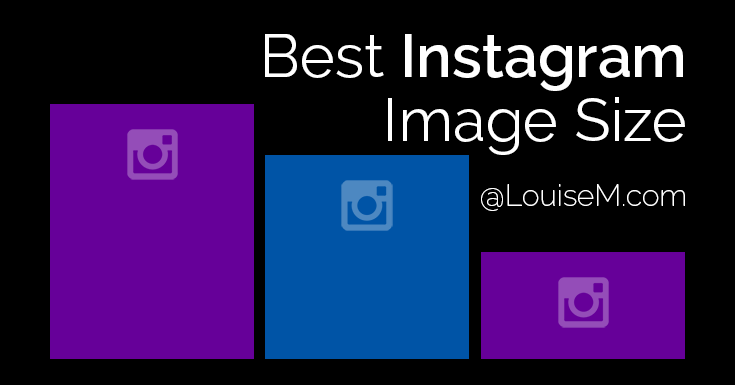 But the site forces users to play by their own rules and fit into the framework. Let's talk about how to post a photo in full size on Instagram.
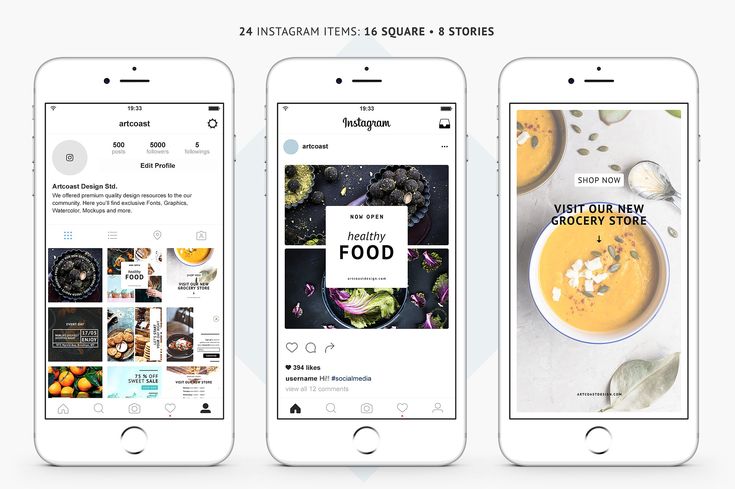
Users of social networks often notice that the quality of photos drops when uploaded to the Internet. Why is this happening? Is it really a conspiracy of the owners of communication services to worsen the quality of life of people? In fact, this is of course not the case. And in 2019, everything is much better in this regard - for posts, the maximum resolution is 1080 by 1920, and for stories 600 by 1067, which is often quite enough for most modern mobile devices. Modern users, moreover, can post images in any orientation, unlike the early days of the social network.
Of course, I can write that this is done in order to save space on the site's servers. Think for yourself, if there are no restrictions, people will also upload 4k photos, which weigh quite a lot. But these are just my conjectures, there is no official information confirming this idea. Although, of course, lower quality = lighter weight = faster loading. This is the first reason. Let's move on to the second.
What is the feature of Insta? in publication format. They are displayed correctly and uniformly on devices of any year of manufacture and with any operating system. And this is achieved precisely by limiting the uploaded photos.
Formats, restrictions, resolution, yes, yes, yes. But you can somehow upload a large photo, it’s impossible that people don’t come up with some tricks for this. In fact, this section is here to warn you. There are many articles on the Internet about how to supposedly add an image without losing quality, without cropping it. They mention applications, and the same ones that promise to help you in this situation. But I don’t really understand why people write about these tools over and over again, because no matter how we process the image, or make a panorama, in the end everything will rest within the framework of the social network itself.
For example, the NoCrop application, which is often recommended in such articles, only helps to fit the photo to the required extension. Of course, when uploading an image processed in this application, its quality will not drop. But since it has fallen to this, it cannot be said that the photo will be uploaded in full size. But, again, why download third-party software for this if the service does it on its own? Therefore, alas, 1080 by 1920 is our limit.
As we have already understood, it is unrealistic to fully preserve the quality. But do you need something more than FullHD? Of course, 4k technology is already being introduced into phones, but there are only a few such devices, and it will take some time before a full transition to a new generation of screens. Therefore, under “How to upload a photo without losing quality on Instagram?” I mean, first of all, maintaining the original orientation, and not adapting to the standard square format.
Go to instructions:
So, as we understand, there is no way to get around the restrictions of the social network. But what if you post the image as it is? Let's discuss a few ideas that might come in handy.

If you look at the situation soberly, then the answer to the question “How to post a photo in full size on Instagram?” one is nothing. There are, of course, many articles on the Internet on this topic. But most of them cite applications that only fit photos to the format of a social network. That is, Insta does not crop anything, because everything has already been compressed to a photoset.
#1. Why does Instagram cut photos?
The resolution limitation allows you not to stretch the image loading time. And it ensures the uniformity of publications, which allows them to be correctly displayed in the feed of users, regardless of what device they use.
#2. Hello! I tried to upload a small photo, it is stretched to a size of 1080 on the larger side. How to make sure that the original size of the photo does not change? For example, I have a photo of 600x700, how can I leave it the same?
Add a white border to it, adjusting the photo in this way to the standard size of Insta.
#3. How to upload a photo in the correct orientation?
Now there are no problems with orientation. You just need to click on the icon with two arrows in the lower left corner of the photo when creating a publication.
Do you still have questions? Write them in the comments! Also watch videos on the topic.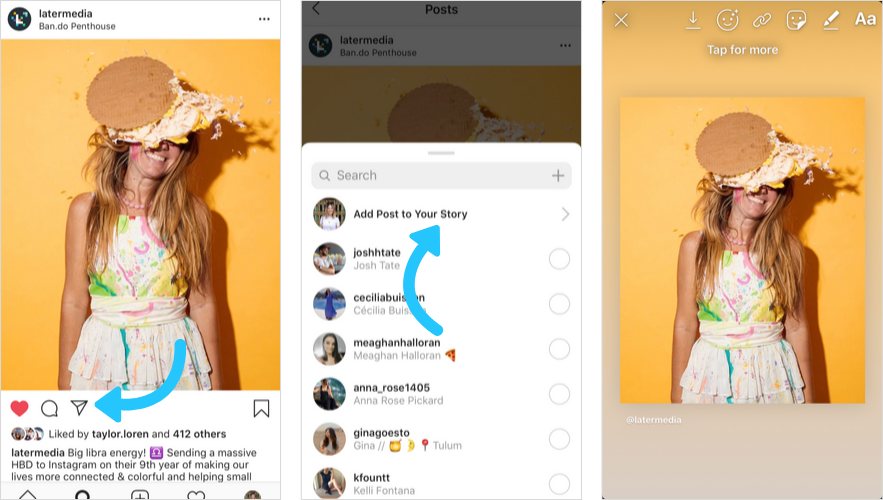
[Total: 1 Average: 5/5]
Did you like the material? Share with your friends!
Post a photo on Instagram in full size is possible through third-party applications or using the function: "Carousel".
Content
When posting a picture on a social network, the size decreases, the quality decreases. This posting format is applicable to any content on Instagram in order to increase download speed and reduce server load.
Other problems when posting to a social network:
Compression occurs when the user uploads a high quality image. Rectangular images are also cropped.
If the screen displays: “Unable to download. Please try again later”, then the problem is in the speed of the Internet or there was a failure in Instagram. You need to switch to a more stable connection and upload the snapshot again.
To upload photos to Instagram without losing quality, you need to use third-party applications.
Tips on how to post pictures in full size without losing quality:
In Inshot, the user can improve the quality using the button: Save. You will be offered a choice of quality: from 240 to 1080. Maximum - increases the size of the photo, but reduces noise and removes pixels.
The Image Converter application is designed to change the format of pictures and videos. It is recommended to change the photo type from JPG to PNG. This format is applicable for raster images, but requires less resources to load and retains the initial quality.
If Instagram ruins the photo quality, then it is worth checking the compliance with the technical parameters.
The social network has requirements for posting materials:
Uploading a file that exceeds the size or resolution - the social network will show an error. For placing Stories: rectangular orientation, weight - no more than 300 MB. To avoid upload problems, the user should compress the photo themselves. In this case, the quality of the image is lost: pixels appear and the number of colors decreases. Find out all the reasons why Stories are of poor quality.
Two to ten photos can be uploaded to the Carousel. When adding to the collection, the user must reduce the size or Instagram will automatically crop the pictures to a square type.
If your photo doesn't fit on Instagram, you can crop it or share it through third party apps. For example, No Crop Instagram will help you post a full-size photo. In the settings there is cropping photos and editing the size, with the addition of frames.
The second way is to make a panorama from one picture. That is, placing a photo in the Carousel.
Other ways to place a photo and leave it in its original quality:
 In the Instagram settings, when editing, there is a parameter: " Details ";
 Filters and color changes are not recommended. Additional effects can spoil the quality: make the image soapy, cut off important details.
To post a photo without cropping, you can use the NoCrop application. It creates a picture frame that reduces the size of an image without losing quality. As a result, the user will receive a square image with the frame selected earlier.
How to keep the original quality: