Home »
Misc »
How do i make an event on facebook mobile
How do i make an event on facebook mobile
How to Create a Facebook Event on iPhone and iPad
When you’re organizing an event, Facebook can make it easier to invite others and communicate all the details. Whether it’s a private affair such as a birthday party or open to the public, you can create a custom event page with information such as date, time, location, etc. Further, you can also keep track of who’s attending and edit details if needed. So let’s learn more about how to create a Facebook event on your iPhone and iPad.
- Create an Event on Facebook App for iPhone
- Edit an Existing Event in Facebook App on iPhone
- How to Cancel or Delete Facebook Event on iPhone and iPad
- Add Facebook Events to Your iOS’s Calendar App
Create an Event on Facebook App for iPhone
- Launch the Facebook app and tap on the Hamburger icon.
- Choose Events and tap on Create.
- Event to be hosted can be created either in Online or In-person.
![]() Here I’m selecting Online.
Here I’m selecting Online. - Now, add the Event name, Start Date, and time and then choose Privacy can be changed as per requirement.
- Private: It would only allow the participants who have been invited prior to the event.
- Public: Can be viewed by anyone on or off the Facebook app.
- Friends: Will be visible to all of your Facebook friends.
- Group: You can send the event invite to the groups you are in on Facebook.
- After you tap on Next. You will be asked to choose a way for invitees to join your event (Applicable only if you are hosting an online event).
- Messenger Rooms: It would allow you to stay together in a video chat. People will be able to join the room directly from the event page.
- Facebook Live: A Facebook Live will be scheduled for your event so that people can watch.

- External link: Adding a link will help people to know where to go when your event starts.
- Other: It allows you to add instructions in your event details on how to participate.
- You will next be able to review the details of the event. A description or guidelines for the event can be added.
- From the screen where all of your event details are mentioned, you will send invites or edit the event details.
Edit an Existing Event in Facebook App on iPhone
- Open the Facebook app and tap on the Hamburger icon.
- Now, tap on Events.
- Tap on the calendar, and you will see a list of events you are hosting.
- Tap on the event you wish to edit.
- Now. tap on Edit.
You will change the event name, time, location, add co-hosts, and add more info about the event. In addition, you will be able to view the changes you’ve done in the event details.
How to Cancel or Delete Facebook Event on iPhone and iPad- Go to the Facebook event you’ve created.
- Tap on the More icon and tap Cancel Event.
- Select Cancel Event or Delete Event.
- Click on Confirm.
Note: Once you’ve deleted an event, you won’t be able to restore the event. When you cancel an event, you’ll no longer be able to make changes to it, but people will still be able to post. When you delete an event, everything will be deleted and no one will post.
Apart from these events, editing them, and deleting the same. You can add your Facebook events to your iOS device’s Calendar app as well.
How to Add Facebook Events to Your iOS’s Calendar App
- Open the event from your Facebook app.
- Tap on More, and in that, tap on Add to Calendar.
- You will see a pop-up mentioning the event will be added to your iPhone’s calendar.
 You can add it to your Gmail id, Family, Home, or Work.
That’s It!
I hope all your queries were resolved in this article.
If you still have some questions! Do write to us in the comment section below! Till then, keep reading and stay upgraded.
You may also like to read:
- How to Post Live Photos on Instagram and Facebook from iPhone
- How to Group Video Chat in Facebook Messenger on iPhone and iPad
- Facebook Not Working on iPhone and iPad? Here’s The Real Fix!
- How to hide a comment on Facebook and other alternatives
iGeeksBlog has affiliate and sponsored partnerships. We may earn commissions on purchases made using our links. However, this doesn’t affect the recommendations our writers make. You can read more about our review and editorial process here. Author
Suraj is a digital marketing expert on the iGB's team. He contributes to the social media section along with tips and tricks for iPhone, Apple Watch. Apart from blogging, he likes to work out as much as he can in his gym and love to listening to retro music.
How to Create an Event on Facebook
As the premier social networking site, Facebook provides a multitude of ways to connect with others. One of the more popular method of connecting both online and in-person through Facebook is Facebook events. Facebook events let you either plan an in-person event or host a live online event through Facebook’s platform. These events can be anything from a birthday party to a live tour of your business. They can be public or private, so you decide who you can view or attend your event. We’ll cover all of that when we go through the details on how to create an event on Facebook.
In this article, we will go over how to create an event on Facebook for both in-person and online events. We will cover how to create the event, how to invite people to your event, and how to use Facebook’s various features to make the best event possible.
Create an Event on FacebookTo create an event on Facebook, first log in to your Facebook account. On desktop, navigate to the left side of your screen. You’ll find the Events tab just below the Watch tab and above Memories. Click on Events to go to the Facebook event page.
On mobile, click on the furthest right tab on the top of your screen, called the Menu tab. From this page, you can scroll down to “Events”.
Your Facebook events page will display your upcoming event along with popular public events. You can also click on the “Your Events” tab on the left side of your screen on desktop, or the top of your screen on mobile, to view all past and future events on Facebook that you have been invited to, attended, or hosted. On desktop, you can also click on the Birthdays tab to view upcoming birthdays among your Facebook friends.
To create a new event, click on the “+ Create New Event” button on the left side of your screen on desktop. On mobile, this button is in the upper left corner.
On the Create Event page, you must select between an In-Person or an Online event. Let’s go over each type of event and how you can plan it through Facebook.
In-Person EventsClick “In Person” to create an in-person event. For these events, Facebook is used primarily for inviting guests and getting out the correct information about the event. When you create your event, you will be prompted to add the event name and start date and time. You also have the option to add an end date and time.
Additionally, you must choose between four privacy settings: Private, Public, Friends, or Group. Private means that only people you invite will be able to view the event. If you make an event public on Facebook, then anyone can see it. The Friends setting limits the view to only your friends, while Group limits it to only people in a specific group. Regardless of which setting you choose, you can also decide whether or not guests can invite others to the event. If you don’t want anyone else sending invitations, then toggle “Guests Can Invite Friends” off.
Click “next” on the bottom of the event tab to continue creating your event. On the second page, you can set the location of the event. On the third page, you can add a description. Finally, on the last page, you can add a cover photo, either by uploading a picture or choosing an illustration from Facebook. You can also click on “Event Settings” to add other co-hosts to the event or toggle “show guest list” on and off. If “show guest list” is on, then anyone who can view your event can see the guest list. When you’re finished with settings, click save to go back to the previous screen, then click “Create Event”.
On desktop, an event preview will feature on the right side of your screen so you can see how your event will look to others on Facebook. Unfortunately, this feature is not available on mobile.
Once you’ve created your event in Facebook, you can invite others to it by clicking the “invite” button. You can also invite others by copying the unique event link, found under the “…” key on the event, and then sending it to whoever you want to invite. From the “…” drop-down menu, you can also change your notification settings about the event, duplicate the event, export the event page, export the guest list, or cancel the event. Finally, you can edit your event at any time.
Live EventsThe process for making an online event in Facebook is very similar. On desktop, the same event preview will be on the right side of your screen, while you will fill out information about the event in the left pop-up column. Filling out the event’s name, start and end time, privacy, description, cover photo, and event settings is the same as for an in-person event, as shown above.
However, the location page is different for online events. You have the option to choose between four locations: Facebook messenger rooms, Facebook Live, an external link, or “other”.
If you select “messenger rooms”, then Facebook will create a messenger room that guests can enter once the event starts.
If you choose Facebook Live, then Facebook will start a live stream for you at the time of the event. Others will be able to view your event, but they cannot also share their video. Be sure to have your webcam and audio devices ready before the stream starts!
If you choose an external link, you will be prompted to enter the link to the event. This link can go to any other video platform such as Google Meet, Zoom, or YouTube.
Finally, if you choose other, then you must provide directions for how guests can access the event in the event description.
Everything else about the event page will remain the same after it’s published. You will be able to invite guests, edit or delete the event, change notification settings, and export or duplicate event details as described in the previous section.
Why Create Facebook Events?As shown above, it is very simple to create an event on Facebook on any device. You can create Facebook events with ease on desktop, mobile, tablet, or any other device with an internet connection. This simplicity is one of the reasons that creating a Facebook event to plan and advertise your event is a great idea.
You should use Facebook events if you want to quickly invite a lot of people to your event, whether the event is friends-only or open to the public. Since guests can post questions or comments on the event, it’s also a great way to keep in touch with guests and keep them informed of any changes. Facebook events is simply the easiest way to quickly create an event and invite others to it, as long as they also have a Facebook account.
Facebook events is also great for advertising your public events. Because users can discover events based on location, popularity, or attendees, creating a Facebook event is a great way to get the word out about your event to as many people as possible. Even if not everyone RSVPs to the event in Facebook, you may still earn attendees from people who first saw your event on Facebook. As such, any organization hosting a public event should use Facebook events as part of their advertising strategy.
If you’re looking to drive traffic from your Facebook event, check out Cosocial, the ultimate video-powered sales solution for dealerships.
Facebook event: how to create and promote
Content [hide]
Creating an event - step by step instructions
Step 1. Select the “create event” item on the page
Step 2. Filling the event with useful information
Step 3. Work with publications
What should be the publications in the event
Often the company's activities are associated with holding various events: master classes, concerts, trainings, seminars, etc. That's what Facebook events are for. They can be created directly from the corporate page. In the event, you can see how many people are interested in the upcoming event, how many are going to go to it.:no_upscale()/cdn.vox-cdn.com/uploads/chorus_asset/file/19981287/Image_from_iOS__92_.jpg) nine0003
nine0003
All upcoming events organized by the company can be seen on the page:
In the event, you can not only specify basic information, but also make publications. This allows you to tell potential visitors about the event in more detail, to attract them with interesting content. You can see the publications in the "discussion" tab.
Also, the undoubted advantages that an event on Facebook has include the following points:
- If the event is public, then friends of the participants can see information about the event in their feed.
- Participants receive notifications when an event is approaching.
- If there are any changes related to the events, this can be done in personal correspondence with the participants.
The disadvantages include, perhaps, the increased cost, in comparison with other types of advertising on Facebook. In the next section, we will talk in detail about its creation.
Creating an event on Facebook is not so difficult - with all the necessary information and materials, this can be done in just 10-15 minutes.
Step 1. Select the “create event” item on the page
Step 2. Filling the event with useful information
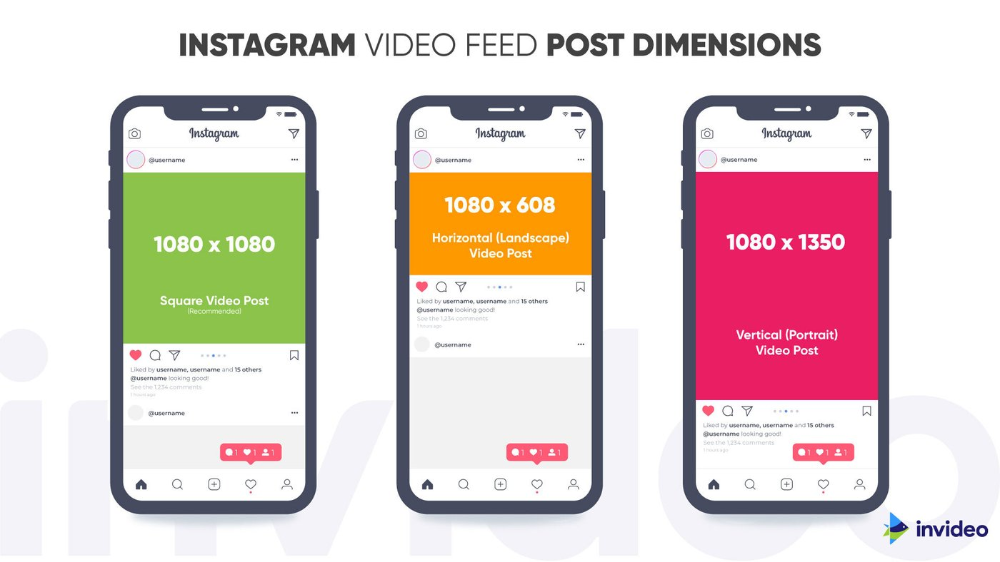
We fill the event with information: you need to upload an image on the cover, write the name, date, time of the event, give a brief description. The cover should correspond to the theme of the event and at the same time be bright, colorful, eye-catching. If you want to run ads on it, remember that the amount of text should not exceed 20% nine0003
You can also provide additional information, such as a link where you can purchase tickets (or indicate that admission is free), enter keywords, or create a guest list. It is also important to specify who will be able to post - all users at any time, all users with subsequent approval by the administration, only administrators.
Step 3: Working with publications
In general, the event on Facebook has already been created. It can be shared on the company page so that more users will see it. But in order for the event to attract more attention, it is better to create publications in it and share them on various platforms. nine0003
What should be the publications in the event Now let's talk about publications. They can tell in more detail both about the event itself and about those who will hold it. For example, if this is a concert, tell us more about the performer, his work. If the seminar is about speakers, and so on. In addition, the post must be:
- Laconic.
 Long opuses are more likely to cause boredom than a desire to go to an event. Try to be brief. nine0024
 - Up-to-date. All information must be correct and true at the time of publication.
- Bright and stylish. If you attach photos to the publication, they must be in good quality, consistent with the topic of the post.
Also, the publication may contain useful information related to the event - notifications about discounts, special offers, etc. In a word, creating an event on Facebook is a powerful tool for SMM promotion, it is a convenient way to promote an event that provides many opportunities for interaction with the audience. If you have any questions about how to create an event on Facebook - write in the comments. nine0003
What are Facebook Events?
Facebook Events is a feature that can help you organize social meetings through Facebook. You get a dedicated page to provide all the details of your event, as well as a range of tools to notify friends about it and keep track of who's attending.
Facebook Event is different from Facebook groups and Facebook pages.
How Facebook events work
Anyone can create an event on Facebook - and best of all, it's free. Your event can be published as an invite-only (private) or public (public) event. nine0003
Private Facebook Events
Only invited guests can see the private event page, which is ideal if you want only certain people to attend. You can include the following basic information on your private invite-only Facebook event page:
- Photo or video (from the Facebook theme library or from your own uploaded file)
- Event name
- Venue
- Description of event
- Date and time of event
- Ability to create a schedule for event
- Names of any co-organizers of the event
- Ability to allow guests to invite their friends
- Ability to allow guests to view the guest list
Facebook Public Events
If you create a public event, anyone on Facebook can see the event and find it, even if they are not friends with you. Public events are ideal when you are trying to attract a large audience to a big event - like a local concert, festival, fair, etc.
For public events, you can provide all the information listed above for private events and more. You can select a category so that people browsing public events can find it, set a repeat frequency if it's a recurring event, provide additional details such as keywords, set admission rules (such as providing a link for people to buy tickets), and control who can post in your event.
Invite people to a Facebook event
When it comes time to invite people to your event, you can invite friends from your profile friends list, group members, or page followers. A public event on Facebook can spread very quickly, potentially reaching many people in a short amount of time.
The event page has an area for RSVP so you can see how many people are planning to attend. If the event is public and someone RSVPs that they are attending, that information is displayed on that person's collection where you can see your friends. nine0003
If the event is public, the visitor's friends can decide if they would like to participate as well. No need to worry about people forgetting to visit. As the event date approaches, a reminder appears on attendee homepages.
Setting up a private event
You can set up an event from Facebook.com in a web browser or using the Facebook mobile app. Below are screenshots for Facebook.com only.
-
On the web, select the Events tab on the left side of the news feed (under Overview ) on the home page and click Create Event.
In the app, tap the menu icon in the main menu (bottom of the screen on iOS and top of the screen on Android), then tap Places & Events > Create .
-
Select Create Private Event from the dropdown/popup menu.
In the application, you may notice another option: Create group event ./cdn.vox-cdn.com/uploads/chorus_asset/file/19887934/9p6JvT3g.png) This option is for creating events related to one of your groups. You can also create them from group pages.
This option is for creating events related to one of your groups. You can also create them from group pages.
-
Option 1: On the web, select " Select Theme" from the recommended themes to make your event page more visual, broken down by events such as birthday, family, vacation, travel, etc.
In an application, tap the image icon in the upper right corner.
Option 2. Select " Upload photo or video", if you have your own photos/videos that you want to use.
-
Enter a name for your event in the field Name / Event Name .
Your event name can be up to 64 characters long.
-
Enter the physical location of your event in the field " Location” and select the appropriate address from the list of locations that Facebook discovers.
If your event is an online event or is held at an unregistered location, enter this information as is in the field.
-
Set up date/time (web) or today at 4pm (app).
-
Click the Schedule button (online only) to include an additional route for your event. nine0003
-
Enter the ant details you want to provide about the event in the Description field.
-
If applicable, start typing a friend's name in the Co-hosts field and select a suitable friend's name from the list. (You can have multiple co-owners).
In the application, press " Shared hosts" to search or select friends from the list.
-
Uncheck the box if desired Guests can invite friends, if you don't want anyone else to be invited.
In the application, press the green button next to this option to turn it off.
-
Select " Create a private event" (or " Create in app") to publish (and take you to) the event page on Facebook.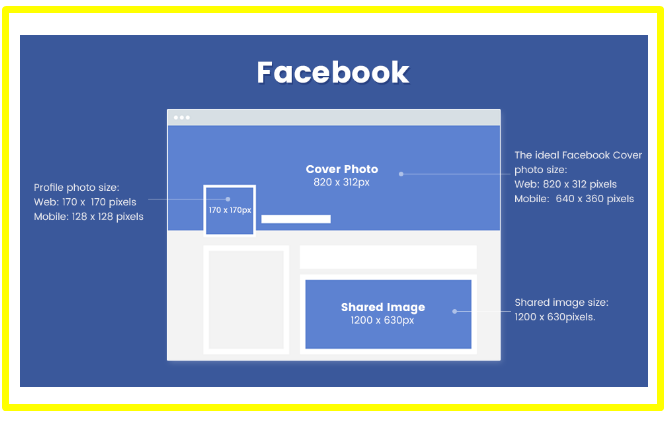
-
Select the Invite tab and search for the names of friends in the app, or select friends from the list. You can add an extra note to personalize the invitation. nine0003
Interact with your invitees and attendees to create excitement and anticipation for the event. Write a message, add a photo/video, or create a poll on your events page to help people stay up to date while they wait for the date and time of the event.
Setting up a public event
You set up a public event in the same way as a private event, but only up to a certain point.
You can basically use the first few steps above to create a public event, but choose 9 instead0047 Create public event on tab Create event . Then set up your photo, event title, location, start and end day and time, just like you would for a private event.
Next, the Public Event setup screen will display a section where you can enter additional information. You can select an event category, enter keywords, and choose whether the event offers free admission or is suitable for children.
After you have added the required information for all fields, press the button " Create" which will take you to a new Facebook page for the public event.
Facebook event limits
Facebook sets a limit of 500 invites to avoid spam messages. If you send invitations to a large number of people who do not respond, Facebook reserves the right to further limit the number of people you can invite to your event.
You can expand your reach by allowing any invitee to invite their friends and by designating a co-host who is also allowed to invite up to 500 people. nine0003
Promoting your event on Facebook
Once you've planned your event page and filled it with interesting content, you'll want to promote the event to increase traffic.
There are several ways you can do this:
- If your event is public, post it to your newsfeed or groups you belong to if allowed by the group.