How to use viber on mac
How to use Viber on Mac?
In this article, we cover how to download Viber for Mac.
Launched in 2010, Viber grew so fast that it was bought by Japanese electronics and e-commerce giant Rakuten in 2014 for $900 million. Rakuten continued to improve and strengthen the platform, with growth continuing after it was acquired.
Not long before Viber joined the Rakuten family of companies, they released web-based versions so that users could continue to message and make calls using PCs and Macs. As anyone who’s a Viber user — or a regular user of other messenger platforms such as Facebook or WhatsApp — being able to send messages on a Mac while doing other work is such a relief and time saver.
How to download Viber for Mac?
Whether you’ve got an older Mac OS X or a newer macOS, you can download and use Viber on a Mac.
To download and install Viber on your Mac, you need to have an active Viber account and app installed on your phone (iOS or Android). You’ll need to keep your phone nearby to complete the setup of Viber. Follow the steps below to install Viber on your Mac:
- Go to the official website of Viber and click Download for Mac.
- Open the .dmg file and drag the Viber icon into the Applications folder.
- Go to Applications from Finder.
- Open Viber and Follow on-screen instructions to complete the installation.
Viber will then send a text with an activation code to confirm the final stage of the setup process. Once you get that text, enter the code, and then you’re all set up on your Mac to use Viber. Enjoy the benefit of Viber on your Mac for sending messages and calls.
What happens if you want to uninstall Viber or it stops working? We’ve got you covered in those situations, too.
How to uninstall Viber on Mac?
If you are no longer using Viber — or any app — the best thing to do is to uninstall it. Sometimes, if an app isn’t working, uninstalling and installing it again can be the most effective way to fix it. There are two ways to do this.
One of the ways is to uninstall Viber is manually, going to the Applications folder and dragging Viber into the Bin. Once you’ve done that, make sure to remove any shortcut icons on your desktop or Dock, then empty the Bin. To check that you’ve removed every trace — including cache folders — it is always sensible to restart your Mac.
Another way to uninstall Viber or any other apps you don’t want is to use a Mac cleaning and performance app, such as CleanMyMac X. Here is how you use it:
- Download CleanMyMac X, install, and launch it.
- Go to Uninstaller.
- Check the apps you want to delete.
- Press Uninstall.
If you have trouble with Viber but want to continue using it, CleanMyMac X can help you reset it with the help of the Uninstaller tool. Just select the box next to the Viber icon and select Reset from the drop-down menu instead of Uninstall. The app will run smoothly after the reset.
Now, you know how to install Viber on your Mac and reset it if it doesn’t work the way it should.
How to Download and Use Viber for Mac?
With technology evolving, a number of apps have been created to fulfill the needs of the consumers. One important area of apps that have been formed is those of instant messaging and communication. They are ways to communicate and call your loved ones through the Internet. One such important app is Viber for Mac. It’s a great application that has been created for instant messaging. It also has features for audio calling and video calling. It’s a great way to connect with your friends, family members, classmates, and even co-workers.
Here, we will give a comprehensive guide to Viber for Mac. In this way, you will know how to install, uninstall, and use the said instant messaging app. You will notice that it is a very flexible application in terms of communication. Check out our guide to Viber for Mac below.
Article GuidePart 1. Can I Use Viber on My Mac?Part 2. How Do I Download Viber on My Mac?Part 3. Uninstalling Viber For MacPart 4. Conclusion
Part 1. Can I Use Viber on My Mac?
Viber for Mac is a messaging application that is made for the Mac desktop platform. Aside from that, it is also available in Android, iOS, and Windows operating systems. You can take advantage of the platform through its features including the following:
Sending Messages
You can use it to send text messages, files, videos, and photos to another individual. You can even use it to record quick voice messages and short video messages. You can send these to other individuals as well.
Connect With Others Through Video And Voice Calls
You can talk to other individuals through voice calls that are crystal clear and of high-quality. In addition, you can easily switch to video calls to be able to see the individual(s) on the other side of the line. This makes communication more fluid and clear.
Create Group Calls And Chats
Viber For Mac is a great way to make group hangouts even better. It even allows you to create a host of family meets or even yoga classes. Communication among different people is possible through group chat, group video calls, and even group voice calls.
Be Part Of Communities
Viber For Mac allows you to become part of different public groups that were created around particular interests or for particular causes. You can connect with different people from ordinary individuals, to brands, and even influencers.
Share Your GIFs And Stickers
You can communicate in a genuine manner through different GIFs and stickers. You can be very expressive and playful with your message through endless options of different stickers, GIFS, smileys, and more.
Create Your Own GIFs And Stickers
Another way to express yourself is the ability to create your own personalized stickers and even GIFs. You can use these personalized creative juices within you to communicate with your friends and your loved ones.
Edit Or Delete Messages
You can edit the messages you have typed by mistake.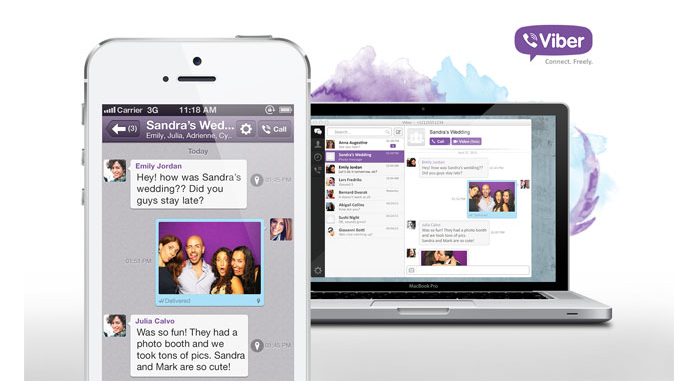 This is a good way to say what you actually meant, instead of saying the wrong thing. You can even delete entirely wrong messages that were not meant to be sent to the individual or group.
Set Up Disappearing Messages
Finally, you can create a timer for messages. In this way, they will self-destruct or instantly be deleted after a particular amount of time. This is a good way to protect your privacy or to just make a blast if you want to.
Part 2. How Do I Download Viber on My Mac?
So, how do you download Viber for Mac? Fortunately, the app works even if you got an older version of the Mac OS X. It also works if you got the newer versions of the macOS. With these platforms, you can grab, download, and use Viber for Mac.
In order to download and then install Viber for Mac, it is necessary for you to have the main account that’s active. This should be on your smartphone or tablet. It can be either on an iOS or an Android phone. To set it up, it is necessary for you to have this account (on your smartphone or tablet) on hand, near you during the entire process. Below are the steps to install Viber for Mac:
- Visit Viber’s official website. The first step is to visit the official website of Viber to get the installation file for Viber for Mac.
- Download installation file. The next step would be to click “Download For Mac” in order to grab the installation file from the official website.
- Launch the installation file. The third step would be to open the PKG file for you to start the installation process.
- Drag Viber towards the Applications folder. Then, you would have to drag the icon of Viber towards your Applications folder. This will allow you to put the app in your roster of apps for the Mac computer.
- Go to Applications. Then, you need to go to Applications by using Finder. In this way, you can find the Viber app on your computer.
- Launch Viber. In order to complete the process of installing Viber for Mac, you should launch the Viber app on your Mac computer.
- Follow Instructions. The final step would be to follow the instructions on the screen in order to complete the process of installing Viber for Mac.

After that, Viber will send an SMS with an activation code in it. This will help you confirm the culminating sections of the process of setting up Viber for Mac. When you get the text message, you should input the code. After that, your Mac will be able to use Viber. You will now have the ability to enjoy the features of this popular messaging app on your Mac.
Part 3. Uninstalling Viber For Mac
What if you want to uninstall Viber for Mac? We’ve got you covered. There are two ways to do this. One way is through the manual method of moving Viber for Mac towards the Trash. After that, you should empty the Trash. Then, you should restart your Mac computer. However, there’s a more automatic way of doing it.
This automatic method of uninstalling Viber for Mac is through the use of iMyMac PowerMyMac and its Uninstaller module. It is a great way to uninstall apps on Mac without leaving leftovers. They remove all associated files with the app. Thus, you are sure of a complete cleanup without leaving leftovers behind.
The great thing about PowerMyMac is that it has other modules as well. These modules can help to find all unnecessary files (e.g., temp files, cache files, system logs) within your Mac computer. Then, it can erase it all in one click.
Here are the steps to follow to use iMyMac PowerMyMac and its Uninstaller module to uninstall Viber for Mac:
Step 01. Download, Install and Launch The Tool
The first step is to download the tool on its official website. Grab the installation file through the download process. After that, open the PKG file on your Mac computer. Then, follow the prompts on the screen to install the software on your computer. Finally, open the software on your Mac computer to enjoy its features.
Get A Free Trial Now!
Step 02. Click The Uninstaller Module
After that, click the Uninstaller module. This can be found on the left side of the interface of the PowerMyMac tool. This will take you to the feature where you can uninstall apps on your Mac computer without leaving leftovers.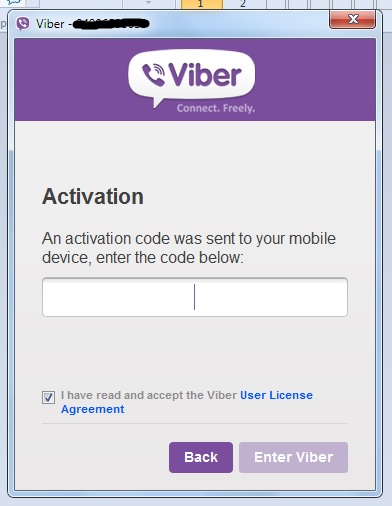
Step 03. Scan And Preview
The next step would be to scan your Mac computer for all the apps that you can remove including Viber for Mac. Wait for the scanning process to be complete which will only take a couple of seconds or minutes. After that, preview all the apps you can remove. Then, find the option that says Viber For Mac.
Step 04. Clean
The next step would be to choose Viber for Mac as the application you want to uninstall. You should start the cleanup process by pressing the Clean button. After that, wait for the process to complete. You will notice that everything, including the associated files of Viber for Mac, will be deleted. Thus, you have a complete cleanup of the app on your Mac computer.
Part 4. Conclusion
Here, we have discussed Viber for Mac. We talked about the introduction of Viber for Mac and its features. Then, we moved on to talking about how to grab the app on your Mac computer. Finally, we ended with manual and automatic ways to uninstall Viber.
The best way to uninstall it is through iMyMac PowerMyMac and its Uninstaller module. It’s a great way to make sure your computer is free of the app including its associated files. It won’t leave leftover files like that of manually removing apps from your Mac computer. Grab the tool now to optimize your Mac easily!
How to install Viber on Apple Mac
Experts are also ready to help you directly.
Find all the news on Apple Mac in our articles. Vous can pay aussi call a team of experts to help you.
You now have an Apple-branded computer called a Mac. When you start using a new computer, it's quite normal to get lost among all the great features a Mac has to offer. Therefore, in order for your computer to best meet your requirements, installing programs is a necessary step. nine0003
However, it is important to know how to install Viber without errors in order to avoid possible problems on your Mac. Therefore, in this guide, we will guide you through the basic operation: install Viber on Apple Mac . We will first explain how to install Viber via the App Store and secondly how to install Viber via the Internet.
Install Viber through the Apple Store
We'll start by demonstrating the first method of this tutorial. This method is the easiest and fastest.
This consists of install Viber through the App Store is the Apple brand's online store where you'll find a wide variety of free and paid apps.
First of all, start by going to the "App Store", which is represented by a white letter "A" drawn with brushes in a blue circle. You can find the App Store in the taskbar at the bottom of your computer screen.
Then you just need to type "Viber" in the App Store search bar.
Our other Apple Mac pages Maybe I can help you. nine0003
Once you find Viber among all the results, click on it.
Read user ratings and reviews carefully to make sure the program is reliable.
Then click Get. Viber is downloading. You just need to wait a few seconds for the app to install on your Mac. When the download is complete, you can click "Open" to go directly to Viber and start using it.
Most likely, Viber will need an update. nine0003
Don't worry, the App Store will most likely update Viber automatically.
If not, the App Store will let you know so you can update manually.
Install Viber online
Set up your Apple Mac to install Viber
We offer you the second way to install Viber on your Apple Mac: install Viber online download . Before proceeding with installing Viber, you just need to change your Mac's settings. You have to go to "Settings" of your computer. nine0003
Then go to Security & Privacy. Finally, your computer will ask you where you allow app downloads.
All you have to do is select "Anywhere" and then confirm your choice. With this little modification, your Mac will allow you to install Viber because the installation will take place outside of the App Store.
These programs will be downloaded in ".dmg" format.
Download Viber for Apple Mac
Start with the Internet. On Mac computers, the Internet is called "Safari" and marked with a compass. nine0003
It is located on the taskbar at the bottom of your computer.
Then type "Install Viber" in the Safari search bar. Once you've found Viber, check the reliability of the program by carefully reading the app's user ratings and reviews. Once you have downloaded Viber, locate the file on your computer.
Then double click as if you want to open it.
This will create a disk image.
Finally, drag this icon to your Applications folder. It is characterized by the letter "A", as for the App Store, but on a folder with a blue background. nine0003
Installing Viber on an Apple Mac
Since this is definitely one of the first times you install the program on your Mac, this part is just as important.
It is very likely that a message will appear when installing Viber via the Internet. This will simply tell you that the program is from an unknown developer. Don't worry, this is just a warning message so you can't install malware. Hence, you need to right-click on the Viber image and select "Open". A small window will open and all you need to do is click on "Open". Viber is now available on "Launchpad" with a rocket image. nine0003
It's over! Viber is ready to use.
Conclusion on installing Viber on your Apple Mac
You have mastered installing Viber on your Apple Mac . Now you know how to install any program on your computer, and as you can see, it's very easy. However, if you are not used to computers or new technologies, it is quite normal to make mistakes.
If you have any problems, feel free to contact a friend or relative who is familiar with new technologies to help you solve the problem. nine0003
Thank you for reading this article.
Need more help or other information? feel free to contact our team of experts via the contact form or read our other articles about your Apple Mac model.
Our other articles about your Apple Mac model can help you too. Also, many experts for you if needed. Finally, if nothing works feel free to take advantage of your Apple Mac's warranty.
Dictation of messages and documents on Mac
The Dictation feature allows you to dictate text instead of typing it. This feature can be enabled in the keyboard settings section. Your words will be sent to Apple's servers to process your requests. In the speech response window, you can adjust the speech volume and use the basic dictation controls.
Use Voice Control to dictate text and control your Mac with your voice without using your keyboard and trackpad. Control your Mac and apps with voice commands. When Voice Control is enabled, Dictation is not available. nine0003
On a Mac with an Apple chip, requests entered using dictation are processed on the device in many languages without an Internet connection. When dictating into a search field, text can be sent to a search provider to process the request. In addition, you can dictate text of any length without a time limit. You can turn off the dictation feature manually; the feature will turn off automatically if no voice input is made within 30 seconds.
nine0104 Dictation is not available for some languages and in some countries/regions. Features may vary.
Enable Dictation
-
To change settings, on your Mac, choose Apple menu > System Preferences, then click Keyboard in the sidebar. (You may need to scroll down.)
Open keyboard settings
-
Go to the Dictation section on the right, then turn on Dictation. If prompted, click Enable. nine0003
-
If you're asked if you want to improve Siri and Dictation, do one of the following:
-
You want to share audio recordings. Click Share Audio to allow Apple to save audio recordings of your interactions with Siri and Dictation on your Mac. Apple can listen to samples of saved audio.

-
You don't want to share audio recordings. nine0104 Click Not Now.
If you later decide to change your mind about sharing or not sharing audio, choose Apple menu > System Preferences, then click Privacy & Security in the sidebar. (You may need to scroll down.) Go to the Analytics & Improvements section on the right, then turn on or turn off Improve Siri and Dictation. See Change your privacy and security settings.
nine0104 You can delete audio recordings at any time (that are associated with a random ID and are less than six months old) - see Deleting your Siri and Dictation history.
-
-
To dictate text in another language, click the Language pop-up menu, then choose the language and dialect you want.
-
Adds a language that is not listed. Select Customize or Add Language, then select or add the required languages.
Delete language. Click the Language pop-up menu, choose Customize, then uncheck the language you don't want to use.

-
To learn more about how Apple protects your information and lets you choose what you share, click About Dictation & Privacy at the bottom of the window. See Apple's privacy site.
How to dictate text
-
In a Mac app, set the insertion point where you want the text to be dictated to appear. nine0003
-
Press the key (if it is in the function key row), use the dictation keyboard shortcut, or choose Edit > Start Dictation.
Press and release to start dictation; press and hold to activate Siri (Siri must be enabled).
-
If the Speech Response window shows a microphone icon with a bouncing volume indicator, or you hear a sound indicating that your Mac is ready to dictate, start dictating. nine0003
-
To insert a punctuation mark or add simple formatting to text, do one of the following:
-
Say the name of the punctuation mark, such as "exclamation point".

-
Say "new line" (equivalent to pressing Return once) or "new paragraph" (equivalent to pressing Return twice). A new line or new paragraph will appear when you finish dictating.
For a list of commands that can be used when dictating, see Commands for dictating text.
Dictation automatically inserts commas, periods, and question marks as you dictate. To turn this setting off, choose Apple menu > System Preferences, then click Keyboard in the sidebar. (You may need to scroll down.) Go to the Dictation section on the right, then turn off the Auto Punctuation option. nine0003
-
-
If you have set up dictation for multiple languages and want to switch from one language to another during dictation, click the language icon in the dictation voice response window, then select the desired language.
To set up Dictation for multiple languages, see Enabling Dictation.
-
When you're done, press the keyboard shortcut for dictation, the Return key, or the Done button in the voice response window.

On a Mac with an Apple chip, you can insert emoji with your voice while you are dictating. For example, say "heart emoji" or "car emoji". nine0003
Text that cannot be accurately recognized is underlined with a blue line. If the text is not recognized correctly, click it and choose another option. Or type or dictate the correct text.
Customizing the keyboard shortcut for Dictation
You can select a specific keyboard shortcut for dictation or create your own.
If there is a key in the row of function keys, you can press it to start dictation. You can also use keyboard shortcuts. nine0003
-
To change preferences, on your Mac, choose Apple menu > System Preferences, then click Keyboard in the sidebar. (You may need to scroll down.)
Open keyboard settings
-
Navigate to Dictation on the right, click the pop-up menu next to the Shortcuts section, then choose a shortcut to launch Dictation.
To create a keyboard shortcut that is not listed, select Customize and press the keys you want to use. For example, you can press Option-Z. nine0003
After you select a Dictation keyboard shortcut, the Keyboard pane under System Preferences Keyboard may automatically change between Press fn or Press to, depending on your Mac model. For example, if the keyboard shortcut for dictation is "Press the Fn (Function) key twice", the setting in the Keyboard section automatically changes to "Start dictation (press the Fn key twice)".
For more information about keyboard options, click the Help button in Keyboard preferences. nine0003
Change the microphone used for Dictation
The microphone source in Keyboard preferences shows which device your Mac is currently using to listen to Dictation.
-
To change preferences, on your Mac, choose Apple menu > System Preferences, then click Keyboard in the sidebar.


