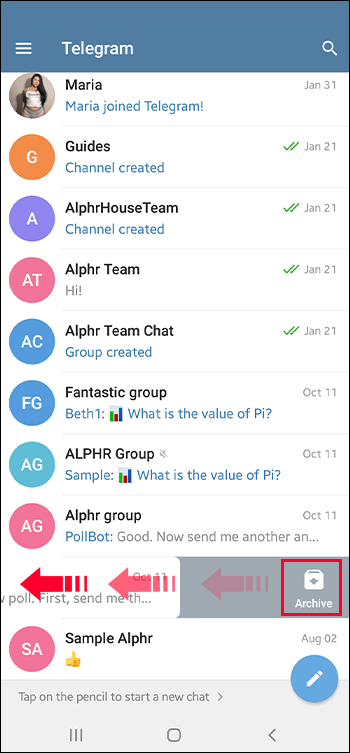
How to post on instagram through pc
Von einem PC aus auf Instagram posten: Schritt für Schritt
Die Anleitung zeigt, wie du Fotos und Videos von deinem PC aus auf Instagram posten kannst, und du findest Tipps zur optimalen Nutzung von Unternehmensprofilen auf Instagram.
Wir sind heutzutage alle sehr vertraut damit, wie man Bilder auf Instagram postet. Du lädst deine Bilder entweder aus einem Fotoalbum von deinem Smartphone hoch oder machst deine Fotos direkt in der App. Es gibt jedoch Fälle, in denen du von deinem Computer aus posten musst. Zum Beispiel, wenn du im Büro bist oder gerade dein Smartphone nicht zur Hand hast.
Instagram hat kürzlich die Möglichkeit hinzugefügt, Fotos und Videos direkt von deinem PC aus zu erstellen und zu posten. Viele Leute greifen von ihren Computern aus auf Instagram zu, insbesondere mit geschäftlichen Instagram-Accounts. Daher ist es sehr hilfreich, von deinem Computer aus Bilder posten zu können. In diesem Leitfaden findest du einen Überblick und eine Schritt-für-Schritt-Anleitung, wie du Bilder und Videos von einem PC aus auf Instagram posten kannst.
Um mehr darüber zu erfahren, wie du von einem PC aus einen Beitrag auf Instagram erstellst, lies diesen Artikel weiter.
So postest du von einem PC aus auf Instagram: Schritt-für-Schritt-Anleitung
Wenn du jemals in der Situation bist, dass du etwas auf Instagram posten möchtest, aber dein Smartphone gerade nicht dabei hast, ist es hilfreich zu wissen, wie du Bilder von einem PC aus auf Instagram posten kannst. Befolge dafür einfach die folgende Schritt-für-Schritt-Anleitung.
1. Gehe zu Instagram.com
Das Wichtigste zuerst: Um von deinem Computer aus auf Instagram posten zu können, musst du zunächst Instagram.com aufrufen und dich bei deinem Account anmelden.
2. Klicke auf das Plus-Symbol
Sobald du dich auf deinem Computer bei deinem Instagram-Account angemeldet hast und bereit bist zu posten, klicke auf das Plus-Symbol in der oberen rechten Ecke. Das Plus-Symbol findest du zwischen den Meldungen und den Kompasssymbolen.
3. Klicke auf “vom Computer auswählen”
Nachdem du auf das Plus-Symbol geklickt hast, öffnet sich ein neuer Bildschirm. Nun klickst du auf die Schaltfläche “Von Computer auswählen”, wo du dann Fotos vom Desktop deines Computers, Dokumente oder Downloads auswählen können.
4. Bearbeite dein Foto
Sobald du ein Foto von deinem Computer ausgewählt hast, das du posten möchtest, kannst du das Foto bearbeiten. Du kannst verschiedene Filter hinzufügen und dein Bild zuschneiden. Du kannst es aber auch unbearbeitet lassen.
5. Füge Text und Tags hinzu
Nachdem du das Foto bearbeitet hast, kannst du eine Bildunterschrift oder einen Standort für das Foto hinzufügen und/oder Personen im Beitrag markieren.
6. Aktualisiere die Einstellungen nach Bedarf
Du kannst die Einstellungen für deinen Beitrag nach Bedarf aktualisieren. Du kannst beispielsweise entscheiden, wo es geteilt wird, Kommentarfunktionen anpassen und vieles mehr. Ebenso kannst du die Beschriftung oder den Ort ändern und weitere Tags hinzufügen.
7. Klicke auf Freigeben
Sobald das Foto erfolgreich hochgeladen und bearbeitet wurde und du mit den Ergebnissen zufrieden bist, kannst du den Beitrag für alle deine Follower freigeben.
Wenn du fertig bist, kannst du mit deinem Smartphone jederzeit überprüfen, wie deine über den PC geposteten Bilder auf Mobilgeräten aussehen.
So postest du von einem PC aus Videos auf Instagram
Nachdem du nun weißt, wie du von einem PC aus Bilder auf Instagram posten kannst, sehen wir uns an, wie von einem PC aus Videos auf Instagram postest. Das Posten von Videos auf Instagram von einem Computer aus ist dem Posten von Bildern ziemlich ähnlich. Aber hier ist die genaue Schritt-für-Schritt-Anleitungen, die du dafür befolgen solltest:
1. Gehe zu Instagram.com
Um Videos von deinem PC auf Instagram zu posten, musst du auf deinem Computer zunächst die Instagram-Website aufrufen und dich bei deinem Kunden-Account anmelden.
2. Klicke auf das Plus-Symbol
Sobald du dich auf deinem Computer bei deinem Instagram-Account angemeldet hast und bereit bist, dein Video zu posten, klicke auf das Plus-Symbol in der oberen rechten Ecke. Das Plus-Symbol befindet sich zwischen den Meldungen und den Kompasssymbolen.
3. Klicke auf “vom Computer auswählen”
Nachdem du auf das Plus-Symbol geklickt hast, sollte eine neue Seite mit der Schaltfläche “Vom Computer auswählen” angezeigt werden. Klicke auf diese Schaltfläche und du kannst auf die Videos auf deinem Computer zugreifen und eines davon zum Posten auswählen.
4. Bereite das Video vor
Sobald du ein Video zum Posten auf Instagram ausgewählt hast, kannst du das Video vorbereiten. Du kannst das Video kürzen, einen Filter hinzufügen oder andere Bearbeitungen vornehmen, wenn du dies für erforderlich hältst.
Um dein Video ansprechender zu gestalten, kannst du aus der auf Instagram verfügbaren Auswahl Musik über Spotify hinzufügen. Du kannst auch ein Titelbild auswählen. Dies kann dazu beitragen, die Ästhetik deines Feeds zu erhalten, und ermöglicht es dir, einen informativen Titel oder eine Zusammenfassung hinzuzufügen. So werden deine Videos von zukünftigen Besuchern deines Profils mit größerer Wahrscheinlichkeit mehr Klicks erhalten.
5. Füge Text und Tags hinzu
Nachdem du das Video nach deinen Wünschen vorbereitet und bearbeitet hast, kannst du eine Bildunterschrift und einen Standort hinzufügen und Personen im Beitrag markieren. Wenn du möchtest, kannst du die Kommentarfunktion auch deaktivieren.
6. Aktualisiere die Einstellungen nach Bedarf
Du kannst alle anderen Einstellungen nach Bedarf aktualisieren und Änderungen am Beitrag vornehmen. Du kannst die Beschriftung oder den Ort ändern und weitere Tags hinzufügen.
7. Klicke auf Teilen
Sobald du das Video vorbereitet und bearbeitet hast, musst du nur noch auf Teilen klicken und fertig! Das ist alles, was du dafür benötigst, um von deinem Computer erfolgreich ein Video auf Instagram zu posten.
So postest du von einem PC aus auf Instagram: Verwende die Erweiterung
Eine andere Möglichkeit, von einem Computer aus auf Instagram zu posten, ist die Verwendung der entsprechenden Chrome-Erweiterung. Hier erfährst du, wie das geht:
1.
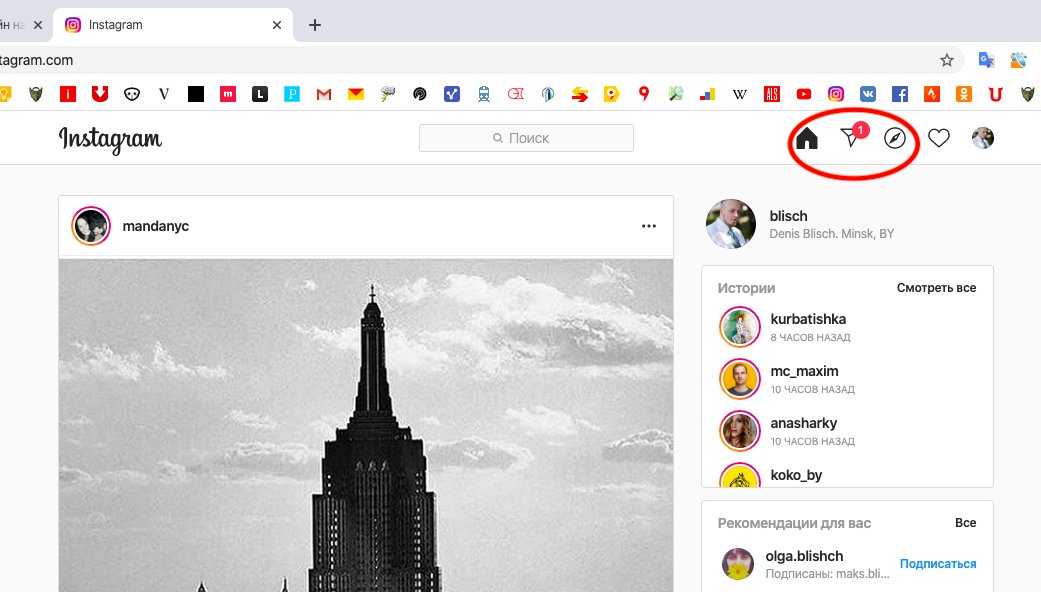 Lade die entsprechende Chrome-Erweiterung herunter
Zunächst musst du die Chrome-Erweiterung für Instagram auf deinen Laptop oder PC herunterladen. Öffne den Chrome Web Store, suche nach der “Erweiterung für Instagram” und klicke dann auf “Zu Chrome hinzufügen”. Mit dieser Erweiterung kannst du Fotos hochladen sowie Fotos und Videos herunterladen.
2. Klicke auf die Erweiterung und melde dich an
Sobald die Chrome-Erweiterung für Instagram auf deinen Computer heruntergeladen wurde, klicke auf die Erweiterung in der Leiste oben in deinem Browser und melde dich bei deinem Instagram-Account an.
3. Klicke auf das Plus-Symbol
Nachdem du dich bei deinem Instagram-Account angemeldet hast, klicke auf das Plus-Symbol in der oberen rechten Ecke der Seite. Das Plus-Symbol befindet sich zwischen den Meldungen und den Kompasssymbolen. Du kannst dann das Bild auswählen, das du von deinem Computer hochladen möchtest.
4. Bearbeite dein Foto
Sobald du ein Foto von deinem Computer ausgewählt hast, das du posten möchtest, kannst du das Foto bearbeiten. Du kannst dem Beitrag auch eine Bildunterschrift und einen Standort hinzufügen und Personen markieren. In den erweiterten Einstellungen kannst du die Kommentarfunktion auch deaktivieren.
5. Teilen
Nachdem du dein Foto bearbeitet und eine Bildunterschrift erstellt hast, kannst du deinen Beitrag in deinem Instagram-Feed teilen.
Andere Möglichkeiten, von einem PC aus auf Instagram zu posten
Du kannst Instagram-Fotos und -Videos von einem PC aus posten, aber du kannst keine Instagram-Storys, Instagram-Anzeigen, IGTV-Posts oder Reels von einem Computer aus teilen. Du kannst auch kein Live-Video von einem PC aus starten. In der Desktop-Version von Instagram bist du daher auf das Posten von Fotos und Videos beschränkt. Damit kannst du jedoch viele der Instagram-Aufgaben deines Unternehmens problemlos von deinem Schreibtisch aus erledigen.
Keiner weiß aktuell, wie wir von einem PC aus eine Instagram-Story posten können, aber man weiß nie, was die Zukunft bringt.
Neben dem Posten auf Instagram über einen Webbrowser oder die Verwendung der Chrome-Erweiterung gibt es noch einige andere Möglichkeiten, wie du von einem PC auf Instagram posten kannst, wie z. B. die Verwendung einer Planungssoftware. Du kannst eine Planungssoftware wie Mailchimp verwenden, um deine Instagram-Posts im Voraus zu planen. Eine Planungssoftware kann sehr hilfreich sein, wenn es darum geht, deine Inhalte für die sozialen Netzwerke zu verwalten und sicherzustellen, dass deine Beiträge immer zur richtigen Zeit hochgeladen werden.
Wenn du ein Unternehmen besitzt, ist es wichtig, in den sozialen Medien präsent zu sein. Aber nur in den sozialen Medien präsent zu sein reicht nicht aus. Du musst darüber hinaus auch regelmäßig auf den von dir ausgewählten Socia-Media-Plattformen posten und mit deinen Followern interagieren.
Wir verstehen, dass dies für Geschäftsinhaber mit begrenzter Zeit und begrenzten Ressourcen eine Herausforderung sein kann. Hier kann die Verwendung einer Terminplanungssoftware von großem Vorteil sein. Eine Planungssoftware kann dir bei allem helfen – von der Erstellung organischer Social-Media-Beiträge bis hin zu zielgerichteten Anzeigen, sodass du alle deine Kanäle in den sozialen Medien an einem Ort verwalten kannst.
Egal, ob du ein etabliertes Unternehmen oder ein Startup hast: es ist immer sehr hilfreich zu wissen, wie man von einem PC aus auf Instagram postet. Das Posten auf Instagram von einem Computer aus ist einfach, sobald die dafür notwendigen Schritte kennst und dich mit den Unterschieden zwischen PC und Mobilgeräten vertraut gemacht hast.
Wenn du dich von all den Verwaltungsaufgaben für deine Social-Media-Beiträge überfordert fühlst, ziehe die Verwendung von Mailchimp in Betracht. Du kannst Mailchimp für dein Social-Media-Marketing nutzen sowie als Planungstool für das automatische Hochladen von Social-Media-Beiträgen zu bestimmten Zeiten.
Außerdem kannst du mit der Planungssoftware von Mailchimp einen Einblick in deine Daten gewinnen, sodass du herausfinden kannst, was auf jedem deiner Kanäle funktioniert und was nicht. Du hast Zugriff auf eine Vielzahl hilfreicher Tools, mit denen du Social-Media-Kampagnen erstellen, Anzeigen entwerfen und Inhalte für alle deine sozialen Plattformen erstellen kannst. Fang noch heute damit an und überzeuge dich selbst, welchen Unterschied die Verwendung von Mailchimp machen kann.
How to Post on Instagram from a PC or Mac (3 Methods)
Tired of posting on Instagram from your phone? Wondering how to post on Instagram from your PC or Mac instead?
You’ve come to the right place. Posting on Instagram from your desktop can save you time and offer more flexibility in what you can upload (such as edited videos and images).
And you can do it without having to upload them onto your phone first.
Below we’ve outlined three different ways to post on Instagram from your computer.
How to post on Instagram from your computer
Method 1: How to post on Instagram from your computer using Hootsuite
Method 2: How to post on Instagram from a PC or Mac
Method 3: How to post on Instagram from your computer using Creator Studio
How to post an Instagram Story from desktop
How to post an Instagram carousel post from desktop
How to edit an Instagram post from desktop
Bonus: Download a free checklist that reveals the exact steps a fitness influencer used to grow from 0 to 600,000+ followers on Instagram with no budget and no expensive gear.![]()
Below, you’ll find ways to post on Instagram from your PC or Mac. We’ll also show you how to post via Hootsuite which works on either operating system.
If you’re more of a visual learner, watch this video from our pals at Hootsuite Labs to see how easy it can be:
Method 1: How to post on Instagram from your computer using Hootsuite
You can schedule feed posts, Stories, carousel posts, and Instagram ads with Hootsuite.
The instructions below will walk you through the process of posting to your Instagram feed. We cover Instagram Stories and carousels a little further down in this article.
To post on Instagram from a PC or Mac using Hootsuite, follow these steps:
- Log into your Hootsuite dashboard. If you don’t have an account yet, create one here for free.
- From your dashboard, click on the green New Post button at the top.
- The New Post window will appear. Under Post to, select the Instagram account where you want to post your content. If you haven’t added an account yet, you can do that by clicking +Add a social network in the box and following the directions.
- Drop the image or video you want to post to Instagram in the Media section. Enhance your image and/or video with the photo editor.
- Once you’re done, add your caption in the Text section as well as any hashtags you want to use. You also have the option to add a location at the bottom.
- When you’ve crafted your post, review it for any errors. Once you’re sure everything is good to post, click the Post Now button at the bottom.
 Alternatively, you can also Schedule for later if you want it to post at a different time.
For a quick summary of how to post on Instagram from Hootsuite, watch this video:
Voila! Posting photos and videos to Instagram from PC or Mac is that easy.
Method 2: How to post on Instagram from a PC or MacAs of October 2021, all Instagram users can create and publish feed posts from the browser version of the app.
To post on Instagram from your desktop computer (PC or Mac), follow these simple steps:
- Go to the Instagram website (instagram.com) and sign in to your account.
- Click the plus symbol in the top right corner of the screen (it’s the same button you would use to create a post in the mobile app).
 A Create new post window will pop up.
 - Drag photo or video files into the popup window, or click Select from computer to browse and pick files from your PC or Mac. If you want to create a carousel post, you can select up to 10 files.
- Click the frame icon in the bottom left corner of the popup to change the ratio of your image or video. You can also use the zoom feature (looking glass icon in the bottom left) and drag your file to edit your frame. When you’re done, click Next in the top right corner.
- Edit your image. You can select one of 12 preset effects in the Filters tab or go to the Adjustments tab and manually adjust specs such as brightness, contrast and fade. Click Next.
- Write your caption. Click on the smiley face icon to browse and pick emojis. You can also type in a location in the Add location bar, restrict commenting in Advanced settings and add alt text to your files in the Accessibility section.
- Click Share.
And that’s it!
At the moment, only feed posts can be created and published directly from Instagram on desktop. Keep reading to find out how to post Instagram Stories from a PC or Mac computer.
Method 3: How to post on Instagram from your computer using Creator Studio
If Instagram is your social network of choice and you don’t mind not having all your social networks in one dashboard, Creator Studio could be a good option for you.
Note that when using Creator Studio, you can post and schedule all types of posts other than Instagram Stories.
How to post on Instagram using Creator Studio:
- Make sure you are connected to Instagram in Creator Studio.
- Navigate to the Instagram section.
- Click Create Post.
- Click Instagram Feed.
- Choose the account you want to post to (if you have more than one Instagram account connected).
- Add a caption and a location (optional).

- Click Add Content to add photos or videos.
- Next, choose between these 2 options:
- Click From File Upload to upload new content.
- Click From Facebook Page to post content that you’ve already shared on your Facebook.
- (Optional) If you want to simultaneously post this content to the Facebook Page connected to your Instagram account, check the box next to your Page under Post to Facebook. You can add additional details to your Facebook post after you publish to Instagram.
- Click Publish.
You can post an Instagram Story from your computer using a third-party social media management tool like Hootsuite. Just follow the steps outlined in this short video:
Or, read our step-by-step article on how to post an Instagram Story from your computer.
If you don’t have Hootsuite, you can post an Instagram Story from your PC or Mac through the following steps:
- Go to Instagram.com.
- Go to developer mode on either Safari or Google Chrome (see Mac and PC sections above for detailed steps).
- Click on the camera in the top left.
- Choose an image or video you’d like to add to your story. Edit it with text, stickers, filters, gifs, or whatever else.
- Tap Add to your story at the bottom.
You’re done! It’s practically the same steps as if you were using the Instagram app on a mobile device.
#1 Social Media Tool
Create. Schedule. Publish. Engage. Measure. Win.
Start free 30-day trial
How to post an Instagram carousel post from desktop
With Hootsuite, you can also create and easily publish carousel posts (with up to 10 images or videos) directly to Instagram. Here’s how.
1. Go to Planner and tap New post to launch Compose.
2. Select the Instagram account you want to publish to.
3. Include your caption in the Text box.
4. Go to Media and tap Select files to upload. Select all the images you want to include in your carousel. All selected images should appear under Media.
5. Use the yellow Schedule button to select a date and time to publish your post.
6. Tap Schedule. The post will show up in your Planner at the time you have scheduled it for.
That’s it! Your post will go live on the date and time you selected.
How to edit an Instagram post from desktopHootsuite Compose allows you to edit any image directly on your dashboard before you post it. Unfortunately, you won’t be able to edit the image once it’s posted.
Follow these steps to edit:
- Log into your Hootsuite dashboard. If you don’t have an account yet, get your free 30-day trial here (no pressure to pay, you can cancel anytime).
- From your dashboard, click on the green New Post button at the top.
- The New Post window will appear. Under Post to, select the Instagram account where you want to post your content. If you haven’t added an account yet, you can do that by clicking +Add a social network in the box and following the directions.
- Drop the images and/or videos you want to post to Instagram in the Media section
- To edit, click on Edit Image below the Media section.
 This brings up Hootsuite Composer’s edit tool. It allows you to customize the aspect ratio of your image to fit practically any social media platform’s image metrics. From the sidebar, you also have the ability to add filters, adjust lighting and focus, add text and stickers, and use the brush too.
 - Once you’re finished click Save.
- Add your caption, hashtags, and location. Then click Post Now.
Voila! You just edited your image from your desktop.
Post to Instagram from your PC or Mac using Hootsuite. Save time, grow your audience, and measure your performance alongside all your other social channels. Try it free today.
Get Started
Easily publish and schedule Instagram posts from your computer with Hootsuite. Save time and get results.
Try it for Free
How to add a photo or video to Instagram* from a computer
June 12, 2020 Likbez Technologies
Social network desktop site does not allow posting. But there are workarounds.
1. How to add a photo or video to Instagram* from a computer using a desktop browser
You can open the mobile version of the Instagram* website on your computer and create stories and posts there, just like in the official app. How to do this - we show on the example of Chrome, but in most other browsers the steps will be similar. nine0003
Go to the Instagram* website and log in to your account.
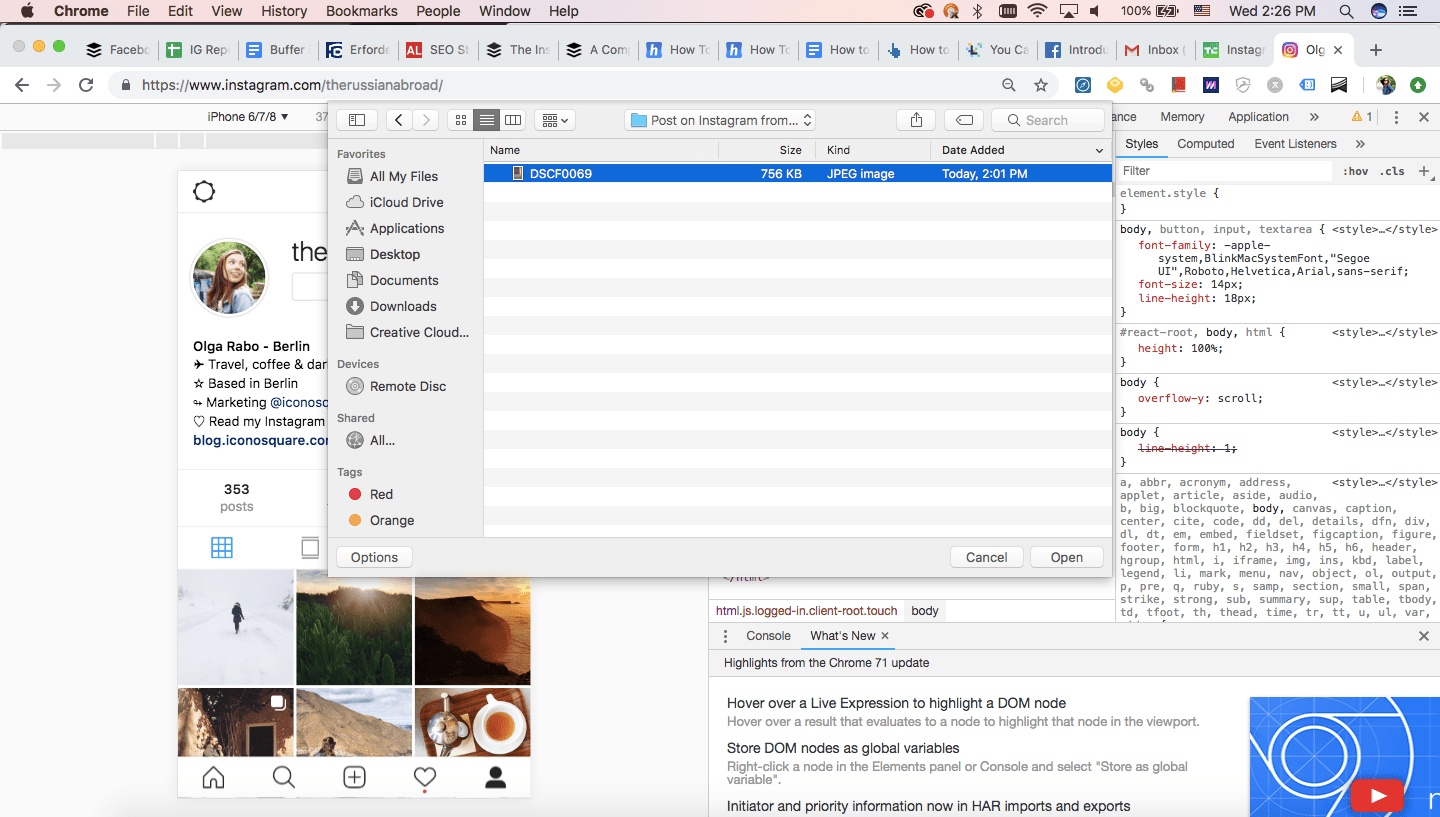
Open developer tools. To do this, press Shift + Ctrl + I or right-click on the page and select View Code (or a line with a similar name).
On the toolbar that opens, find the icon with a schematic representation of multiple monitors or mobile devices and click on it. If you can't find it, press Shift + Ctrl + M. One way or another, the browser should launch the site in mobile mode. nine0003
Customize the size of the Instagram* interface that is convenient for you using the buttons above the site window.
Refresh the page. After that, a publish button will appear and you can use the social network on a PC in the same way as on a smartphone.
2. How to upload a photo or video to Instagram* from a computer using Facebook* Creator Studio
Last year, Facebook* launched a dedicated Creator Studio section. It allows you to publish and even schedule posts on Instagram*. You can't create stories yet. nine0003
To work with Creator Studio, you need to switch your Instagram* account to a professional one (creator profile or business account). To do this, go to the settings of the Instagram* mobile app, select "Account" → "Switch to a professional account" and follow the prompts. The procedure will take you a couple of minutes. If you don’t like something, you can return to the usual account type at any time.
In addition, you must link your profile to a Facebook page*. To do this, click the Edit (iOS) or Edit Profile (Android) button on your account page in the Instagram* app. Select "Page" and connect your new Facebook* page using system prompts. nine0003
Now open Creator Studio on your computer browser, select the Instagram* icon at the top and log in with your account.
To make a post, on the left panel, click the Create a post button and select Instagram* Feed. Add a photo or video using the Add Content button.
Click the arrow next to Publish and select the appropriate option: Publish Now (publish now) or Plan (schedule). In the second case, you can specify the time at which the service will publish the post automatically. nine0003
3. How to add a photo or video to Instagram* from a computer using the Android emulator for PC
Emulators are special programs that allow you to run any Android application directly on your computer. By launching the official Instagram* mobile client this way, you can easily publish Stories and posts. You don't need an Android device for this.
Install any free emulator from Lifehacker's selection for Windows, Linux and macOS. In the screenshot example, you can see a window with the NoxPlayer interface. nine0003
Launch the emulator and enter the Google Play app store through it by clicking on the corresponding icon. Connect your old or create a new Google account to be able to download Android apps.
Download Instagram* from Google Play directly in the emulator and log into your profile. After that, you can publish videos and pictures from your computer as if you were using the social network on your smartphone.
See also
- 20 must-have apps for Instagram users*
- How to view a private Instagram profile*
- How to restore or access your VKontakte page
- 17 Instagram tricks* you might not know about
- You can now create your own digital avatar on Facebook*. Here's how to do it
*Meta Platforms Inc. activity. and its social networks Facebook and Instagram are prohibited in the territory of the Russian Federation.
How to add a photo to Instagram from a computer
Update: 02/12/2021
To work effectively on Instagram, it is not enough to have an application on your phone. Many people need to upload photos from a computer, and often publish at a time when it is not convenient.
Anyone who has ever tried to upload photos to Instagram from a web page through a browser knows that it cannot be done just like that. There are the following ways to solve the problem. Using:
- browser tools;
- Creator Studio via Facebook; nine0063 browser extensions for Android and iOS on PC;
- delayed posting service SMMplanner.
Let's consider each of them in detail.
Using available browser tools
If you are faced with a one-time task to upload photos to Instagram from a computer, this method is for you. To start uploading a photo:
- Log in to Instagram through a browser on your computer.
- Press F12 (or Shift+Ctrl+I, or right-click anywhere on the page, then "Inspect Element") to open the developer window. nine0064
- In the window that appears, click the phone icon.
Please note that the developer window, depending on the browser, can be located both on the side of the page and on the bottom.
- Refresh the page.
- Use.
Using Creator Studio via Facebook
This way of posting through the official Facebook service is suitable for those who want to post often and a lot. After authorization in Creator Studio through the browser, you will be able to add and delete photos, set up delayed posting and page statistics. nine0003 Mandatory action - linking the Instagram account to the Facebook page after creating the Page
Following the instructions, enter the Login and Password for the desired Instagram account, and confirm the link to Facebook from your smartphone.
Features of the service:
- authorization is carried out through Facebook, Instagram and Facebook accounts are linked to each other;
- works only with business and Author accounts;
- Stories publishing is not yet available; nine0064
- there are additional restrictions due to Instagram permissions.

Via User-Agent Switcher browser extension
Compatible with Opera and Chrome browsers. Using the emulator, you can open Instagram as if it were open on a smartphone.
Click the extensions icon in the upper right corner of the browser, then "Add extensions" In the search bar, enter the name User-Agent Switcher Find the blue planet extension icon, click on it and installWhen the installation process is completed, click on the extensions icon in the upper right corner of the browser and enable the installed extension by clicking on the button. The extension icon will appear next to the address bar, among other extensions.
Now go to your Instagram page.
By clicking on the User-Agent Switcher, in the window that appears, click the Android icon and the "Refresh" button in the same window A button for adding a new photo has appeared at the bottom of the page. Click on it and upload a picture from your computer The disadvantage of this method is the impossibility of framing well and applying some other settings.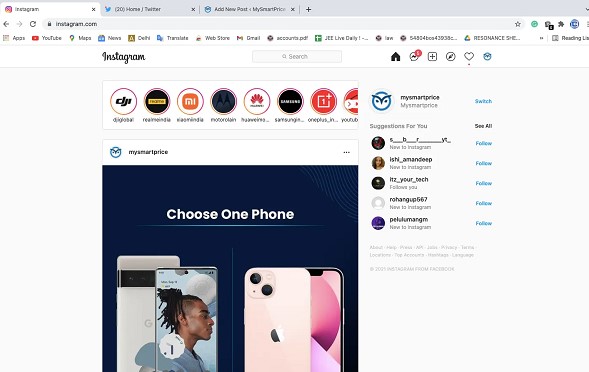 Also, users complain that when placing text, the preview of the description of the publication does not allow you to see it in its entirety.
With the help of the delayed posting service SMMplanner
The delayed posting service is designed to facilitate the management of Instagram accounts. You plan today, and see the result tomorrow (and even a year later). The way of laying out images through the service is suitable for both those working in this field and amateurs. nine0003
SMMplanner allows you to add and remove photos and videos for a minimum amount, publish them to the Feed, Stories and IGTV. You can apply all sorts of filters, settings to the content, edit the general appearance of the page and, of course, make many posts at once and set the time of their publication.
The service provides not only the settings of the posts themselves, but also extensive filters for editing photos. On the Internet, there are four working ways to send your image to the Instagram social network from a computer.