HomePlatformsFacebook
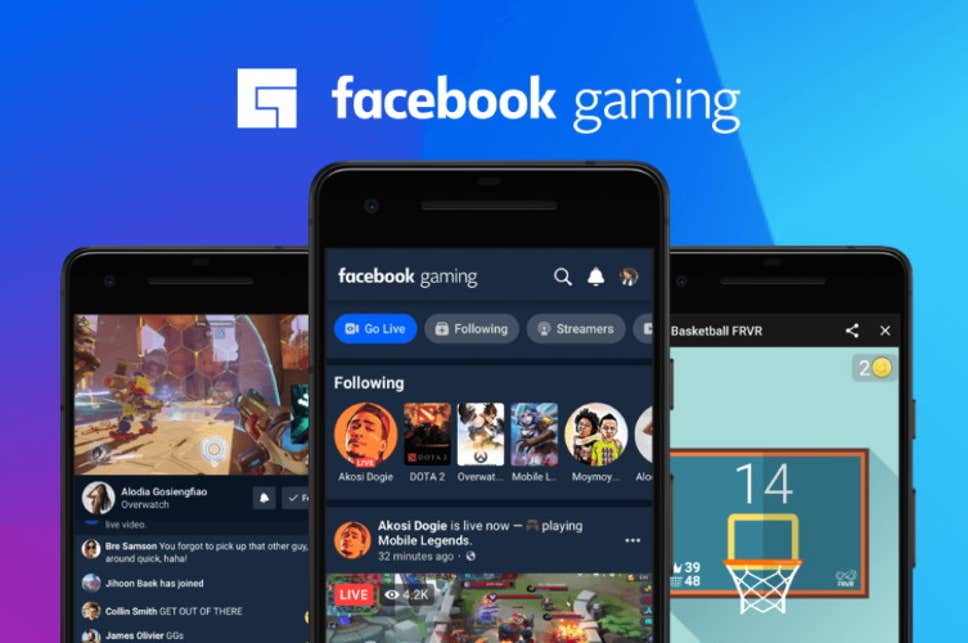
Streaming Games on Facebook Just Got Easier
3 min read
Jan 17, 2019
Full Facebook Gaming Integration Within Streamlabs Desktop Is Live
Ethan May
Read more by Ethan May
Last Updated on January 28, 2022
Today we are proud to announce that Facebook Gaming is now integrated with Streamlabs Desktop with full API support. Now users with Streamlabs Desktop can stream their favorite games through Facebook with a suite of different supported features faster than ever.
If you’ve streamed video games using other broadcasting software you probably realize that it can be a pretty intimidating and technical experience, especially for new streamers. Our goal for this integration is to make the streaming experience on Streamlabs Desktop as smooth and seamless as possible. We want to enable content creators to turn their passion into a business, and a Facebook Gaming integration with full API support is a crucial step in helping creators earn a living from live streaming.
“In 2018, we saw a 91% increase in content creators using Streamlabs Desktop on Facebook,” said Ali Moiz, CEO of Streamlabs. “ We hope that this full Facebook Gaming integration will open the doors for thousands more to enter the market and make money doing what they love.”
“We’re always looking for new ways to make live streaming easier and more rewarding for our growing community of gaming creators,” said Nick Miller, Product Manager at Facebook Gaming. “The new Streamlabs Desktop integration makes it faster than ever for Facebook Gaming creators to stream. We’ll continue to work with partners like Streamlabs so gaming creators can focus on what’s most important — making awesome content, connecting with their fans and earning money from their work. ”
”
So, how does this integration make it easier for you to stream games?
Here is a look at the old process if you’d like to stream games on Facebook:
And here is the process now that Facebook Gaming is fully integrated within Streamlabs Desktop:
And here is a gif showing just how fast it is to start streaming today:
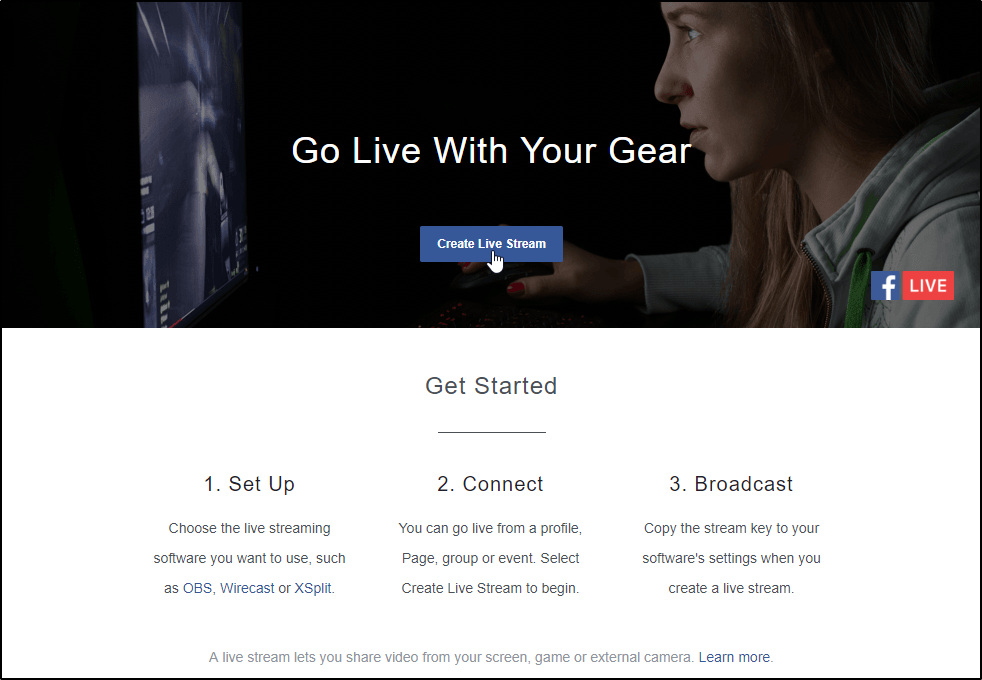
Go live on Facebook GamingFacebook Gaming has provided their developer API’s so we can make streaming games to your favorite social media platform more convenient than ever before.
Right now the Facebook Gaming Integration within Streamlabs Desktop includes:
Coming Soon:
Currently, only Facebook Pages, not personal profiles, are supported for live streaming using Streamlabs Desktop. An automatic notification within Streamlabs Desktop will tell users to set up a page for streaming if they don’t already have one. Alternatively, you can click here to create a Gaming Video Creator Page now.
To start streaming games on Facebook visit Streamlabs.com and download Streamlabs Desktop today. Happy streaming!
Share!
Was this article helpful?
Get Streamlabs Desktop — go live in minutes!
Free Windows 240MB
Free macOS 10.14+ 309MB
Turn your passion into a profession!
Open Streamlabs University
2 min read
How to Add and Customize Alerts For Facebook Gaming in Streamlabs Desktop
Alerts are the lifeblood of any live stream. Born out of a desire to share the events on stream with your fans, alerts give you the…
November 05, 2019
Ethan May
2 min read
How to Stream VR Games With Streamlabs
New Open VR integration With Streamlabs Desktop
August 26, 2020
Ethan May
7 min read
Streamer Spotlight with former American Idol contestant, Janell Wheeler
From singing on stage to streaming on Twitch, former American Idol contestant, Janell Wheeler, channeled her love for entertainment into…
October 14, 2019
Ethan May
Back to Blog
Chris SlightApril 05, 20222 mins read
Facebook has become one of the bigger destinations for streaming games. It’s no surprise that the big Meta company would be able to find a foothold with such a large userbase. The company hasn’t relied on this alone, however, they’ve been putting in the time to make Facebook Gaming an attractive site for streamers. So let’s take a look at how to stream games on Facebook!
So the very first thing you’ll want to do is make a profile page on Facebook Gaming. This is pretty simple to do but it’s an important step as this will be the place your live stream is going to go through too!
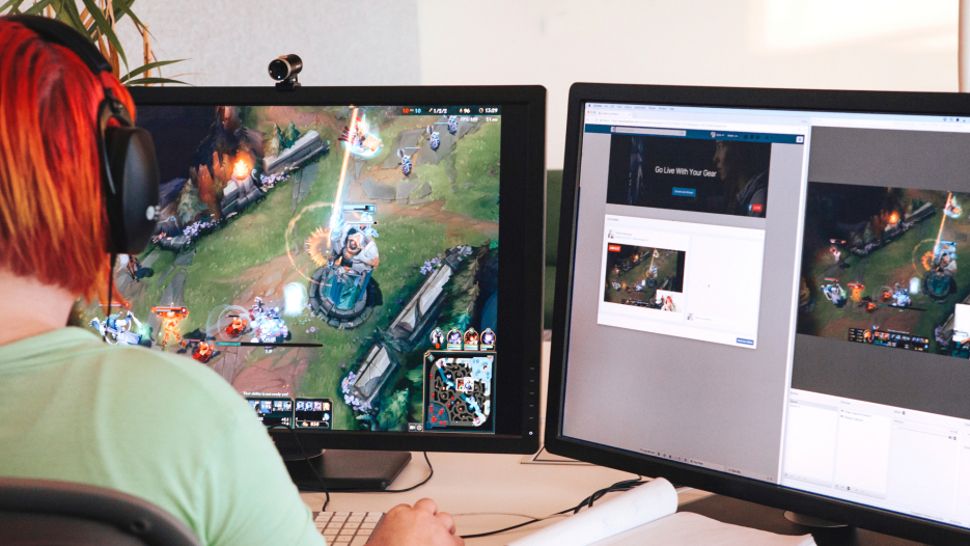
Next up you’ll want to download some software to stream with. XSplit Broadcaster will not only allow you to easily stream to Facebook but will make your stream run smoother and look better!
Once you’ve downloaded XSplit Broadcaster you’ll be prompted to make an account and sign in. From there, you’re ready to create your scenes by adding sources to them. XSplit Broadcaster comes with a number of templates to make this process easier for you! The source you add can be anything from your webcam, graphics, alerts, and gameplay from a capture card or direct from your PC.
Next up you’ll want to set up your Facebook output. This is a straightforward process, head to the Broadcast menu and select Facebook Live! From here, you will be prompted to log in and now you’ll be asked where you want to stream. There will be some options, the first is Timeline. This will stream your video directly to your personal timeline. In this instance, we’re looking to go to Facebook Gaming and the page you just created so you’ll want to select the public page.
You’ll also see some encoding settings which should be automatically selected for you based on the best settings for your computer but you can change these later if you need to. It’s worth keeping in mind that unless you’re part of the Facebook Level Up program you’ll only be able to stream as high as 720p and 30FPS.
From here, you’re basically ready to go live once you click Continue! Select the output you just made again from the Broadcast menu to go live. Next, you will be asked to input your stream details. From here you can either select a pre-made post you’ve already created on Facebook or create a new one directly in Broadcaster.
You can also use a similar method to stream to scheduled streams that you may have set up for your page, which you can find more information about here!
Photo by Pete Pedroza on UnsplashSo now you know how to stream games to Facebook, how about we look at leveling up your content a little? With XSplit Broadcaster it’s easy with some of our downloadable widgets! Want your comments to appear live on screen? Some new alerts? Want to see the reactions from viewers come up live on the screen? We’ve got you covered!
All you have to do is head to the Plugin Store which is available by going to the Extensions menu, selecting Add Extention, and selecting Find More Extensions. From here just search Facebook and you’ll find all of the things mentioned above and more!
Once they are installed you can find them in the Sources menu under Facebook widgets. You can find out more about our Facebook widgets here!
Chris SlightChris is the Communications & Content Editor here at XSplit. You may find him voicing tutorials, on stage at events around the world, or right here on xsplit.com. Find him at chrisslight.netMore from this Author
GeForce Experience makes it easy to stream online gameplay from your PC to your chosen service. GeForce Experience supports live streaming to Facebook Live, YouTube Live, and Twitch. While each of these services is unique and has its own account creation rules, user interface, and audience, GeForce Experience combines access to them in one easy-to-use interface, without wasting time setting up and remembering multiple passwords.
Prerequisites
In addition to the requirement to have a GFE account, this guide assumes that you already have a Facebook, Twitch or YouTube account. If you do not yet have an account with the service you would like to use, please register at http://www.facebook.com, http:/www.twitch.tv or http://www.youtube.com. Creating a GFE account is a one-time process that must be completed after installing GFE for the first time by following the on-screen instructions.
Initial setup
To set up streaming with GeForce Experience:
PLEASE NOTE : If the Share overlay does not appear on the screen, it may be disabled. You can enable it by going into GeForce Experience at Settings > SHARE > SHARE and toggle the toggle switch. The green light will turn on, indicating that the Share overlay is enabled.
PLEASE NOTE : You can change the keyboard shortcuts for the Share overlay. To do this, go to Settings > Keyboard Shortcuts if you don't want to use Alt+Z.
Connecting to streaming services
GeForce Experience supports streaming to Facebook Live, Twitch, and YouTube Live. In this section, you'll learn how to set up broadcasting for these services.
To connect to the service:
Broadcast settings
Depending on your network bandwidth, you can lower or increase certain broadcast settings, such as resolution, frame rate, or bit rate. To change broadcast settings:
PLEASE NOTE : You can set the broadcast quality separately for each service.
Webcam and microphone setup
If you have a webcam and microphone, or a webcam with a built-in microphone, connected to your PC, you can use them while you broadcast using GeForce Experience.
To set the microphone:
 , Off and Settings . Open Settings to choose. Which microphone to use, adjust the microphone volume and volume gain.
 To set the webcam:
PLEASE NOTE : You can turn the microphone and webcam on or off at any time during the broadcast by simply pressing Alt+Z (this will open the Share overlay) and clicking on the microphone or camera icon.
Start broadcasting
For this example, we'll be streaming gameplay to Facebook Live, although the steps to do so are similar to broadcasting to Twitch or YouTube Live.
Before you start broadcasting, make sure you have connected and configured all the necessary devices. See sections Initial setup and Connecting to broadcast services .
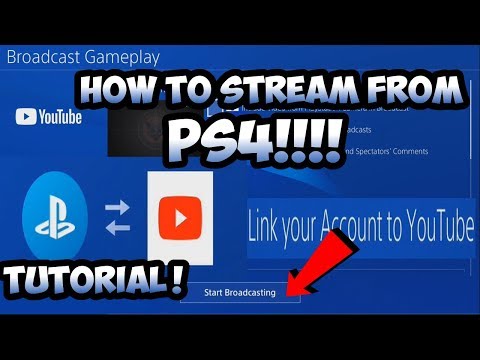
To start broadcasting on Facebook Live:
Your game is now streaming on Facebook! Please note that during the broadcast, the broadcast icon is green and the status has changed:
PLEASE NOTE: If you want to set up the broadcast or make changes to the general settings, you must first stop the broadcast.
PLEASE NOTE: You can only stream gameplay to one service at a time.
Access to the broadcast
While broadcasting your gameplay, your friends or any other users (depending on what you have selected in the "Audience" option) can watch your gameplay. Your broadcast is available on Facebook through a web browser and the Facebook app on any supported mobile device.
To watch your live stream on Facebook, users must:
With this guide, you can now broadcast your PC gameplay to your friends and fans, it's so easy!
Justin SabrinaUpdated on October 09, 2022
Conclusion
Want to record Facebook Live Video for offline viewing? Here is an article about capturing and recording Facebook live video on PC/iPhone/iPad/Android, then you can watch Facebook live video offline even after deleting it, such as video clips, vlogs, music videos, online TV. shows, sports broadcasts.
“Last week I watched some tutorials on Facebook Live. Now I want to record a video live on Facebook so that it's easier to see some of the key moments. Is there any good Facebook video recording app that can help me record Facebook live video online?"
Facebook Live allows Facebook to start live video streaming. Live video is video and audio content that is broadcast live on the Internet and has become very common. Watching TV specials, game matches, one-off episodes, exclusive broadcasts, and everything else online in your free time is an enjoyable experience. However, if your favorite show is just catching up with your busy schedule and you missed it. What a pity! Even worse, you don't know if there will be any reruns. Therefore, you can save the live video to your local drive for sharing or viewing in the future. In this article, we will show you 9 best screen capture tool0018 create high-quality recordings from Facebook Live videos , making it easy to watch live broadcasts anywhere, anytime and on any device, even after deleting them.
CONTENTS
Part 1: Record Facebook Video with UkeySoft Screen Recorder (Best)
Part 2: Record Facebook Video on iOS Device
Part 3: Record Facebook Live Video on Android
The best way to record Facebook Live is to use UkeySoft Screen Recorder. All you need is to turn on the built-in screen recording feature and you are ready to go, no additional software, no security risk. With UkeySoft program, users can record Facebook live video with high quality audio. This UkeySoft program can be used for both screen recording and screen capture. It is a multi-functional screen recorder without streaming, equipped with powerful capture function, lossless video-audio quality video capture, selectable screen recording area, support for various output formats, snapshot capture, advanced editing functions, etc.
Main features of UkeySoft Screen Recorder:
Here is how to record Facebook live video with this UkeySoft Screen Recorder. To get started, you should download the trial version on your computer.
Step 1. Launch UkeySoft
Screen Recorder Download UkeySoft Screen Recorder on your Windows computer. Open it and select Screen Recorder.
Step 2. Set the recording area
Before recording, you need to determine the size of the area where the screen is to be captured.
recording area setting option makes it easy to view the recorded video in 1:1 ratio. record video with original sound quality.
Step 4. Set the output information
Go to settings, where you can choose the path, format, quality to save the streaming video. Video can be saved to MP4, MOV, AVI, GIF and more.
To record online video, you may need to disable "Show Mouse Cursor" to prevent the recorder from capturing mouse actions in the video. Instead, you can use a hotkey.
Step 5 Start Facebook Live Video Recording
Open Facebook Live Video, then play the video and click Record button to start recording Facebook Live Video in MP4 and any other common video formats.
While recording, you can add an annotation, take a screenshot and share it on social networks.
Step 1. Launch UkeySoft Screen Recorder
Download UkeySoft Screen Recorder on Mac or PC, follow the instructions to install the program. Then open the program, you will see its interface as below.
Step 2. Select the recording type Here, select the "Application Window" option.
In the meantime, open the Facebook Livestream video in your browser. Select the Facebook Live Video window.
Step 3 Set the quality and sound
You can choose Original Quality, HD Quality or SD Quality as you like.
Select System Sound under Sound. You can turn the camera on or off according to your needs.
Step 4: Set the output options
In this step, click the gear icon to set the output options. In the General section, you can set the video format, video quality, frame rate, etc. In addition, you can click Shortcuts, Watermark for more settings.
Step 5. Start Recording Facebook Live Video
Now you are done. Click the "REC" button to start recording Facebook live video.
While recording, you can pause or end (fn 1 on the keyboard) Facebook video recording as desired.
Step 6 Play Recorded Facebook Video
After you finish recording, you can click the "History" icon to find the output video files.
Now you can play these Facebook videos on your computer anytime!
It is quite easy for iPhone or iPad users to record video on Facebook using the device itself. If your iPhone or iPad is running iOS 11 or later, you can do so using the screen recording features on the device. Read the instructions for recording Facebook live video on iOS device in detail.
Step 1: Tap Settings > Control Center > Customize Controls. Find "Screen Recording" in the bottom list and click the "+" button next to it.
Step 2. Swipe down from the top right corner of the screen to open the Control Center. Touch the screen recording button and click "Start Recording" to start recording a Facebook live video.
Step 3. You can click the red bar and confirm stop recording at any time. The recorded video file will then be saved to Photos, where you can play and edit it on your device.
As with the above we shared with you, Android can easily record Facebook video using the device itself. If your Android phone is running Android 11 or higher, you can do this using the screen recording features of the device.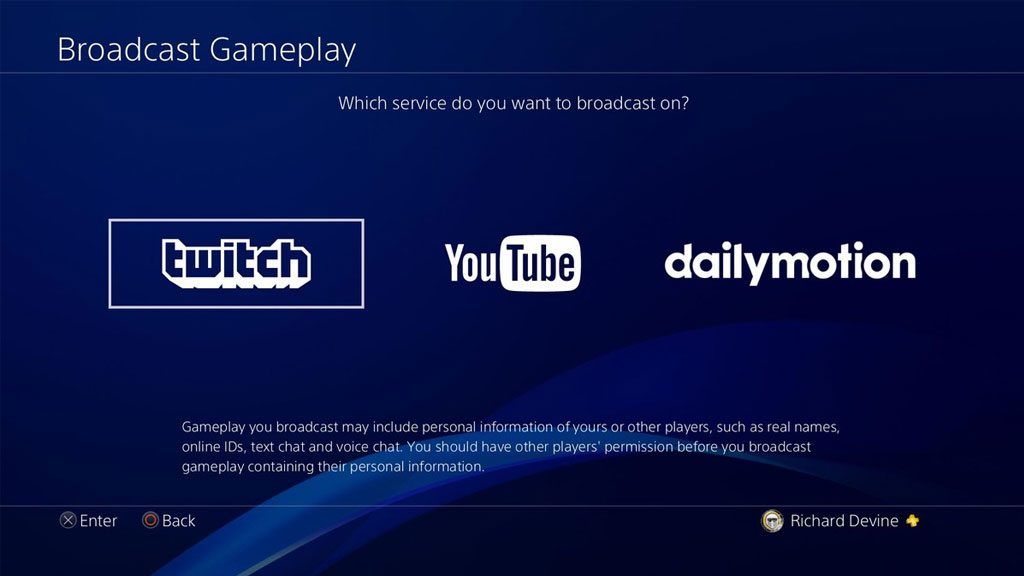 Read the instructions for recording Facebook live video on Android device in detail.
Step 1. Swipe down twice from the top of the Android screen.
Step 2. Click Screen Recorder. You may need to swipe right to find it. If you can't find it, click "Edit" and drag the screen recording to "Quick Settings".
Step 3 Play the Facebook video for recording and click start. Recording starts after the countdown.
Step 4. You can stop recording at any time, just swipe down from the top of the screen and tap the screen recorder notification. When the recording is over, you can find the recorded files on your phone Photos, where you can play and edit them on your device.
Here are three solutions to help you record videos on Facebook, including recording on a computer/iOS device/Android device. We recommend that you try the first solution as well as the best solution to record Facebook videos with high audio quality with UkeySoft Screen Recorder.