Home »
Misc »
How to send pictures on viber desktop
How to send pictures on viber desktop
Sending photos through Viber for Android, iOS and Windows ▷ ➡️ IK4 ▷ ➡️
Sending photos through Viber for Android, iOS and Windows
The ability to send files of various types through Viber is demanded by almost all users of this service to share information over the Internet. The following article describes the techniques that can be used to send or forward a photo using messenger from an Android device, an iPhone and a computer on which the system client application is installed and activated.
Considering that Viber users most frequently choose photos among all types of files that are sent, the developers of the Android, iOS and Windows client applications of the service have envisioned the possibility of performing an image sending operation far the only way. The examples below show the simplest and most convenient methods to solve the article title problem, both from a phone and from a PC or laptop.
Table of Contents
- 1 Android
- 1.
![]() 1 Method 1: Messaging tools
1 Method 1: Messaging tools - 1.2 Method 2: The "Share" function on Android
- 2 iOS
- 2.1 Method 1: Messaging tools
- 2.2 Method 2: Share feature on iOS
- 3 Windows
- 3.1 Method 1: Messaging tools
- 3.2 Method 2: Explorer
- 3.3 Method 3: Send function in Windows
- 4 Conclusion:
- 4.0.1 Has this article helped you?
Android
Users Viber for Android they have the ability to send an image via messaging at almost any time by taking advantage of the messaging system's client application or a function built into the mobile operating system.
Method 1: Messaging tools
In general, the application through which Viber is accessed from the Android environment is equipped with everything necessary to transfer files, regardless of how the sender received them (photos saved in the device memory; created with the camera of the device). device prior to shipment; shipped from another service account).
Device storage
- Launch the Viber client application on the Android device and open a dialogue with the user who needs to send a picture or go to a group chat. To send an image saved in the device memory, press the second icon at the bottom of the matching screen.
- The next steps are two options:
- To quickly transfer to another user, find the desired image in the area that appears at the bottom of the screen (duplicates "Gallery". Android), short press to highlight it. If you send multiple photos, check each one. Press the button "Send". to complete the resend procedure.
- Go to the list of photo directories on the device storage by tapping the button in the lower left corner, and find an image in one of the folders. Click on a thumbnail of the image to be sent through Vyber and select it. If you want to send multiple files at the same time, tap on each of them.Once your selection is complete, tap the check mark in the upper right corner of the screen.
 If desired, add descriptive text to the image and tap the check mark at the top again. This completes the operation and the item is delivered to the recipient.
Camera device
- When you open the correspondence with the recipient of the photo, click on the icon "Camera". at the bottom of the screen, which will launch the Android module that allows you to take a photo.
- We take a photo, add text and effects to the graphic message if desired. Then tap the button "Send".. The recipient will be able to view the broadcast as soon as it appears online.
Forwarding
- To forward an image received or already sent via messaging to a foreign Viber user, open the chat containing the image and press the arrow that appears next to it.
- Select the recipient from one of the available lists:
- "Recent".. Touch the recipient's name - the image is instantly sent to chat with the selected user.
- "Contacts".. After selecting the user by clicking on their name (you can mark several) you have to confirm the intention to send the photo: click on the box at the top of the screen on the right.
- «Groups». Here you specify a group of messaging participants as the recipient of the image by touching their name: the image is immediately transferred to the conversation.
Method 2: The "Share" function on Android
Many Android apps have an option that allows you to transfer multiple files, including photos, to other users through a wide variety of services, including Viber. This functionality allows you to initiate an image transfer using the messenger without even opening its client application, which is very convenient.
We will consider the method using Google's file manager as an example, but by learning how the algorithm described below works, you can apply it to other programs capable of interacting with image files downloaded to the memory of an Android device.
Download the Google Files file manager from Play Market
- Launch the "Explorer" for the Android operating system and navigate to the directory containing the photo (s) being forwarded via Viber.
- In addition, if you plan to send a single photo, it is possible to open it to see it in detail, and if there are several - select all the necessary ones by long pressing on each thumbnail or file name until a mark appears.
- Click on the icon. Share. on the device screen and then click the icon Viber. on the menu "Shipping method"..
- When running Viber, proceed in the same way as described in point 2 of the instructions. "Forwarding." photo files using the messaging tools above in the article. In other words, select one or more recipients and confirm the wish to send images by double-clicking the check box in the upper right corner of the screen, if confirmation of intentions is required.
iOS
Using Viber for iPhone, quickly transferring one or several images to other participants in messaging is no more difficult than in the Android environment described above.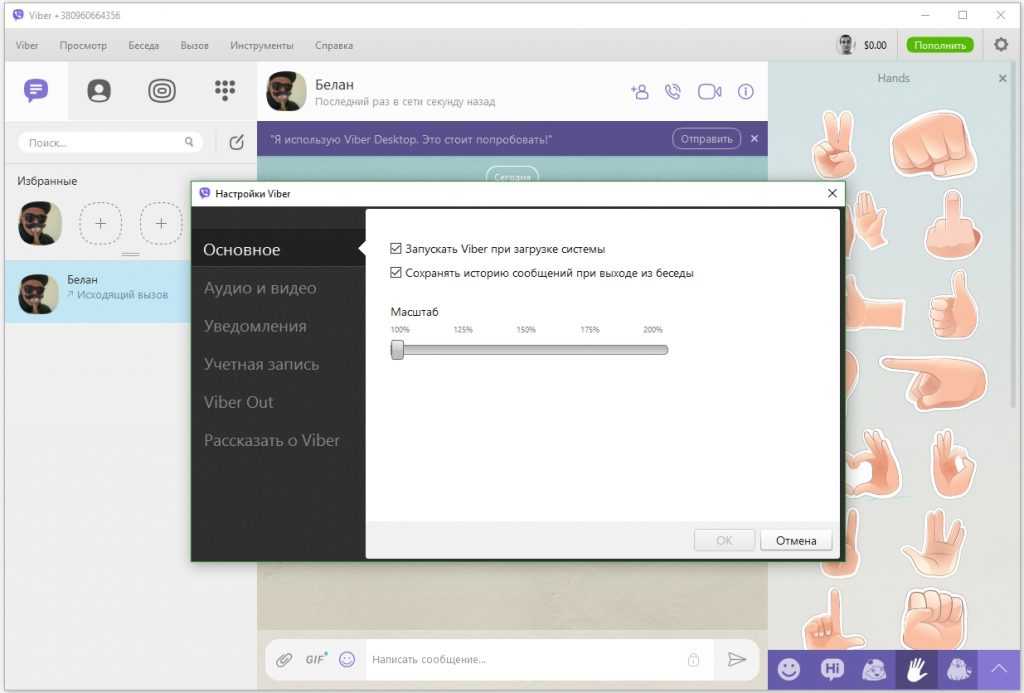 On iOS, you can take one of two main paths to resolve the issue.
Method 1: Messaging tools
Any image of the iPhone can be transferred through Viber, using only the functionality of the client application of the service. Specific action differences within the proposed methods below are dictated by how the image is received on the sender's device.
Device storage
- Start Viber and open a dialogue or group chat to which you want to send the image (s). Then tap on the icon "Photo". (second from left) at the bottom of the screen.
- Now you have to tell the system what or what files are going to be transferred via messenger to another member. Is this possible to do:
- In the preview area for existing photos that appears at the bottom of the screen. Tap on the thumbnail, which will show a check mark on it, or tap to highlight multiple previews. Click the button "Send".which starts the transmission of the selected one to the chat.
- On the screen. «All the photos».It is accessed by pressing the button located in the lower right corner of the area of the screen described above. Here you touch a preview of one or more photos and, once the marking is completed, you touch "Done".In addition, there is the possibility to add effects and descriptions to the images.
Among the most outstanding features is the possibility to create a message with a disappearing image: tap the icon with the image of a crossed out timer and set the interval after which the message will disappear from the chat after the recipient opens it.
Once you have finished editing the graphic message, click the round button "Send". - the content will begin to be transmitted to the recipient.
Device camera
- Going to the screen of correspondence with the recipient of the photo, we open "Camera".tapping the icon on the shooting tool.
- Create a photo, then edit the resulting photo as desired and add a description and / or effects to the image, then tap "Send".
 .
. - In a moment, the recipient will receive the image and can view it.
Forwarding
- To forward the photo previously received or sent via messaging to third-party Viber users, go to the dialogue or group chat that contains the destination photo. Then click on the arrow to the left or right of the message with the image.
- So there are two options for action:
- Click on the title of the conversation in the list of chats that are taking place through Viber and then confirm the transaction by tapping "Yes". in response to a request "Forward via Viber.". In this variant, the photo will be transmitted instantly.
- Clicking the icon «Add user». At the top of the screen, on the left. Check the box next to the recipient's name. You can also mark multiple contacts, in which case a group chat will be created within the messenger and the image will be sent there. Confirm shipment with a tap on the button "Done".
 .
.
Method 2: Share feature on iOS
It is possible to send images through Viber without having to open the messaging client application, which is convenient if the desire to share an image with another messaging user arose, for example, while browsing the contents of the iPhone memory.
As an example to achieve the purpose in question, the application "Photo".The button that starts the file transfer can also be found in other programs that "know" how to work with images.
- Launch the image viewer recommended by Apple for and use on your devices, and find the photo that is sent via messaging. The easiest way to search is to go to the tab Albums..
- Then the actions are of two variants. If a single file is sent via Vyber, tap its preview - this will allow you to view the photo in full screen mode. When you need to send multiple images simultaneously, press "To select". and mark your thumbnails.
- Touch the icon Share.
 in the lower left corner of the screen. In the menu that opens, find the messenger icon and tap it. If the messenger icon is not in the list, tap "Plus". and in the list that opens, flip the switch Viber. in position "activated"and then press "Done"..
 - The last step to send one or more photos is to select a recipient:
- Tap on the title of one of the conversations in progress through Viber and confirm the request received.
- Or we can find the recipient in "Contacts".taking advantage "Look for".. Touch the recipient's name and reply "Yes". in response to a request from the system.
Windows
To transfer an image via Viber for PC, one of three approaches can be applied. Depending on their own preferences and habits, the user can choose any of the following methods or combine their application based on the current situation to simplify and speed up the process of transferring graphic information through the service.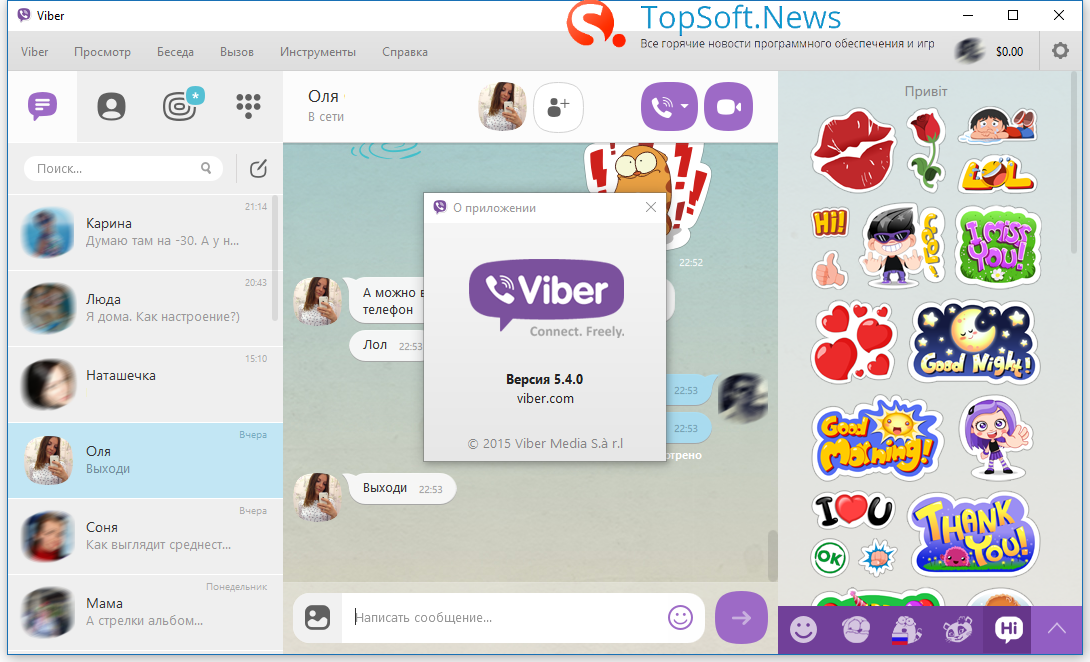
Method 1: Messaging tools
There are two options in the Viber client application for Windows that allow you to send an image stored on your PC drive or forward an image received from another service member to him or to a third party.
Disc for PC.
- Open the Viber Desktop application.
- Go to a conversation with the user who will be the recipient of the images as a result of the operation in question, or to a group chat where the images will be sent. Then you need to click "+" below the area containing the received and sent messages.
- In the shipping selection window that opens, navigate to the location of the image files. Select one or more images and click "Opened"..
- The result will not take long: the files selected in the previous step have already been sent to another Viber member.
Forwarding
- Open a dialogue or group chat in your computer's messaging application whose history contains the target photo and click the arrow next to it.

- In the window that opens, select one or more users, the future recipients of the image, by checking the boxes next to their names in the list "Recent" I "Contacts".. When you have finished specifying the recipients of the picture message to send, click "Ahead"..
- Now you can evaluate the result of the manipulation - the image is already present in each chat selected in the previous step of this instruction.
Method 2: Explorer
To solve the problem of transferring image files from a PC drive via Vibere, you can use the technology "Drag and drop"That is, just drag and drop an image into the messenger window.
- Open a dialogue with another Viber user or a group chat.
- In the Windows Explorer window, navigate to the location of the photo (or photos) you want to send.
- Drag and drop the photo file with your mouse into the matching area of the Wyber client window, which will change its appearance in the process, giving you the option to apply compression to the submission.
 Similarly, you can send multiple images at once by selecting and dragging them into the chat window.
 - After a few moments, everything selected will be delivered to the recipient.
Method 3: Send function in Windows
Sending the type of data in question via messenger can be done by invoking the context menu of the "Explorer" window, which contains option elements applicable to the photographic file.
- Open the folder that contains the image to be sent. Right-click on the thumbnail of the image you want to send, or its name (multiple files can be selected here). Click on the submenu Viber. . "Send". from the context menu of the files.
- In the messaging window that opens, select the recipients of the photo by checking the boxes next to their names. Then we click on "Share"..
- This completes the transfer of image files to the Vibera member (s) - very soon the recipients will be able to see the message.
Conclusion:
Concluding the description of the methods of sending photos with Viber, we would like to point out once again the simplicity of its implementation. We hope that after studying the above instructions, readers will not have any difficulty in solving the above task.
We are glad that we were able to help you resolve the issue.
Describe what has not worked for you.
Our specialists will try to respond as quickly as possible.
Has this article helped you?
Best free antivirus
Read more:
What is the size in pixels of the sheets a4 a3 a2 a1 and a0 depending on the dpi
How to delete a Facebook account without password and email
How to know who is behind an instagram profile
How to know who canceled the message on instagram
How to know if the iPhone is hacked
How to install IPTV on the Fire TV Stick
What to do if images disappear from gallery on Android
Spotify cracked IOS 2021, How to install it?
How to copy the link to your instagram profile
How to know who is behind a Facebook profile
Troubleshooting the red LOS light on the router
How to find out the MI account id on your Xiaomi smartphone
How to install IPTV on the Fire TV Stick
How to change Supercell email id
How to unblock Iphone Telegram channels
how to hide who i follow on instagram
How to fix the error requires action with the Google account
e_fail 0x80004005 error in Virtualbox, causes and solutions
How to put your name on a WhatsApp list
How to delete your Shein account
Troubleshooting the red LOS light on the router
How to see how many messages are in a chat
How to unblock Iphone Telegram channels
How to send self-destructing photos or videos on Telegram
How to download Facebook stories from PC
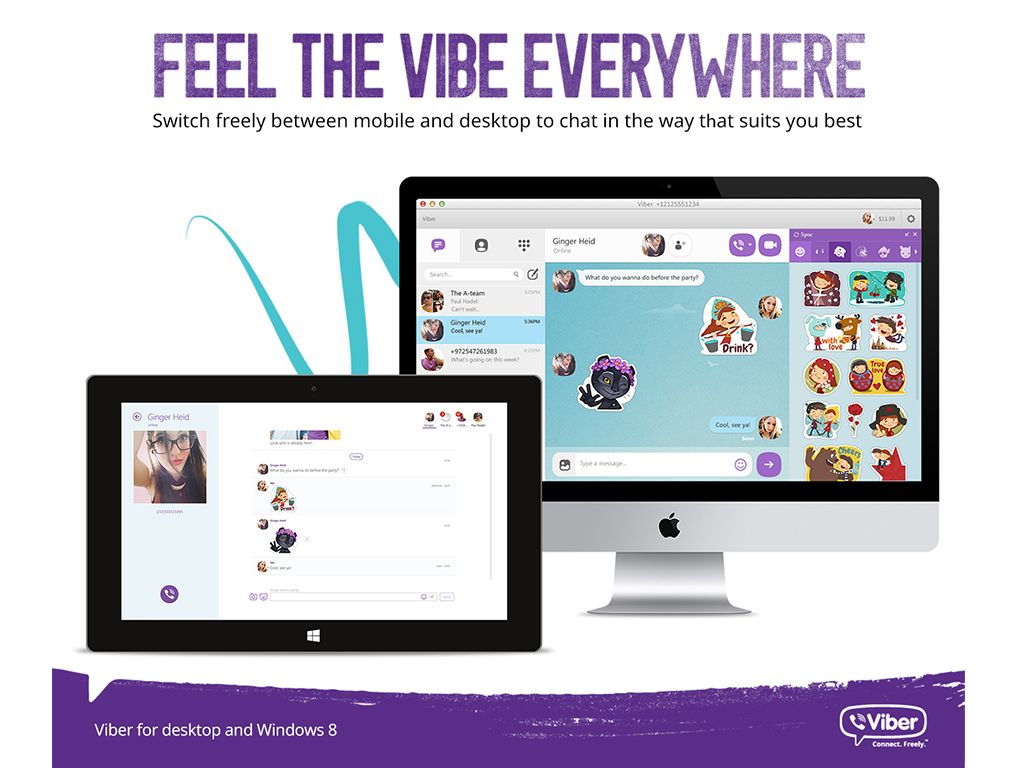
7 Hacks to Get the Most out of Viber for Desktop
Features & Tips September 14, 2017
By Nathalie Cohen-Sheffer
Whether you’re new to Viber for Desktop or have already played around with the platform for quite some time now, chances are you could still improve your productivity and like with anything in life, learn more. Here are seven hacks you should check out if you’d like to learn all there is to know about using Viber for Desktop like a pro.
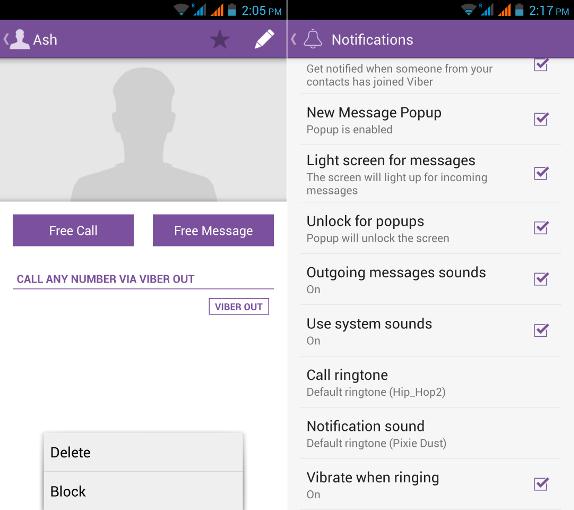
Add someone to your list of favorites
You may be chatting to quite a few people at once, but there are only a select few you actually need and want to have quick and easy access to. Whether these are your coworkers, friends or family – choose the top 7 people or groups you’d like to have easy access to and add them to your list of favorites. Add people to your list by going into the info panel of your chat or group chat and placing a star under the group image. You can also drag the person or group you’d like to add into your top handle in order to add them to your favorites list.
Turn a chat into a group instantly
Drag any contact into the header of a conversation you’re already having and make it a group! Simply add the person you’d like to your group by dragging their contact into the group chat header. Now, let the good times roll!
Share a contact with another contact
Share the details of a person on your contacts list in the quickest and simplest way.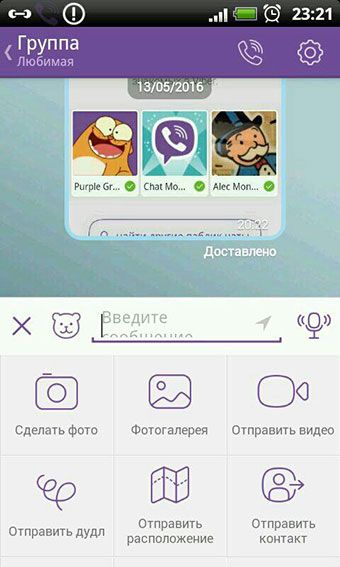 Simply drag the contact you wish to send into a one-on-one chat or in a group chat. Yup, it’s that simple.
Share almost any file type up to 200 MB
Sharing files can come in handy, particularly when you want the person within your chat to get easy and quick access to them. Viber for Desktop enables you to send almost any type of file up to 200 MB, which means you are now able to bombard your recipient with a whole lot of files. Just drag the file or files you’d like to share with the person or group you’re chatting with.
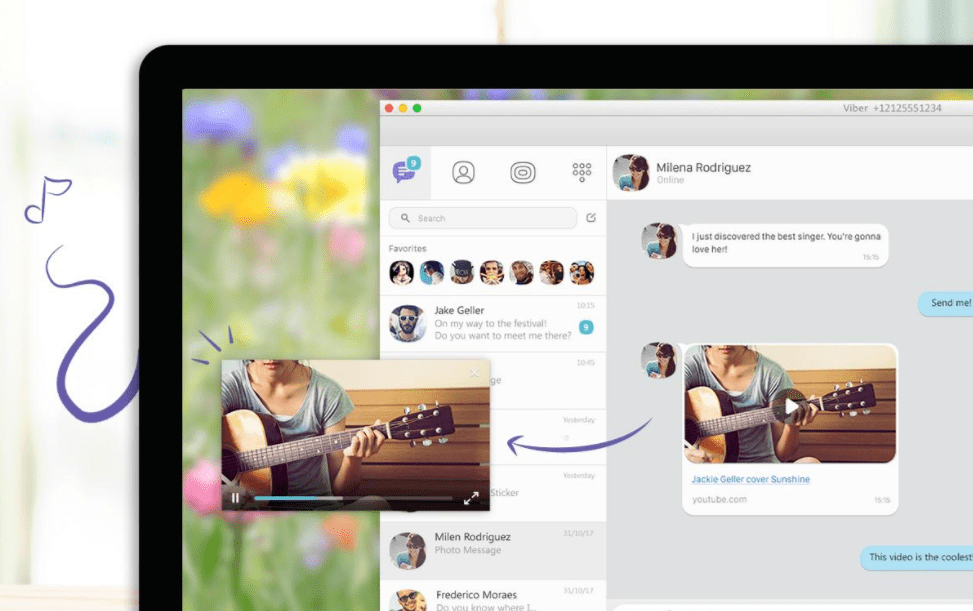
Share photos faster by dragging them into your conversations
In the same way you can share your files in your chat, you can also send your photos through our improved drag & drop feature. You can even take control over the quality of the files you send by choosing their original uncompressed size (again, up to 200 MB) or sending them in their usual compressed size.
Avoid awkward moments and delete messages before anyone sees them
We’ve all sent messages we wish we could delete, which is precisely why knowing how to use the delete messages feature on Viber is so important. Choose whether you’d like to delete the message for everyone within your group chat or just for yourself.
Send quick replies without having to leave your current chat
How amazing would it be if you could simply give a big thumbs up the next time you’re asked whether you’d like to have lunch together instead of having to leave the chat you’re currently on in order to do the same action? Our newest desktop feature enables you to send a quick reply without having to leave the chat you’re currently on. Hover over the chat or group chat you’d like to send a quick reply to, then choose one of the five emojis (kiss, laugh, thumbs up, thumbs down or heart) and continue your current conversation. Read more about quick replies here.
Congrats! You have now successfully finished our crash course on the hacks you need to get the most out of your Viber for Desktop experience. If you have yet to download Viber for Desktop get it today, and you’ll get all the tips you need on using it like a pro!
Previous
Get to Know the FC Barcelona Players
Next
Replace Your Best Friend with a Bot
How to send a photo via Viber from a phone, computer: instructions
How to send a photo via Viber using different tools - read our review! We will tell you how to share pictures from the memory of a smartphone or computer with any user.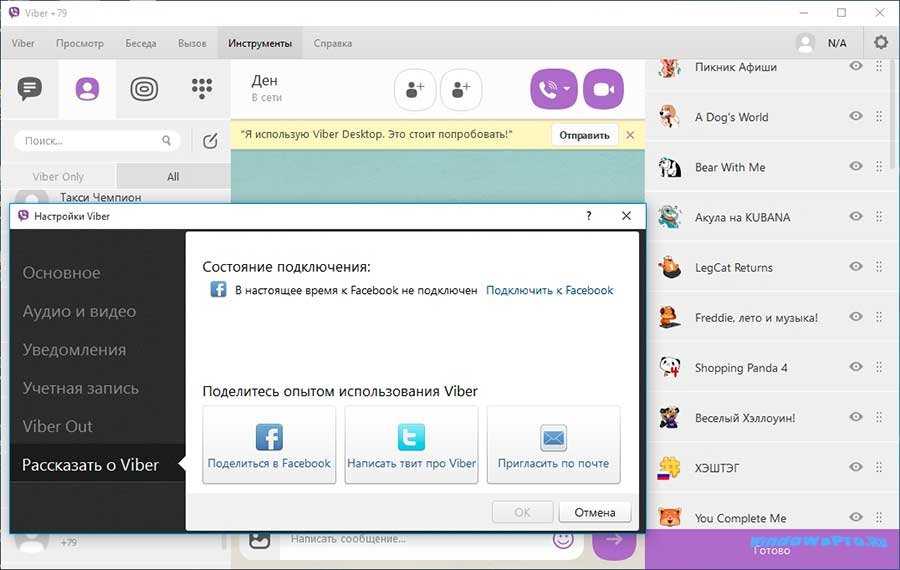 Learn, put into practice and get the most out of the possibilities of the messenger.
Manual for smartphone users
If you use Apple products or Android, you can easily share pictures with friends and colleagues! No restrictions - we will teach you how to send any image to the selected user. nine0003
Send from the gallery
First, we will tell you how to send a photo via Viber from the gallery on your smartphone:
- Open the messenger and go to the chat section;
- Select a conversation and join it;
- Under the line for entering text, look for a button in the form of a camera;
- Tiles of images recently uploaded to the gallery will open;
- If there is no desired picture, click on the tile icon to be transferred to the smartphone gallery; nine0014
- Navigate through albums and find pictures you want to share.
Remember that if you have been sent an image, you can always save the photo from Viber to your gallery.
In file format
Recall that pictures are transmitted in a compressed format - if you want to avoid this, let's try to send photos in Viber without compression:
- Open the desired dialog;
- Go to the line for entering text and click on the icon with three buttons; nine0014
- Select the menu item "File without compression" or simply "File";
- You will be automatically transferred to the gallery - make a choice, mark the pictures and click on the "Done" icon, most importantly, find out the correct name of the photo in the gallery, since there are no images in the list, only names.
And now let's try to send a photo via Viber from your phone, after taking a picture:
- Open the Viber messenger and go to the desired conversation;
nine0013 Find under the message box the button in the form of a camera, the same as in the first instruction; - Take a photo with the front or regular camera;
- Add stickers or text, draw a doodle;
- Once you're done editing, click on the airplane to send it.

If you are faced with the fact that the photo in Viber suddenly does not open, read about what can be done in a separate article.
Send image
You can also easily send a photo via Viber to another user within the application:
- Enter the chat and hold your finger on the picture you want to send;
- From the menu that appears, select "Forward photo";
- If necessary, tick multiple images;
- Click on the arrow in the lower right corner of the screen;
- Select the desired person and click on their name.
There is an easy alternative! You can send a photo from phone to phone via Viber in a few seconds:
- Enter the desired Viber conversation;
- Find the picture and click on the arrow next to it;
- The contact list opens;
- Select people and click on the "Done" icon in the upper right corner of the screen.
These instructions can be used for both Android and iPhone - there are no differences in the Viber algorithms! The following steps are slightly different, so we provide two different methods for different operating systems.
On iPhone
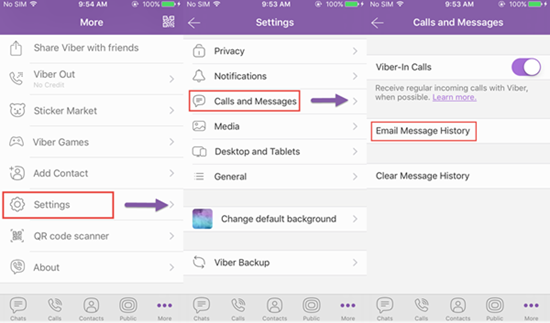
Let's try to figure out how to send a photo from Viber to email (or other messenger) on iPhone:
- Open the photo in full screen mode;
- Click on the arrow button in the lower left corner;
- Look for the "Share" button;
- Select the line "Letter to yourself";
- Or click on the mail client icon.
If you wish, you can choose another social network or messenger and upload the picture there. We talked about this in detail in other reviews on our website! nine0003
On Android
And now let's try to send a photo in Viber from an Android phone to email - you will see slight differences in the instructions:
- Open the Viber messenger and find the desired chat;
- Click on the image;
- An icon in the form of a forked arrow will appear in the upper right corner;
- Click - you will see a small menu;
- You need an email client icon;
- Choose the right program and send photos to email.
 nine0014
We studied the issue in detail and figured out how to send a photo via Viber from phone to phone! It's time to finish with the mobile version, let's move on to the Viber desktop client and consider the existing opportunities.
Algorithm for computers
If you chose the desktop version, don't worry about limitations - you can share your favorite pictures! Let's talk about what options users have.
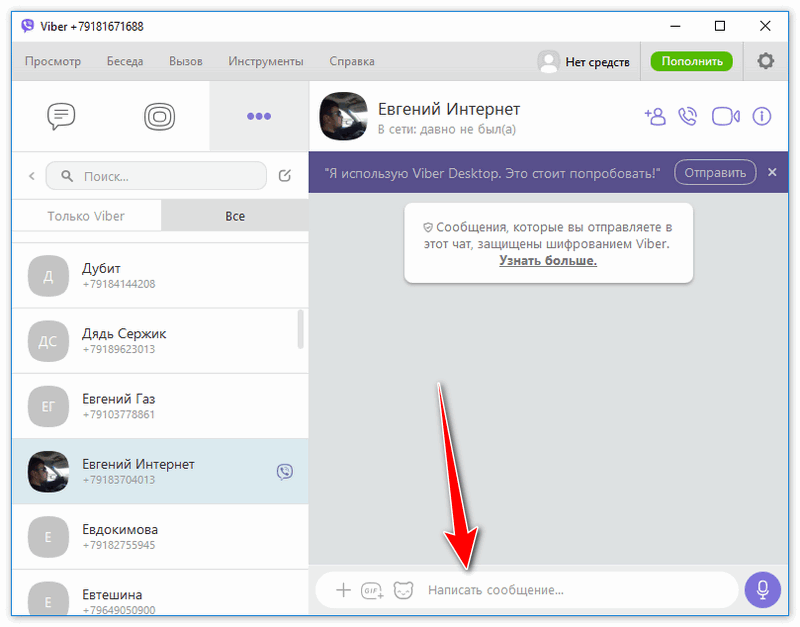
First, let's try to send a photo to Viber from a computer - the picture can be in a folder or on the desktop:
- Open the application;
- Find the desired dialog on the left side;
- There is a plus sign next to the text input field;
- Click to open the download manager;
- Navigate to the desired path and find the picture on the computer;
- Click on the "Open" icon. Done, the image will be sent to the dialog!
You were able to send a photo from the computer gallery in Viber.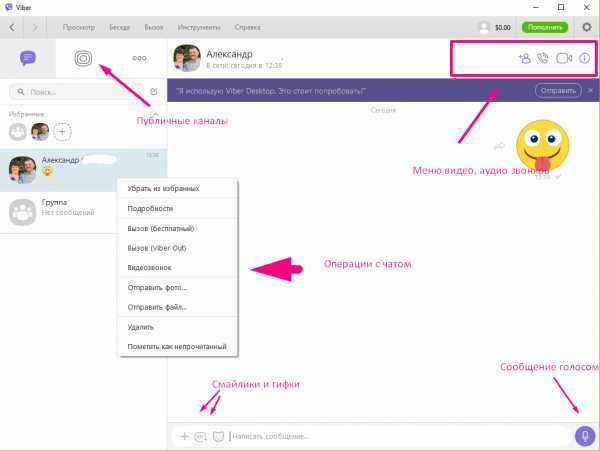 Also you can take a photo from one dialog to another:
- Enter the program and go to chats;
- Open a conversation and find the image you want;
- A small arrow will appear nearby - click on it;
- Select a person from the list and click the Share Photo icon.
A similar possibility can be implemented in another way - try this algorithm:
- Open a picture in a conversation;
- On the top bar you will see an arrow icon; nine0014
- Click on it and select "Share";
- In the contact list, find the person with whom you want to share the picture;
- Click the confirmation icon. Ready!
Now you can easily send a picture in Viber on your phone or computer! Follow our instructions to share pictures from the gallery or take a photo directly in the messenger. Throw images from chat to chat, send them by e-mail - all the possibilities are open to you! nine0003
How to send a photo in Viber to another person?
How to send pictures to viber - step by step
Contents
- 1 How to send pictures to viber - step by step
- 2 How to send photos via viber from phone and computer
- 3 How to send a greeting card in viber
- 4 How to send several photos in viber at once
- 5 How to send a photo via Viber
- 6 The algorithm is simple
- 7 How to send a photo via Viber
- 8 How to send a fresh photo via Viber
-
- 12 How to send a photo to Viber from a phone
- 13 How to send a photo to Viber on a computer
- 17 How to share a picture from a gallery
- 18 How to send a photo from a chat
- 19 How to send photos via Viber without quality loss?
- 20 Sending an electronic photo.
 Possible ways
 - 21 Viber messenger as a way to send photos
- 22 A common method of sending does not mean the right one
- 23 Solving a problem
- 24 Conclusion
- 25 How to forward a message or photo in Viber to another person?
Greetings, dear readers! Postcards, photos, video files help to share impressions, congratulate on holidays, talk about your feelings. But it's one thing to buy greeting cards from a kiosk, send files by email. Another is to share them on Viber. It is not always easy to deal with this, and therefore today we will describe step by step how to send free pictures using the messenger. nine0003
How to send a photo via viber from your phone and computer
Regardless of the device on which viber is installed, to send a photo you need to go to the chat and select the person who should receive them.
- in the "chats" section, click on the plus sign;
- select the desired pattern;
- click "open".

On an Android phone or iPhone, tablets, the choice of options for sending photos is wider:
- sending files from the gallery. Click on the picture icon. Select the picture you want to send, click on it. Next, if you wish, write comments and click "send";
- Sending photos from the camera. Go to the dialogue window, select the respondent, click on the camera icon. Once you've taken a photo, send it. This function is very convenient when you want to share a picture instantly, such as attending a class meeting, seeing something amazing on the street. It is also interesting in that by taking a photo, you can send a disappearing, temporary message. To do this, after taking a picture, you need to click on the timer icon, select the time during which the photo will be available for viewing; nine0014
- Sending pictures from the photo gallery. Select the photo you are interested in, click the "share" icon, click on viber, find the recipient and send him the file.

Viber running on a smartphone and PC also sends dynamic pictures - gifs. This can be done with a separate tool, indicated on the panel as "gif +". Click on the icon, select a GIF file, send.
How to send a greeting card in viber
A separate question that worries many is how to send birthday, wedding, holiday greetings in the messenger. nine0003
There are several ways to do this:
- open a ready-made congratulation from the gallery and send it as a regular photo or a separate file. The source of such postcards is most often the Internet;
- select and send a wish sticker. There is a tool on the panel for this function. Sticker collections are paid and free. You can download them in the viber store or from the Internet;
- Draw the card yourself using the doodle tool. It allows you to draw, write text, use filters; nine0014
- take a photo and edit it with a doodle.
How to send several photos at once in Viber
Viber is convenient because it can be used to send several photos at the same time. The function is available in the version for PC and phone.
- enter the chat;
- in the photo gallery, select 2-3 or even more pictures at once;
- click on send.
You can send photos, dynamic pictures, postcards to viber. Step by step instructions make this process easy and affordable. nine0003
nashkomp.ru
How to send a photo via Viber
Viber is a convenient tool for staying in touch even if you have no funds on your mobile phone account. Using the application, you can send messages, call other subscribers, and also send media files of various formats. Novice users who are just getting acquainted with the messenger are often interested in how to send photos via Viber from their phone.
Simple algorithm
- First you need to enter the program.
- Next, select the contact to whom you want to send the image.
- Click on the picture icon at the bottom of the screen.
- After that, you need to select the "Photo Gallery" section.

- One or more photos are marked next.
- The last step is to click the Submit button.
The messenger offers to select up to 10 photos that can be simultaneously sent to the interlocutor. Moreover, it is possible to select them from various folders located in the Smartphone Gallery. nine0003
If desired, you can send images taken directly in the application. To do this, after selecting the interlocutor, click on the button with the camera icon in the chat.
The messenger offers to use both the front and the main camera. After the picture is taken, it can be deleted (trash can icon) or sent to other contacts (tick).
If the application does not open the image from the dialog, then there are problems with the Internet connection. A slow connection may be the reason why you cannot send photos to Viber from a computer. The last action can only be taken with the desktop version of the application installed on the PC. Please note that when synchronizing the messenger on a desktop computer and a smartphone, pictures will automatically be saved in the correspondence history. nine0003
How can I find and view a photo sent by my interlocutor? You will need to open the chat and click on the message containing the image. The file can be sent via Bluetooth. In order to do this, you need to open the picture and click on the button located in the right corner. The application will prompt you to perform an action of interest (open an image via the Internet, save it to a folder, transfer it via Bluetooth, etc.). We choose what needs to be done and confirm our choice. If Bluetooth is disabled, the messenger itself will ask for permission to activate the function. nine0003
xn--80acbos8b.xn--d1ababe6aj1ada0j.xn--p1acf
How to send a photo via Viber
It is probably already known that using the Viber messenger you can send various files, including photos. So how to send a photo via viber from phone ? This is not easy to do, but very easy! To do this, you just need:
- download the Viber program;
- open a chat with the interlocutor for whom the sent photo is intended; nine0014
- while in chat mode, you need to click on the button with the plus sign , which is located on the left side of the text field;
- the menu for sending files opens.
 Select item "Photo Gallery". You will be prompted to select the desired image from those already available on the device;
 - after the image is inserted into the chat, it can be sent by clicking on the appropriate button.
The picture is sent in the same way in a group chat.
How to send a fresh photo via viber
To do this, you need to open the photo itself and select "Share" in the available actions item, and then select the Viber program among the tools available for sending.
You can also first call up the menu for sending files as described above and select item Take a photo. The application will launch the camera built into the phone. After the picture is taken, Viber will offer to send it immediately, or take another photo.
If a Viber photo is not sent
It may be unnecessary to remind you that before sending a photo via Viber , you need to make sure that you have a good Internet connection. Otherwise, the picture may simply not be sent. Most of the questions of the form are connected with this, why the photo from the phone is not sent via Viber, or why the received pictures are not loaded in full size? nine0003
 xn——6kcbabcghy3bdq0cpysercfo2g1fk.xn--p1ai
How to send a photo via Viber according to the instructions
If there are no funds on the mobile device account, then Viber will always help out in this situation. It allows you to send messages to the interlocutor in the form of short texts. You can also use it to call a friend or send him some media file. New users are often interested in how to send a photo via Viber.
With the help of Viber you can send photos and pictures
It should be noted right away that this process is not difficult. To deal with it thoroughly once and for all, it is enough to follow the following instructions:
- Messenger is installed and Viber Messenger is logged in.
- A contact is being selected.
- Tap on the icon in the form of a picture at the bottom of the screen.
- The section called "Photo Gallery" is selected.
- A photo to send is highlighted.
- The "Submit" button is being touched. nine0014
Important! Pictures in the amount of 10 pieces can be sent to another subscriber from different folders created in the phone's gallery.
Nuances of using the program
If you need to take a picture during a conversation with a subscriber, then you need to click on the icon on the chat screen, which shows a camera. After that, the user will have to select the rear or front camera.
It is not uncommon for a user to be unable to open an image from a chat. This problem most often occurs due to a poor internet connection. The picture will be displayed in the smartphone as soon as the connection speed increases.
At the same time, it is automatically saved in the dialog history if the application is synchronized on the desktop and phone. If the user has received an image from another subscriber, he can open it via the Internet, transfer it to another device using Bluetooth, or save it in a folder on his mobile device. nine0003
Using Viber, you can send and save any photos
To use these functions, you need to open a dialog and tap on the message that contains the received picture.
After that, the button is pressed at the top of the screen on the right side. As you can see, working with images in the utility is very simple.
After studying all the functions, the owner of the device will never again be interested in how to send a photo via Viber. nine0003
xn——7kcabbec2afz1as3apmjtgqh5hrf.com
How to send a photo on Viber to a contact
You can share emotions through instant messengers not only using text messages and voice notifications, but also actual photos.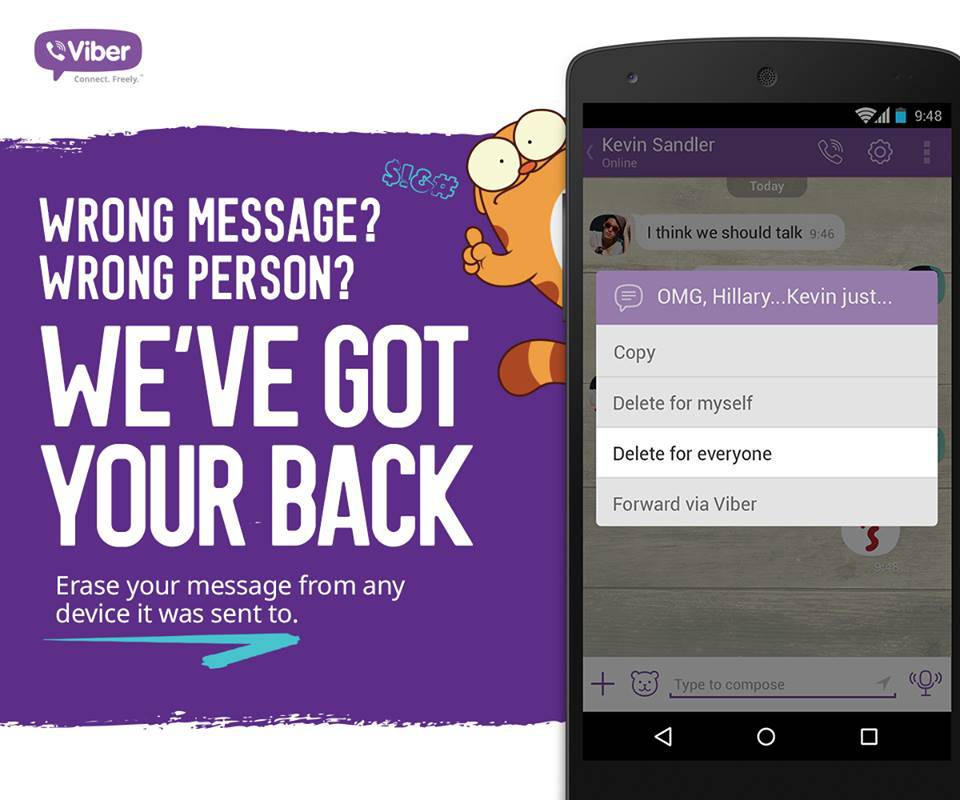 It will take quite a bit of time to figure out how to send a photo to Viber , but it will open up a new way to share vivid impressions.
How to send photos to Viber from the phone
Due to the presence of several operating systems that have flooded the mobile device market at once, photo transfer methods differ slightly depending on the device model. Therefore, they should be considered separately. nine0003
Sending a photo to Viber via Android is quite simple:
- You need to open the
dialog .
- Below there will be a small label with the image of painting , you should click on it.
- A list of the images stored in the device's memory appears.
- Select the desired photo or several at once. It is possible to add an effect, a comment through the editor.
- Finished work can be sent by pressing the appropriate button ( purple arrow ).
After that, you can figure out how to put a photo uploaded from another user in Viber.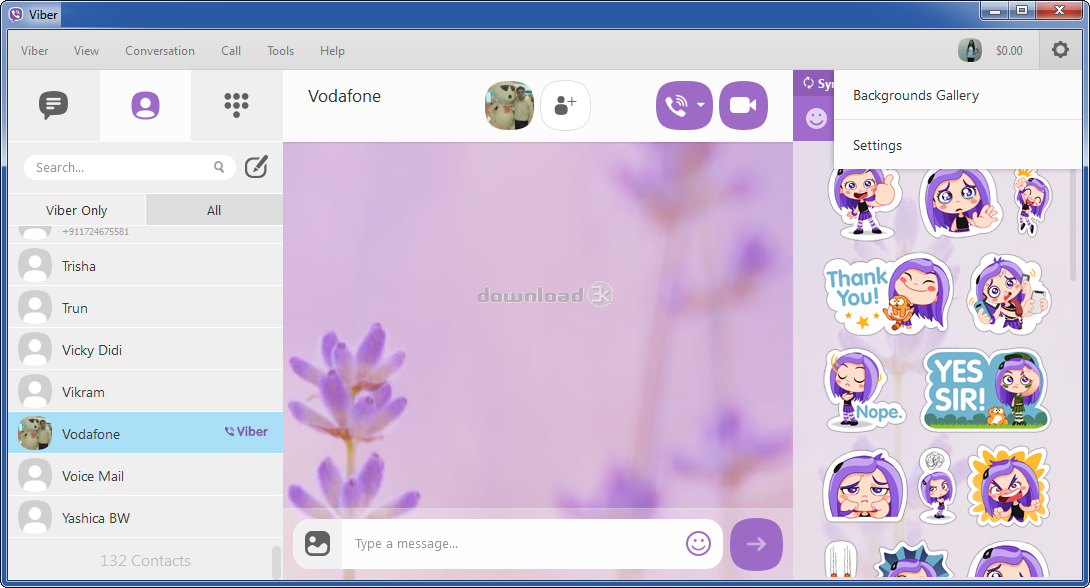
The second method involves using the camera to take the actual picture. This happens as follows:
- The chat opens.
- Instead of the picture label, select the small camera .
- The lens window appears.
nine0013 The received frame can be transformed, a description can be added to it and sent to the selected contact.
On tablets everything works the same way. Everything happens according to the following scheme:
- You should select an active chat.
- Click on the label with the image of painting .
- For added convenience, open advanced gallery view (square button). nine0014
- Mark one or more images with stickers, captions, doodles.
- Submit by clicking the arrow .
How to send photos to Viber on a computer
It is much more convenient to send photos from a computer online. To do this, it is enough to have the current version of the software and do the following:
- Organize a conversation or open an active chat.
- Click on the image " + " located to the left of the line for entering messages. nine0014
- A window will appear with a choice of files for the message. By default, the gallery folder opens, but you can always specify the path to the image yourself.
- Once a photo has been selected, it can be sent to without any conversion.
So, without much effort, you can send a picture or snapshot to any of the selected chats, embellishing it with additional effects.
xn—-7sbdcrwk5aq.xn--p1ai
How to send a photo via Viber
One of the significant advantages of Viber is the ability to send photos to another subscriber. Moreover, you can send images of different quality and size. Problems can only arise when the Internet is not working properly.
Viber consumes little data, so it's easier to share pictures through it than through social networks.
How to send a photo from the phone
To send a photo via Viber, you must perform these manipulations:
- open the application and the desired conversation;
- below the text input field there are icons below, find the second one from the left and click;
- select a picture from a tile;
- You can optionally add a description. To do this, touch the "pencil" icon at the bottom right;
- Click Submit.
This method of sending is not very convenient if there are a lot of photos on the phone. Since all images are offered for sending at the same time, sorted only by date, and not by folders. nine0003
You can send a photo in Viber from your phone in another way:
- by opening the tile with images, in the lower left corner, click on the square of dots;
- now we see several folders from which we can select the required photo;
- find a picture, add a description and send it.

You can send a photo or video you just took. To do this, click on the "camera" picture located under the chat window. In the lower right corner, select the "Regular photo or selfie" mode and press the large button in the center. Holding it down will record video. nine0003
How to transfer a picture via Viber on a computer
Although Viber is mainly intended for phones, it is often used on computers, especially for sending pictures.
You can send an image using the following steps:
- open a conversation;
- click on the plus in the lower left corner of the window;
- when opening a frame with icons for different actions, click on "Gallery" or "Take a photo";
- select the desired image and transfer. nine0014
Clicking "Gallery" opens a folder with pictures. If you need a picture from another storage location, just specify the path to it in the appropriate field (the line at the top of the window).
How to share a picture from the gallery
The easiest way to send a photo via Viber is to send directly from the gallery. Let's consider step by step how to do it:
- open the gallery;
- we find the necessary picture, click it and hold it; nine0014
- click on the three dots located in the upper right corner;
- in the window that opens, click the "Submit" option;
- in a new window, click the Viber item;
- select a subscriber;
- , if desired, add a description and send.
How to send a photo from a chat
Viber allows you to share pictures directly from the chat. This method saves a lot of time, since you do not have to look for a picture in the gallery.
You can share an image from a chat on an Android smartphone using the following manipulations:
- in the upper right corner, click the "Arrow" icon;
- select the desired person from the proposed sections "Contacts", "Recent", "Groups";
- click on it and send it.
In iPhones, the algorithm of action is the same.
Sending a photo using the Viber application is very simple and fast. Moreover, you can send several selected images of different quality and size at the same time.
allmessengers.ru
How to send photos via Viber without quality loss?
In the modern world of high technologies, it is enough for a user to have any one of the gadgets, as well as be able to use it, in order to send a photo to relatives and friends for a family album as a keepsake, or to someone else if needed. For example, a potential employer wants to see your appearance during a remote acquaintance, and you should not fall into the dirt on your face by sending a low-quality picture. Or you need to send the results of your work to the manager, capturing them in a photo. And these results cannot be considered due to the poor quality of the picture. Today, even photo services provide services to the public remotely. That is, send them photos through any application or program, they print them out. You just have to get them ready. The only requirement for such a service is high quality photos, otherwise they will not be accepted for work, in addition, they will make an unpleasant remark. nine0003
Sending an electronic photo. Possible ways
The easiest way to send photos today is via e-mail: Mail.Ru, UKR.NET, any other similar mail services.
In addition, it is possible to send photos using various messengers, such as Viber, Skype, Telegram, and some others.
Viber messenger as a way to send photos
Viber is an application that can be downloaded using Play Makret by logging in through Google. Such an application allows you to make calls and video calls for free, as well as send photos, sms and videos at absolutely no cost. nine0003
A common method of sending does not mean correct
Let's consider the method of sending a photo via Viber.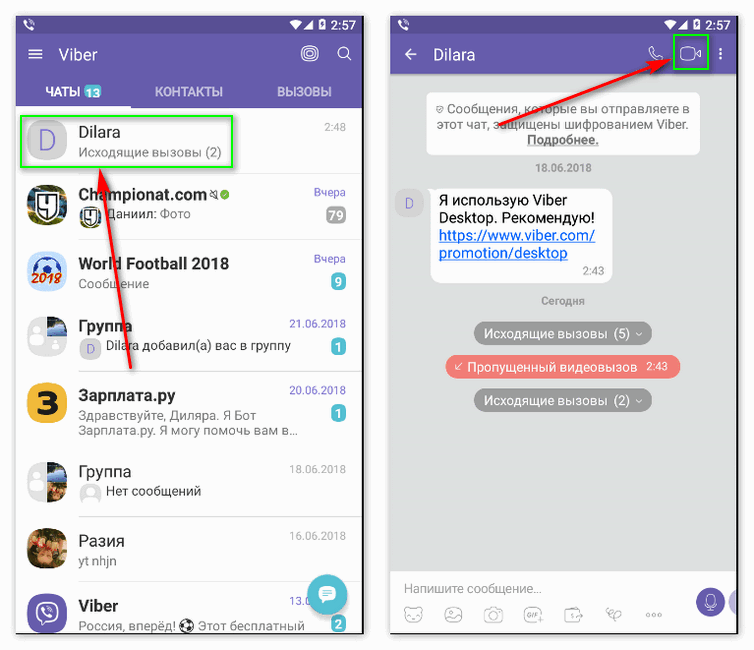 Usually everyone sends photos through Viber using the Gallery section. That is, in the specified Viber application, the sender, being in the subscriber's contact, selects a gallery, opens it, marks the photos needed for sending and presses the "send" button. Or, the user, initially being in the gallery, selects the desired photo (one or more), at the same time, an icon similar to a "tripod" appears in the upper right corner of the gadget. By clicking the specified icon, a list of possible resources appears, using which you can send the selected photo. The sender selects Viber in the list, searches for the recipient in the contacts, presses the "send" button. nine0364 At the same time, you can add a description to the sent photo. The photo is sent.
Important: The problem is that with this method of sending, the subscriber receives a photo with a strong loss of quality. The result is that the resulting picture can come with a quality 100 times worse than the original one.
Solving the problem
There is a way out of the situation. It's pretty simple. You need to send photos and pictures via Viber using files . Please note that in the messenger at the bottom there is a menu in the form of three buttons. When you enter there, there is an option to "send a file". You need to click it, then a list of device folders opens. Photos are usually located in the DCIM folder. You just need to find it among other folders, open it, mark the desired photo (maybe several). Send.
This photo will be delivered to the recipient in a fairly high quality. There will be practically no loss now.
nine0119 Conclusion
Thus, if you are reading this article, it means that you have already dealt with the problem of receiving / sending low-quality photos using Viber. Now you have received the necessary information. You can use it in a useful way. Good luck!
mobcompany.info
How to forward a message or photo in Viber to another person?
Sometimes it becomes necessary to forward a message.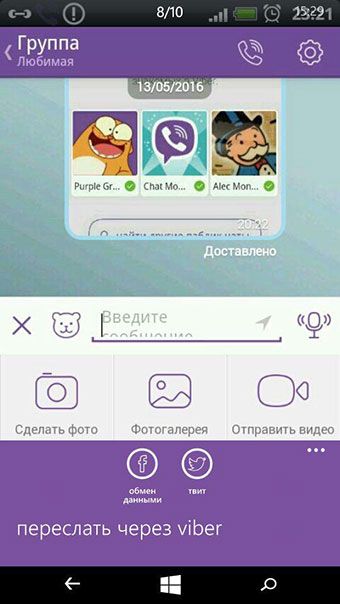 Imagine that you received a message from one subscriber, information from which you want to send to another subscriber. Do not rewrite the message again, especially if it is voluminous? Much easier to send it. Fortunately, Viber allows you to do this. nine0003
Let's immediately draw your attention to the fact that you can send not only text messages, but also:
In this case, the forwarding method does not change - there is only one instruction. Remember, everything is very simple.
Open the "Chats" section and find here the chat from which you want to forward the message. Click on this chat.
Select a message to forward and click on it. Hold your finger until the menu appears.
In the menu, click on the menu item "Forward via Viber". nine0003
You will then be prompted to select the contact you want to forward the message to. On the first tab you will see a list of chats, on the second - contacts, and on the third - groups.