“How can I SAFELY migrate to a new Facebook Pixel?”
I get this question quite often, so I decided to publish this small guide instead of e-mailing the answer every single time.
Migrating from an old to a new Facebook Pixel is not complicated if you have a good plan.
The biggest mistake you can do: replace the old pixel with the new one without any additional steps. This will break everything and ruin your Facebook ads just like that.
There are TWO things you need to keep in mind:
You need to TRAIN your new pixel for 180 days, re-create Custom Audiences and Custom Conversions, add it to your Product Catalogs, replicate Pixel Events, and use it for your ads at the right moment.
Create a NEW Facebook PixelInside your Facebook Business Manager, go to Events Manager and click on Add New Data Source. Follow the steps until your new pixel is created.
I am going to use PixelYourSite Pro for this task because it supports multiple pixels.
Copy your NEW pixel ID, open PixelYourSite Dashboard, click on the “Add Extra Facebook Pixel ID” button and paste the ID. Save the new settings.
Don’t delete the old pixel!
Train your NEW pixelThis is the key part o your migration plan, and it can take up to 180 days.
Custom AudiencesIf you’ve run Facebook Ads for a decent amount of time, chances are that you already have several Custom Audiences. You will need to replicate them using the new Facebook Pixel.
Tip: replicate only those audiences that you need.
Here’s a list of Custom Audiences that you might find useful:
Other audiences you should consider are direct traffic (GeneralEvent + the traffic source parameter), people that searched on your website (the Search event), embedded video views (the WatchVideo Event) and clicks on key links (the ClickEvent).
Lookalikes AudiencesReplicate your most useful Lookalikes Audiences.
What are Lookalikes? A Lookalike Audience is a way to reach new people who are likely to be interested in your business because they’re similar to your best existing customers.
If you run an e-commerce business, your most powerful Lookalikes will be based on the Purchase Event Custom Audiences 180 days (your clients).
If you don’t have enough purchases in your desired location, you can use AddToCart or even ViewContent Custom Audiences.![]()
If you use any Custom Conversion, replicate them for the new pixel.
Connect the new pixel to your Product CatalogsGo inside your Business Account, click on the top menu, and open Product Catalogs. Click on the catalog’s link and select “Events Data Sources” from the left-side menu.
Enable the new pixel and click Save.
This is a crucial step if you run or plan to run Dynamic Product Ads, so make sure you don’t skip it.
Replicate your Facebook Pixel EventsThe new pixel should send the same events and the same parameters as the old one.
If you use the PixelYourSite plugin you are all set, because it sends all the existing events to every installed pixel.
Update your Ads CampaignsYour existing campaigns are optimized and tracked by the old pixel and they target your old Custom Audiences or Lookalikes.
There are two things you will need to change:
For Catalog Sales campaigns that use “Retarget ads to people who interacted with your products on and off Facebook.” you must change the pixel AFTER the number of days your ads are configured to go back.
For all your other ads you can change the pixel right away.
How to change the pixel for existing adsOpen your Ads Manager and select all the campaigns you want to change. Click “Edit”, go on “Ads” and scroll down until you find the Tracking section. Select the NEW pixel and click Publish.
New ads trackingYour new ads can be tracked by the new pixel right away.
Your targeted audiencesYou can safely replace the old audiences AFTER the interval they are configured is consumed. So a Custom Audiences for the Purchase Event in the last 180 days can be replaced after 180 days.
Shortcut: You can edit your ads and add the new Custom Audiences along with the old ones. The same trick can be applied to new ads.
Delete the old pixel after 180 daysIt is safe to delete the old pixel 180 days AFTER you installed the new one on your website. By then, the new pixel has all the possible data tracked.
TricksYou can RENAME your old and new pixels to make sure you remember what you need to do.
How to RENAME your pixelOpen your Business Manager top menu, click on Pixels and click on the pixel you want to rename.
The end result can be something like this:
ConclusionReplacing your Facebook Pixel is not complicated, but you’ll need a plan and some discipline:
Yes, you can replace your Facebook Pixel with a new one. Remeber it can take up to 180 days for the new pixel to work as expected.
No, your new Facebook will have NO data at all. That’s why you need to TRAIN YOUR NEW PIXEL.
Replicate your existing Custom Audiences and Lookalikes.
Replicate your Custom Conversions.
Replicate your current Pixel Events.
This proces can take up to 180 days.
How Do You Rename A Facebook Pixel
If you have a solid strategy, switching from an old to a new Facebook Pixel is not difficult.![]()
The most common mistake is to just replace the old pixel with a new one without taking any further measures. This will immediately damage everything and destroy your Facebook advertising.
There are TWO things you should remember:
ZERO data is collected by the NEW Facebook Pixel.
For 180 DAYS, the pixel data is accessible.
TRAIN your new pixel for 180 days, re-create Custom Audiences and Custom Conversions, add it to your Product Catalogs, duplicate Pixel Events, and utilize it for your advertising at the appropriate time.
Make a brand-new Facebook pixel
Go to Events Manager in Facebook Business Manager and select Add New Data Source. Follow the instructions until you have a new pixel.
On your webpage, add the NEW pixel.
Pixel Your Site Pro will be used for this job since it supports numerous pixels.
Copy your new pixel ID and paste it into the Pixel Your Site Dashboard’s “Add Extra Facebook Pixel ID” button. Save the new configurations.![]()
Don’t get rid of that old pixel!
Educate your new pixel.
This is the most important element of any migration strategy, and it may take up to 180 days to complete.
Individualized Audiences
If you’ve been running Facebook Ads for a while, you’ve probably already created a few Custom Audiences. You’ll have to duplicate them with Facebook’s new Pixel.
Replicating just the audiences you need is a good idea.
Here’s a list of Custom Audiences you may be interested in:
If you sell online, your most significant Custom Audience is the Purchase Event 180 days.
Visitors to the website for 180 days.
180 days of product visits (View Content). Depending on your approach, you may need longer intervals, such as 14 or 30 days.
Direct traffic (General Event + the traffic source parameter), visitors who searched on your website (the Search event), embedded video views (the Watch Video Event), and key link clicks are all other audiences to consider (the Click Event).
Audiences of Lookalikes
Replicate the Lookalikes Audiences that are most helpful to you.
What are Lookalikes, exactly? A Lookalike Audience is a method to reach new individuals who are similar to your best current customers and are likely to be interested in your company.
Your most potent Lookalikes will be based on the Purchase Event Custom Audiences 180 days if you operate an e-commerce company (your clients).
You may utilize Add To Cart or even View Content Custom Audiences if you don’t have enough transactions in your chosen area.
Conversions Made to Order
Recreate any Custom Conversions for the new pixel if you have any.
Connect your Product Catalogs to the new pixel.
Open Product Catalogs from inside your Business Account by clicking on the top menu. Select “Events Data Sources” from the left-side menu after clicking on the catalog’s link.
Click Save after enabling the new pixel.![]()
If you’re running or planning to run Dynamic Product Ads, make sure you don’t miss this step.
Make a copy of your Facebook Pixel Events.
The new pixel must transmit the same events and parameters as the previous one.
If you use the Pixel Your Site plugin, you’re good to go since it transmits all of the current events to every pixel you’ve placed.
Make changes to your ad campaigns.
The old pixel optimizes and tracks your existing campaigns, which target your old Custom Audiences or Lookalikes.
There are two things that must be altered:
The pixel that keeps track of your advertisements.
You’ve identified your target market.
Changing the tracking pixel for your advertisements
You must update the pixel AFTER the number of days your advertisements are set to go back for Catalog Sales campaigns that utilize “Retarget advertising to individuals who engaged with your goods on and off Facebook.![]() ”
”
You may adjust the pixel for all of your other advertisements straight immediately.
How can I alter the pixel on my advertisements that are already running?
Select all of the campaigns you wish to modify in your Ads Manager. Click “Edit,” then “Ads,” then “Tracking.” Scroll down to locate the Tracking section. Click Publish after selecting the NEW pixel.
Ad tracking for new advertisements
The new pixel can immediately track your new advertisements.
Your intended audience
After the period for which the previous audiences were set has expired, you may securely replace them. So, after 180 days, a Custom Audiences for the Purchase Event in the previous 180 days may be changed.
Shortcut: You may update your advertisements and combine the old and new Custom Audiences. The same strategy may be used with new advertisements.
After 180 days, delete the old pixel.
It is safe to remove the old pixel 180 days after the new one has been placed on your website.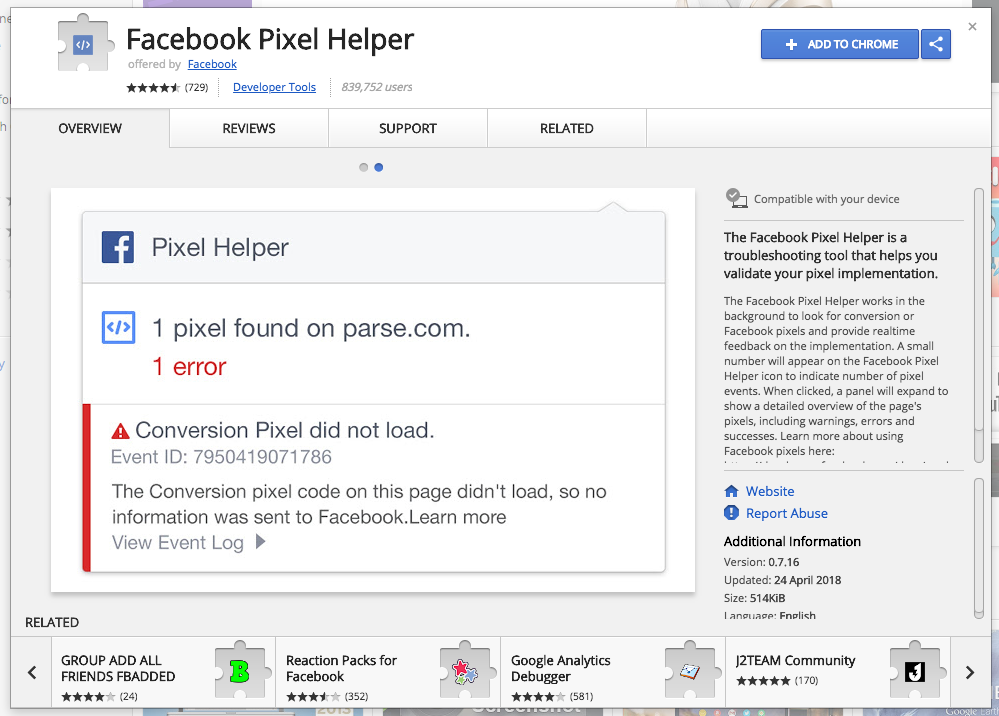 By that time, the new pixel has accumulated all available data.
Tricks
To make sure you remember what you need to accomplish, RENAME your old and new pixels.
What is the best way to RENAME your pixel?
Click on Pixels in the top menu of your Business Manager, then on the pixel you wish to rename.
The final product might look like this:
Conclusion
It’s not difficult to replace your Facebook Pixel, but you’ll need a strategy and some discipline:
Replace the old pixel with the new one.
REPLACE Custom Audiences, Lookalikes, Custom Conversions, and Pixel Events in your new pixel.
Connect your Product Catalogs to the new pixel.
The new pixel may be used to track your advertisements.
Custom Audiences or Lookalikes may now be added to your targeting.
After 180 days, remove the old pixel.
 ru
ru :"\u041d\u043e\u0432\u044b\u0435 \u0432\u043e\u0437\u043c\u043e\u0436\u043d\u043e\u0441\u0442\u0438 \u0434\u043b\u044f \u043e\u043 \u043d\u0438\u0439, \u0441\u043e\u0437\u0434\u0430\u044e\u0449\u0438\u0445 \u043a\u043e\u043d\u0442\u0435\u043d\u0442\u043d\u0430 vcbut" ":"","imageUuid":"","isPaidAndBannersEnabled":false}
15557 views
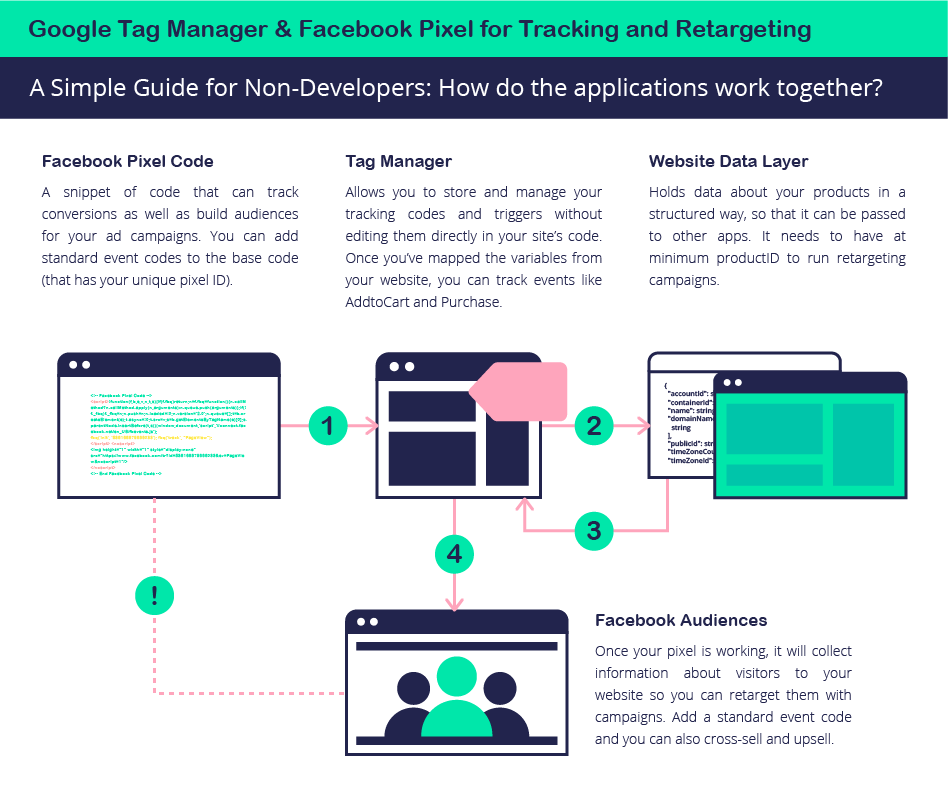
What is a pixel
A pixel is a JavaScript code that collects information about users and tracks their actions on the site. What pages the user visited, what buttons he clicked, what forms he filled out, what goods he put in the basket, and what he bought - all these steps are recorded by the pixel. The code itself is called a pixel, since one of its parts is a pixel-sized image. This image is being uploaded to the site. A pixel is placed on each page of the site. nine0003
On all platforms, the code is generated in the advertising account:
Read more about pixel settings on different sites in VKontakte help, Facebook Ads help, and MyTarget help. nine0003
Each social network has its own pixel, and it is unique for each ad account.
Why install pixel
The pixel of each social network is connected directly to the advertising account. For example, you installed the Yandex.Metrica code and the Google Analytics code on the site, and set up goals in both systems. Let's say you have a Form Submission goal set up that tracks any form submissions on the pages of your site. You've added UTM tags to your ad campaigns, but haven't set pixels. What will be the result? nine0003
In Yandex.Metrica and Google Analytics you will see:

Are they really not enough? Why is it recommended to set pixels anyway? nine0003
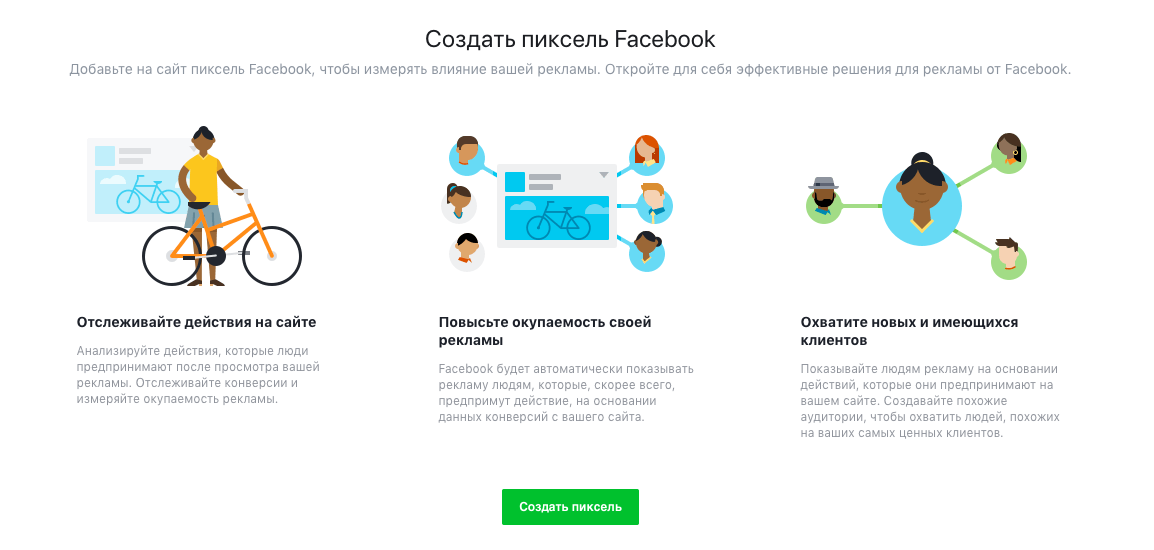
How to create a Facebook Ads pixel
Click the "Continue" button.
What to do after creating pixel
So, you have created a pixel, and now you need to install it. This can be done either manually or through partner integrations.
The pixel is set manually by adding code to the site. If your site is built on a website builder, check the access to your website builder and find recommendations for installing the Facebook Ads pixel in the help. For example, Tilda offers clear and understandable instructions. nine0003
If the site is not created on the constructor, you need to install the Google Tag Manager (GTM) code. Installing a pixel through GTM is much more convenient.
Tracking user targeted actions is a must have for any project. Data about user actions on the site allows you to understand the effectiveness of advertising campaigns and control the return on investment.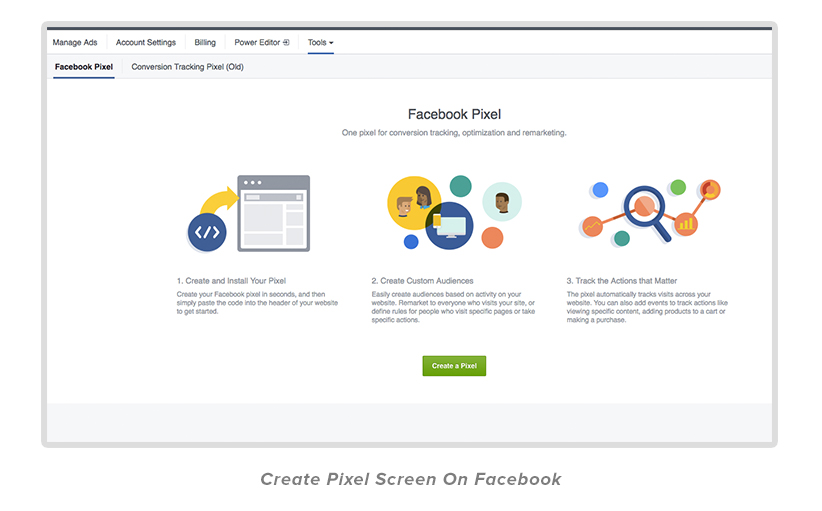
This article will focus on the pixel, an analytics tool for the Facebook advertising system. It is used to track conversions, optimize advertising campaigns, and create remarketing audiences. In addition, the Facebook pixel can also be used for Instagram retargeting. nine0003
The Facebook pixel is a piece of code with a unique account identifier.
You can create it in your Business Manager account under Measurement and Reporting - Pixels.
After creating the pixel, you need to install it on the site. There are two ways to do this.
The easiest way. Choosing it, you need to send instructions for installing the pixel to the programmer's mail. nine0003
To set the pixel directly in the site code, you need to copy the code from the manager interface:
and install it in the site header before the closing tag .![]()
For this installation, you need to create a separate tag. The tag type is "Custom html".
Add the copied pixel to the tag configuration:
You must also specify an activation trigger. The Facebook pixel should be placed on all pages of the site, so it is enough to select the “All pages” trigger.
Set the name of our tag and save. We check the operation of the tag in the preview mode and unload the changes.
To check if the Facebook pixel is installed correctly, you can send test traffic to it.
If installed correctly, you will receive a notification:
Another way to check if a pixel works is to use Facebook Helper. This is a browser extension that will help you find out if a site has a pixel installed and check it for errors. You can install the extension for Google Chrome here.![]()
This completes the basic installation of the Facebook pixel. The next step is to set up standard events.
Business stories and goodies
Standard events allow you to track specific user actions on the site (conversions), optimize advertising campaigns and create audiences of users who have completed some targeted action.
9 standard events include the following user actions:
To track standard events on the site, you must place an event code. The programmer must call it when the event occurs. nine0003
Each standard event has a set of parameters in which additional necessary data about the event can be passed. The table lists all 9 standard events, indicating the code and valid parameters.
| Event | Event code | Parameters | Parameter values | nine0232
| ViewContent | fbq('track', 'ViewContent') | value, currency, content_type, content_ids, contents. | value - value currency - currency content_type — product/page type; contens_ids - product id, contents - (object that contains the European product number (EAN). |
| Search | fbq('track', 'Search') | value, currency, content_category, content_ids, contents, search_string. | content_category — product/page category; search_string is the string entered by the user to search. |
| AddToCart | nine0002 fbq('track', 'AddToCart') | value, currency, content_name, content_type, content_ids, contents. | content_name — product/page name. |
| AddToWishlist | fbq('track', 'AddToWishlist') | value, currency, content_name, content_type, content_ids, contents. nine0219 | |
| IntiateCheckout | fbq('track', 'InitiateCheckout') | value, currency, content_name, content_category, content_ids, contents, num_items. | num_items - the number of goods / items in the order. |
| AddPaymentInfo | fbq('track', 'AddPaymentInfo') | value, currency, content_name, content_category, content_ids, contents. | |
| Purchase | fbq('track', 'Purchase') | value, currency, content_name, content_type, content_ids, contents, num_items. | |
| Lead | nine0002 fbq('track', 'Lead') | value, currency, content_name, content_category. | |
| CompleteRegistration | fbq('track', 'CompleteRegistration') | value, currency, content_name, status. | status is a parameter that shows the registration status. | nine0232
These parameters are optional in all cases, except for dynamic ads. Read our article about setting up Facebook dynamic remarketing.
Depending on the use/non-use of parameters, the event code can be of two types:
In this case, when the code is triggered, the pixel registers that a purchase has occurred.
 nine0016
 Depending on how the base pixel code is added to the site, the principle of setting and standard events changes.
When installing a pixel directly into the site code, you need to make changes to the base code of the pixel and set up the triggering of the changed base code when the user performs the target action.
Default basecode captures page view only:
After adding the standard "Add to Cart" event code to it — fbq('track', 'AddToCart') the pixel will look like this:
It should be placed on the add to cart page.
Total: on each page of the site, the base code should fire, and on pages that indicate the completion of the target action by the user, the base code and the standard event code.
Standard events can also be configured using Google Tag Manager.
This method is more convenient than the others:

To set up a standard event using Google Tag Manager, you need to create a new tag with the "Custom html" type and add the event code to it. nine0003
Let's add a standard "Purchase" event. Without additional parameters, the code in the tag will look like this:
Don't forget to specify the firing trigger and save the tag. This completes setting up standard events through Google Tag Manager.
You can check the triggering of custom events in Events Manager:
Now let's look at custom conversions that can be used to track user events/actions by URL. You can set up a maximum of 100 conversions per account. If you've set up more goals, you can remove unwanted conversions and create new ones. nine0003
Go to the Custom Conversions tab and select Create Conversion.
You can set up conversions based on the URL, or connect the target URL to a standard pixel event. Let's consider both options.
To create a custom conversion based on specific pages on your site, you need to specify a part of the desired URL in the conversion settings. For example, you can specify the address of the "Thank you for the newsletter" page:
At the creation stage, you can specify the value of the conversion and classify it as an event.
These conversions allow you to separately track the purchase of a specific product category or any other user action that meets the desired conditions.
For example, this is how the custom conversion setting “adding a product with a value of more than 1000 UAH to the cart” looks like: we use a standard event, specify the URL and the condition for the “value” parameter. Be careful: when setting up a standard event, you must configure the transmission of this parameter. nine0003
The conversion is counted only if the user adds a product to the cart, the cost of which is more than 1000 UAH.![]()