When you share something on your profile, you can use the audience selector to choose who it's shared with. If you want to change who can see things you've already posted, you can:
Choose a new audience for one of your past posts.
Change who can see all of your past posts to Friends at one time with Limit Past Posts.
To choose a new audience for one of your past posts:
Classic mobile browser experience
Tap in the top right of Facebook, then tap your name.
Scroll down to the post you want to edit.
Tap on the post, then tap Edit Privacy.
Select who can see the post from the options that appear (example: Public, Friends, Only Me). Learn more about the different audiences you can choose.
Updated mobile browser experience
Tap in the top right of Facebook, then tap your name.
Scroll down to the post you want to edit.
Tap in the top right of the post, then tap Change Audience.
Select who can see the post from the options that appear (example: Public, Friends, Only Me). Learn more about the different audiences you can choose.
To change who can see all your past posts at one time:
If you'd like to limit who can see all of your past posts at one time, you can Limit Past Posts in your account settings. This will change all your past posts visible to more people than just your friends (example: posts shared with Public) to be visible to only your Friends.
Tap in the top right of Facebook.
Scroll down and tap Settings.
Scroll down to Audience and Visibility and tap Posts.
Tap Limit who can see past posts.
Tap Limit Old Posts, then tap Confirm to confirm your decision.
When you use Limit Past Posts to change the audience of all your past posts:
When you Limit Past Posts, you’ll change the audience of all your past posts to Friends. If you want to change the audience of your posts back to what they were, you'll need to change the audience of each individual post. Limiting the audience of your previous posts cannot be reversed in one click.
If you have shared a previous post with a custom audience, such as Friends except Acquaintances or Close Friends, Limit Past Posts won’t change the audience for those past posts.
If you tagged someone in the post, the audience of the post will still include the person you tagged and people they include in posts they're tagged in. Learn more about how to change the audience of a post to just your friends when you tag someone. You can also remove the tag.
Limit Past Posts only controls the audience for posts you've shared. If you've been tagged in someone else's post, they control the audience for their posts.
When you share something on someone else's profile, that person controls the audience for the post.
Learn more about how to control what people can see on your profile.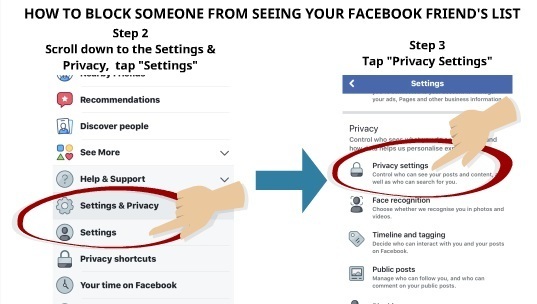
by Madalina Dinita 2 Comments
If you don’t like the idea of everyone being able to see your Facebook posts, you can tweak your privacy settings to hide them. If you’ve never done that before, follow the instructions below to get the job done.
The good news is that Facebook has a really handy tool that allows you to hide all of your timeline posts with a single click. Go to Settings and Privacy, select Privacy in the left-hand pane, and click on Limit Past Posts. This option automatically hides all your public posts from the Public and sets them to Friends only.
In this manner, people who are not your friends won’t be able to see your timeline posts.
As for future posts, go to Your activity and under Who can see your future posts, select Only Friends or Only me. Of course, if you don’t want anyone to see your future posts, you can select the Only me option.
If you’re using the Facebook mobile app, go to Settings & Privacy. Then tap Privacy Shortcuts, and select Review a few important privacy settings.
Go to Who can see what you share and use the Privacy Checkup tool to locate Future Posts and Limit Past Posts.
You can then change the privacy settings of your future posts and make them visible to friends only, or just you.
Alternatively, you can archive or permanently delete your old timeline posts en masse. Go to the Activity log, select Manage Activity, and then go to Your Posts.
Select a specific category of posts, click the three dots next to the respective posts, and select Archive or Trash.
The Social Book Post Manager for Chrome is a useful browser extension that allows you to delete entire months or years from your Facebook timeline. This tool is only available on desktop computers and it can help you delete tens or hundreds of posts in just a few seconds.
On mobile, you can use the Jumbo app to delete old posts. The tool will carefully comb through all your social media posts and permanently remove them in bulk.
If you want to hide previous Facebook posts from the public, you can use the Limit Past Posts option. On the other hand, if you want to hide future posts, go to Settings and under Who can see your future posts, select Only Friends or Only me. Alternatively, you can also archive or trash old posts from your timeline. Why did you decide to hide your Facebook posts? Share your thoughts in the comments below.
Filed Under: Internet Tagged With: facebook
The section "Publication management" will immediately help you delete all posts on Facebook. The user will be able to hide or permanently get rid of unnecessary posts.
Table of contents
Facebook for a long time did not have the function: "Delete post", instead it was "Hide from the general timeline". Recordings were stored in the Archive, from where the user could re-publish them. In one of the updates, the option appeared in the browser and mobile versions.
How to remove one post:
In order not to lose a previously created entry, the user can hide it. A completely deleted publication cannot be restored, as well as returned added photos or videos.
The browser version has a section: "Manage publications", so it is easier to delete a post from the computer than in the mobile version.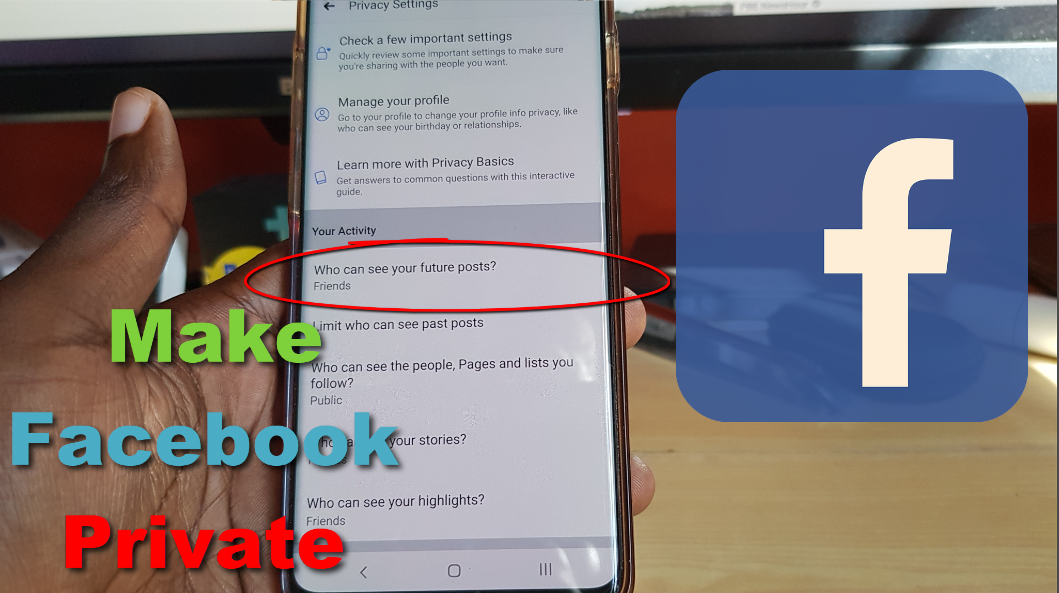 The user can select which entries to remove or hide from the Timeline. Separate options: change the posting date, edit the audience and the post itself. nine0003
How to delete multiple entries:
Publications are placed by date and grouped by months and weeks.
To delete everything at once, the user needs to go to the button: "Filters":
There are also other options for filters: "Privacy" and "Tagged Publication".
From the mobile version, in order to delete a post on Facebook, you must also go to management.
In contrast to the browser view, the function is hidden in the application and is located in the "Personal profile" category:
 nine0010
 There are also filters with the same settings. The profile owner can delete individual posts one by one by going to them using the "Feed".
Another way to get away from others is to set your privacy settings. Change access to records:
The profile owner can restrict access to basic page information. For example, city of residence, date of birth and place of work.
Facebook timeline - a log that allows you to view user activity from the day of registration. The owner of the page will see what search queries he performed, the publications he liked and deleted. The Chronicle is made in the form of an Archive: it stores information that can be restored.
Hiding in the feed, the profile owner will be able to return the post back:
To restore lost records, you need to go to the "Settings" section:
The entry will appear on the same date that it was published. When posting again, there is a function: "View" - full information regarding the post, time and likes will open.
December 28 Social media instructions
Contents:
Self-deleting posts is possible from your own or someone else's page, from any publications of groups and accounts with business content.
Important! You can remove the materials placed in the profile from a PC and any mobile device - this does not depend on the installed operating system.
Log in to your Facebook account. In the news feed that opens, click on your profile picture and open personal content.
Select the materials you want to get rid of and click on the three horizontal dots on the top right of the page.
In the context menu that opens, click on the "Move to Trash" item.
The system will ask you to confirm the action - click on "Move".
The post is almost deleted - it will be visible in the trash for 30 days, after which it will disappear. You can remove it from the shopping cart:
Click on the three dots at the top of the screen.
Scroll down the page to Settings.
In the menu that opens, find the line "Your information" and "Action log".
In the window that opens, click on the "Cart" button.
A list of all deleted content that is stored there for less than 30 days will appear. You can remove all or select the last move of materials to the trash. Click on the three vertical dots next to the selected post. nine0003
In the window that appears, confirm the final deletion.
A disappearing message will appear on the screen confirming the completion of the process.
You can remove your published materials from any group or page as follows:

How to delete posts on your page step by step:
Log in to your profile, go to "Settings" and open the "Action log" section. Click on the checkbox next to "Your publications". nine0003
In the window that opens, select the content for the posts you want to delete. For example, "Photos and Videos".
A list of publications from newest to oldest opens. In front of each of them is a white empty field in a square - click on each of them, highlighting in blue.
All posts from the list with a blue square can be deleted - click on "Add to trash".
In groups, on other people's personal or business pages, you must scroll through the feed of publications and delete each post manually. nine0003
Step-by-step algorithm for deleting all posts from your Facebook page:
Log in to your account.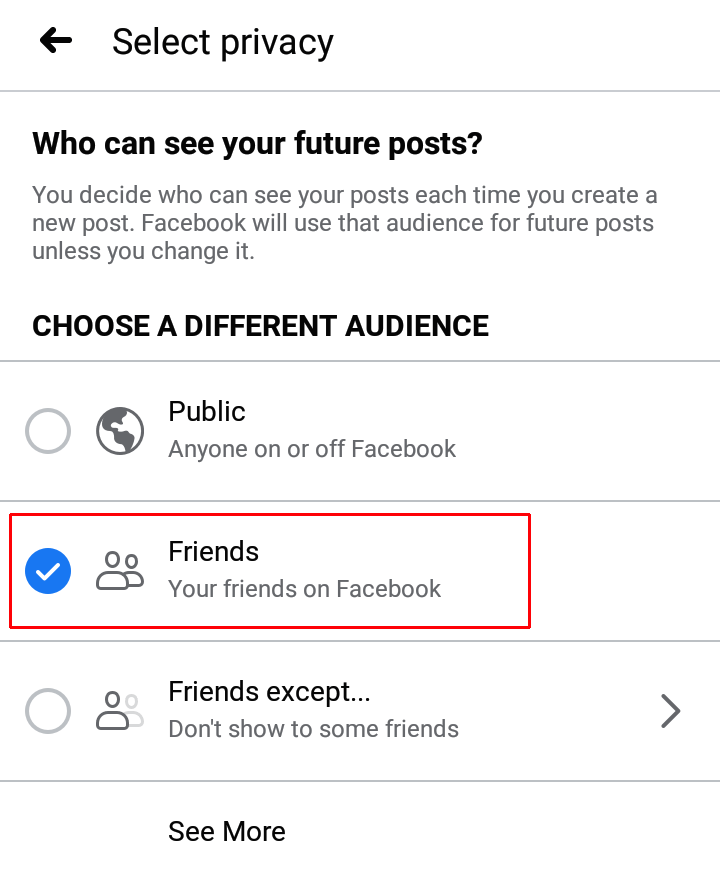 After that, find in the settings section "Activity Log", click on it and go to "Your publications" and "Photos and videos".
On the left side of the page, click on the filter icon.
Filter posts for deletion in any way. For example, by date of posting.
A window will appear where you need to set the start and end dates. Set the range and click "Finish". A list of sorted posts will appear, each of which must be manually deleted. nine0003
In groups and pages, scroll through the feed and delete each post manually.
You can use one of the above methods using the "Action Log" section. It is not possible to delete all posts in one step on Facebook.
Deleted content is stored in the Trash section for 30 days. If the post was not immediately deleted from there, it can be restored.
Find the "Activity Log" and "Your Posts" sections in your profile settings.