You may have seen photos from a THETA 360 degree camera on Instagram. Have you ever wondered how to create such images in wonderland?
The beauty of THETA is that you can shoot photos and videos that capture moments all around you in 360 degrees with a single click.
THETA images can be uploaded as 360-degree images on Facebook and LINE, but not on Instagram. In that case, you need to edit them using the dedicated editing app, THETA+.
Let’s see how to post THETA images on Instagram and some tips for shooting and editing!
The easiest way to shoot is simply to press the shutter button on THETA for an instant 360-degree shot. It’s simple and easy no matter what situation you’re in.
Shooting with THETA in hand
All it takes is the press of a button, but you might notice that your hand is big in the frame.
Taken with THETA in the hand
If that’s the case, try using a selfie stick!
We recommend RICOH THETA Stick TM-3 or TM-2, which are exclusive selfie sticks for THETA.
THETA Stick TM-3 and THETA SC2
Attach the selfie stick to THETA and activate it while holding the self-timer button on the body of THETA SC2.
With this method, you don’t need to connect your smartphone to THETA via Wifi when shooting, but you can still quickly activate the self-timer, making selfie stick shooting easier.
Click here for how to activate THETA V, SC, and S with the self timer.
Shooting with THETA and a selfie stick attached
THETA does not show what is directly below it. In addition, THETA has a top-bottom correction function, so the sky is always at the top regardless of the direction in which THETA was pointing while shooting
Therefore, there is no need to keep THETA at an angle to the selfie stick. It’s best to keep them aligned while holding the stick and THETA in any direction that suits you in the moment.
Click here for how to shoot with a selfie stick.
Taken with THETA and a selfie stick close to the leaves and edited with the THETA+ app
By shooting with THETA and the selfie stick in alignment, the selfie stick does not appear at all, and it looks as if someone else had taken the picture.
▼Try moving the image around in any direction!▼
Post from RICOH THETA. – Spherical Image – RICOH THETA
Shooting with THETA Z1 and a selfie stick
One of the fun scenes for shooting with THETA is flowers.
Taken with THETA SC2 and edited with the THETA+ app
You may have wondered how to shoot such “flower ring” images often seen on social media.
Once you get the hang of it, it’s super easy!
The tip is to use a selfie stick and put THETA as close as possible to the flowers.
Shooting with THETA SC2 and a selfie stick attached
Try using the self-timer button on the body to take a quick shot.
You don’t need a massive field of flowers to get the effect. With a little editing in the THETA+ app, you can make a simple flower garden look amazing with THETA.
Post from RICOH THETA. – Spherical Image – RICOH THETA
The 360 degree image of above was taken with THETA SC2
You can easily edit the 360 images using the THETA+ app. To make the flower frame images, flip the “Little Planet” mode.
Edit with THETA+
You can also edit tone and colors directly on THETA+. And of course, it can be edited with another editing app after that.
Click here for more details on how to use THETA+!
Sometimes you want to shoot only the scenery without yourself in the shot.
Taken with THETA and edited with THETA+
photo by @93kumi93
In such cases, try making the most of a tripod or monopod!
Use a selfie stick and put THETA deep in the flowers, and crouch down to avoid being in frame as much as possible.
An even better way to shoot the scenery without yourself in view is to put THETA on a tripod and shoot remotely from a distance using the THETA app on your phone.
Left: THETA with a selfie stick atop a tripod standing in a field of flowers
Right: THETA with a selfie stick in a patch of flowers
*RICOH THETA Stick TM-3 and TM-2, exclusive selfie sticks for THETA, have screw holes that allow mounting on a generic tripod.
After shooting, try editing 360 images with THETA+.
Edit with THETA+
Try flipping around “Little Planet” or playing with interesting angles.Your photos will transform into unexpected and exciting compositions!
When we share precious time with our loved ones we can capture the scene easily with THETA without spoiling the moment.
THETA lets you smoothly capture the entire scene and everyone present. No one needs to be left out for holding the camera.
The easiest way is to use THETA and a selfie stick attached with the self-timer button. This way you can quickly take a selfie.
Shooting with THETA SC2 and a selfie stick
By editing images into a wide angle, you can make it look as if someone else took the photo.
Edit with THETA+
We’ve all been in the situation where one person in our group is left out of the photos because they are the designated photographer, or we have to resort to asking strangers to take photos for us, which can quickly become tedious.
Shooting with THETA SC2 and a selfie stick
Well, you don’t need to worry anymore! Try taking a quick shot with THETA on a selfie stick!
Edit with THETA+
You can photograph the 360-degree view surrounding you and won’t miss a good moment!
How about keeping all the wonderful scenery of the season in 360 images so that you can always look back on your memories with the THETA viewing app.
It’s also fun to edit and share memories with your friends, like on Instagram.
Just look at these colorful autumn leaves!
Shooting with THETA attached to a selfie stick close to the autumn leaves
Or you can shoot glittering night views in winter.
Post from RICOH THETA. – Spherical Image – RICOH THETA
Taken with THETA Z1
Taken with THETA Z and edited with THETA+
Or capture spring with gorgeous cherry blossoms.
Even a single cherry tree becomes a dynamic tapestry of color when you shoot with THETA among its branches, getting it as close as possible to the blossoms!
Taken with THETA SC2 and edited with THETA+
And in summer, capture a bright and sunny flower field!
We hope your memories in each season become more wonderful with THETA!
Please share your beautiful memories with us on social media!
For more details, please visit the product page.
Photo : @minatymom103
Model : @minatymom103, @hmk_1002
Mobile phone photography has evolved so much in the last few years. With all smartphone check with artificial intelligence, Augmented reality, mixed reality, and many other capabilities, 360-degree photos are the next big thing.
So Much that Facebook has started supporting 360-degree photos, from last few years, and they even allow you to take 360-degree photos, even when your smartphone camera is not eatable for taking 360-degree photos, check out this article to know how.
Considering Facebook owns Instagram, it’s a shame that it is not allowed the same kind of capability on Instagram as well since it is the most visual social media platform available.
The content created on Instagram is mostly videos and photos and would have been nicer if Facebook had allowed posting 360-degree photos on Instagram as well.
The Facebook acquired Instagram in 2012, it introduced a number of features to the platform since then, and one of them was the ability to post multiple photos in a single post.
View this post on Instagram
A post shared by Lucknow Tips by Asif (@lucknowtips)
We can use the same feature for boasting panoramic for 360-degree photos on Instagram. And the good thing is that we can use the same method of creating 360-degree photos or panoramic photos on Facebook, which also keeps a copy of the photo of in a folder named Facebook, which can be found under the ‘Pictures’ folder.
If you had already shared 360-degree photos on Facebook, you might already have them saved in that folder, if not you can go through the article mentioned above to create one.
Now, you need to install one of these apps that I found on the Play Store. The purpose of these apps is to chop off the panoramic or 360-degree photo into multiple photos that can be posted on Instagram.
People would be swiping through the photos as if it is a single photo.
Panorama crop for Instagram is pretty good on the UI path, it gives you three options to post a photo on Instagram, for posting Paranomic photos or 360 photos Unity select the first one which is it swipeable post.
You will then be able to browse to the folder where you will find the saved 360-photo that you have created using the Facebook app.
You can then select the Canvas and the number of photos you want to slice the 360-photo to post.
Other than being highly annoying for showing popup ads there isn’t anything negative about this app. If you want to use it once in a while this should be ok since it is not very heavy and sized under 10MB.
Install from the Play Store
Panorama for Instagram at which is also under 10 MB and offers all the functionalities the above tab offers.
The only thing that is different from the above app is the user interface, it is still easy, but like the Panorama crop for Instagram, the Panorama for the Instagram app is also quite ad heavy which is a bit of turn off.
Again, if you are not someone who is going to post 360 photos in Instagram every single day or, multiple times a day, then you can surely use either of these apps, they function properly.
Install from the Play Store
Panorama for Instagram: Inswipe, is a rather simple app for posting 360 photos, all the Panasonic photos on Instagram.
The user interface is not that’s good, two cities in simple Black and White, but the thing that I like about this app the most, it did not have too many annoying ads.
Obviously, since that is free to use the only way to monetize the app is by showing ads, I am really happy that a developer has thought of putting only banner ads, and not trying to make more money by annoying users by showing popup ads, at least till now.
I used all the three apps for testing purpose then immediately uninstalled the other two and I’m happy with the Panorama for Instagram: Inswipe.
You can save your time by directly installing the last app, but you are free to try three of them choose the one you like the most.
Install from the Play Store
This is how you can post 360-degree photos or panoramic photos on Instagram without actually having the feature natively available on the platform.
report this ad
report this ad
report this ad
Table of contents:
Many people are now seriously engaged in the promotion of Instagram. However, no amount of money invested in promotion will be useful if the quality of the content leaves much to be desired. What people see in your posts and page description determines whether they follow you or not. But Insta is a social network for mobile devices, and it is not always possible to implement the intended image format. Let's talk about how to post a panorama on Instagram.
If you have looked at the camera interface on your phone, you may have noticed that there is a special mode, "Panorama". What is he doing? It allows the device to take multiple photos and glue them together. What we end up with is a long, narrow picture, either horizontal or vertical, that gives us an almost complete view of what's in our field of vision. Now there is little sense in such shooting - even phones have wide-angle cameras that allow you not to bathe with panning, but simply take pictures.
Now there is no hard cropping of images in the social network - in principle, you can post both horizontal and vertical photos. But there are still limitations. The panned image is too long to post in one post.
Although this situation has been observed in the social network for a long time, there are not many solutions to it. Perhaps the only thing you can do is cut the picture and post it in one post.
Another option is to put these parts not in one post, but in several in a row, so that they form a single long picture like a puzzle. It will look something like this:
Panorama on Instagram - the content is not very popular, because the social network does not support their full download. Yes, and you need to think logically - this service is focused on mobile devices and optimizes posts for their screens. In long pictures, there are often a lot of details, and even if you could lay them out, there would be little sense - anyway, people will not be able to see everything that you would like to show. But, since there are ways to optimize such photos for your profile, let's talk about how to make a panorama on Instagram. But not in the sense of taking it off - this functionality is available in all standard applications for shooting on phones. Therefore, let's talk about how to process an image so that it can be uploaded to a profile without any problems.
Swipeable is an iOS app that allows you to not only cut an image into a carousel, but also automatically add it to a post. Can create panoramas or 360 shots. Optionally, you can add filters right here. So, this tool automatically solves the issue of how to post a panorama on Instagram.
InSwipe is an assistant for Android. You set the number of sectors, adapt the grid to the size of the panorama and cut the image in the right places.
And here's a couple more words on how to upload a panorama to Instagram, will not be superfluous.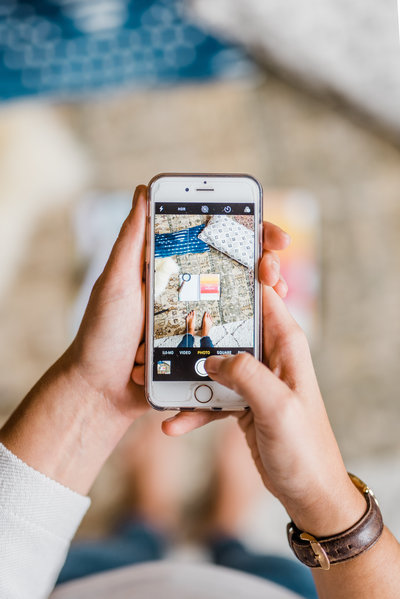 This question is poignant because it can be a bit confusing which picture to load first. So, the algorithm of actions is the following:
How to add a panorama on Instagram? The social network, due to optimization for mobile devices, does not support the download of such images. Therefore, for this you have to be tricky, cutting the image and loading its parts into one post through the carousel. With shooting, no difficulties will arise - the necessary functionality is available in all modern official applications for shooting.
#1. How to upload a photo to Instagram in full size?
Now there is no such strict restriction on the orientation of the photo. You can upload not only square pictures. You can place a full-length image by clicking on one button in the lower left corner. But remember that in the preview, people still see the square, and you might end up with
#2. Why does the quality of a photo drop after uploading to Instagram?
Instagram is designed for mobile devices, so images are limited both by the screen quality of most gadgets and by cutting, which directly affects the file size, and, consequently, the download speed.
#3. Can I crop a photo for posting?
If it doesn't match the aspect ratio, you can't.
If you want to ask a question or speak out - you in the comments. Also, don't forget to watch the video tutorial on the topic.
[Total: 0 Average: 0/5]
Like the content? Share with your friends!
Author: Egor Denisov
Content
Panorama or 360-degree shots - photographs with a larger field of view. Using the smartphone settings, you can create one long image in high resolution. When publishing to social networks, the picture will be reduced to the required format.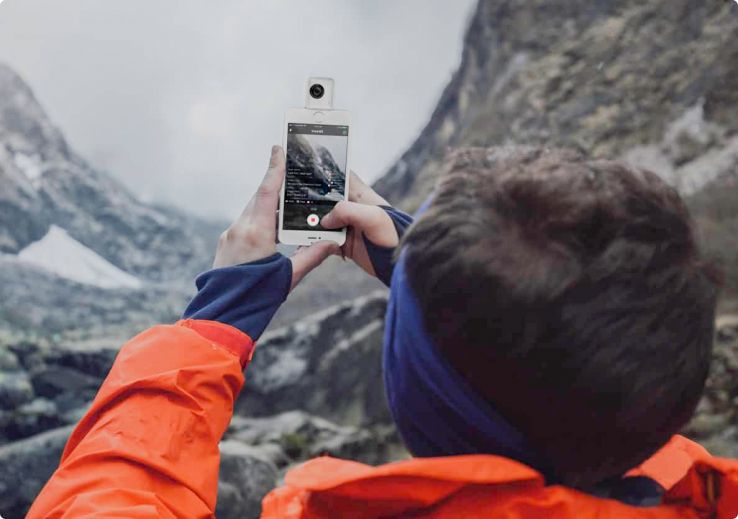 The following methods will help you post a panorama on Instagram.
Before downloading third-party photo cutting applications, you need to make sure that your mobile device supports this function. A panorama is created from several photos: the photographer can stand still and the phone will do everything by itself, or it must turn around and take pictures. As a result, a long picture will appear in the Gallery, which can only be viewed on a computer.
You can make a panorama on Instagram using:
Instagram's latest update allows users to post carousels of pictures. This is a small photo album that can hold up to 10 photos. Using it, you can lay out a panoramic image without losing quality or reducing the height.
Panorama for Instagram is required to create images with a large view. The advantage of the tool is that the quality of the photo does not decrease and it can be immediately published on a social network. Slicing of pictures takes place according to clearly defined parameters: 3:1 or more.
Instructions on how to upload a panorama to Instagram:
- Didn't find an answer? Ask a question we will prepare and send you an answer by e-mail
- Powerful upgrade of Instagram account
- Free and paid services for promotion

Depending on the specified number of photos, the user will receive from three to ten small pictures. They can be published in a carousel, and profile visitors can scroll through, take a closer look at the details.
You can use computer programs to take a panorama on Instagram. The most popular photo editing tool is Photoshop. Using it, the user will be able to crop the picture, edit and improve the quality.
Instructions on how to cut a panorama in Photoshop:
 For example, if the image height is 800 pixels, then specify the same value in the field.
 Important: the length of the image must be at least three parts long. According to the example: the length should be 2400 (800*3).
When saving the panorama, specify: Save for Web and upload location. Folders with cut pictures will appear. They can be transferred to a mobile device using Bluetooth transfer or a USB cable. When uploading a panorama to Instagram, also select “ Carousel ” in the parameters and mark the pictures in order.
Creating panoramic shots is easier with a tripod or accessories that allow you to keep your camera steady. Taking pictures without fixation, the user runs the risk of getting a blurry and poor-quality image.
It is worth noting that you can only take a photo through the standard functions of a smartphone or a professional camera. In mobile applications, only cutting and publishing to a social network is available.