How to make your instagram profile pic not blurry
Why Is My Instagram Profile Picture Blurry?
An Instagram profile picture is the first thing people see when they come across a profile. It is essential to have a good one to attract more followers and get engagement.
With that in mind, what could be more important than having a quality image as a profile picture?
Exactly! But just like me, you probably uploaded a nice profile picture only to discover that the picture turned out blurry and that after all attempts with different photos, you still got the same blurry image.
Did you know that all images uploaded on Instagram are compressed and cropped automatically by the app? You would need to upload the best possible photo to meet the basic requirements of Instagram.
By this, I mean an image having a square dimension and a minimum size of 110x110 pixels or 1080x1080 at best. Otherwise, you would discover that your excellent picture turned out blurry. That’s the last thing you need on your profile.
In this article, I will tell you how I upload the best HD photo on my profile simply by following some simple steps. We will also discuss how to upload a profile picture to Instagram.
Table of Contents
- Reasons For Blurry Profile Photos on Instagram
- Reason #1: Oversized Photo File
- Reason #2: Wrong Aspect Ratio
- Reason #3: Improper File Format
- Reason #4: Uploading From the Wrong Device
- How To Upload a Profile Picture the Right Way?
- How To Fix Blurry a Profile Photo on Instagram?
- Method #1: Adjust Instagram Settings
- Method #2: Adjust Camera Settings on Your Phone
- Method #3: Use Instagram’s Built-In Camera
- In Conclusion
The Instagram app is a popular photo-sharing app with over a billion users and only has a few flaws. One of these flaws is the blurry profile pictures everyone seems to have.
Whether it’s because of the phone’s low-quality camera or the effect Instagram uses, Instagram profile pictures can be a bit blurry and challenging to see.
Let’s consider reasons that could lead to blurry images on Instagram.
Reason #1:
Oversized Photo FileInstagram automatically compresses images larger than 1MB, which often results in a loss of quality and causes the photo to turn out blurry.
Reason #2:
Wrong Aspect RatioInstagram crops all the profile pictures that are not in the 1:1 aspect ratio. It’s best to use the recommended ratio to keep your image sharp.
Reason #3:
Improper File FormatInstagram accepts JPEG or JPG by default. Using any other format might lead to having a black picture or a blurry photo.
Instagram is a mobile-based application that operates better on mobile devices than on PCs. Uploading images from a PC might turn out blurry.
Now that you know the common reasons for blurry Instagram profile pictures, it’s time to change your current one.
Changing your profile photo on Instagram is relatively straightforward. Here is how to do it:
- Take or choose a photo you want to use as an Instagram profile picture.
- Edit the image according to the guidelines in the previous paragraph.
- Open the Instagram app on your mobile device.
- Tap on the profile icon in the bottom right corner.
- Tap the “Edit Profile” button below your bio.
- Tap the “Change profile photo” button.
- Select “Choose from library.”
- Select the photo from your phone’s gallery.
- Press “Done” in the top right corner.
- Press “Done” in the top right corner again to confirm changes.
If you still have a blurry photo, read on because we will further discuss how to fix blurry profile photos on Instagram.
How To Fix Blurry a Profile Photo on Instagram?Many aspects might cause a blurry Instagram photo. Try the methods below to fix yours.
Method #1: Adjust Instagram SettingsYou need to make some adjustments on Instagram to avoid having a blurry image. Putting off the “Data saver” feature will improve the photos you upload.
Here’s how you can turn off the “Data Saver” mode on Instagram:
- Open the Instagram app on your mobile device.
- Tap the profile icon in the bottom right corner.
- Tap on the menu icon in the top right corner.
- Select “Settings.”
- Choose “Account.”
- On an iPhone:
- Select “Data Usage.
 ”
” - Turn off “Use less mobile data.”
- Turn on “High-quality uploads.”
- Select “Data Usage.
- On an Android device:
- Select “Cellular data use.”
- Turn off “Data Saver.”
Adjusting the camera setting is another way to avoid taking low-quality images that turn out blurry as profile pictures. Open your phone’s camera settings and ensure “HDR” is turned on.
On Android devices, it’s called “Ultra shot HDR.” If your device allows you to select the picture size, choose the largest size available for the best quality.
Method #3: Use Instagram’s Built-In CameraWe already know that Instagram compresses all images above 1MB, a great way to ensure good quality upload is by using the camera feature built into the Instagram app.
Let Instagram adjust the aspect ratio, file format, and other settings for you. Follow these steps to access the built-in camera:
- Open Instagram on your mobile device.
- Tap on the profile icon in the bottom right corner.
- Tap the “Edit Profile” button.
- Tap “Change profile photo.”
- Select “Take Photo.”
- Take a photo.
- Tap the “Done” button in the top right corner.
In Conclusion
You can fix the problem of a blurry Instagram profile picture by being cautious of things like photo size, file format, aspect ratio, and all these little things most people overlook. However, these aspects can distinguish between a clear or blurry photo.
Always remember to mind the aspect ratio and image size. A 1:1 ratio for an image of 320×320 pixels is excellent for a profile photo.
Upload JPEG or JPG and avoid uploading photos shared through messaging services such as Facebook Messenger because such images have been compressed and have lost their quality.
Following the steps mentioned above, you can fix the issue of blurry photos. This guide covered all possible root causes of blurry Instagram profile photos. However, you can also use this as a guideline for other high-quality Instagram photo uploads.
Why is My Instagram Profile Picture Blurry?
Unfortunately, one of the most common issues that users of Instagram experience is their profile picture appearing blurry after they have uploaded it. This can be frustrating as it will keep your profile picture from displaying correctly.
A blurry profile picture is most likely due to unoptimized photos, internet issues, or low-quality photos. All of the issues could cause your profile picture to appear blurry when viewed by other users on the Instagram application.
This guide will walk you through the many common causes of these types of issues as well as some troubleshooting methods that you can use to help resolve your issues. It is important that you are able to upload your profile pictures and have them displayed as intended. This guide can help you do this.
Why Is My Instagram Profile Picture Blurry
Table of Contents
The next part of this guide will focus on the reasons that your Instagram profile picture appears blurry after being uploaded. There are several different causes for this, most of which stem from some type of user error.
Note: Usually, when your Instagram profile picture is blurry, you might notice that your posts are blurry or Instagram stories are blurry.
These causes include unoptimized profile pictures, poor internet connection, and unsupported images. All of these issues will be covered in detail in the list below.
Use the list of causes below to help you identify and resolve your issue. It is important to accurately identify your issue so that you can implement the proper troubleshooting method.
1. Your Profile Picture Is Not Optimized
Your profile picture could be displayed as blurry because it is not properly optimized. Proper optimization includes the right resolution, aspect ratio, and picture format. If your photo does not meet the requirements by Instagram for a properly optimized photo, you will likely encounter display issues like your picture appearing blurry.
The most optimal size of an Instagram photo is 110×110 pixels with an aspect ratio of 1:1. This will produce a perfect square that is an optimal size that Instagram is set up to display. If you maintain this ratio and picture size, your Instagram photo will always be the perfect size for display.
That being said, there are other aspect ratios and picture sizes that can work with Instagram. You will still need to optimize the photos to ensure that they display correctly.
2. Your Network Connection Timed Out
If your network connection has timed out while attempting to load the profile picture, it will not be able to properly display the image, and it will appear blurry. The image will be partially displayed as it will have begun the process of being loaded before the network connection was lost.
It will not however be able to completely display the profile picture as it does not have access to the data containing all of the elements of the photo. Your network connection will time out anytime that you lose internet connection while attempting to access data on the internet.
Internet connection issues can be caused by outages, router problems, or storm damage. You will need to address your internet issues before trying to view your profile picture correctly. Your internet service provider can provide more information regarding your internet outage.
3. Your Image Is Not Supported
If the image type that you have uploaded as your profile picture is not supported by Instagram, it will not display correctly, often displaying as blurry. The image types supported by Instagram are JPEG and PNG, BMP, and non-animated GIFs.
Any other image types that you attempt to upload will not be displayed correctly. This is due to the restrictions that Instagram has placed on image processing. You could also encounter issues with your Instagram profile picture if the image is too large or too small.
You should consult the guidelines for an acceptable profile picture that is displayed on the upload screen on Instagram. Following these guidelines can help cut down on your chances of encountering issues with your profile picture being blurry.
4. There Is A Bug
Your Instagram application could have encountered a bug that is causing it to not function correctly. This could include errors with your profile picture displaying as blurry when you view it.
Bugs and glitches are errors that cause temporary issues with functionality when using features associated with Instagram. They typically occur at random and are resolved on their own. That being said, there are some more reoccurring bugs that can present themselves while you are using Instagram that will need to be addressed before you regain the full functionality of the application.
Bugs and glitches are common across all types of software applications but are typically easily resolved. You should consider updating your application, restarting the Instagram app, or uninstalling and reinstalling the Instagram application to help resolve these types of issues.
How To Fix Blurry Profile Picture On Instagram
The next part of this guide will focus on the different ways that you can resolve issues with blurry profile pictures on Instagram. This includes general methods for uploading a picture correctly and also ways that you can fix issues caused by bugs that are causing your problems.
It can be frustrating to deal with a profile picture that is not displaying correctly. Your profile picture is one of the ways that users can create a unique presence on the Instagram application. You can use the following methods to ensure that you can always get your Instagram application’s profile picture to display correctly.
It is important that you first use the list of common causes listed above to accurately identify the root of your issue. This can help save you time when applying the correct troubleshooting method to solve your issue.
1. Keep Right Aspect Ratio So Instagram Does Not Blur Your Profile Picture
You will need to ensure that you are using the right aspect ratio for your profile photo to be displayed correctly. If the photo you are attempting to upload is too big or too small, or in the wrong resolution, then it will often appear as blurry when you attempt to view it.
Keeping the right aspect ratio can help you avoid these types of issues. You should check Instagram’s guidelines for an appropriate picture aspect ratio. The best aspect ratio to use on Instagram is 1:1. Using this aspect ratio, your Instagram picture will always be the correct size.
2. Maximize Your Phone’s Camera Settings To Improve Loss Of Quality
You should use the best settings possible on your phone so that the picture you are attempting to upload is of the highest photo quality. The quality of your phone’s camera settings will play a vital role in the overall quality and resolution of the photo you upload for your profile picture.
You should use the high-definition settings for all photos that you are taking that you plan on uploading to Instagram as your profile picture. One of the ways that you can maximize your phone’s camera settings is to avoid the digital zoom feature of your camera.
Digital zoom can produce blurry, pixelated photos. This is because the digital zoom is only a replication of camera zoom. You should always move as close to what you are taking a picture of instead of using the digital zoom features.
Using a tripod can also help improve your picture quality. Tripods can add stability to your image, which can give it a professional quality that you might not otherwise have. Tripods can be purchased for cheap, with mini-tripod being the most popular for use with mobile devices.
If your phone has a Pro photo mode, you should consider enabling it to take your profile pictures. Pro mode will give you much more control over your phone’s camera settings, including exposure settings and other photo editing settings.
You should always take a profile picture using the 4k settings on your phone’s camera. This will ensure that you have the highest resolution photo to upload to the Instagram application. 4k photos are supported by most models of modern smartphones.
You should also make use of your phone’s AE and AF lock features. These auto-focus and auto-exposure features can help automatically stabilize and optimize the photos that you take with your phone.
It is important that you set your phone to use only natural colors when taking a photo for your Instagram profile. This can help your photos from appearing oversaturated. You can typically access the color settings in your phone’s display settings.
Finally, and most importantly, you should make sure that your lens is clean before taking a photo for your Instagram profile picture. If your lens is dirty, it will cause your photo to appear obscured by dirt and grime.
3. Upload Profile Picture From Browser
If you are having issues uploading a properly displaying profile picture in the Instagram application on your mobile device or Instagram desktop app, then you should consider using the Instagram browser application to upload your profile picture.
This could help bypass any errors that your Instagram application is experiencing. Using the Instagram browser application operates on separate software that is not dependent on user updates.
You will have to upload the picture that you wish to use as a profile picture on Instagram to your PC before you will be able to use it in the Instagram browser. You should use the optimization methods listed above to help you take the best photo you can before uploading it to your PC for use on the Instagram browser application.
Instagram.com has all of the same features that the application does but in web browser format. This is often the preferred way to use the Instagram application for some users as it shows pictures in a larger and more full resolution.
4. Use A High-Quality Camera To Keep Quality High And Prevent Blur
You should also use a high-quality camera to take all photos you plan to use for your profile picture. The camera quality will play a vital role in your overall picture quality on Instagram.
If the camera you are using is not high-quality, your photos will more than likely wind up appearing blurry and pixelated when viewed on Instagram. You should upgrade your camera if having a high-quality profile picture is important to you.
The iPhone 13 Pro Max has one of the best cameras currently on the market. Another phone with an extremely impressive camera is the Pixel 6 Pro, which can almost match the quality of the iPhone 13 Pro Max.
For Android users, the Samsung Galaxy S22 Ultra has the best camera of any android phone currently on the market. Using any of these phones will produce the highest quality photos that you can possibly get out of a modern smartphone.
5. Use Instagram’s Camera To Prevent Loss Of Quality
Instagram has a camera feature in the mobile app that allows users to upload a profile picture automatically and directly to the application. You should use this feature to avoid loss of quality during picture conversion.
You can access this camera feature by tapping the camera icon located in the application. This will automatically open the camera app on your device and skip the conversion process. Most profile pictures uploaded in this manner will be automatically converted to the correct resolution and aspect ratio.
This makes it the best option for avoiding issues when uploading profile pictures to the Instagram application. You should use this method if you are having issues uploading using other methods.
6. Do Not Share The Photo Before Uploading To Prevent Initial Blurring
You should avoid sharing the photo to the Instagram app through the chat or direct messaging feature to avoid initial compression of the photo. You should first upload your photo as your profile picture and then share the uploaded photo by saving it to your device again.
Compression is one of the main causes of blurry profile photos on Instagram. Photos are automatically compressed to an extent when shared through the chat or direct messaging features.
You should upload the raw photo from your PC or mobile device and not a saved copy of the photo from where you shared it. This will keep you from encountering initial blurring issues when uploading your profile picture to Instagram.
7. Update Instagram If Your Profile Picture Is Blurring More Than Usual
Many issues with the Instagram application are caused by outdated application software. When software falls behind on updates you will likely begin to experience issues more frequently, including your profile picture being uploaded and displaying as blurry.
You should always update your application as soon as Instagram notifies you that one is available. Doing so will ensure that you are always caught up on bug fixes and app optimizations. You should consider checking for an update when you are having issues with the Instagram app. You will need to manually download and install the update for it to take effect.
If you are using the Instagram browser application, you will not need to update the Instagram application. The Instagram browser application is automatically updated. The method for updating the Instagram application has been detailed below.
First, you will need to open your phone’s app store. Once you have opened the app store, you will need to search for the Instagram application using the app stores search feature. Once you see the Instagram application in the app store, you will either be presented with the option to open or update the app.
If you are presented with the open option, your application is up-to-date. If you see the update option, then your application needs an update. Tap the update button and your device will automatically begin the update process.
8. Use Other Photo Editing Apps With Pre-Set To Keep Quality High
You could also use some photo editing applications that have pre-sets that are designed to keep your settings optimized for Instagram. The photo editing applications can be found for free online and can be used to help keep your photos up to standard with the Instagram application so they are always displayed correctly.
Photo editing applications are popular for enhancing profile pictures but adjusting certain elements of the photo. More advanced photo editing software offers many more features but typically costs some sort of subscription fee to use.
VSCO is one of the most popular free to use photo editing applications. Using VSCO, users can adjust photo settings like brightness, contrast, and saturation. VSCO also offers several photo presets that you can use on your Instagram profile photos to help improve their quality.
For more advanced photo editing, suited for more experienced editors, Photoshop Express is a good paid option to consider. It has by far the most extensive selection of photo edition options currently available on the market.
Either one of these options is more than enough to properly optimize and edit your Instagram profile pictures to ensure that they are ready for upload and will be displayed correctly.
Keep in mind that you should utilize third-party applications carefully, as some could potentially cause compatibility issues with the Instagram application.
9.
 Do Not Upload With A Weak Internet Connection
You should always ensure that you are uploading a photo while your internet connection is stable. If you are experiencing a spotty, inconsistent internet connection, then you will not be able to properly upload a photo to the Instagram application.
Internet connection issues could be caused by an internet outage, router problems, or storm damage in your area. You should contact your internet service provider for more information regarding your outage.
You should use some of the troubleshooting methods below to help you resolve some of your internet issues. These troubleshooting methods include restarting your router, power cycling your router, and what you should do during an outage.
To reset your router, simply unplug it for at least sixty seconds. This will give your router time to completely power off and stop any latent functions occurring inside the device. Once you have powered your router back on, it will automatically begin the process of reestablishing a connection to your devices.
If resetting your router did not fix the issue, you should consider contacting your internet service provider to find out more information regarding your outage. They can provide you with more details including the cause of your outage as well as an estimated time that you can expect the issue to be resolved in.
Final Thoughts
This guide has provided you with all of the information that you need to fix your blurry profile picture issues on Instagram. Using the troubleshooting methods found in this guide, you can accurately identify and remedy any issues that you may be experiencing with your Instagram application’s profile picture feature.
In short, to ensure that your profile picture is displayed correctly after uploading, you should ensure that your photo meets all of the requirements set by Instagram for a fully optimized profile picture.
This includes maintaining the correct aspect ratio, resolution, size, and other quality settings that could affect the picture’s display quality. Use this guide to help you stay within these guidelines and ensure that you always have the best possible profile picture.
It is important that you are able to upload a profile picture to the Instagram application and have it displayed correctly. This guide can help ensure that it does.
How to upload photos to Instagram without losing quality: Tips for optimizing your shot
Many people say that Instagram compresses photos and degrades the original quality of images. If you use the platform only to chat with friends, then the decrease in clarity may not interfere with the publication of frames. However, detail is important when you are promoting a brand and business, posting photos from photo shoots, and creating a beautiful feed. Today we will tell you what determines the clarity of the picture and how to upload a photo to Instagram without losing quality. nine0003
Photo format and size requirements
In order for photos to be displayed without cropping or compression, you must set the appropriate photo format and size.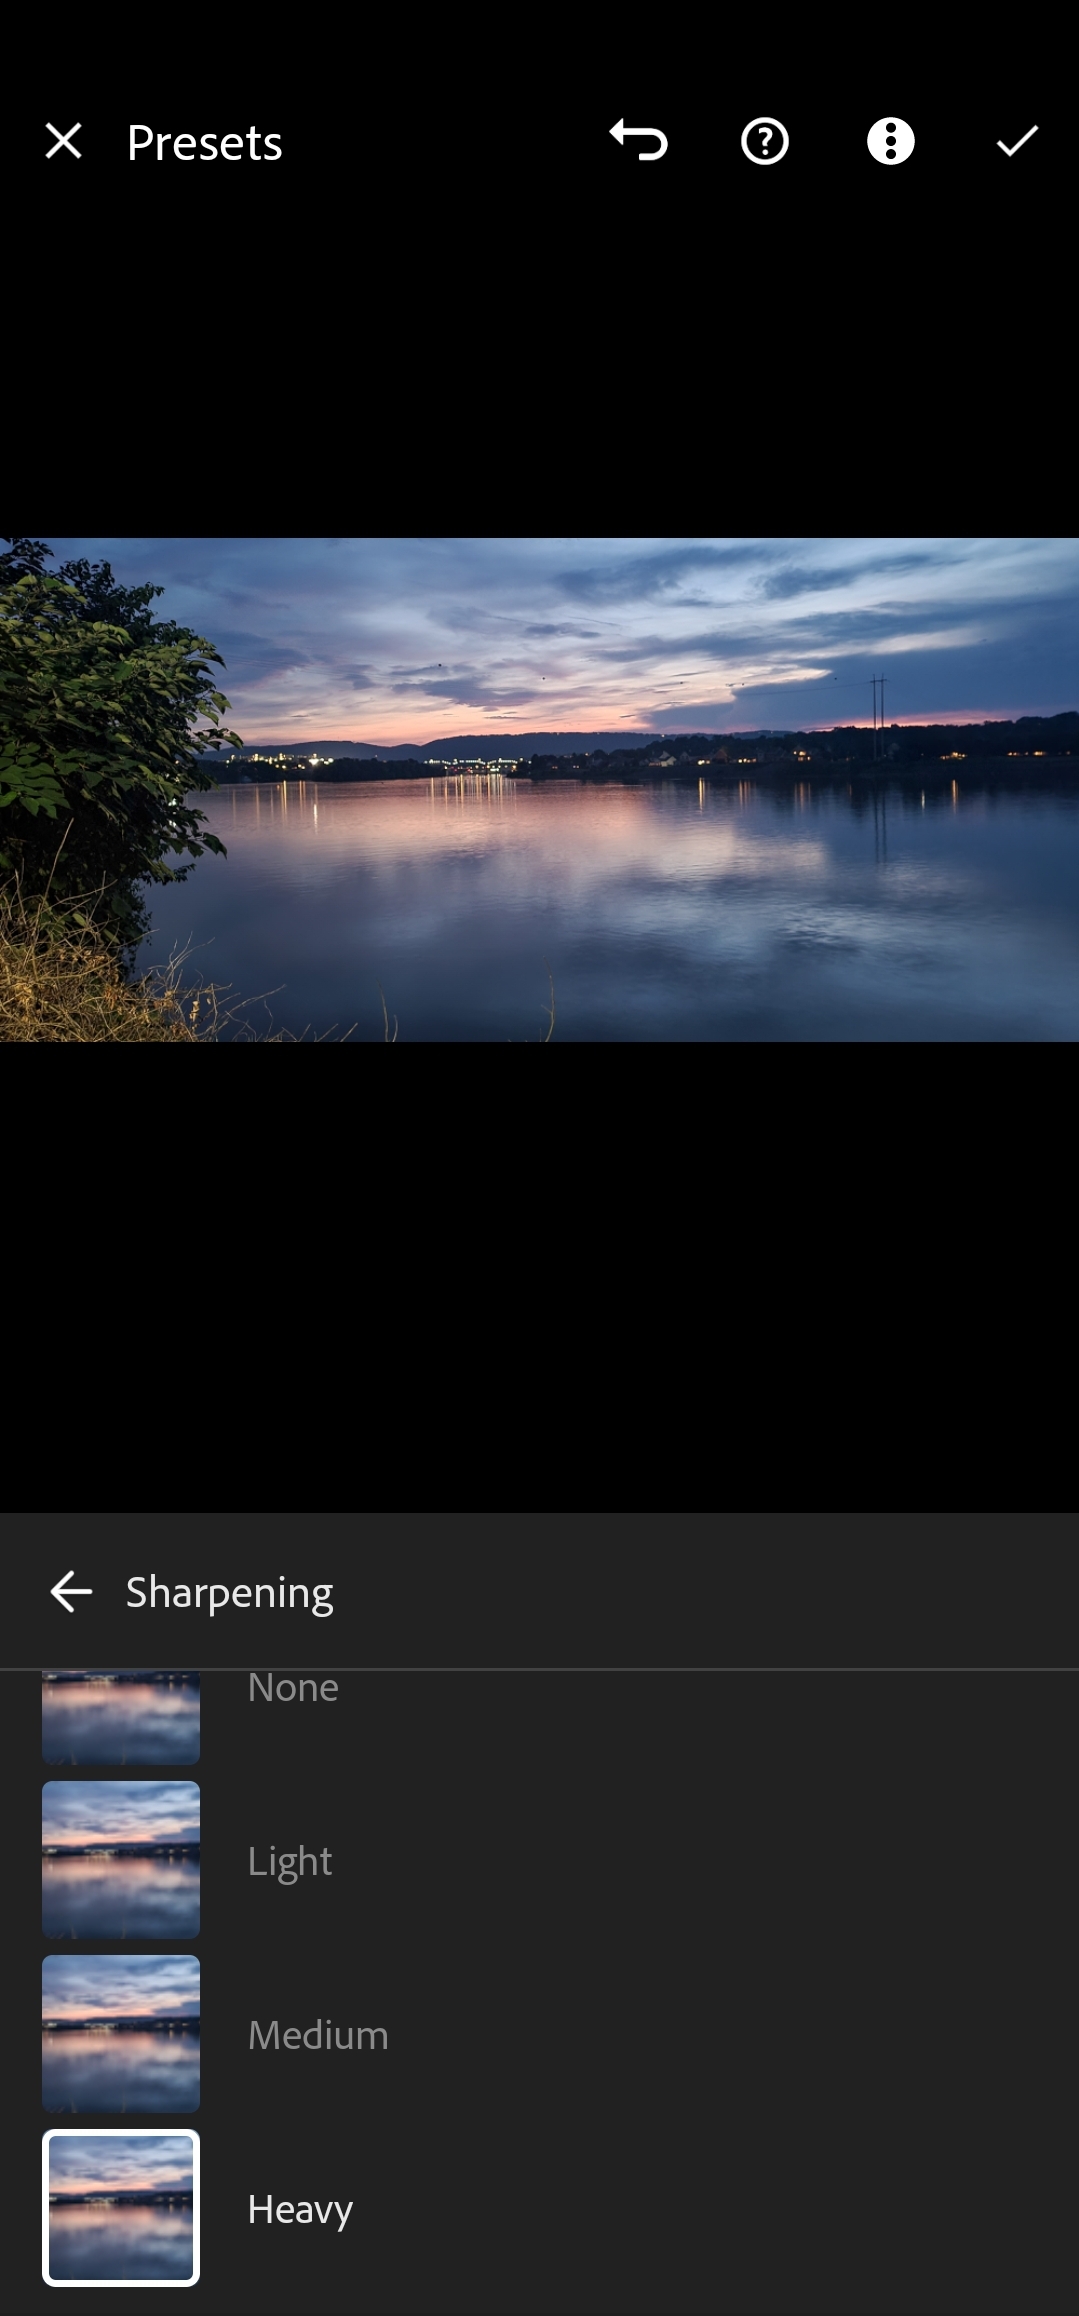 The rules of the social network spell out the required frame proportions and resolution for posts, stories, and even profile photos.
Post sizes
You can post photos in different orientations in the feed. You can upload a vertical, horizontal or square image. In the profile, all content will be displayed in the form of a square, but when you open a picture, Instagram will show the original frame without cropping. nine0003
To ensure that images do not lose quality, you need to set the correct aspect ratio:
- Format: for horizontal images - 1.91:1, vertical - 4:5, square - 1:1.
- Resolution: for horizontal - 1080 × 566 px, vertical - 1080 x 1350 px, square - 1080 × 1080 px.
What happens if I upload an image "as is" without setting the resolution? When posting photos with a width of less than 320 pixels, Instagram will automatically increase the image resolution. Because of this, digital noise and pixelated areas will appear in the photo.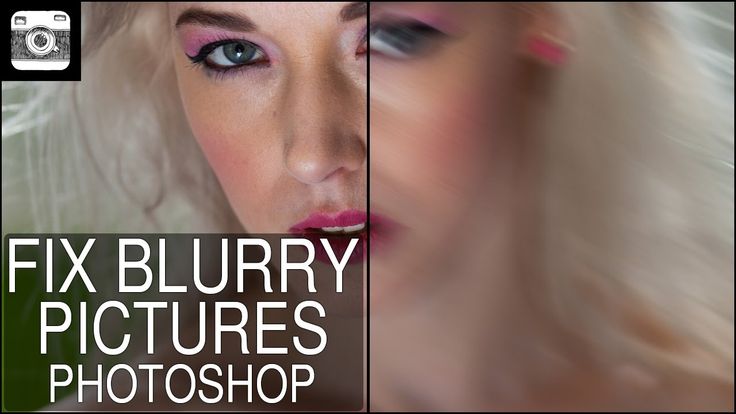 nine0003
When uploading large photos, the social network will reduce the width to 1080 pixels. In this case, the detail and contrast of the photo may decrease.
How publications will look in different layouts
Aspect ratio in Stories
In Stories, for the correct display of the image, you need to publish content with a vertical orientation. Horizontal or square footage will either be framed with black borders, or they will adjust to the predominant color of the image. nine0003
Required properties for stories:
- Format: 16:9.
- Resolution: 1080 × 1920 dots.
- Media size: up to 30 MB.
And by the way, photos will be displayed in stories for 5 seconds. You won't be able to change the media duration.
How pictures look in different positions in Stories
Profile photo resolution
The profile avatar in the social network is displayed as a circle, but a square picture is uploaded to the server itself. It's best to crop the shot yourself, as the platform automatically removes the edges of the image and can cut off important parts of the frame. nine0003
The size of the avatar depends on where the profile is opened:
- when viewed on a smartphone — 110 x 110 px;
- in a browser on a computer - 180 x 180 px;
- when displaying search results - 40 x 40.
Automatic cropping of photos with different aspect ratios
What affects the quality of pictures
Basically, the quality depends on the original resolution of the image. Also, the following criteria affect the clarity of the photo:
- when publishing content directly from applications for iPhone, the quality deteriorates; nine0021
- JPG and PNG images are best displayed;
- the social network makes the image faded and blurry, so before uploading it is worth sharpening and increasing the saturation of the photo;
- The detail depends on the model of the device from which the file was published.

How to upload photos to Instagram without losing quality
To optimize the image from your phone, you can use special applications. Good options for Android and iPhone would be InstaSize and NoCrop . For Android users, there is also a good software A Better Camera . All these utilities allow you to maintain the original proportions and upload pictures without white borders, help you avoid blurring the picture and scale the photo correctly.
Step-by-step instructions for optimizing a photo for Instagram
We will look at how to post photos on Instagram without losing quality, using the example of the application A Better Camera . It will allow you to expand the standard capabilities of the main camera, set the appropriate aspect ratio and get high detail. nine0003
You can download the application for free from the Google Play Market. Then we act according to the algorithm:
1. You need to launch the application and swipe from top to bottom. In the menu that opens, select "Settings" and go to the "General settings" - "Shot size" section. Here you can choose the appropriate resolution for Instagram.
The higher the Mpix value, the higher the resolution.
2. Next, you need to go back and open the Screen Settings tab. You can display additional items in the start menu: battery power, grid, various modes, etc. nine0003
Options will allow you to control the quality of the photo
3. Then you need to exit the settings and swipe down again. Open the "Scenes" tab and specify the desired option: portrait, landscape, sports, etc. The software will automatically set the appropriate exposure, contrast and exposure settings. In fact, you need to choose a thematic filter in order to better convey the atmosphere of the frame and avoid graphical defects.
Available scenes
4. Click on the "Focus" option. If you need to shoot small objects, it is better to switch to the "Macro" mode. For other situations, "Auto" is suitable. nine0003
Available options
5. Next, you need to return to the start menu and click on the modes icon in the lower right corner. Here you can select automatic shooting, create a panorama, a tool for removing unwanted objects, applying an HDR effect, or night mode.
The option is marked on the picture
6. After saving all the settings, you need to tap on the screen in the place where the lens should be focused. Click on the camera icon to take a photo. The result will be saved to the gallery. Now you can upload it to the platform through the Instagram mobile app. nine0003
Conclusions
Now it's clearer how to upload photos to Instagram without quality loss. The original low resolution affects the clarity of the pictures. In such cases, Instagram will automatically enlarge the image and make it blurry and pixelated. A large image will in turn be reduced, and this can reduce the detail and contrast of the photo.
Before publishing, be sure to adjust the aspect ratio in the software, otherwise the frame will not be displayed correctly in the feed. You can use InstaSize, NoCrop and A Better Camera. To find other useful applications for working with photos and not only, it is necessary to read reviews of programs. So you can find the best solution for various tasks and get acquainted with all the features of the software. nine0003
If you follow the requirements of the social network, use special applications for optimization, you can guarantee a perfect image in the feed.
Android I/O Instagram iPhone As an advertisement
How to post a sharp and high-quality photo on Instagram*
February 1, 2019 A photo
Just a few simple steps in Photoshop are enough.
If you're an active Instagram* user, you've probably noticed that the quality of your photos degrades slightly after being posted.![]() It's all because of the compression algorithm that the service uses to store millions of snapshots on its servers. nine0003
It's all because of the compression algorithm that the service uses to store millions of snapshots on its servers. nine0003
For many, it is important that their images look as sharp and high quality as possible. This is especially true for photographers and bloggers, whose income is highly dependent on how aesthetically pleasing their content looks.
Here are some simple tips to help you post the most eye-catching photos on Instagram*. All you need is Photoshop and a little time.
Switch to sRGB color profile
Open the image you want to edit. You need to find out which color profile is currently in use. To do this, click on the arrow in the lower left corner of the screen, which is located next to the photo scale indicator, and select Document Profile. nine0003
You will most likely see the ProPhoto RGB color space being used. Because of it, the colors on the smartphone will differ from those displayed on the computer screen. So you need to switch to sRGB.
- On the top bar, click Edit.
- Select Convert to Profile.
- Specify sRGB in the Profile line.
- Click OK.
Make the image 8-bit
This will also help make the colors on your mobile device look identical to what you see on your PC. nine0003
- On the top bar, select Image.
- Press Mode.
- Select "8 bits/channel".
Make the background white
To see how your photo will look on Instagram* on your computer, change the background in Photoshop from the default gray to white. This can greatly affect the perception of the image as a whole.
Right click on the background and click "Select a different color". Then select white from the palette and click OK. nine0003
Play with saturation
By adjusting the colors of the image, you can make the picture more visible in the feed. In the lower right corner, click on the icon with a circle divided in two and create a "Selective Color" layer.
Select the layer with the left mouse button, and just above you will see the Cyan, Magenta, Yellow and Black sliders. Experiment with them to change the saturation of individual colors.
Crop photo
Instagram* can only post photos with a certain aspect ratio, otherwise the service will crop them. It will be much better if you do it yourself. nine0003
In the left panel, select the "Frame" tool and at the top, simply enter the desired aspect ratio. For example, 4:5 is good for portraits, while 1.9:1 is good for landscapes. Then simply select the desired area of the image.
Adjust image size
The maximum size of an Instagram* image is 1,080 pixels wide. If you upload a larger image, the service compresses it, which may affect the quality.
To adjust the size yourself, click on the Image bar at the top and select Image Size. Enter 1080 in the Width field and the height will change automatically. The remaining parameters can be left untouched. nine0003
Sharpen
Press Ctrl + Alt + Shift + E to create a layer that combines all the previous ones. After that, you can make the picture sharper.
- On the top bar, click Filter and select Convert for Smart Filters.
- Click "Filter" again and in the "Other" tab select "Edge Contrast".
- Fit the thumbnail image to fit the screen of your smartphone and set the radius at which details start to appear in the image. Click OK. nine0021
- In the Layers panel, find the "Normal" button and select the "Overlay" mode.
That's it! Your photo is sharp and ready to be published. It remains to save it and send it to the phone.
Read also 🧐
- These apps and services do what Instagram users lack*
- 20 Must-Have Apps for Instagram Users*
- How to Download Instagram Photos* to Computer, Tablet or Smartphone
*Meta Platforms Inc. and its social networks Facebook and Instagram are prohibited in the territory of the Russian Federation.


