Home » Misc » How to make one picture into two for instagram
How to make one picture into two for instagram
PhotoSplit for Instagram on the App Store
Description
PhotoSplit is the most popular app to split your photos to the grid and post them directly to Instagram.
PhotoSplit lets you slice any photo into a 1x2, 1x3, 2x3, 3x3 & 4x3 grid while keeping it in high resolution. It then quickly lets you post the split images to Instagram to show it as one big photo on your profile. Elevate your Instagram game by giving your profile a professional look.
In PhotoSplit, you can zoom in, move, or even rotate your photo to instantly see how it will look like on your Instagram profile.
Why PhotoSplit? • Choose from a variety of grid options: 1x2, 1x3, 2x3, 3x3 & 4x3 • Move, Zoom or Rotate to get the perfect fit. • Keeps images in high resolution. Does not reduce quality after splitting. Will not blur the image. • Share images directly to Instagram without having to save first. • If you like, save split images to photo library and post from within the Instagram app. • Send any photo to PhotoSplit app from the iPhone Photo Gallery and other apps directly through Share widget. • No login, No subscriptions, No ads. • Over 23,000 5-Star Ratings • Trusted by over 400,000 Instagram lovers
Version 1.9.8
- New Theme - Bug fixes and Enhancements
Ratings and Reviews
27K Ratings
Go pro to actually make it worth your while
If you’re going to be using Instagram extensively and care enough to use this to enhance your page, just pay the pro fee. It’s less than $4 USD, which is around the average price of a coffee.
There are claims that using this app to split images reduces the quality of the resulting split images. I have not noticed any drop in image resolution. For the intended purpose (of posting on Instagram and viewing images on smaller screens) this is fine. Don’t use this app to split your professional photography for gallery prints...
Simple, easy to use app.
Thank you for your kind words. We are always working to make the app better.
Why is this 4.8 Stars?
The app only lets you post two photos and save two photos. After that you have to pay. That’s not two WHOLE photos either. That’s one photo cut up into squares and each square is one photo. So if you use the layout with nine squares you basically waste your time posting less than half of the photo before you realise you have to delete the posts and download another app.
Great Until You’re Hijacked
You Can Only Split 2 Photos before a message letting you know to Go Pro at $7. 99 in order to gain lifetime use pops up & ends your project. I’m using it for a Non-Profit Companies Social Media account that I volunteer to assist, so was still just testing to see if this App is a good way to create more interest. However, I didn’t even get to post my 2nd Freebie Split photo, since I went back to do some edits before Splitting the updated image then was told, no more Free Photo Splits for me, Lol. Well Ok, the App works decently well & I would have given 4 stars if being at all upfront about needing to $Go Pro for the ability to post more than two pics.
The developer, Tech Positive, indicated that the app’s privacy practices may include handling of data as described below. For more information, see the developer’s privacy policy.
Data Not Linked to You
The following data may be collected but it is not linked to your identity:
Identifiers
Usage Data
Diagnostics
Privacy practices may vary, for example, based on the features you use or your age. Learn More
The Best Free Instagram Photo Split Tools For an Engaging Feed
Have you been mystified (and a little envious) of how people get those incredible Instagram feeds with a photo split between multiple posts?
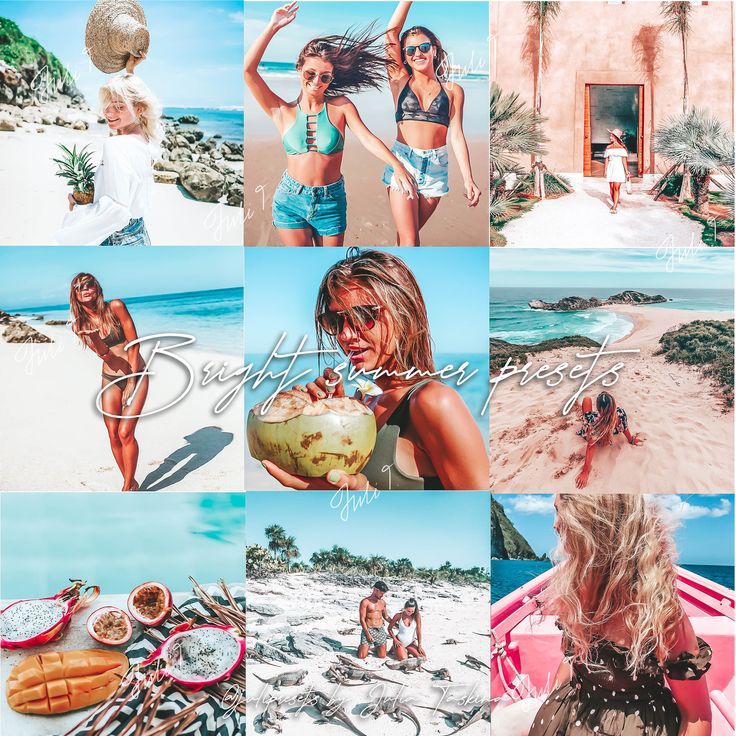
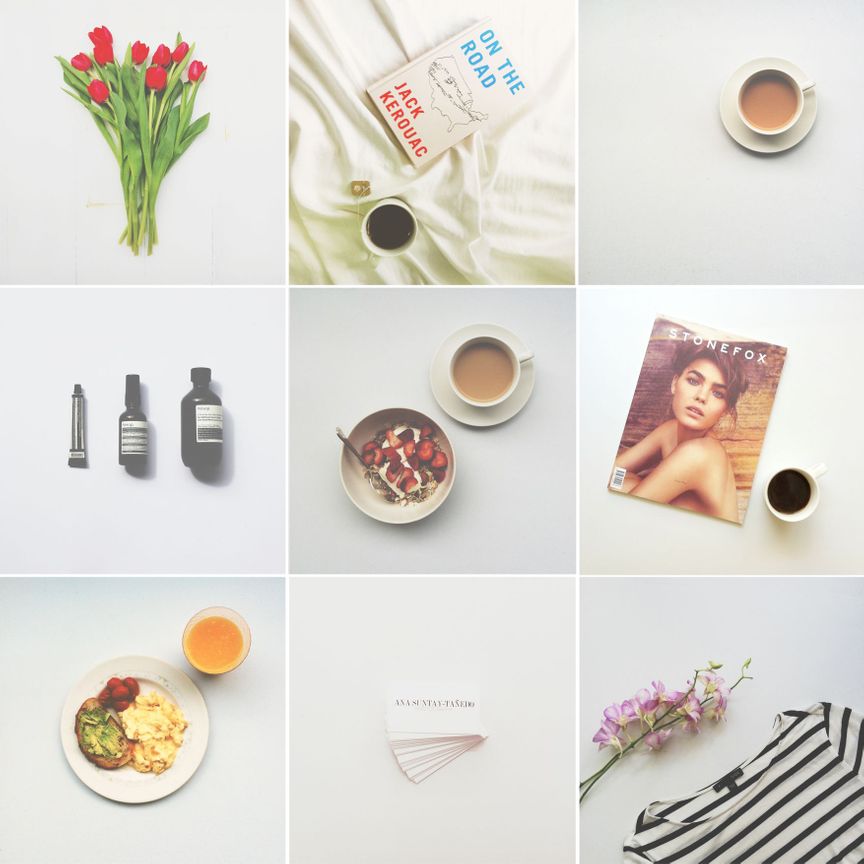
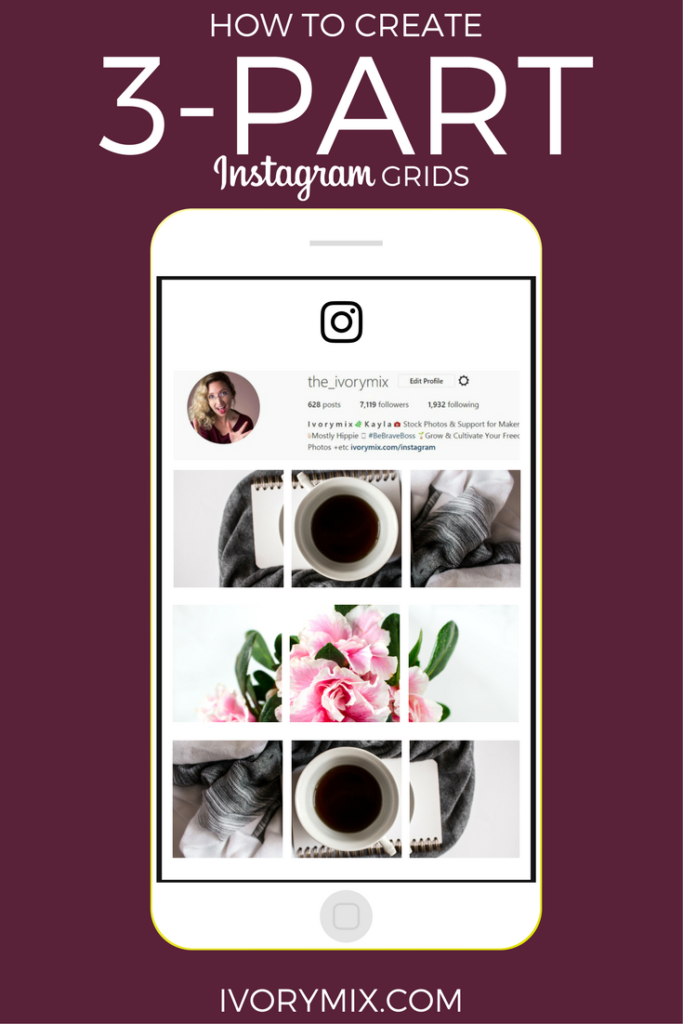
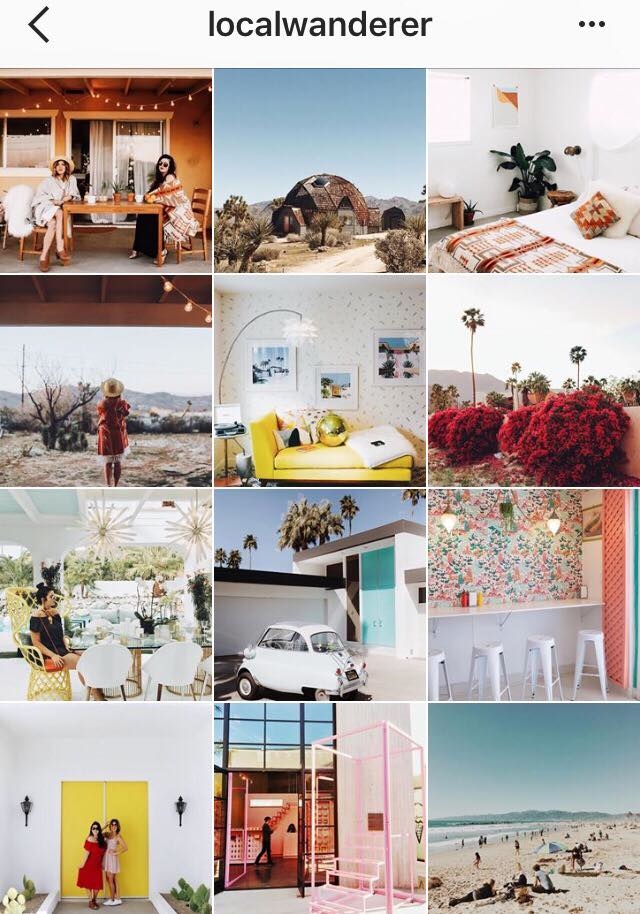
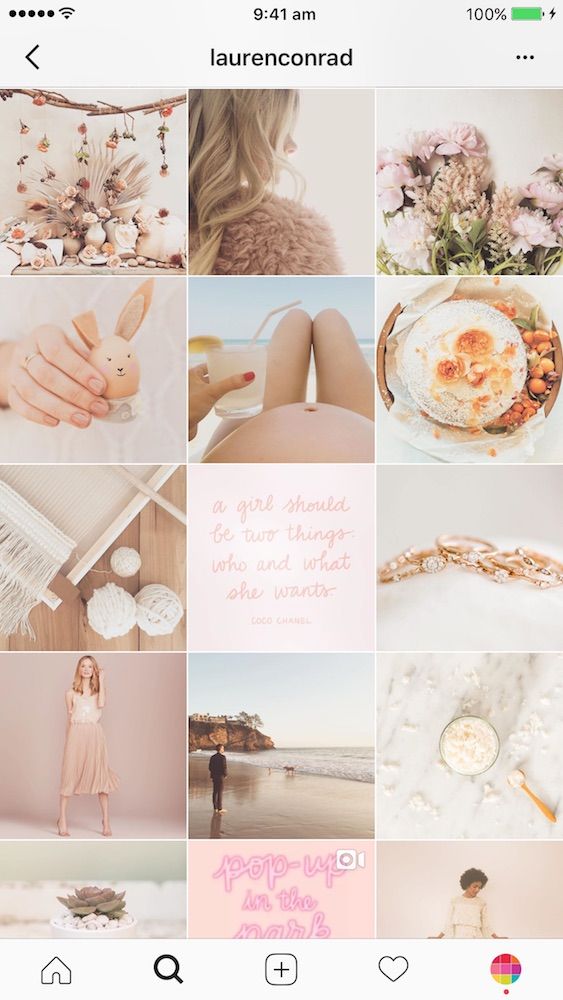
When you click on someone’s Instagram profile and their 9 grid is one large photo, or they have a beautiful feed design with 3 Instagram pictures in a row, it truly makes for a bold, impactful, and cohesive aesthetic.
Celebrities like Taylor Swift and Blake Lively use this to garner attention to upcoming movies or albums, and many companies use this method to get more interest in new product launches or new clothing seasons.
So, if you’re thinking of showcasing a photoshoot, or just want to give your Instagram grid (and profile) a professional new aesthetic, we have a collection of free tools to turn one picture into a multi-photo grid for your feed.
Here are our favorite image splitter softwares for posting split pictures on Instagram! ✨
The Best Free Instagram Photo Splitter Tools
2. ImageSplitter by Chron
3. 9Square for Instagram
4. PineTools
5. Instant Squares
Where do I find the split and crop slice tools?
What is the best way to use Instagram photo split tools to enhance your feed?
You don’t have to be a magician or split a photo a million times to get it perfect for each frame. There are tools for that!
And frankly, cropping and dividing photos on your own is incredibly time-consuming and complicated.
Who has time for that? Not you!
Let these four photo split tools do the work for you to achieve that cool aesthetic! They’re designed to make splitting pictures quick, easy, and hassle-free. 💪
1.
PhotoSplit for Instagram
Available on iOS and Android
Price: Free for the first two photos and then $11.99 (one-time cost)
This app is pretty simple to use for Instagram split photos, and it’s great for beginners. Or, anyone who wants a straightforward tool to get the job done!
PhotoSplit also includes several grid options including a 1×2, 1×3, 2×3, 3×3 and 4×3, so you can choose an option that works great for your photo!
If you don’t plan on using this feature often, you might not want to pay for the Pro version.
However, if you do see yourself taking full advantage of this app, having a one-time charge instead of a monthly or yearly subscription is well worth it!
Is PhotoSplit the Right Instagram Photo Splitter For You?
Choose PhotoSplit if you’re looking for an app that:
Is very easy to use
Has a variety of grid options
Has a straightforward Instagram picture splitter
Charges a one-time charge for unlimited pro photo splitting
Allows you to zoom, move, or even rotate your photo
Able to post directly to Instagram
How to Split Pictures on Instagram with PhotoSplit:Step One: Choose Your Grid Option
With this app, you can choose between a 1×2, 1×3, 2×3, 3×3, or 4×3 option.
Depending on your photo, you may want to only take up one row (1×3 grid) of your Instagram 9 grid or up to 4 (4×3 grid)!
Play around with the multiple options and decide what works best with your photo and how much of your feed you’d like this image to take.
Step Two: Adjust Your Photo
PhotoSplit allows you to move, zoom, or rotate your image, so take full advantage of it!
Once you’ve decided which grid option compliments your image and feed best, adjust your photo to be centered and zoomed in the way that looks best.
Step Three: Split!
Once you’ve chosen the perfect spacing, hit the Split button on the top right.
The app will then take you to a screen with your pictures numbered and aligned in the correct order in which to post them.
Fair warning: it will look pretty wonky, but they’ve done the photo Jenga work for you to get that photo split sequence perfect on your feed.
Step Four: Post Your Split Image to Instagram
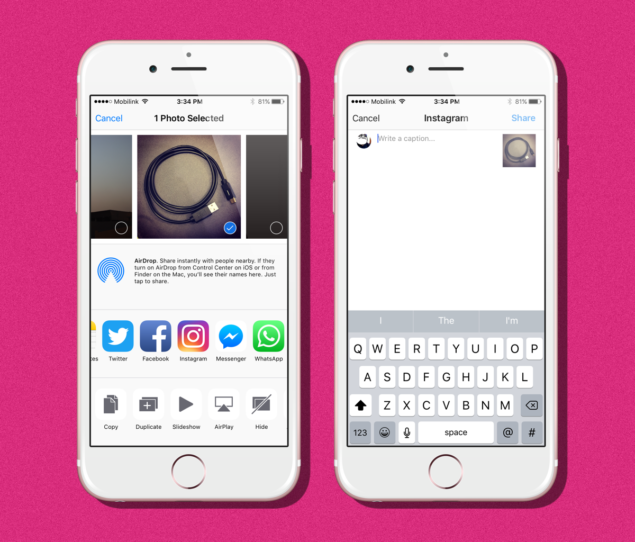
Following the next step, you can tap on each photo in the grid and post it to Instagram from the PhotoSplit app directly.
However, you can also save your individual images to your Camera Roll and upload them to Tailwind to post in the correct sequence there!
This is a great option if you want to take your time with your caption and hashtags on each frame! Snag a free trial of Tailwind for Instagram here – no credit card required!
Before:
After:
2.
ImageSplitter by Chron
Available on Desktop
Price: Free!
ImageSplitter’s tagline, “If you were asking How to divide your Instagram photos into smaller pieces to make a giant square, you are in the right place!” says it all.
This tool is intuitive, gives recommendations of picture size for each grid option and includes helpful graphics to show you what your image would look like with each grid layout.
Grid options include 3×1, 3×3, 3×4, 3×5, and 3×6.
Is ImageSplitter the Right Instagram Photo Splitter For You?
Choose ImageSplitter if you’re looking for a tool that:
Has a desktop version
Is free 💰
Is easy to use
Gives helpful recommendations for sizes and examples for your photos
Is able to post images to your Instagram
How to Split Pictures on Instagram with ImageSplitterStep One: Upload Your Image
ImageSplitter gives recommendations on the sizes that will work best for each different type of grid option.
So, if you want to only post 3 pictures in a row on your Instagram, you can choose an image that will look best horizontally with the 3×1 grid.
If you have more vertical space you want to show, you can choose the larger grids.
Step Two: Choose Your Grid Size
Your image will automatically be split into 9 separate images for a 3×3 grid; however, you can adjust the Columns and Rows buttons on the left sidebar to create whatever grid style you want!
Step Three: Adjust Your Image
After you’ve chosen how many spots of your grid you will use, you can then drag the boxes around to fit the exact part of the image you want to show!
These green lines show where your image will be split, so you can get a good idea of what each post will look like.
This capability eliminates the need to crop the image or zoom in before uploading – you have all the control!
Step Four: Split!
Once you’ve chosen your image layout, hit the Split Image button.
ImageSplitter will process the images and download a zip file including your individual posts.
Each photo in your folder will be labeled with a number. You follow these numbers to post your images in the correct order so they will show on your feed the right way!
Step Five: Upload to Instagram
Now, follow the numbers on your saved images and upload to Instagram in the order!
If you want to take a bit more time with your caption or just want to not rush to post, upload your images to Tailwind and schedule them to post automatically for you!
You can include Hashtags in the First Comment and edit all your captions to perfection. Plus, plan and schedule posts quickly (without leaving your feed looking like a lopsided mess in between each upload 😅)
Start a Free Trial of Tailwind for Instagram!
Schedule photos and videos directly to your Instagram feed with Auto Post.
Optimize every post for more engagement with SmartSchedule and Hashtag Finder.
Automatically hide your post’s hashtags in the first comment to keep your caption clean & clutter-free.
Make your posts more discoverable with user tagging & location tagging.
Analyze what's working across every post and profile with smart analytics.
No credit card required
3.
9Square for Instagram
Available on Android
Price: Free!
9Square for Instagram is a simple app you can use to get that giant square image on your Instagram feed!
There are a LOT of grid option presets to choose from, and this app also allows you to flip your picture (horizontally or vertically), crop, and rotate.
This app is only available on the Google Play Store though, so there isn’t an option for Apple devices.
If you can deal with a few ads, this free app can’t be beat!
Is 9Square The Right Instagram Photo Splitter For You?
Choose ImageSplitter if you’re looking for a tool that:
Is free for Android
Has drag features to crop and zoom
Allows you to rotate or flip your image
Is easy to use
Allows you split photos and post them directly to Instagram
How to Split Pictures on Instagram with 9Square for Instagram:Step One: Choose Your Grid Preset
9Square has the option for a grid from 3×1 to 3×5 and even 2×1 to 2×5.
Choose what layout works best for your image. Here, we uploaded a photo to a 3×1 horizontal grid to show our lovely team members on a windy day in Oklahoma last year.
Step Two: Crop
Once you have the exact split you want, hit the Crop button on the top right.
This will send you to a page where you can post your images directly to Instagram or save them to your device.
Again, these images are conveniently labeled in the order you should post them!
Step Three: Upload to Instagram!
Now, you’re ready to upload your images to Instagram!
You can do this directly from the app by clicking the bottom right “Instagram” button, or you can save them to upload yourself (or through Tailwind!)
4.
PineTools
Available on Desktop
Price: Free!
PineTools is another great desktop tool you can use to split your images, and it offers a TON of editing options!
These can get a little more advanced than the other apps and image splitter softwares listed, but it gives you all the control in determining exactly what your image will look like to match it to your Instagram theme.
Is PineTools The Right Instagram Photo Splitter For You?
Choose ImageSplitter if you’re looking for a tool that:
Has a comprehensive desktop experience
Provides a variety of tools for high-resolution edits
Gives you advanced options and more control
How to Split Pictures on Instagram with PineTools:Step One: Edit Your Image (optional)
To take full advantage of this tool, scroll through the left sidebar to see the different options available to edit your image!
We wanted this image to be a bit browner to match our feed and cropped to just the right size.
Be sure you have the right ratio when you crop to ensure that your image will be split into equal parts that are compatible with the square images on Instagram!
Step Two: Split Image
Once you have the image you are excited to work with, select “Split Image” on the left sidebar.
You’ll upload your image again and decide how many blocks you want your image split into.
This tool does not provide the standard grid options, but instead lets you choose exactly how to split your image yourself!
You do this by clicking on Vertically, Horizontally, or Both (Grid) to determine the direction you want your image sliced.
Then, you choose the Quantity of Blocks you want on each column and row. This allows you to get really creative with how you’d like to cut your photo!
Step Four: Download Your Split Images
Now that your image is split, PineTools will generate the pieces of your larger image labeled by each row and column.
Download these while keeping the names for easy uploading next!
Step Five: Upload your images
Now, take your downloaded images and upload them to Instagram! You’ll need to follow this order:
Row 3, Column 3; Row 3, Column 2; Row 3, Column 1
Row 2, Column 3; Row 2, Column 2; Row 2, Column 1
Row 1, Column 3; Row 1, Column 2; Row 1, Column 1
Use all of these editing tools to jump in and plan your feed theme with some great eye-catching designs!
5.
Instant Squares
Available on Android
Price: Free
Instant Squares for Android is a much-beloved app that easily splits photos into a variety of squares and rectangles in 30 seconds or less!
Social media users also love the ability to select the parts of your image you’re most interested in capturing with zooming and adjustments. It’s easy and intuitive to work with while giving you total control of your split photo for Instagram!
Is Instant Squares The Right Instagram Photo Splitter For You?
Choose Instant Squares if you’re looking for an app that:
Is compatible with Android
Gives you different sizing options, such as 3×1, 3×2, 3×3, all the way up to 3 x 9!
Allows you to add captions and hashtags
Shows you a Preview of your split image
Posts directly to Instagram
How to split pictures on Instagram with Instant Squares:
Step One: Choose Your Photo Edit
Instant Squares allows you to choose between two edits when you open the app – a grid photo on your profile or a swipeable panorama! The panorama is perfect for posting Instagram carousels to your feed.
Step Two: Position Your Photo
Select your photo and tweak the central focus with rotation, cropping, zooming or moving tools.
On this screen, you’ll also select the size of the split square you want to create by changing the numbers in the bottom right corner.
The grid overlay gives you a peek of what will be included in each square.
Step Three: Preview and Save Your New Split Image
Preview your new split images on the next screen, and save each piece or share it to Instagram!
The squares are labeled with the order you should post them in to make it as easy as possible to create your new Grid.
Start Scheduling Your Split Instagram Pictures to Your Feed
Now that you know how to make one picture into multiple on Instagram and are ready to update your feed, let’s get those images published!
And of course, you can use Tailwind’s publishing tool to schedule and publish your images!
Tailwind’s Instagram publishing tool makes it a snap to schedule your split photos into a beautifully curated Instagram feed ✨.
You can avoid the rush of copy and pastes to get your full image on your feed with stellar captions and relevant hashtags for great engagement!
Plus, our Instagram visual planner experience allows you to double-check everything before it’s posted – no out of order images for your feed!
Ready to dazzle your followers with a new Instagram aesthetic? Claim your free trial of Tailwind for Instagram here!
Pin Me For Later 📌:
FAQs
Where do I find the split and crop slice tools?
Image splitter softwares that are free or for purchase can be found on your mobile device’s app store and through a simple Google search for a desktop version of an image splitter software for download.
There are plenty more options beyond these 4 fabulous free tools we mentioned here in this article! Do your research and comment below on which ones you found to be particularly useful or impressive!
What is the best way to use Instagram photo split tools to enhance your feed?
Instagram photo splits are a very popular way to display your static Instagram posts on your Instagram profile in a way that invites those who see it to engage more. Users landing on a profile using Instagram photo splits tend to scroll on the profile for a while so that they can see what the “bigger picture” looks like.
Because Instagram profiles are displayed in rows of 3 static posts, the best way to use Instagram photo splits to enhance your feed is to ratio the splits to be 1×3, 2×3, or 3×3. So you will either have 3 photos produced out of the one original, 6 photos out of the original, or 9 photos out of the original.
How to create a mosaic on Instagram*
October 27, 2017Web Services
Turning your Instagram* into a work of art is easy. It is enough to evenly cut the photo you have taken.
Share
0
What kind of mosaic?
Look at what @micahnotfound or @c.syresmith are doing with their accounts. You can do the same.
How to do?
Desktop editors
You can cut a photo into equal parts in any graphics editor such as Photoshop or GIMP. Just open the photo in the editor, divide it into equal square parts and save each part as a separate file.
Photoshop
From the View menu, choose Show→Grid. Go to the Edit menu and open Preferences → Guides, Grid and Slices.
You can divide the image into parts depending on the panorama you want to create. Just enter the desired value in the "Internal division by" field.
Now that your image is divided into parts, select and copy the desired fragments into separate files.
GIMP
Go to the View menu and enable the Show Grid and Snap to Grid options. Then click on "Image", select "Adjust Grid" and split the image into parts.
Select parts of the image one by one, copy and save to separate files using "File" → "Create" → "From Clipboard". Use the hotkeys Ctrl + C and Shift + Ctrl + V to speed up the process.
Web services
Divide a photo into equal parts using web services such as Griddrawingtool.com and Imgonline. com. It's faster and easier.
When the image is cut, you can start uploading. Just remember to upload the bottom right piece of the photo first and the top left piece last.
Mobile Apps
There are many mobile apps that create and upload mosaics to Instagram*. With them, you do not have to bother working in graphic editors.
iOS
Grid-it
This application can cut apart photos you have taken or images in your gallery. True, you will have to upload fragments to Instagram * one at a time.
Download
Price: Free
Grids
Another application for splitting photos into parts. You won't need to save each snip individually as the app has the built-in ability to send snippets directly to Instagram*. You can choose colors and gradients for the tiles to add variety to your mosaic.
Download
Price: Free
Android
9square
Very simple app to crop photos and upload to Instagram*. You can choose from 3×1, 3×2, 3×3, 3×4, or 3×5 grid sizes.
Download
Price: Free
9Cut
Similar to 9square, absolutely identical in functionality.
Application not found
*Activity of Meta Platforms Inc. and its social networks Facebook and Instagram are prohibited in the territory of the Russian Federation.
How to split photos for Instagram? Design for 5
Contents:
1 Why cut a photo into parts?
2 Applications that will help you split photos into 9, 6, 3 or 2 parts
2.1 For Android
2.2 For iOS
3 A selection of services for splitting photos into several parts
4 Examples of interesting designs
accounts 5 Questions from our readers:
Now many people are seriously engaged in the promotion of their accounts in social networks. However, no amount of money invested in promotion will be able to provide the desired progress if the content of the page leaves much to be desired. A very big influence in all social networks, and especially on Instagram, is the design. The appearance of the profile grid may be different. People came up with a lot of interesting things. In this article, we will talk about what features there are and how to split a photo into parts for an Instagram account.
Why cut a photo into pieces?
You may need to split a photo into several parts in several cases. Of course, in the article we will only talk about how to use this to draw up a profile. But in order to be objective, consider a few situations.
The photo is too wide to show all the details when placed in the publication. Often this happens when you shoot, for example, a panorama.
You have decided to make a competition for discounts or something like that. Sometimes maintaining a profile to leave intrigue and mystery requires making posts with fragments of a picture.
You are creating a landing page and need to cut a banner to draw people's attention to an event or product. Such one-day profiles are usually designed so that, only by opening it, people see the “offer of the century” that they want to convey to them.
Page maintenance concept. The appearance of the publications grid can be different. Some options mean that one image is divided into several posts, and these posts are combined into one photo. We will talk about these concepts a little later, but it looks unusual and fresh.
Applications that help you split photos into 9, 6, 3 or 2 parts
There are several ways to split photos for Instagram. First, let's look at what applications can help us. It is much more convenient to do this from your phone, because it is the easiest way to download posts from a mobile device. I can offer you the following selection:
For Android
9Cut Insta – Grids For Instagram. You can choose the grid size. True, you cannot divide the picture into 2: at least 3 parts or one line, if we talk about the grid in the profile.
Stack (Grids and panorama for Instagram). I advise you to search in this way, because the game of the same name is much more popular and will not allow you to immediately find the right tool. The functionality is the same as in the previous version.
Grids for Instagram. Such a simple and uncomplicated name allows you not to get confused in the options for search results. Right here you can crop the image if there are unnecessary parts. If you need, for example, to regularly split the picture into 6 parts, this will not work here - only 9.
On iOS
Photo Grid. Already on the screenshot you can see some of the possibilities - you can make a grid of several shots or, for example, with the addition of frames.
Grids for Instagram. There are already fewer opportunities here, but the application will cope with cutting the picture into 9 parts.
Grid Post - photo video editor. Allows you to simulate a grid with the addition of not only photos, but also videos. And this is often very important - in all interesting accounts, the content is diverse.
A selection of services for splitting photos into several parts
It is not always convenient to split an image through an application or software. Online work is easier - you do not need to download and install anything, waste time and memory in the device. The following sites can help us do what we have in mind:
Photoshop Express. This is the official online version of one of the most popular photo editors. Everything here is not as convenient as in specialized services and applications. But there are no restrictions either - any processing, the ability to split one image into at least as many parts, to make people in the image more beautiful or, conversely, uglier - you can do everything.
IMGonline. The tool was created specifically for solving our problem. In terms of capabilities, it differs little from the applications that I wrote about above.
Grid Drawing Tool by ArtTutor. The feature tool is a cross between FS and the previous minimalistic version.
Examples of interesting account designs
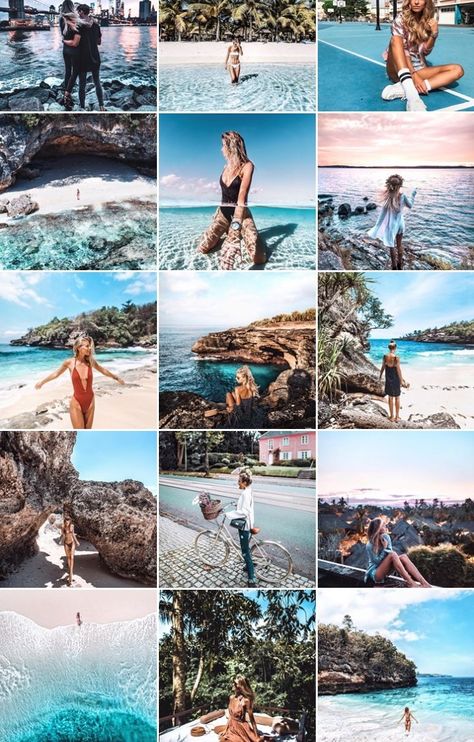
@caseymcperry. Very interesting, bright and stylish profile. All posts are one big collage, and it looks insanely unusual.
@deethaito. Here the concept is the same as in the previous case. But I don't think it looks that interesting. Perhaps the whole thing is in a different topic, perhaps the collage itself is nothing special, or perhaps it's just a matter of taste. In any case, such a complex composition makes an impression.
@leal.klotz. Judging by the posts, this is a tattoo artist's account. He doesn't bother with a single collage, but sometimes embeds large images in 6 posts. It is more difficult, but at the same time there are no such rigid frameworks as last time.
@reynoldskitchens. Bright, interesting and appetizing. There is not much more to say, the concept here is the same as in the previous two cases.
@imperia_sumok. To be honest, I don't like this account. The color scheme jumps a lot, the photos themselves are not impressive. But the fact that entire compositions are sometimes embedded in the grid of posts deserves respect.
There are several ways to cut a photo for Instagram into 9 parts: applications, services or software on a PC. Which of these is more convenient? Large compositions are easiest to make in full-fledged Photoshop. But to design a landing page, you can simply download one of the applications mentioned in this article.
Questions from our readers:
#1. How to post publications so that the collage does not “move out”?
Maintaining a profile this way is not very easy at all. To keep the picture, you can upload 3 posts at once, for example. Or pause between posts and put up with the fact that sometimes the account will not be so beautiful.
#2. Is it worth putting so much effort into the appearance of the grid on the page?
 I have not noticed any drop in image resolution. For the intended purpose (of posting on Instagram and viewing images on smaller screens) this is fine. Don’t use this app to split your professional photography for gallery prints...
 99 in order to gain lifetime use pops up & ends your project. I’m using it for a Non-Profit Companies Social Media account that I volunteer to assist, so was still just testing to see if this App is a good way to create more interest. However, I didn’t even get to post my 2nd Freebie Split photo, since I went back to do some edits before Splitting the updated image then was told, no more Free Photo Splits for me, Lol. Well Ok, the App works decently well & I would have given 4 stars if being at all upfront about needing to $Go Pro for the ability to post more than two pics.
 Learn More
 There are tools for that!


 Instant Squares
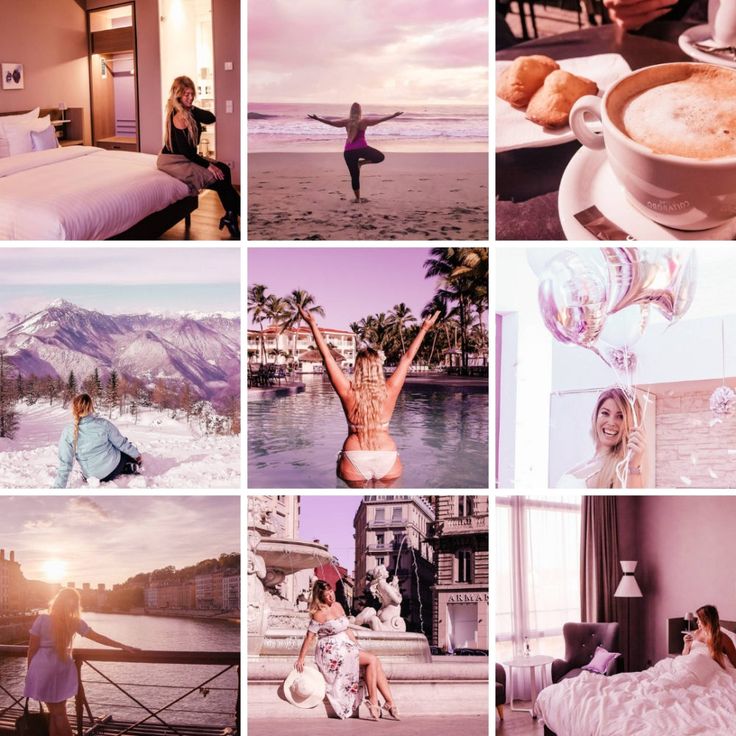
 Users landing on a profile using Instagram photo splits tend to scroll on the profile for a while so that they can see what the “bigger picture” looks like.
 Just open the photo in the editor, divide it into equal square parts and save each part as a separate file.
  com. It's faster and easier.
 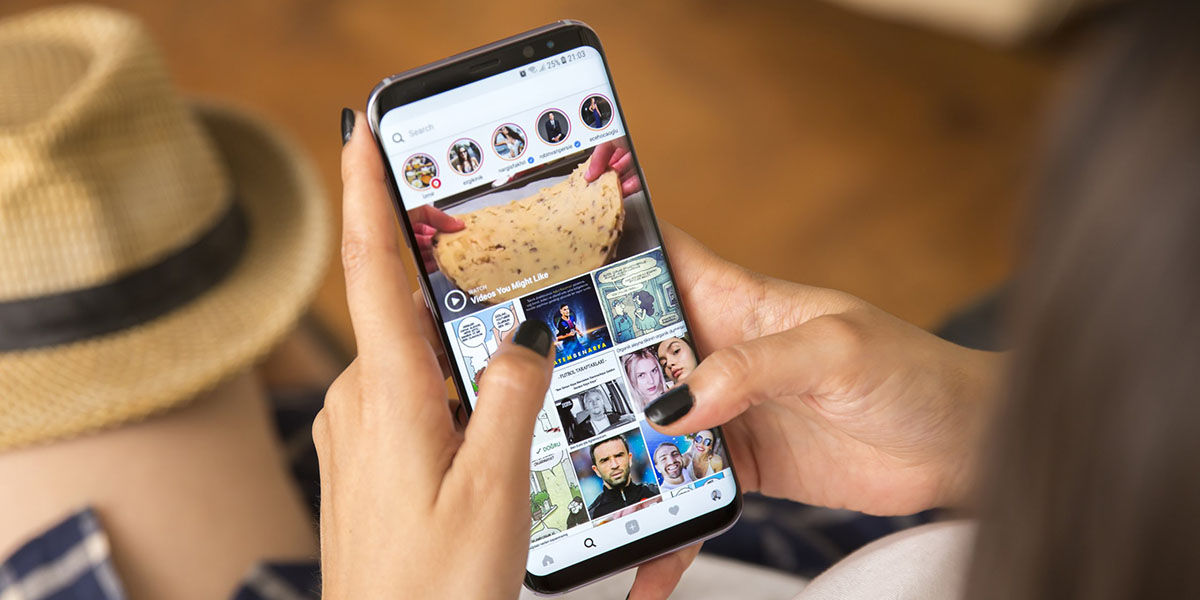 You can choose from 3×1, 3×2, 3×3, 3×4, or 3×5 grid sizes.
  A very big influence in all social networks, and especially on Instagram, is the design. The appearance of the profile grid may be different. People came up with a lot of interesting things. In this article, we will talk about what features there are and how to split a photo into parts for an Instagram account.
  Such one-day profiles are usually designed so that, only by opening it, people see the “offer of the century” that they want to convey to them.
 And this is often very important - in all interesting accounts, the content is diverse.