Tired of posting on Instagram from your phone? Wondering how to post on Instagram from your PC or Mac instead?
You’ve come to the right place. Posting on Instagram from your desktop can save you time and offer more flexibility in what you can upload (such as edited videos and images).
And you can do it without having to upload them onto your phone first.
Below we’ve outlined three different ways to post on Instagram from your computer.
How to post on Instagram from your computer
Method 1: How to post on Instagram from your computer using Hootsuite
Method 2: How to post on Instagram from a PC or Mac
Method 3: How to post on Instagram from your computer using Creator Studio
How to post an Instagram Story from desktop
How to post an Instagram carousel post from desktop
How to edit an Instagram post from desktop
Bonus: Download a free checklist that reveals the exact steps a fitness influencer used to grow from 0 to 600,000+ followers on Instagram with no budget and no expensive gear.
Below, you’ll find ways to post on Instagram from your PC or Mac. We’ll also show you how to post via Hootsuite which works on either operating system.
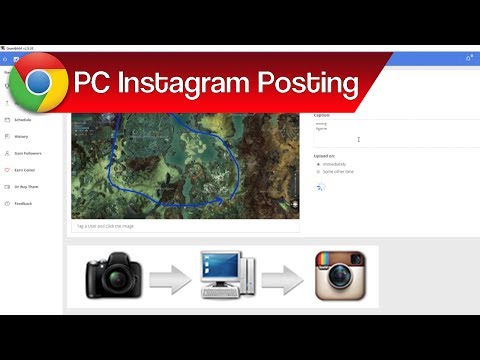
If you’re more of a visual learner, watch this video from our pals at Hootsuite Labs to see how easy it can be:
You can schedule feed posts, Stories, carousel posts, and Instagram ads with Hootsuite.
The instructions below will walk you through the process of posting to your Instagram feed. We cover Instagram Stories and carousels a little further down in this article.
To post on Instagram from a PC or Mac using Hootsuite, follow these steps:
 Alternatively, you can also Schedule for later if you want it to post at a different time.
 For a quick summary of how to post on Instagram from Hootsuite, watch this video:
Voila! Posting photos and videos to Instagram from PC or Mac is that easy.
Method 2: How to post on Instagram from a PC or MacAs of October 2021, all Instagram users can create and publish feed posts from the browser version of the app.
To post on Instagram from your desktop computer (PC or Mac), follow these simple steps:
 A Create new post window will pop up.
And that’s it!
At the moment, only feed posts can be created and published directly from Instagram on desktop. Keep reading to find out how to post Instagram Stories from a PC or Mac computer.
If Instagram is your social network of choice and you don’t mind not having all your social networks in one dashboard, Creator Studio could be a good option for you.
Note that when using Creator Studio, you can post and schedule all types of posts other than Instagram Stories.
How to post on Instagram using Creator Studio:
You can post an Instagram Story from your computer using a third-party social media management tool like Hootsuite. Just follow the steps outlined in this short video:
Or, read our step-by-step article on how to post an Instagram Story from your computer.
If you don’t have Hootsuite, you can post an Instagram Story from your PC or Mac through the following steps:
You’re done! It’s practically the same steps as if you were using the Instagram app on a mobile device.
Growth = hacked.
Schedule posts, talk to customers, and track your performance in one place. Grow your business faster with Hootsuite.
Free 30-Day Trial (risk-free!)
With Hootsuite, you can also create and easily publish carousel posts (with up to 10 images or videos) directly to Instagram. Here’s how.
1. Go to Planner and tap New post to launch Compose.
2. Select the Instagram account you want to publish to.
3. Include your caption in the Text box.
4. Go to Media and tap Select files to upload. Select all the images you want to include in your carousel. All selected images should appear under Media.
5. Use the yellow Schedule button to select a date and time to publish your post.
6. Tap Schedule. The post will show up in your Planner at the time you have scheduled it for.
That’s it! Your post will go live on the date and time you selected.
How to edit an Instagram post from desktopHootsuite Compose allows you to edit any image directly on your dashboard before you post it. Unfortunately, you won’t be able to edit the image once it’s posted.
Follow these steps to edit:

Voila! You just edited your image from your desktop.
Post to Instagram from your PC or Mac using Hootsuite. Save time, grow your audience, and measure your performance alongside all your other social channels. Try it free today.
Get Started
Easily publish and schedule Instagram posts from your computer with Hootsuite. Save time and get results.
Try it for Free
José Adorno
- Oct. 19th 2021 9:19 am PT
@joseadorno
Instagram today announced that it’s rolling out the ability for people to post photos and videos using its desktop web browser.
A few months ago, Instagram began testing the ability to post from the desktop but it was limited to selected users. Now, as reported by TechCrunch, everyone will be able to post through the desktop app starting October 21. Not only that, but the company also announced a number of new features launching this week
For example, starting today, there’s a new “Collabs” feature, which is currently described as a “test” that will “allow people to co-author both Feed posts and Reels.” TechCrunch explains that to do so, “users can invite another account to be collaborator from the tagging screen on Instagram.![]() ”
”
Instagram will also begin testing a way to create fundraisers for nonprofits. The feature lets you start a fundraiser directly from the plus button. There, you’ll be able to select a nonprofit organization and add the fundraiser to your Feed post.
For Reels, there are a few additions to enhance the experience with music:
On Thursday, Instagram will introduce two new effects called Superbeat and Dynamic Lyrics, which will help creators who edit and perform using music on Reels. Superbeat will intelligently apply special effects to music to the beat of the user’s song while Dynamic Lyrics will display 3D lyrics that will flow with the song’s “groove,” says Instagram.
What do you think of all of these features? Are you planning to use them? Tell us in the comment section below.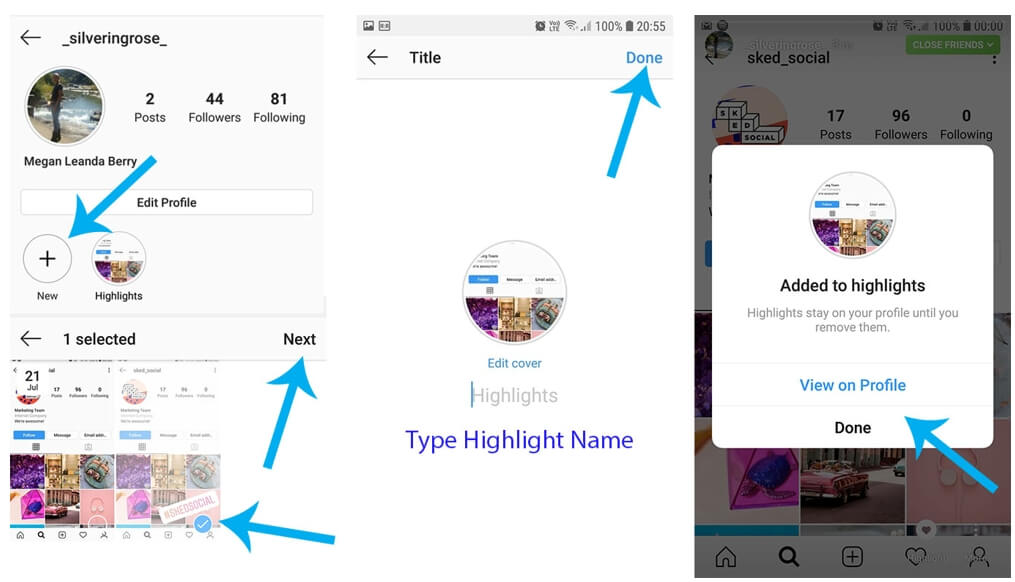
FTC: We use income earning auto affiliate links. More.
Check out 9to5Mac on YouTube for more Apple news:
You’re reading 9to5Mac — experts who break news about Apple and its surrounding ecosystem, day after day. Be sure to check out our homepage for all the latest news, and follow 9to5Mac on Twitter, Facebook, and LinkedIn to stay in the loop. Don’t know where to start? Check out our exclusive stories, reviews, how-tos, and subscribe to our YouTube channel
@joseadorno
Brazilian tech Journalist. Author at 9to5Mac. Previously at tv globo, the main TV broadcaster in Latin America.
Got tips, feedback, or questions? [email protected]
Many people ask themselves: “Is it possible to post a photo to Instagram from a computer?”. We have collected in this article methods that give a 100% guarantee that your publication will appear in the feed if you add it from a PC. Let's move on to detailed instructions.
To post an image to Instagram from a computer, use your browser. For Google Chrome and Opera, right-click on the "View Code" option, and in "Yandex Browser" - "Explore Element". Now let's see how it looks in practice.
Go to the browser, go to the Instagram page and connect your account.
Application main pageRight-click and select View Code. We used the Google Chrome browser.
An example of how to enable "View code" in the browserIn the window that opens, select the display of the page in mobile phone format.
Selecting the page format in the browserRefreshing the page and using all the functionality of the application from Facebook.
Mobile version of Instagram on PCAnd now we can send a picture.
An overview of working with an image Next, let's look at several options for loading images using browser extensions.
This application helps you quickly upload a photo without you needing any extra effort.
Installing the extension.
To access Google Chrome extensions, click on the three dots at the top of the screen, select "More tools" and then find the "Extensions" line.
An example of how to enter extensionsAfter installation, an icon will appear in the extension bar:
Web Instagram icon in the extension barClick on it, a separate tab will open in front of you in a vertical size. Now you can work with the service, as in a mobile phone.
A separate tab with an application The screencast shows the mechanism of the application - press the "+", select a photo and send the picture to the feed. The only downside is that you will not be able to edit the image with the built-in Instagram functionality.
The second extension we are looking at allows you to add images and work with stories.
Installing the extension.
Open an Instagram account in a browser. After connecting, several icons will appear on the page: a camera - uploading images, a smartphone - opening a separate tab in the mobile phone format, a bright circle with an arrow - stories. And the last symbol allows you to download all publications.
Work extensionClick on the "camera" and select "Add to Profile" - this function allows you to publish an entry in the tape.
Selecting a button to publish to the feedThe overview below shows how the extension works. You are only allowed to resize the image, tag people and make a note.
An overview of how to post a picture from a PC The third extension is a separate application through which you can add photos, videos and stories.
Install and run the extension.
In the browser, click on the application icon at the top right.
Application iconWhen clicked, a separate tab will open. Here you need to connect your account and work with the profile, as from a smartphone.
The checkbox for uploading photos is checked by default, as is access to the full image format. Additionally, through the Desktopify extension, you can upload videos to IGTV.
Tab with extensionThe overview below shows an example of how the application works when the Desktopify extension is connected. You can apply a filter to adjust a photo, but you can't edit—to change the brightness, contrast, or saturation of an image.
Application overviewAnd now let's move on to the emulator service that displays the smartphone screen on a PC - use mobile applications or run games.
Of all the emulators on the market, BlueStacks is the most convenient. The application automatically adjusts to the screen, optimizes games and works without delay.
Download and install the emulator. In the program window that opens, connect your account to Google Play. We install the application.
Installing the application in BlueStacksGo to the main page - this is a tab located next to Google Play at the top of the screen. Open the "System Applications" folder and turn on "Media Manager".
We will need this step to upload photos that we will publish in the feed.
Important! Emulators do not have a function to open computer system folders. All images must be uploaded to the server in advance.
Path to the image upload folderIn the file manager, click on "Import from Windows" and select the images that we want to place in our Instagram account.
Importing photos from Windows Returning to the application page and loading a picture.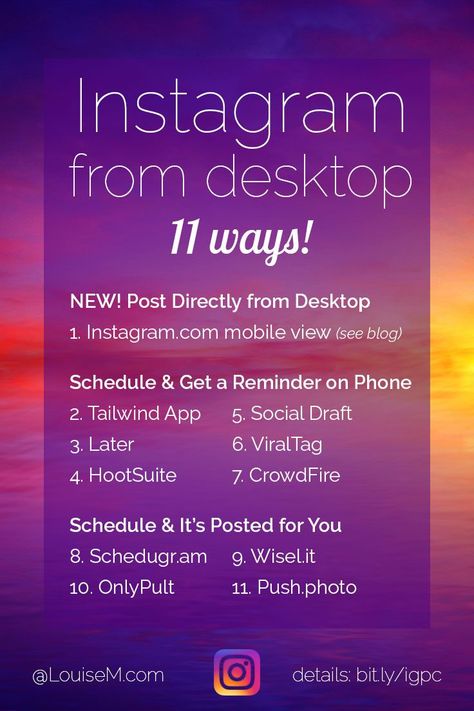
A feature from Facebook that allows you to work with two social networks at the same time. Let's see how to link accounts and add images.
Go to the Facebook Creator Studio page. At the top of the screen, switch to the Instagram icon.
Important! Check that your Facebook and Instagram accounts are linked.
A page where you can link the accounts of two servicesAfter clicking on the button, a window will appear - agree to the terms and add profile data.
Request for accessNow you can add entries: click "Create publication" and start registration.
Create Post button on Facebook The example below shows how the service works. The only thing is that you can’t edit a photo here, but you can prepare it in advance in image editors: for example, in Canva, Photoshop or Figma.
In the following sections, we'll look at how to set up a delayed write in the scheduling services. They are used in their work by SMM specialists, marketers and bloggers.
Important! Please note that all planning services provide free access for a limited period of 7 to 14 days. If it is more convenient for you to send photos via PC, we recommend purchasing a paid subscription.
In this section, we will look at a simple and convenient program for scheduling posts.
Go to the SMM Planner website and register.
Main page of the site SMM PlannerGo to the dashboard. Select the "Accounts" tab and connect your profile to Instagram.
Steps for connecting an account in the plannerThe added profile should look like the screenshot below:
Connected account in SMM Planner Next, go to the "Posts" tab. Here we form publications and plan the time of sending.
Click on the "Schedule a post" button. It will be posted on the feed. In the window that opens, add a photo and text, and check the boxes where necessary: disable or add comments, send a picture to stories or IGTV.
A window where you can arrange and schedule a publicationAfter publication, the entry will appear in the dashboard, and the post in your account.
Example of displaying scheduled postsAnd here we looked at a program through which you can not only publish images, but also track analytical data for each post.
Register on the Parasite website.
Parasite website home pageAdd an Instagram account.
An example of what the dashboard looks like after adding an account Click on the green button labeled "Add post" and make an entry.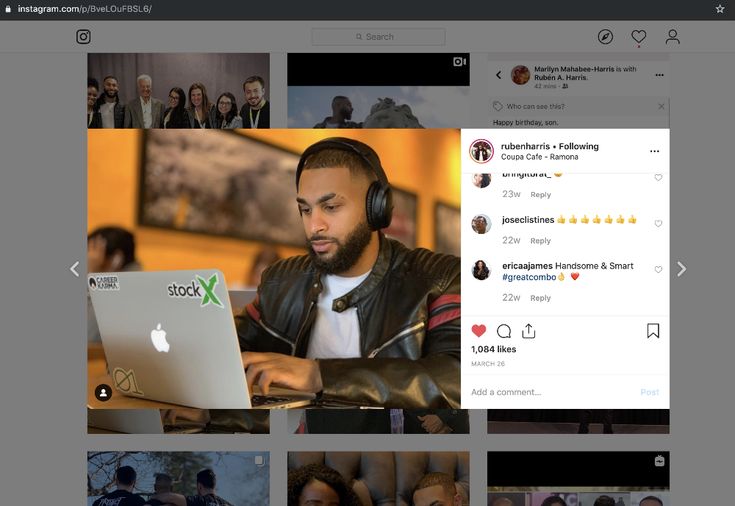
At the appointed time, the entry will be published.
Quiz passed - post publishedAnd here we show you how to post with a promotion program.
Create an account on the Tooligram website.
Main page of the serviceAdd an Instagram profile. Go to the "Features" tab and find the "Delayed Posting" item.
Delayed posting in the Tooligram serviceWait until the service connects your account. Then click on "Auto Posting". You will see a window with an authorization request, agree and proceed to the registration of the record.
Dashboard with a connected accountThe review below shows how to work with the functionality of the service - selecting and editing an image, adding text and setting the date and time when a publication appears.
Overview of the serviceAn example of our publication being successfully sent to the feed:
Successful sending of the post If you want to send a post quickly and without problems, use browser extensions. Are you ready to take the time to install and register? Create a link of accounts through Facebook Creator Studio. And if you plan to constantly upload images from your PC, connect online services for scheduling posts.
Recommended reading! You can read about how to design Instagram in our article.
Register with SendPulse and use methods for promotion: email campaigns, web push, Viber and SMS campaigns and chat bots in Telegram messengers, Facebook Messenger and VKontakte!
Want to post photos on Instagram, but you've never done it before? Our small but useful guide on this topic may be useful to you.
Posting a new post on Instagram* takes a little time and is not difficult. How to add a post to Instagram* from your phone: first you need to go to your profile through the official application, then follow the steps.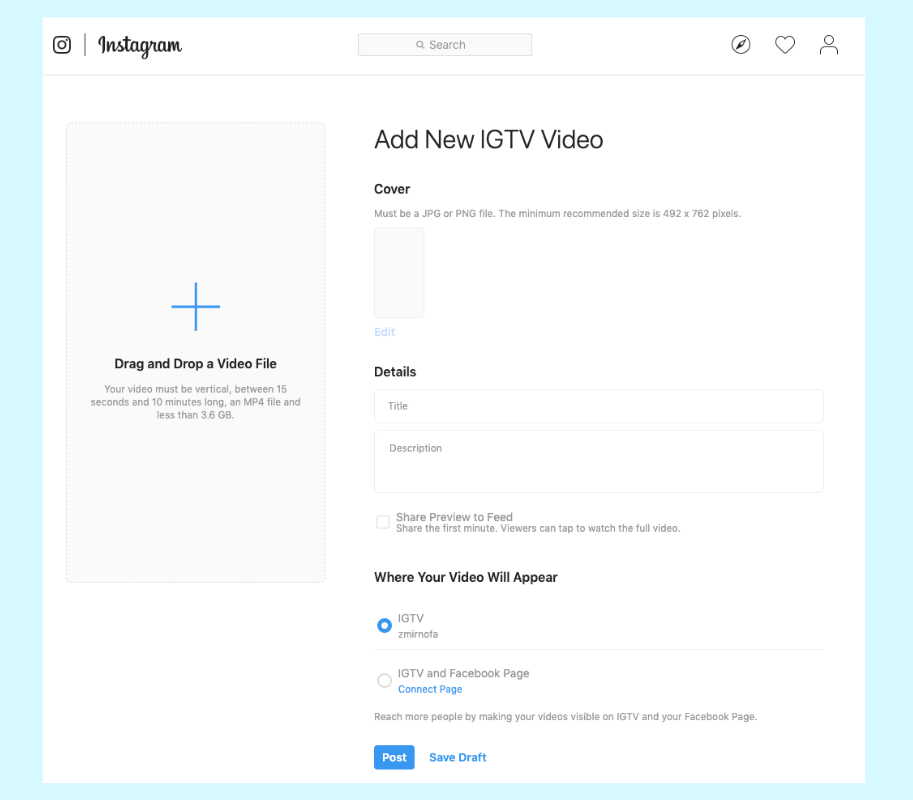


We looked at how to post on Instagram* from Android. If you have iOS, the intuitive process will be the same, just some functions will be called differently.
There is another way to post from your phone. This is very convenient, for example, when you scroll through your gallery and find a photo that you urgently need to share with other users.
Step by step how to add a post to Instagram* from your phone through the gallery:
 For each your own filter or one for everyone - just like when publishing simply through the Instagram application *.
 You can also crop unwanted parts of the frame to make it more accentuated in the right place in the photo. Or do nothing, don't edit, just click on the blue arrow to go to the next block.
You can use any suitable hashtags and geotags of your choiceOur blog has many articles about the benefits of hashtags and how to use them correctly in publications. For example:
And if you just need to quickly find hashtags for publication, you can use our bot "Gennady".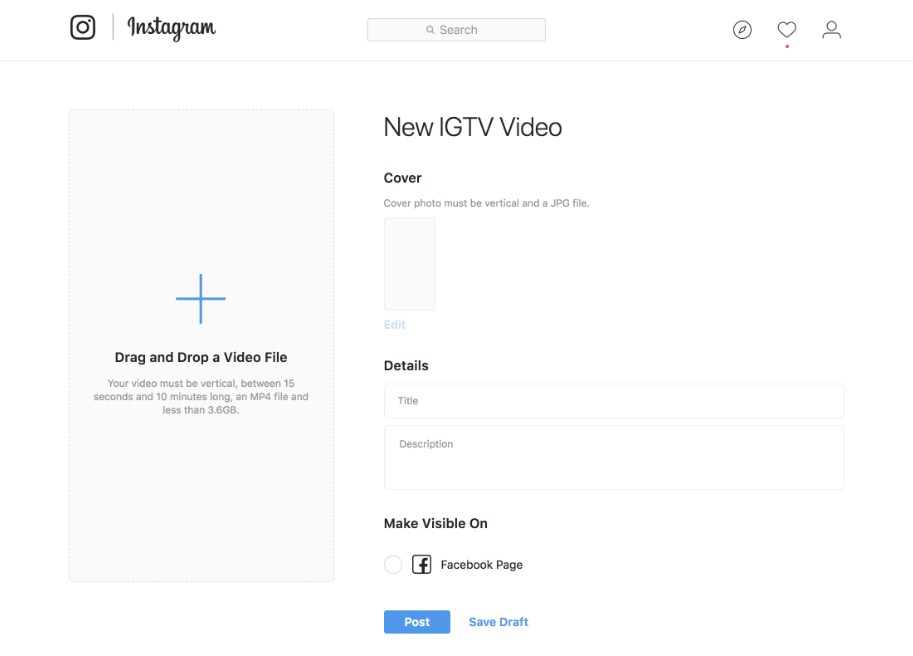 You give him a photo or a word for which you need to pick up hashtags, and he gives you a whole cloud of hashtags that can be attached to a post. But we digress. While we were thinking about hashtags, our post has already been published.
Let's say you tried both options, but the photo still doesn't want to be added. What to do in this case? Determine the cause and try to fix it:
 To fix this error, download the new version of the application from the Play Market or AppStore.