Facebook is a treasure trove of memories of you and your friends, so you may want to download Facebook photos and videos to your computer or phone.
We'll show you the official methods as well as third-party Facebook photo downloader apps, allowing you to download your photos, your friends' photos, and videos.
If you want to save a single photo on Facebook, don't bother with third-party apps or websites. Facebook itself offers an easy downloader tool.
You can use this method to download Facebook photos. It's as simple as that.
However, to download your friends' Facebook photos, their Facebook photo privacy settings should allow for it.
If you want to download a Facebook album from your own profile, Facebook has a simple method to do that. Again, you don't need any third-party downloader apps for this. However, you'll need to use Facebook on the web since the mobile apps don't let you download albums.
Follow these steps to download your Facebook album:
Facebook will get to work creating a zipped folder. Depending on the size of the album, this can take some time. Once it's done, you will get a notification telling you that the album is ready to download. Click the notification, enter your Facebook password, and select Continue. Your album will immediately start downloading.
The downloaded album comes as a ZIP file. You'll need to extract this ZIP file to access the pictures.
There is also a simple method to download all photos from Facebook that you have ever uploaded. You will even get them in the right sub-folders organized by album. But the names of the files can be a little strange.
Here's how to use the easy built-in Facebook photo downloader:
 If you have a lot of pictures, this will increase the file size and the time taken by Facebook to get it ready.
 Facebook will take some time to get the ZIP file ready, depending on how many photos and videos you have on Facebook. Once it's done, you will get a notification to download it from Available Files.
Download and unzip the file to see all of your posts and images, with albums as sub-folders.
3 Images
Multi Downloader for Facebook is one of the best Facebook picture downloader apps out there. It's free, it's super easy to use, and it works for videos, too.
With this app, you can download your own Facebook photos and albums, and your friends' Facebook photo albums, too. You can also search for users or Pages, and download photos and videos from there.
The app menu has quick links for Photos, Videos, Friends, Search, and a quick link to your downloaded images and videos.
Tap Photos for your own pictures, Friends to browse for someone in your friends' list, or Search to browse users and pages on Facebook.
The filter icon next to the search box at the top helps you find a user or a Page. Then browse to the album you want. Here, you can download all photos in the album or select a few to save. The method also works for videos. The major caveat is, the app is only available on Android.
Although Multi Downloader isn't as versatile as our previous favorite (VNHero Studio's Download Videos and Photos: Facebook and Instagram) that's no longer available, it does offer enough to stand among the rest.
Download: Multi Downloader for Facebook for Android (Free, In-app purchases available)
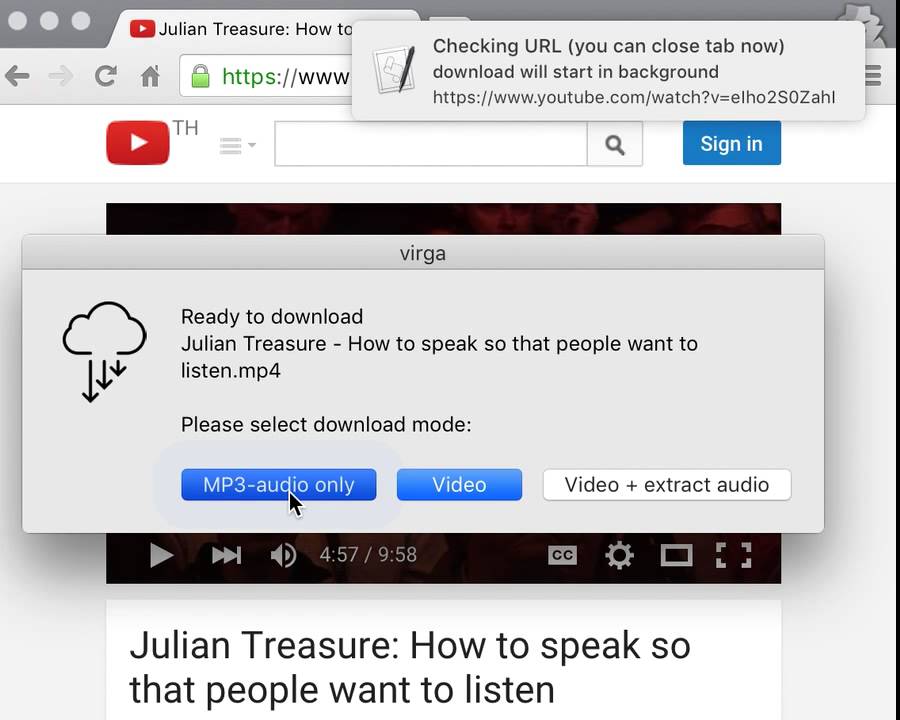
Pictures on Facebook have a simple Download button. But videos don't have any such easy way to download them. FDown.net is one of the easiest web apps you can use to save Facebook videos. The site lets you download private Facebook videos and works on desktop computers and smartphones.
Here's how to use it:

It should work like a charm. The downloaded file will be in MP4 format, which should be fine for most people. The method works on mobile browsers as well. We've tested the website on Chrome, Firefox, and Safari on Android and iOS, so pick any of the three.
FDown also has a handy extension for Google Chrome on desktop dubbed Video Downloader Plus. When you are playing a Facebook video, click the extension icon to download it to your computer.
Download: Video Downloader Plus for Chrome (Free)
There are lots of other sites that work the same as FDown. Now that you can save Facebook videos, you might want to go back and search for old videos you liked. To help you do that, here's a guide on how to find videos on Facebook.
Apart from photos and videos, Facebook has a ton of other information about you. The company is also notorious for its data collection.
The above methods let you download photos and videos easily, but you might want to consider backing up your Facebook history and learning about other download and data management tools.
Device Links
Did you know that Facebook users upload millions of photos every day? If you’re one of those users and have posted many pictures over the years, it might be time to clean up your albums.
But before you delete all the photos from Facebook and lose them forever, downloading them first might be a great idea. That way, they will all be in the same folder.
Fortunately, you don’t have to download each photo separately. You can download all images simultaneously, and this article explains how.
One of the reasons some Facebook users decide to download all their photos in bulk is that they want to delete their accounts, but there are other reasons as well.

 ” These four categories should include any images or videos you posted, shared, or sent. Do not click “Next.”
 Click on “Save” when finished.
Note: When choosing to download all Facebook images in bulk, the created folder also downloads any other data residing in the specified folders. You’ll have to browse through some of them (mostly for HTML format) to find the images and videos. such as “your_posts.html.” Others (mostly with the “JSON” option) like “stories” and “posts > media > [folder name]” only show the images and videos. Keep in mind that the number of videos and pictures you have on Facebook determines how long it takes for the file to download. Once the process is complete, you’ll receive a notification and an email from Facebook.
You can only download all photos from the Facebook page for which you are the administrator. However, you will also have to download all other data to download all images and videos.
Essentially, you’re making a full copy of your page. That’s the only way it works on Facebook pages for now. Here’s what you do:

It might take a few minutes for Facebook to create a downloadable file. Once complete, you can save it to your device.
Unlike Pages, Facebook doesn’t allow data from groups to get extracted. There are several reasons why this could potentially be the case. Some groups have tens of thousands of members who want to protect their information.
On the technical side, extracting files from groups would create large files. Some browser extensions and add-ons can download separate albums from Facebook, but they don’t always work very well.
iPhone users also can download all photos from their Facebook profiles to their devices. Before you start, ensure that you have enough storage on your phone when it’s time to download the compressed file.
 ”
”You can choose to save your compressed file to your iPhone camera roll or iCloud.
Android users can also download all their Facebook photos in one compressed file. If you have an Android phone or tablet, here’s what you need to do.
If you’ve already exchanged plenty of photos with your friends, you can’t retroactively download them all at once. You download them individually by tapping on the image and saving it to your device.
However, if you want Facebook image downloading to be an automated action in the future and avoid having to save the files manually, here’s what you can do.
Once you have completed the above steps, your Messenger photos and images will automatically get saved to your device.
You can download all photos at once from Facebook only within your profile account or page, regardless of whether you’re using a browser or the mobile app version of Facebook.
The created file can sometimes become several GBs, so ensure you have a stable internet connection and enough storage to save the file.
Sometimes, you don’t need every photo or video from your Facebook account, just a particular album. There’s a simple way to download the album you want. Here’s how to do it.
If you have a business page on Facebook, you can download all the data, including your photos and videos. Unfortunately, you can’t just save pictures alone. Regardless, here’s how to download your images from your Facebook business page.
In closing, whether you want to purge your Facebook profile or just clean it up, there’s no need to lose all the photos forever when you don’t want them on Facebook anymore. There are several ways to download your precious images and videos and preserve them forever. How you go about it is up to you!
Yes, you can save your Facebook images to your devices and the cloud, such as iCloud or Google Photos. Navigate to “Settings>Your Facebook information,” then select “Transfer a copy of your photos or videos.”
Facebook asks you to choose a file location, and you can select “Google Photos” or any other destination you have in mind. Finally, just confirm the transfer. Facebook will send you an email when the import is complete.
Yes, you have the option to download all your photos at the same time. You can do it on mobile devices and your computer (Mac, Linux, Windows, etc.) The easiest way to get all images is to access the “Your Facebook information” section from the “Settings” menu.
Copying facebook images is just another term for downloading them. There are three ways you can copy all pictures from Facebook.
The first option is to copy one picture at a time, but that might take a while.
The next option is to download one album at a time. If you don’t have too many albums, the process won’t take that long to complete.
The third option is to export all your photos and videos at once. Keep in mind that when exporting all the images in bulk, videos are attached too. You can’t just download all the photos.
To post a photo to Facebook from a phone, the user needs to give the application access to the internal storage. Through a smartphone, you can create separate albums, upload pictures to History and Chronicle.
Table of Contents
The profile owner can upload videos to Facebook using "Albums" or publications. In the second case, the entries will be added a separate section: "Downloaded from the phone.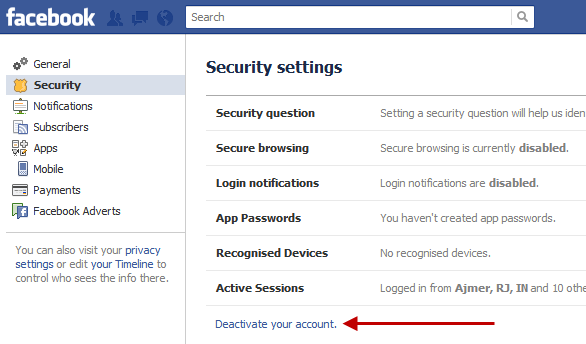 " Photo albums can be edited, moved pictures, add privacy options and captions.
How to upload a picture from a smartphone:
The photo will be seen by subscribers and page visitors. An author can specify privacy settings before posting to the public.
The maximum number of photo cards that can be added to an entry is 80 and after the first ten they will be published as a separate album. In addition to photos, short videos are added to publications, lasting no more than two minutes.
Up to ten photos can be added to choose their display format: tile or single view. There is also editing of each card separately, if you select the "List" format.
On the PC version, you have access to uploading photos to the Tape: up to 80 photos and with an additional description. When creating a text publication, a function will appear below: “Attach a photo”, clicking on which will open the storage locations of media files on the computer.
Adding photos to communities should be considered separately:
After uploading one snapshot, a new tab will appear in the toolbar: "Media Files". Through it, you can view a list of previously uploaded photos, videos.
There are separate rules for pictures added by subscribers:
 Delete or change photos without notifying the author.
 Any downloaded content will be available on the tab: "Media Files". Posts can be moved between albums as an editor or administrator.
To separately add a photo on Facebook to a group or personal page, you need to create a photo album. In this way, editing is available, organizing files that are uploaded to the profile.
How to make an album from the mobile version:
Next, to fill the photo album: open it - click on the button: "Upload photos". In albums, there is editing of the description of the entire collection, deletion. If you hold down on the picture, you can move among other files.
Make from the computer version:

In the same section, the user can upload pictures and videos separately. To do this: go to the tab: "Photo" and select: "Add photo". The picture will be loaded outside the album if the author does not specify its path.
There are standard problems why pictures may not be uploaded to a social network. The main reason is non-compliance with technical requirements.
Rules for posting pictures on Facebook:
Disallowed according to usage policy:

If the picture has not been blocked by the administration, you can file a complaint against it. For example, if a picture appeared in some community without the consent of the author. You need to go to the image and select in the additional menu: "Send a complaint", select the reason and send.
There are technical problems, why the photo is not added to Facebook. The list of main problems includes:

For example, if you upload up to twenty identical photos to a profile or group within a period of up to 5 minutes, the system will send a notification: “You often send posts.” The placement limit works if the user performs a series of similar actions in a short time.
If there are no problems with the Internet speed, but the pictures are still being processed, restart the application. Or go to the Play Market, AppStore to install the update. In case of a repeated error, you need to use a different type of connection, check access to the cache memory.
The last problem users face is the lack of permissions. In this case, go to the smartphone settings and select: "Applications". The details will tell you which areas Facebook has access to.
Svetlana Simagina
Do you need to save all the photos from your Facebook profile? Luckily, this is a lot easier than you might think. What's more, you can do it right on your iPhone, iPad, Mac, or Windows PC.
After the data breach in early 2018, the company changed its privacy policy to allow users to download all their data from Facebook. This includes your photos, videos, messages, posts and more. With the new feature, you can easily download all your photos and videos in one go.
Below we'll show you how to do this on a computer or mobile device.
 In our case it is Photo and video .
 6. You will see a message that your copy is being created. Will have to wait a while. Then press Download .
That's all, after downloading you will receive a file with all your photos and videos.
If you don't need all the photos from your profile, you can save only the ones you need one at a time.
That's it, saving photos one at a time is even easier.