One thing I love to do on Instagram is search for a location far from my home in Texas and see what people are doing—What fun are they having? What food are they eating? What styles are in for that area? It’s become a favorite way to pass the time while I’ve been cooped up at home during the last two years of off-and-on quarantine.
Living vicariously through my phone.
It’s one reason I’m so happy Instagram’s location tagging feature exists. And luckily, it’s not only a benefit for my wanderlust, but it’s also a benefit for businesses trying to put their locations on the map (literally!) to attract a new crowd, collect user-sourced photos, and give people a glimpse at what to expect from a visit.
But how do you add a location on Instagram or tag a location in your Instagram posts?
In this guide, we’ll cover why adding a business location on Instagram is important and then some ways you can actually do it.
Feel free to skip to the tactic you’re most interested in or read through for all the different options!
Why add a location to Instagram?
Every small business owner wants to put their business on the map to get found by more customers. That’s why local listings sites and Google Business Profiles are so important. But social media platforms also give you an opportunity to put your business on the map (in more ways than one!), and Instagram is no exception.
Getting your business on Instagram and adding your business’s location is a great way to get in front of people who are active on the social media site—and not just any people, but the people who are most likely to become customers.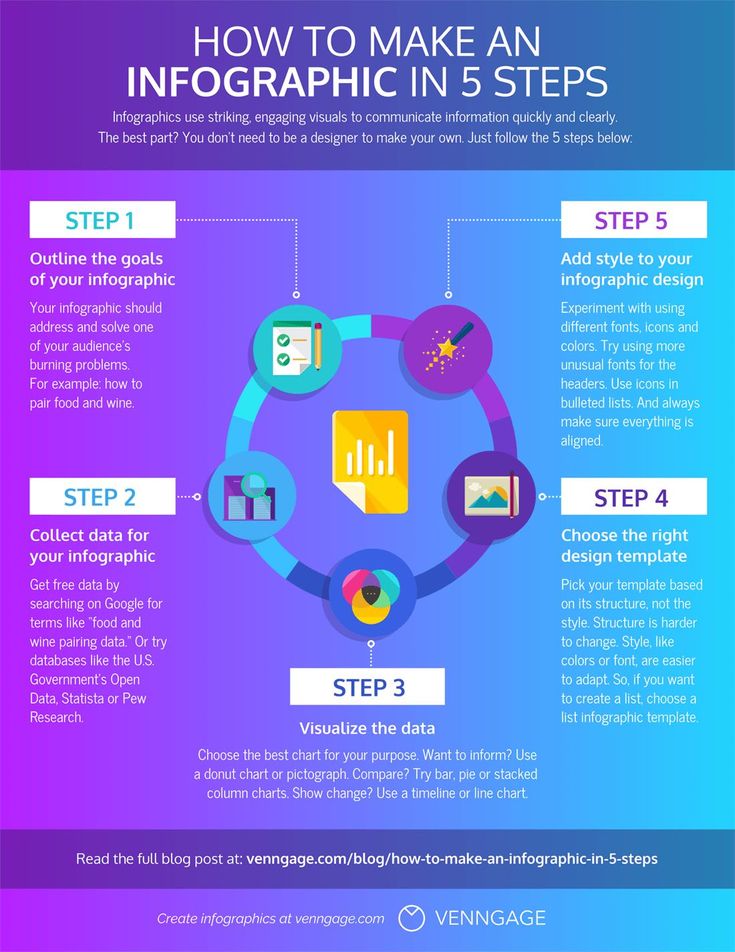
Instagram users add and search locations for a variety of different reasons. Whether they’re daydreaming about a vacation, looking to learn more about a city, or searching for tasty dishes at your restaurant, locations on Instagram give users the ability to tell their followers where they are.
Adding a location on Instagram
There are a few different ways you can include or add a location on Instagram:
We’ll walk through each way to add a location on Instagram here.
How to search for a location on InstagramBut first: You might not need to add a location to Instagram because it may already exist in the app. Instagram has pulled in many business locations from Facebook, so before you try to add a location, make sure it’s not there already.
Here’s how to search for a location on Instagram:
Unfortunately, you can’t add a new location to Instagram at this time, but you can add a location from the Facebook app to show up on Instagram.
All you need to do to add a location on Instagram is:
Now your location is added to Facebook and should be added to Instagram as well (in due time–this won’t happen immediately and can take up to a couple of weeks).
Again, because Instagram uses information from Facebook for its locations, it’s important to have a Facebook page for your business and to add your location on Facebook. (And it helps to link your Instagram to a Facebook Business Page!)
Aside from adding a location on Instagram, there are some other ways you can take advantage of the app’s location features, which we’ll get into now.
How to add an address to your Instagram profileIt’s a good idea to include your business’s address right in your Instagram profile because it allows users to map to your location directly from the Instagram app. Plus, it’s really easy.
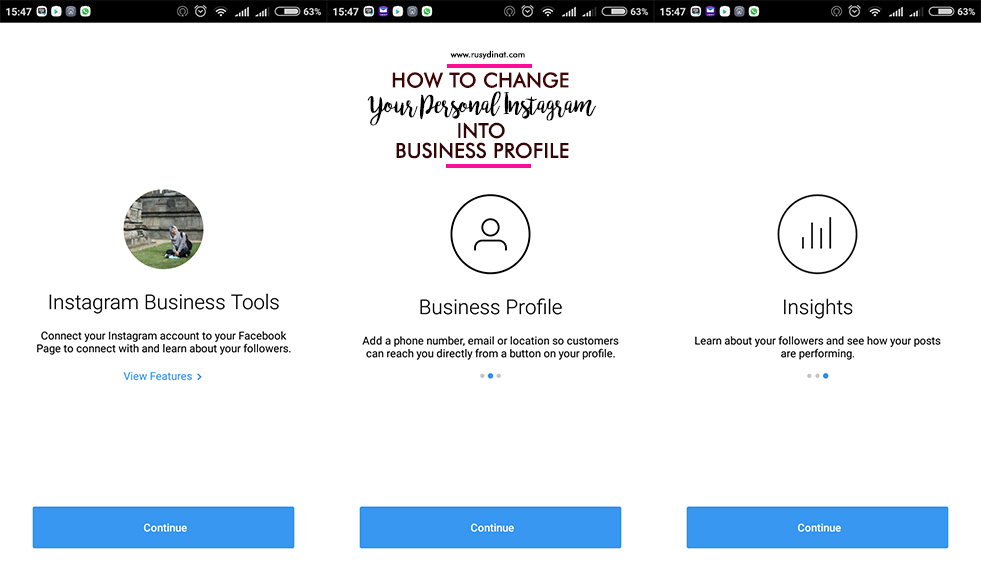
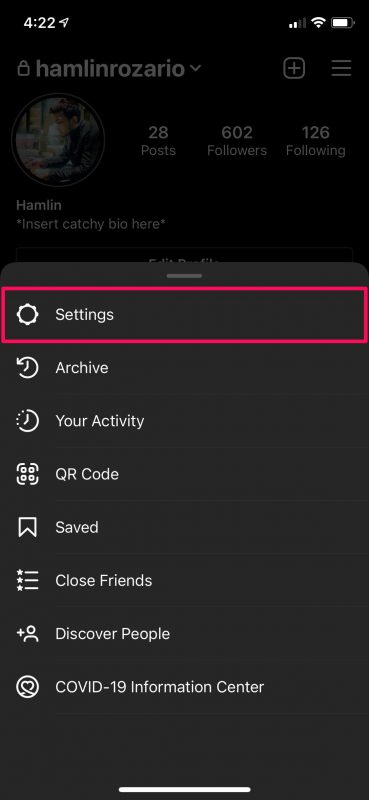
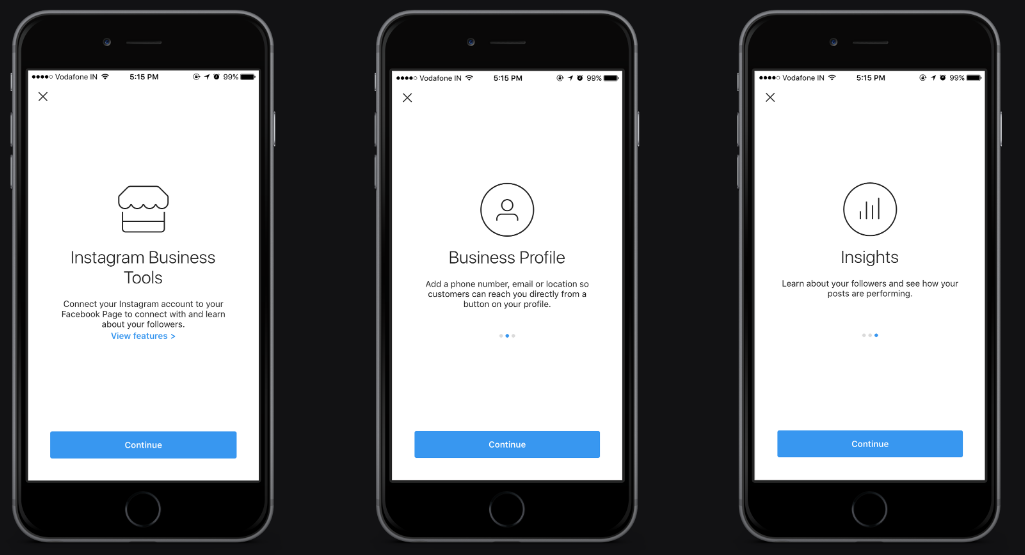
Note: This feature is only available if you’re using a professional account for your business’s Instagram. If you’re not using a professional account, we recommend making the switch because it gives you some great tools and deeper analytics to help manage your business on Instagram. (If you’re not using a professional account, navigate to “Settings” when you’re logged in under your business account, tap “Account,” and then tap “Switch to Professional Account. ”)
”)
Here’s what it will look like when you’re using a professional account on Instagram.
Here’s how to add an address to your Instagram profile:
Now your business address should be showing on your profile page so users can easily see where you’re located and click to get directions.
PS: Want to spruce up your Instagram bio? Get our ultimate guide to how to write a business description here!
How to add a location to an Instagram postAnother way you can add a location on Instagram is by including it in an Instagram post. This adds a location tag to your post that displays directly above your photo. Users can click on the location tag to see a collection of all the photos tagged to that location along with a map. It’s definitely a good idea to tag your business location in your posts and encourage others to do the same—this can easily be done through an Instagram contest.
You can also add a location tag when you post about other businesses or community areas. For example, you may add a broader location tag for your city or town to try to get more awareness and interest for your post.
Here’s how to add a location tag to an Instagram post:
And you’re done!
How to add a location to your Instagram Story or ReelIn addition to adding a location tag to an Instagram post, you can also add a location to your Instagram Story or Reel. If you add a location tag to your Instagram Reel, it may show up on the location page on Instagram, so this is a valuable addition to expand your reach.
You can also encourage your customers to tag your location in their Instagram Story or Reels so you can see their posts and reshare with your audience.
Here’s how to add a location to your Instagram Story:
Super simple!
Now, here’s how to add a location to your Instagram Reel:
And there you have it! Now you can make sure your location is out there in both your Story and your Reels.
Adding an address to your Instagram bio and tagging a location on Instagram are great ways to get your business location out there, but you can also use a tried-and-true method for getting more exposure: hashtags!
In addition to custom hashtags or event hashtags, use a location hashtag to help users find you even if they’re not looking for your exact location (not to mention it’s a free way to promote your Instagram account!).
Examples of location hashtags include:
Adding a location hashtag is as easy as typing into your Instagram captions!
Search for relevant location hashtags in your area (you might even take a peek at what your competitors are doing to get inspiration) to find out what’s resonating with your audience and bringing in new users.
Put your business on the map on Instagram
By using these various tactics to get your business location on Instagram, you can give your business a better chance at reaching a new audience, gathering content you can reshare to your Instagram account, and putting your business on the map (literally!).
Want to take your web presence to the next level? Try our free online presence and website grader to find out where you stack up right now!
Need to create a location tag for your business on Instagram in 2022?
Well, of course, you do! Yes, even if your business does not have a physical location, we’ll get to talk about that as well!
Location tags are a great way for your business to gain visibility on Instagram. Not only through your own content – but through user-generated content!!
Let’s say your business does have a physical location, you are an amazing photography studio, local bakeshop, marketing agency, boutique, etc.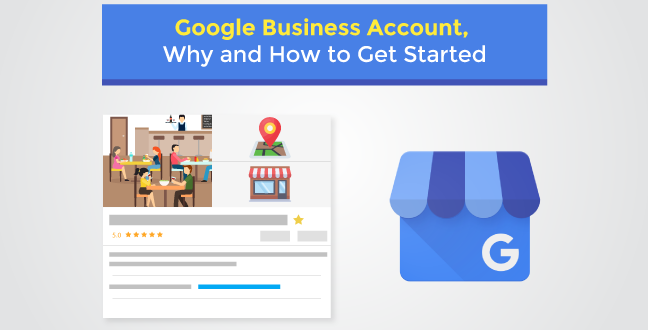
Your client/customer comes stops by your Instagrammable business and wants to brag on the amazing service/purchase that they’ve just received.
Amazing client creates a post talking about their experience and tags your location and your Instagram handle.
Congratulations – you’ve just won the user-generated content lottery! Something your business needs to thrive, grow, and be highly visible.
Why does your business need that user-generated content? And what’s the point of the ‘client brag’ if nothing other than referrals?
If you opened your business anytime within the last 10 years, you know it takes more than just good old-fashioned word of mouth to bring in the next client.
Your business needs a brand, an experience, and a solid marketing plan that builds your know-like- and trust factor. The true sweet spot.
People want to know, and like YOU – not just your business. They want to be able to trust you before willingly hand over their dollar to your business.
[convertkit form=1116998]
Having a previous (or current) client create content on your behalf is a little something we call user-generated content!! UGC comes with the golden ticket of social proof.
Proof that someone just like them has already invested in you and it was so amazing they took the time to share their experience on Instagram.
User-generated content is one of the best ways to cut to the chase when building your know like and trust factor.
UGC creates social proof while also working to gain visibility for your business.
So how do you wave the magic want of gaining this amazing free content, visibility, and social proof?
Gaining user-generated content is paved with a few action items on your part.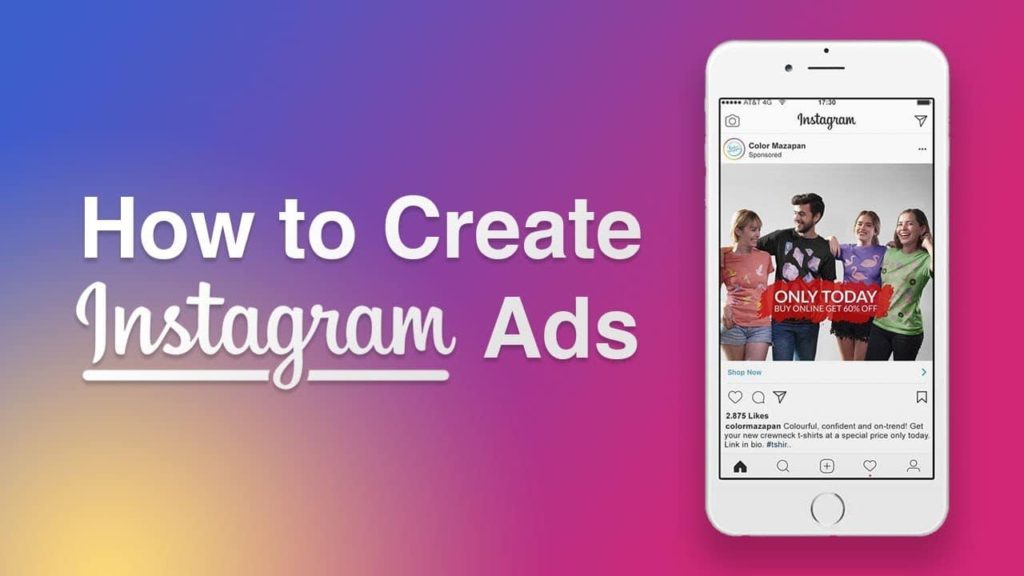
Step number one is to make it easy for clients to post, and step number 2 is to incentivize their posts.
PS: incentivizing your clients UGC doesn’t have to come with a ‘post and receive a discount’ label.
Incentivizing your client’s posts about your business can be as simple as you re-sharing their post on your own account and talking about how great it was to work with them.
It requires that you provide them with an unforgettable experience or product (which I’m sure you are already doing), creating something that causes the desire to be photographed (think cute cafe, Instagrammable mural, or brides holding up signs that say ‘I said yes to the dress’) and yes creating your own geotag.
Having your own personal geotag that your clients and customers can use is a nice easy guidepost for them to create content on your behalf. It’s a nod to your business’s presence in the social space.
[convertkit form=1116998]
Ok so perhaps your business is 100% online and you run a community, membership, mastermind, group coaching, or even a directory.
Do you still need to create a location tag on Instagram?
Your business still needs that geo-tag, and I’ll tell you why!
How many times have you thumbed through Instagram stories to find the obligatory shot of an account you are following about to hop on their weekly Zoom call?
I know that I have personally created this exact content for collectives/group programs that I’ve been a part of.
You know what happens – there are typically too many members to tag in the space of time it takes me to take the photo and post before the call gets started.
Would it be easier to add in one geotag that cites the name of the group so that my followers can tap to find out more about what I’m taking part in….. yep.
Being part of an online community means staking your claim to that spot within your community, and that means tagging it and bragging it!
Creating a geotag for your online business gives your members the ability to quickly and easily create UGC.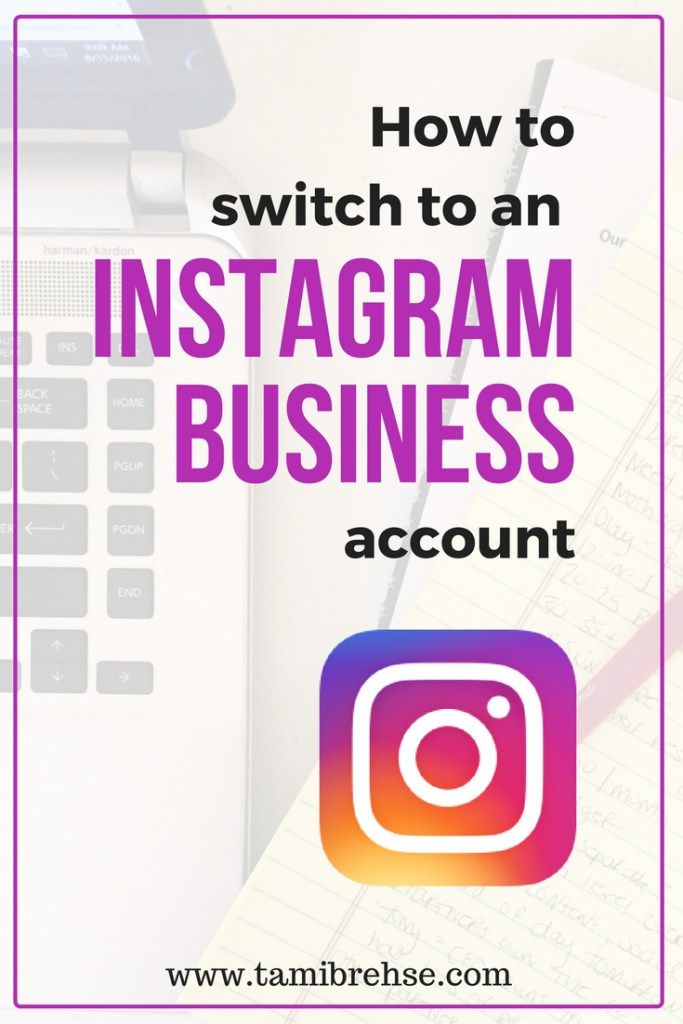
Each time they do so, your business is now reaching a new audience via your client’s audience.
Now we are getting somewhere and the road is paved with everlasting gobstoppers.
Ready to create a location tag for your business on Instagram?Here’s how:
[convertkit form=1116998]
To make selling on Instagram more convenient and efficient, the social network has introduced a special profile format for companies — a business account. The transition to it is available to absolutely all users. I'll walk you through how to connect and set it up step by step - as well as what features it provides and how they help sales.
A business account is a type of Instagram profile created for business promotion and analytics on the social network.
If you logged in through a PC, then you need to make just a few clicks to connect a business account. In the settings, find the "Switch to a professional account" item, then select the "Company" sub-item. Follow the prompts: specify the category of your business and set up its display in the profile.
Connecting a business account in a PC browserHow to switch to another category? Easy peasy! To do this, go to your Instagram profile page and click "Edit Profile". In the “Profile Information” section, select “Category” and change it to any other that is relevant to you.
Change the category at any time Switching to a business account from a smartphone is also easy: select "Account" from the settings menu, scroll to the end of the list that opens and click "Change account type". The further algorithm is the same as on a PC: read the tips, find the appropriate category and confirm your choice.
You will also be offered to integrate your Facebook. This can be done immediately, or at any other time. The condition is now optional, but integration will significantly expand your opportunities for positioning your business on social networks. By the way, on Facebook it should also be not just a personal, but a corporate page.
Completing settingsInteresting. You can quickly and safely promote your social network by boosting likes, reposts and views on publications. So you can increase coverage and get a hot target audience. Click and use -> TapLike
So, you have switched to a commercial profile. And you will definitely want to immediately try out all the new features and chips. Then I will give a brief overview of the settings and advantages that distinguish an Instagram business account.
The instagram business profile allows you to display the subject of your page. In addition to the inscriptions “brand” and “personal blog”, which are now quite common, you can put any other profession or topic, for example: musician, politician, clothing store, cafe, bar, etc. This is important because it attracts the attention of your target audience.
CategoriesAs advertising
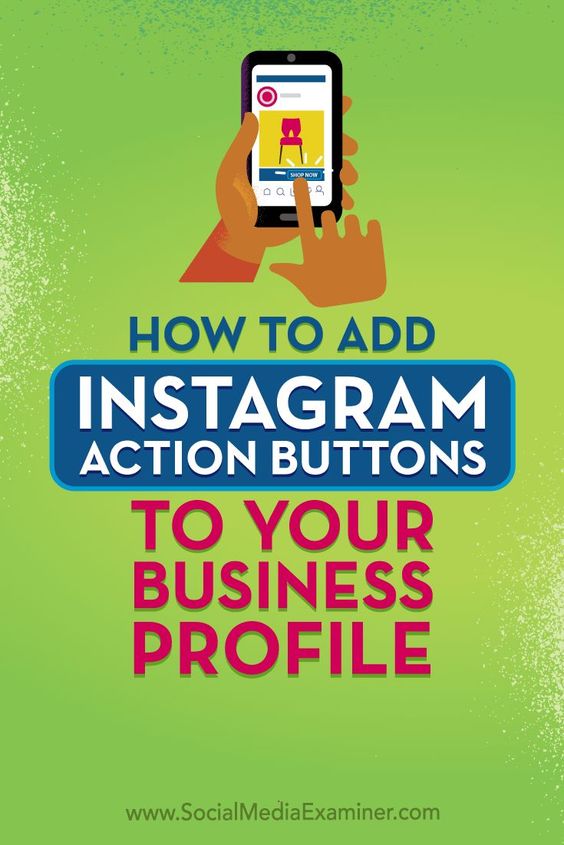
For this setting, please fill in the contact details first. Add them to the fields: email, phone, address. Then the action buttons will become available, and they are implemented through integration with third-party business applications. You will be able to place, for example, an online registration form or online payment. It will look like "Call", "Register", "Order delivery", etc.
A business account makes it easier for users to contact you. For example, when you click on the "Call" button, the phone number automatically appears on the mobile dialing screen, that is, you do not need to copy it to the phone's memory, open the desired section, paste it - everything is done in one click.
Communication buttonsBy the way. In order for Instagram algorithms to work for you, I recommend cleaning your account from garbage through the Instahero service. Use the promo code "INSCALE" to get a 30% discount on a full analysis. Click and test -> Instahero.
Various statistics can be viewed for a business profile. So you get the opportunity to track the reaction of subscribers to a particular content, analyze the effectiveness of advertising campaigns, contests, etc.
Statistics exist both for the profile in general and for individual publications and stories. This feature is useful not only for selling accounts, but also for personal brands.
On a business account on Instagram, you need to click on the “Menu” section on the profile page. Then select "Statistics". Switching between tabs here you can see:
Life hack. Want to increase your reach and engagement on social media? Then we recommend LiveDune. The service will quickly and safely conduct social media analytics and offer promotion options. Click and test 7 days for free -> LiveDune (Promo code "INSCALE" 30% discount)
In addition to general statistics, track reactions to individual publications. To do this, on the profile page, select any photo or video and click "View statistics" under the publication.
The number of likes, comments, shares and saves of the selected publication will appear in the window. In addition, the total number of actions performed with this post and the number of transitions to the profile are calculated here.
Publication statisticsGET INTO SOCIAL NETWORKS ALREADY 40 000+ WITH US
Catherine
Sergey
Ivan
Elena
Catherine
Subscribe
You can access the statistics of stories from the already familiar section “Menu” -> “Statistics” -> “Content”. Next, you need to find the “History” section. From here, the coverage of each story is available. Clicking on any post will open more detailed statistics, where you can even find out exactly who viewed your story.
Instagram has its own functionality to promote your publications. It works in such a way that it allows you to show your posts to the target audience, advertise your profile or drive traffic from Instagram to some external resource. This is more effective than simple cheats, although you will need cash investments for this tool.
PromotionLifehack. When replenishing your account, use a special service that returns up to 20% back to the balance of the promotion amount. For example, you threw in 10,000, and you can run an ad for 12,000. Click and learn more -> GetUniq.
 Shopping Tags
 Shopping Tags allow the audience to view your product cards, read the description, find out the price, go directly to the desired section of the online store. This feature has a positive effect on the growth of sales.
Shopping TagsInteresting. I also recommend using multilink. It will help to create a full-fledged online store, as well as contact you via instant messengers.
If you sell goods not only online, but also offline, you are probably often asked how to find you in order to buy a service or product. Business accounts allow you to post exact addresses and hours of operation with access to view the address on a map.
Physical address Posting an address may not be relevant to you if, for example, you do not offer your services offline. Then this place can be used to place an additional lead magnet. The address bar allows you to place a fairly large amount of information, which is very useful in cases where a profile description and biography is not enough.
The business profile is relevant not only for selling pages or instagram landings: its wide range of features will find its use even if you do not sell anything.
One of the most compelling reasons to switch to a business profile is free access to statistics that will show, for example, which posts turned out to be the most interesting. And finally, I will briefly list the main advantages:
And one more thing to help you. Do you want to make a bomb out of your account, get hundreds of subscribers a day and a flurry of enthusiastic direct messages? Then watch the courses below:
Content:
Do you want to present your business on Instagram but don't know how to do it? Instagram is a great platform to promote your business for free. Many companies use Instagram to announce their product launches, sales, or even sweepstakes.
In addition, you can easily connect with your customers on Instagram.
However, many businesses either underuse Instagram or misuse it, resulting in minimal conversions.
Therefore, in this guide, you will learn 5 steps to introduce your business on Instagram.
By the end of this guide, you will be able to apply the steps to successfully present your business on Instagram.
 But what does “optimize your profile” mean?
 Optimizing your profile means making sure your profile clearly reflects your business whenever someone visits it.
You can do this with your profile picture, biography, name, and category.
In other words, you must fill out your profile completely and do not skip a single field.
You must first switch your account to a business account if you have not already done so.
First, switch your account to a business account if you haven't already.
You can do this by going to your profile > menu > settings > account > switch to business account.
After you have switched your account to a business account, you can select a category for your account.
There are many categories to choose from - choose the one that best suits your business.
Instagram has many categories - choose the one that best suits your business.
For example, if your company is a website, select Website. Then use your company name as your Instagram username.
If the desired username is not available, you can add "hq" or your domain extension (eg com, org, net) to the end of your username.
Using your company name as a username is important so your customers can easily find it on Instagram.
Third, you must use a logo for your profile picture.
If you don't already have a logo, you can use free online logo designers to create one.
This is to create a strong brand so people can easily recognize your business from your logo.
Don't forget to fill in your curriculum vitae as well. Add a short description or slogan about your company to your bio.
Every successful business page on Instagram has a single theme. When choosing a topic, ask yourself these questions.
What message do I want to convey with my photographs?
What color scheme should I use to best represent my business?
Before you start publishing, it's important to plan your topic.
This is because once you start posting, it's very hard to deploy your topic unless you archive/delete all your posts.
Always plan the theme of your feed (eg colors, filters) before you start posting. Otherwise, it's very difficult to deploy your topic, as you'll probably have to archive/delete all your posts.
Many Instagram pages make this mistake and their feed is constantly blown out due to an inconsistent theme.
If they want to restart their feed, they will either have to archive or delete all their previous posts, which will also remove likes and comments.
This is due to a lack of planning. If you don't know where to start, you can try following your logo's color scheme.
For example, if your logo is blue, you can display blue and white images in your feed.
This will ensure a consistent color scheme throughout the feed.
But that doesn't mean you have to strictly follow your logo colors for your images.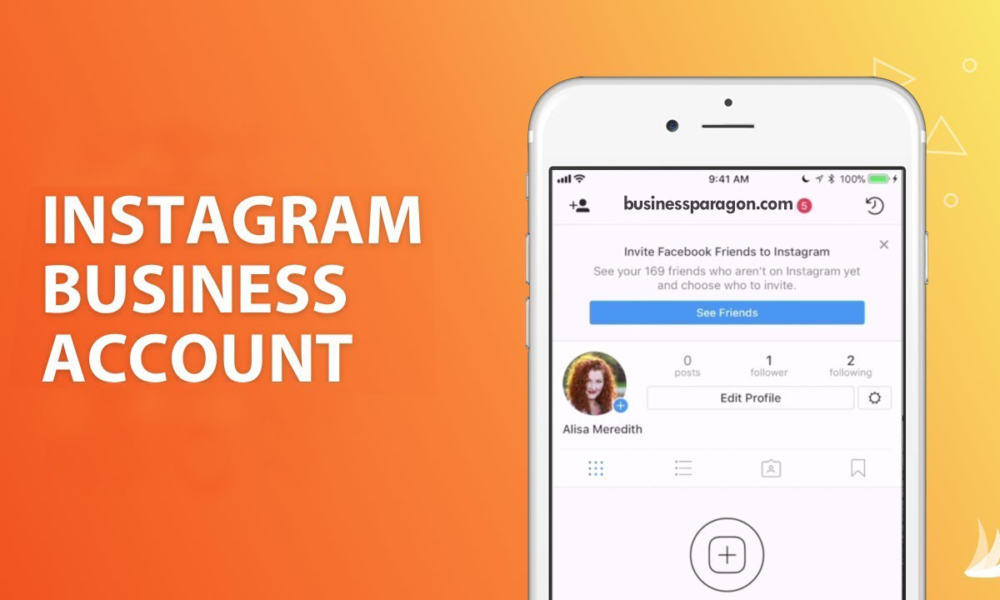
You can also use other colors and filters to create a consistent theme.
For example, filters are a great way to keep your feed consistent.
If you use the same filter for every post, your feed will stay pretty consistent even if you post images of different colors.
Connecting with your customers on Instagram via direct messages is one of the most underrated marketing strategies.
If you communicated by email, it was a slow, awkward, and formal process.
What's more, the average email open rate is less than 20%.
Unlike e-mail, direct communication is faster, more convenient and less formal.
Believe it or not, the average open rate of direct messages on Instagram is over 80%!
This is about 60% higher open rates than email.
That's why using direct messages on Instagram as a means of communication is easy.
Also, you can use Instagram direct messages as a customer service if you don't have a live chat on your website.
Customers can communicate with you via Instagram direct messages, which is a quick way to get your message across.
More than 1 billion people use Instagram every month, so communicating through Instagram direct messages is a hassle-free process.
There are several ways to use Instagram direct messages for your business.
Another way to use them is to promote your product or service.
Every time someone follows you, you can send them a private message to thank them for following. At the same time, you can present your product or service.
The general idea is to send a direct message to someone who has just followed you and introduce your business.
Every time someone follows you, thank them for following and use a call to action.
Here is an example: “Hi, thanks for subscribing! You might be interested in our products - right now we have a sale, visit our website topgoogle. ru.
ru.
You should never hesitate to send a direct message to a potential client on Instagram.
What's more, whenever someone follows you, it's a great opportunity to send them a private message as it's less chilly.
It is important to follow others, especially if they are your customers.
Following other people's responses and interacting with their messages is a great way to build rapport with them.
After all, it doesn't hurt to follow some people back. Don't aim for the perfect follower-to-follower ratio, as that is very selfish.
Your ideal follower-to-follower ratio can also affect your engagement.
Let's say you follow someone who doesn't follow you back.
If you consistently like their messages but they don't like any of yours, you'll be less likely to interact with their messages.
Similarly, if you don't like your subscribers' messages, they can unfollow or disable your messages.
Therefore, if someone disables your posts, it will negatively impact your engagement.
Try your best to reciprocate every like you receive and reply to every comment on your posts.
To soften this up, don't forget to reciprocate any likes you receive.
Also, try your best to like and reply to every comment on your posts.
This shows that you care about your followers because you value their participation.
You can use Instagram Stories as promotional vehicles and get attention.
You can use Instagram Stories to promote your product/service or to get attention. If you're launching a product soon, you can use the countdown feature on your story so people can set a reminder.

For example, if you're launching a product soon, you can use the countdown feature on your Instagram story.
This way people can turn on a reminder when your product is launched.
In addition, they can share the countdown with their story.
The main idea is to create as much buzz on Instagram as possible before launching the product.
On the other hand, if you want to grab attention, you can add your post to your story immediately after posting.
Adding a post to your story is a great way to increase engagement.
You can do this by adding a post to your story immediately after posting and adding a caption/sticker prompting users to like your post.
For example, you can add a heart sticker right above a post in your story. This will encourage users to go to your post and like it.
You can also add a "new post" sticker to let your followers know that you've posted something recently.
Some people view Instagram stories more than posts, so they may have missed your post in their feed.
Adding your post to your story ensures that anyone who views your story will know that you've posted something recently.
Therefore, they will be more likely to click on your story post and like it.
Presenting your business on Instagram is a great way to drive traffic to your website.
If you use Instagram correctly, it can generate conversions for your business.
After all, it's free promotion of your product or service.
In addition, Instagram allows you to connect with your customers more closely.
Companies use Instagram for a variety of purposes: storytelling, behind-the-scenes work, giveaways, and more.
There is no better way to announce something than on social media like Instagram.
For example, if you are launching a product, you can post teasers to create buzz on Instagram.
If your site is down, you can announce it on Instagram to keep your customers well informed.
In general, having an Instagram account for your business is not only for promotional purposes, but also to keep your customers in the loop.
Your first Instagram post could be an introduction to your business or a photo of your team.
For example, if you just launched your product or service, you can post an image with the text "We just launched!" like your first post.
You can even post a photo of yourself or your team if you don't have any ads.
Posting a photo of your team will let your customers know the person(s) behind the business.
This way it becomes more informal and makes your marketing more real.
However, you need to make sure you have a topic before you start posting.
For example, if your first post is an illustration, some of your future posts must also be illustrations.
On the other hand, if your first post is a picture of your team, you also need to post pictures of people in some of your future posts.
Think about the angle at which you want to position your Instagram feed.
In the end, your first post is critical, as it sets the stage for the rest of your posts.
There is no one size fits all approach to what to post on Instagram for your business.
This is because every business offers different types of products and services.
For example, if your business sells food, you must post pictures of the products you sell.
On the other hand, if you have an internet business, you can post whatever you want, depending on your niche.
Posting on Instagram as a business doesn't have to be restrictive, but you must stick to a consistent theme.
One of the big business mistakes is that they post random photos on Instagram.
You should never post random photos on Instagram as this can confuse your customers.