Badges on social media are an icon next to a user’s username that helps others to identify who that person is or their involvement with a group, page, or channel. Facebook allows users to assign badges to their top fans, admins, and other important people.
Perhaps you’ve seen a badge you don’t recognize, or you don’t understand what each badge means. Regardless of why you’re here, this article will teach you everything you need to know about Facebook badges.
Facebook badges are used in Facebook Groups and on Pages to identify certain members. You’ve probably seen the ‘Top Fan’ badge at some point, but there are so many more to explore. Now, depending on whether you’re managing a group or page, your badges may vary.
Here is a list of all the badges available for Groups on Facebook in 2022:
So, how can you identify these badges? Here’s the list:
The Group Admins, Experts, and Moderators have this badge:
Here are the remaining badges:
As you can see, Facbook offers a lot of badges to easily identify a user’s role in the group.
Facebook pages are different from Facebook groups and the badges are too. Here are a list of badges available for Pages:
One of the key responsibilities as an administrator or moderator of a group is managing members and their communications. Fortunately, Facebook makes it easy to assign badges on the web version and the app version. We’ll cover both in the follow sections.
If you prefer to use Facebook on a web browser, follow these steps:
 Click See All to view all of the options.
If you prefer to moderate your Facebook group using the mobile app, follow these steps:
Here are more answers to your questions about Facebook badges.
The badges are designed to help you identify different group members, such as moderators, admins, and the most active users.
Many users had concerns about top fan badges in the beginning and the introduction of the feature was quite a source for trolling and light banter. Most top fan badges are updated weekly, before displaying yours a notification will pop up asking if you’d like to display your badge.
If you’d rather not display the icon don’t accept, otherwise, you may not have the option to remove it. Before the recent update, you could click on the community option and turn your badge off, now you’ll have to contact a group admin to have it removed.
The badges might not appear in all groups. The admins can control their availability and disable or enable them via Settings under Admin Tools and Insights. And to be eligible badges, a group needs to have at least 50 members.
Badges are also available on Facebook Pages. You can simply turn them on by going to your page’s Settings menu. Click on Facebook Badges and toggle on Top Fan Badges.
Good communication is at the core of any social network. Unlike other platforms, Facebook has found a cool way to support valuable interaction between its users.
It’s up to you to contribute with engaging comments or posts, and soon enough you’re going to start receiving those badges. Just remember that they might not be available or have the same criteria in every group, so don’t get discouraged if you don’t receive a badge right away.
Facebook group badges are kinda a great deal.
They have been around since the mid 2018s yet remain one of the most liked features in Facebook groups.
Badges on Facebook not only help admins acknowledge the efforts of their members, but are also a boon for the newcomers as they can easily identify the community leaders and seek help.
For those of you who haven’t used Facebook badges until now and would like to know everything about them, I recommend you read this article till the end.
As you scroll down, you’ll know:
So, without wasting any moment, let’s get started!
What are Facebook group badges?Facebook group badges or Facebook group member badges are the visual tags that you see beside group members’ names.
These icons next to names on Facebook appear in all group posts, comments, and member profiles.
They help you learn about community leaders, single them out from the crowd of group members, making it easier for new members to reach out whenever needed.
And also are an awesome way for admins to recognize group members for their significant contributions in the group.
An important note: Group badges on Facebook are available for communities having more than 50 members.
As mentioned by Facebook,
“There are badges for admins, moderators, new members, for a member’s group anniversary, members identified as conversation starters, and for founding members.”
Let’s have a look at what each of these mean.
Facebook Group Badges ListHere is a list of all the Facebook badges 2021.
All the admins and moderators of a group will have these badges respectively alongside their names. The first image is that of the Facebook group admin badge while the second one is the moderator badge.
The Facebook admin badge and moderator badge helps group members (especially the new ones) identify them easily, making it easier to seek help whenever needed.
Seen the Facebook hand next to name of a group member?
Well, that’s the new member badge. It appears next to the name of every new member added in your Facebook group in the last two weeks.
This FB badge is no less than an aid for the admins and moderators who are looking to welcome new members, answer their queries, guide them, and make them feel supported.
Available mostly in newly created groups, the Facebook founding member badge acknowledges members who joined within the first three days of the group’s creation, posted in it, and even invited more people to join in.![]()
Basically, this badge is like a small token of appreciation for those who have helped your group grow.
This badge recognises members who often start meaningful conversations in the Facebook group. It appears for all those whose posts get the maximum reactions and comments in a period of 4 weeks.
Wondering how to become a conversation starter on Facebook?
Initiate some relevant and highly valuable discussions in the Facebook group you’re a part of. Do that often and you’ll earn the Facebook conversation starters badge in no time.
Wondering what is a rising star on Facebook?
Well, it’s an attempt to acknowledge all the enthusiastic souls who have started to participate in group conversations within the first month itself.
The Facebook rising star badge appears for all the new members whose posts get the most comments and reactions.
For all those who can’t spark a conversation without sharing relevant photos and videos, the visual storyteller Facebook badge is for you.![]() Mostly because other members find it valuable and engage a lot with your posts.
Mostly because other members find it valuable and engage a lot with your posts.
To put it simply- all those who provide immense value to the group by means of images and videos stand a chance to land the Facebook visual storyteller badge.
You must be aware of Facebook’s recently introduced Q&A feature – an improved way to initiate conversations.
In case you aren’t, check out this BLOG and know everything about it.
It’s for the members who consistently share valuable answers to the questions in a Facebook group.
With Facebook’s new group expert feature, admins can easily designate knowledgeable members as ‘experts’ in their groups. When they do, members will have to accept the proposal post which a group expert badge on Facebook is displayed against their names. This group expert badge signifies a person’s expertise in a subject matter.
As Facebook tells – “This will make it easier for others to spot informative or insightful posts and comments, and admins can collaborate with these members to host Q&As, respond to members’ questions, and share perspectives. Furthermore, we believe that group experts will support admins in fostering quality conversations and make it easier to discover valuable content, ultimately making for a more meaningful experience for members.”
The all-new group ambassador badge recognises members who help your group grow by inviting others to join it.
It will certainly help admins acknowledge their group ambassadors for their coveted actions. It’s also likely that this badge would encourage other group members to share the group’s content or invite their family and friends as they seem fit, seeing this is what their community peers do naturally.
An amazing thing is that this badge appears alongside members’ names and is visible across group posts, comments, member group profile for the next 30 days only if they choose to display it.
Ans. To add badges to your Facebook group, you must follow these steps:
a. From the left hand corner on your news feed, select the group you’d like to turn on badges for
b. Open group settings
c. Click on pen icon beside badges
d. You will see a list of all the member badges available for your Fb group. Choose the badges you want to enable for your group by checking the box against each one.
e. Hit save
Ques. Facebook group badges not showing. What might be the reason for it?
Ans. Ideally, Facebook group badges should be visible under your group settings if your group has over 50 members. You can follow the steps mentioned in the above question to turn them on.
However, if Facebook group badges are missing from the settings section, you must raise the issue to group support. You get the group support option in the left side itself.
When you click on it, a window will appear. In the text box below, describe your issue. You can even add screenshots.
If due to some reason, your Facebook group does not have the support option, you can ‘Report the problem’ to Facebook from your personal account. For the same,
a. Click on the arrow facing down icon on the top right of Facebook
b. Select ‘Help & Support’
c. Click on ‘Report a Problem’
d. Hit ‘Something went wrong’ and tell Facebook about the broken feature
e. A dialog box will appear. Fill in the necessary details, and hit submit. You can choose to add screenshots
Ques. How to see your badges on Facebook?Ans. To see all your Facebook group badges, follow these steps:
a. Select the group from the left side of the news feed for which you’d like to see the badges
b. Go to any of your recent posts / comments done in that group and click on your name
c. Your profile will open – On the left side, you’ll see your ‘Group Badges’ listed
Ques. How to manage badges in a Facebook group I’m a member of?Ans. As a group member, you can always choose which badges appear next to your name. Here’s how you can manage them:
a. Select the group from the left side of the news feed for which you’d like to manage the badges
b. Go to any of your recent posts done in that group and click on your name
c. Your profile will open; Select ‘Edit Profile’
d. Scroll down to the badges section and click on edit
e. Click on the Facebook group badges you’d like to see/not see beside your name and hit done
That’s all there is to Facebook group badges. While they are surely a great engagement generator, you can check out this blog to understand about the other ways you can keep your group members active and engaged.![]() 👇🏻
👇🏻
25 highly effective ways to increase your Facebook group engagement
If you have any questions/concerns regarding this or anything else, feel free to drop them in the comments section.
Or post them in our Facebook group where thousands of admins constantly share their valuable suggestions and learnings.🙂
Simran Grover
Creating value in the lives of others with my content, little by little.✨
Working at Convosight, I do more than just wrangle commas. I’m passionate about innovating new ways to create amazingly effective content and sharing it with the right audience.
Check out my latest blogs and feel free to share them!💛
Outlook
Setting
Signature
Signature
Adding Facebook and Twitter hyperlinks to email signatures
Outlook for Microsoft 365 Outlook 2021 Outlook 2019 Outlook 2016 Outlook 2013 More. ..Less
You can add links to your Facebook or Twitter profile to your email signature. To get started, save copies of the Facebook and Twitter icons to your computer. You will also need the web addresses of your profile pages on each of these social networks.
In the browser, right-click each icon you want to use.
nine0002Select Save Picture As and do one of the following:
Accept the specified file name.
OR
Change the name of the file to the name (eg Facebook) of the social network it corresponds to. nine0003
Specify where you want to save the icon, and then click the Save button.
In Outlook, on the Home tab , select New E-mail .
nine0024On the Message tab, in the Enable group, click the Signature button and select Signatures.
On the tab Electronic signature , in the field Change signature , select the name for which you want to change the signature.
In text field Change caption add a new line below the current caption.
Tip: Place the cursor at the end of the label line, and then press Enter.
Select , navigate to the folder where you saved the icons, and then select the social network icon you saved.
Select Insert > hyperlinks .
In the Address field, enter the web address (for example, http://www.facebook.com/ username ) for the social network account that corresponds to this icon, and click the OK button.
Tip: Repeat steps 5-7 to add a second icon.
In the body of the message, on the Message tab, in the Include group, select Signature , and then select the modified signature.
Note: For more information about creating custom signatures, see Add a signature to messages.
You probably know that Facebook collects data about you.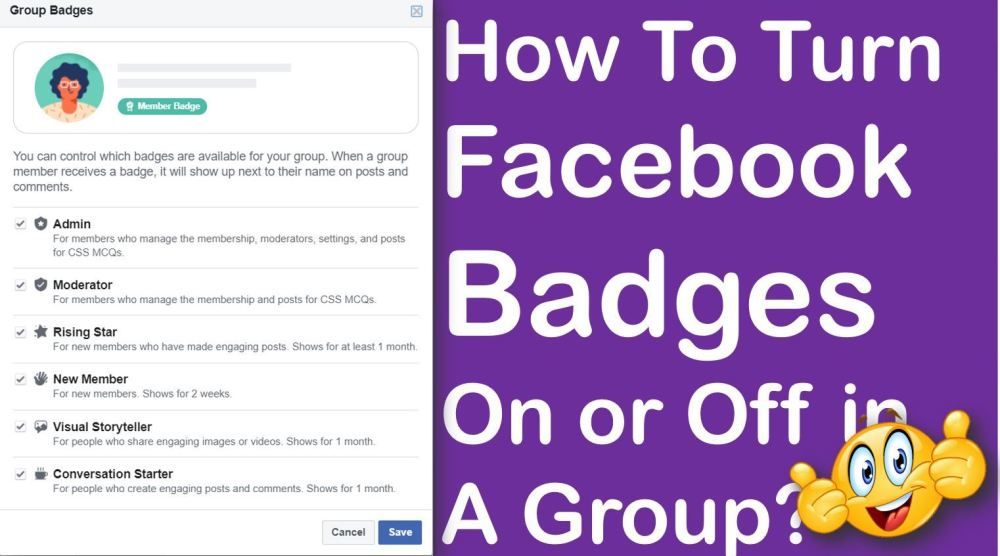 Moreover, the company receives information for your dossier not only from your page on the social network, but also from many sites and applications that, at first glance, have nothing to do with Facebook at all. And if the decision on whether to post something on Facebook or not is up to you, then third-party services, as a rule, do not even tell you to whom and what data they transfer.
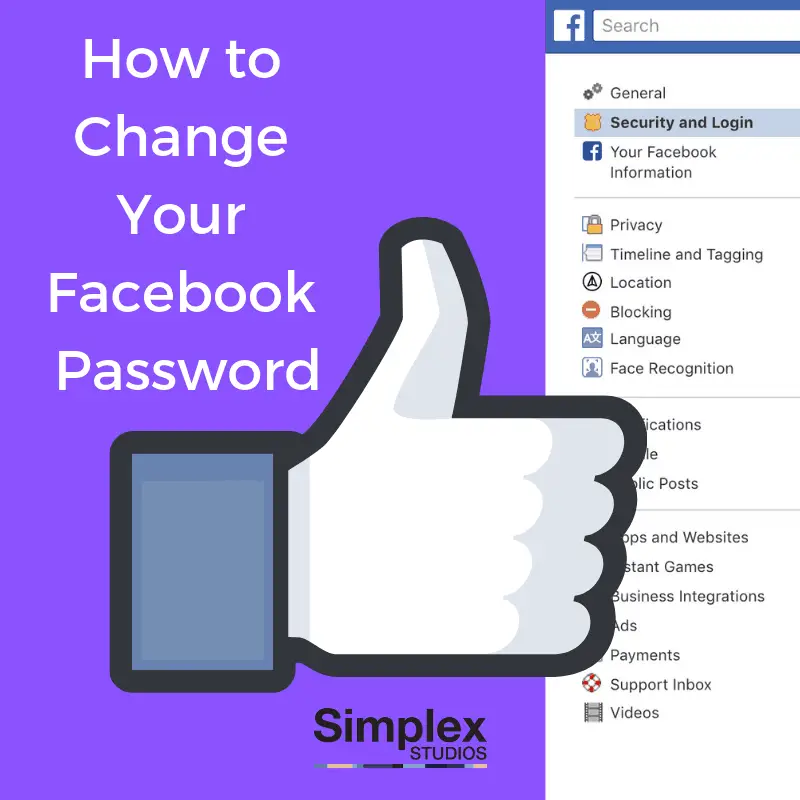
Not so long ago, an important tool appeared in the Facebook settings that allows you to view and manage information that the company received from third parties. It's called Actions Off Facebook. To find it:
Of course, you can't just stop collecting data. But by digging into the "Acts outside of Facebook", you can find out who and what says about you social networks, and untie unnecessary information from your profile, and this is already a lot. nine0003
Sites and applications that use various social network tools, from the “Login with Facebook” button to analytics tools, can share information with Facebook.
Right on the page Off-Facebook Activities you can see the last few "speakers". To see the full list, click Manage your off-Facebook activity information , then you'll need to enter your password.
Most likely, the scale of data collection will impress you: among Facebook partners there may be news portals, and banking applications, and resources that you don’t remember at all, because, for example, you accidentally visited them only once, hitting them from a search . nine0003
“Off-Facebook activities” is primarily information about your interactions with third-party services. For example, a media site can tell the social network that you have read the latest news, and an online store that you have viewed or bought a particular product. And this section can also include the actions of the site or application itself, for example, displaying ads.
In the Facebook settings, it only shows the number of actions shared by this or that resource, but you can download the archive with the details. For this:
Depending on what data you want to download, it will take from several minutes to several days to create an archive. If you're only interested in information about off-Facebook activity, it's likely to be prepared quickly. As soon as the archive is available, you will receive a social media notification and an email.
Facebook notes that it actually receives more data from third-party services than it shows you. Nevertheless, information from the archive may be of interest. In addition, if you find, say, too sensitive data in the list of actions, you can complain about the service that transmitted it to Facebook. For this:
Facebook allows you to remove data collected about you from your profile. To do this, go to Go to Settings -> Your information on Facebook -> Actions outside of Facebook and click Clear history above the list of sites and applications - and your previous online activity will not affect what ads the social network shows you.
It is impossible to completely stop communication between Facebook and third-party services: sites and applications will in any case tell the social network some information about you. Sometimes individual resources get caught transmitting too personal data and change their approach, but this has nothing to do with Facebook settings. nine0003
On the other hand, the social network may not link information about actions in third-party services to your profile and may not use it to display personalized advertising. This can be configured for individual sites and applications, or for all at once.
To stop Facebook adding specific property data to your account:
After that, within two days, Facebook will stop giving you ads based on information from this resource. True, there is a downside to the coin: you will not be able to use the “Login with Facebook” button on it until you allow it to be linked to the profile again.![]() nine0003
nine0003
You can also completely turn off the sending of data by sites and applications. But get ready for the consequences: after that, you will be immediately thrown out of all the services where you entered using the social network. If there are many of them, it can be very inconvenient.
To completely prevent Facebook from targeting ads based on the sites and apps you use:
Done! Now the social network will no longer bombard you with shoe ads if you recently bought a pair of sneakers.