Before getting your Access Token you need to "create an app" on Facebook for Developers.
Facebook for Developers is an independent service. You can use your existing or you can register a new account which you will confirm using the verification code Facebook will send to your mobile phone.
Clicking the Create App button will trigger a modal window where you will need to specify what exactly should your app do.
First select More Options.
Then choose Something Else in order to register an app with a custom permissions set.
Adding an app will open a pop-up window where you need to insert:
Note: You may be prompted to go through a "I'm not a robot" and reCaptcha security check.
After you have successfully added a new app, you will be redirected to a new page where you need to configure Instagram Basic Display and also add a tester in order to generate your Access Token.
Note, you will see two different Instagram options. Choose Instagram Basic Display.
You will be redirected to Basic Display section automatically, but in case you wonder off go back to this section.
This name will be displayed automatically so do not change it.
This is the part where you need to add an Instagram Tester (test user) in order to generate an Access Token.
After creating an app you will be automatically redirected to this section.
Note, there are two tester options, so make sure to add a tester to the Instagram Tester section.
When you add the IG username to the field, a dropdown menu with suggested IG users will appear so as to make sure you have entered correct details.
Log into your Instagram account here.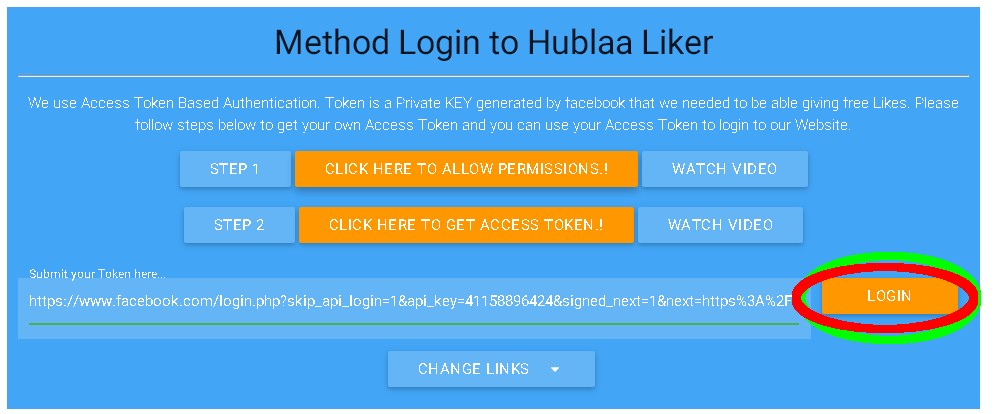
Note, you may need to re-login to the Instagram account again in order to allow specific permissions before the token is being generated.
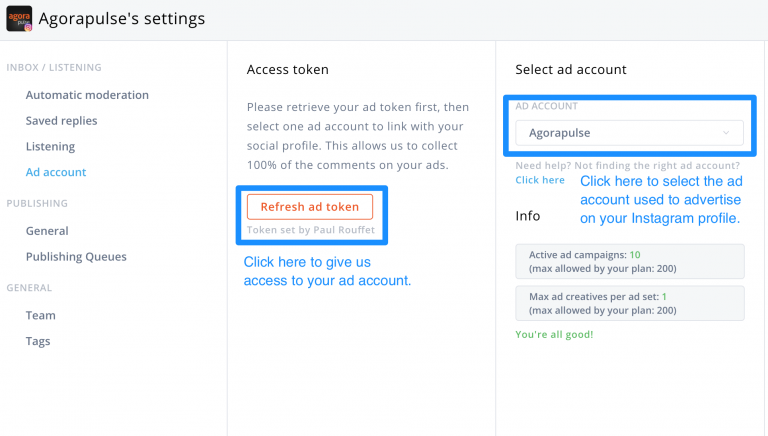
The last step is, go to the Instagram tab of your dashboard and copy the Access Token to the input box provided. Then you are ready to display your Instagram Feed on your website!
Did this answer your question?
Thanks for the feedback There was a problem submitting your feedback. Please try again later.
Sharing your beautiful Instagram feed on your WordPress website is a great way to boost your follower count and get more engagement. But to do this, you need to create or generate your Instagram access token first. Don’t worry, this is easier than you think. Today, we will show you how you can collect your Instagram access token in only three easy steps.
Why Do You Need To Collect Instagram Access Token?Sharing photos from third-party accounts is prohibited by Instagram. So, in order to prove that you have permission to share Instagram images on your WordPress website, you need to retrieve your Instagram access token. This token is basically a set of characters that allow other applications access to your Instagram account.
It may sound like too much trouble, but this is actually a very secure way to ensure that your content on Instagram is being protected from people who do not have permission to use your photos.
Once you have the access token, you can simply connect your Instagram account to your WordPress website and share your stunning photos with your site visitors.
How To Create Instagram Access Token In 3 Easy Steps?In this section, we are going to give you a step-by-step walkthrough on how to create your Instagram access token within minutes. You do not need any extra tool to do this; you just have to make sure that your Instagram account is public, and then you have to create an app on Facebook Developers. Here’s how you can do it without breaking a sweat.
Step 1: Add A New App On Facebook For DeveloperFirst, head over to Facebook Developers Account and log in with your own Facebook profile credentials. Afterwards, click on the ‘My App’ button at the top of the page. This will redirect you to a new page where you can click on the ‘Create App’ button to add a new app on Facebook developer.
As soon as you click this button, a popup will appear where you have to choose what you want your app to do. This decides the permissions that your app will need. In this case, you will need to go for the ‘Something Else’ option as shown below.
Afterwards, give a name to your app inside the ‘App Display Name’ input field. Enter your email address and choose a Business Manager if you have one. When you are done, click on the ‘Create App’ button.
That’s it! You have successfully created a new app on Facebook Developers. Wasn’t that easy?
Now, you just have to set up the Instagram Basic Display API. This is the API that allows your app to get access to your profile information, photos and videos from your Instagram account. Move on to the next step to learn how to set up Instagram Basic Display.
Step 2: Configure Instagram Basic DisplayAs soon as you create your app on Facebook developer, you will be taken to a new page. From here you will see several different options as shown below. Click on the ‘Set Up’ button under Instagram Basic Display.
You will be taken to the ‘Basic Display’ page where you have to scroll down and find the ‘Create New App’ button. Click on this button and then enter the name of the app you created earlier.
You are done configuring Instagram Basic Display. Now it’s time to go retrieve your Instagram access token.
Step 3: Generate Your Instagram Access TokenTo get your Instagram access token, first you add an Instagram Test user. From the ‘Basic Display’ page, scroll down until you find the ‘Add or Remove Instagram Testers’ button.
Simply add the Instagram user ID of the person you want to set as your tester. If you are planning on sharing your own photos and videos, then just add your own Instagram username to grant access to your account.
Once that’s done, log in to your Instagram account and navigate to Settings→ Apps and Websites and click on the Tester Invites tab as shown below.
Accept the invitation and return to your Facebook Developers dashboard. Click on the app you have created and go to the ‘Basic Display’ page. Afterwards, scroll down to the ‘User Token Generator’ section and click on the ‘Generate Token’ button.
A pop-up will appear with your Instagram access token. You can now copy this token to your clipboard and show your Instagram posts on your WordPress website.
Just like that, you can easily collect your Instagram access token to share your Instagram photos and videos on WordPress. All it takes is three simple steps and you are good to go.
How To Display Your Instagram Feed On WordPress Using Elementor?If you love page building with Elementor, then you can display your Instagram feed in a spectacular way using Essential Addons For Elementor. This is one of the most popular elements libraries for Elementor and is beloved by more than 1 million happy users. It comes with over 70 amazing elements to help you enhance your Elementor page building experience. One of these elements includes the EA Instagram feed, which lets you display your Instagram photos in a beautiful way.
All you have to do is drag-and-drop the EA Instagram Feed element anywhere on your web page, and then enter the Instagram access token that you have collected. Your Instagram feed will then be automatically displayed on your WordPress website. Check out this guide to find out more.
That’s how you can easily create your own Instagram access token and boost your engagement by sharing your photos and videos on your WordPress website. For more tips and tricks, fun tutorials, news and updates, make sure to subscribe to our blog or join our friendly Facebook Community.
Post Views: 10,866
Instructions for obtaining an Instagram access key (access_token) to connect a widget or plugin to display publications from your account. Outdated version - does not work at the moment.
Obtaining a token (access_token) on Instagram is an inevitable procedure if you want to somehow remove publications from your account on a website or application.
Access tokens - allows you to get access via API not only to photo or video materials, but also to almost any data and attributes of your publication: publication date, number of likes, comments, photo captions, hashtags, list of users who viewed the publication and much more.
The module we developed also actively uses the social network API and for its correct operation, it is also necessary to obtain an access key (access_token).
1. First of all, you need to register or log in to Instagram under the account from which you want to display publications.
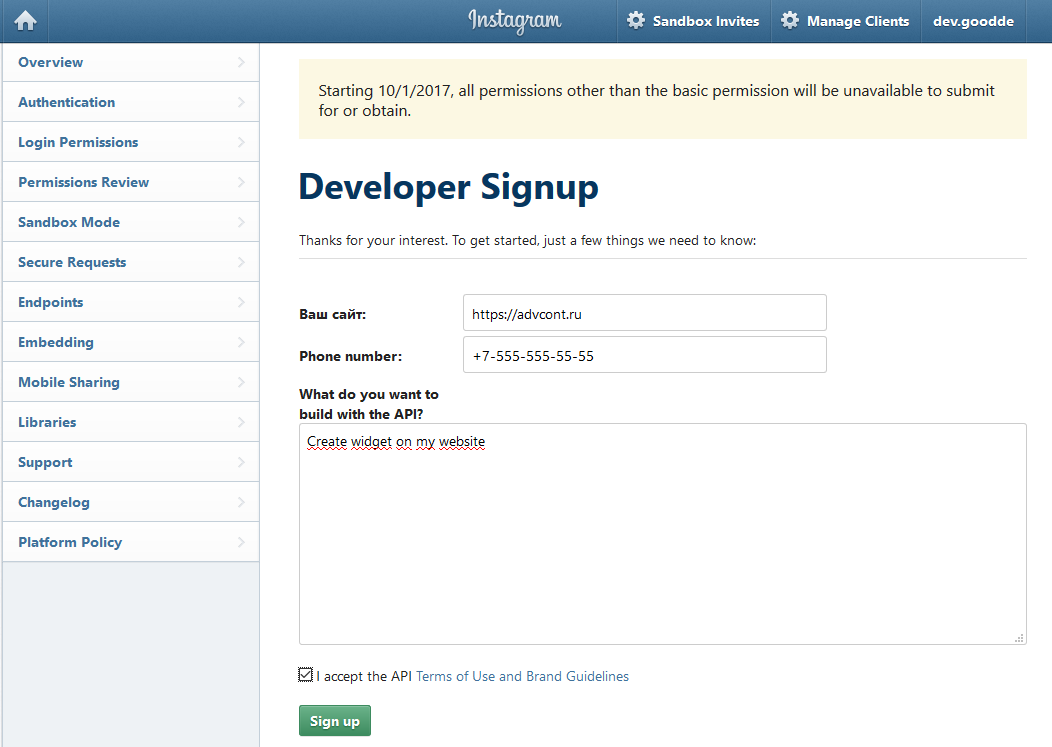
2. Go to section for developers and create a profile if it does not already exist. Consistently fill in the fields: website; phone number; briefly write how we plan to use the API (for example: Create Widget on my website).
3. Register a new client in section Manage Clients by clicking on the button Register new Client
4. Fill in the form fields:
5. On the Security tab, uncheck Disable implicit OAuth and click Register
6. After successful registration, 9 will be displayed0019 Client ID. Paste the link into the address bar of the browser:
https://api.instagram.com/oauth/authorize/?client_id=CLIENT-ID&redirect_uri=REDIRECT-URI&response_type=token&hl=en
and instead of CLIENT-ID, we insert the received Client ID, and instead of REDIRECT-URI, the site address from the Valid redirect URIs field from 4 points and follow the link
7. We confirm our application with the button Authorize
8. The site will open, from the address bar you will need to copy the line after: #access_token= This is the one we need Access token . It remains only to save the received token in a safe place in order to exclude the possibility of the key getting into the public domain.
It is important to remember: the received token does not expire, while changing the password or login in your profile will make the token invalid and you will have to go through the whole procedure again.
By accessing the Instagram API function, you will be able to evaluate hashtags, track activity on your accounts, view and analyze information to evaluate the behavior of your audience, place posts and images on Instagram on your website and so on.
The Instagram API allows you to connect your app to Instagram features and functionality. Companies and developers can use the API to fully manage their Instagram presence, including searching for mentions, getting basic data about other businesses, and searching for photos with hashtags.
In order for Instagram to work with your app, you need to get an access token. Below we describe in detail the process of obtaining it with screenshots.
Since Instagram is currently owned by Facebook, interaction with the API takes place through it. First you need to have or register a Facebook account.
Step 1. First, log in to your Facebook account and go to the developer dashboard at https://developers.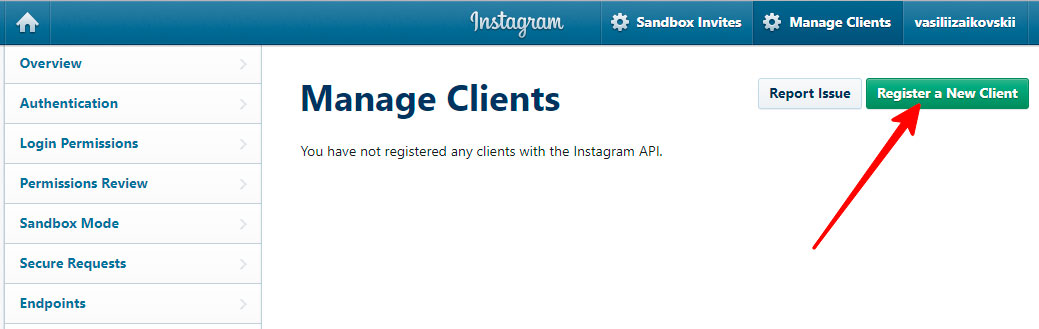 facebook.com/.
Step 2. After that, you need to create a new application. Go to the "My Apps" section and select "Create an App".
In the pop-up window that appears, you should select the "Advanced options" item.
After that, you will see another pop-up window, select "Other" in it.
To finish creating the application, you need to complete 3 more items.
Enter "Application Name", email address and if you have a Business Manager account, you can select it. Complete the standard security check to complete the app creation.
Step 3. You must configure the application and add a target framework to it.
Navigate to the created application.
Click on the "Settings" item and move to the "Basic" subsection.
At the very bottom of the window that opens, you can find the "Add platform" item.
In the window that opens, select the target platform.
In our case, we have selected "Website" and you will be asked to enter its address after the "Next" button. When finished, click the "Save Changes" button.
Step 4. After that, you will return to the management section of your application. You should click on the “Add Product” item and go to the Instagram Basic Display setup.
Step 5. After that, you can proceed to the settings of the already added product. Click on "Settings" in "Instagram Basic Display".
On the page that opens, at the very bottom, click on the "Create New App" button.
You will see a new window.
The Display Name field will be the name of your application. Click on the "Create Application" button.
You will have new customization options.
The Instagram Display Name will be the name of your app. In the remaining three paragraphs, add the URL of your site and save the changes.
Step 6. After that, it's time to add a new "Test User".
Go to the "Roles" section and select "Test Users". You are interested in "Testers". Click on "Add Testers".
You will see a new window through which you can send an invitation to an Instagram user.
You should enter the name of the user who will receive the invitation and click the "Poison" button.
A new Tester will be created, but it will have the "Pending" status.
Step 7. You need to accept the role of Tester via Istagram.
Sign in to your Instagram account. In the Apps & Sites section, you will find an invitation and you should accept it.
Step 8. It's time to go back to the developer panel on Facebook and start generating the token.
Click on "Basic Display".
There you will see the "User Token Generator" section, in which, opposite the name of the tester, you will find the "Generate Token" item.
Your application will attempt to retrieve information from your Instagram account and you will need to allow these actions by logging into Instagram.
After that, the token you need will be generated and you will see the following window.