Instagram is a visual platform — so having great photos is key to a successful Instagram strategy. In other words: quality images result in quality engagement.
Thankfully, you don’t need to be a pro photographer to post beautiful content to your Instagram accounts.
All you need is your smartphone camera, a few editing tools and tricks… and a little practice.
Watch this video if you want to learn how to edit your photos for Instagram using Adobe Lightroom:
Or, read on to learn how to edit Instagram photos to grow your audience and establish a compelling brand aesthetic. You’ll also get a breakdown of some of the best photo-editing apps that can take your images (and engagement) to new heights.
Save time editing photos and download your free pack of 10 customizable Instagram presets now.
Instagram has built-in editing tools and filters, so this is a great place to start if you’re just starting to dabble in the world of image manipulation.
Even the best filter can’t disguise a bad picture, so make sure you’re starting with a quality photo.
Natural light is always the best option but use the HDR mode on your smartphone camera when shooting in dim light, close up, or outdoor portraits for best results.
Another pro tip? Snap a bunch of shots to make sure you’ve got options when posting time rolls around.
If you’re strapped for time or inspiration, try customizing stock photography.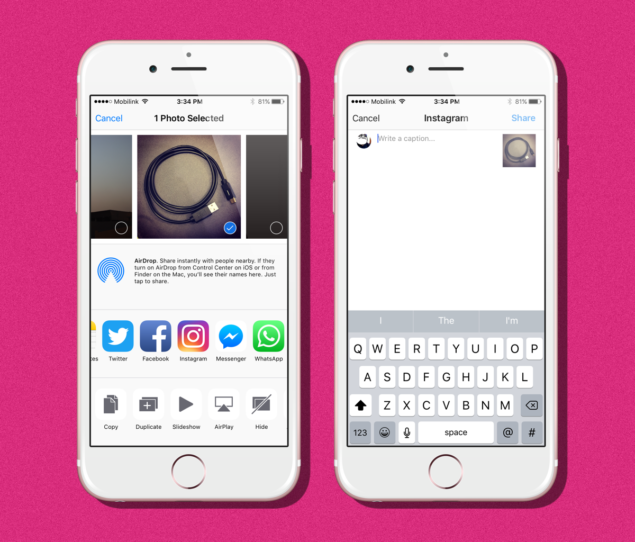 There’s a whole wide world of free, quality stock photography out there to choose from.
Pro tip: Start with a photo that’s sized for Instagram. If your photo or video is too small, it may appear blurry or grainy, no matter how much you edit it. And you can’t edit your photo after posting. Photos that are at least 1080 pixels wide will look best. Instagram will crop your photo as a square by default, but you can adjust it to its full width or height if you prefer.
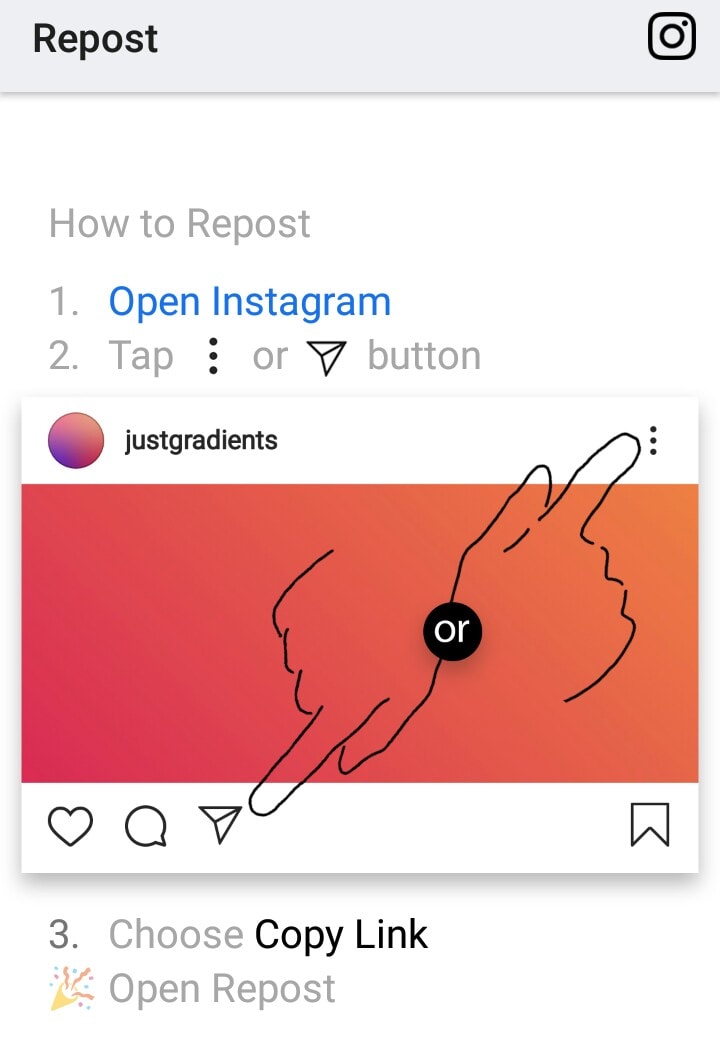
Open up the Instagram app and select the plus-sign icon in the top right.
This will open up a menu of posting options. Select post and then pick your photo from your image gallery. Tap next.
Here, you’ll find a variety of filters, which will adjust the lighting, colors, contrast, and sharpness of the image in different ways.
“Gingham” for instance, creates a flat and muted look, while “Inkwell” turns your photo black and white. Tap each filter to preview how it will look on your particular photo.
“Claredon” is the most popular filter in the world, according to Lifewire, for a cooler look that pumps up the contrast in a natural way.
Pro tip: You can adjust the intensity of any filter by tapping it a second time and adjusting the sliding scale from 0 (no effect) to 100 (full effect).
But in 2021, most pro Instagram users tend to skip the filter step all together in favor of customizing their own visual balance. Which brings us to the “edit” function in the Instagram app…
At the bottom of the screen, you’ll see an “Edit” tab on the right. Tap that to access a menu of editing options:

 (What’s the difference between this and structure? Unclear.)
Pro tip: At the top of the screen, you’ll see a magic wand icon. Tap that to open the Lux tool, which allows you to tweak the exposure and brightness on a sliding scale.
When you’re done making your edits, tap Next in the top right corner.
If you’re sharing multiple photos in a single post (also called a carousel), you can edit each one separately. Tap the Venn diagram icon in the bottom-right corner of the photo to bring up individual editing options.
If you don’t do this, Instagram will apply your edits to every photo the same way. If your photos were taken in different conditions, or feature different subjects, editing them individually is worthwhile.
6. Post your photo (or save it for later)Write your caption and tag any people or locations, then tap share to get your masterpiece out into the world.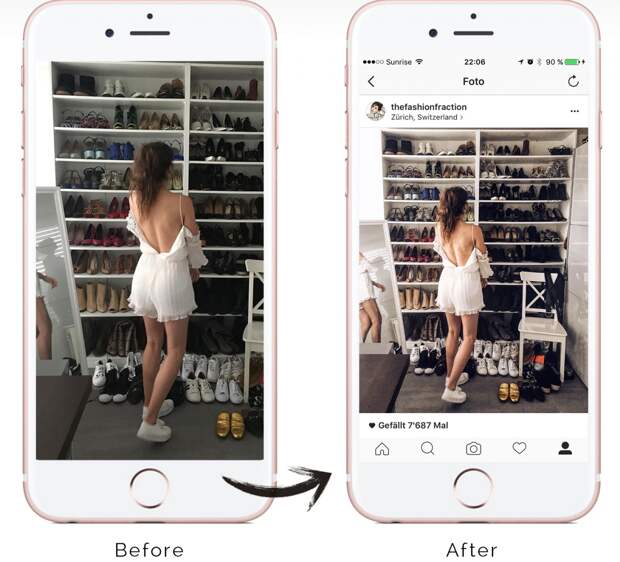
You did it! You edited an Instagram photo! And now everyone will see!
… or if you’re feeling shy and want to wait, just tap the back arrow twice and you’ll be prompted to save your image and edits as a draft.
Instagram photo editing tips: beyond the basicsIf you want to take your Instagram photos to the next level, though, you’ll need to spend a little time working on your images before you even open them in the app.
Here are a few ways to go beyond the bare minimum to make those pics pop.
Straighten up and focusYou’ve done your best in the shooting stage to create a great composition, but in case your camera wasn’t perfectly level, or if a stray piece of litter has crept into the shot at the edges, the straighten and crop tool is here to help.
This tool is the easiest way to improve your composition when it’s too late to retake the shot. A good rule of thumb? If the horizon in your photo is straight, you’re golden.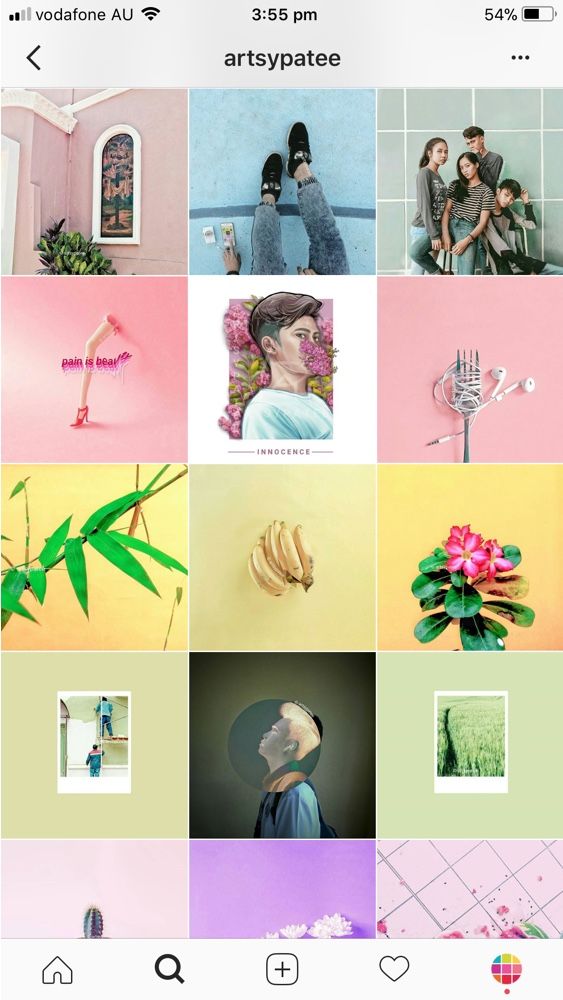
Use the spot-removing tool in your favorite editing app to clean up your images before you get to the color correction stage.
Whether that’s removing stray crumbs from the table of your food shot or discretely erasing a zit from your model’s face, cleaning up those distracting details will ultimately make your shot look more polished.
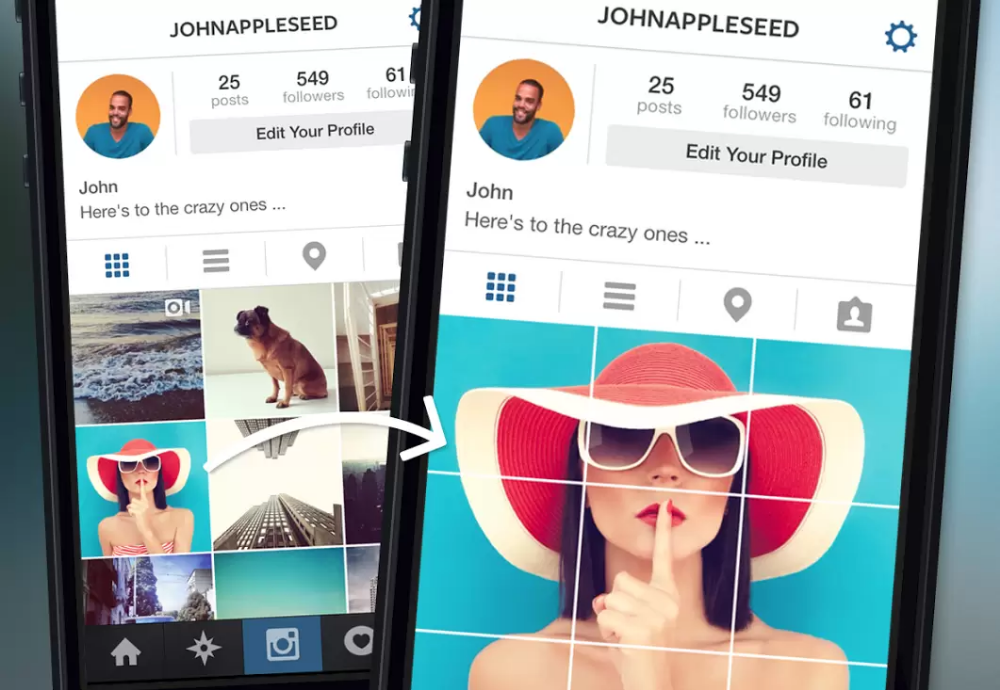
Consider the gridWant to create a grid with a consistent, on-brand vibe? Keep your tones uniform, whether that’s warm and vintage-y, vibrant and neon or pretty in pastel.
Find some grid-spiration here, with our countdown of 7 creative ways to design an Instagram grid layout.
Mix and match editing toolsThis is one of our top tips.
There’s no rule saying you need to stick with one editing app. If you love the smoothing effects of one program, and the cool filters in another, use ‘em both and get your photo just right before you upload it to Instagram
How Instagram influencers edit their photosWondering how to edit Instagram photos like the pros? We watched Instagram influencers’ how-to videos so you don’t have to!
You’re welcome.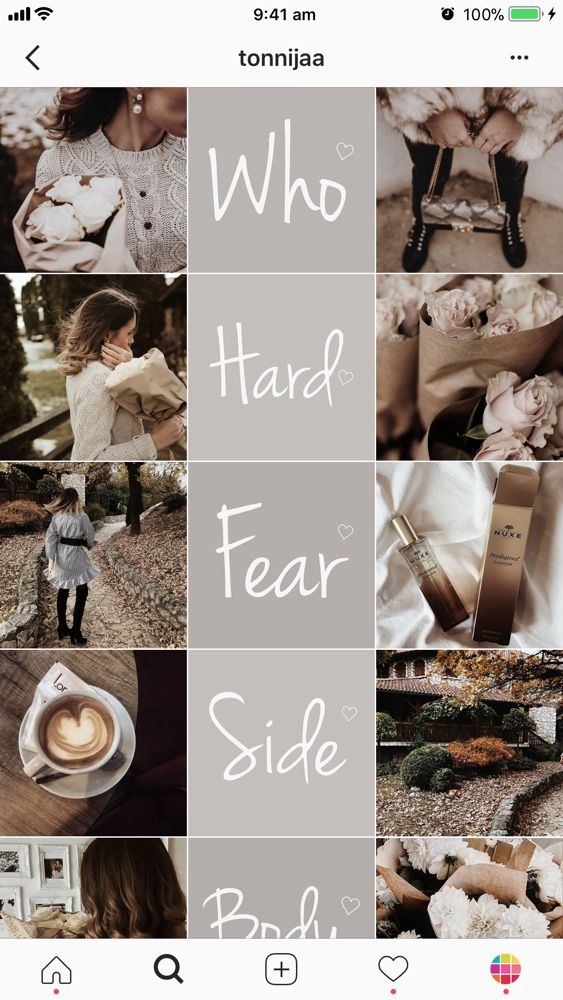
TLDR: Most professional Instagram posters use multiple editing apps to get the look they want — Facetune and Lightroom are particularly popular.
For instance, Instagram influencer Mia Randria smoothes out her skin with Facetune, zooming in to even out the area under her eyebrows or rough skin. She uses the patch tool for bigger bits, and the push tool to adjust details like her lip line.
Once that’s done, she uses presets in Lightform to adjust the lighting, contrast and color. (If you want to experiment with presets, we’ve got 10 free Instagram presets to download right here!)
While there are tons of great apps out there to help you make your posts for Instagram the best they can be, these are some of our favorite photo-editing tools.
If you want to edit your photos in the same platform you’re scheduling posts and planning your content calendar, look no further than Hootsuite.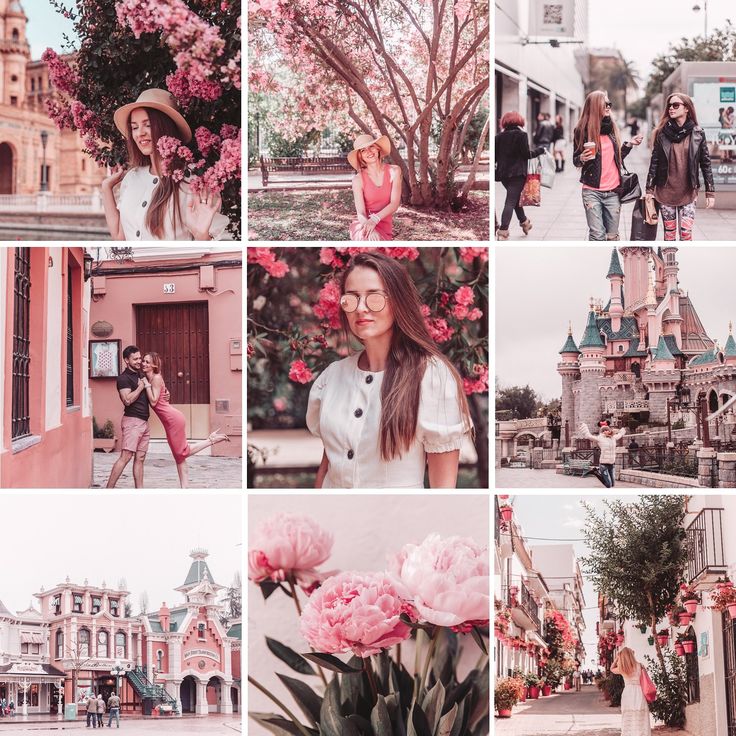
With Hootsuite image editor, you can resize your photos according to preset social media network requirements, including Instagram. You can also adjust lighting and saturation, apply filters and focus points, apply text, and more.
Here’s a full list of all the image editing features available in Hootsuite for Professional users and above.
Try it for Free
2. VSCOThe app comes with 10 free preset filters (pay to upgrade your account and you’ll access 200-plus others), and features sophisticated editing tools that help adjust contrast, saturation, grain, and fade. The “recipes” tool allows you to save your favorite combo of edits.
Save time editing photos and download your free pack of 10 customizable Instagram presets now.
Get the free presets right now!
Source: VSCO
3. A Color StoryFilters galore (choose bright whites or moody hues to suit your style), 120-plus effects and high-level editing tools that go into photography-nerd detail (in case you wanted to tweak your “functioning curves and HSL”).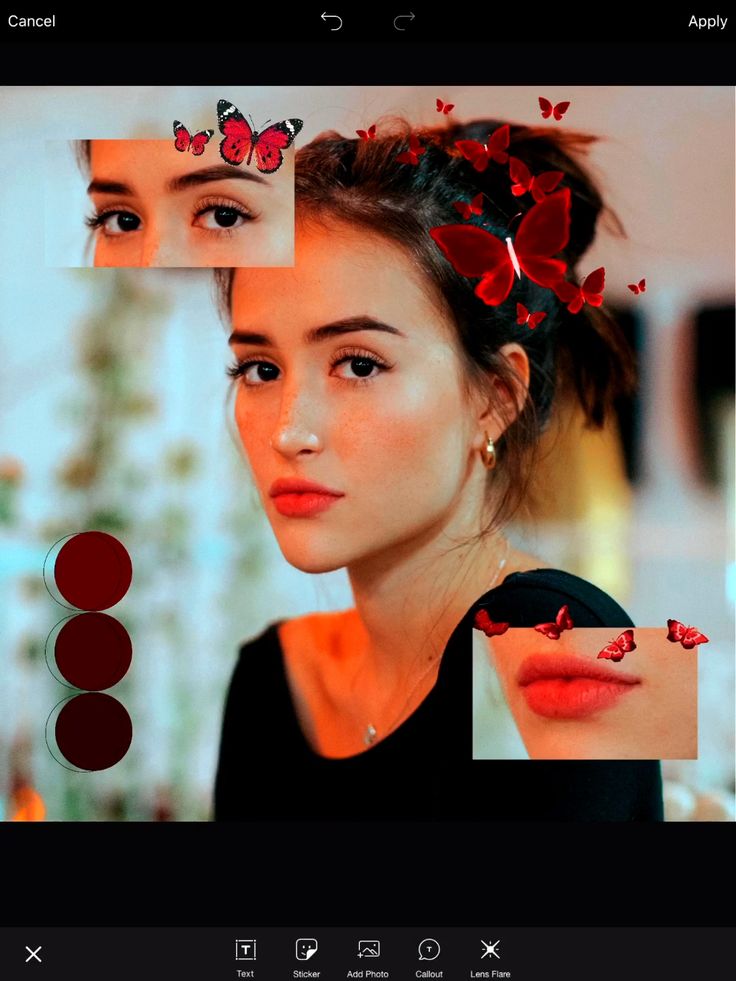
For those of us with more “big picture” brains, A Color Story also features a preview of your grid so you can workshop a cohesive look.
Souce: A Color Story
4. Avatan Photo EditorWhile there’s a robust library of effects, stickers, textures, and frames in the Avatan photo editor, the retouching tools might be most useful. Smooth out skin, brighten dark spots, and patch distracting details easily.
Source: Avatan
Developed by Google, Snapseed is a robust toolkit for photo editing that lives conveniently on your phone. The brush tool allows you to easily retouch saturation, brightness and warmth; the details tool enhances surface structure to layer in texture.
Source: Snapseed
6. Adobe LightroomWondering how to edit Instagram photos fast? Presets are the answer.
And this cloud-based photo tool not only makes it easy to edit your pics on your phone or your desktop, but it’s also the editing app of choice for people using presets as filters.
The intelligent highlight tool makes it easy to edit just the photo subject or just the backdrop with a single click or tap… but the downside is that to access the most robust tools, it’s a paid subscription.
Source: Adobe
PS: Interested in trying presets? Most influencers will sell you theirs for a small fee, but we’re offering a pack of 10, created by our amazing designer Hillary, for free.
Save time editing photos and download your free pack of 10 customizable Instagram presets now.
7. AfterlightThe filter library is populated by custom filters by photographers, so you know you’ve got a ton of great options to sift through. Advanced tools and interesting overlays (dust texture, anyone?) give photos a real film-like quality.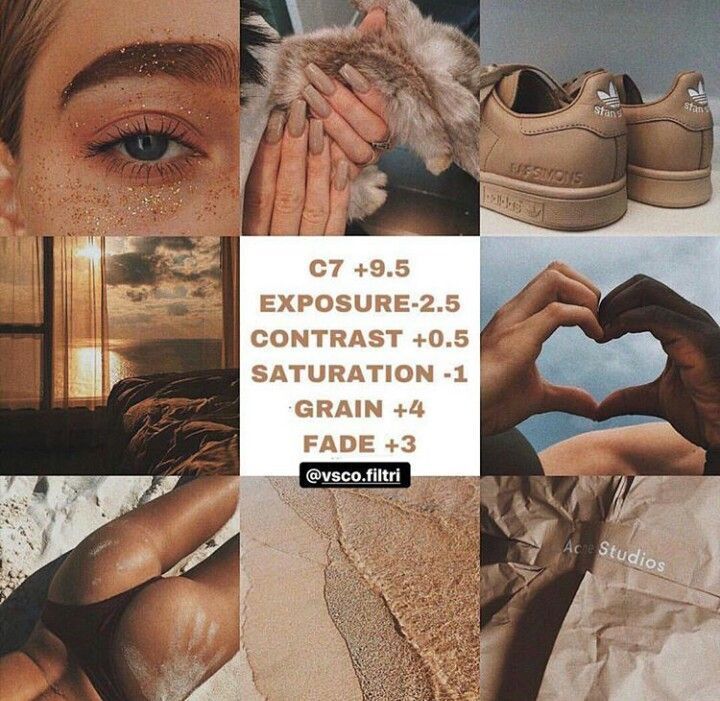
Source: Afterlight
This is the quick and dirty mobile edition of Photoshop, and takes advantage of AI technology to intelligently handle noise reduction, retouching, cutouts and more to clean things up with a few taps.
Source: Adobe
9. TouchRetouchTouchRetouch is sort of a magic wand to fix any awkward moments in your photo: a few taps and — abracadabra! — that distracting powerline or photobomber in the background disappears. It costs $2.79, but once you’ve got this bad boy in your arsenal, blemishes will have nowhere to hide.
Source: The App Store
10. FacetuneThis spooky-realistic face editing tool has been downloaded by over 100 million users. Smooth out rough patches subtly, amp up your best features, and generally ignore the true meaning of #IWokeUpLikeThis.
But don’t go overboard with the editing features. Many Instagram users are savvy enough to recognize when their favorite influencers are tuning their faces too much and may be turned off by your lack of authenticity.
Source: Facetune
These are just a few of the Instagram photo editing tools out there. There are plenty more Instagram apps—for editing or otherwise—to discover.
Now that you know how to edit Instagram photos, the key is to find a few apps that work for you and use them regularly to refine and enhance your posts.
From there, you can build an inspiring and engaging Instagram presence, one stunning photo at a time. Trust us—your followers will notice.
Save time and manage your entire Instagram marketing strategy in one place using Hootsuite. Edit photos and compose captions, schedule posts for the best time, respond to comments and DMs, and analyze your performance with easy-to-understand data. Try it free today.
Start Editing
Grow on Instagram
Easily create, analyze, and schedule Instagram posts, Stories, and Reels with Hootsuite. Save time and get results.
Free 30-Day Trial
A few weeks ago, I promised on my Instagram stories that I will be sharing my photo editing tips and tricks. Don’t worry guys!! I definitely haven’t forgotten about my promise! 🙂 Okay – Enough fluff, let’s go straight into the good stuff. Here is how I edit my Instagram Photos!
PS: Just a quick intro for those who found this post via Google Search, you probably don’t know me so here is a link to my Instagram account @girleatworld, where my photo taking and editing style have earned me ~300k followers.
This is one of those “if I have a nickel everytime someone asks me…” question. I’ve gotten questions from many of you asking me what camera I use, and I think the answer surprised most people. I take my photos with the one device that’s always in my pocket (and probably yours as well): iPhone’s small, yet powerful camera.
I had an SLR camera which I used to take with me on my travels many years ago. But since I got my first iPhone in 2010, I have slowly transitioned to using just the iPhone camera. I’m a no-fuss casual photographer and I want to edit my photos on the spot without having to deal with transferring files, so phone-editing is perfect.
I also love how a small phone camera allows me to snap away inconspicuously and efficiently. Taking a photo for @GirlEatWorld is not exactly a glamorous activity so I prefer to blend in and take it as quickly as possible.
Me, taking a photo in Old Town Prague and trying not to get hit by traffic. Thanks to my friend Shekhar for taking this pic.Disclaimer: All the tips and apps I’m going to recommend are for iPhone. Unfortunately, I can’t advise if other phones have the same features since I am not experienced with them. Also, I’m by no means a professional photographer – I’m just sharing all the self-learned methods I’ve discovered over the years so these tips might seem very elementary to some of you.
I’ll elaborate more on how I use these apps throughout the post, but I’m just putting it here for easy access.
I’ll be straight with you guys – there is no shortcut to great photography. The only secret is that you must spend time honing your photography skills and keep practicing it. It wouldn’t matter how much editing you do, nothing beats properly shot photos.
So without further ado, here are a few photography tips that have helped me:
No matter what camera you use, you must master framing your photos. This is usually referred to as Photo Composition. It is probably the most time-consuming skill to learn, but it is the most rewarding as it allows you to define your own photography style.
I suggest watching this quick video of composition tips by Steve McCurry, one of my favorite travel photojournalist. There are many different types of composition and style, and over time you will start to develop your own style.
As for me, ever since I picked up my first camera I had been obsessed with the perfect symmetry (Wes Anderson is my favorite movie director, as you may have guessed) and bokeh, the blurred / out of focus effect you tend to get with certain lens if you take close up shots of an object. Combining these two styles resulted in photos you see at @GirlEatWorld.
If you are an iPhone user, there is a native support to compose your photos. I recommend to turn on your grids by going to Settings > Photos & Camera > Turn on Grid. This will give you a nice 3 x 3 grids each time you fire up your camera app, which you can then use as a guide to make sure your subject is properly positioned and not crooked.
For @GirlEatWorld, I usually position the subject inside the two bottom middle boxes. For me, this creates the perfect subject to background ratio. This way I don’t overwhelm the background by taking a too-close picture of the food.
iPhone camera with Grid View EnabledIf all else fails, this is the one photography tips you should remember. I always tell people that you cannot take your photos with your back against a light source – be it the sun, a lamp, anything that’s bright. There are some exceptions, of course, such as if you’re aiming to take a silhouette photo – like this photo below where I didn’t mind that the subject was covered by shadow because I wanted to bring more attention to the scenery in the background.
Currumbin Alley in Gold CoastSo next time you take a photo, make it a habit to see where the sun is and try to position yourself opposite of it.
Which brings me to my next point…
 Time of the day matters… a lot.
Though sometimes it can’t be helped, I don’t like taking photos in the middle of the day when the sun is directly on top of you. This tends to cast harsh shadows and it doesn’t look very flattering on photos.
Instead, I prefer to take pictures in the morning or a few hours before sunset, where the sky tend to be more beautiful, colorful and the natural light are softer and gold/warm-toned. As such, in the photography world, this time frame is often referred to as “Golden Hour“.
There is also another terminology called “Magic Hour” which is right before sunrise or right after a sunset and tends to produce photos that are whimsical. This was taken during magic hour in Boracay, Philippines
Magic Hour in BoracayAnd here is another one from a rooftop in Hong Kong
Sunset in Hong KongIf you’re traveling and planning to visit certain sites, try to research ahead of time where your subject is facing, then arrange your visit accordingly. For example: if your subject is facing east, then you definitely want to go in the morning to catch the morning golden hour. Pay attention to the weather forecast, and be patient if the sun doesn’t come out.
This might be getting a bit technical… but my favorite iPhone camera feature is the tap-to-focus feature and AE/AF lock. AE stands for Automatic Exposure (how much light is in the image) and AF stands for Automatic Focus (where you want things to be sharper). This is really easy to achieve – all you have to do is tap on the subject you want to focus on, and give it a long press until a yellow box appears over your camera viewer. Like this:
iPhone camera with AE/AF Lock EnabledYou can then correct your composition until you get the perfect shot. Keep in mind that you must maintain the same distance from your subject once the lock has been activated. Changing the distance while the focus is locked will make your subject out of focus and you have to re-do the AE/AF lock.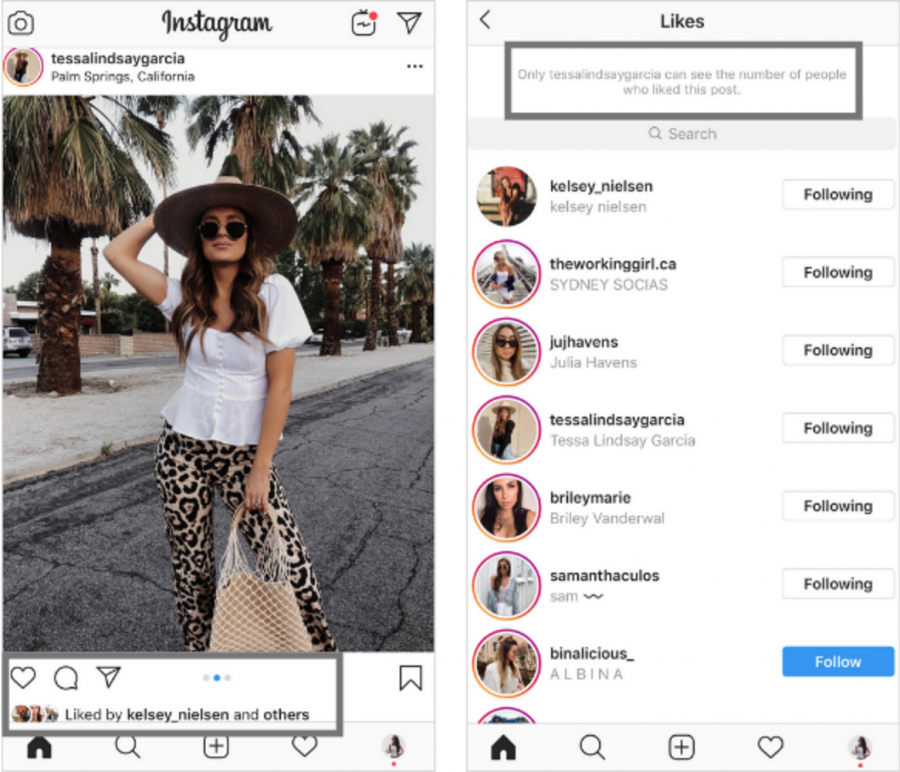
In most lighting condition, AE/AF lock feature works well. However, for times when the light just refuses to work with me, I use an app called Camera+ for iPhone for further control of my photos. The app allows me to lock the focus and exposure separately. That way, while taking the photo you can arrange your focus and exposure points so that you don’t lose details to overexposure while still getting the focus correctly. For more info on these controls, this article explains it much better than I can!
The other most important tip I have is: Move around and change your angles! Sometimes you just have to experiment with a different viewpoint to get the best shot.
Here, I try to illustrate several photos I took before settling on the one that I ended up posting on Instagram. The process didn’t actually take long at all (I believe it was about 5 minutes). I simply crossed the road, looked up, and thought that this was the better angle.
One thing I like to do before travel is to look through the geotag of a location I’m going to visit. I’m usually looking for photos that catch my eyes and bookmark them so that I can reference back to it when I actually visit the location. Then I either try to mimic the same angle or spin-off of my favorite photos for editing practice.
The image below is probably one of the most popular angles of People’s Park Complex in Singapore, but getting the shot itself and editing helped me hone my photo editing skills.
Editing photos after it’s taken is referred to as “post-processing”. Even if the composition of the photo you originally took is off, sometimes a little post-processing can still help save it.
As a rule of thumb, I try not to over-process photos because this causes the photo to appear less genuine. The most important thing about travel photos is that your image should appear crisp and clear, though this all depends on your own editing style.
I use VSCO Cam and Instagram native app for all my editing purposes. They are both very simple apps and I believe they have the best filters and editing capabilities. The editing tools I love using is brightness/exposure and sharpness. I usually try to bump the sharpness to 50 – 70% and this really helps to make the image appear crisper. I also tend to prefer to adjust brightness and sharpness using Instagram more than VSCO as I feel Instagram gives a subtler edit.
As for filter, I always go to VSCO. The filters I kept going back to is called A7, A8, C7 and C8. Whenever I apply a filter, I never go full strength as it might alter the photo too much, but a little bit (say, 40-50% strength) goes a long way to make the photo stand out in a subtle way.
Another tool I love and use a lot is from Instagram native app, called Lux effect. When used moderately, it does wonders to your images in bringing out more colors, sharpness, and textures. I used Lux effect on the photo below to help bring out the wooden texture of the building signage, as well as the folds of the jeans worn by the man.
As I said before, one of the styles I adore is symmetry. As such, I’m a huge fan of the tilt/rotate, straighten, X-skew and Y-skew tool that you can find in most photography apps these days, to achieve that perfect symmetry!
I use tilt/straighten to correct any crooked-ness within my photos – sometimes it doesn’t have to be perfectly straight, just to get it to a point where it feels more balanced. I use the X-skew and Y-skew for a similar reason – to bring more balance to the photos. Basically, the skew tools allow you to correct the perspective of your shot so that it appears more straight and pleasing to the eye. It could be that my image was slightly heavier to the right/left or top/bottom, and the skew tools could really make a difference.
This image I took in a train station in Berlin was originally slightly crooked and not very symmetrical as I took it at a slight angle, but using a combination of tilt, x-skew and y-skew I managed to make it look symmetrical.
A Train Station in BerlinSimilarly, this shot of square tiles was near humanly impossible to be taken as straight as it looks here, because… well, the tiles itself aren’t really straight in real life. I used the skew tools so that it looks like it’s taken from straight above.
Peranakan Tiles in SingaporeSometimes, I use rotate to get a creative with my photo angles. Take this image below for example – of course, this image was originally taken upright but I find that rotating it 180 degrees makes a much more interesting photo.
Perople’s Park Complex in SingaporeI use crop deliberately to frame my subject better.![]() Cropping also helps to create a more zoomed-in effect, so the attention of your viewer is directed to where you want them to look.
Cropping also helps to create a more zoomed-in effect, so the attention of your viewer is directed to where you want them to look.
This photo I took in Seoul was originally landscape, but I find that portrait orientation would help bring out the details more when viewed from a mobile phone. So I rotated the photo and made it portrait orientation instead, and cropped it for better focus.
Imperial Palace in SeoulSimilarly, this photo I took in Prague was also taken as landscape and from afar, but I wanted to highlight the building and the street itself, so I cropped it to look like it was taken from much closer.
Prague Old TownI use FaceTune‘s whiten tool to help tone down the colors at a certain spot if I feel the image is already too distracting. In the original photo of this image below, the color of the wooden table, paired with its rustic texture, took away too much attention from the main focus of the photo. So I toned down the color of the wooden table so that I can bring the viewer’s attention to the food and accessories on the table itself.
While I try not to post-process too much for photos on @GirlEatWorld, I REALLY go to town with photos I post to my personal Instagram (@ichabunni) which I treat as a photo editing playground.
If you scroll through my personal Instagram, you’ll see that my editing style changes from time to time. There was a period when I was obsessed with light leaks, a period of time where I used white borders on square photos, and there was another time where I alternate between horizontal and vertical photos with thick white borders.
This might not be for everyone, but lately I’ve been loving thick white border around my Instagram pictures. The app I use for adding a white border is Afterlight 2. I love this app because it preserves the geolocation from the original image, so when you post it on Instagram you can still geotag the location properly!
Sunshine Coast, AustraliaI love how the white border makes my feed look like its hung in an art gallery. (Not saying my photos are art… but… you know…)
At the end of the day, the single most important advice I can give you is to practice editing as many photos as you can. Eventually, you’ll find the style you like and editing will seem like a breeze as it becomes your second nature.
And that’s all I have to say about photo editing on mobile! Phew, that was quite long, wasn’t it? I hope it was worth the wait and that you find this post useful. Please leave me a comment below if you do, and if you want to know anything else – feel free to ask me!
Until next time.
The author of the article is an Insta-blogger look.tkachuk
Modern users will no longer be surprised by equally “licked” light profiles, but still, for a simple user, photos on a light background, in the bright light of a fine day, a cup of coffee and fresh Forbes, seem like something ideal unattainable.
There is also a camp of haters of such profiles of the same type, which increase every day at an unrealistic rate. But today we see that such profiles gain more likes than a simple photo without processing.
Dnative in Telegram. The author's view on the correct SMM.
Breaking news, research, market analytics and expert articles on how to make quality SMM. Subscribe .
I'd like to share a few simple photography tricks that won't take much time or effort to process but will help make your profile livelier and more interesting. From a rather impressive collection of photos on my iPhone, I found a few photos and processed them using the free app PS Express . I don’t have any impressive collection of applications, I’m so attached to this one that I’m not looking for any others anymore. Here you can process the photo to “that blogging white ideal”, or you can not go to this extreme and just make the photo brighter, more contrast and livelier.
Life hack : no one likes yellow artificial light - that's a fact. Photos in such lighting are treacherously spoiled and give the impression that the photographer is far from technology, and in principle, only yesterday he learned what Instagram is and how to spam photos there. It is real to remove yellowness in a photo in such lighting. I understood this only by typing, and now I can’t do without this tool when processing any photo. See an example: the photo is difficult to process - the light is not just yellow, but also almost absent.
Step One: increase Exposure so that all the details in the photo are visible. (Draw it out until the photo looks too overexposed.)
Step two: go to Temperature and move the slider to the left until the yellow tint doesn't haunt your photo tools - Exposure , Temperature , Backlight ).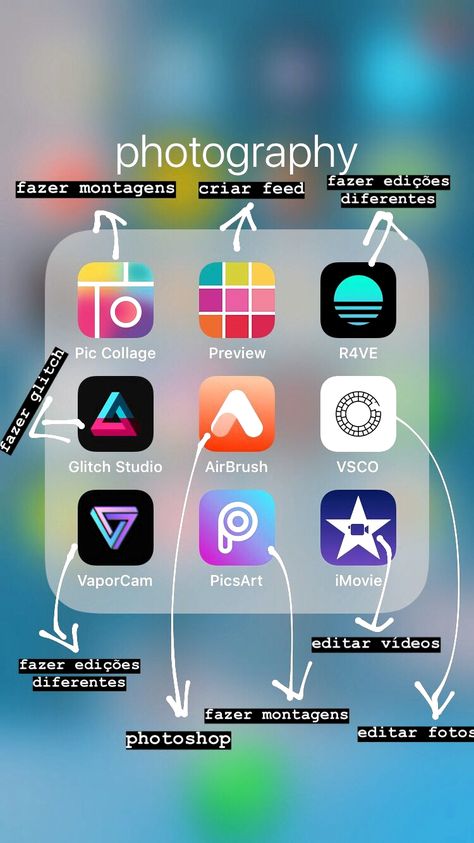
Step three : try adjusting to your liking Clarity , Sharpness , remove artifacts (just don't overdo it, usually up to +20), Exposure and Backlight 900 if you are your best friends10 supporter of light photos, add or reduce Contrast, based on your taste and look.
In general, these 7-8 tools are enough for processing photos of any complexity, and it makes no sense to fill the phone's memory with dozens of similar applications. Try processing some random photos from your camera roll by combining the PS Express tools to your taste. After a dozen finished results, you will feel like you need a particular photo. Somewhere you want more light, somewhere contrast, somewhere glossy smoothness. Experimenting here is simple, convenient and exciting. It is especially useful to compare the original and your unique processing. By analyzing, you will very quickly understand what style you like, and you already know how to achieve it.
I never ignore the Clarity, Exposure, and Temperature tools. Though small changes, but each of my photos goes through this obligatory ritual!
If you have any questions, feel free to ask them in the comments, I will try to answer everything!
The best blog about Instagram in social networks. Subscribed to the latest articles?
Telegram channel
Vkontakte group
Surely you have often wondered: “What is the secret of these instablogers that they have such bright and attractive accounts?”
And there is no secret as such. There is a basic set of knowledge that they use. In this article, I will share some of them.
You need to start with the base - the better it is, the better the results will be. The base moments are:
Composition . The same object can be photographed in different ways. In one case, the photo will collect a lot of likes and comments, and in the other, the photo will be embarrassing to show. And it's not about crooked hands, it's just that you need to learn the art of composition.
Composition can be based on balance, geometric shapes, point of view, depth, or abstract objects.
It is unlikely that you will be able to achieve results like @muradosmann, but you can be inspired and “peek”
The @gregorywoodman account looks no less cool
I advise you to repeat the composition of your favorite pictures at first or go to a special course. After taking a few hundred of these photos, you will have a sense of beauty .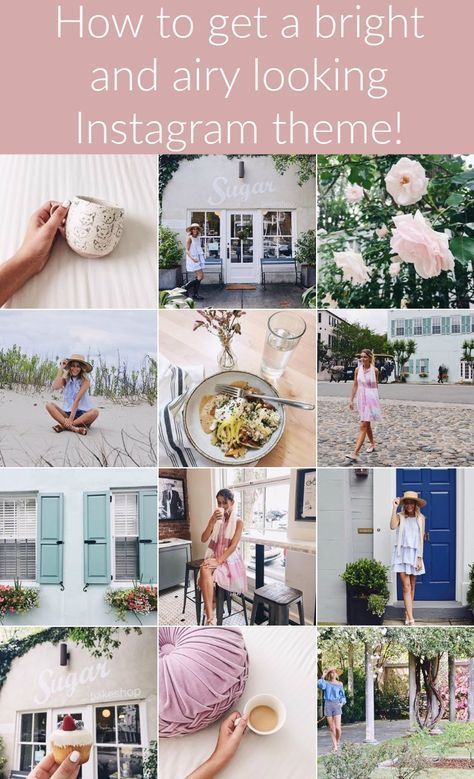 .. well, at least at the initial stage. Otherwise, you won’t learn, because it’s like in music: you can read the entire database, but until you sit down at the instrument, you won’t start playing.
Source quality . Quality plays the most important role - the better the source, the better the result. And if you think that the matter is in the camera, then, of course, it plays a significant role, but not the most important one. I have met a lot of bloggers who take incredible pictures with their phones.
A few tips: do not forget to wipe the camera lens before shooting, do not shoot in front of the sun and focus the camera so that the picture is free of white spots or dark areas. posting SMMplanner.
Lighting . The brighter the lighting, the better the picture. Try to shoot in well-lit places. If you want to shoot indoors , drag equipment along with you, do it near the window, then the picture will be better.
This is where the real magic begins! Each instabloger has several applications that allow you to change the photo beyond recognition.
Secret application set:
Snapseed - for processing and enhancing photos, as well as enhancing a certain area of photos (download from the App Store or Google Play)
InShot Photo and Video Resizer for Stories, Gallery and more (download from the App Store or Google Play)
Enlight - change the color of objects (download on Google Play)
TouchRetouch - application for retouching; “paint over” so that subscribers will not even guess (download in the App Store or Google Play)
VSCO is perhaps the most popular filter in the world. If you can’t process the photo at all, you can simply apply one of the filters (download from the App Store or Google Play)
These apps can do wonders, and each of them contains much more features than described above. But I prefer to use them for these tasks.
Example 1: Enhance a Photo in a Few Clicks
To get the best results, we need several applications at once. Conventionally, processing can be divided into 3 stages: Snapseed, VSCO and Instagram*.
Let's take this photo as an example and upload it to Snapseed.
Photo by @alenanurkova before Snapseed
В 90% of the time you will need these tools for processing:
Snapseed Tools menu
Correction . Select "Correction" and adjust the parameters: brightness, contrast, saturation, light balance, light and dark areas. I won’t tell you the exact numbers, it all depends on the source, just move the slider to the sides until you achieve the desired effect. You can swipe right and left on the photo, and watch the result. Your task is not to distort the colors, but to slightly improve the photo.
To view "Before" and "After" photos, you just need to touch the screen after changing the next values.
Selective correction . Select "Selective Correction" if you need to process a specific area in the photo - for example, a face or an object in your hands.
Click on the plus sign, hold your finger in the place on the photo where you want to change something. Tweak Brightness, Contrast, Saturation, Structure.
Lightening, expanding and improving the structure
If you need to lighten or paint over a specific area, do it with the help of Brush
If you need to expand a photo, do it using the "Expand Photo" function
If everything is fine with the photo, select "Sharpness" and improve the Structure a little.
Tip: If you slightly reduce the sharpness in a portrait, you will get a more perfect facial skin.
Compare and upload
After all manipulations, compare "Before" and "After". If it gets better, save it. Here's what we got:
Photo by @alenanurkova after processing in Snapseed
The first stage is over. Now we need one of the VSCO filters - due to this, the photos will become even more interesting and will visually appear to be made in the same style.
Upload the processed photo to VSCO and select a filter. Almost all of them are very bright, so we set the filter slider closer to the center.
There are some free filters in the application and many paid ones. If you don’t want to overpay, you can buy them cheaper from “craftsmen” (type in Instagram * search: “buy a VSCO filter”).
We will “twist” the photo on Instagram itself*. To do this, you can select one of the proposed filters and unscrew the slider up to 20%, or use the standard settings.
I know it sounds like a lot of work, but the whole process only takes a few minutes and the difference is significant.
I deliberately brought the shade of the cape closer to orange and made the cape bright and saturated.
Photo by @alenanurkova, before and after
When the material is ready, you can upload the photo to Instagram* from your computer using SMMplanner.
Example 2: Remove all unnecessary
Many applications have a useful function that will remove all unnecessary things from your photo - for example, unnecessary objects, vehicles, stains, cracks on the walls.
The easiest way to do this is in TouchRetouch, using the standard Brush.
Photo by @ekaterinamalyarova before and after retouching. Find 10 differences!
As you can see, the fewer unnecessary items in the photo, the more interesting it looks. Just do not get carried away, otherwise you can spend a lot of time and make it even worse.
Example 3: Change object color* or background
Looked at by @dominic__ana (I haven't used it myself yet). To do this, we use the Photoleap application (formerly Enlight).
@dominic__ana changed the color of the dress in Enlight
It's easy to get lost in the settings, so step by step it looks like this: the area whose color you want to change → If you climbed over the edges, use the eraser.
If you need to paint over the background, do the same only with the background.
@nevzorovakati changed the background colors, which made the photo much more lively.
Another application, but with fewer settings, is Pics Art. After selecting a photo, select "Effects", and in the "Color" tab, click "Replace".
Choose the shade you want to replace, choose which one to replace. If more objects fall under the desired shade in the photo, there is an eraser at the top
To summarize
Remember a few simple rules:
Learn the art of composition from those who excel at it.
It is more profitable to shoot light objects on a dark background, and dark ones on a light one.
Do not photograph people against a yellow or brown background, the color of the photo will be unnatural.
Wipe the camera lens before shooting.
Feel free to use multiple apps to edit your photo.
Remove everything unnecessary from the photo (unnecessary objects, stains, etc.)
Don't be afraid to experiment - change colors and backgrounds.