How to create moving images for instagram
How to create a moving photo for Instagram with @mrdrowlands.
EXPERIENCED, BEGINNER, INTERMEDIATE · 1 MIN
Moving photos, aka cinemagraphs, can be pretty hypnotic. So, if you’re looking to create super-engaging social content, you’ll want to know how to make these. Lucky for you, filmmaker Darren Rowlands (aka @mrdrowlands) has made a step-by-step tutorial using Adobe Premiere Pro – check it out below.
What you'll need
Get files
Tip: Shoot on a tripod to make the editing process easier. Record for at least 30 seconds so you have enough footage to choose from, and keep it simple.
Set up your project
Drag your files into the Project window and then drag this footage onto your blank Timeline to create a new sequence.
Optimise it for Instagram Stories
Resize it for Instagram by selecting Sequence > Sequence Settings. Update the frame size to ‘1080 x 1350’. Then, in the Effect Controls panel, play around with the Position and Scale values to get the right framing.
Create a still frame layer
Next, you need to duplicate the clip. Go to the Timeline and select your clip. Hold down the Option/Alt key and drag the clip upwards onto a new video layer.
Choose your hold frame
Use the Playhead to have a quick scan through the footage. When you spot the frame you want to work with, right-click and select Add Frame Hold. This will make everything after this point in time a still frame. Now trim the clip to remove the motion before this and extend your static clip by dragging its edge with your mouse.
Mask the moving layer
Click on the top clip, head to the Effect Controls panel and click the Pen tool under Opacity. Use this to draw around the section of the clip where you want to have movement and then tick the Inverted box.
Find the perfect loop
Look through the clip until you find a section that has minimal movement. Set In and Out points using I and O on your keyboard. Then press the Loop Playback icon to test out your selection. Zoom in and move around the loop to see if there’s anything that’s jerky. If you want to tweak these points, simply drag the handles that have appeared and move them as you see fit.
Trim the clips
Finally, cut down the clips so they match up with the In and Out markers you’ve created. Premiere Pro should automatically help you out with this, so it should be a straight-forward drag and let go. Now you need to move it to the start of your Timeline – simply click in the gap and hit Delete. You’ll see your In and Out markers haven’t moved. So, drag these back over to your clip to make it loop again.
Export for Instagram
You’re nearly done. Now all you need to do is make sure it’ll work in Instagram, which means making it at least three seconds in length. So, select all your clips, press the Option/Alt key and drag the two layers to the right to duplicate them. Do this until you reach (or exceed) the three-second marker. Then press Command/Control and M to open up the Export window. Choose your output folder by clicking on the blue text alongside Output Name. Then hit Export and you’re ready to post your creation.
Download my practice assets
LET’S CONNECT
Facebook: http://facebook.com/adobecreativecloud
Twitter: http://twitter.com/creativecloud
Instagram: http://www.instagram.com/adobecreativecloud
YouTube: https://www. youtube.com/channel/UCL0iAkpqV5YaIVG7xkDtS4Q
Behance: https://www.behance.net/live Join our regular livestreams with real pros, real projects in real time and find inspiration.
How to Create the Instagram-Popular Moving Photos You've Been Seeing
0shares
In the age of social media sharing, people always look for newer and better ways to edit their photos. For a time, interactive filters and Boomerang flooded everyone’s feeds. (They still do, but mostly in Instagram Stories.) Now people are creating their own cinemagraphs.
A cinemagraph is described as “still photographs in which a minor and repeated movement occurs, forming a video clip.” Another way to describe it is that it looks like the moving photos in Harry Potter. This technique was also made popular on America’s Next Top Model Cycle 20.
Recently, we spotted posts from blogger Lexi Mendiola and model Gisele Bündchen wherein they made the waves move.
A post shared by Lexi Mendiola (@leximendi) on Mar 14, 2018 at 5:04am PDT
A post shared by Gisele Bündchen (@gisele) on Mar 22, 2018 at 6:29am PDT
We were curious as to what app they used to create that effect. Luckily, TV host Marie Lozano posted about Plotaverse and shared a mini tutorial on her Instagram Stories Highlights.
Looking at the tutorial, creating a cinemagraph seemed intimidating. What are those arrows? Why are there so many arrows? So I decided to download Plotaverse and test it out. First, I chose a photo from the beach to make the water move. The trick is to place the arrows on the part that you want to animate. It’s also important to mask and anchor the parts that you don’t want to move.
The purple part is the masking and the red dots are the anchors.My first attempt at it is wonky. You could clearly see that the rocks were moving even though it shouldn’t. Woops!
I tried it again on two other photos, and they looked slightly better. I need to lessen the masking though because you can see where the waves cut out.
Overall, creating cinemagraphs is fascinating despite all the things you have to do to perfect it. You just need a lot of practice with other subjects like the sky and even a plain wall. If you want to try it out, you can download it for free on the Apple Store and Google Play, but you have to pay P249 after the three-day trial. (You can cancel the trial any time, don’t worry.) So go experiment with it before deciding if you want to pay for the full version.
Are you into the cinemagraph photo trend too? Feel free to share us your creations on social media!
Art by Yayie Motos
Follow Preen on Facebook, Instagram, Twitter, and Viber
Related stories:
This or That: IG Stories Templates Are the New Social Media Trend
Why Instagram Removed GIFs: Racism
Camille Co, Kryz Uy, and Lauren Young on Their Favorite Photo Apps
Travel Photography Tips From Kimi Juan and Martine Cajucom
5 International Getaways to Spruce up Your Instagram Feed
Total
6
Shares
Stay in the loop
ShareTweetEmailShare
How to post a moving picture on Instagram?
By Milena Anderson Reading 4 min. Views 10 Posted by
Short answer
- One way is to take a video on your phone and post it as usual. nine0014
- Another way is to use an app like Boomerang or Hyperlapse to create a GIF or time-lapse video and then share it.
How to Create Motion Pictures for Instagram
How to Create Motion Pictures for Instagram (Instagram Cinemagraphs)
Can I post a motion picture on Instagram?
Yes, you can post a moving photo on Instagram. To do this, capture a moving photo on video and then post it as a regular video on Instagram. nine0003
How to make a moving picture on Instagram?
There are several ways to make a moving picture on Instagram. One way is to record a video and then post it to Instagram. Another way is to use an app like Boomerang or Hyperlapse to create a GIF or time lapse video and then post it to Instagram.
How to take a live photo?
To take a Live Photo on iPhone, you need an iPhone 6s or later. When you take a photo, instead of just saving the photo, it also records a short video clip. nine0003
Can I post a GIF on Instagram?
Yes, you can post a GIF on Instagram. To do this, first save the GIF to your phone's photo library. Then open Instagram and create a new post. Tap the Photos icon and choose a GIF from your library. You can then add a caption and share it with your followers.
How do I post a moving GIF on Instagram?
There are several ways to do this. One way is to use a website that hosts GIFs and then post a link to Instagram. Another way is to use an app that lets you create and post GIFs to Instagram. nine0003
How do I post a GIF from my camera roll to Instagram?
To post a GIF from your camera roll to Instagram, you first need to save the GIF to your phone. Then open Instagram and tap the plus sign in the bottom left corner of the screen to add a new post. Select "Photo" or "Video" and then select "Library". Tap the GIF you want to post, then tap Next. Add a caption and click "Share".
How to post Giphy on Instagram? nine0003
To add Giphy to Instagram, you can use either the Giphy app or the Instagram app. With the Giphy app, you can search for a GIF and then share it on Instagram. With the Instagram app, you can find a GIF and then save it to your camera roll.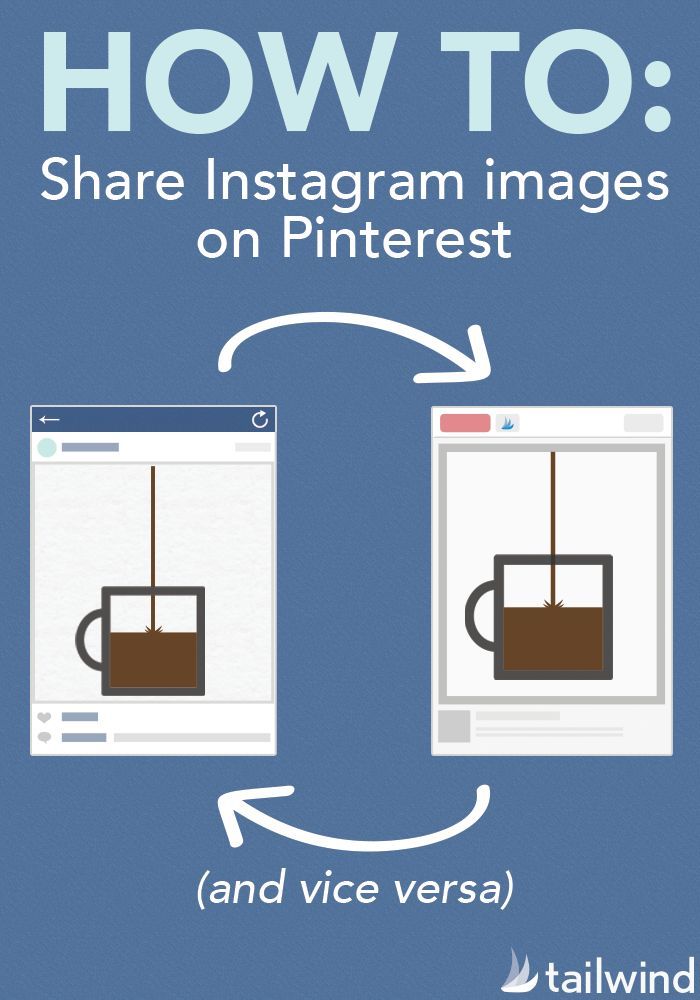 Once you've saved the GIF to your camera roll, you can post it to Instagram.
How to make a moving wallpaper?
There are several ways to make a moving wallpaper. One way is to create an animated GIF and then use it as your wallpaper. Another way is to create a video and set it as wallpaper..
How do I share Live Photos?
To share a live photo, open the photo and click the share button. Select the person or app you want to share with, then click Send.
How to make a live video on Instagram?
To take a live video on Instagram, open the app and tap the camera icon in the top left corner. Then select "Live" at the bottom of the screen. You can add a description and choose who can see your live video before it goes live. nine0003
How to make a video live wallpaper?
There are several ways to make a video live wallpaper. One way is to use an app called Video Wallpaper. Another way is to use an app called Muzei.
Why can't I play live photos?
There are several possible reasons why you cannot play Live Photos. One possibility is that you are not using an iPhone 6s or later as Live Photos is only supported on those devices. Another possibility is that you have not enabled the Live Photo feature for your camera. To do this, open the Camera app and tap on the three dots in the top right corner. Then select Live Photos and turn on the switch. nine0003
How to make a GIF for Instagram?
To create a GIF for Instagram, you will need a program such as Photoshop or GIMP. You can then upload it to Instagram using the app or online.
How to convert GIF to image?
There are several ways to do this. The easiest way is to use websites like Giphy or Imgur. Go to the site and find the GIF you want to convert. Click the Share button and then select Upload Image. This will download the image as a JPEG file. You can then open the file with any photo editor and save it as a PNG or JPEG file. nine0003
📌 How to make motion photos on Instagram - LiveDune Blog
Reading time: 5 minutes
May 23, 2019
Animated photos can grab attention and stand out among the abyss of other posts. Let's consider two popular types of "live" photos: cinemagraphy and photo animation.
Our products help you optimize your social media experience
Learn more
and improve accounts
using deep analytics
accounts using deep analytics
How to make cinemagraphs for Instagram?
Cinemagraphs are those photos that you want to stick to. The looped combination of video and photo creates the impression of a “live” photo. Such a photo stands out against the background of static content and loads faster than a video.
Cinemagraphs are far from new, but for some reason they are rarely used in commercial accounts. Many have formed the erroneous opinion that you can’t do cinemagraphy on your own, and the pros take a lot of money. nine0003
This is not true. Here is a small list of applications that can create a cinemagraphic effect on a photo: make clouds float, ripples appear on the water, hair flow in the wind, etc.
These are not all applications that allow you to create cinemagraphy on Android and iOS. We have chosen those that are adequate in cost and those that we have used ourselves.
Preparing to create a cinemagraph from a photo
Many people try to create a motion photo from a photo archive on a smartphone. Such material is not suitable for cinemagraphy. Cinemagraphs can be created from both photos and videos, but in both cases, the workpiece must be thought out and filmed in advance. nine0003
A moving object in the video must be cyclic in order to get a beautiful "live" photo. For example, a running river, flowing smoke from a fire or flames.
When shooting, you will need a tripod or a homemade device that will prevent the camera from shaking during shooting. The video should focus on one subject, especially if the live photo is created for a commercial account.
Processing: creating cinemagraphs
Let's analyze the process of creating cinemagraphs using the PLOTAVERSE PRO application as an example. In other applications, the principle is relatively the same. nine0089
Upload the photo you want to "animate" and select the "Mask" tool. Use a mask to blur areas of the photo that you want to remain static.
Go to the "Animate" section and select the direction of movement (we have Infinite - down). We put arrows on the waterfall in the direction of water movement.
On the preview (play button) you can look at the result and adjust the animation speed. By the way, the slower the animation, the more natural it looks. nine0003
Most likely, some static areas will float, to fix this go to the "Anchor" section and put anchors in those places where static areas float during animation. Once your cinemagraph is ready, save it as a video or gif. On Instagram, you can only post a video (at least 3 seconds), on Vkontakte, for example, you can also post a gif.
Try it for free
You can find out what content your followers like the most and whether there are posts with live photos among them in LiveDune
How to make an animation from a photo
Animated applications differ from cinemagraphs in that they are not always cyclic and are created in other applications. Of the free photo animation apps, the most interesting in our opinion is Werble (iOS only). The very application in which you can add flowing steam from a hot mug of coffee or a burning sparkler.
Source: @tsaplina_olga
On the main page of the application there is a feed of animated photos, where you can find ideas for your animations.![]() What's more, when you click on a post from the feed, Werble will show you what effects have been used. nine0089
What's more, when you click on a post from the feed, Werble will show you what effects have been used. nine0089
Source: @werbleapp
For example, for this animation we used effects: smoke (169 ₽), 80s style (149 ₽) and rays (free).
Werble has a large selection of animation effects, but most of them are paid (up to 300 ₽). To open the entire list of animations, upload a photo to the application, then click on the "More Filters" button.
Animation is a simple but powerful way to grab the attention of your followers as they scroll through your social media feed. And for commercial accounts, also draw attention to the product. Experiment and surprise subscribers. nine0089
Only important news in the monthly newsletter
By clicking on the button, you agree to the processing of personal data.
What's new in SMM?
Subscribe now and get 9 ways to promote on Instagram for free
Popular articles
≈ 4 min to read 28. 07.2020
How to make a countdown on Instagram and use it for business purposes?
The countdown sticker will help you announce an event, increase the motivation of your followers and increase your Instagram reach at the same time. nine0003
#instagram 04/15/2019
Masks on Instagram: how to find and make your own
How to create masks for Instagram stories yourself, where to find them and how to save masks of other authors to yourself.
#instagram 04/09/2019
11 video editing apps In order for the video to cause admiration and reactions from subscribers, you need to process and edit it beautifully.
#instagram 03/14/2019
Features of Instagram stories that you might not know about
To make your stories stand out among hundreds of others in the feed, you need to use all available features. We share secret tricks that will help make your stories original.
LiveDune marketing products - 7 days free
Our products help you optimize your social media experience and improve your accounts with the help of deep analytics
Analyze your own and other people's accounts by 50+ metrics in 6 social networks.![]()

