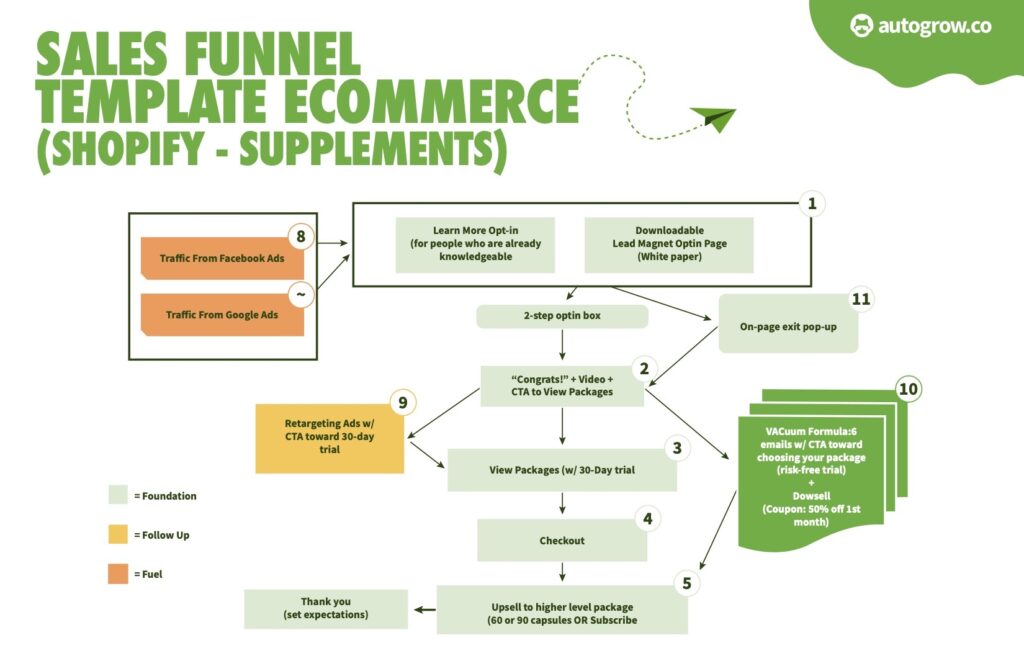
How many platforms are you currently selling products on? One? Three? Ten? Is one of those a Facebook Shop page? It should be. Here's why selling on Facebook makes a lot of sense:
📢 “You need to learn how to sell on Facebook!” All businesses, big and small, hear these words without getting much advice on how to actually do it successfully. Well, the fact of the matter is that if you have an online store, you should also consider selling on other places like Amazon, Facebook, and even Etsy. This will help you expand your reach and find more customers – since people are more likely to spend time on those other platforms than on your website.
👉 In this guide, we focus on a Facebook store specifically. Here's how to create a Facebook Shop page in an afternoon and get on your journey to selling on Facebook!
We're going to cover all the steps in the process, from blank canvas to a working Facebook shop page. But first:
In a world filled with multi-platform companies, it's hard to keep up with competition if you don't expand to where your customers hang out the most. And it just so happens that Facebook is one of the spots online where people spend the majority of their time. This is the single reason why selling on Facebook is such a good idea!
In fact, Facebook users spend an average of 40+ minutes per day on the popular social network. And a good chunk of that time goes towards Facebook shopping.
That's quite a bit of time considering this happens on a daily basis! Not to mention, many of us can think of our personal experiences of spending way too much time clicking on links and liking posts on Facebook throughout the workday.
Therefore, it's time to take advantage of Facebook as a selling platform! Facebook might not give you as many ecommerce features as, say, Shopify or BigCommerce, but you do get all which is truly essential for you to start selling your products.
What's great about a Facebook Shop page is that you don't even need to have any preexisting online store and can run your entire operation via Facebook if you want to. But the benefits don't end there. With a Facebook Shop page you can:
Just the last thing from this list is a good enough reason to look into this whole Facebook Shop page on its own!
How do I set up a Facebook Store using Facebook?Follow these steps for setting up a Facebook store:
Step 1: Go to your Facebook Page and configure the Shop page.
Step 2: Set up your shop details.
Step 3: Configure your payments.
Step 4: Add a products to your Facebook store.
Step 5: Managing your orders.
Step 6: You're done!
Okay, with all the “whys” out of the way, here's how to set up your Facebook Shop page:
💡 If you aren't already aware, let me assure you that everyone can create a Facebook Shop page and start selling on Facebook to their followers basically immediately.
Here's what you need before you can begin:
Getting the two crossed off the list shouldn't be too difficult. You likely already have a business page on Facebook so we'll skip this part and instead get straight down to the meat and potatoes:
Apart from the two requirements above, your Facebook page must also adhere to the following:
* This is only valid for US-based stores. The exact tax identification number will vary depending on where your business is based.
If you're positive the above won't be a problem in your case, you can proceed to set up your Facebook store:
In a hurry? Watch this video on how to make a Facebook Shop page instead of reading
The first step is to navigate to your Facebook business page. You need to be logged into the business page and have admin privileges.
By default, many Facebook business pages already have the Shop page shown when you're logged in. Your customers don't see it, but you do.
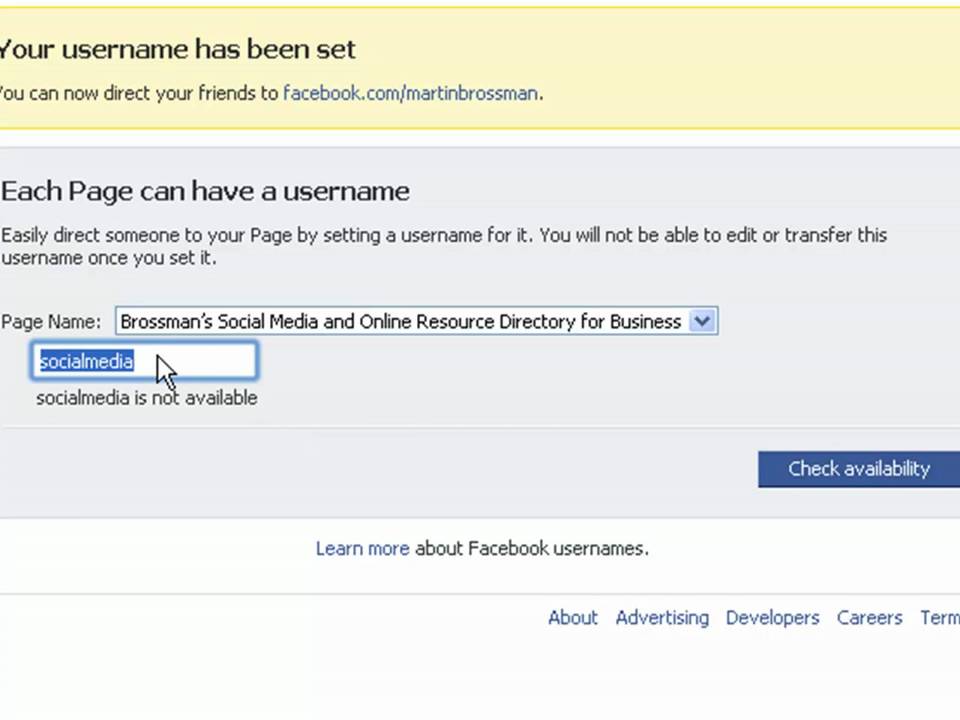
In order to get started, locate that Shop tab on the left and click on it.
Having trouble locating the Shop tab?
If you do not see the tab, it means that you don't have the right page template activated. To set up a Facebook shop, you need a template aptly named “Shopping.”
To change your template, go to Settings → Templates and Tabs.
Find the Current Template area and click on the Edit button.
From there, you can apply the Shopping template. Some of the others have the Shop tab as well, but the Shopping template should work nicely for most stores.
After you get that Shop tab on your page, click on it.
Read this for US-based stores 🇺🇸
Selecting the Shop tab reveals a pop-up explaining the setup you're about to walk through. Feel free to read it and then click on the Get Started button.
Another pop-up comes up asking about your business details. Start by punching in your business type and address. Then, click on Next.
The step after that asks for the states in which you do business and your tax registration number. You can skip this step for now, but at some point, you'll need to give Facebook this information.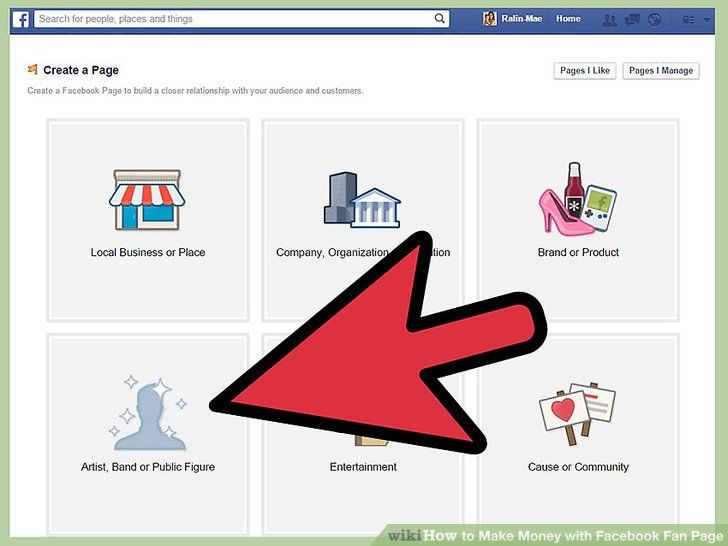
The next step is where you can indicate the type of products you intend to be selling on Facebook.
We're not done with taxes just yet! In the next step, Facebook asks about the type of your business and information of your business representative – this is most likely going to be your own info, unless you want to designate someone else.
With that done, you have the difficult stuff behind you, and you can now finalize the setup of your store on Facebook.
The last things to clarify are your shipping options, return policy and customer service email. Just pick from the list of available shipping options and set your details for each.
As per Facebook's rules, you must ship the package within three business days after receiving the order. The customer must receive the package no more than ten days after they order – that's one of the factors that make Facebook shopping attractive to people. You also must use shipping services that offer features like tracking and delivery confirmation. One more important detail is that the customer can cancel their order within 30 minutes of purchase if you haven't marked it as shipped yet.
Furthermore, Facebook doesn't let you ship internationally or sell to countries other than your own – the country that the store has been set up in. In most of the cases, if a person from another country enters your shop page, they'll see a blank page, like this one:
One final step before completing the setup that you might have to go through is agreeing to the Merchant Terms and Policies (depends on your account setup and location).
Read this for stores not based in the US ⛔🇺🇸
Clicking on the Shop tab from the sidebar will first show you a Merchant Terms agreement box. In order to continue, you need to check the box next to “I agree to the Merchant Terms and Policies” and click on Continue.
Next, you have to choose the actual method in which the orders are going to be handled.
⚠️ Important; depending on your country, you might not even see the following panel, but get redirected straight to the shop page creation screen instead.
So, which to choose?
Well, the advantage of option (a) is that you don't actually need to have an online store at all to be able to get orders via Facebook. Literally every step of the process can be handled through Facebook Messenger where you and the customer agree on how to handle the order, the payment method and so on.
The downside is that dealing with all the messages is a lot of manual work and it's easier to overlook a new order coming in. Additionally, you don't get the benefit of having the bulk of the technical heavy lifting handled by an ecommerce tool like Shopify.
The advantage of option (b) is that you can have the customer pick the product they want on Facebook and then be redirected straight to your shopping cart software to finalize the purchase (granted, this is not 100% Facebook shopping, but more about driving people to your external online store).
The obvious disadvantage is that you need to own an ecommerce store. Luckily, getting one isn't that difficult. We cover the topic in this guide.
The short answer is this:

For the purpose of this demo, I'm selecting (b).
💡 Note; if you go with option (a) – “message to order” – your setup is going to be mostly the same, with only minor differences, so feel free to follow this guide as well.
The next step is selecting your currency. Nothing too difficult here:
With that done, you will be taken to your new Shop page where you can add your products and set everything up.
Depending on your country of operation, the Facebook store module will present you with a different set of options here. For US-based businesses, the most common setup involves linking a bank account and having the funds (from your orders) deposited there.
In other cases – for other locations internationally – Facebook might let you set up payments via PayPal or Stripe.
The integration process itself is simple, but it changes from time to time due to the updates with PayPal and Stripe themselves.
The good news is that you will be taken by the hand by the Facebook store interface along the way through the setup.
⚠️ “I don't see this section!”
Yes, in some instances, you might not see this section of the setup at all – it's what happens if you're an EU-based user, for example. In that case, you can skip to the next step by clicking here.
👉 What follows is the bank account setup for users in the US. 🇺🇸
At this point, you should see a module that asks you to set up your payments to publish your shop. Click on the Set Up Payments button to proceed.
The first pop-up asks for your tax details. This is required, and it can't be edited later. So, make sure you have the accurate information for your business name, employer identification number, and your legal name. Click on the Save button.
The final step is to link your bank for payment. Type in your bank routing and account numbers, along with the name on the account.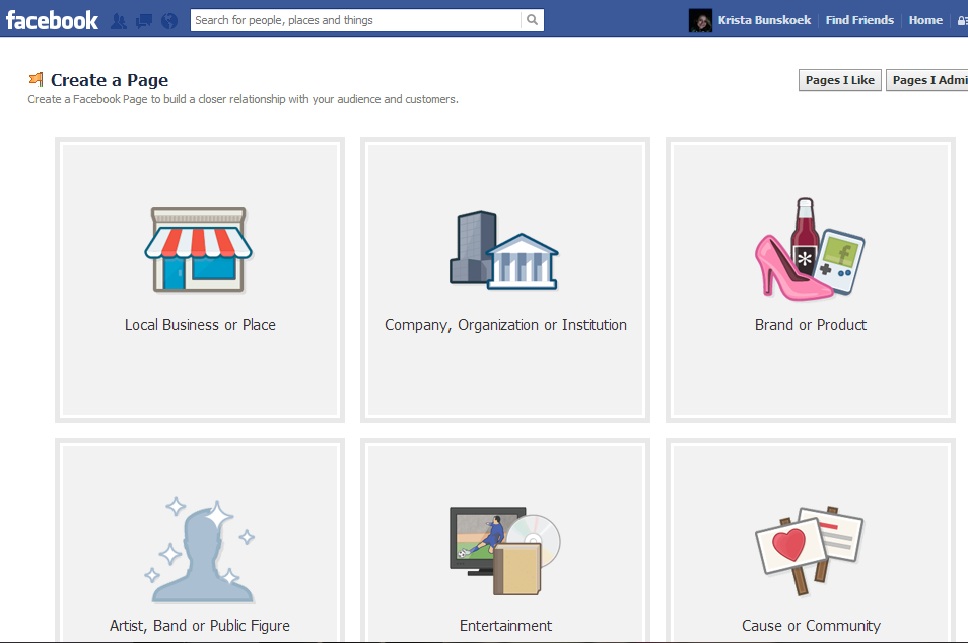 Click on the Save button.
This is what your new Shop page looks like when you first create it:
As you can see, Facebook encourages you to add your first product. You can do that by clicking on the Add Product button. Once you do that, you'll see the following form, but it will differ based on your country:
For US-based shops 🇺🇸
The form looks fairly straightforward and features all the details you'd expect.
 Once again, this all depends on the type of products you're selling, so feel free to get creative and talk about what makes the product special. You can also simply copy the product description you use in your ecommerce shop.
Click on Save to finalize the process.
For international shops ⛔🇺🇸
The form features all the needed details that are required to describe your product in full.
 ) This is the specific URL in your ecommerce store where this product can be purchased. No matter if you use Shopify, WooCommerce, or anything else, you can get your product link simply by navigating to the product via your web browser and then copying the URL from the address bar. Paste that URL back into the Checkout URL field.
Click on Save to finalize the process.
With that done, you'll see your product live on your Shop page.
When a customer clicks on it, they'll see a more detailed view, along with a button letting them “Check Out on Website” – this leads them to the product page in your ecommerce store.
You can add more products to your store at any time via the Add Product button.
Or, if it makes sense in your case, you can also create product collections.
Once you've uploaded a certain number of products, you'll see each of them placed on a list inside your shop management panel. To get to it, just click on the Publishing Tools link in the top bar:
When there, from the sidebar, click on Products. You'll see a screen like this:
From here, you can edit each of your products as well as add new ones.
⚠️ Order management isn't a feature that's rolled out for Facebook stores worldwide. It's mostly available in the US and a couple of other places.
How to find out if you have this feature?
Simple, go to your Publishing Tools from the main menu:
Look for the Pending Orders link in the sidebar. If it's there, you have order management!
Once you click on that link, you'll be able to take care of your orders, check the details of each one, see the buyer's info, communicate with them, and eventually fulfill the order. Additionally, Facebook will send you a notification whenever an order comes through.
Just to remind you, per Facebook's rules, you must ship each order within three business days after receiving the order. Once the order has been shipped, click on the Mark as Shipped button to finalize everything.
The scenarios presented in this guide so far have all been pretty “manual” in nature, for the lack of a better word. What I mean is that setting up your Facebook store was all on you. But that doesn't have to be the case.
Some of the modern ecommerce solutions actually have great integration with Facebook and will set up a Shop page for you automatically, while also linking your external ecommerce store and the Facebook Shop page together.
That means that you'll be able to take care of your orders and products in a single place and have everything synchronized with Facebook seamlessly.
We'll show you two ways of doing that – using the most popular ecommerce solutions in the market: Shopify and BigCommerce.
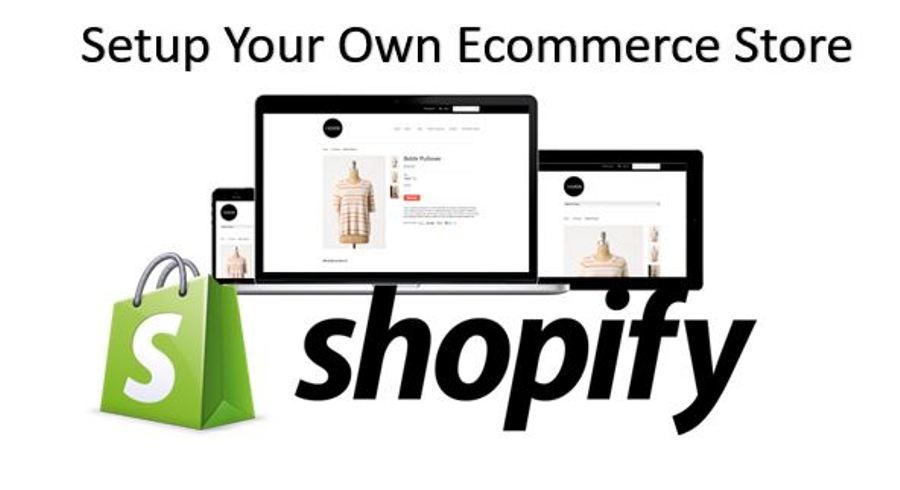
Shopify is a great ecommerce solution by itself. We've been talking about it a lot here on the site and recommending it to practically anyone who's looking for an easy way to start an online store.
One of Shopify's many advantages is that it also lets you establish your store on Facebook without having to deal with much of the technical hurdles.
All you need to do is go to your Shopify panel and add an app called Facebook Channel to your setup.
Once you install the app, what happens is that Shopify takes all your products and exports them to your Facebook Shop page. Everything gets synchronized so that you can keep managing your store on Shopify and have all the changes be sucked into your Facebook Shop page.
If that's not good enough, Shopify even gives you tools to sell via Facebook Messenger.
👉 Click here to go to Shopify and begin.
💡 Keep in mind, though, that Shopify doesn't give you any clever back door into Facebook's interface for setting up the Shop page. The same Facebook's regional rules and limitations still apply. For example, if Facebook doesn't allow handling orders via the Facebook interface in your country then Shopify won't have the ability to help you with that either. Same goes for any other limitations.
BigCommerce is the main competitor to Shopify and – in many ways – a great alternative offering roughly the same scope of features, only in a different package. Chances are you're going to find the solution fitting you perfectly with either Shopify or BigCommerce.
On the Facebook Shop page front, BigCommerce lets you do pretty much the same thing as does Shopify – which is connect your online store seamlessly and have all your products available on Facebook.
Setup-wise, getting things running with BigCommerce is very similar to how it's done with Shopify as well – just install a Facebook store add-on and you're good to go.
BigCommerce also has a very good module for Facebook Ads, which gives you another interesting way of putting your products in front of people.
👉 Click here to go to BigCommerce and begin.
💡 Keep in mind, again, that BigCommerce doesn't give you any clever back door into Facebook's interface for setting up the Shop page. The same Facebook's regional rules and limitations still apply. For example, if Facebook doesn't allow handling orders via the Facebook interface in your country then BigCommerce won't have the ability to help you with that either. Same goes for any other limitations. Here's what BigCommerce says about this in their docs.
We've received a wide range of questions from readers in the comments section. We want to outline the most popular ones here so that people have a quick reference to the most pressing of issues.
Your best bet is to check out Facebook's guidelines for listing products – since the requirements change on occasion.
There are also several things to worry about such as the dimensions, image formatting, and backdrops. For instance, at the time of this article, Facebook recommends having image resolutions at 1024 x 1024 or higher, along with white backdrops and square images.
This all depends on your own website and payment processor. Facebook doesn't offer its native shopping cart in some regions, so transactions are redirected to your own shopping cart and payment processor. That said, Facebook is rolling out these features to new countries as we speak.
Facebook has a list of prohibited items. Some of the unapproved products include prescription drugs, weapons, animals, alcohol, and anything that promotes discrimination.
Also, you can only sell physical products. That means no downloads, or any other type of digital products.
There are two likely reasons why this happens:
That depends on a couple of factors. Here's the gist of it:
Go to top
That's it! You've just learned how to sell on Facebook and hopefully created your own Facebook Shop page by now. Unfortunately, things tend to change often with Facebook, so if you ever need assistance with how to perform some specific operation on your Shop page, you should find the guidance you need on this official page from Facebook Help Center.
If you have any questions about building a Facebook Shop page, leave a comment in the section below. If you've successfully established your Facebook store, feel free to leave a link for others to visit and check out the techniques you've used to make your page unique.
🤔 Just starting your adventure with online stores and ecommerce? Check out our in-depth guide on how to start an online store from scratch. We go through the process step-by-step and not omit any crucial details that might be a roadblock to you.
Tweet Share on Facebook Submit to reddit Add to buffer Save to pocket Share on LinkedIn Email
The first step to selling products on Facebook Shops is to become the admin of your business page. Then, add your products, and read through and agree to Facebook’s Merchant Terms. If you’re starting from scratch then not to worry – we’ll guide you through the process.
If you already have a Facebook Page Shop, this is a simple four step process.
Don’t have a Facebook Page Shop yet? That’s great – we’ll show you how to set up one of those, too.
Facebook Shops is an extra feature that’s currently being rolled out by Facebook to make existing Facebook Page shops more shoppable. Facebook aims to create an online shopping experience tailored for mobile phones and working alongside builders like Shopify to give businesses extra support.
Facebook Shops gives your store a ‘storefront’, so you can make it look more like your own site, rather than a Facebook page. As with a Facebook Page Shop, customers can check out directly with Facebook, rather than be redirected to the business website. That said, it’s likely many will still use Facebook to browse, and come to the site to buy. The same feature is being made available for Instagram.
Keep in mind that Facebook Shops as a feature is only just starting to be rolled out now. Facebook will actually get in touch with you if it’s ready for your store.
To get yourself in the running, you’ll need to create a Facebook Page shop. We know we’ve thrown in a few similar terms at this point (we blame Facebook for their rather unoriginal names), so let’s quickly cover these:
Facebook Page shop – Existing Facebook feature which allows you to display products on your Facebook Business page. When customers click on the products, they’re given the option to check out on your website.
Facebook Shops – New feature which provides a storefront to existing Facebook Page shops, offering customers a more seamless experience and the chance to check out without leaving Facebook if they wish.
 Details on what you need for that are below if you don’t already have one.
Given that Facebook Shops is only available to those with a Facebook Page shop, let’s look at what you need to set one of those up:
Facebook Marketplace is a great alternative to setting up a Facebook store if you’re just looking to sell on a few items you don’t need anymore. It works in a similar way to sites like Craigslist, but is accessed via your Facebook account.
To get started, go to Facebook Marketplace and hit the button in the left menu that says + Sell Something, then follow the onscreen instructions.
If you already have a Facebook Page shop (and if you don’t, we’ll cover how to set that up below), here’s how to set up Facebook Shops once you get the go-ahead from Facebook.
Let’s take a look at exactly what’s involved in each step:
You may already have an account with Commerce Manager, but if you don’t, here’s how to set one up.
Head to Facebook’s Commerce Manager, and you should see a screen that looks something like this:
Click the blue Start Selling button.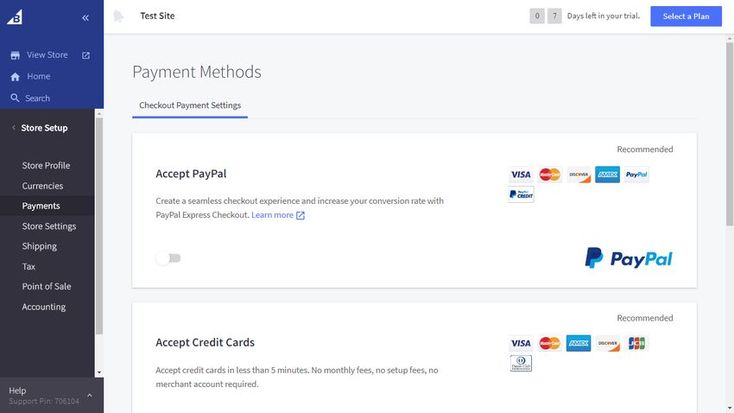 You’ll then see this option:
We’ll cover using an ecommerce platform later on, but to set up a Facebook Shop, hit Get Started for Facebook on the left. You’ll then see this recap of requirements for Facebook Shops:
The rollout of Facebook Shops is starting in the US, which is why you need US bank details and tax info. Non-US readers, don’t despair; Facebook Shops is on its way to you soon, and in the meantime, you can skip to the section below to set up a simple Facebook Page shop.
Clicking Next takes you through to the following screen:
Start by clicking Set Up for your business information. You’ll then be walked through the process of choosing a name for your store, linking your Commerce Manager to an existing page (or creating a new one), and checking you have a Business Manager account.
We won’t go through each of these stages here – Facebook does a brilliant job of guiding you through adding products and payment details to your account, so as long as you follow this guidance, you won’t go too far wrong!
 Create a collection
Your products need to be grouped together into ‘collections’ in order to get the most out of Facebook Shops. To create a collection, log in to your Commerce Manager and click Create Collection.
For each collection, you’ll need to add:
Once you’ve finished, you can add more collections (click Create Another Collection), or move on to the next stage – customizing your storefront.
This is where Facebook Shops really comes into its own! You have the chance to personalize your store, making it look more ‘you’ and less ‘Facebook’.
When customizing your shop to get it ready for publishing, jump back into the Commerce Manager (if you’re not already there). Click on Shops, and select the Shop you want to edit (if you have more than one). Click Edit.
You’ll see two tabs within your chosen shop:
Check out how your page will look by using the Shop Preview, and when you’re happy with everything, click Publish. Facebook will then review and approve your collections within 24 hours – you can select whether you’d rather they go live as they’re approved, or all at once.
Until Facebook Shops is more widely available, setting up a Facebook Page shop is still your best bet. This way you can start selling straight away, and easily link up with the Facebook Shops feature once it’s available to you. You can also create a Facebook Shop directly from your Shopify account if you already have a business set up on the platform (we’ll explain how later on!).
We’ll walk you through the process of setting up a shop for our fictitious brand, Testing Tshirts. Again, we’re assuming here that you already have a Business Page ready to go. You also need to be working from a laptop or desktop computer in order to set this.
You’ll find this down the left hand side (you may need to expand the menu to see it).
You’ll then be prompted to read and agree to Facebook’s Merchant Terms and Policies.
This is where things start to split off a little depending on where you are in the world:
Nice! In that case, you’re in luck – customers can buy products directly from your Facebook page! This is a huge pro, but just requires a little more admin at this stage.
Over the course of a few steps (which Facebook will guide you through), you’ll be asked to provide:
In terms of shipping policies, Facebook has a few of its own rules you should be aware of:
After agreeing to the Merchant Terms and Policies, you’ll be prompted to select a checkout method. Businesses based outside of the US can’t currently link up payment details to their Facebook store, so they’re relying on one of two methods to complete a sale:
Message to Buy – A more labor-intensive option, but the obvious choice if you don’t currently have a website to link to. It could also be helpful if you offer highly tailored/customized products.
Check Out on Another Website – Customers will be redirected to your website to complete their purchase. This is the option we’ve selected for now.
You’ll then be prompted to select what currency you’d like to use.
Now we’re all back on the same track, and whether you’re based in the US or elsewhere in the world, you should see a screen similar to this one:
To start adding products, hit the blue Add Product button.
To add a product, you’ll need to have product images, a product price, a product description and name, as well as a link to where the customer can check out (normally the product listing on your own website). If you opted to sell over Messenger, you won’t have to add a link here.
This is how we’ve filled ours out:
If you want to share the product straight to your page as a post, select this option. This is great for new releases later down the line, but we’ll leave this off for now as we’re going to be adding all our existing products at once. Once you’re done, click Add Product.
A note for our US-based readers! You’ll have a little more info to add at this stage, including:
Once you’ve added a product, it will display as ‘Processing’ while Facebook checks that your product complies with their policies. It should be approved and on display in your shop within 24 hours.
Your new item will then appear here, and you can click + Add Product again to add more.
Once you’ve added your products, you’ll want to organize them into collections to make it easier for customers to find what they’re looking for. It’s up to you how you want to do this – go for whatever feels right for your brand!
We’re going to add these two products into a ‘Men’s Tshirts’ collection. You’ll see the option to add a collection below your new products:
Click Add Collection, then + Add Collection.
Give your collection a name (this will be the name it’s displayed under in your shop), then add the relevant products:
If you’re based outside of the US, you’re basically done at this point in terms of logistics. You can continue to add and remove products depending on stock levels, and any sales will happen either over Messenger or on your own website (whichever you selected at the start).
Even if you start out using Messenger for your sales, we recommend you build a website at some point and switch to this option. We promise it’s not as daunting as it may seem!
If you’re setting up a Facebook Page shop in the US, adding and grouping your products is only the beginning – you need to know how to actually manage and deliver the orders that are coming in!
You can manage your orders by going to Publishing Tools (along the top menu):
Next, select Pending Orders from the menu down the left hand side:
When orders come in, you’ll be able to see them here, and update the order status as you go through the process of sending them:
You can also schedule and review posts in the Posts section. This is useful for arranging posts ahead of time, and for checking how much people have engaged with them:
If you have an ecommerce website, we recommend syncing this up with your Facebook shop as soon as possible. This will allow you to control your inventory across both platforms from one place, and for any updates to carry across to both stores – thus halving your admin time.
We’ll give you a quick rundown of how to sync up Facebook Shops with two of the most popular ecommerce platforms: Shopify and BigCommerce.
Shopify is one of the top ecommerce builders out there because its an all in one platform. Shopify has advised that if you’re already able to use product tags on Instagram, you’ll be first up to gain access to Facebook Shops.
Either way, to make sure your store is ready for when Facebook Shops is available to it, make sure you add Facebook as a Sales Channel.
Shopify will then walk you through the process of syncing up your Facebook Page Shop and your Shopify site.
Shopify was ranked our #1 ecommerce builder, as it has a great depth of sales features and is a customer favorite.
Let's Get Started!
Shopify Review – see our comprehensive discussion about the pros and cons of using Shopify
Shopify Pricing Review– find out about Shopify’s price plans and value for money in our in-depth pricing review
It’s a similar story with BigCommerce. To get yourself in the best position for when Facebook Shops does become available to you, you’ll want to integrate your Facebook Page shop into your BigCommerce store now.
To do this, download BigCommerce’s Facebook Shop app, which will walk you through the process of syncing both stores.
BigCommerce is more ideal for larger enterprises and clothing stores due to it’s great inventory systems, check out our reviews to learn more about it!
In this article, we’ve walked you through Facebook’s new feature, Facebook Shops, and shown you how to install it. If Facebook Shops has been made available to you, getting set up with it is as easy as:
In the meantime, you need to get a Facebook Page shop set up so you’ll be ready to switch over to Shops straight away. We’ve outlined the best way to do that depending on where you’re based.
Now the only thing that’s left to do is wish you good luck! Facebook Shops is going to be a real game changer for small businesses, and we’re so excited to see what you create.
If you choose Shopify as your online store builder, all you have to do to create your Facebook Store is add their free app and you’re good to go! Your products will update automatically, plus your customers can even checkout directly on Facebook.
You can find out more about Shopify in our in-depth review.
Having a Facebook store is a great way to grow your business, allowing you to tap into new audiences and gain more customers.
It makes sharing your content really easy, so it’s a great way to market your store and products, increase sales, and boost your bottom line!
To increase your conversions from your Facebook Store, you need to grow your Facebook audience. This can be done through promoting Facebook posts – if you have the budget – or simply through increasing your Facebook activity.
You could also try searching for Facebook groups related to your store and post about your store in those, which may help increase your traffic and boost your conversions.
This feature is being rolled out globally, but in stages. If you have a Facebook Page Shop and have received a notification from Facebook that the Shops feature is ready for you, you’re good to go! In the meantime, set up a Facebook Page Shop if you don’t already have one.
What is a Facebook Catalog? online stores, offers with flights, booking hotels and tours, offers with rental and sale of real estate, cars, etc.Facebook catalogs are created in the service for working with the Commerce Manager assortment, available at business.facebook.com/commerce .
Thanks to the catalog, the company will be able to:
Add products to Facebook, specify and manage information about them. In the catalog, you need to specify the name of the product, add its image, description, cost, various options, etc. Products and data about them can be uploaded individually or in bulk.
Create groups for ads and collections in stores. Groups and collections are a set of items from the catalog.
Share with colleagues and partners to collaborate on the catalog.
Specify country and language data. This will allow users to display correct information about products regardless of their language and country.
Facebook recommends adding all line items to one feed rather than creating multiple feeds. The presence of all items in one catalog allows:
it is easier to manage information about products, since they are all in one place;
Create audiences based on pixel events associated with catalog positions. Since all products will be in the same directory, events for them will not be separated;
Sell all available items in Facebook Shops (according to the rules, only one directory can be connected to a store created using Facebook Shops).
Products from the catalog can be advertised on Facebook and Instagram. Facebook Ads types available for catalog line items:
Dynamic advertising. Shows users items from the catalog that they were interested in on the advertiser's website or on the Internet.
Advertising with a selection. The ad includes several items from the catalog below the main image or video. By clicking on a product, the user can learn more about it or see similar products.
Carousel advertisement. Items from the catalog are dynamically loaded into carousel cards.
Advertising with shopping tags. Products from the catalog are marked with special tags in the ad. By clicking on the label, the user goes to the product page with information about it and can place an order.
Affiliate advertising. Brands that sell products through merchants can run direct sales campaigns. The merchant must give the brand access to the relevant catalog segment, which the brand can use to set up dynamic ads.
Before setting up the catalog, create a company business page and a Business Manager account to link the catalog to the business page. Next, open Commerce Manager.
Click "Add catalog" and select from the proposed list the subject to which the positions in the catalog belong, for example, e-commerce.
Next, specify how you want to add products to the catalog - upload the information yourself or use a partner platform, such as Shopify or Big Commerce.
For self-download, click "Download product information". You can add products one at a time manually, add products in bulk using a feed, or use the Facebook pixel to import and update line items from your site.
If using a partner platform, click "Partner platform connection", select the desired platform, go to the site and complete the setup. This option only works for e-commerce.
Next, select the Business Manager account that the catalog is linked to to access more options for using the catalog than with a personal account. It will also be possible to give access to work with the catalog to other employees and partners. Only a user who has been assigned the administrator role can select a Business Manager account.
After that, enter the name of the directory and click "Create". The catalog is ready. Now it needs to be filled. To do this, go to it, click on the "Add Products" button and select the desired option.
You can upload one product by manually adding a description. To download several products, the system will prompt you to select one of the methods.
Manual upload of products one by one
Multiple upload options
Once the catalog is full, it can be used to set up ads and display products on the storefront on Facebook and Instagram.
Do you have a small business with big ambitions?
Selling through Facebook is an opportunity you should not overlook if you are looking to sell.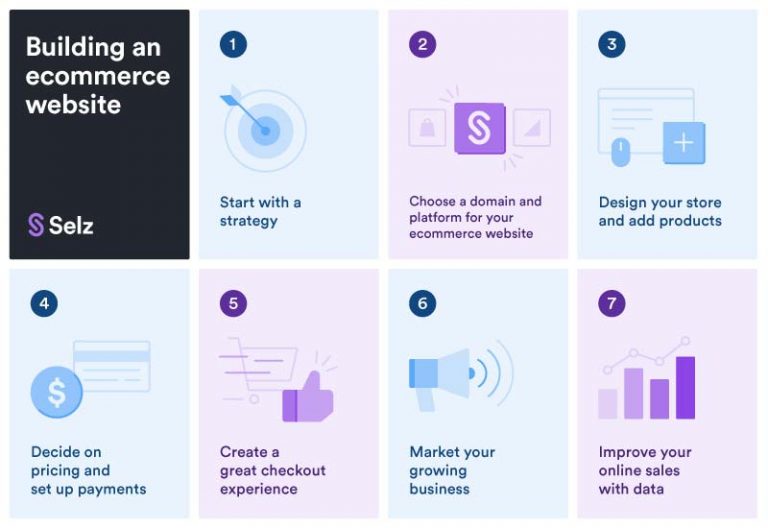
Facebook may seem like an old school platform by today's standards, but it has incredible reach. It is the third most visited site in the world after Google and YouTube.
If you don't know where to start, we'll show you how to sell on Facebook and how to do it successfully.
If you're just starting out selling on Facebook, it's easy to get lost or confused.
The platform offers several options for profiting from goods.
Depending on who you are and what you sell, you can use either the Facebook Marketplace or the Facebook Store. In the future, you will also be able to use Facebook Stores.
Yes, there is a Shop, and there are Shops.
While all options are available to commercial sellers, not all are the same.
Let's take a look at the differences between the Facebook Marketplace, Store, and Stores before deciding which path is right for you.
The Facebook Marketplace feature, launched in 2016, is sometimes referred to as the answer to Craigslist.
Facebook has gone to great lengths to open up its marketplace to entrepreneurial sellers, but the feature is essentially a garage sale.
Don't be scared - the Facebook Marketplace can be the perfect model for your business.
Selling with this feature you get potential benefits:
If you have big ambitions, you are probably just reading between the lines looking for cons.
However, in the spirit of balance, here's why you might not want to sell on the Facebook Marketplace:
Facebook has had an iteration of the Store tool for some time. If you've downloaded the app for personal use, you've probably noticed it on the pages of your favorite store.
The Store feature is available to businesses of all sizes and is located in the navigation bar on the business profile page.
In terms of getting your business noticed on social media, the Store feature has a number of real benefits.
Although the sellers seem a little more passive than on the Facebook Marketplace, the Store in turn offers:
Shop is a great feature, but it has its drawbacks. Think about them before you get carried away with sales:
 Buyers can't shop on Facebook outside of the US. This is a plus for traffic to your own site, but speaks of a lack of convenience.
 So, Store and Stores: what's the difference?
Introduced in 2021, Shops is an e-commerce platform developed by Facebook for small businesses.
Although the Stores are so new that they are still in development, it is very likely that they will take over the existing functions of the Store in a larger and better way.
Offering a much more personalized shopping experience, the new Stores update puts Facebook on a really solid footing in the world of e-commerce.
If you're new to using Facebook as a small business owner, the Stores feature gives you all the tools you need to be successful:
 Facebook gives you a template that you then edit to match your brand identity. You can customize colors, logo and content.
 While it seems like a better business proposition than Facebook's Marketplace and the more established Store feature, the Stores feature is still obscure:

Top Tip
If you haven't already noticed that Facebook loves the word "shop", there's something else we need to mention.
You'll notice that some of the business pages already have the word "Stores" in the navigation bar. This directs users to physical stores rather than an e-commerce platform.
Users will be able to access your shiny new "Shops" e-commerce feature by clicking the button at the top of your business profile.
Before you start selling on Facebook, make sure your business is ready.
Millions of people sell in this app. Eye-catching visuals, a cool backstory, and tons of prepared information will help your business stand out from the start.
Make sure you're all set up to easily start selling on Facebook.
Of course, you can sell on Facebook without an online store. If you're only planning on making some money on his Marketplace, then all you really need is an account.
Otherwise, having an online store will be critical to your success:
If your online store looks good and delivers a compelling message, you've done your job well.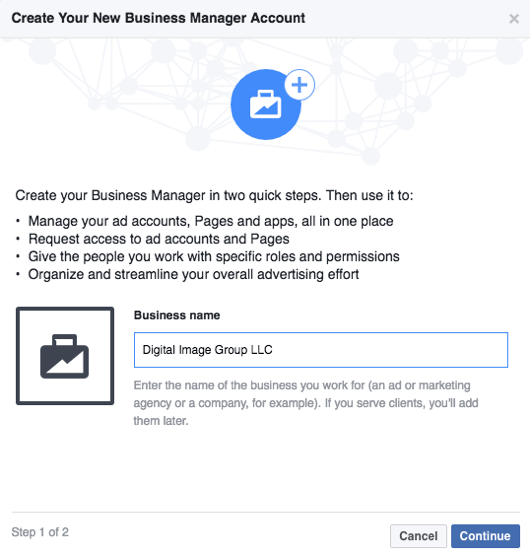
Make sure you're ready to do the same when you start selling on Facebook. Remember that consistency is the key to growing your brand.
A strong brand identity is the backbone of any successful business.
Do you want your followers to trust you and be loyal to your brand? Of course!
Make sure you look the same on all channels you sell on, including Facebook. You should have a clear idea of:
Although Facebook is not the most visual social media platform, you still have to deal with short attention span .
Like a storefront in a mall, your business page or Marketplace ad should grab attention right away.
However, unlike a normal shop, you sell people things they can't touch yet. Interest in your images as follows:
When customers find your store on Facebook, they want to know everything about it.
While you shouldn't overwhelm users with information, it's annoying to have to search and figure it out when all you have to do is buy a product.
Get ready to prepare:
Are you satisfied with the look of your brand?
The next step is to create your Facebook business page, which will serve as the entrance to your Store.
From here you can manage everything related to promoting your business among Facebook users.
If you are still not convinced that the Facebook Marketplace is the only way to sell products, this page will form the basis of your store in this application.
Check out our detailed guide on how to create a Facebook business page.
Once your Facebook page is ready, it's easy to add the Store feature.
You can upload your entire product catalog or a selection that Facebook users want to see.
Select filter options for products that reflect those on your site, or that seem most intuitive to users browsing on their way to discovery.
Now that your Store is open, you are ready to get started.
Despite the ease of listing items for sale, Facebook users won't get to your Store if you don't put in the effort to promote it.
Therefore, the Facebook Marketplace has an undeniable advantage when it comes to visibility.
In the Facebook Marketplace, if you have what people want, they will find your ad.
However, with the Store, this process takes much longer.
One of the benefits of selling through Facebook is that you can have a more personalized approach to your customers.
We're not talking about taking them out to dinner, but feel free to give them a little more information about your brand.
If you're going to sell on Facebook using the Shop feature rather than the Facebook Marketplace, it should be easy to retain customers through consistent posting.
Show your followers that they don't buy products from faceless robots.
If a team of people helps you sell, show it. It's a great way to personalize your brand and also add value to what you're selling.
You can tell about your colleagues in:
No command? This will not prevent you from interacting with users.
Think about how much you want to show about yourself on your business page. This may be overkill, or it can help build your personal brand.
If you're selling handmade items, sharing your personality in messages is a great way to interact.
In a world obsessed with efficiency, people like to see small businesses that still find time to do things right.
We are all naturally curious. Social media is the best way for people to peek into other people's lives.
Take advantage of this by posting regular updates, for example:
If you're using dropshipping or working in a poorly lit warehouse, get creative with your posts.
You always have to think about what to sell next, so share what inspires you. Try not to be another faceless dropshipping store.
Opinions. Facebook is full of them.
With over 2.6 billion monthly active users, you're sure to get feedback on your posts on your Facebook page.
Encourage people to share their opinion in your store by posting your products on the home page. It's fast, free, and will help you better understand your customers.
Users first learn about your store on your business page. Don't hide items in the Store tab and expect people to stumble upon them naturally.
With a little effort, you will likely find that placing items on the front page will affect what you sell in the future.
Simplify your work and advertise your products:
 If you want to add multiple products at once, publish them as a new collection.
 If the thought of it tires you, plan ahead.
As with any other social networking application, there are optimal times to post content on Facebook. If these moments do not coincide with your free time, plan publications in advance.
This is a simple action available in the app if your Facebook page is set up for business. You can also use a third party app or hire a freelance social media manager to do the scheduling for you.
If you have a personal passion for the products you sell, tell your followers about your industry.
Chances are if you sell smartphone accessories, your followers will be interested in an article about the latest ways to take selfies.
Do you sell jewelry in a specific location? Buyers would probably like to know about local jewelry crafts.
You can also share:
Don't forget to link your social media accounts to each other.
Does your store have an Instagram account? Are your products popular on Pinterest? Share your latest posts across all platforms.![]()
This way you will be consistent and let your Facebook followers see that you are also active on other platforms.
Facebook gets most of its revenue from advertising. You have to figure out their complex ad setup if you want to promote your brand and increase sales, but tread carefully.
You will be able to advertise your page, posts on it or your website through Facebook. The purpose of advertising is to generate interest, not to make instant sales.
Ask your users for an email address to sign up for your mailing list first, instead of pressuring them to buy something right away.
Using advertising is another great way to build trust and credibility. Selling through Facebook requires a long-term strategy.
As you would expect from a multi-billion dollar revenue stream, Facebook advertising has many levels.
Before you start using advertising, decide which tools are right for you in the first place.
While the Business Manager account is best for agencies and large businesses, you'll probably want to start with Ads Manager.
This tool is purely for launching campaigns. It's powerful and fully manageable, so there's nothing to worry about.
In Ads Manager, you can set goals, find your audience, and get creative with your ads.
Facebook has developed comprehensive guides for every aspect of Ads Manager, so take the time to learn as you go.
Unless you're running advertising campaigns for entertainment, use this service.
The Facebook pixel is a snippet of code that essentially tells you the ratio of revenue to ad spend.
You put code on your site so that every time someone makes a purchase through Facebook, you can track that conversion in a report.
If you don't know how to add a Facebook pixel to your site, find someone to help you. This is an invaluable resource for optimizing your ad experience.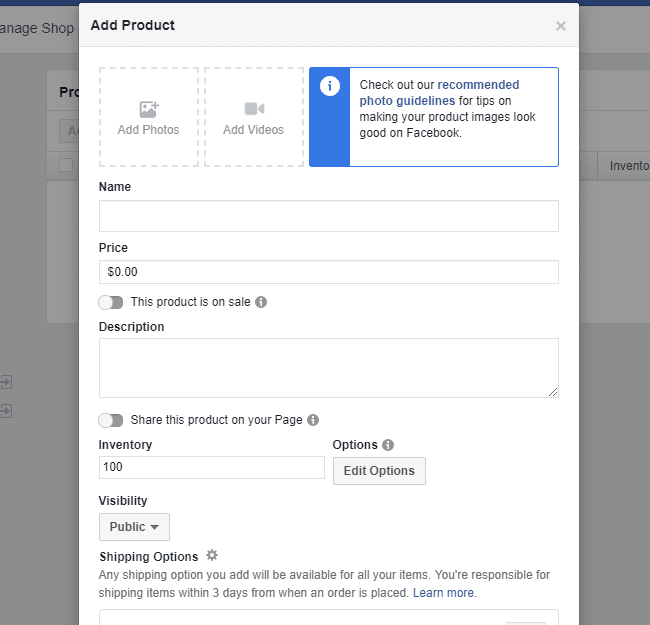
Facebook has billions of users and it can be tempting to target them all.
But you need to have a clear understanding of your store's target market, and most importantly, focus on it. Facebook has also made it much easier to set up ad targeting options.
You can start targeting by:
You can also target broad categories or make it more specific to interests, which will bring more accurate results.
Interest-based targeting allows you to find people based on what they say they like, which Facebook groups they follow, and what they talk about the most.
You may feel like a spy, but interest-based targeting will increase your sales.
Make sure you don't spend too much targeting on a terrible image.
Proper visualization of your ads is the key to their success on Facebook. You want your store to stand out for the right reasons, right? Then think carefully about how to attract attention.
There are many types of Facebook ads. You can create videos, use canvas ads, or even GIFs if it suits your brand.
Although it might be better to start simple. Keep doing the same ads as for your site and:
You don't have much time to sell your store with words.
At first, the attention of users will be attracted by the image in your ad, but you will still have room for text. If you don't know how to express yourself beautifully, find a friend who can help you.
With a short, attention-grabbing headline and a short line of text, you'll need to engage the viewer, generate desire, and complete the ad with a call to action.
Your Facebook shop is full of products. You create great content. You have launched a successful advertising campaign.
What next?
After all this hard work, you are definitely ready to start selling on Facebook. But don't forget communicate directly with your subscribers .
Unlike the Marketplace, where you are in direct contact with customers, using the Store requires a more dynamic way of communication.
User-generated content is any content created about your brand by someone not associated with it.
So if a customer tags your Facebook page with their photo or posts a review on one of your products, this is considered user generated content.
And your store can profit from it.
User-generated content gives your store something traditional marketing can't achieve: credibility.
No one cares if your ads say that 9 out of 10 buyers love your products (that's really a cliché, by the way).
Customers trust other customers . User-generated content influences the buying decisions of the majority of people surfing the Internet, and it all starts with visual elements:
 Get creative.
 If user posts give you more credibility than ads, you know what to do.
Integrating user-generated content into your Facebook ads is a smart move. You prove that your store is authentic and demonstrate that your products are already benefiting other people.
Could you:
Example - Toyota
Driving user-generated content can make your store a huge success.
Car brand Toyota created an entire Facebook ad campaign in which musicians posted videos or photos of their performances using the #feelingthestreet hashtag.
Viewing the original posts, followers voted for their favorites to form the Feeling the Street Band.
The winners were given the opportunity to tour and play all over Australia. This Facebook campaign increased Toyota's engagement by 440% - the campaign was well worth the effort.
Reward your subscribers with prizes from time to time.
There are many ways to get people to enter the Facebook contest that will benefit both you and them.
Subscriber engagement will skyrocket, as will your brand reputation. This move may sound like the opposite of Facebook sales, but it will pay off indirectly: