START HERE
Share on facebook
Share on twitter
Share on pinterest
Share on reddit
Share on email
Share on linkedin
Share on buffer
Buffer
Have you ever wondered how you can utilize your personal profile page on Facebook to expose and gain greater visibility for your business? There is one simple thing that you can do that will do just this for you and your business.
This is one of the most common mistakes that I see businesses of all kinds making; in fact about 95% of businesses are making this mistake! I have seen hundreds of personal Facebook profiles where the owner is definitely not aware of this mistake and they are missing a golden opportunity to promote their business AND their fan page at the very top of their personal profiles.
The top of your personal Facebook profile is premium real estate because that is where most people’s eyes are drawn when they visit your personal profile. The mistake that most are making is that they have not linked their personal Facebook profile to their fan page in the “work” section at the top of their personal profiles.
Obviously many of us have inner mingled our personal family and friend relationships with our business associations on our personal Facebook profile page and it can be very difficult to expose our business on our personal Facebook wall because of this. This tip is a great way to utilize our personal profile page to gain added visibility for our business in a very unobtrusive but yet effective way.
Facebook recently rolled out the new Timeline look and the way you find your employer information is slightly differently. Underneath your Cover image, there are now three ways to find your work and education details.
Once you click on one of these three options, you will find the Work and Education section listed there. Click on the ‘EDIT’ button in the top right of that section.
Start typing your fan page name EXACTLY as it is spelled. Facebook usually picks it up and it is displayed in a drop down underneath and you simply click on that and it will complete the box for you.
You can add your position, city/town and a description of your business. For position you could be the President or the CEO of your own company. Remember to project a positive business image. As an example, mine states Passionate about sharing how ‘YOU CAN DO’ social media. Find out more about me at https://kimgarst.com. If you prefer to not share any or part of this information, you can simply leave it blank.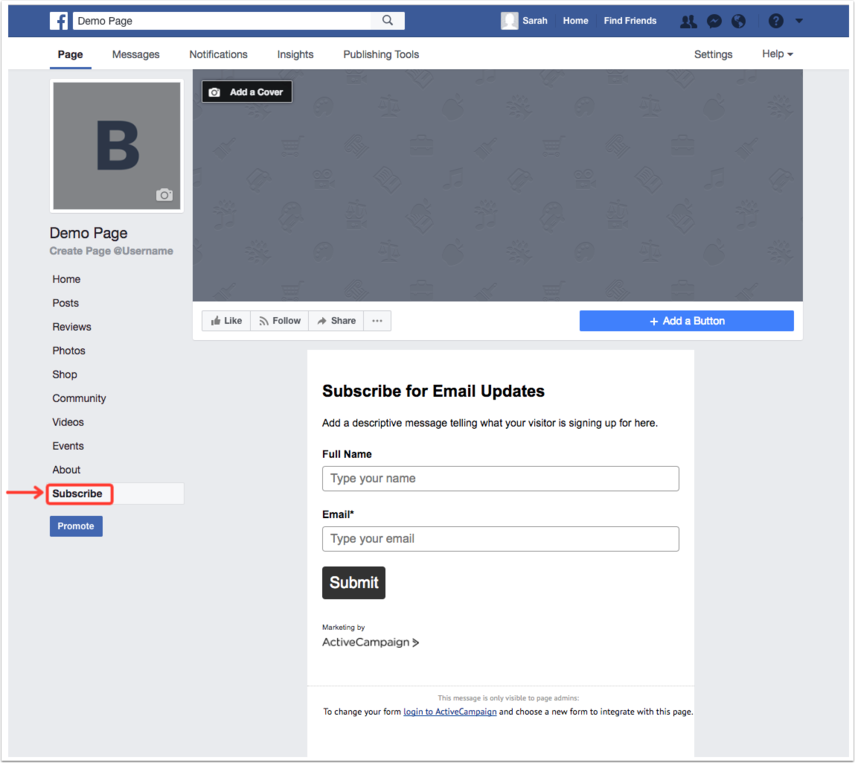 Once you are done editing, please do not forget to click SAVE CHANGES.
It’s that easy and now your fan page is displayed as a clickable link at the top of your personal profile page!
Kim Garst is one of the world's most retweeted people among digital marketers. She is a renowed business strategist, keynote speaker and an international best-selling author of Will The Real You Please Stand Up, Show Up, Be Authentic and Prosper in Social Media. Kim helps business owners grow their business using social and digital media.
She is the founder of KG Enterprises, LLC, a business strategy and consulting company that helps business owners create more sales using the power of digital and social media.
Kim is also internationally recognized as a thought leader in the social media space. Forbes named her as one of the Top 10 Social Media Power Influencers. Her blog is one of the top social media resources in the world.
See author's posts
Comment Via Facebook
Copyright © 2023 · All Rights Reserved KimGarst.com
For limited time only, get LIFETIME ACCESS to
Business Builder's Academy and never pay ongoing fees again!
THIS OFFER ENDS IN..
DAY
HRS
MINS
SECS
Get FREE Access to 51 Mini Digital Product Ideas that people will line up to buy!
You keep hearing people talk about how they are using their facebook fan pages to grow their businesses.
You and I rarely have free time, but today, you’ve found some and have decided to get your fan page set up.
So you land here and are wondering if you should keep reading.
You just asked yourself: “Is this a quick, easy, guide that actually helps me get an effective fan page or is this just another article that’ll ill spend 10 minutes reading and still be lost at the end?”
This is the quickest, easiest way to set up a Facebook fan page that generates likes, email leads, and sales.
Once you’re on Facebook.com/pages, click the green “Create a Page” button in the upper right.
Then select which category your business is: Local business or place, Company, Organization or Institution, Brand or Product, Artist, Brand or Public Figure, Entertainment, Cause or Community.
If you are unsure which you belong to, select Company, Organization, or Institution.
After you click the large square corresonding to your business type, you’ll be asked to fill out some information.
This information will be different depending on which category you picked. For example, if you picked “Company, Organization, or Instituion”, you’ll be asked to choose a sub-category and then to type your company name.
When complete, don’t forget to click “I agree to Facebook Pages Terms”, then click the blue “Get Started” button.
During this step, you’ll be asked to select a profile picture, fill out your about section, and set up your Facebook Web Address.
When considering your Profile Picture, be sure you pick an image that is 180px by 180px. Once uploaded, the image will show on your fan page at about 165px by 165px.
Once you’ve either uploaded your profile picture or imported it from your website, click save photo and click next. If you want to leave your picture blank for now, its ok to click the “skip” button for now.
Next, you’ll want to fill out some basic information about your business. When filling in your basic information, consider being clear and concise while also including keywords relevant to your business.
For example, if you are a social media consultant, you’ll want to use other keywords in your description like Facebook or Twitter marketing. This’ll help you get more leads through Facebook search later on.
Then type in your website URL and if you have a question with a yes and no radio button present, be sure to click yes, then click “Save Info”.
Lastly, you’ll want to set up your Facebook pretty link. Think about this like buying a pretty domain name from GoDaddy. This is the link your potential customers will type in to find you. Make it short and memorable.
Facebook will recommend you use your business name you entered earlier however, if that name is complicated or hard to remember, you may consider something shorter and more memorable.
Click “Set Address”.
Only the fan page administrators can see the admin panel. The admin panel highlights core pieces of your page including Notifications, new people who have liked your page, and insights which will tell you how well your fan page is doing.
Additionally, use the “Edit Page” navigation option to update your info or add new administrators. You can also use the “Build Audience” navigation option to start inviting people to your page.
Be careful how you use this though. You’ll want to invite folks after your page is filled with remarkable content which brings us to the next step.
Congratulations, you now have your basic page set up. This step is what will really decide how successful your page will be. It also takes the most time.
You’ll want to focus on filling your page with status updates, milestones, images, videos, and other content that shares value with your fans and tells your brand story.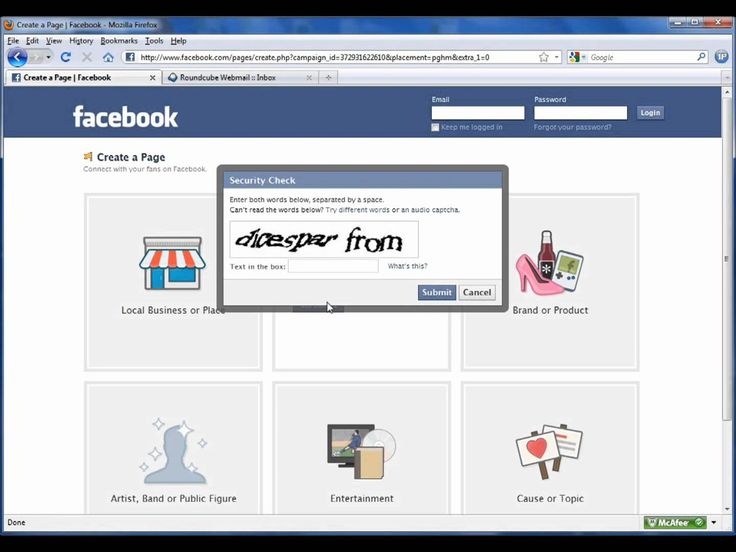
These 27 status updates are some of the most effective ones we’ve seen that can be used by anyone in any industry.
Additionally, add in a cover photo to help build your brand. The cover photo should be 851px wide by 215px tall.
After you’ve delivered amazing content through your Fan Page wall, start implementing strategies to drive traffic, leads, and sales from your page. Start with the 3 tab solution.
One tab will focus on collecting email leads from your fan page, one will focus on capturing more traffic, and one will enable you to sell your products (even collect credit card payments!) all through your fan page.
You have permission to steal traffic from our blog by posting your new fan page link in the comments below. Go ahead, put your fan page link in a comment so we can check it out.
Nathan Latka has supported the growth of over 100,000 small businesses using social media and data driven campaigns — all without a college degree.
Facebook Brand Pages make it easier for companies, organizations, brands and community organizations to share news and connect with people. Like profiles, pages can be updated by posting news, hosting events, and more. People who subscribe to your page updates will receive notifications of new events in their news feed.
To create a Facebook page :
Note . Anyone can create a page, but only authorized representatives can create pages for brands owned by an official organization, company, or public figure.
If you want to introduce a company, brand or product on Facebook, create page . It allows you to attract the attention of other people on Facebook and offers tools for managing and analyzing audience activity.
If you want to share events from your schedule with a wider audience, you can let others follow you . If you allow others to follow you, all Facebook users will be able to follow you and see your public events in their feeds, even if you are not a Facebook friend. The number of people who follow you is unlimited, you can follow a maximum of 5000 users. You personal account can have up to 5000 friends
How to claim an unmanaged page
A page about your company can exist even if it was not created by one of your employees. For example, when someone registers for a job that doesn't have a page, Facebook creates an unmanaged page whose job it is to represent the location. The page can also be created from a Wikipedia article.
If the page is not managed, the inscription unofficial page is displayed under the photo in the background. You can claim a page, become its administrator, and connect it to your existing page that you manage on behalf of the company.
To get rights to an unmanaged page:
Be aware that Facebook may ask you to provide information to verify your ties to the company, such as your company's phone number, email address, or documents. If you know who the current admin is (for example, a former employee), you can contact that person and ask them to add you as an admin.
You can use more tools when creating a page. The page can be shared with a large number of recipients. Turning a profile into a page will create a new Facebook page based on your profile. You can only turn your profile into a page once.
After converting the profile to a page:

To turn your profile into a Facebook page:
What happens to the invite friends, followers, and pending friends sections when you convert your profile to a page?
After publishing a new page:
Using a profile to represent anything other than yourself (e.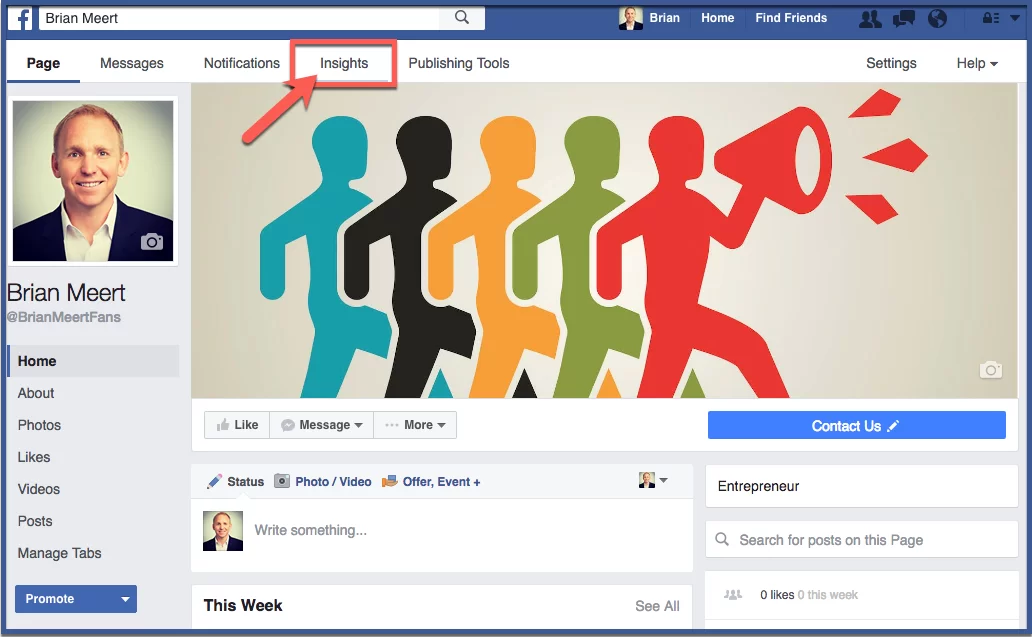 g. company products) is inappropriate Facebook Terms of Use . You may permanently lose access to your account unless you convert your account to a page.
If you use your profile to represent your company, turning it into a page will give you many benefits:
If you have two Facebook pages about the same thing, you can merge them, provided that:

Before submitting a page merge request, ensure that the campaigns that are running do not have a page listed that will be removed.
To merge pages:
If you don't see the option to link your pages, it means they can't be linked. If you see an option to link your pages, your application will be considered.
The page merge feature merges all your likes and registrations, but all other content such as posts, photos, ratings, reviews, and username is permanently removed from the linked page.
The page you want to save will remain unchanged; only likes and registrations from the second attached page will be added to it. A page that is not saved will be removed from Facebook, and page deletion cannot be undone .
Note . If your pages are in the business manager, go to business.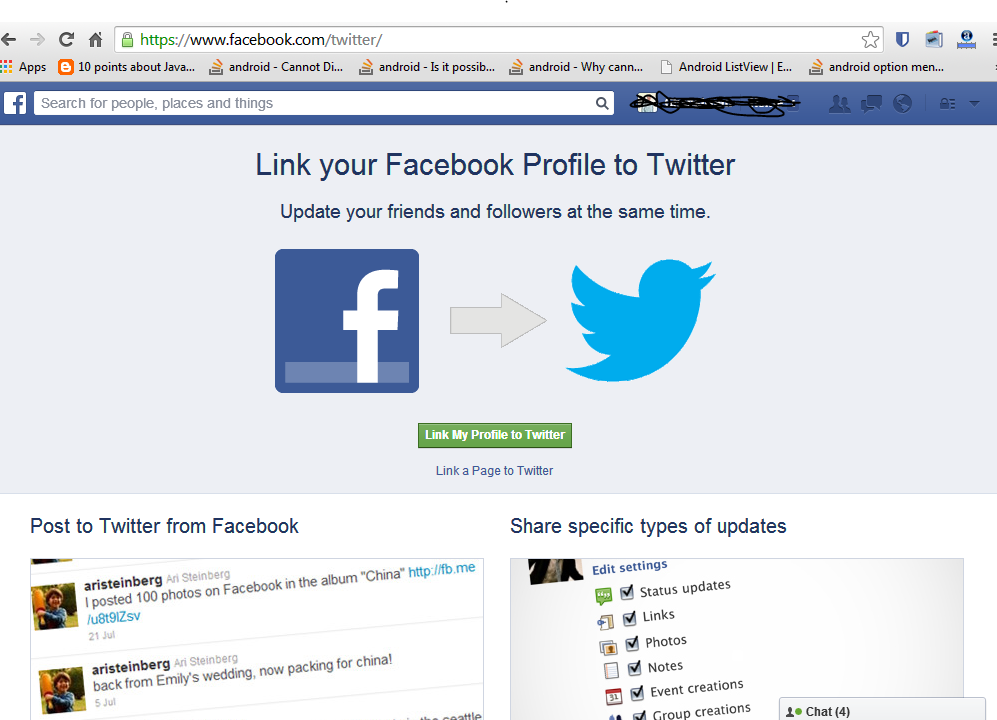 facebook.com/pages/merge to merge them.
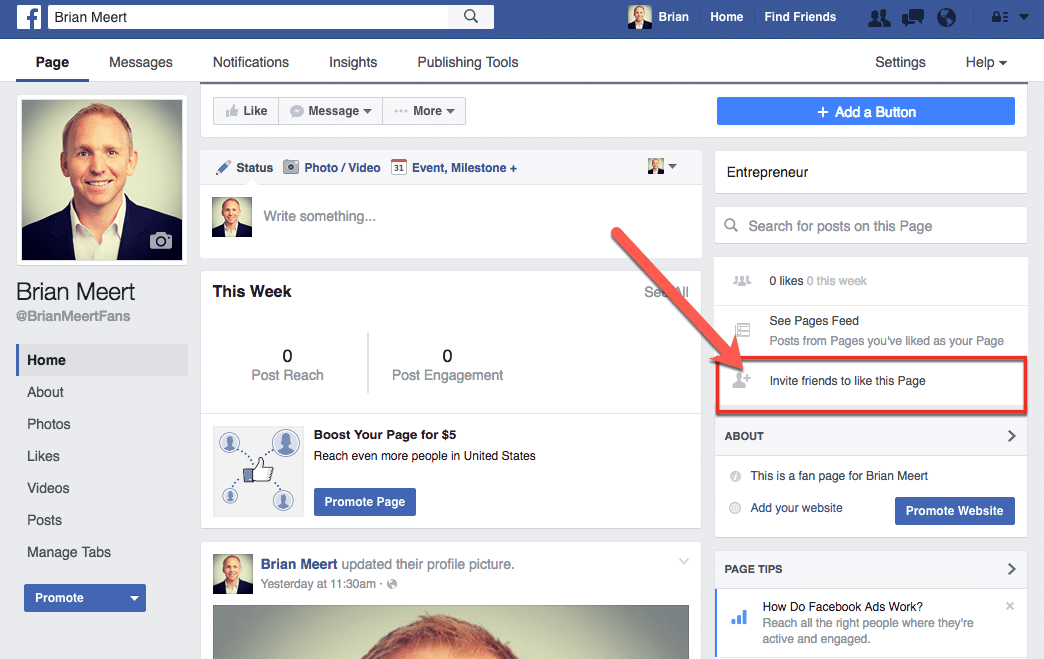
To invite friends to your like page:
To view the invitations on the likes page, go to the Invitations tab.
If your site has less than 100,000 likes, you can invite people who reply to your page posts.
To invite people to reply to posts on your Page:
Remember that if the site has more than 100,000 likes, you will see the option to add people as friends instead of inviting them to the likes page.
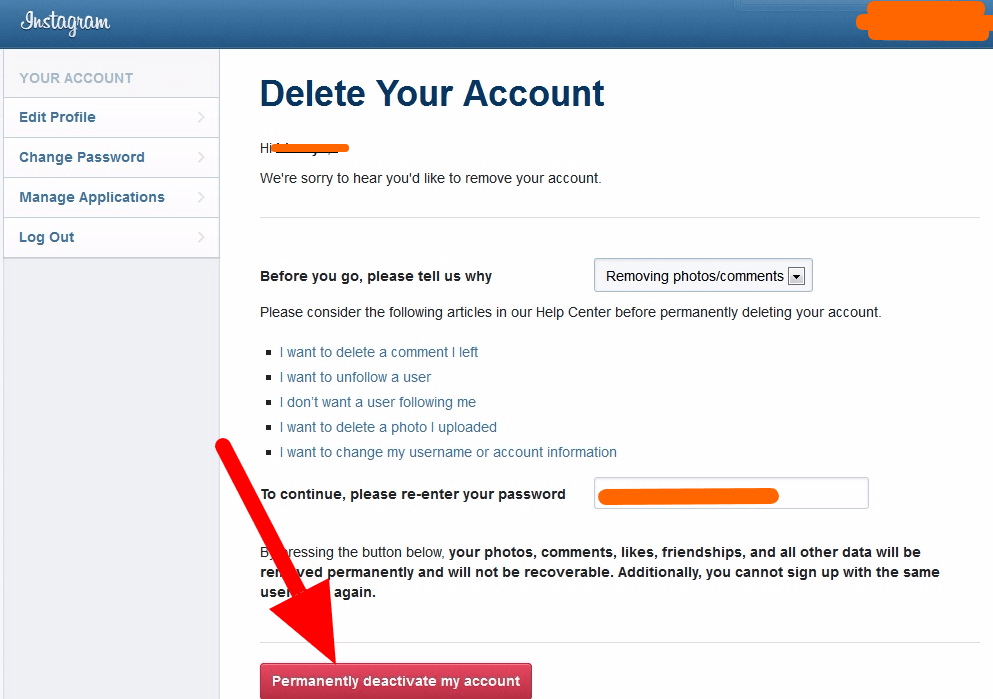
To delete a page you must be an administrator of the page. If you are an administrator:
Your page will be permanently deleted after 14 days, but you can unpublish it at any time.
To cancel deleting a page:
You can also delete your personal account.
Note . If you don't see the delete page option, it may mean that you are not an administrator.
Published pages are visible to the public. Unpublished pages are only visible to those who manage them. Unpublishing a page will hide it from users, including those who liked it. The page will remain invisible until it is published.
As an administrator, you can cancel a post at any time. To unpublish a page:
Be aware that newly created pages may be unpublished due to inactivity.
Want to create your own page for business on Facebook, but don't know where to start and how to do it right? Then this article will be useful for you.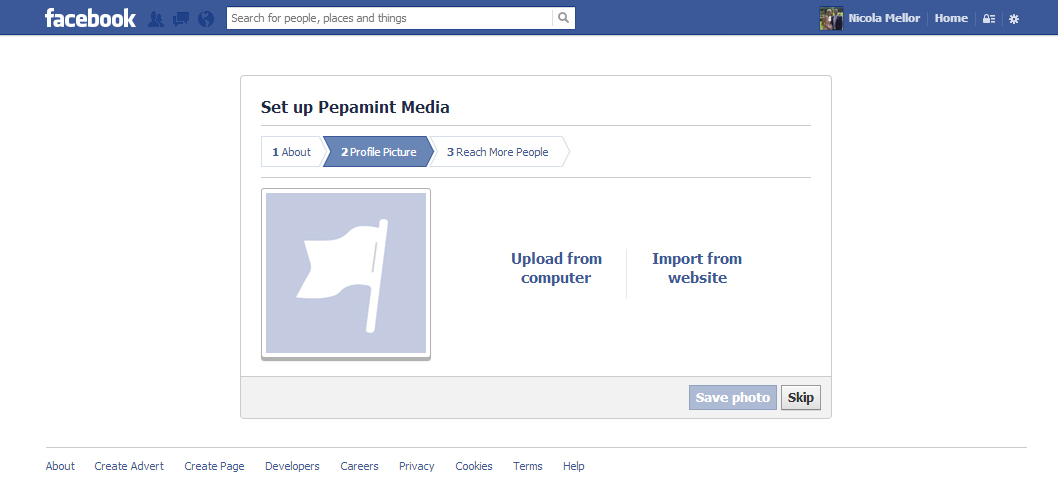
Let's get started. In order to create your Facebook page, you need to go to the fan communities page and select one of the categories that your business belongs to.
In total, Facebook offers 6 main categories to choose from. Each category has its own settings and features. Below is a table from the Facebook directory, where you can see what features are available when you select a particular category. And choose the best option for your page.
Let's take a closer look at each option:
Local Business or Place.
You should select this category if your company has a physical address where your potential buyers can find you. Also with this feature (Facebook Map), your customers can tag your address when they visit your business and/or leave reviews on your Facebook page. For example, you have a hairdressing salon in the Darnitsky district of Kyiv.
Company, organization or institution.
If your company is not tied to the local market, but operates in a large area, you should choose this category. Also, this category is suitable for you if you do not want users to be able to leave a review, but your address was indicated on the map. For example, you represent Pepsi or Tesla.
Brand or product.
This category is suitable for those companies whose goods are sold in different outlets, through retail. This option is suitable if writing a physical address is not relevant for you. For example, you are a representative - Roshen.
Artist, band or famous person.
You should choose this category if your page is about a famous person, like you. This is ideal if you're promoting yourself as a brand and want more promotional opportunities than a regular account. For example, you are Andrey Shevchenko.
Entertainment.
This category will suit you if your page is about books, movies, sports in general, but not individuals like the category above. For example, you want to create a Manchester United fan page.
General idea or community.
This option is for those who do not fit any of the above categories.
IMPORTANT POINT: You can change the category of your page on Facebook as much as you want.
And now, for example, let's select the category "companies" and click "start", i.e. create your page.
Next, using the tips, you need to set up your page. Step one is to write a description of the page (what your page will be about, who you created it for, etc.) and insert a link to your website.
Step #2 is choosing a photo (180X180) for your avatar. You can skip this step and choose a photo later. Also, at any time you can change both the avatar photo and the cover photo of your fan page.
In the third step, you will be prompted to add the page to your favorites (this can also be done later if necessary). And at step number 4, you will be prompted to select the preferred audience for your page.