By Kevin Arrows August 8, 2022
2 minutes read
Kevin is a certified Network Engineer
In June, the beta version of Viber was announced by Microsoft and on July 25th, the full version of the application got added to the Windows store. There are a lot of new features that have enhanced the Desktop application (more on that below) and the anticipation is finally over.
Viber has been available to smartphone users for quite a long time now and the release of a Windows 10 supported application has been met with thrill by the users. An aesthetically designed, highly user-friendly application, Viber can be used to send messages and/or make audio/video calls in high definition while using your internet connections.
Installing ViberTo install Viber, follow these steps:
Press the windows key to invoke the start menu.
Write Store and from the suggestions click on
In the search bar present at the top right of the Store window, type
From the search results, select Viber under Apps and Games.
Click on Install and follow the on-screen instructions to install the application.
Viber Features on Windows 10As mentioned above, there are some exciting features that have been added to the newly released version. A complete list of things you could do with Viber:
Video callsYou can basically do a video call with anybody from your contacts (that also have Viber installed). With the app open, select the contact you want to call and press on the Camera icon to start the video call.
Cortana supportViber now has cortana support. To call or text somebody, you can open Cortana and issue a voice command. You will find Cortana next to the Windows icon on your device.
Quick replyEven when the application isn’t open, you will receive your messages. You can click on them and reply instantly without having to open the application itself!
Sharing on ViberYou can share text, links, photos, videos or even your location on Viber without any hassle from within the application.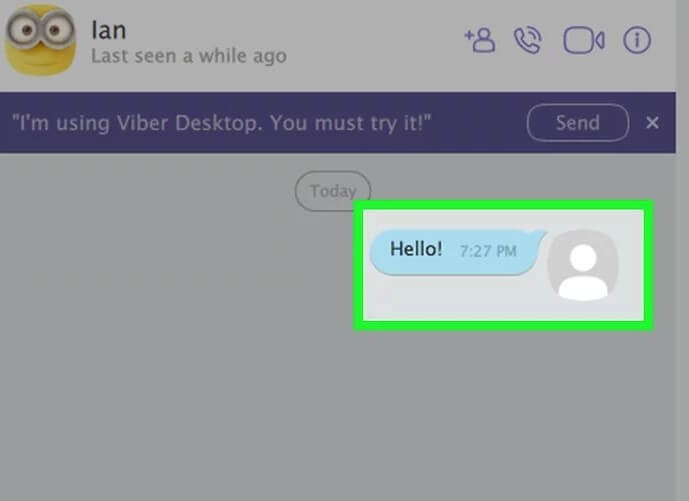
You can reply to recent chats or start a new message right from the start menu. To do so, you will have to pin your chats or contacts to the start menu from within the application.
Organizing stickersIn the updated version, you can alter the order or completely hide the stickers via the sticker market settings. To do so, follow these steps:
Open the sticker market.
Click on the Settings
Press and hold the re-order button that’s depicted by two vertical lines containing three dots.
Drag to reorder.
To hide, you can simply click on the hide
Added language supportLanguage support for both Portuguese and Russian languages has been added.
Like messagesIn group chats, you have the ability to like messages now! Just press on the heart icon before the message to do so.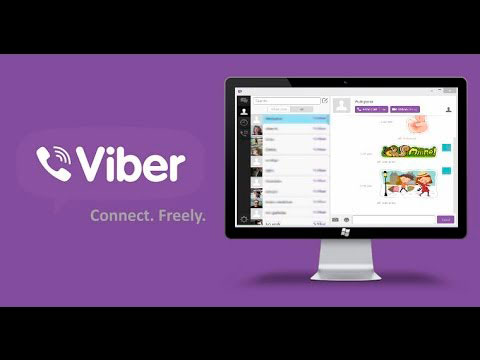
The live tile on your Windows 10 device will show all the recently received messages!
“I use Viber messages for bussiness and worry about data loss when my phone damaged. Is there some effective way to back up Viber messages on my PC?”
Viber is a widely used application by people around the globe. You can communicate via voice or video call and send a message to anyone anywhere in the world, without paying any amount. Due to user-friendly and fascinating features, numerous individuals use Viber for everyday purposes, from sharing business proposals to submitting assignments to the professor.
If a person entirely relies on Viber for all his personal and business communication purpose, such a person can not afford to lose their entire Viber data. Thus, every individual should always back up their Viber messages on their smartphones and their PC. If you lose your phone and forget your apple or google id, in such a circumstance, having a backup of Viber messages on PC will prove to be of great help to recover all your important business-related or personal messages back.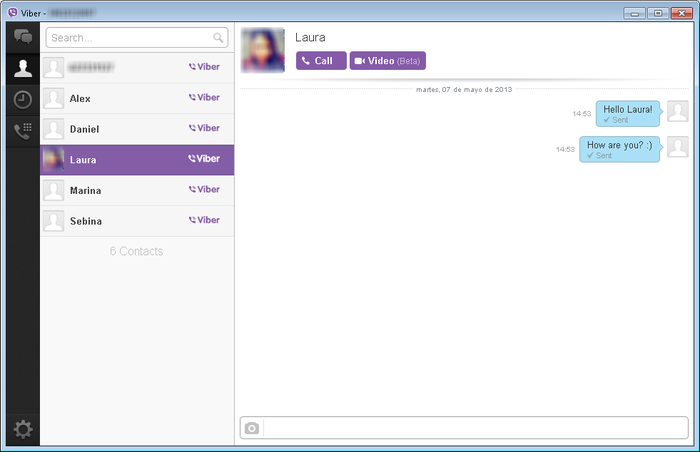 Here are three effortless ways to backup Viber messages on PC.
Viber, itself, offers a way to manually backup Viber messages on PC by permitting you to email them in zipped CSV files to yourself on your email id or skype id. It is a simple and straightforward method. Follow the steps below to backup Viber messages on your device.
Step 1: Open the Viber application
Launch the Viber application on your smartphone. Click on the menu button and enter the settings option in the application. You will see many options, find and click on the "Call and Messages" button.
Step 2: Mail Viber Messages Backup
Select the option of "Email Message History". You will be asked to provide an email account. Provide with the email recipient on which you would like to receive the backup of Viber messages. Make sure to choose the appropriate email service to provide. It will take some time to back up the data, hence wait patiently.
Check your mailbox to confirm that you have received the Viber messages backup file. Once you have the backup file in your mailbox, you can restore and extract the Viber messages on your PC or any other device.
However, this method is not effective in retrieving messages which are hidden. You can not restore images either sent or received. Only text messages can be fetched through this method.
MobileTrans - WhatsApp Transfer is very practical and easy to operate software, which is initiated by wondershare. This software allows you to transfer data from one device to another, backup Viber data on PC, and similarly, restore it. Most interestingly, you can backup attachment, pictures, and videos along with the text messages. Below are some steps to backup data effortlessly with just one click feature.
Try it FreeTry it Free
safe & secure
Step 1: Install the MobileTrans application on the computer.
Download the MobileTrans application and run it on your PC. Several options will appear on your screen like Phone Transfer, Backup, Restore, and WhatsApp transfer. Select the option of the "Whatsapp Transfer" to proceed further.
Step 2: Connect your iPhone to your PC.
Link your device and computer to MobileTrans software. On the left column, tap on the option of Viber from 5 distinct choices. On the right side, you will be asked whether you want to backup or restore Viber data.
Step 3: Backup Viber Data from your smartphone.
Select the option of "Backup". Your screen will show that the data is being processed. Once completed tap on the "OK" button.
Step 4: Export Data to PC
On your desktop, tap on the option of restore. Next, you will be able to perceive the backup that you have ever made. Select the most recent Viber data backup that you have created. Click on the start button to restore data.
Step 5: Retrieve Data
Once the restoration process is completed, you can open and view all the Viber messages along with photos, videos, and attachments. Make sure to keep devices connected throughout the process.
Free DownloadFree Download
safe & secure
Use step by step guide below to backup Viber messages on PC through iTunes. This method is only suitable for iPhone devices only.
Step 1: Run iTunes application
First, connect your iPhone to your PC and then open the iTunes application on your computer. After launching iTunes, you will be asked to select a device. Choose your device as "iPhone".
Step 2: Backup Viber messages
On the left column, you will see many options to choose from. Click on the "summary" option. This will show all your device summary on the right side. Under the heading of manually backup, you will see the option of "Backup Now". All your data including Viber messages will start to backup on your PC.
Step 3: Verify
After you receive the notification that your backup has been completed. Check whether there is a backup available in your iTunes preference> devices.
You can not see specific content in your backup file and similarly, you have to restore entire data just to retrieve back the Viber messages.
You may also be interested in How to Sync Viber Messages?
With having important business proposals to university assignments on your Viber chats, you definitely can not afford to lose your data at any cost. Thus, the above listed are methods that will help you keep your Viber messages safe and secure. Choose the process wisely to ensure quick yet effective backup and restoration of your Viber messages on PC.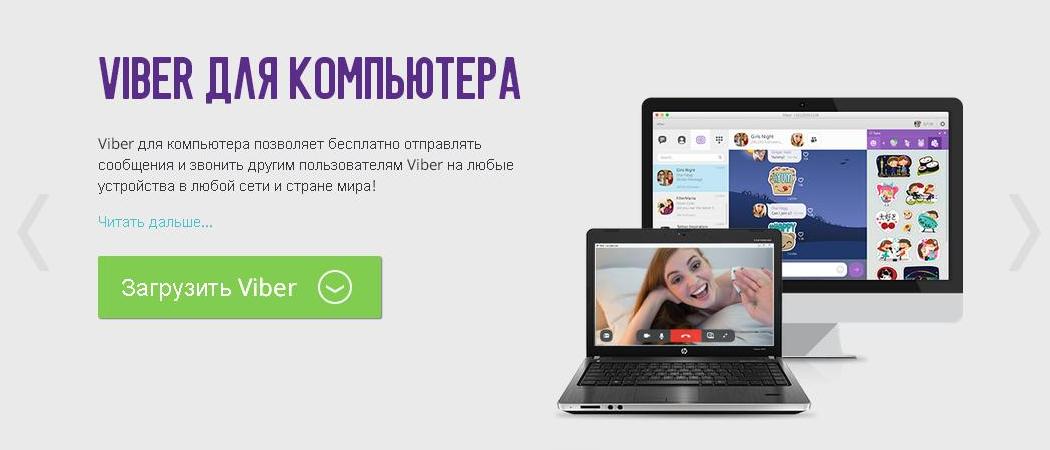 You can also create a backup on your smartphone but it is very beneficial to have Viber messages backup on your PC too.
Try it FreeTry it Free
safe & secure
New Trendings
Viber is basically communication on a smartphone, but sometimes it is more comfortable to use the Windows version. This approach can be justified, for example, when mobile communications are poor and there is no Wi-Fi. If everything is OK with the mobile phone - Viber is already installed on it, then the version for the computer is installed in a couple of clicks without problems. But what about the owners of antediluvian phones that are not friends with the messenger? Catch the info on how to install Viber on your computer without a smartphone.
Note: How to check the battery of a smartphone: 4 tips
If you cannot make friends with your phone with Viber, you need to use an Android emulation program.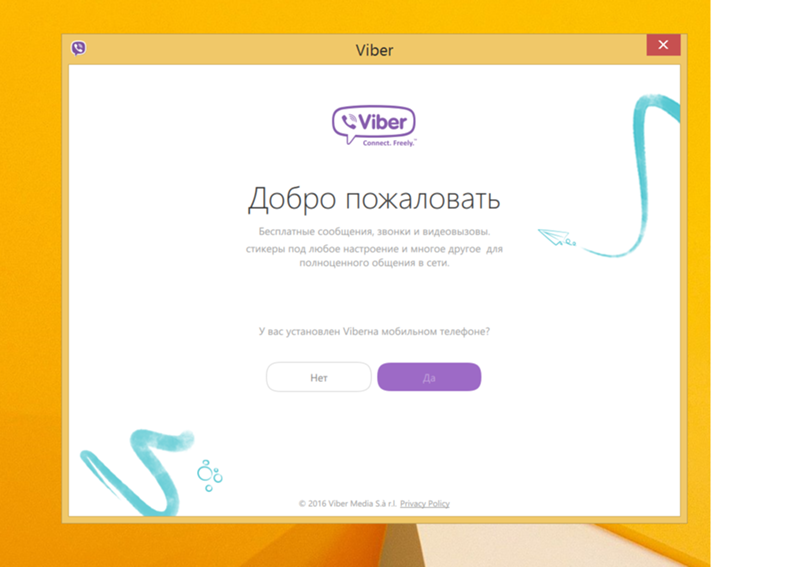 There are several options for such applications. We present the top solutions in the form of a table:
All these are Windows programs, although there are Mac versions under all these names, and Andy even works under Linux.
After installing the emulator, you need to install Viber on a desktop PC or laptop. Read on for details.
An interesting article: How to install Whatsapp and Viber on a tablet: instructions for installing 2 popular instant messengers
As an emulator, we will choose Bluestacks, as the most functional program. To get started, you need to download it from the office. site. If the antivirus does not like it, do not pay attention. You can remove it from your computer after use. Bluestax installation takes 5-10 minutes. To install, you need a couple of free GB, select a folder on a suitable disk.
Checkboxes for access to the store and communications should not be removed during installation. After installation, the application will launch. The program will ask permission to determine the user's location. You can agree or refuse, it will not play a special role. Next, select the interface language. The following setting items:

Viber settings in the emulator:
Now we have Viber in the emulator, it remains to install the computer version of the application on the PC. We download it at messenger website and proceed to install Viber on a computer without a modern phone. At the very beginning of the installation, the program will prompt you to enter a phone number. We enter the one to which the Viber is attached, installed in the emulator.
Next, the messenger will offer to scan the QR code with a smartphone. Select the "Camera not working" link. In the authentication window that opens, click "Copy", after which a link is placed on the clipboard, which is the identification key.
We return to Bluestacks, go to the browser and paste the copied key into the address bar. The emulator will prompt you to confirm the activation of Viber on your computer. We agree, completing the process of installing the messenger on the PC.
Connecting Netflix: Installing and Setting Up Netflix: 7 Rules for Watching Movies for Your Pleasure
In conclusion, we list the main stages of the deed:
In general, the main idea is to replace the smartphone with a program that imitates it. As you can see, Viber is installed on a computer without first being installed on a phone.
Upgrading hardware: How to properly install an SSD on a computer and laptop? — 3 ways
Contents
The Viber application adapted for Windows significantly expands the possibilities of the user registered in the system for exchanging information. Let's take a look at what features are provided by the version of the messenger for computers and laptops, and also demonstrate how to use the available functions as efficiently as possible.
Before any software tool can perform its functions properly, it must be installed and configured. Difficulties are definitely not what you will encounter when getting and setting up the desktop version of the Viber application, but only if you correctly prioritize operations and follow the recommendations step by step.
In the case of Viber, designed to be used on a PC or laptop, we are not dealing with a standalone application, but in many ways only a clone of a messenger running on a mobile device. Therefore, the best solution would be to initially ensure the operability and configure the service client on your smartphone.
Read more: How to set up Viber on an Android smartphone and iPhone
Windows environment. If you follow the detailed instructions from the articles on the links below, no problems should arise in the process, we only note that Windows XP users should be more careful about choosing a distribution version than users of current versions of Microsoft OS.
Read more:
How to install Viber on a computer or laptop
Proper installation of the Viber messenger in Windows XP
How to activate the Viber application on a computer
The functions of Viber for a computer depend on the phone version of the messenger, the need to ensure synchronization of the main (for Android or iOS) and affiliated (for Windows) applications is extremely important. Pair the indicated clients before further use of the communication system with a PC, if this was not done immediately after activating the desktop version of Viber.
Read more: How to sync Viber on PC and Android smartphone or iPhone
By and large, after completing the previous steps, you can start using the Viber desktop client. At the same time, in order to ensure the highest possible level of comfort when working in the messenger from a computer, read the list of its settings and override the settings if necessary.
 The appearance of Viber for PC can be customized for the most comfortable experience by changing:
 Read more: How to switch the interface language in the Viber PC 9 app0003

Next, or click on the image preview in the list supplied with the messenger,
or upload a photo from the PC disk into the application by clicking on the area "Select background or drag and drop here" .
You can select which "Microphone" , "Speakers" or "Camera" are involved using the drop-down lists (of course, if these devices are not present in the system in a single copy). And here it is also possible to adjust the sensitivity of the voice recording device and the playback volume level of all sounds coming from the messenger.
Read also: How to turn off the sound in Viber on a computer
 In this settings section there is a rather useful option that allows you to restrict access to the application by unauthorized persons - "Set a password for Viber" . If you find it necessary to enable such protection:
When you have finished overriding the settings, close the window "Parameters" . Now Viber for a computer is considered prepared for further operation.
After installing, activating and configuring the Viber application in a Windows environment, users of stationary PCs and laptops do not have any obstacles for effective interaction with one of the most popular information exchange systems today.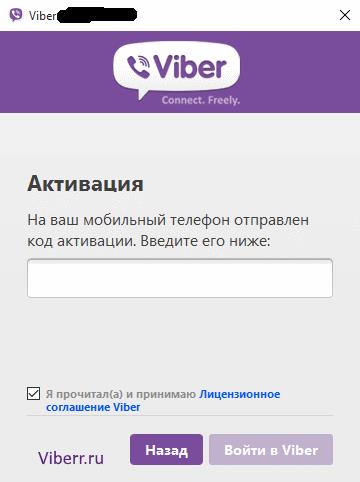 The desktop client of the messenger has a lot of functions, but it’s not difficult to figure out how to perform this or that operation.
Correspondence (chat) with another person physically located anywhere in the world is perhaps the main reason why people install any messenger on their computer. The developers of Viber for PC took this fact into account - all the interface elements that will be needed when creating a message and sending it, as well as for reading incoming messages, are immediately available after starting the application.
Whichever of the above actions you perform, the address book will open. Further, depending on the type of the displayed list of contacts, simply click on the name of the future interlocutor or check the checkbox next to the desired user, and then press "Start a chat" .
Read also: How to add contacts to the address book of the Viber messenger
To send a message, click on the round button "Paper airplane" next to the input area.
In addition to typing manually, the text of the message can be generated by copying from other applications and then pasting into the field of the messenger window,
but in this case, note that there is a limitation. The volume of the message transmitted via Viber must not exceed 7000 characters.
In situations where you need to delete one or more messages from a chat, completely clear the history of correspondence with a particular user, or arrange the list of open conversations by destroying its individual elements, follow the appropriate instructions from our articles.
Read more:
How to delete one, several or all messages from a chat in Viber for PC
Deleting a chat from the Viber messenger in the Windows environment
The text of a message transmitted via the desktop version of Viber can be very easily “diluted” with emoticons, as well as supplemented or even replaced with an emotional “sticker” picture, which is very popular among messenger users today.
Note that you can only add to your collection of stickers using the mobile version of the messenger with which the desktop client is affiliated. Both in the version of Viber for Android, and among the functions of that in the iOS environment, there is "Sticker Store" from which static and animated "stickers" are downloaded.
To organize your collection of stickers and remove unnecessary sticker packs from the application on your PC, use the instructions from the following material.
Read more: How to remove stickers from Viber for PC
In the attachment menu that you used above to bring up the emoji and stickers panel, there is an icon "GIF" that provides the ability to quickly find and send content posted on popular websites without launching a browser and copying information from it into a message sent via Viber for a computer.
you will instantly share the link with your interlocutor.
Many messenger users find it convenient not to type messages from the keyboard, but to dictate a message into the microphone and send a recording of their voice to the interlocutor. The desktop version of Viber makes it very easy to create "Voice Message" and quickly transfer it to another account holder in the service in question.
Viber for Windows can be a very convenient tool for transferring various files, because it is on the computer that users most often store most of the information. The only limitation on using the messenger to send files is the size of the file being sent - if you try to transfer more than 200 MB of data, the application will give an error.
The above instruction describes not the only possible algorithm, following which you can quickly send a file to another participant in the information exchange system under consideration. A separate article on our site describes other methods for implementing the procedure using the example of sending a photo, but you can use these techniques for any type of file.
Read more: How to send photos via Viber for PC
Correspondence with one user within a single conversation is not the only place where you can use the above functionality of the Viber desktop client. You can at any time become a member of a group of three or more people and, using the same techniques as in a chat with a single user, send messages with emoticons, stickers, various content, voice messages, as well as files, but already to several or many people.
Note that it is very easy to organize a group chat by yourself.
More: How to create a group in Viber from a computer
Participation in communities and subscription to public accounts have become very popular among users registered in the messenger. We talked about finding a suitable resource of this type in Viber, including from a computer, as well as the actions that need to be taken to join a group or subscribe to receive information from public pages, in a separate article on our website. To view it, please follow the following link.
Read more: How to find a community or public account in Viber from a computer
Voice and video communication within the service is the next most popular feature for registered users of Viber after the exchange of short messages. In addition to being free, the popularity of this type of communication is due to the simple implementation of the call process, including from a computer. The procedure for making audio calls using Viber in the Windows environment is described in the article at the link below.
Read more: How to make voice calls via Viber on a computer
Video calls, as well as communication exclusively by voice, are easy to organize in the desktop version of Viber.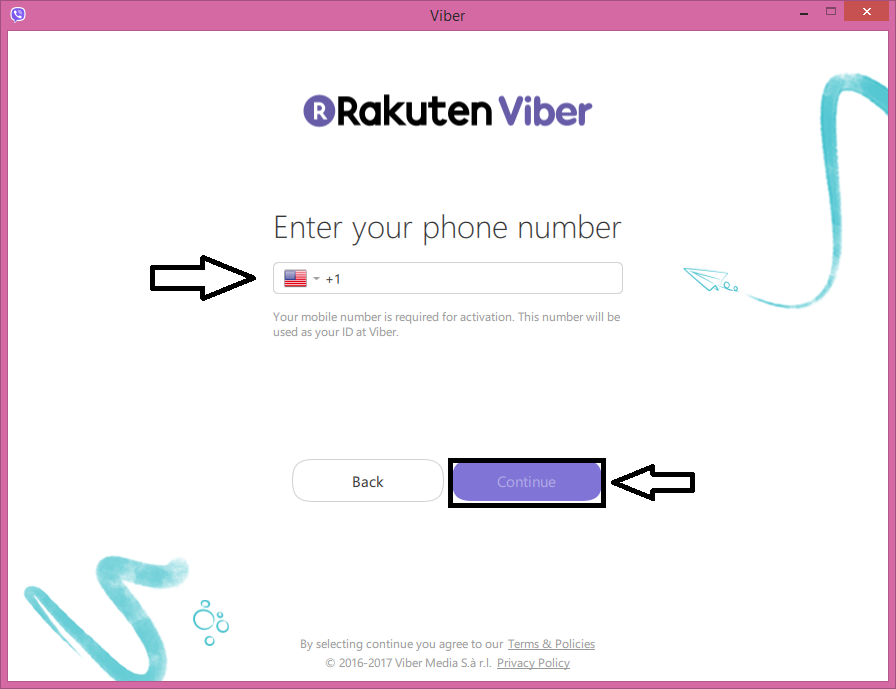
 “Transferring” a video call to a smartphone is done by clicking on the button marked in the following screenshot.
One of the features of Viber, which distinguishes it from analogues, is the ability to make calls not only within the messenger, but also to any phone numbers in all countries of the world. This service is called Viber Out and is provided for a fee, and instructions for using it from a computer can be found in the material on our website, available at the following link.
Read more: How to use the Viber Out service from a computer
In conclusion of the description of the methods for calling and implementing Viber functions from a PC, we will present several life hacks, the use of which allows you to work more efficiently in the messenger.
Viber for Windows is temporarily suspended by exiting the application. Here you need to take into account that by default the tool in question always works in the background and, even by clicking on the button with a cross in the title of its window, you will not close the messenger, but only minimize it to tray.
To completely stop using the computer as a means of accessing the capabilities of the information exchange system, you will need to deactivate the program on your PC and (optionally) uninstall it. Instructions for performing these three operations are already presented in the materials on our website.
Read more:
How to completely close the Viber application for PC
How to uninstall the Viber application from your computer
Mastering Viber for Windows may seem complicated and lengthy at first glance. In fact, the considered application is arranged simply and logically, and the process of using each of its functions can be effective even if the user acts on an intuitive level.