What are Instagram Reels?
How to make a Reel on Instagram in 5 steps
5 tips for making viral Reels as a business
Instagram Reels cheat sheet
By now, you already know that Instagram Reels are a gold mine for helping you grow your following. The short, entertaining videos have a special way of grabbing users’ attention, which can mean lots of engagement for your brand.
Since Reels debuted two years ago, they’ve become the platform’s fastest-growing feature. Creators like Justin Bieber, Lizzo, and Stanley Tucci helped transform the addictive feature from a TikTok wannabe to a full-blown competitor. And we’re not surprised.
But how do you use this tool to reach more people, get new followers, or spread the word about your products and services? In this guide, we’ll cover everything you need to know, from how to make a reel on Instagram to figuring out the best time to post it.
Bonus: Download the free 10-Day Reels Challenge, a daily workbook of creative prompts that will help you get started with Instagram Reels, track your growth, and see results across your entire Instagram profile.
Instagram Reels are full-screen vertical videos that can be up to 90 seconds long. They come with many unique editing tools and an extensive library of audio tracks (featuring everything from trending songs to snippets of other users’ viral content). On top of sounds, Reels can include multiple video clips, filters, captions, interactive backgrounds, stickers, and more.
Reels are different from Instagram Stories. Unlike Stories, they don’t disappear after 24 hours. Once you post a Reel, it’s available on Instagram until you delete it.
The best part? Reels are currently favored by the Instagram algorithm, which is more likely to recommend them to people who don’t follow you than feed posts. That’s huge for social marketers.
Users can also discover Reels in a dedicated section of the Instagram app. A scrollable feed full of trending Reels (a.k.a. Instagram’s version of the TikTok For You page) can be accessed through the Reels icon at the bottom of the Instagram app’s home page.
An individual user’s Reels can be viewed in a dedicated tab that can be accessed above the account’s Feed.
Reels are also heavily featured in the Explore tab. If you’d like to set your Reels up for success with this powerful discovery tool, check out our guide to getting your content on the Instagram Explore page.
If you’re familiar with Instagram and/or TikTok, you’ll find making Reels quite easy.
Are you a visual learner? Check out this video and learn how to make an Instagram Reel in under 7 minutes:
Otherwise, follow these simple step-by-step instructions.
To access Reels, simply open the Instagram app and head to your profile page. Click the plus sign button on the top right of the screen and select Reel.
You can also access the Reels editor by swiping left to the Instagram camera and selecting Reel from the bottom options.
Instagram Reels gives you two options to create a Reel:
Reels can be recorded in a series of clips (one at a time), or all at once.
If you set a timer early on, there’s a countdown before the hands-free recording starts.
During the recording, you can tap the record button to end a clip, and then tap it again to start a new clip.
Then, the Align button will appear, allowing you to line up objects from the previous clip before recording your next. This allows you to create seamless transitions for moments like changing outfits, adding new music, or adding new friends to your Reel.
If you want to watch, trim, or delete the previous clip you recorded, you can tap Edit Clips. Check out our Instagram Reels tutorial for more in-depth editing tips.
Once you’re done with recording, you can add stickers, drawings, and text to edit your Reel using the icons on the top of the editor.
The Reels editor features built-in creative tools so you can do all your editing from one interface.
Here’s what each feature does:
 You can even choose to add your favorite part only.
After you’ve aligned your clips, you can tap the music note icon to add trending sounds or music, or record a voiceover.
You can also tap the download icon to download Instagram Reels to your device to view or edit later.
Check out our Instagram Reels tutorial for more in-depth editing tips.
When you’re ready, tap Next in the bottom right corner of your screen. You will be able to:
Once you adjust your settings, tap the Share button at the bottom of the screen.
Congrats! You’ve posted your first Reel. Now, let’s move on to some tactics that will help you make this format work for your brand.
Optional: Schedule your Reel
You’ve got your Reel ready to go, but maybe 11:30 pm on a Tuesday isn’t the best time to get maximum exposure. You might want to consider scheduling your Reel to post at a more ideal time.
Until recently, this feature was only available via Meta’s Creator Studio, or with a third-party tool like, you guessed it, Hootsuite!
In-app Reel scheduling is coming to both business and creator accounts, with Meta confirming that they “are testing the ability to schedule content with a percentage of our global community.”
While only available to lucky Android users at the moment (check your App, you might have it already!) the scheduling feature is expected to be available to everyone very soon.
At this time, regular posts and Reels can be scheduled in-app, but not Stories and no scheduling feature is available for desktop users.
Instagram Reels can be a great way to get your business in front of the right audience. The feature can also help you grow your following and boost engagement rates. But this doesn’t happen automatically. You’ve got to know the hacks to go viral on Instagram Reels.
The magic of Reels is in Instagram’s not-so-secret sauce — the algorithm. This is the all-knowing matchmaker the platform uses to determine which Reels it shows to which users. Understanding the way the Reels algorithm works can help you get more views from the Explore page and the Reels tab.
Adding trending sounds, using the right hashtags, and making your Reels visually appealing are all great ways to tell the algorithm, “Hey! Pay attention to me!”
If you scroll through Instagram Reels or TikTok on the regular, you’ll notice that many creators use the same sounds on top of their videos. Thousands of people have used The Home Depot Beat and the typing sound audio. That’s not a coincidence.
Instagram Reels sounds are snippets of songs or audio clips from other creators’ videos. When they gain popularity, they can help you get more views if you add them to your Reels. This is because users often search by sounds and because, quite frankly, the aforementioned algorithm seems to like it.
The best way to find trending audio on Instagram is to use the platform and take note of which sounds you’re seeing pop up more than others.
When you scroll through Reels, make note of any sounds that have an arrow next to the name of the sound.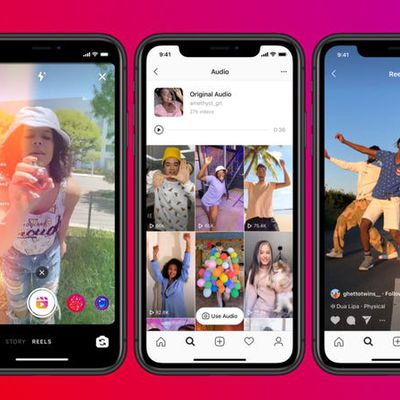 The arrow indicates that they’re trending. It can be tough to find sounds after you’ve already excited a Reel, so make sure to save them and use them later.
One last tip! Be sure to choose songs wisely and use them sparingly. We all know what happens when trending sounds get overused. (Oh no, oh no, oh no no no no no).
As much as you might want to sell, the reality is that users don’t open up social media apps hoping to see ads. They turn to Instagram to explore ideas, connect with others, and get a quick burst of entertainment during breaks in their day. That’s why you need to make sure your Reels help them do just that.
Be sure to create content (yup, this includes Reels) that’s actually entertaining to your target audience. Whether that means leaning into a trending dance or creating quick how-to Reels, aim to delight, inform, and entertain users rather than sell to them.
See: Away’s comedic approach to travel content, Barkbox’s clever use of trending sounds, and Delta’s brilliant attempt to gamify Reels.
That doesn’t mean you shouldn’t turn your Reels into ads, though. Boost those high-performing—but non-salesly!—Reels to get even more visibility.
You can use the same strategies to be successful with Reels that you used to boost content on Instagram Stories or in the original Feed. Consistently posting is one of the best things you can do to help improve your performance across the platform, including in Reels.
Bonus: Download the free 10-Day Reels Challenge, a daily workbook of creative prompts that will help you get started with Instagram Reels, track your growth, and see results across your entire Instagram profile.
Get the creative prompts now!
That’s because it helps increase your odds of going viral. Plus, the algorithm is kind of like your biggest fan—it loves when you post new stuff! In general, the Instagram gods prioritize showing recent videos over stale ones, so keep things fresh.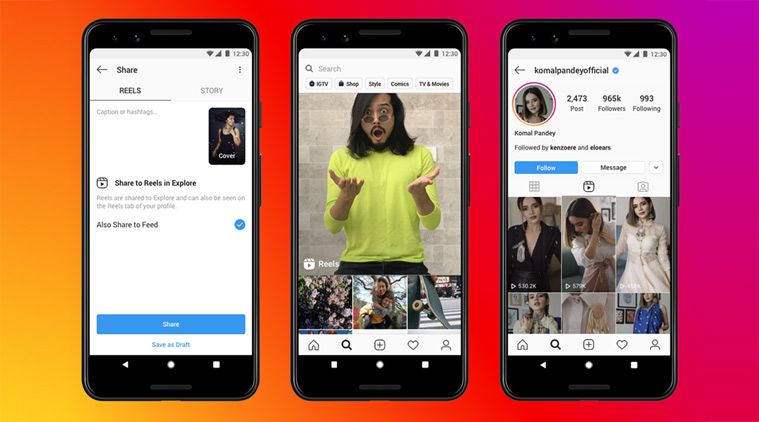
Posting often also helps you aggregate a ton of helpful insights that will guide you when you’re trying to figure out what works and why. The more you post, the more you’ll learn about your target audience—what they like, when they scroll, and more.
Last year, Instagram added a new feature called Collabs. This option lets you share credit with another creator and allows them to share the Reel from their page as if it was their own.
The Collab feature is a game-changer if you work with influencers, brand partners, and others. It lets you extend your reach to their entire following, which can mean tons more likes, shares, reach, and overall engagement.
Here’s how to use Collabs:
Once the user accepts your collab invitation, the Reel will show up in the Reels tab in their account.
Need quick answers to all your burning Reels questions? Skim our cheat sheet (and bookmark it for later).
Scheduling social media posts is a must when you want to stay on your game without having to work overtime. Luckily, there’s an easy way to schedule Instagram Reels with Hootsuite.
Using Hootsuite, you can schedule your Reels to be auto-published at any time in the future.
To create and schedule a Reel using Hootsuite, follow these steps:
Start your free 30-day trial. You can cancel anytime.
And that’s it! Your Reel will show up in the Planner, alongside all of your other scheduled social media posts. From there, you can edit, delete or duplicate your Reel, or move it to drafts.
Start your free 30-day trial. You can cancel anytime.
Once your Reel is published, it will appear in both your feed and the Reels tab on your account.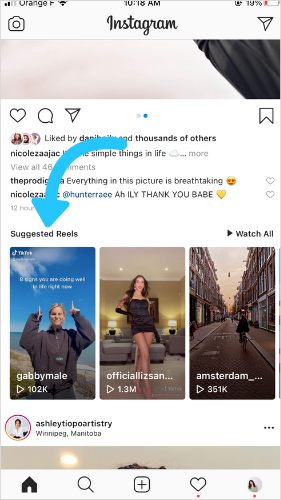
Note: You can currently only create and schedule Reels on desktop (but you will be able to see your scheduled Reels in the Planner in the Hootsuite mobile app).
In-App SchedulingNote: At the time of writing this feature is in a limited testing phase but is expected to be released to all Instagram users soon.
Whether you’re a creator or a consumer, downloading Instagram Reels is a useful tool to have up your sleeve.
When creating, it helps you save drafts directly to your device or share them with others before they go live. You’ll also want to download Reels you’ve created if you plan to share them on another platform.
When scrolling, downloading allows you to save other creators’ videos permanently, even if the creator takes them down. It also allows you to access them when you’re offline.
There are several ways to download Instagram Reels.
If you own the Reel, you can download it using the Download option from the Reels editing page. Once it’s published, you can download it from the Reel itself. Click on the three dots in the bottom right corner of the Reel and select Save to Camera Roll.
If you want to download someone else’s Reel, you’ll have to record your screen or use a third-party app, such as InstDown or InSaver.
Learn more in our guide to downloading Instagram Reels.
Knowing what time to post on Instagram Reels is an easy way to target your users when they’re the most active.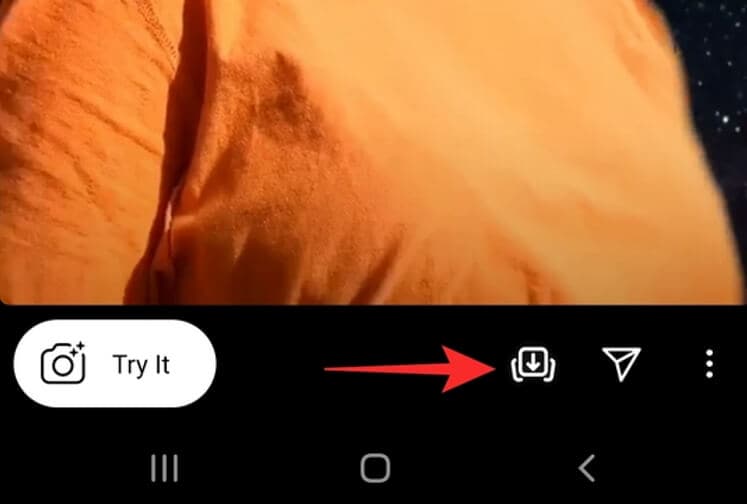 Catching them when they scroll means more engagement and further reach for your brand.
The thing is, everyone’s ideal post time is different. For Hootsuite, the best time to post on Instagram is between 9 a.m. and noon, Monday through Thursday. But your audience may skew later, earlier, or scroll more on the weekends.
Don’t worry. There’s a quick way to figure out when to post. In Hootsuite, you can see the best time to publish Instagram content from the Analytics feature. Click “Best Time to Publish” to see when your users are the most likely to engage with the post. The heat map is a handy way to visualize the best times.
Start your free 30-day trial. You can cancel anytime.
Another way to find the best time to post Reels is to check what worked best for you in the past. To review the performance, of your existing head to Analytics in the Hootsuite dashboard. There, you’ll find detailed stats, including:
Getting the sizing right is another great way to set your Reel up for success.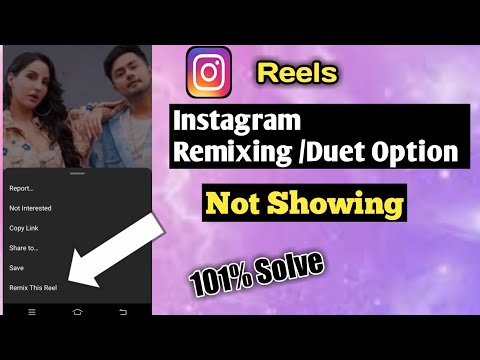
Using the wrong dimensions can make your post look—we won’t sugarcoat it—downright ugly. And that means an instant swipe-up from users. On top of that, the almighty algorithm doesn’t like it when your Reels look stretched or distorted. We don’t blame her.
So what’s the ideal Instagram Reel size? Make your Reel frames and cover 1080 pixels by 1920 pixels. If you choose to have your Reel show up on your regular Grid (probably a good idea, by the way), make sure your thumbnail fits the ideal size of 1080 pixels by 1080 pixels.
What about the Instagram Reels ratio? Users will have the best experience viewing Reels in full-screen mode, which features a ratio of 9:16. However, Instagram also shows Reels in the main feed, and crops them to a ratio of 4:5.
Just make sure to avoid putting any important information around the edges of the frame, because it could get cut off.
Read our full guide to Instagram Reels sizes.
Instagram Reels can be as long as 90 seconds.
When Instagram first debuted the Reels feature in 2019, users could only post Reels up to 15 seconds long. In 2022, users have a choice of four Instagram reel lengths up to 90 seconds each. That means you’ve got a full minute and a half to dazzle your audience.
But should you actually use all 90 seconds? Not always. It totally depends on the Reel itself. In general, aim for user-friendliness when you’re deciding how long to make an Instagram Reel.
Longer Instagram Reels come in handy for more time-consuming stories, how-to guides, tours, and more.
You certainly don’t want to draw things out, though. Remember that the point of Reels is to create small snippets of delightful content, so keep it short and sweet.
Bonus tip: Unless you’re looking for a quick way to enrage your audience, you should never post multi-part videos when you could do it in one. That’s what 90-second Reels are for!
One of the best things you can do as a savvy Reel creator is checking out what other people are doing on the platform.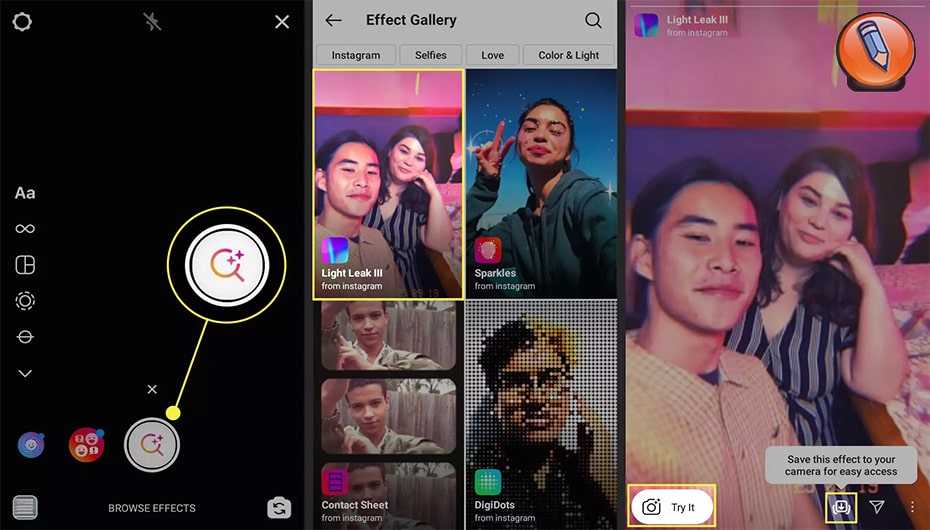 To get unique Instagram Reels ideas, you can search for content to help inspire you.
A quick way to search for Reels is to use the general search bar at the top of the app. Type in a search feature and explore content, users, and hashtags related to that term.
While Instagram’s standard search function is helpful, it doesn’t only show Reels. A good great way to search only Reels is to click on hashtags from other Reels. This will limit your results to Reels and filter out images.
For example, if you’re an avid consumer of puppy content, you can click on the #dogsofinstagram hashtag from a Reel’s caption to see more Reels of dogs being cute.
Easily schedule and manage Reels alongside all your other content from Hootsuite’s super simple dashboard. Schedule Reels to go live while you’re OOO, post at the best possible time (even if you’re fast asleep), and monitor your reach, likes, shares, and more.
Try it free
Save time and stress less with easy Reels scheduling and performance monitoring from Hootsuite. Trust us, it’s reely easy.
Free 30-Day Trial
Posted on August 5, 2020
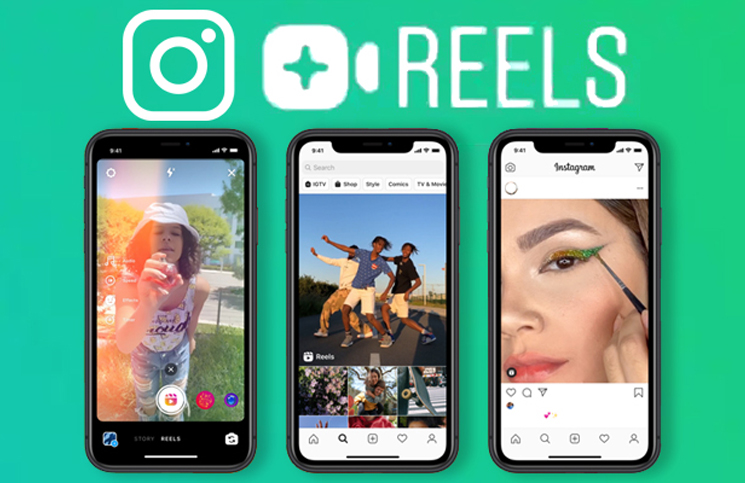
Today we’re announcing Instagram Reels: a new way to create and discover short, entertaining videos on Instagram.
Reels invites you to create fun videos to share with your friends or anyone on Instagram. Record and edit 15-second multi-clip videos with audio, effects, and new creative tools. You can share reels with your followers on Feed, and, if you have a public account, make them available to the wider Instagram community through a new space in Explore. Reels in Explore offers anyone the chance to become a creator on Instagram and reach new audiences on a global stage.
Select Reels at the bottom of the Instagram camera. You’ll see a variety of creative editing tools on the left side of your screen to help create your reel, including:
 You can also use your own original audio by simply recording a reel with it. When you share a reel with original audio, your audio will be attributed to you, and if you have a public account, people can create reels with your audio by selecting “Use Audio” from your reel.
Reels can be recorded in a series of clips (one at a time), all at once, or using video uploads from your gallery. Record the first clip by pressing and holding the capture button. You’ll see a progress indicator at the top of the screen as you record. Stop recording to end each clip.
With Reels, you can share with your followers and can be discovered by the huge, diverse Instagram community on Explore.
 People will not be able to use original audio from your reels, and people cannot share your reels with others who don’t follow you.
 Once your reel is ready, move to the share screen, where you can save a draft of your reel, change the cover image, add a caption and hashtags, and tag your friends. After you share your reel, it will live on a separate Reels tab on your profile, where people can find the reels you’ve shared. If you also share to your Feed, your reel will appear on your main profile grid, though you have the option to remove it.
Whether you have a public or private account, you can share your reel to your Story, close friends, or in a direct message. If you do so, your reel will behave like a regular Story — it will not be shared to Reels in Explore, it will not appear on your profile, and it will disappear after 24 hours.
Reels in Explore showcases the best of trending culture on Instagram. Discover an entertaining selection of reels made by anyone on Instagram, in a vertical feed customized for you. If you love a reel, you can easily like, comment or share it with your friends.
You’ll also see some reels with a “Featured” label. If your reel is featured in Explore, you’ll receive a notification. Featured reels are a selection of public reels chosen by Instagram to help you discover original content we hope will entertain and inspire you.
Reels gives people new ways to express themselves, discover more of what they love on Instagram, and help anyone with the ambition of becoming a creator take center stage.
For more information on Reels, visit our Help Center.
RELATED ARTICLES
Instagram has announced Remix, a feature similar to TikTok Duet that allows users to create a new Reels video alongside an existing one. While Remix is usually useful for harmonizing or parodying existing short videos, you can also pull off some pretty creative and funny replies. If you are wondering how to use the Instagram Reels Remix feature, read to the end to know everything about it.
According to Instagram, Remix is enabled by default for new reels only. As a result, you will have to manually enable remix for old videos if you want other creators to remix your old content. With that out of the way, let's move on to the Reels remixing steps.
1. Open a video in Instagram Reels either from the Reels tab or from the user's profile. Click on the three-dot vertical menu in the top right corner and select "Remix this drum" from the list of options that appears.
Windows programs, mobile apps, games - EVERYTHING is FREE, in our closed telegram channel - Subscribe :)
video. You have effects, timer, retouching and other tools available to use while recording video.
3. You can use the Instagram Toolkit to edit your videos however you like.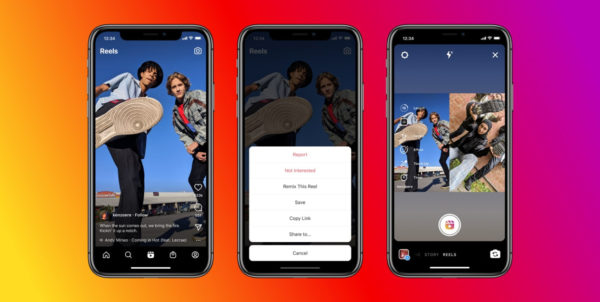 For example, you can press the microphone button to record a quick voice-over.
4. When you're done with all the changes, click the "Next" button and share the post after writing a caption and choosing a cover image.
As mentioned earlier, you cannot remix old videos by default. You won't see the "Remix this reel" option as it's missing from these videos. Hence, you will have to manually enable it so that you or others can remix it. To do this, follow these steps:
1. Open the old coil and click on the vertical menu of three dots in the lower right corner. From here, click "Enable Remix" and that's it. You have now allowed others to remix your old video.
If you don't want others to remix your Instagram Reels, you can disable this feature. You can turn off remixing for specific videos, or turn off the feature entirely for all of your videos. Check out the steps for both options below.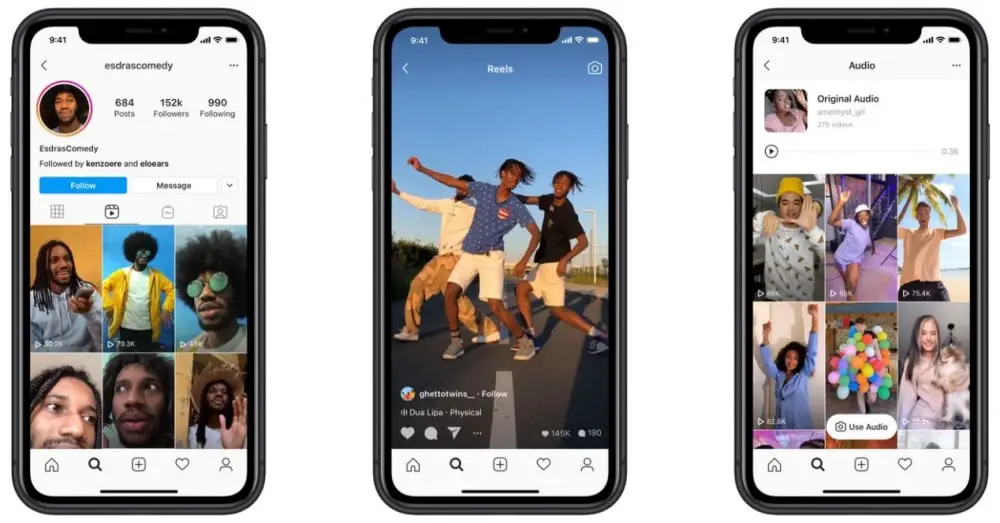
Disable remix for individual reels
1. With the Reels video open, click on the vertical three-dot menu and click the Disable Remix button.
2. Instagram will now show you a warning before disabling the remix feature. Click Disable to confirm the change.
Disable remix for all reels
1. You can completely disable remix for all your videos in the settings. Open "Settings" in the Instagram app and go to the "Privacy" section.
2. In the privacy settings, you will see the "Reels" option. Click on it and turn off the "Enable Remix" toggle to disable this feature. Other users will no longer be able to remix your drums.
So here's how you can remix Reels on Instagram. This is a fun feature that will let people get creative and make parody videos together, harmonize songs, cook, dance battles, and more. If you found this guide helpful, check out our articles on Reels video uploads, Instagram Reels best features, and tips for using Reels like a pro.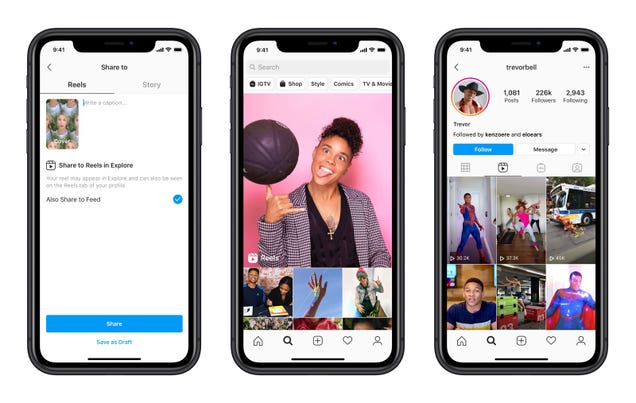 Also, don't forget to check out the best Instagram features and Instagram tips and tricks.
Windows programs, mobile apps, games - EVERYTHING FOR FREE, in our private telegram channel - Subscribe :)
This tutorial for Instagram reels will have to use the video feature like Pro. By now, you must have seen the reels: synchronized dance routines, lip-syncing, a quick costume change with the snap of your fingers... it was a hit on the social media platform, despite the fact that many people are still not sure how it works or why it is. exists.
Instagram has launched so many new features that it can be hard to keep up - especially if you're working hard Participation in Instagram or try to focus on all the different Social media platforms Instagram's denial has already allowed users to share videos on standard posts, stories, live, and IGTV.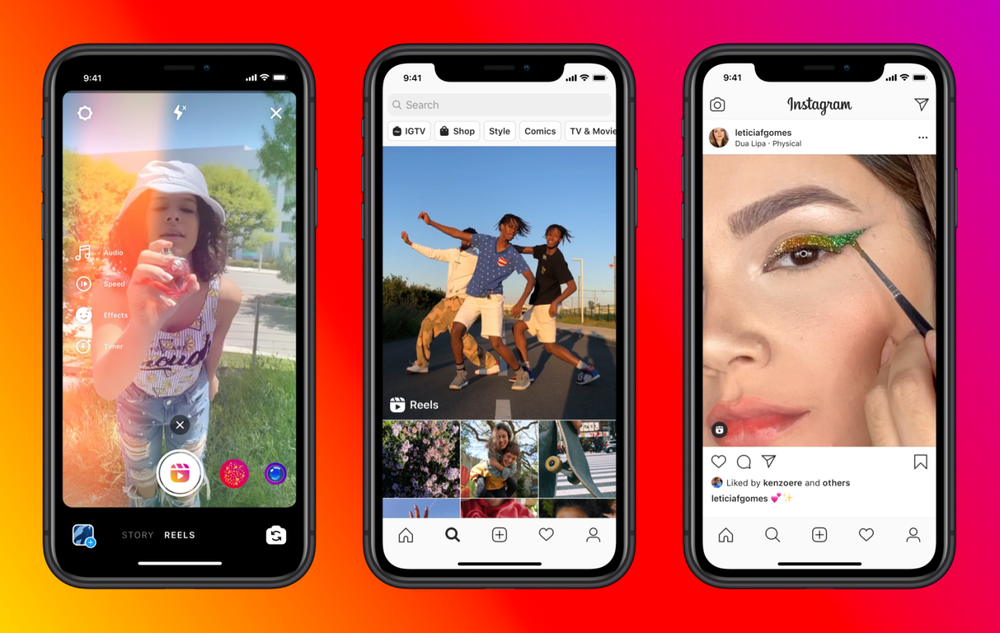 So what's different from drums?
The Micro-Video format is Instagram's answer to the conversational popularity of Tiktok, especially among Generation Z. It offers similar tools, although it is more limited nowadays in terms of time (30 seconds compared to 60), as well as the editing options available.
The reels are in full-screen portrait format, like stories, but can be up to 15 seconds longer. Videos also stay on your profile, while stories disappear after 24 hours if you don't save them to your highlights. But the biggest difference lies in the in-app editing tools, which allow users to add effects and music and splice multiple video chunks (if you'd like something different, see our list). Best Video Editing Apps ).
The reels matter because the world's second-largest social media platforms (Instagram, obviously) are pushing it. Unlike stories, reels appear in both general research and search results, as well as their own tab on the user interface. This makes it much more likely to reach non-followers.
Creatives use reels to share tutorials, from behind scenes, Snak Peeks at work in progress and before and after videos. So how do you start? Read our step by step guide. Having problems with the drums? Go to our Coil Troubleshooting chapter.
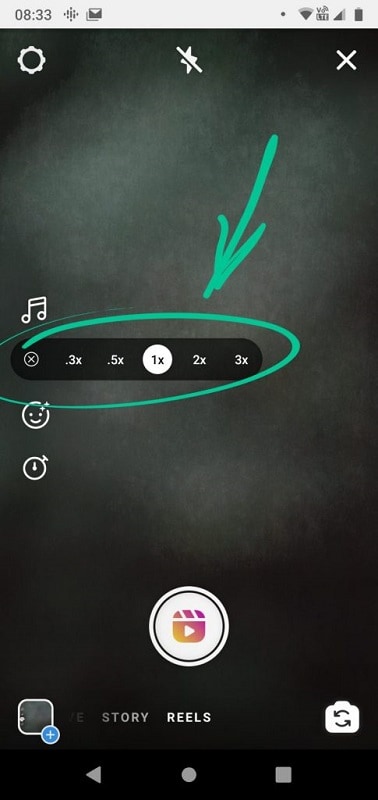
Instagram Ruels has a simple interface to select settings before filming (Image credit: Joseph Foley/Instagram)
If you'd like to share a video you've already recorded, simply click on the camera roller window in the bottom left corner (see step four below). To record video within the app itself, you first need to select settings using the buttons on the left side of the interface.
Choose a time limit of 15 or 30 seconds (the final video may be shorter, but no longer). You can also select playback speed from 1x to 5x, which helps you compress more footage in the time available.
Clicking on the face icon will bring up the effects options in the circles next to the record button at the bottom of the screen. Swipe right to scroll through a range of effects, from glitter and sparkle to color, glitches, voice jaws and a range of 3D monday masks and other novelties.
With some effects, you will find that tapping the screen brings additional options in smaller circles. You can only select one effect at a time.
Unlike Tiktok, Instagram Drums allows you to apply effects before recording. Subsequent editing is limited to cropped tints and adding text, filters and stickers.
Image 1 of 2
Enter an artist name to search for audio or browse trending tracks (Image credit: Joseph Foley/Instagram)
Image 2 of 2
Select the 15 or 30 second section you want to use (Image credit: Joseph Foley/Instagram)
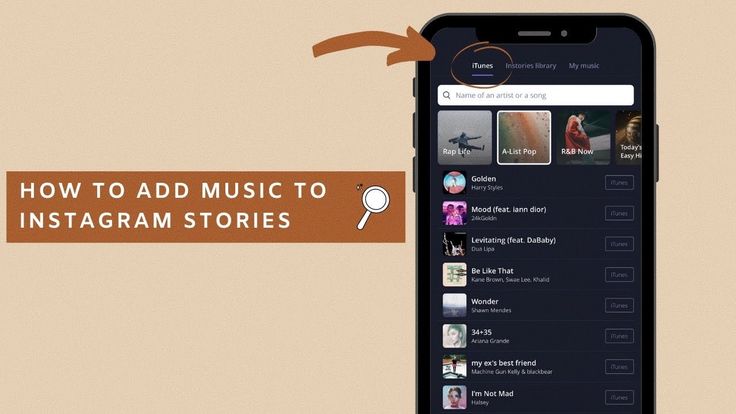
You can record your reel with your own original audio, but if you want to add audio from the app, click on the music icon. This opens the search options where you can enter the name of an artist or piece of music. You can also scroll down to view a genre or audio that is trending in your area.
Once you click on a piece to select it, the audio will play and you can use the scroll bar at the bottom of the screen to select a 15 or 30 second clip to use. If the song has lyrics, the scroll feature will highlight the lyrics from the beginning of the selected clip, even though the music has slightly ahead of the lyrics.
Alternatively, you can add audio from other people's reels. Find and open the coil you want to try, then click on the sound name in the bottom left corner. You will be taken to a screen showing all the drums that are running that audio. Click Save Audio. You can then find it in the saved section in the audio search options when you record your reel.
A message by sharing Courtney Quinn 🌈 Color Queen (@colormecourtney)
Photo posted on
Click on the stopwatch icon, if you want to add three second timers to give you time to prepare, then click the record button to start shooting currency.
You can record as many frames as you want until you reach the limit of 15-3 or 30 seconds. To stop recording, press the record button again. Click < To go back and trim (or delete) the footage you just recorded.
After recording your first video production, a new icon will appear on the left: Align Tool. This overlays your last part of the frames so you can line up the image to create a seamless transition when you start recording again. This helps create quick changes and stop the moving videos that have become so popular in reels.
You do not need to complete the coil in one session. If you click and GT; Through the final shared screen, you can save work in projects and continue with it later.
A message shared by Zack Gruber | Creative (@indiemoto)
Photo posted on
Just like with Instagram stories, you are not limited to capturing footage within the app itself.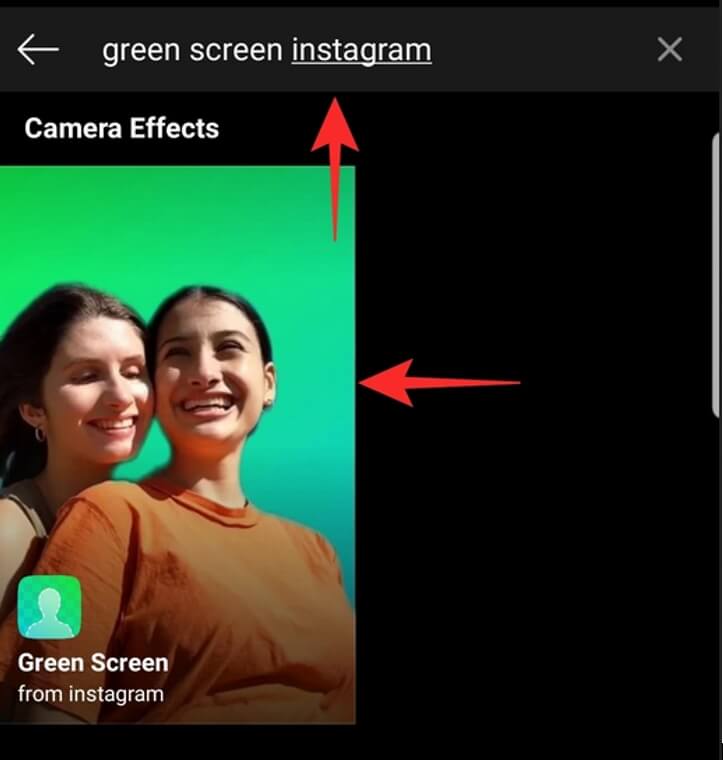 If you don't want to use the reel editing tools but want to take advantage of the format's potential reach, you can upload videos you've already made.
Just click on your camera image in the bottom left corner and you can select any video on your device. Many users upload videos made on Tiktok to share on Instagram.
If you're producing your video outside of the reels, just make sure it's in portrait format (9:16). You will not be able to add music or effects to frames in the reels; Only text, stickers and filters.
Logo shared message, designer inspiration (@Logohero)
Photo posted on
Once you've cropped all the frames you want to use, click and GT; Disclaimer On the next screen, you can add text, stickers, and filters. The mechanics and available fonts are basically the same as in Instagram Stories.
The main difference is that you can choose when you want the text to appear and disappear. This flexibility can be used to create text narratives for tutorials, videos, or videos and videos.
Each text you add will create a small black rectangle at the bottom of the screen. To select specific text, click on the corresponding rectangle, turning it to white. You can then drag the entry and exit points to the bar below to choose when you want the text to appear and disappear.
Unlike Instagram stories, any tags you try to add to the text won't work. You need to add them later in the signature.
A post shared by Tanisha (@ handlettering.is.fun)
Photo posted on
If you want to save your reel to your device to use elsewhere, now is the time to click on the top center of the download icon. Unlike Tiktok, Instagram will remove any third-party audio from the uploaded video. On the flat side, it does not add a watermark.
After that click and GT; progress to the last screen. Here you can add a title that will be displayed on the lower left corner of your reel. It will also appear below your reel in the format of a standard Instagram post if you toggle "Also Share on Feed".
As with any content on Instagram, adding mention tags and a hashtag to your caption can help your reel reach more people.
You can still click on the back of the arrow at this point if you want to re-edit anything. Otherwise, click on the cover to select the point of the video you want to use as the cover when it appears on your profile, then click Share.
If you have a public account, your reel may appear on the Explore Instagram page. People will be able to comment on it if you don't disable comments. Open your posted reel and click on the three dots in the bottom right corner to find an option to turn off commenting or delete your reel.
If you used the original audio, other users will now be able to use it in their drums. In terms of content recycling options at the moment, but Instagram is launching a Remix feature based on Duet Tiktok. This will allow users to respond to the reel by writing their own version of the content next to it. It will be possible to enable or disable this option in the settings.
I don't have coils
Drums are now available to all Instagram users. If you find that you still don't have, or that some features are missing, check the App Store or Google Play to see if an Instagram update is available. Failed, try uninstalling the app, then reinstalling it.
The latest update with the Remix feature has not yet been made available to all users.