Tired of posting on Instagram from your phone? Wondering how to post on Instagram from your PC or Mac instead?
You’ve come to the right place. Posting on Instagram from your desktop can save you time and offer more flexibility in what you can upload (such as edited videos and images).
And you can do it without having to upload them onto your phone first.
Below we’ve outlined three different ways to post on Instagram from your computer.
How to post on Instagram from your computer
Method 1: How to post on Instagram from your computer using Hootsuite
Method 2: How to post on Instagram from a PC or Mac
Method 3: How to post on Instagram from your computer using Creator Studio
How to post an Instagram Story from desktop
How to post an Instagram carousel post from desktop
How to edit an Instagram post from desktop
Bonus: Download a free checklist that reveals the exact steps a fitness influencer used to grow from 0 to 600,000+ followers on Instagram with no budget and no expensive gear.
Below, you’ll find ways to post on Instagram from your PC or Mac. We’ll also show you how to post via Hootsuite which works on either operating system.
If you’re more of a visual learner, watch this video from our pals at Hootsuite Labs to see how easy it can be:
You can schedule feed posts, Stories, carousel posts, and Instagram ads with Hootsuite.
The instructions below will walk you through the process of posting to your Instagram feed. We cover Instagram Stories and carousels a little further down in this article.
To post on Instagram from a PC or Mac using Hootsuite, follow these steps:
 Alternatively, you can also Schedule for later if you want it to post at a different time.
 For a quick summary of how to post on Instagram from Hootsuite, watch this video:
Voila! Posting photos and videos to Instagram from PC or Mac is that easy.
Method 2: How to post on Instagram from a PC or MacAs of October 2021, all Instagram users can create and publish feed posts from the browser version of the app.
To post on Instagram from your desktop computer (PC or Mac), follow these simple steps:
 A Create new post window will pop up.
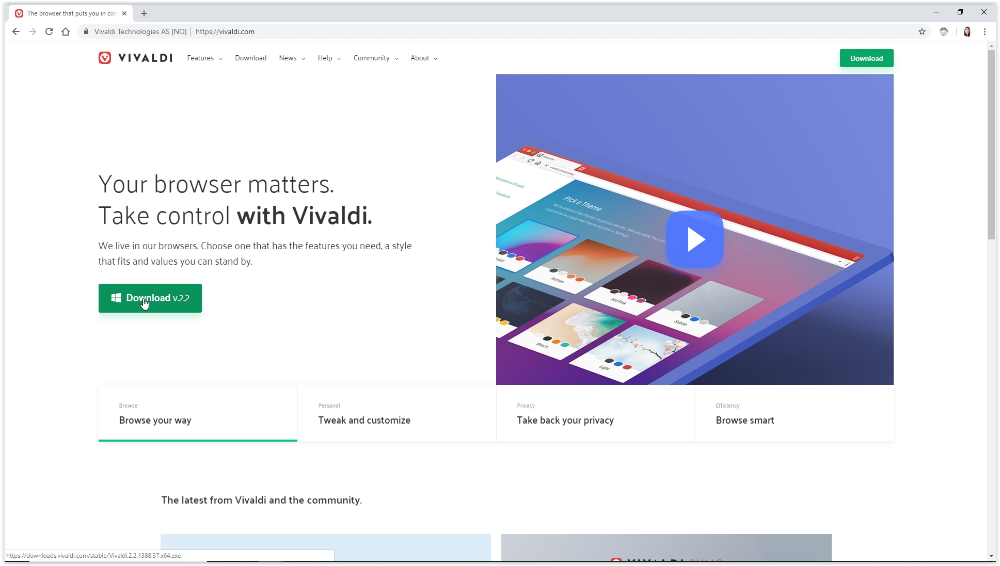
And that’s it!
At the moment, only feed posts can be created and published directly from Instagram on desktop. Keep reading to find out how to post Instagram Stories from a PC or Mac computer.
If Instagram is your social network of choice and you don’t mind not having all your social networks in one dashboard, Creator Studio could be a good option for you.
Note that when using Creator Studio, you can post and schedule all types of posts other than Instagram Stories.
How to post on Instagram using Creator Studio:
You can post an Instagram Story from your computer using a third-party social media management tool like Hootsuite. Just follow the steps outlined in this short video:
Or, read our step-by-step article on how to post an Instagram Story from your computer.
If you don’t have Hootsuite, you can post an Instagram Story from your PC or Mac through the following steps:
You’re done! It’s practically the same steps as if you were using the Instagram app on a mobile device.
With Hootsuite, you can also create and easily publish carousel posts (with up to 10 images or videos) directly to Instagram.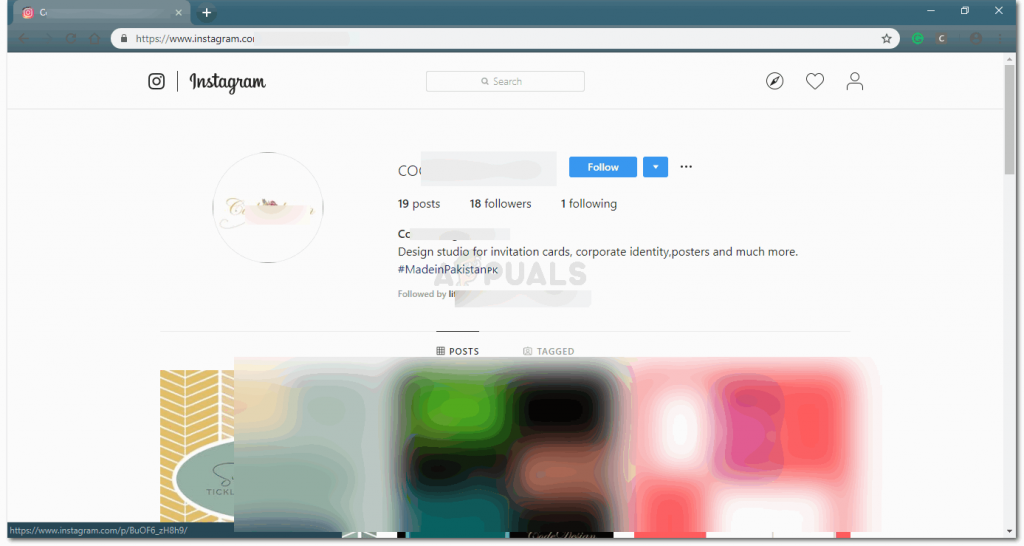 Here’s how.
1. Go to Planner and tap New post to launch Compose.
2. Select the Instagram account you want to publish to.
3. Include your caption in the Text box.
4. Go to Media and tap Select files to upload. Select all the images you want to include in your carousel. All selected images should appear under Media.
5. Use the yellow Schedule button to select a date and time to publish your post.
6. Tap Schedule. The post will show up in your Planner at the time you have scheduled it for.
That’s it! Your post will go live on the date and time you selected.
How to edit an Instagram post from desktopHootsuite Compose allows you to edit any image directly on your dashboard before you post it. Unfortunately, you won’t be able to edit the image once it’s posted.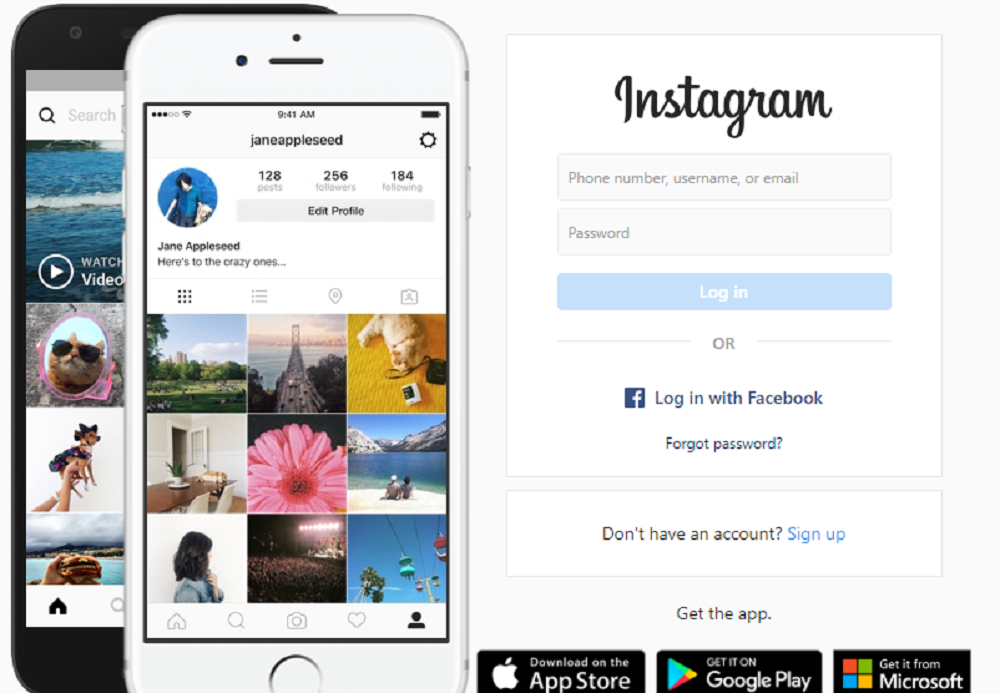
Follow these steps to edit:

Voila! You just edited your image from your desktop.
Post to Instagram from your PC or Mac using Hootsuite. Save time, grow your audience, and measure your performance alongside all your other social channels. Try it free today.
Get Started
Easily publish and schedule Instagram posts from your computer with Hootsuite. Save time and get results.
Try it for Free
By Cat Ellis
last
updated
(Image: © Shutterstock)
Learning how to post to Instagram from PC is a nifty little trick to master for those moments when you're desperate to share your latest adventures with your friends and family but find that your phone is completely out of juice.
If you have one of the best Windows laptops or the best computers, posting to Instagram from there can actually offer you more flexibility in terms of being able to easily upload edited images and videos. Plus, you can view everything on a much bigger screen, which can be really helpful depending on what content it is that you're wanting to share.
That being said, trying to post to Instagram from PC isn't the most straightforward of tasks by any stretch of the imagination. Still, it's definitely worth the hassle if you're someone who prefers to take picture-perfect snaps with one of the best DSLR cameras instead of a smartphone. There's no denying the cameras on the best phones have come a long way in recent years, but for the those of us who are photography fanatics, you can't beat holding a digital camera in your hands.
The good news is that for all you aspiring content creators out there or anyone who just wants a bit more freedom when it comes to posting to Instagram, we have all the tips and tricks you need to know below to help you figure out how to post to Instagram from PC. And all it takes is grabbing some free software!
1. Get Vivaldi
The super-customizable web browser Vivaldi offers the quickest and easiest way to post to Instagram from PC or Mac. It does this by running the mobile version of Instagram's website in a web panel.
Download and install Vivaldi , then either run through the wizard to import bookmarks and set your preferences, or click 'Skip all' and continue with the browser's default settings.
Image credit: TechRadar2. Create a web panel
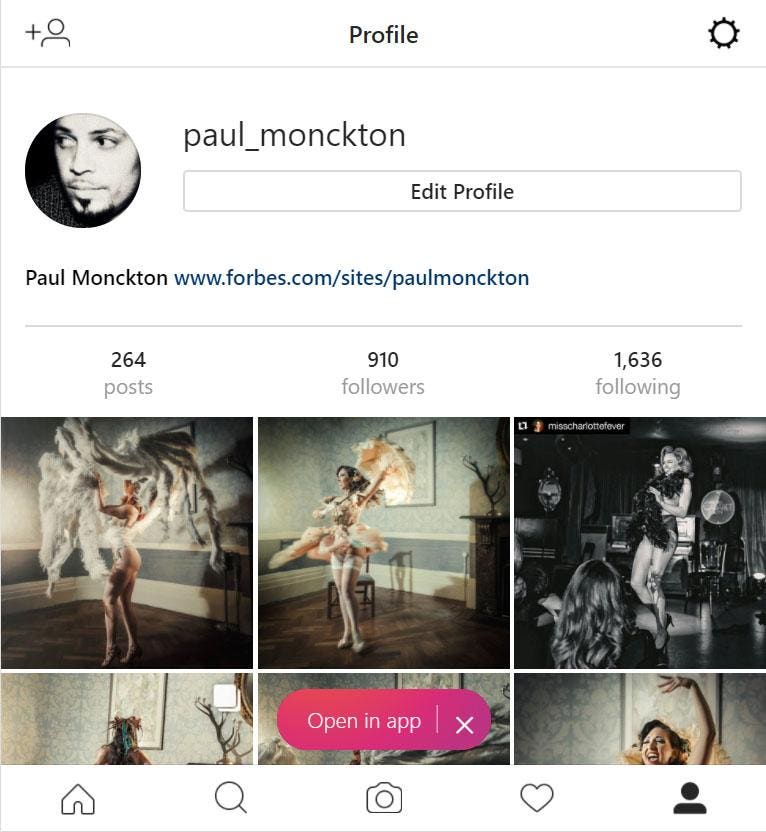
Navigate to www.instagram.com , then click the plus icon (Add Web Panel) on the left-hand side of the browser interface. The URL will be filled in automatically, so all you have to do is click the plus again.
The mobile version of Instagram will now appear in a sidebar on the left-hand side of the browser, and will stay there as you browse other sites. Log into your account, then resize the sidebar until the mobile site fits in comfortably.
3. Upload to Instagram
Click the plus icon at the bottom of the website to choose a photo from your PC or Mac, apply filters, add a caption and tags, and upload it to your account.
1. Get BlueStacks App Player
The Instagram app for Android is superb, and you can run it on your desktop using free Android emulator BlueStacks App Player, enabling you to post to Instagram from PC or Mac.
Download and install BlueStacks , then wait a few minutes while the engine starts for the first time. Dismiss the tutorial using the cross at the top right, make sure the correct language is selected and tap the arrow button.
Image credit: TechRadar2. Log into your Google account
Click ‘Continue’, then log in using your Google account. Review the terms of service and, if you agree, click ‘OK’.
The next checkboxes are completely optional; if you’re only using BlueStacks to upload to Instagram, feel free to uncheck them all. Click the Next arrow, then enter your name (it'll only be used to personalize some apps).
Image credit: TechRadar3. Install the Instagram app
You'll now see a version of the Google Play Store. Search for Instagram (the search bar is in the top right), select the official app when it appears and click Install. The app will request access to information including your contacts and location. If that's OK with you, click 'Accept'.
After a moment, the Instagram icon will appear under the My Apps tab. Click it once to launch it.
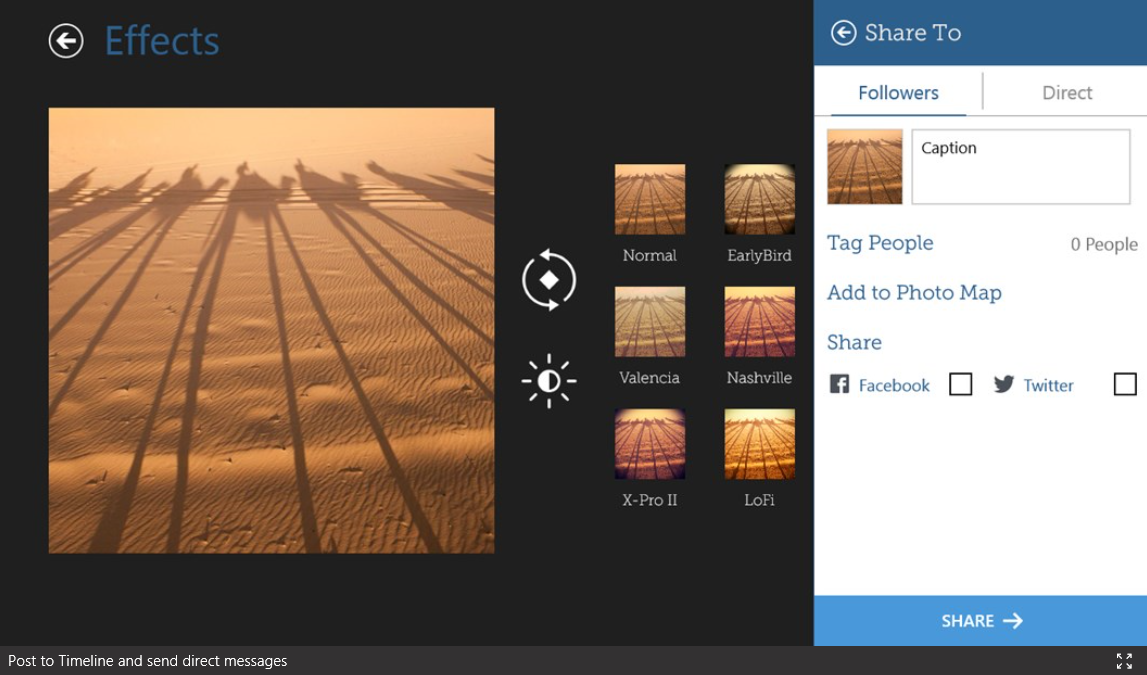
Image credit: TechRadar4. Upload, apply filters and share
BlueStacks will change to the size and shape of a vertically-oriented smartphone. Sign into your Instagram account with your usual details (the login link is at the bottom). Your Instagram feed will appear as it would on a phone.
Click the plus icon at the bottom, then select 'Gallery'. Click the 'Gallery' drop-down menu at the top left and select 'Other', then click 'Pick from Windows'. Find the photo you want to upload, select it and click 'Open'.
You can now crop the picture, add filters and a caption, and share it with your followers via all the usual social networks.
Cat is the editor of TechRadar's sister site Advnture. She’s a UK Athletics qualified run leader, and in her spare time enjoys nothing more than lacing up her shoes and hitting the roads and trails (the muddier, the better)
Many people ask themselves: “Is it possible to post a photo to Instagram from a computer?”. We have collected in this article methods that give a 100% guarantee that your publication will appear in the feed if you add it from a PC. Let's move on to detailed instructions.
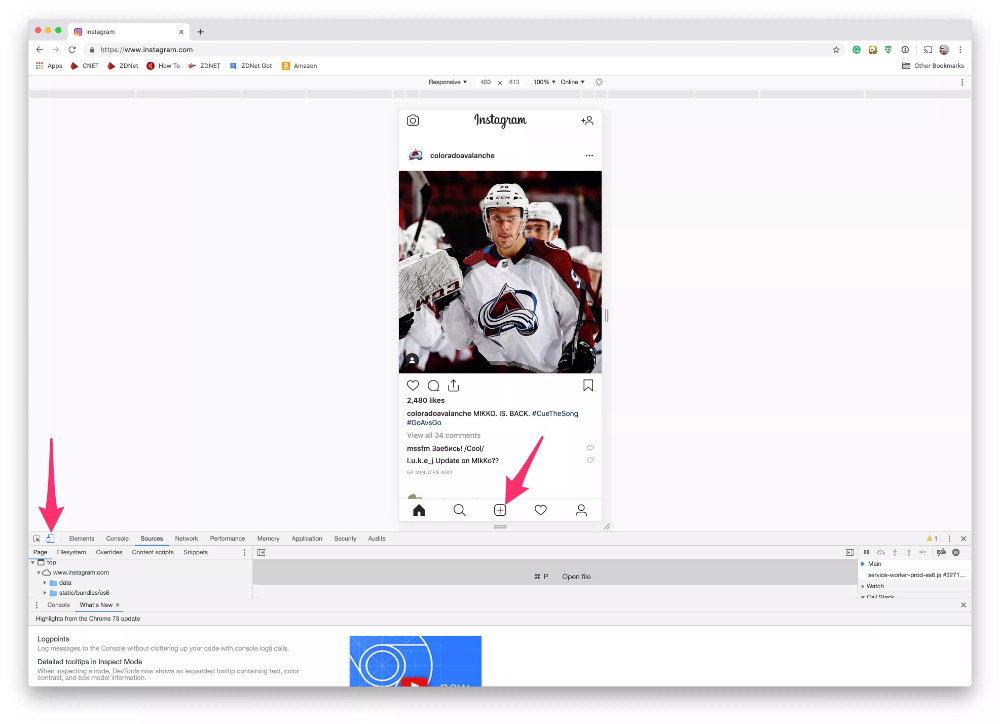
To post an image to Instagram from a computer, use your browser. For Google Chrome and Opera, right-click on the "View Code" option, and in "Yandex Browser" - "Explore Element". Now let's see how it looks in practice.
Go to the browser, go to the Instagram page and connect your account.
Right-click and select View Code. We used the Google Chrome browser.
An example of how to enable "View code" in the browserIn the window that opens, select the display of the page in mobile phone format.
Selecting the page format in the browserRefreshing the page and using all the functionality of the application from Facebook.
Mobile version of Instagram on PCAnd now we can send a picture.
An overview of working with an imageNext, let's look at several options for loading images using browser extensions.
This application helps you quickly upload a photo without you needing any extra effort.
Installing the extension.
To access Google Chrome extensions, click on the three dots at the top of the screen, select "More tools" and then find the "Extensions" line.
After installation, an icon will appear in the extension bar:
Web Instagram icon in the extension barClick on it, a separate tab will open in front of you in a vertical size. Now you can work with the service, as in a mobile phone.
A separate tab with an applicationThe screencast shows the mechanism of the application - press the "+", select a photo and send the picture to the feed. The only downside is that you will not be able to edit the image with the built-in Instagram functionality.
Screencast of available featuresThe second extension we are looking at allows you to add images and work with stories.
Installing the extension.
Open an Instagram account in a browser. After connecting, several icons will appear on the page: a camera - uploading images, a smartphone - opening a separate tab in the mobile phone format, a bright circle with an arrow - stories. And the last symbol allows you to download all publications.
Click on the "camera" and select "Add to Profile" - this function allows you to publish an entry in the feed.
Selecting a button to publish to the feedThe overview below shows how the extension works. You are only allowed to resize the image, tag people and make a note.
An overview of how to post a picture from a PCThe third extension is a separate application through which you can add photos, videos and stories.
Install and run the extension.
In the browser, click on the application icon at the top right.
Application iconWhen clicked, a separate tab will open. Here you need to connect your account and work with the profile, as from a smartphone.
The checkbox for uploading photos is checked by default, as is access to the full image format. Additionally, through the Desktopify extension, you can upload videos to IGTV.
The overview below shows an example of how the application works when the Desktopify extension is connected. You can apply a filter to adjust a photo, but you can't edit—to change the brightness, contrast, or saturation of an image.
Application overviewAnd now let's move on to the emulator service that displays the smartphone screen on a PC - use mobile applications or run games.
Of all the emulators on the market, BlueStacks is the most convenient. The application automatically adjusts to the screen, optimizes games and works without delay.
Download and install the emulator. In the program window that opens, connect your account to Google Play. We install the application.
Go to the main page - this is a tab located next to Google Play at the top of the screen. Open the "System Applications" folder and turn on "Media Manager".
We will need this step to upload photos that we will publish in the feed.
Important! Emulators do not have a function to open computer system folders. All images must be uploaded to the server in advance.
Path to the image upload folderIn the file manager, click on "Import from Windows" and select the images that we want to place in our Instagram account.
Importing photos from WindowsReturning to the application page and loading a picture.
An example of how the emulator worksA feature from Facebook that allows you to work with two social networks at the same time. Let's see how to link accounts and add images.
Go to the Facebook Creator Studio page. At the top of the screen, switch to the Instagram icon.
Important! Check that your Facebook and Instagram accounts are linked.
A page where you can link the accounts of two servicesAfter clicking on the button, a window will appear - agree to the terms and add profile data.
Request for accessNow you can add entries: click "Create publication" and start registration.
Create Post button on FacebookThe example below shows how the service works. The only thing is that you can’t edit a photo here, but you can prepare it in advance in image editors: for example, in Canva, Photoshop or Figma.
An example of how the service worksIn the following sections, we'll look at how to set up a delayed write in the scheduling services. They are used in their work by SMM specialists, marketers and bloggers.
Important! Please note that all planning services provide free access for a limited period of 7 to 14 days. If it is more convenient for you to send photos via PC, we recommend purchasing a paid subscription.
In this section, we will look at a simple and convenient program for scheduling posts.
Go to the SMM Planner website and register.
Main page of the site SMM PlannerGo to the dashboard. Select the "Accounts" tab and connect your profile to Instagram.
Steps for connecting an account in the plannerThe added profile should look like the screenshot below:
Connected account in SMM PlannerNext, go to the "Posts" tab. Here we form publications and plan the time of sending.
Desktop for working with records Click on the "Schedule a post" button. It will be posted on the feed. In the window that opens, add a photo and text, and check the boxes where necessary: disable or add comments, send a picture to stories or IGTV.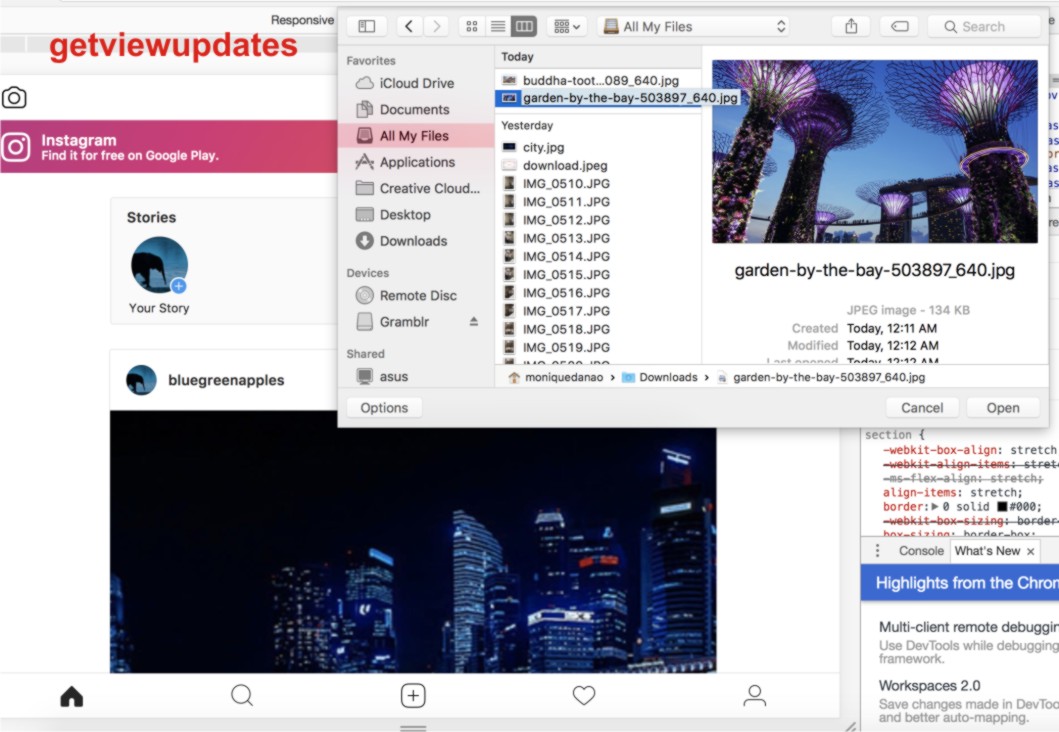
After publication, the entry will appear in the dashboard, and the post in your account.
Example of displaying scheduled postsAnd here we looked at a program through which you can not only publish images, but also track analytical data for each post.
Register on the Parasite website.
Parasite website home pageAdd an Instagram account.
An example of what the dashboard looks like after adding an accountClick on the green button labeled "Add post" and make an entry.
Edit publicationAt the appointed time, the entry will be published.
Quiz passed - post publishedAnd here we show you how to post with a promotion program.
Create an account on the Tooligram website.
Add an Instagram profile. Go to the "Features" tab and find the "Delayed Posting" item.
Delayed posting in the Tooligram serviceWait until the service connects your account. Then click on "Auto Posting". You will see a window with an authorization request, agree and proceed to the registration of the record.
Dashboard with a connected accountThe review below shows how to work with the functionality of the service - selecting and editing an image, adding text and setting the date and time when a publication appears.
Overview of the serviceAn example of our publication being successfully sent to the feed:
Successful sending of the post If you want to send a post quickly and without problems, use browser extensions. Are you ready to take the time to install and register? Create a link of accounts through Facebook Creator Studio. And if you plan to constantly upload images from your PC, connect online services for scheduling posts.
Recommended reading! You can read about how to design Instagram in our article.
Register with SendPulse and use methods for promotion: email campaigns, web push, Viber and SMS campaigns and chat bots in Telegram messengers, Facebook Messenger and VKontakte!
Uploading photos to Instagram from a computer is possible through a computer version by opening the site in a browser and auto-posting programs. Unlike mobile applications, the PC versions lack some features: description, mark for people in the photo.
Table of contents
The computer version is presented as a utility for the Windows 8/10 operating system. You can find the program in the Windows Market, where not only the application for viewing the Feed is available, but also a separate download of photos and videos.
You can upload photos to Instagram through a computer in this way:
But the official application may not work in the following cases:
Before downloading the program, you need to make sure that there are no updates for Windows and that all the latest packages are installed.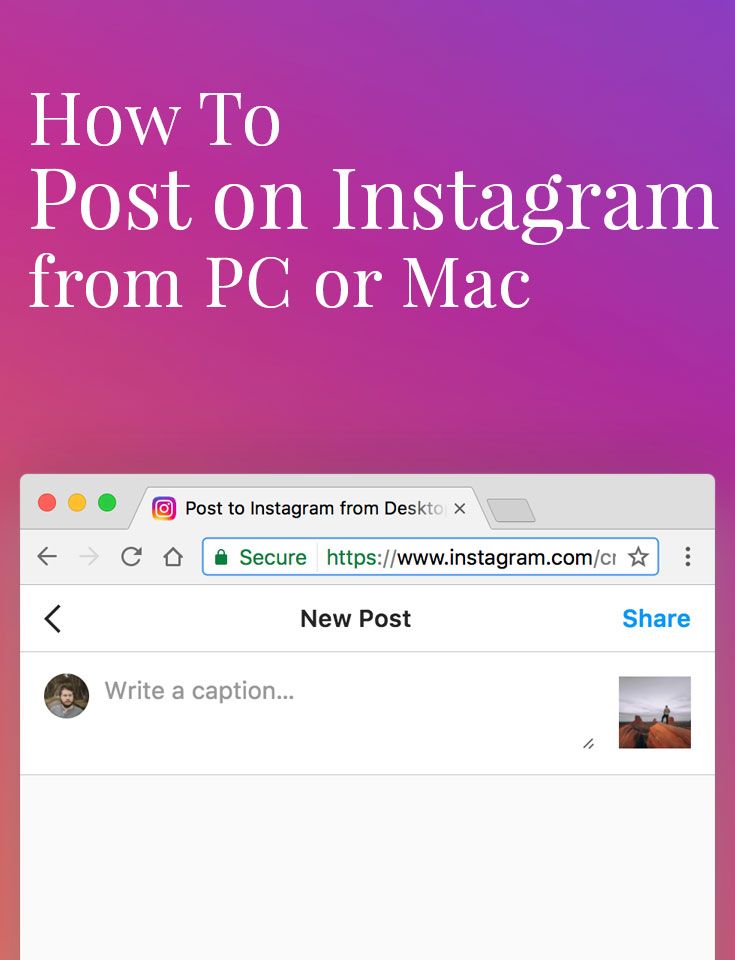 Also, check the authorization in the system: through the browser or click in the "Store" on the menu with categories.
There are errors in the official application when uploading files. In this case, Pic Upload for Instagram is recommended. Available in the "Store" and performs only one task - work with file uploads.
Upload several photos to Instagram at the same time from your computer using the Memu or Bluestacks emulator. Both emulators repeat the Android mobile operating system and work with files from the Play Market. That is, by installing one of the programs, the user receives a mobile version of Instagram in computer format.
The disadvantage of emulators is only in the exactingness to the technical capabilities of the device. For example, to work with Bluestacks, you need 2 GB of free RAM.
How to install Instagram and upload photos:
Unlike Bleustacks, Memu is less demanding on the technical parameters of the computer, but is unstable and often stops working with applications.
With the help of emulators, you can upload videos, use photo editors and even video processing. But the program will be in the background, so you won't be able to receive notifications on time. The task of the emulator is to help the user in a single publication or viewing of the application, without connecting to a smartphone.
Planoly fits more into the category of services, since the main work is done through a browser-based format. The application provides automatic posting, connecting multiple accounts and working with the text part. The disadvantage is the lack of a Russian interface. At the same time, the user can set a date for publication for free and automatically publish photos and videos.
Planoly is also available on mobile devices as a standard app. In addition to scheduling publications, the service provides access to Stories, viewing the Feed and comments.
How to upload photos from a computer using Planoly:
Publishing problems may occur during operation. Usually, you need to go to the mobile application and check the prepared files. If they are missing, re-download through the computer version.
To add a carousel: click on the " Multi " button and add pictures from any source. The application works only with photos, without uploading videos or other formats for publications.
The Parasite service is designed to cheat subscribers, read personal correspondence and create a subscriber base. Additional features include automatic publication, taking into account the time specified by the user.
To use the service, you need to register using your email address, and after that you can connect your Instagram account.
How to add a photo:
The photo will be published on Instagram within the specified time. Lack of service in the trial period, after which you need to buy a paid package. The user is asked to test Parasite for Instagram for seven days.
If necessary, you can add another account for a free subscription. After the deadline, all scheduled posts will not be posted on the social network.
During authorization, the page owner may encounter a problem: it is impossible to connect without confirmation. In this case, you need to go to the mobile application and see if there is a message on the screen: " Login from an unusual device ". If it appears, press " This is me ".
Only photos can be published through the browser version, without adding a description. Also, a shortcut is available for quick access to the social network.
To post pictures via the computer version:
In this editor, there is no possibility to modify images through filters or other tools. To make the procedure for posting photos easier, you can download a quick shortcut from Instagram.
But even with this version of the social network, the function of posting photos is connected through "View Code".