Home » How To » How To Stop WhatsApp From Saving Photos Automatically To Gallery Or Camera Roll On Android And iPhone
by Akshay Thapliyal
As an Amazon Associate and affiliate of other programs, I earn from qualifying purchases.
WhatsApp has currently more than 1 billion users, where people send messages, share photos, videos, locations, and other files with their contacts.
As people receive long the WhatsApp app from the Play Store, followts of photos from their contacts, they look for ways to stop WhatsApp from saving pictures to the gallery. As there could be private or other personal photos that you do not want others to see when you hand over your phone to someone.
One way is to stop WhatsApp from Auto downloading photos and videos but still when a user views it on WhatsApp, it will appear in the Gallery. So to avoid that you can even hide WhatsApp images from Gallery or Camera Roll in Android and iPhone.
Contents
This will stop all the images from showing on the Camera Roll of your iPhone.
You can also watch this video:
After updating the WhatsApp app from the Play Store, follow the steps below.
You can change either default settings that will be applied to all your WhatsApp chats or you can set individual settings on per chat basis.
From now, the received media from all the Chats will stay in WhatsApp only and won’t show in your phone’s Gallery. The photos and videos received earlier when the setting was enabled will still be there and will only be applied to newly downloaded media.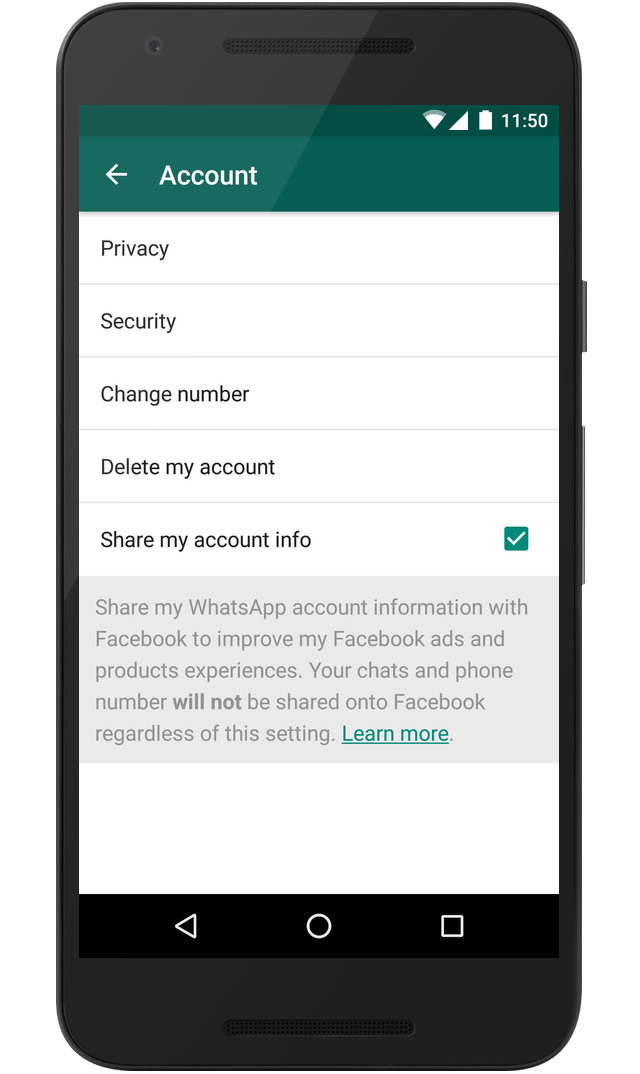
It is also possible to configure the setting on a chat-to-chat basis.
The option you set above becomes the default one for all the chats. But there are always exceptions. You might want to show media from certain contacts in your Gallery or vice versa. You can do that as well. Here’s how.
Similarly, you can do so for other contacts as well.
We receive all sorts of photos and videos on WhatsApp that don’t deserve to be on our phone’s Gallery to be seen by everyone. To take care of this, you can go ahead and use the Media Visibility feature.
You can also check our video:
As mentioned earlier WhatsApp also allows you to prevent from saving the images/videos automatically. If you are not aware of this setting then here we have shared the steps to stop WhatsApp from auto-downloading photos, videos, and other file types on Android and iPhone.

The type of media that you want to automatically download is up to you. You can adjust the settings according to your preference.
Similarly, you can prevent auto-saving when connected to Wi-Fi and when you are on roaming as well.
Also Read: How to Take WhatsApp Backup Using Mobile Data Instead Of WiFi
You can do the same for other file types.
With this, the next time you receive a photo or video it won’t download until you tap on it to initialize the download.
If you happen to use WhatsApp for calling a lot then you can lower data usage on that too. Follow the steps here.
And if your WhatsApp notifications stopped working, read our instructions about how to fix it.
WhatsApp photos are showing in the gallery because your WhatsApp settings are set in such a way. to disable it, go to Settings > Storage and Data > Media auto-download and disable it.
I hope the above methods helped Android and iPhone users to stop WhatsApp from saving pictures to Gallery or Camera Roll or disable auto-downloading of media. If you have a similar issue with the backup, read our post about how to stop WhatsApp backup.
If you want to know more tips and tricks for WhatsApp, check out this post. And if you are concerned about privacy such as who can see your Last Seen status, this article can help you.
If you have faced any issues while following the above steps, do let us know via comments.
Akshay Thapliyal
Akshay Thapliyal is the Co-founder of TechUntold and mainly looks into the strategic planning at TechUntold. He also loves writing articles on apps & problems he faces related to tech. Follow him on Twitter.
“Can someone tell me how to stop WhatsApp from saving photos automatically on my phone? I have joined a lot of groups on WhatsApp, and every day I get so many unwanted photos on my phone!”
If you have a similar query about the automatic saving of media files on WhatsApp, you have come to the right place. This is a question asked by a friend of mine – but millions of other WhatsApp users also encounter a similar issue.
Presently, the default settings on WhatsApp automatically download the shared media files on the device which takes up a lot of space. If you want to de-clutter your phone, then you should learn how to stop WhatsApp from saving photos on iPhone and Android.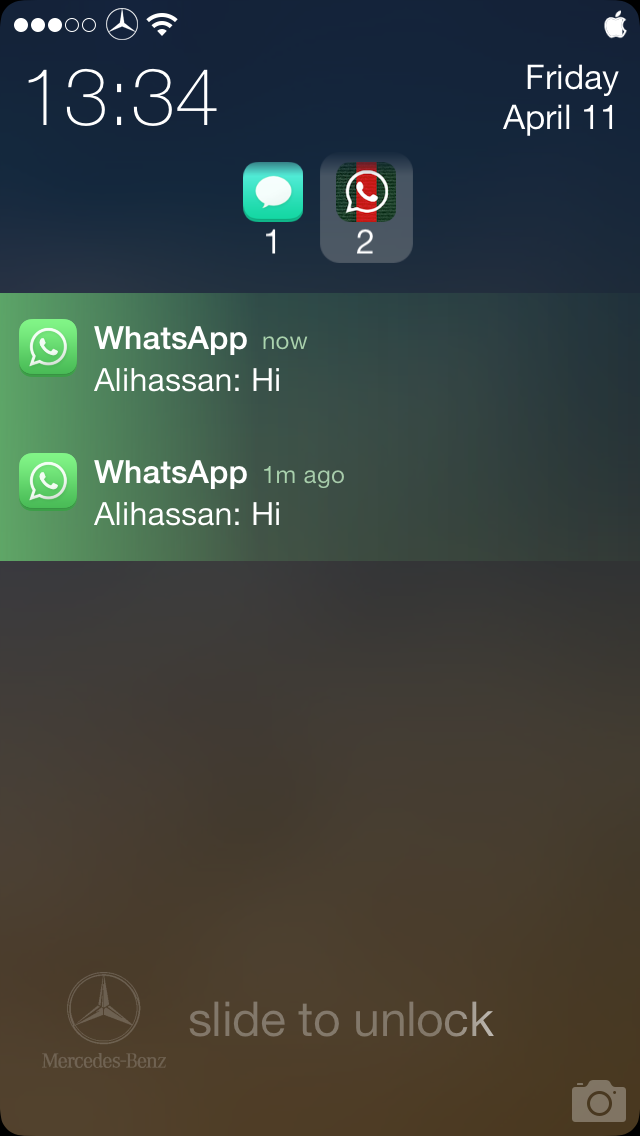 In this guide, I will clear the same double about WhatsApp media storage in a step-by-step manner.
Part 1: How to Stop WhatsApp From Saving Photos on iPhone
Part 2: How to Stop WhatsApp From Saving Photos on Android
WhatsApp provides a smart and hassle-free solution to disable the auto-download feature for photos and videos on iPhone. A lot of times, the automatic download feature makes our Camera Roll cluttered and it even ends up consuming a lot of space on the device. Additionally, the saved WhatsApp photos on your Camera Roll can consume a lot of space on your iCloud Photo Library as well. To fix this and learn how to stop WhatsApp from saving photos on iPhone automatically, follow these easy steps:
That’s it! By following these simple steps, you can learn how to stop WhatsApp from saving photos on iPhone automatically. Not just photos, you can also disable the auto-download feature for videos, audios, and documents as well. Afterward, whenever you would receive a photo on WhatsApp, you need to tap on the download icon to save it on your phone.
Just like iPhone, WhatsApp also provides a feature to disable the auto-download option for media files on Android. The default option for this is turned on and thus, it will keep consuming your device storage or clutter your phone’s gallery. Here are different ways that you can follow to learn how to stop WhatsApp from saving photos on Samsung or any other Android phone.
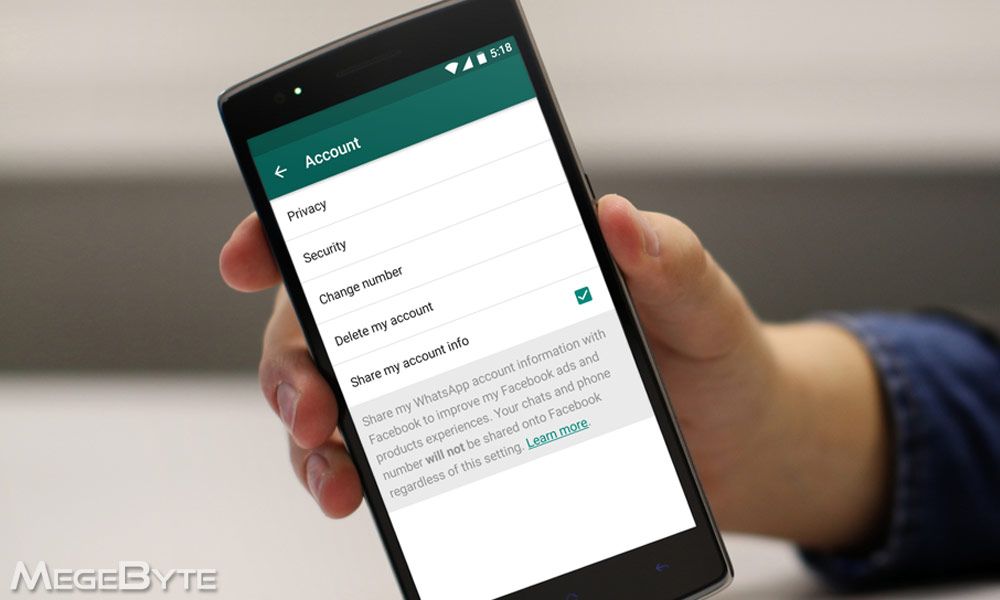
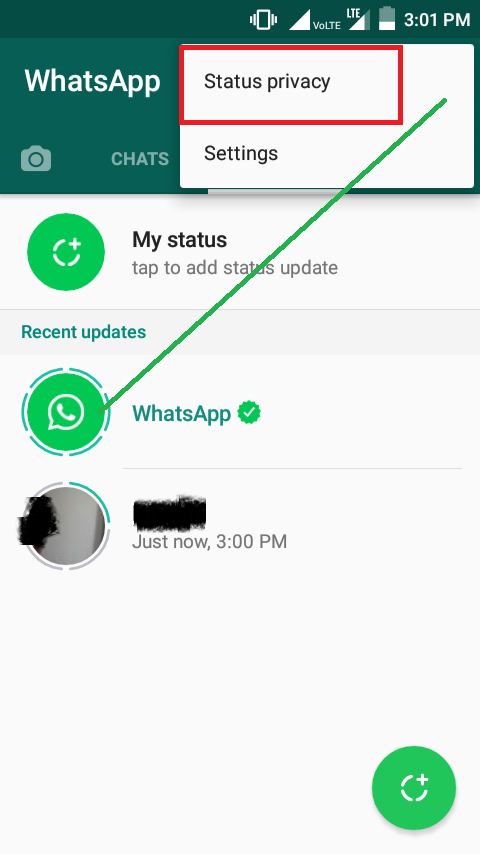
1. Firstly, go to the WhatsApp application on your Android and visit its settings by tapping on the three-dot (hamburger) icon on the top.
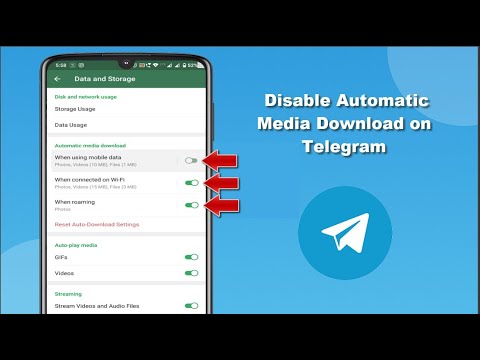
2. Now, browse to Settings > Data and Storage Usage to find the “Media auto-download” section for different options (like WiFi, Mobile Data, and Roaming).
3. If you wish to disable the auto-download feature for WiFi, then tap on the same option and just turn off the download feature for photos (or any other media file). In the same way, you can disable the auto-download option for mobile data and roaming as well.
4. WhatsApp also allows us to not show the downloaded photos on the phone’s main Gallery. For this, go to its Settings > Chats and just turn off the Media Visibility option.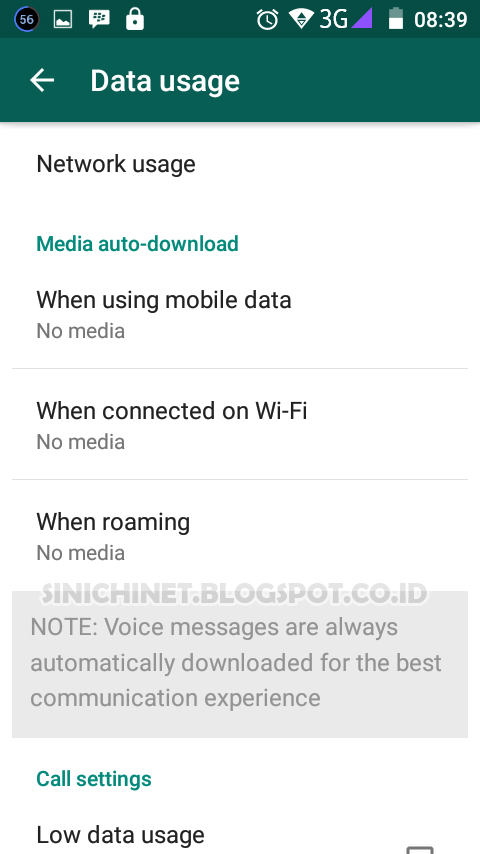
5. If you don’t want the downloaded WhatsApp photos to appear in your phone’s Gallery, then you can also go to its File System > Storage > WhatsApp > WhatsApp Images. Here, you can create a new file, name it “.nomedia” and save it. Later, you can delete the file to make WhatsApp photos appear on your phone’s Gallery again.
In this way, you can learn how to stop WhatsApp from saving photos on Samsung or any other Android device. While the process would be the same, you might encounter a slight change in the overall interface.
We all use WhatsApp to share tons of photos with our friends and family. If you also have a lot of important pictures and videos that you don’t want to lose, then consider taking a backup of your WhatsApp data on your computer. To do this, you can take the assistance of MobileTrans -WhatsApp Transfer (a part of the MobileTrans).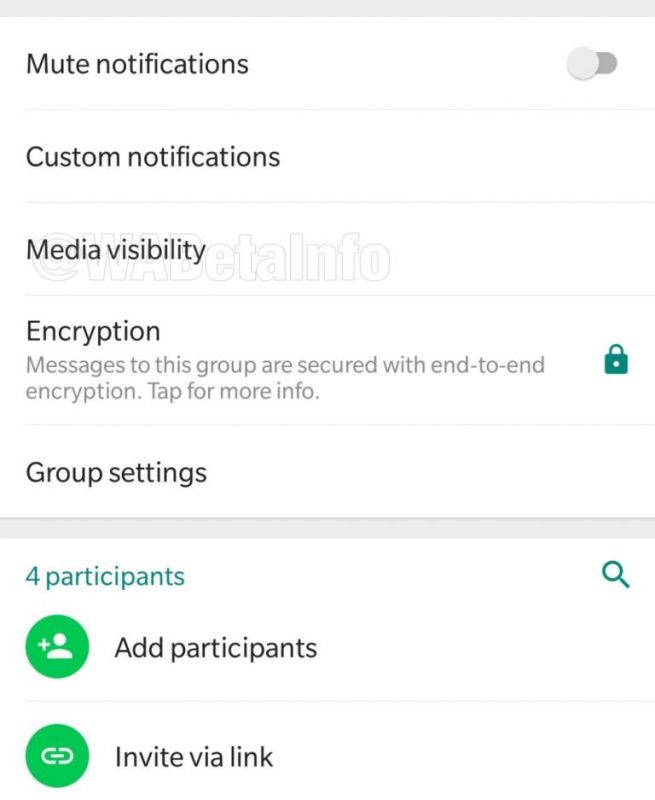 It is a user-friendly DIY tool that can back up the entire WhatsApp data to your computer. This would include its messages, shared media content, contacts, and more. Later, you can even restore your WhatsApp data to the device of your choice.
download download
1. To back up your WhatsApp data, connect your phone to the computer and launch the MobileTrans toolkit on it. From its home, you can tab the “Phone to Phone” module.
2. Under the "Phone to Phone" section, you will be presented with different options. Simply go to the “WhatsApp Transfer” once your device gets connected.
3. Click on the Backup button again and wait for a while as the application would start taking a complete backup of your WhatsApp data.
4. Simply wait for a while for the process to be completed and don’t disconnect your device in between. When the backup is stored successfully, you will be notified.
5. In the end, you can remove your device safely or view the backup. You can later choose to restore the WhatsApp backup to your phone from here as well.
That’s it, everyone! Now when you know how to stop WhatsApp from saving photos on iPhone and Android automatically, you can easily turn this feature off. The guide has listed dedicated solutions for both Android and iPhone for your convenience. Apart from that, you can also take the assistance of MobileTrans -WhatsApp Transfer to take a backup of your WhatsApp photos and chats. It can also be used to restore an existing backup or directly transfer WhatsApp data from one phone to another. If you are a regular WhatsApp user and don’t want to lose your chats, then it will be a must-have application for you!
New Trendings
By default, the process of sharing photos via WhatsApp automatically saves media files to the recipient's device memory when they are opened in the messenger application. This approach is largely justified, but it can cause certain inconveniences and is often evaluated negatively by users. In the article, we will consider all aspects of using the function of uploading photos coming via WhatsApp to the device storage on Android and the possibility of configuring its operation.
With the default settings, when you open an image in WhatsApp for Android, it is automatically saved to your device's storage and then displayed in your smartphone or tablet's Gallery. Further in the article, we will first consider setting a ban on the implementation of these two possibilities, and in the final third part of the material we will demonstrate how to clear the device’s memory from media files already downloaded from WhatsApp.
So, the first thing you can do if the function of the messenger that involves downloading images has become inconvenient (for example, increased consumption of traffic by the device or too fast filling of free space in its memory), is to deactivate the option to automatically download media files. It is possible to establish a ban on its implementation in two ways.
The most radical approach to solving the problem of stopping uncontrolled saving of media files from WhatsApp to the memory of an Android device involves revoking the permission granted to the messenger to access the storage. The instruction below is suitable only for those users who do not plan to use the information exchange system in question for transmitting and receiving files, regardless of their type.
Please note that depending on the version of the mobile OS and the system shell launcher used, the names of options and menu items may differ from those described and captured in the screenshots below, but the general principle is the same in all versions of Android!

WhatsApp developers for Android have provided in this version of the service client application the possibility of quite flexible adjustment of various parameters, including those related to the function in question. This allows us to solve our problem more “elegantly” and “correctly” than the method proposed above in the article.

WhatsApp will automatically download images using your cellular connection to give you quick access to your latest photos.
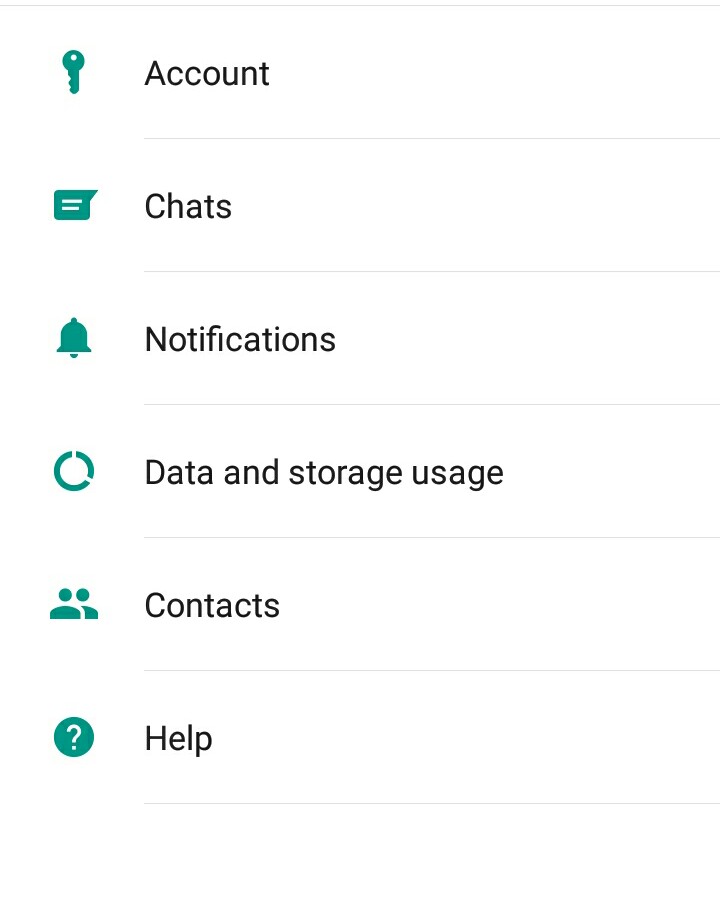
To set up auto-upload of photo, video and audio files, just go to WhatsApp > Menu > Settings > Chats and Calls > Media Autoload .
You can choose when WhatsApp automatically downloads media files.
Selected media files will be automatically downloaded when you connect to a cellular network.
The selected media will automatically download when connected to a Wi-Fi network.
If your goal is not to save space in the memory of your Android smartphone / tablet or the traffic consumed by the device, but to organize photos in the built-in OS tool for viewing and organizing them - "Gallery" , then you can use one of the following methods.
Please note that when using the first two instructions from the article presented later in this section, not only pictures will be hidden in the Gallery, but also videos received via the messenger, as well as GIF animation!
First, you can turn off the display in the Gallery of not absolutely all the pictures that you viewed in WhatsApp, but only those that were received within a single conversation or group chat.
To deactivate saving absolutely all media files received from WhatsApp in the Gallery:
Another method by which you can prevent the display of photos from WhatsApp in the Gallery is available for implementation using many Android Explorers (hereinafter referred to as ES File Explorer).
to follow the path: WhatsApp / Media / WhatsApp Images /.
Among other methods, it is possible to hide pictures received via WhatsApp from the Gallery using the tools integrated into the media viewer application itself.
 Select the "Make invisible" option, which will make the catalog no longer visible in the Gallery, but will not cease to exist.
Step 1. Open WhatsApp.
Step 2. Go to the "Settings" section.
Step 3. Expand the Data and Storage menu.
Step 4. Pay attention to the "Storage Management" item.
Modern instant messengers are almost the main source of wasted memory in the storage of every mobile device. Using the above menu of the WhatsApp application, you can assess the "scale of the tragedy" and carry out the necessary cleaning.
⚠️ If the instruction stopped working or you have problems at some step, please report it in the comments. We will definitely investigate the issue and update the article.
Source
The techniques described above in this article, which involve disabling automatic saving of pictures from WhatsApp and / or their visibility in the Android Gallery, are effective in relation to those media files that will be received after performing one or more other procedure. To get rid of “old” images, for example, to free up the space they occupy in the device’s storage, either the tools provided in the messenger or manual deletion are used.
In order to delete photos received via WhatsApp for Android, you don't even have to leave the application, and clearing the smartphone storage from media files is quite flexible here.
Chat settings
Application settings
 Next, click "DELETE OBJECTS" at the bottom of the screen on the right. Confirm the request received from WhatsApp by tapping "DELETE MESSAGES" in the window that appears.
Of course, if there are many dialogs and groups open in WhatsApp, and a large number of images have accumulated in the device’s memory in the process of receiving information from them, cleaning using the above method can take a long time. It is more convenient and in order to destroy all the photos downloaded by the messenger at a time, use any file manager.

Author admin Reading 4 min Views 704 Published
Mode of automatic saving of videos, photos and other media data directly on your smartphone does not suit everyone. Firstly, it takes up its memory, secondly, why store everything, even data that we will never need, and thirdly, if something happens to the phone’s memory, important photos may be lost.
It is for the above reasons that many of you want to turn off the autosave feature but don't know how. In this article, we will consistently tell you how to disable this mode in WhatsApp on the Android operating system.
Contents
There are several ways to prevent pictures and clips from being written to the device's memory. Below we will describe each of them in more detail.
First, let's disable autosave using the application itself.
 We will show an example for the first case. We tap on the marked point.
Done. Now disabled media types will not be saved.
To do the same for Wi-Fi, set the second item in exactly the same way.
If for some reason the above option did not work for you, try the alternative method below. Let's take a look at it.
The essence of this method is to use one feature of the operating system from Google. In order for programs that work with multimedia not to index videos, pictures, etc., an empty file called ".nomedia" is used here. We will simply add the file to the WhatsApp directory and prevent it from being used.
 Our choice is ES Explorer. Open the Play Store to search for it.
Attention! If your phone has a memory card installed, choose not it, but the internal storage.